Creating Conceptual mass in REVIT and Creation of Sinusoidal curve and a Parametric stadium using Dynamo
Answer To the Question No. 1
Question:1
1) Using Dynamo create a set of sinusoidal points and create a curve and create a surface out of the curve.
Answer:
Aim: Aim to the Question is using Dynamo create a set of sinusoidal points and create a curve and create a surface out of the curve.
Introduction: in this question we have to create the sinusoidal curve with the help of dynamo. we have to used the programming visualising concept in this question.
Procedure: TO COMPLETE THE ANSWER TO THE QUESTION WE FOLLOW THE FOLLOWING STEPS:
Step-1
- First of all to create the sinusoidal we have to Open the Revit Software.
- Now We have to go to the Manage tab and open the dynamo.
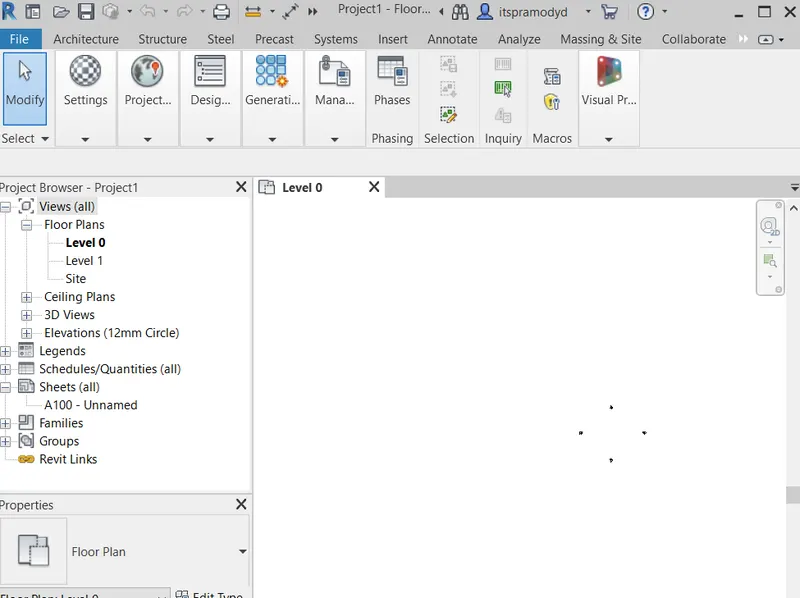
Step-2
- First we insert the integar slider
- go to search option Search integar slider
- We need to make three integar slider.
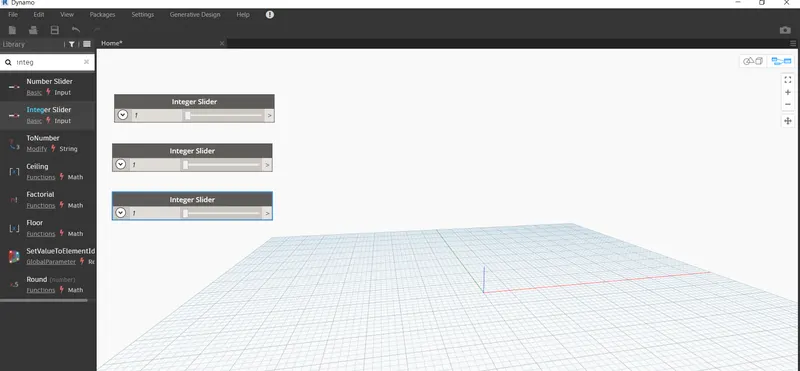
Step-3
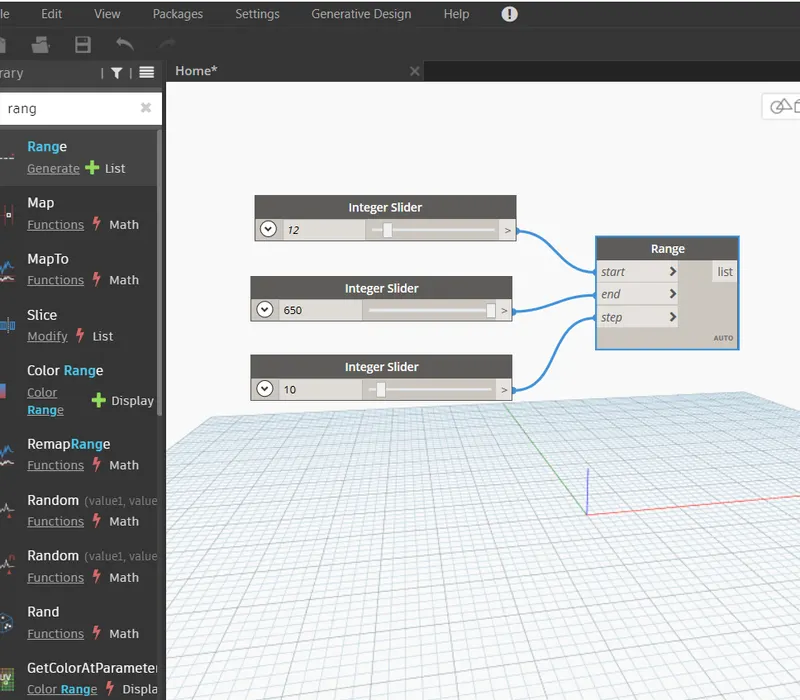
Now Put the integar slider value. 12, 650 and 10
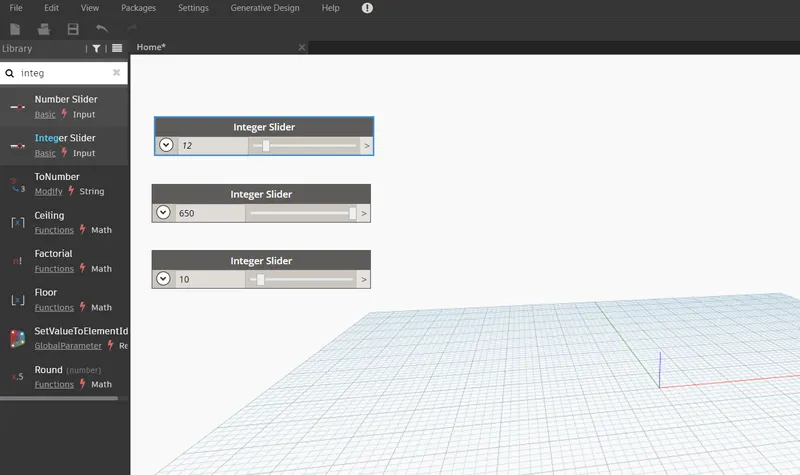
Step-4
- Now Again go to search bar and type range option.
- Choose Range option and
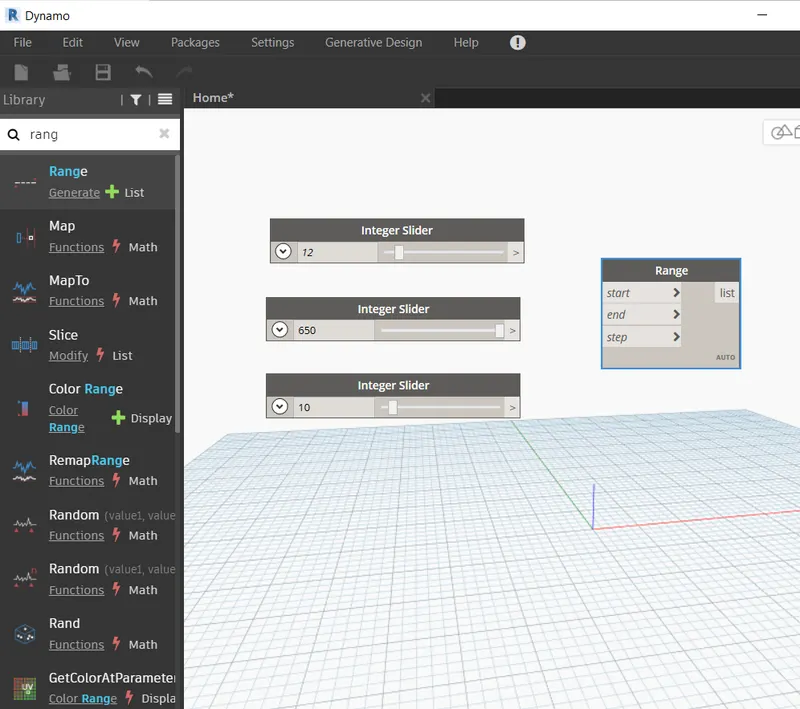
Step-5
- Now connect the first slide to start
- second slide to end and third slide to step
Step-6
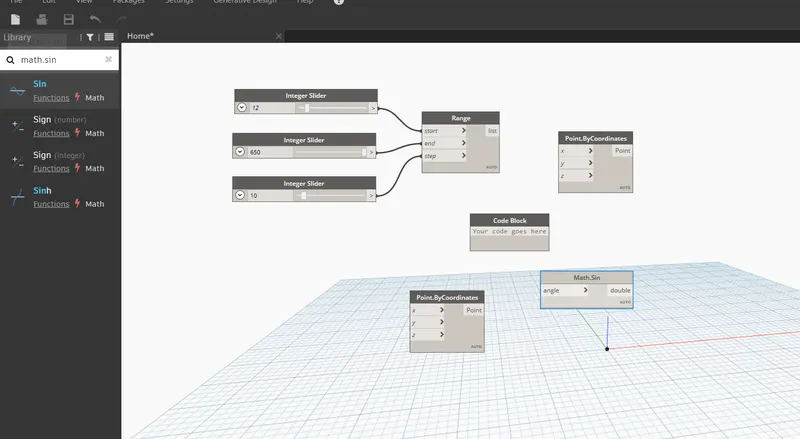
- Now we need to create the point by coordinate.
- Go to search bar and type point by coordinate
- After this inter the code block.
Step-7
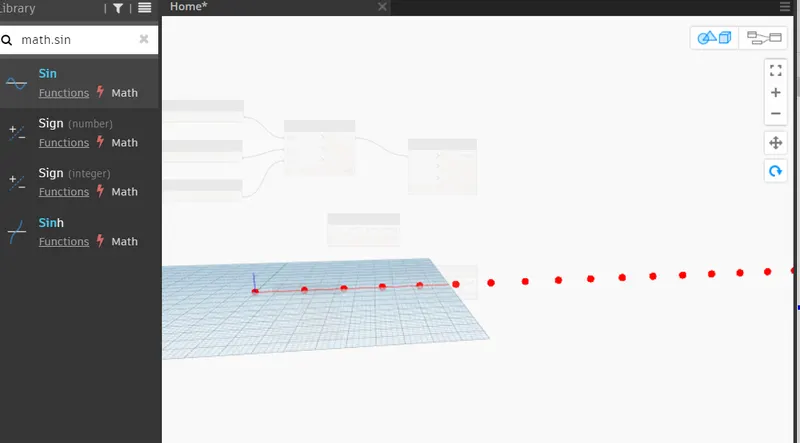
- Now connect the list to the point by coordinate
- So we will get the point in the screen.
Step-8
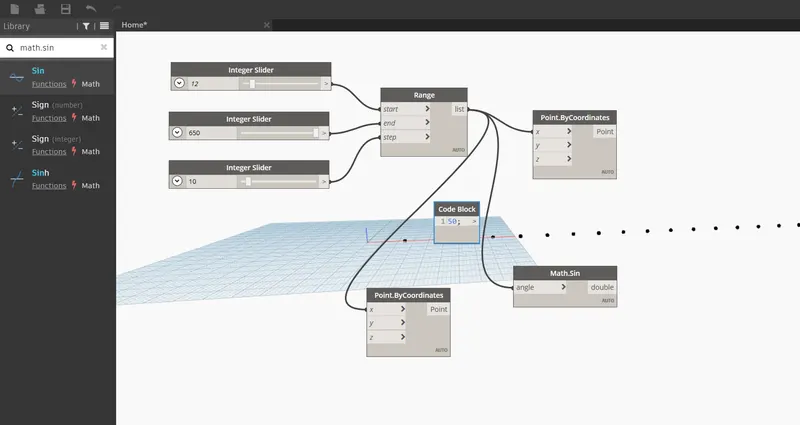
- Now Provide code block 50;
- range list connect to the angle and onother point by coordinate
Step-9
- Now we need to make product.
- in order to make curve or sinusoidal point the next step is to connect the code block to the 'z'
- get the another set of sinusoidal point
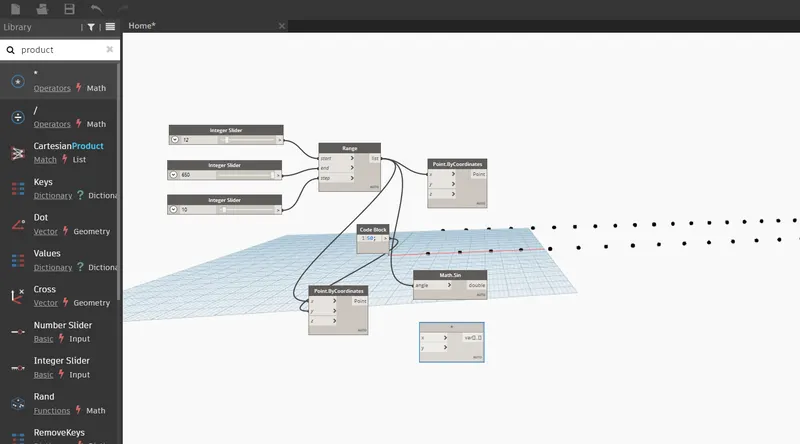
Step-10
- we need to connect the code block to the Z.
- Product connect to the first coordinate z axis.
- and math. Sin connect to the product x axis code block connec to the math. Sin y axis.
- We get the sinusoidal curve.
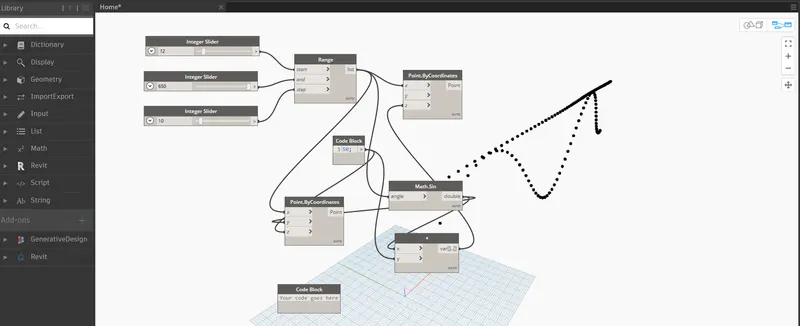
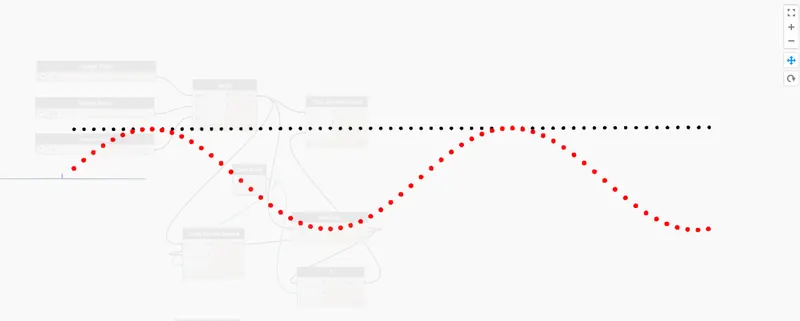
Step-11
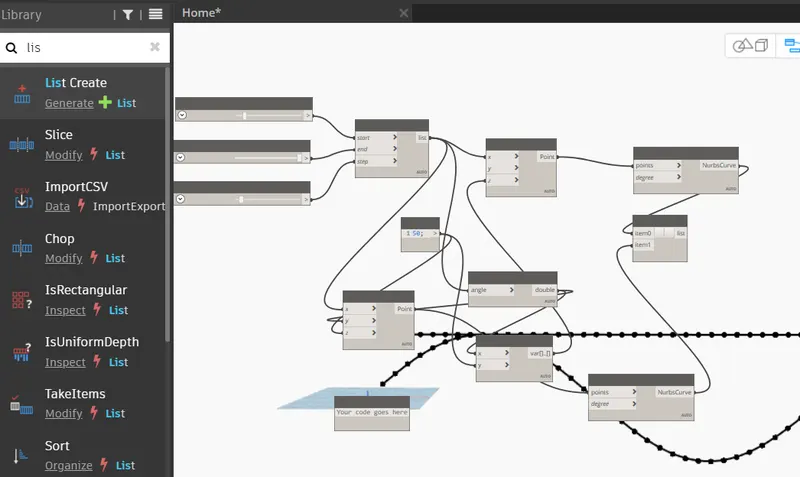
- Go to search option and search nurbs and choose Bycontrolpoint
- Now we need to list option again search list and intert list create.
- Copy the one more nurbs curve.
- Coonect the point by coordinate to nurbs point option we get the line in the curve.
- similarly second point by cordinate connect othe second nurbs point option. we get one more line in the curve
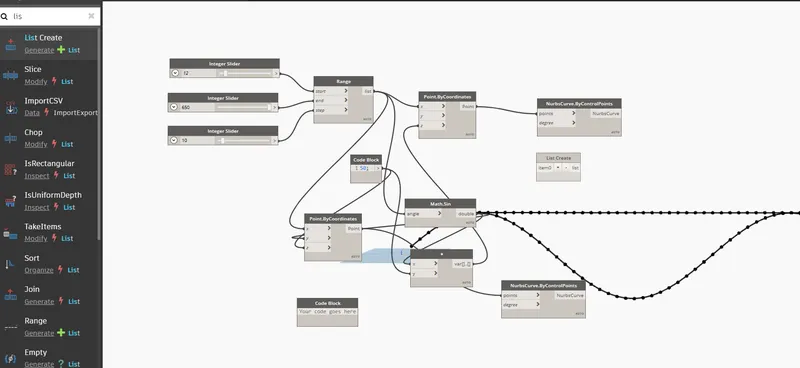
Step-12
- Go to list and click + button we get one more item just connect the nurbs cutb to item0
- And similarly connect second nurbs curve to item1.
Step-13
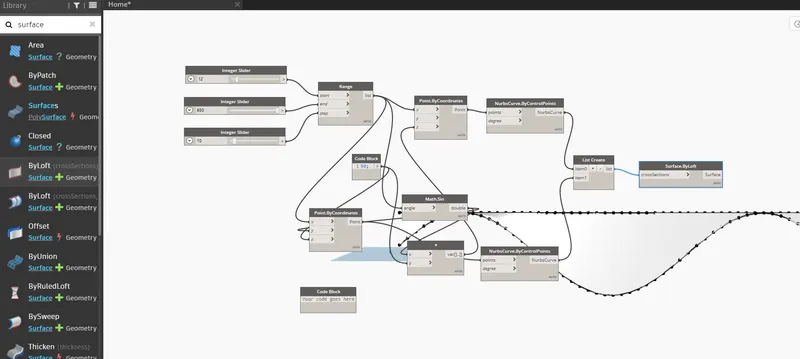
- Now we need to create the surface.
- For this go to the search bar and type surface choose byloft.
- Click this and connect to the list
- So we will get the surface.
3D view:
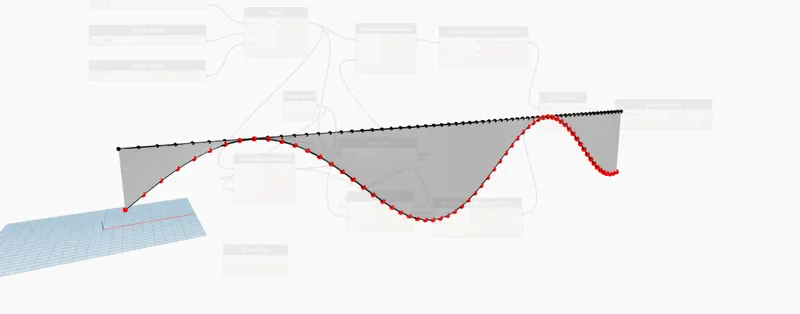
Result: in this question we created the first point with the help of dynamo than connect the point and after this we created the curve. after creating the curve we connect the list to the surface and finally we get the surface. So we created sinusoidal curve and surface in this question.
Resultant Drawings:
Point
Curve:
Surface
Answer To the Question No. 2
Question:2
2) Create a conceptual layout of floor plan in dynamo . Using the tools available in dynamo link the lines to appropriate model elements in Revit by choosing the wall types and wall parameters. Make use of the sliders to slide through the height of the wall and length of the wall.
Answer:
Aim: Aim of the Question is to create a conceptual layout of floor plan in dynamo . Using the tools available in dynamo link the lines to appropriate model elements in Revit by choosing the wall types and wall parameters. Make use of the sliders to slide through the height of the wall and length of the wall.
Introduction: in this questionn we need to create the layout and create the wall type and provide the height of the wall also using dynamo.
Procedure:TO COMPLETE THE ANSWER TO THE QUESTION WE FOLLOW THE FOLLOWING STEPS:
Step-1
- Open the Revit Software go to the manage tab and open the dynamo.
- Go to new tab and open New project.
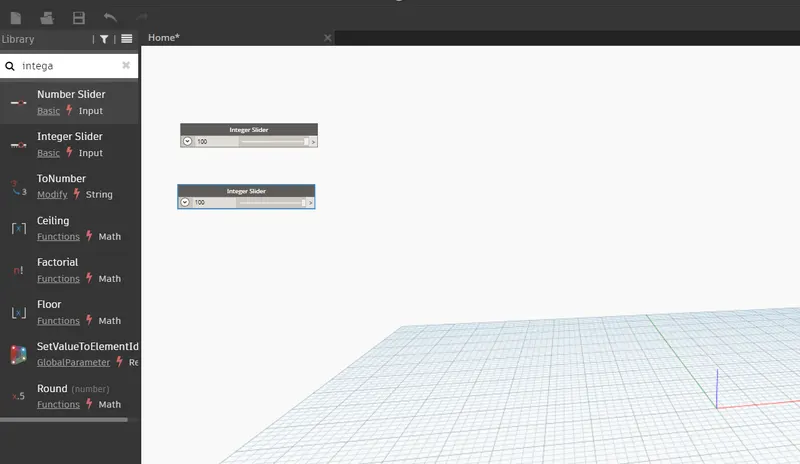
- Making the wall we need to choose the integer slider by the search box of the dynamo.
- Copy the first integer slide and paste this.
Step-2
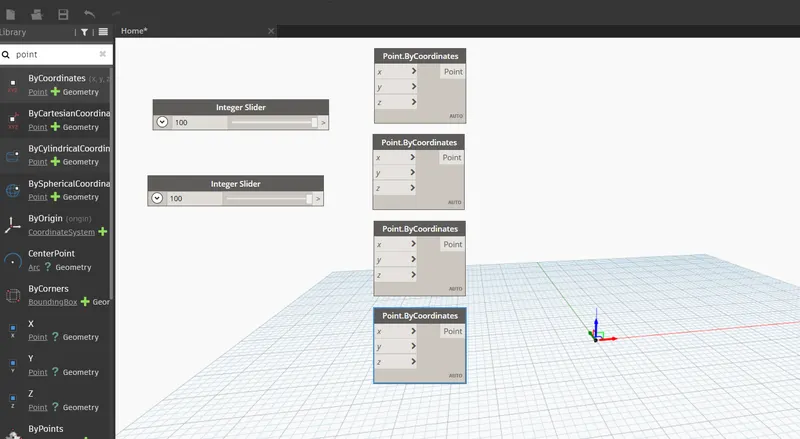
- Now we have need the pointbycoordinate.
- Go to search bar and choose point by coordinate.
- We know that the wall sides are four so we need to three other point so copy the first point by coordinate option three times.
Step-3
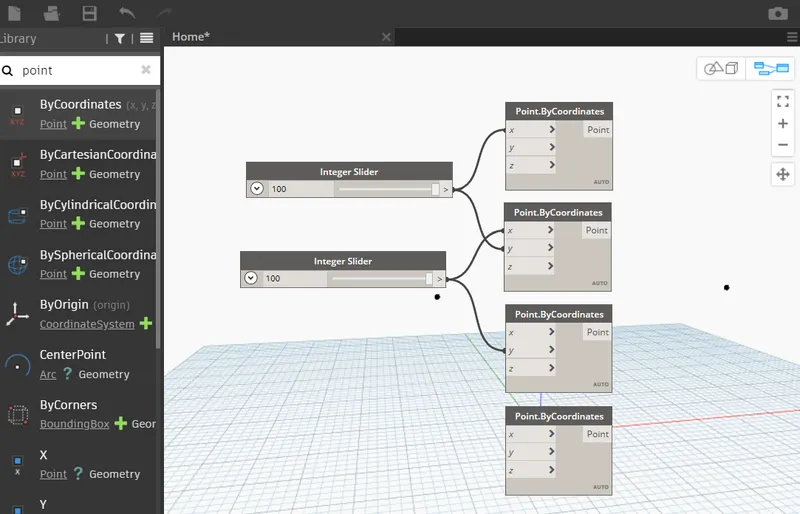
- Connect the first integer slide to first point and second y point
- Again connect second integer to second x point and third y point according to the screenshot.
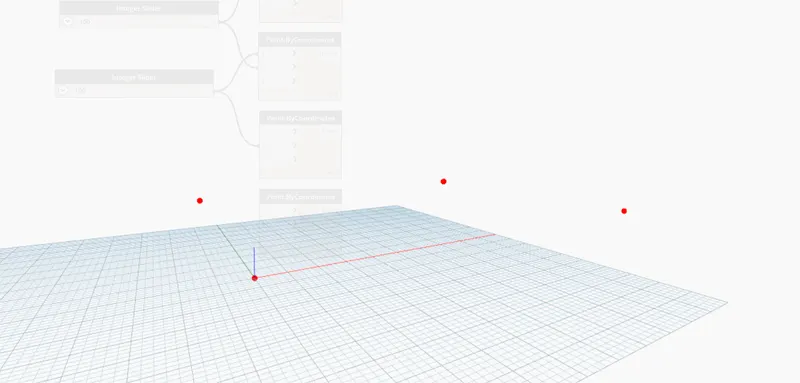
Points:
Step-4
- Now we need to make line through this point.
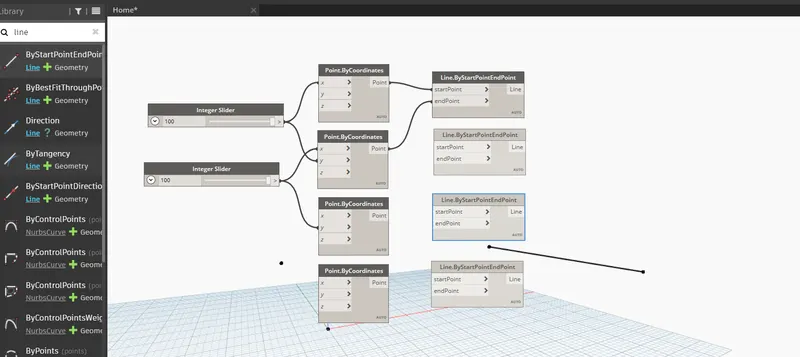
- go to search bar and search line by start point start point end point we need three more this option so copy and paste it three times.
- Connect the first point to the first start point and second point to the first end point.
Step-5
- Now connecting the point. First point connect to the first start point and last end point.
- Second connect to the first end point and second start point.
- third point connect to the second second end point and third start point
- And fourth point connect to the third end point and fourth start point
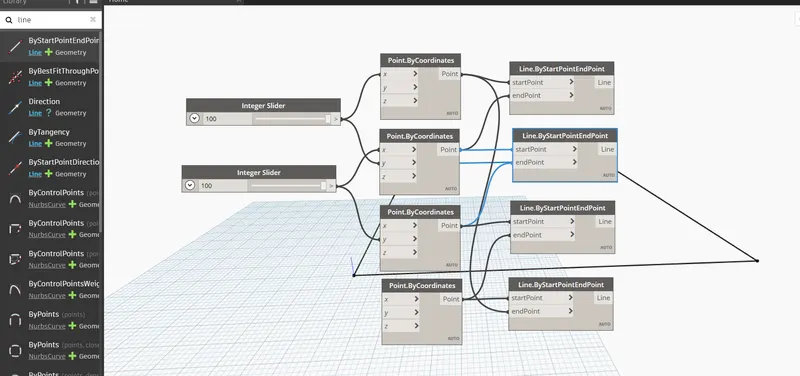
Connect the point to create the wall:
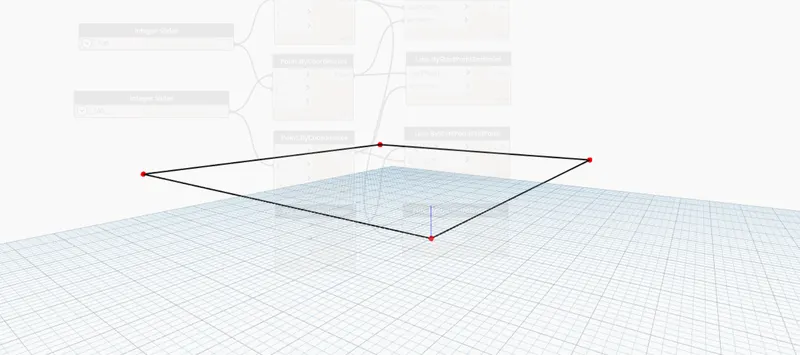
Step-6
- Now go the revit software and see the wall is created.
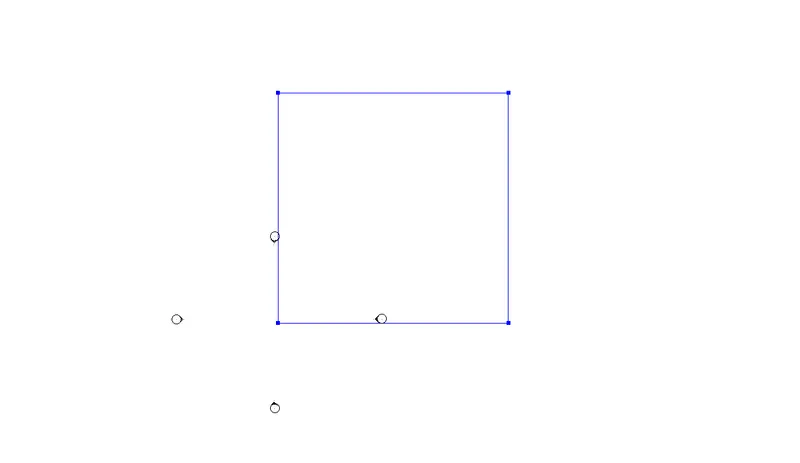
Step-7
- Now we need to create the list go to search bar and type list create .
- GO to plus option in the list and ad 4 items
- Connect the four line to the four items in the list.
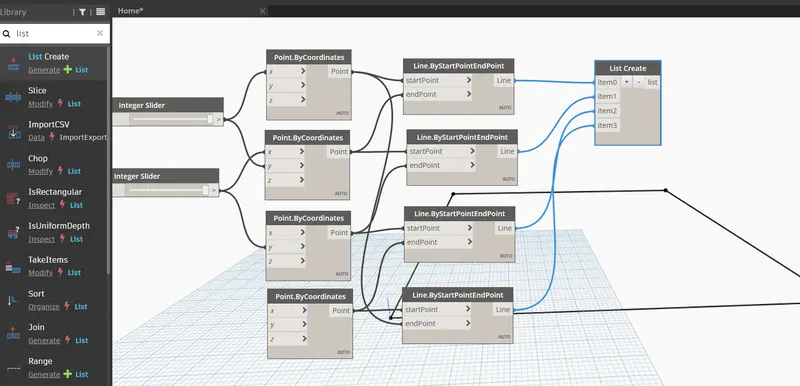
Step-8
- Now we set the levels wall type and floor also .
- Now we add the levels go to the search bar and search levels insert
- Again go to the wall type and search wall type and choose
- again go to the search bar and search integer slide and choose.
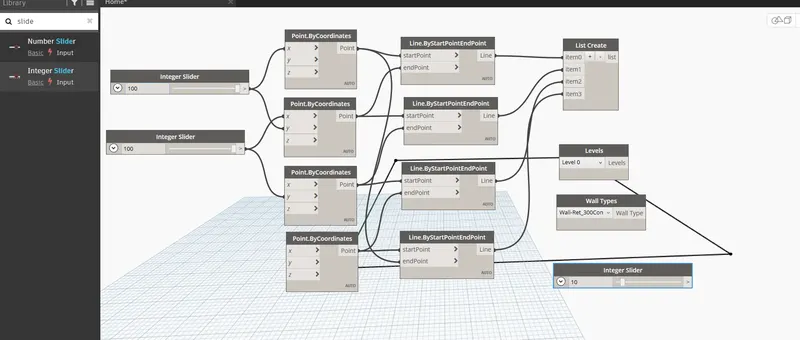
Step-9.
- Set the wall level 0
- set the integer slide 10 wall thickness generic 12"
- search the wall by curve and height.
- And connect the list to the curve
- connect levels to the level and wall type to the wall type and integar to the wall height.
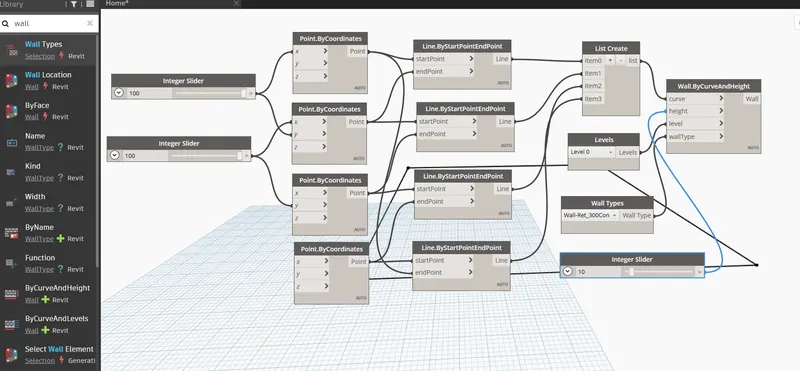
Step-10
- Now we can see the wall wall in the Revit model.
- we can see the thickness of wall and
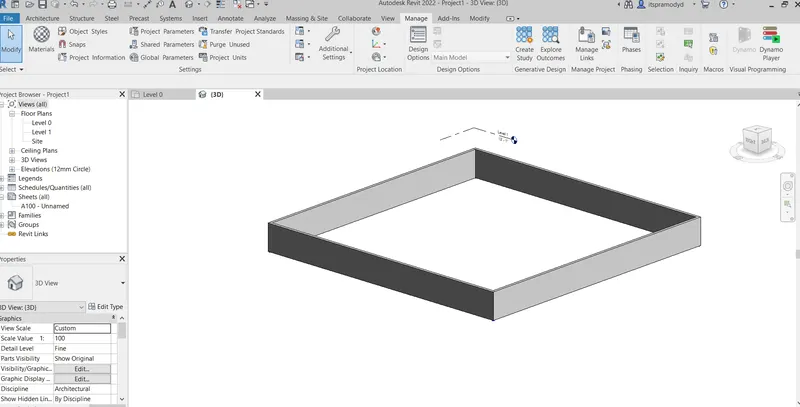
Step-11
- Now we are creating to the floor
- For this again go to the dynamo.
- Goto search bar and type floor type and choose
- again type floor and choose the option by outlineandlevels.
- Now connected the list to the outline curve and floor types to the floor type
- Also connect the levels to the level option.
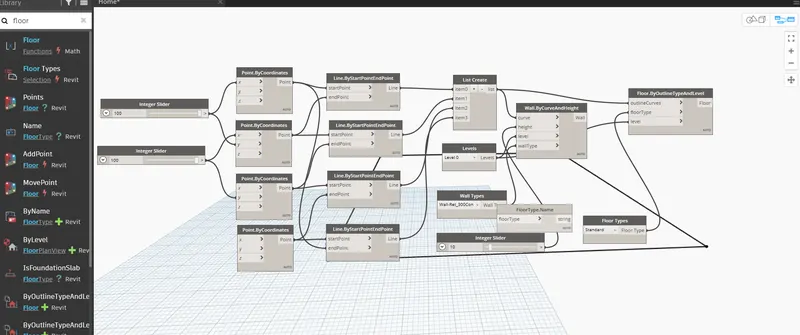
Step-12
- Now go to the Revit view and go to 3D view to see the floor.
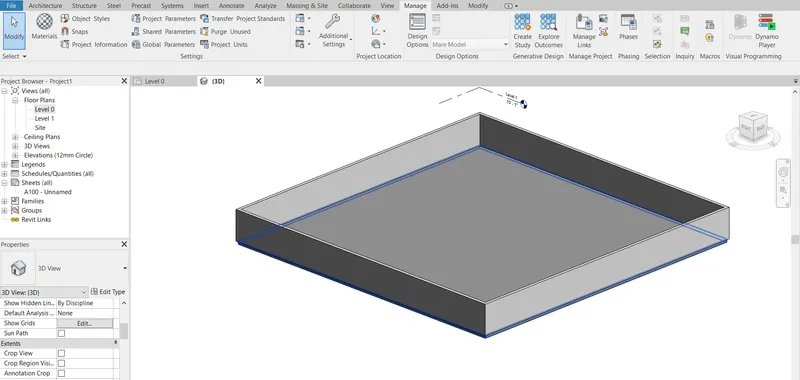
Result: In this question we created the wall and floor. first we created the point with the helpof codes than we join the point and create the wallwith the help of wall type than create levels and in the last we add the floor with thickness. thickness
Resultant Drawings:
Point:
wall:
Floor:
Answer To the Question No. 3
Question:3
3) Create an array of model elements in Revit. Use dynamo to vary the properties of model elements by using the slider or code block
Answer:
Aim: Aim of the question is to create an array of model elements in Revit. Use dynamo to vary the properties of model elements by using the slider or code block
Introduction: In this question we need to create the any element and by selecting the element we have to use array of those element by either slider or by using code block option .
Procedure:TO COMPLETE THE ANSWER TO THE QUESTION WE FOLLOW THE FOLLOWING STEPS:
Step-1
- Open the Revit Software
- Go to the manage tab and open the dynamo.
- Go to the new tab and open New project.
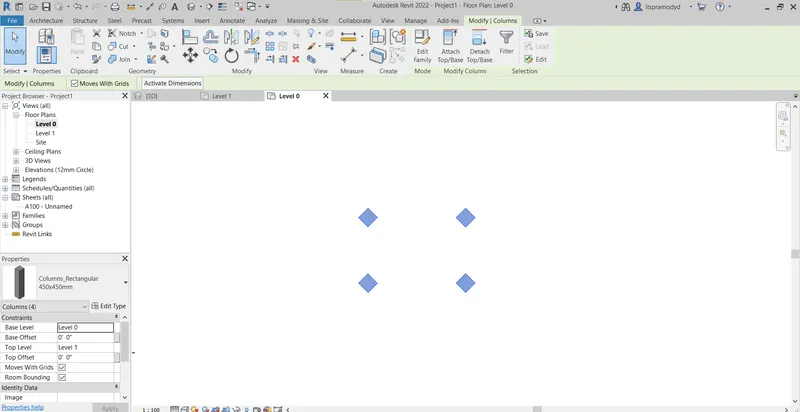
- Again go to the Revit model and
- Place the component like as architectural column to the Revti model.
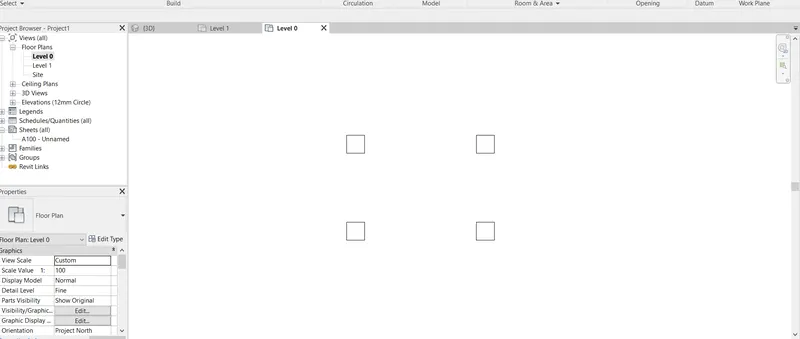 .
.
Step-2
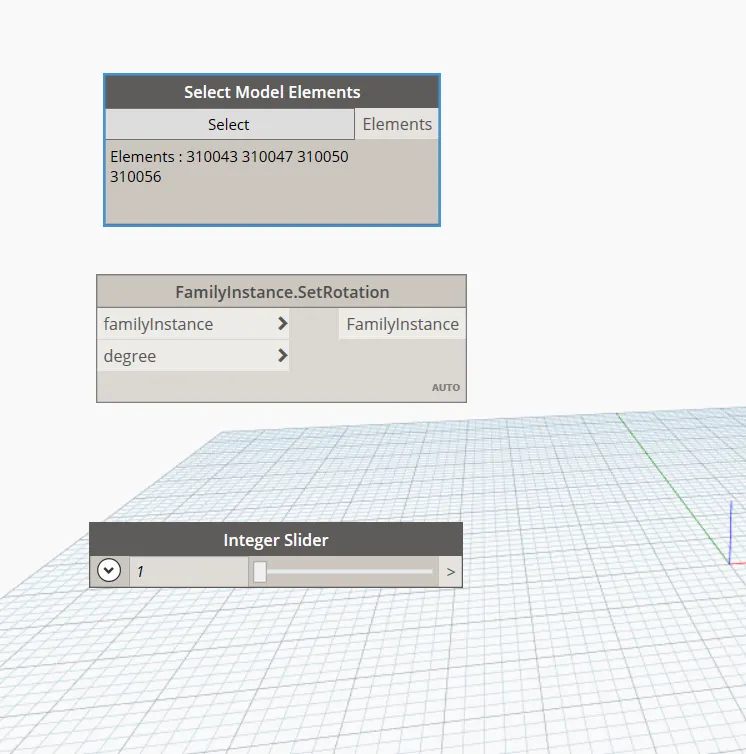
- Again go to dynamo model
- Choose the select model element in the search bar.
- And search the rotation and choose setrotation option
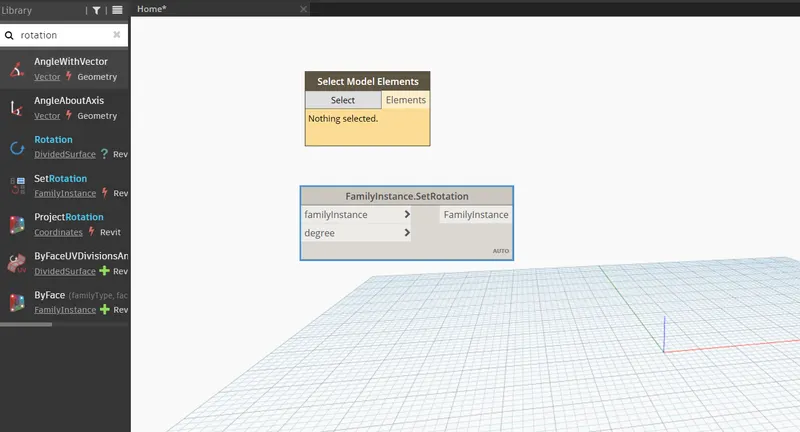
Step-3
- Now search the integger slide and choose in the dynamo model.
- select option from select model elemnt the model element
- Go to revit model
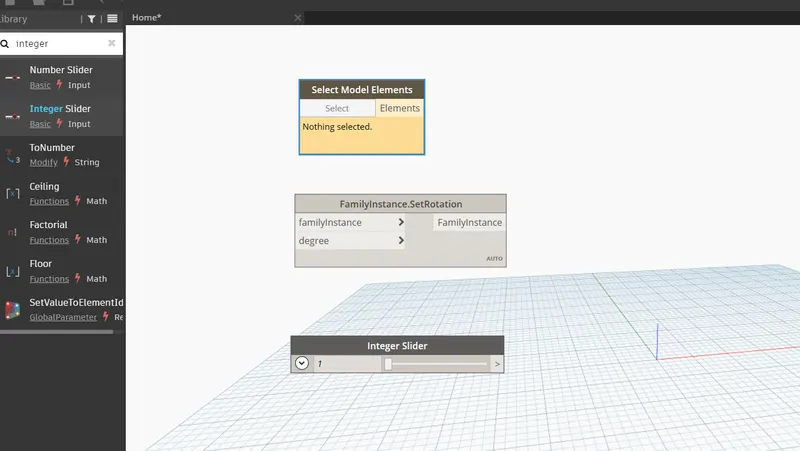
Step-4
- After coming to the revit model select all component
- And this will we selecting.

Step-5
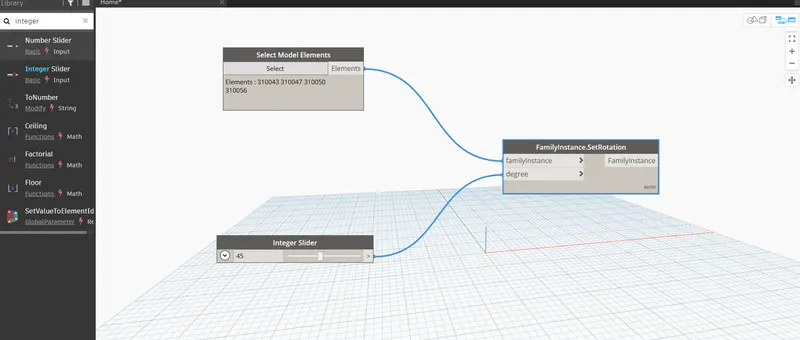
- Now choose the rotation angle 45degree
- And connect the element to the family instances integer slide as a degree.
- Now cross check in Revit we can see the model element are rotate 45 degree.
Step-6
- Revit Model we can see the changes shown in the model.
Result: i completed this question. in this question i inserted array in the revit model, and go to the dynamo and by select by element option i select the mcomponent and try to rotate the element .we rotate the element with the help of dynamo and get the result in the revit software.
Resultant Drawings:
Revit Model:
Code:
Answer To the Question No. 4
Question:4
4) Create a conceptual mass in Revit and develop a parametric column by dividing the surfaces and apply the concepts similar to used in parametric walkway modelling. Use triangular bent or square shaped panels to add finish to the parametric column
Answer:
Aim: Aim of the Question is create a conceptual mass in Revit and develop a parametric column by dividing the surfaces and apply the concepts similar to used in parametric walkway modelling. Use triangular bent or square shaped panels to add finish to the parametric column
Introduction: in this question we have to create the conceptual mass in Revit and develop a parametric column by diving the surface. also apply the concept similar to use parametric walkcway modeling.
Procedure:TO COMPLETE THE ANSWER TO THE QUESTION WE FOLLOW THE FOLLOWING STEPS:
Step-1
- First we need to create the conceptual mass in the Revit model
- Open the Revit Revitsoftware
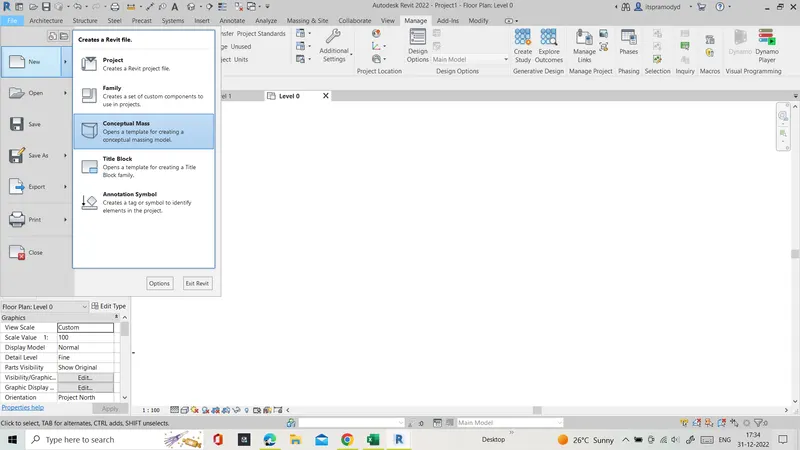
- go to the file option
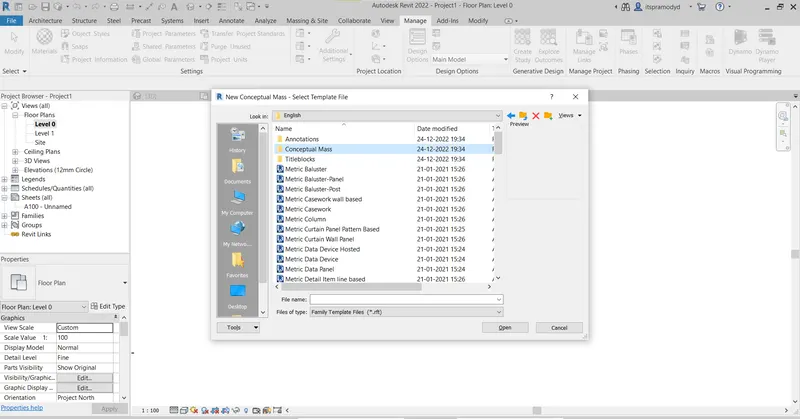
- Click on the new and select the conceptual mass
Step-2
- Now go to conceptual mass option
- Under this go to the metric mas open the file.
Step-3
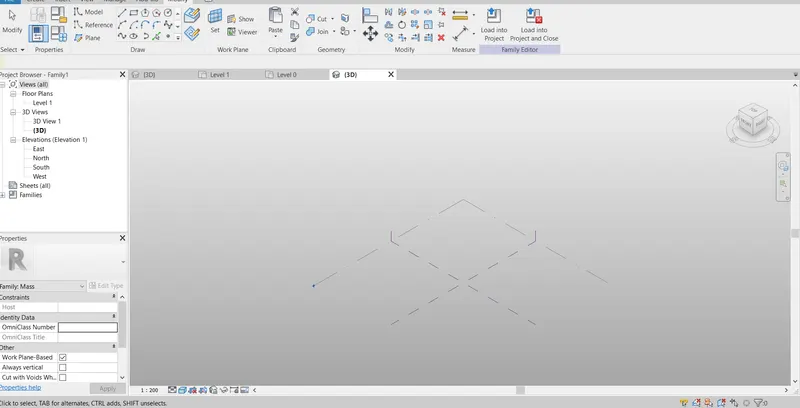
- Now this is the Conceptual mass template.
Step-4
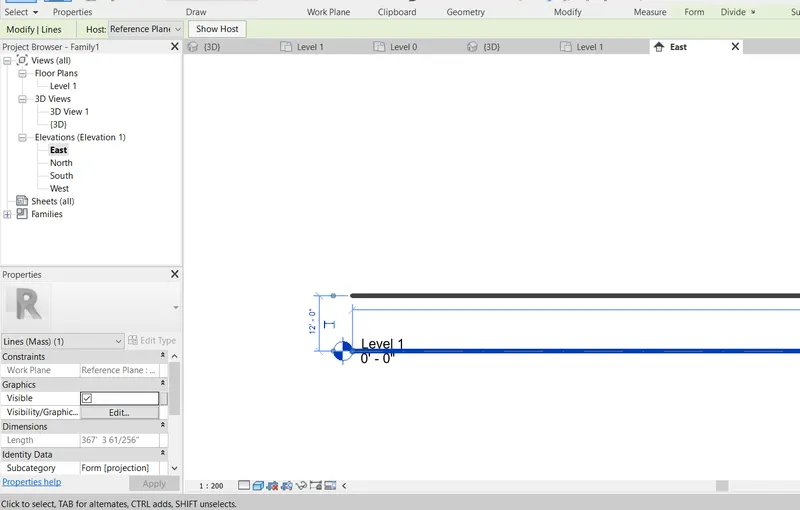
- Now go to floor plan the set the elevation first in the model.
- Go to floor level and set the another level. 12' by using pick linne
Step-5
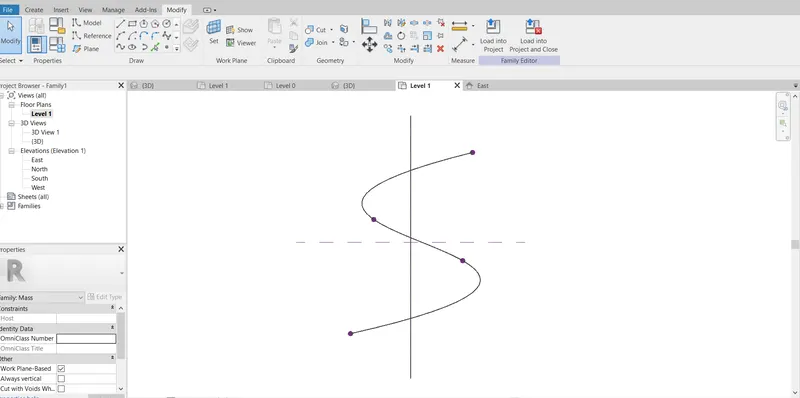
- Go to level-1
- And go to create option choose model line and choose spline through point
- Than place the spline as S shape curved using the model line
Step-6
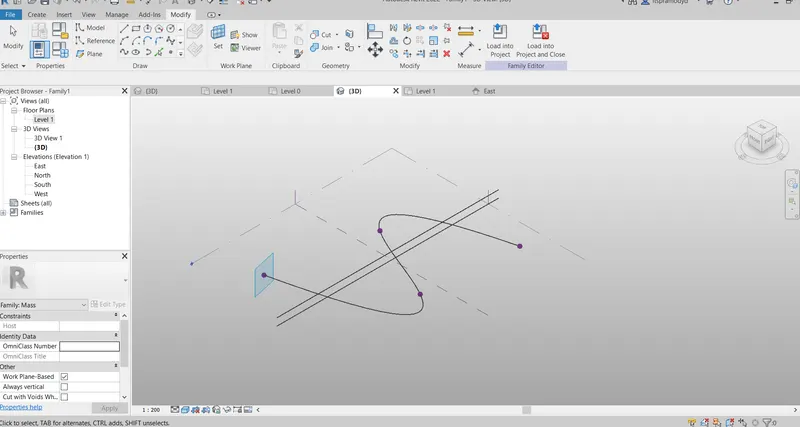
- Now go to 3D view:
- Now we need to set the plane
- go to set option drage this spline first point click show option.
Step-7
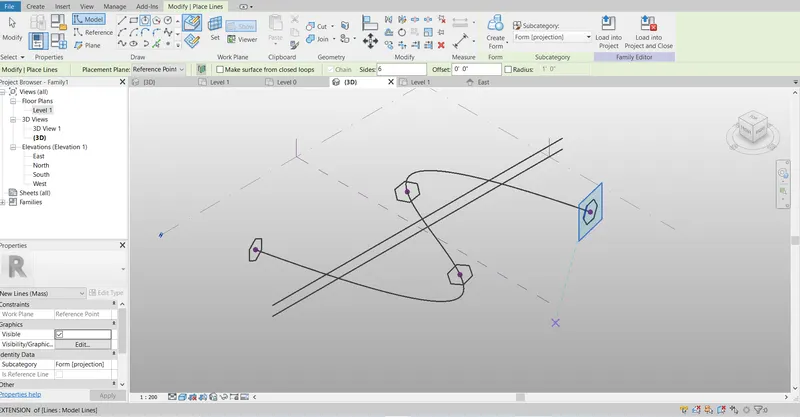
- Now choose the circumscribed polygon. at the height of 12' becouse we set the level Height of also 12'
- So choose apolygon and place it.
- Place the polygon with the 12' radius
Step-8
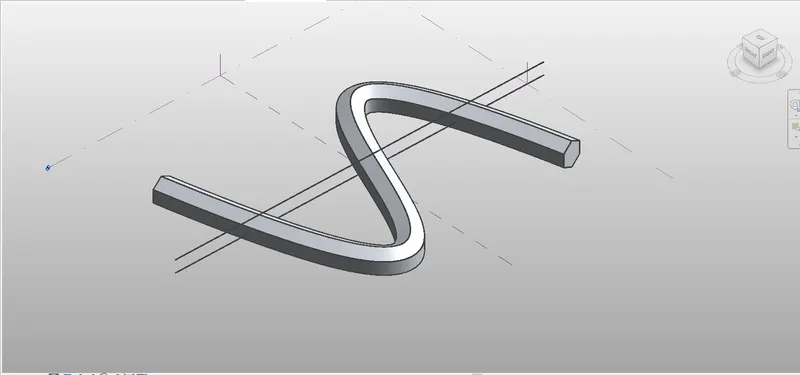
- Now Select the Circumscribed polygon and the curve also
- Go to the Create solit form and click them
- We get the solid element.
Step-9
Triangular Bent model.
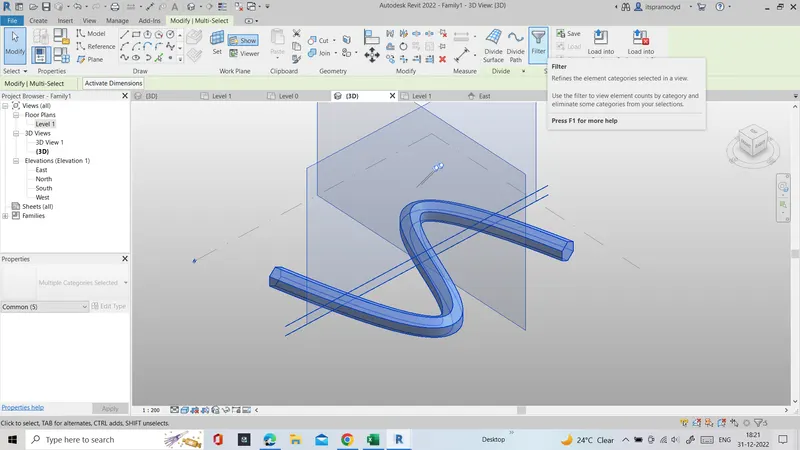
- We divide the surface of solid one
- For this selecet all the solid one
- click the filter option.
Step-10
- Go to the filter untick the line and refrence option and press ok
- Select once again and choose divide surface
- Choose the triangular bend by the properties browser
- For Some other property again select and click divide path
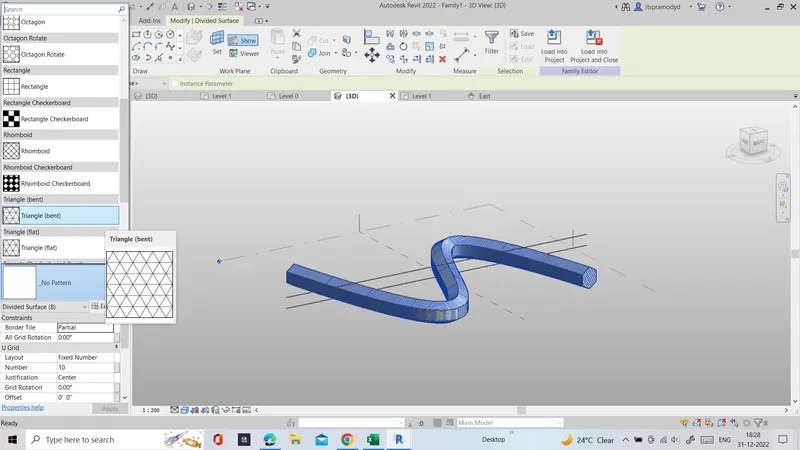
Step-11
- After this we get the following triangular bend conceptual cent model.
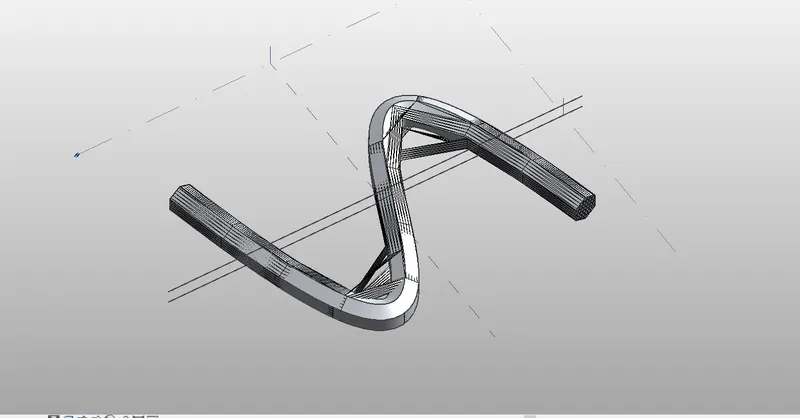 \
\
Other View:
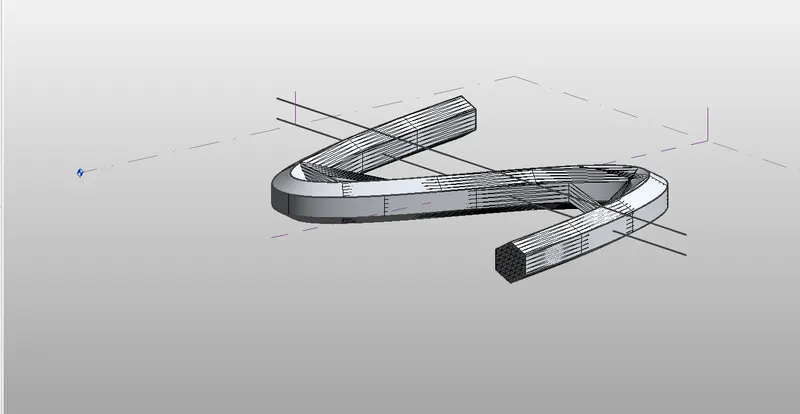
Other View:
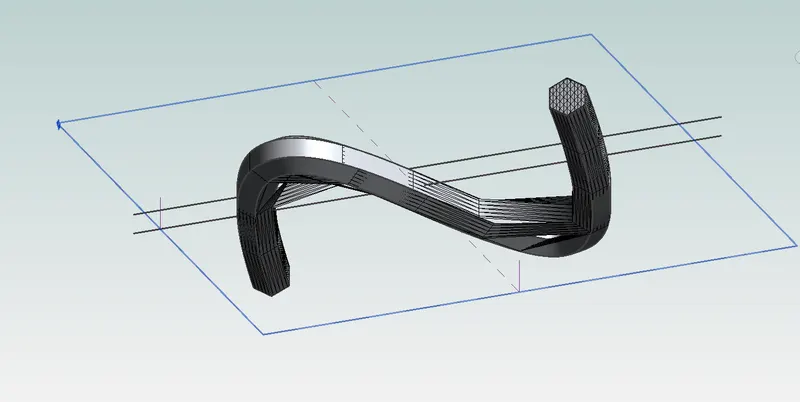
Result: in this question i have created the conceptual mass in the revit with the conceptual mass template. also developing the perametric structure using dividing the surface we used the concept similar to used parametric modeling. we created the triangular bend.
Resultant Drawings:
Curve:
3D-view:
Answer To the Question No. 5
Question:5
5) Use Dynamo to work on developing a Parametric Stadium. List your parameters and use the visual programming approach to complete the modelling, You can use the concepts discussed in parametric high rise tower in class for reference.
Answer:
Aim: Aim of the question is using the Dynamo to work on developing a Parametric Stadium. List your parameters and use the visual programming approach to complete the modelling, You can use the concepts discussed in parametric high rise tower in class for reference.
Introduction: In this question we need to create the parametric stadium using the dynamo by providing some parameter. we have to use the programming visualization concept to create the model.
Procedure:TO COMPLETE THE ANSWER TO THE QUESTION WE FOLLOW THE FOLLOWING STEPS:
Step-1
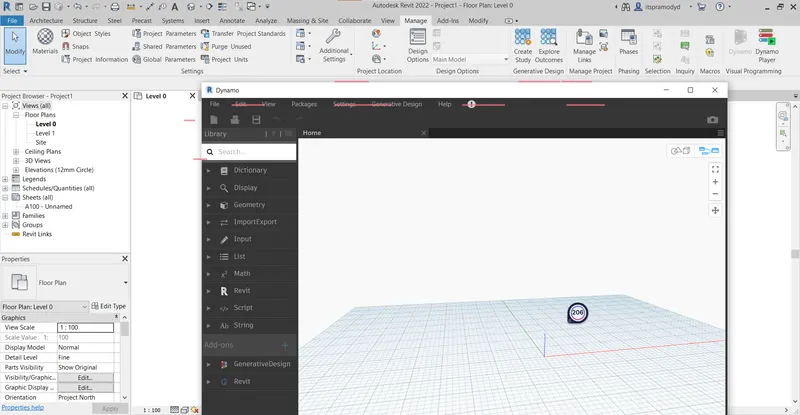
- Open the Revit Software go to the manage tab and open the dynamo.
- Go to new tab and open New project.
Step-2
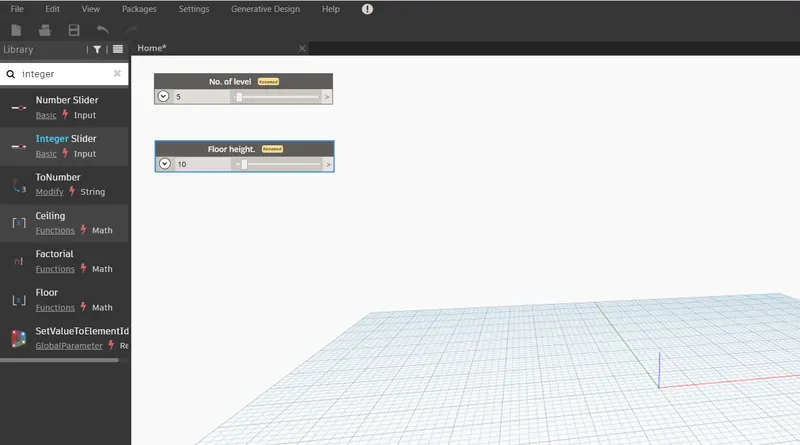
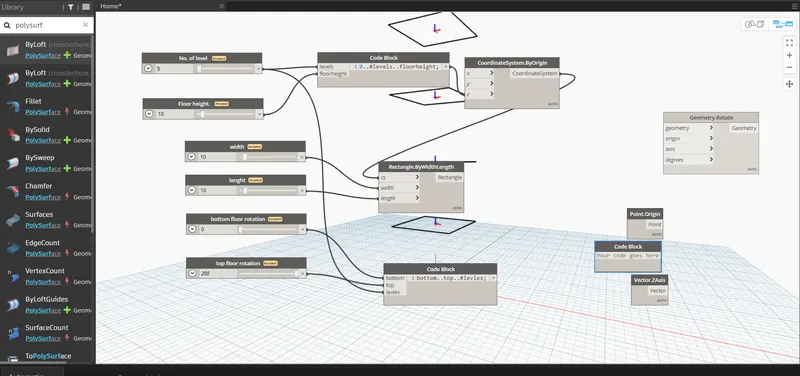
- Just we need to insert the two integer slide one for the No. of level and another for height of floor.
- After choosing the integer slide rename it first is no. of levels and another is height of flor.
Step-3
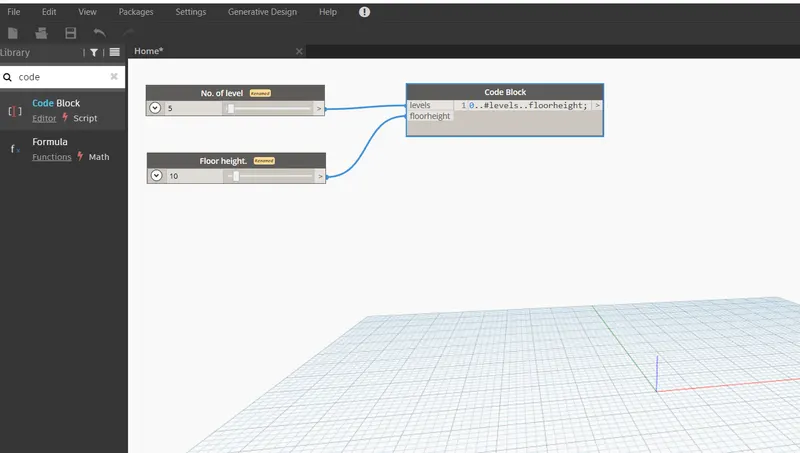
- Now we need to choose the code block by the search tab.
- Now go the codeblock and put the data manually. (0..#levels..floorheight;)
- After connect the no.of levels to the levels and height to the floor height
Step-4
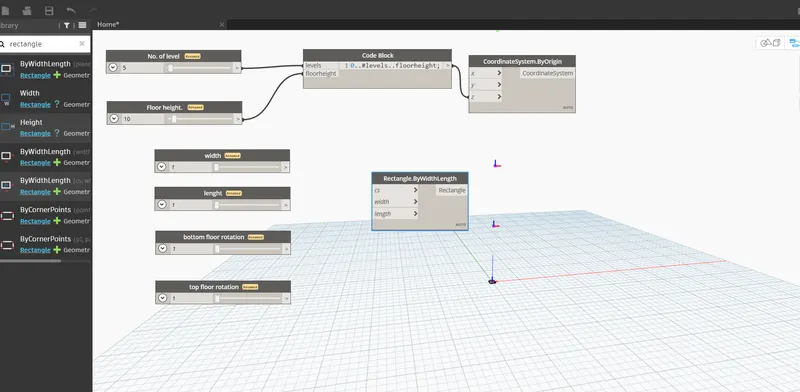
- Go to the searching bar and search the coordinate system origin. and choose this .
- Code block connect to the by origin z axis.
- Now insert the integer and copy the one to the tree times.
- Rename the integer slider first is width second is length third one ek bottom floor rotation and last one is top floor rotation.
- After this go to the search bar and search rectangle
- And choose reactangle bywidthlenght
Step-5
- Coordinate by origin connect to the cs.
- Connect the width to width
- length to length and bottom floor height connect to the code block bottom
- And top floor height connect to the code block top height option.
- Now connect to the search geometry. Rotate.
- Again go to search bar and search point origin and choose
- again go to search bar and choose vectorZ axis.
3D view:
Step-6
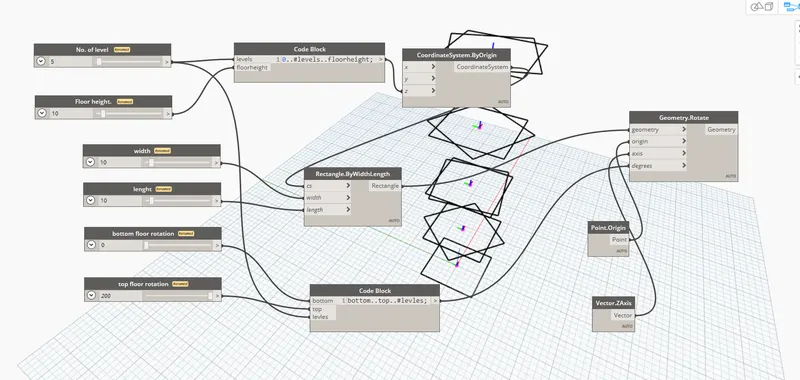
- Now connect the rectangle option to the geometry
- and codeblock2 connect to the degree.
- Point connect to the origin and vector connect to the Axis.
Step-7
CODE:
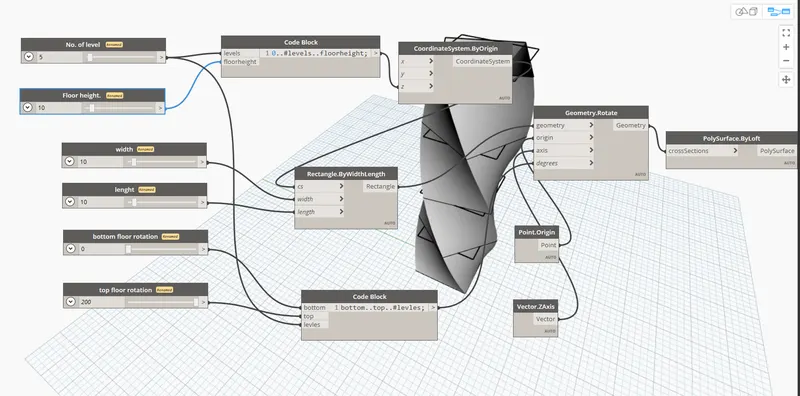
- Now we are creating the surface.
- To creating the surface go to search bar search poly surf by loft.
- choose and connect Geometry to the cross-section.
Step-15
Stadium View:
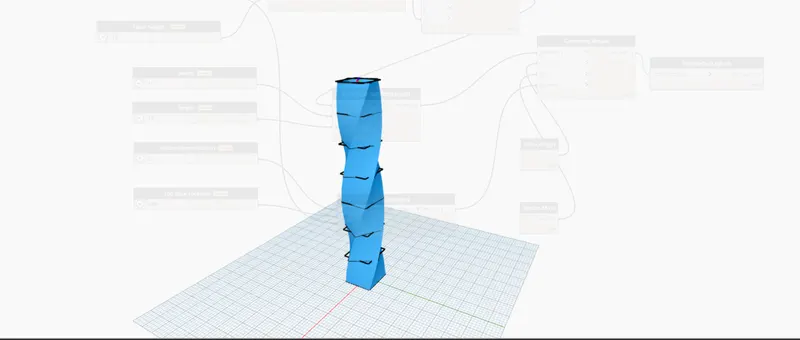
Stadium View:
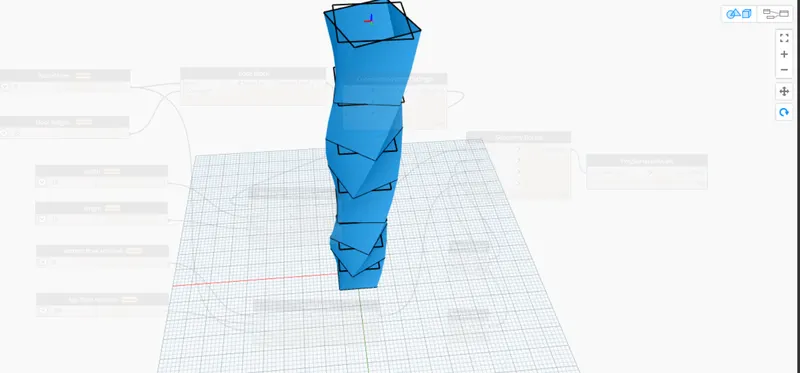
Result: In this question we created the parametric stadiums using dynamo and concept which we discussed in parametric high rise tower in class for reference. we use different types of concept to modeling the stadium. after creating the design steps and screenshots are attached to the model.
Resultant Drawings:
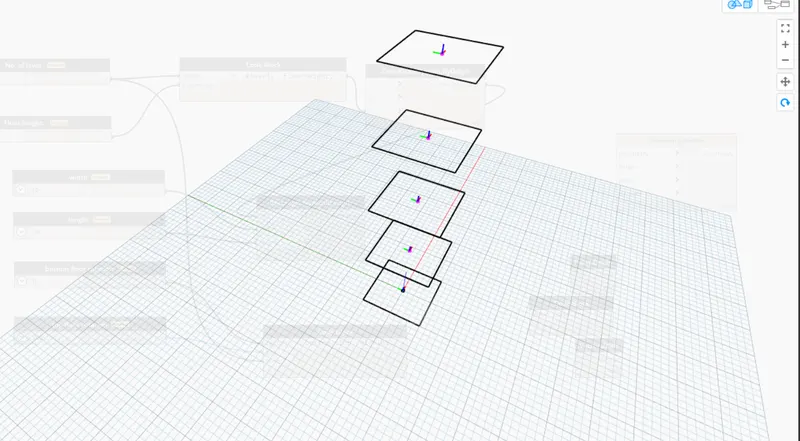
Levels in dynamo:
# view of stadiumstadium