Creating Bar Bending schedule, Different Door types, and Creation of standard drawing templates using AutoCad
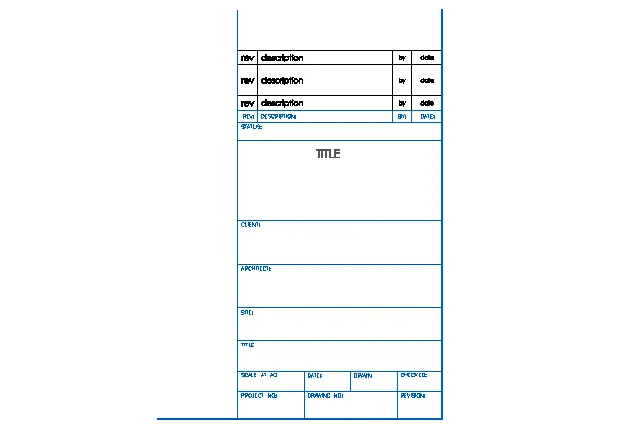
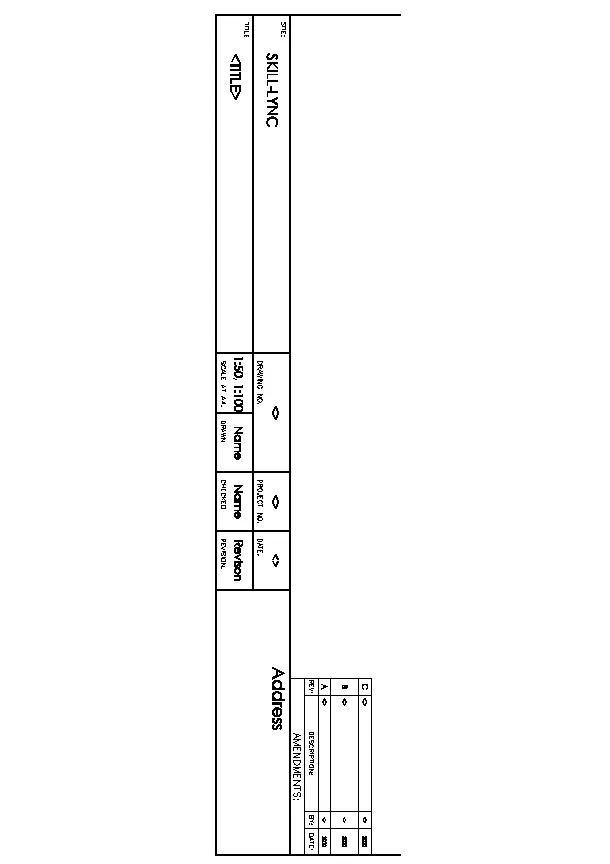
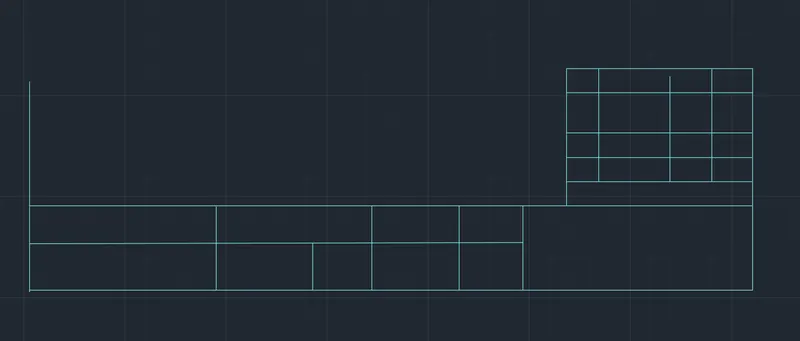
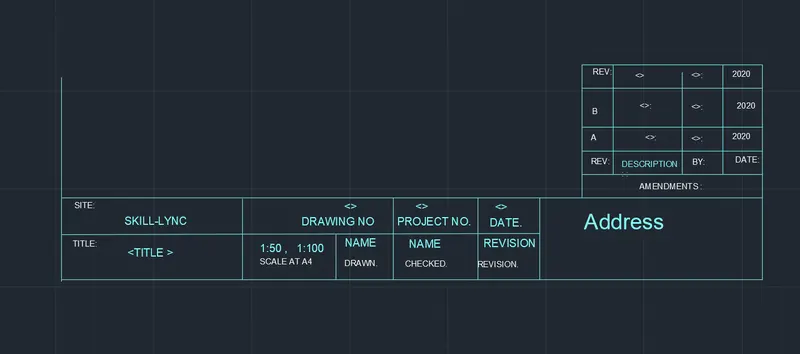
1. Create the templates as shown in Figures. Take the size of the title block as per industry standards or you can assume it as per the size of the paper. Use text and attributes wherever required. After creating the title block you need to save it as a block with names: Custom1_titleblock and Custom2_titleblock, respectively.
AIM AND INTRODUCTION:
Templates as shown in Figures are required to be created taking the size of title block as per industry standarfs or can be assumed as per size of the paper. Text and attributes wherever required are also to be used. Save the as a Created title blocks are to be saved wiith names: Custom1_titleblock and Custom2_titleblock, respectively.
Given : Figures of templates as shown above.
PROCEDURE IN DETAILS :
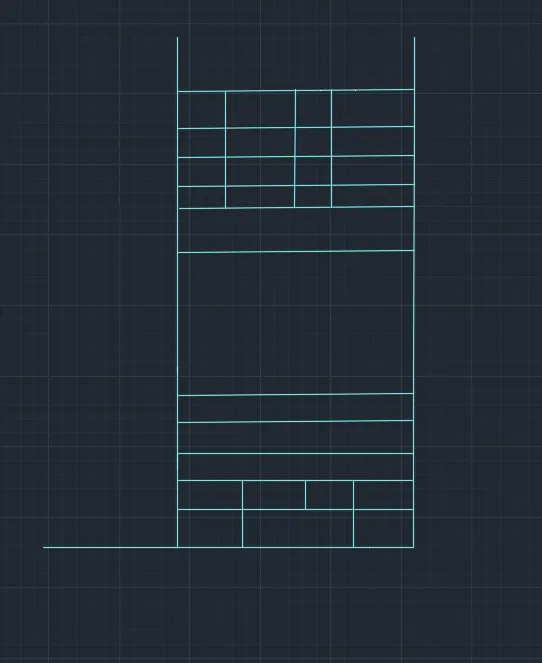
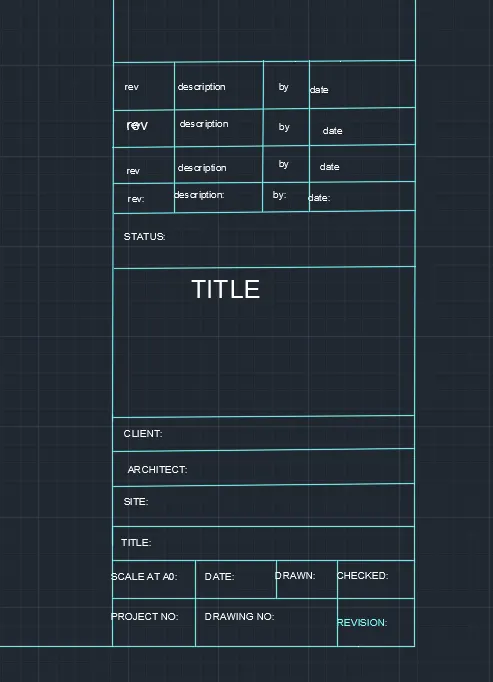
Table as given in figures are created using following commands-
- Line Command - For drawing necessary lines
- Trim Command - For removing/Triming the portion of line segment which are not needed.
- Extend Command - For extending the lines wherever required.
- Offset Command- For offsetting distances
- Dtext Command- For writinf the text
- Copy Command : For copying any object/text
- Paste Command : For pasting the copied object/text at the desired locations
- Erase Command : For erasing any object as a whole if not required.
RESULT : Thus ,
1) Templates are created as per given figures.
2) Text and attributes have been used as required
3) Block names have also been created as given
------------------------xxxxxxxxxxxxxxxxxx---------- END OF Q-1 ---------------xxxxxxxxxxxxxx----------------------
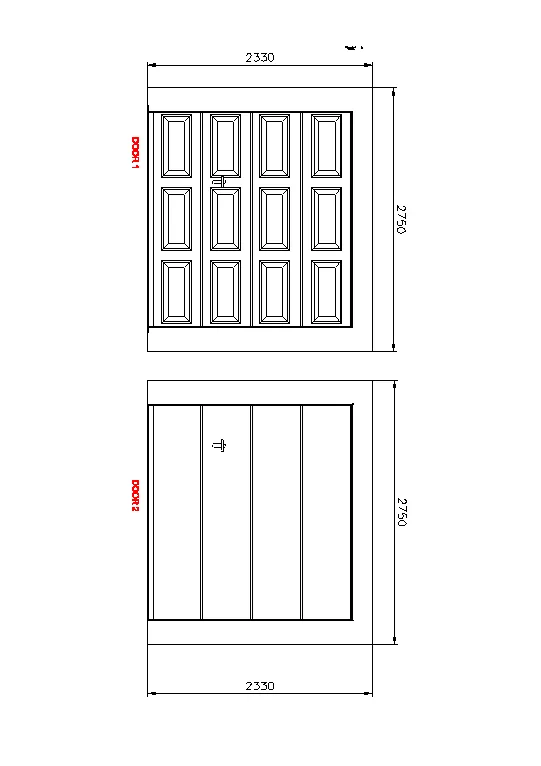
2. Create the doors type for warehouse as shown in the Figure. You need to create each door type as per standard size or given dimensions. Create the blocks of this door type after creating them.
AIM AND INTRODUCTION:
Doors type for warehouse as shown in the figure as per standared size or given dimensions are required to be created . Blocks of this door type after creating them also need to be created.
Given : Figures of door type shown above.
PROCEDURE IN DETAIL :
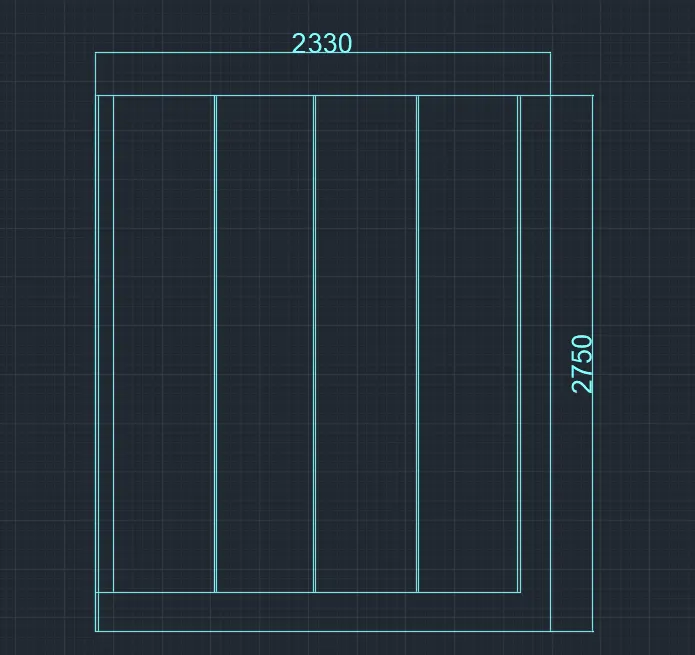
Door frame of given dimension has been created using Rectangle command and Dima command as shown below-
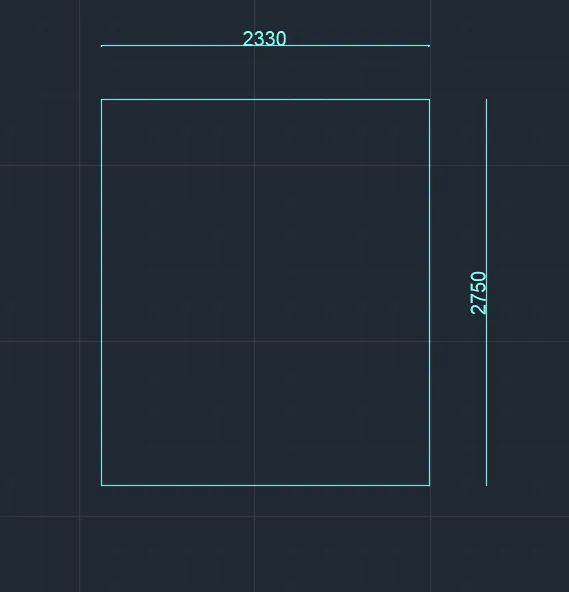
Width of the fram is assumed as 3" and drawn
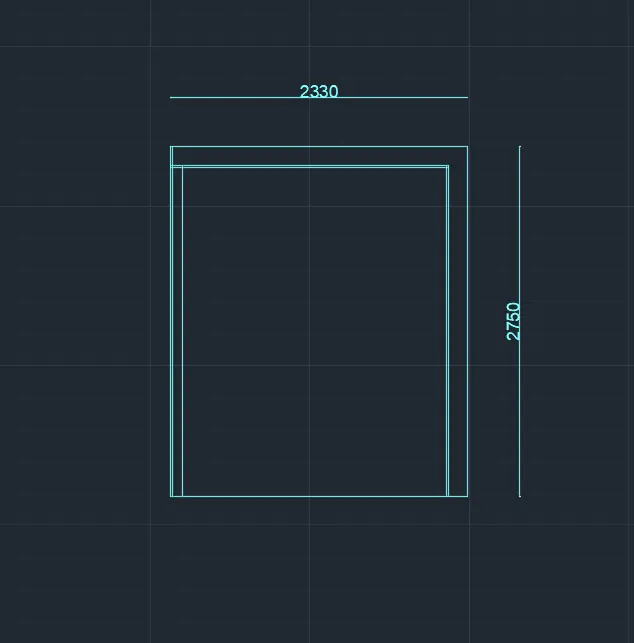
Top rail, Stiles have been created as dimension prevailing in practice in the Industry.
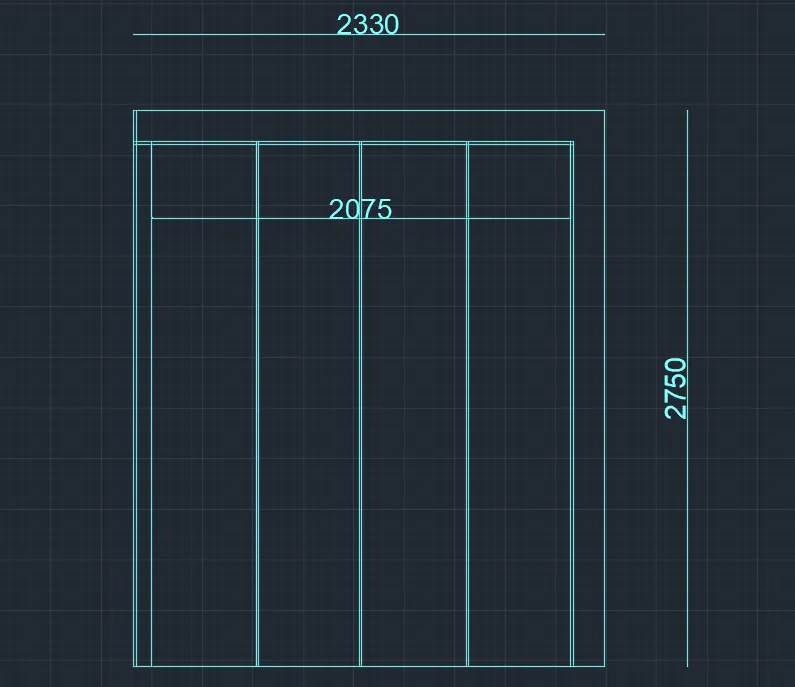
Panelling work is done using Offst command , Trim command , Extend command , delete command , Line command etc. as shown below-
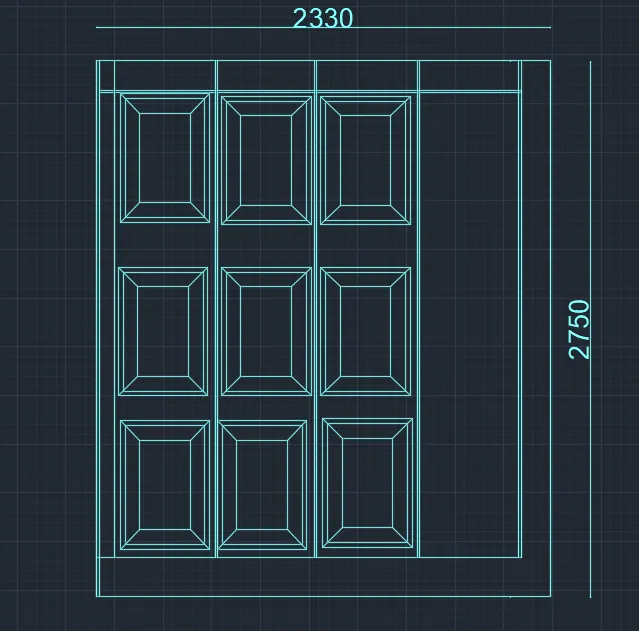
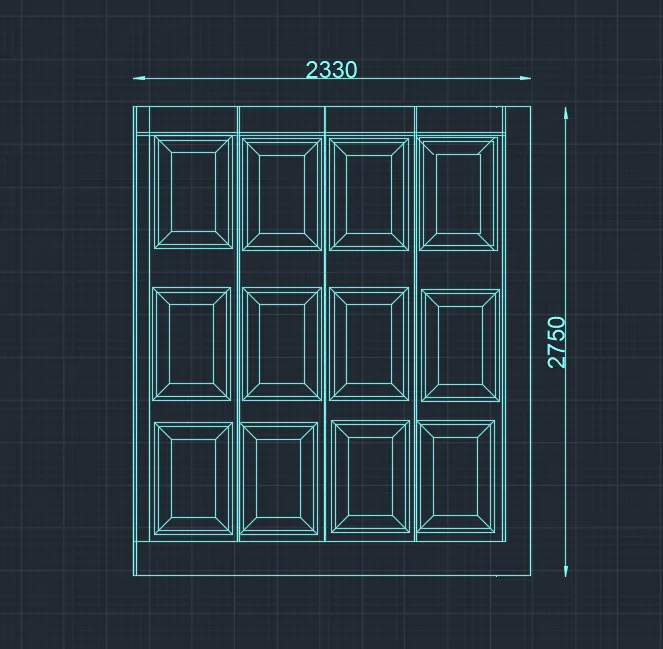
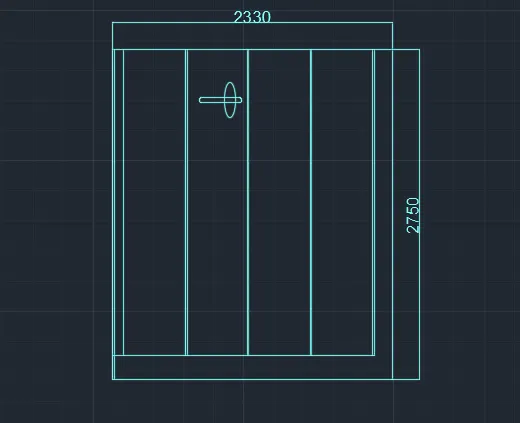
Tower bolt is created and converted inti bloch then attached to appropriate position of door using Line , Ellipse , Trim and Delete command as shown below-
RESULT : Thus,
1) All Door types for warehouse have been created as per given figure .
2) Blocks of created door type have also been created
------------------------xxxxxxxxxxxxxxx--------------xxxxxxxxxxxxxxx------ END OF Q-2 --------xxxxxxxxxxxxxxx------------
3. Create each symbol as a block with the name given in the legend. After creating the blocks arrange them in the legend as shown in the Figure.
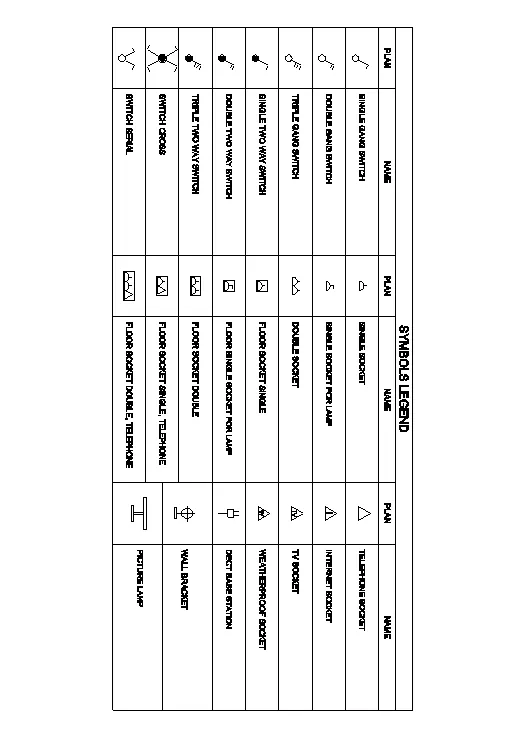
AIM AND INTRODUCTION : Blocks are to be created from the given symbols and nomenclature is also to be done as per legend. Blocks also need to be arranged as shown in the table.
Given: Symbols and their names are given in the form of table as shown above.
PROCEDURE IN DETAILS :
Table is created using Table command and Text are entered using Text and MT command-
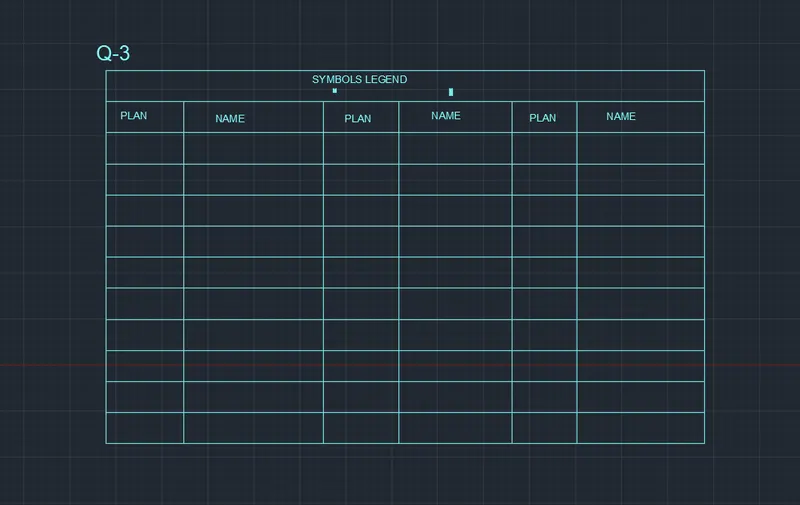
Symbols are created using circle and Line command and converted them into block using Block command and then inserted then in the table-
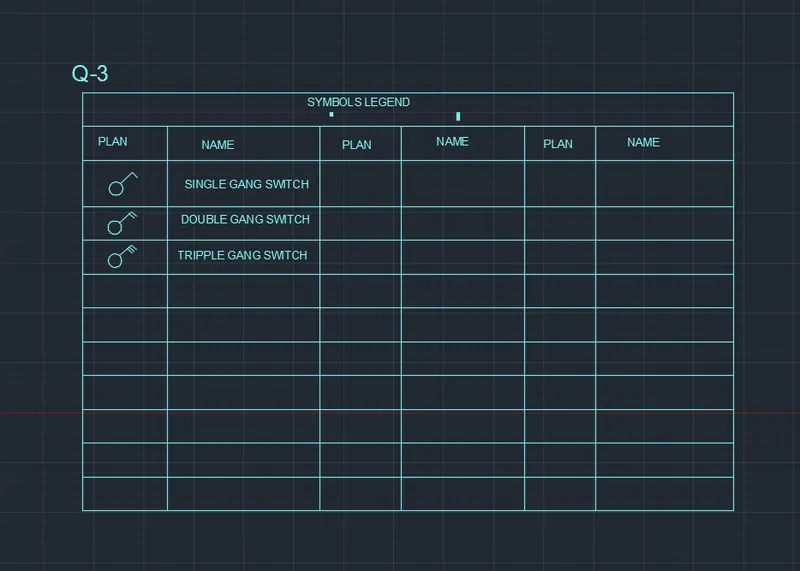
More symbols are created using command as mentioned above and Hatch command-
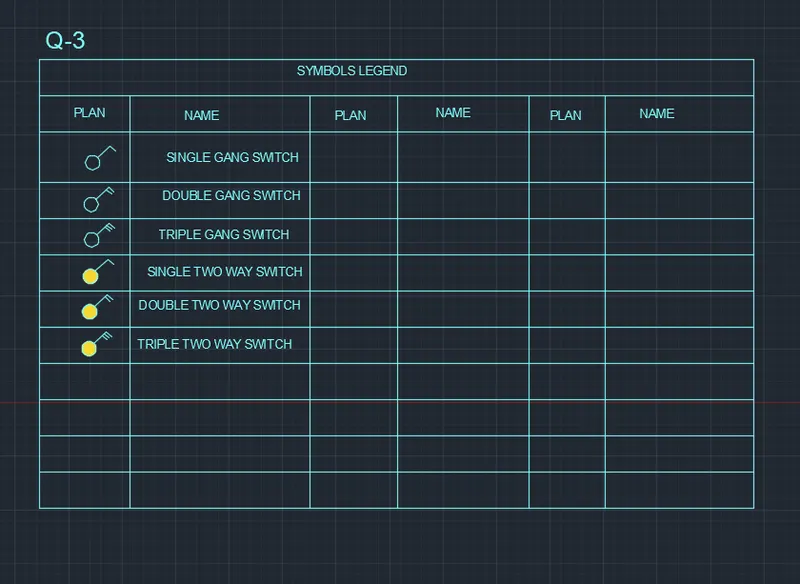
Further symbols are created as above and saved them as block with the name as mentioned in column-2 of the above table-
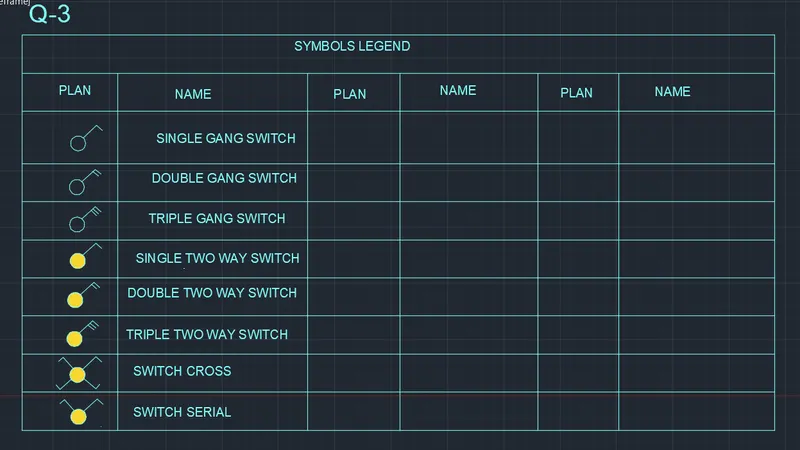
All symbols are created below-
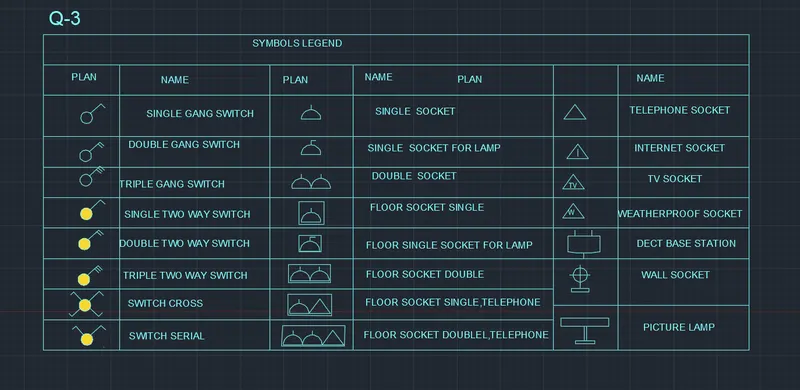
RESULT : 1) Thus, Blocks of all the given symbols are created as tabulated above including their nomenclature
2) Created Blocks are also arranged as shown in the given table.
------------------------------xxxxxxxxxxxxxxxxx----------- END OF Q-3 ----------------xxxxxxxxxxxxxxxxxxx-------------------------
4-Create the door type for residential building as a block. Save the name of the blocks as type. Use given dimensions or assume dimensions as per industry standards.
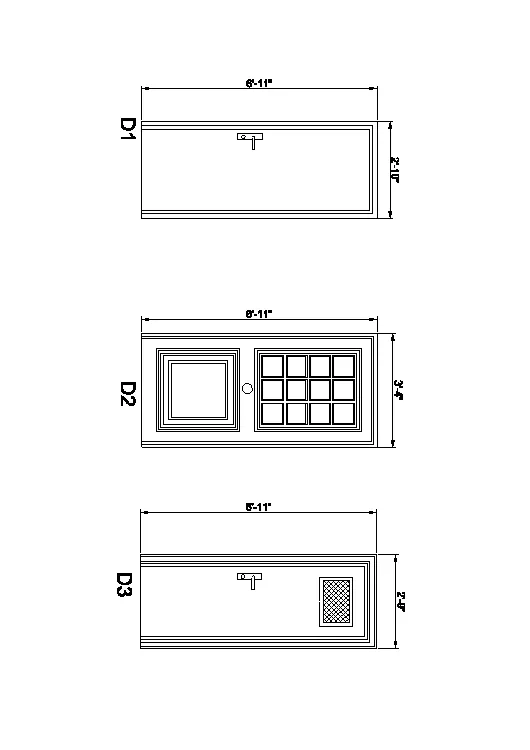
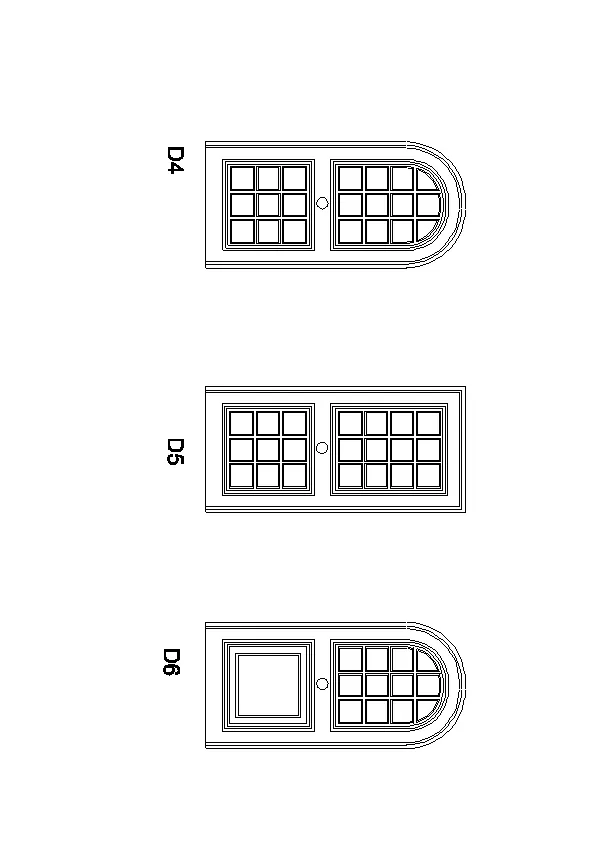
AIM AND INTRODUCTION : Different Door types of Residential Building as given are to be created as per the dimensins and are required to be saved as block according to door type. Other dimensions which are not given shall be assumed as per Industry standard
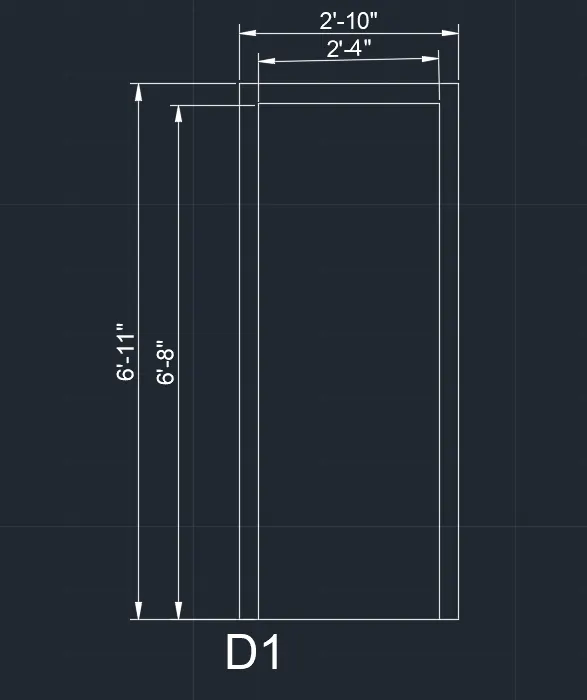
D1 DOOR :
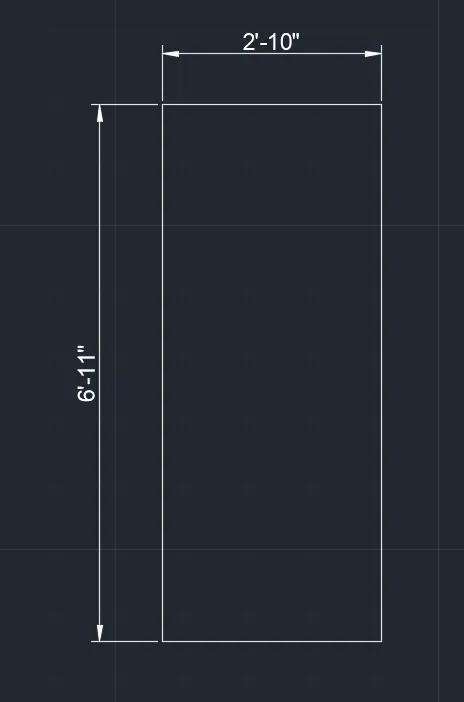
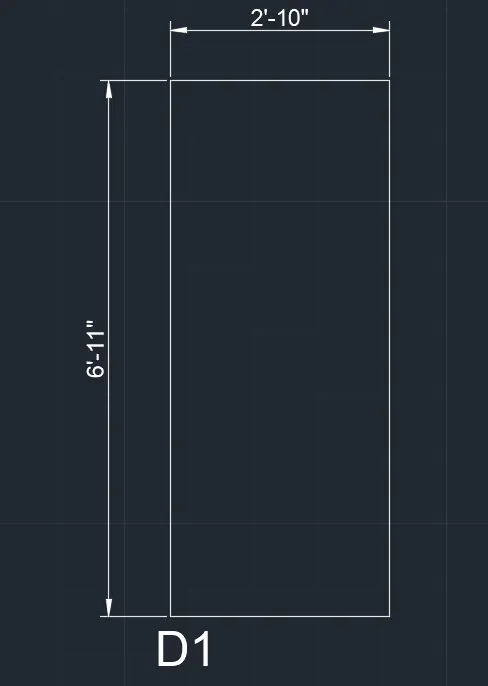
Width of Frame of the door is considered as 3" as shown
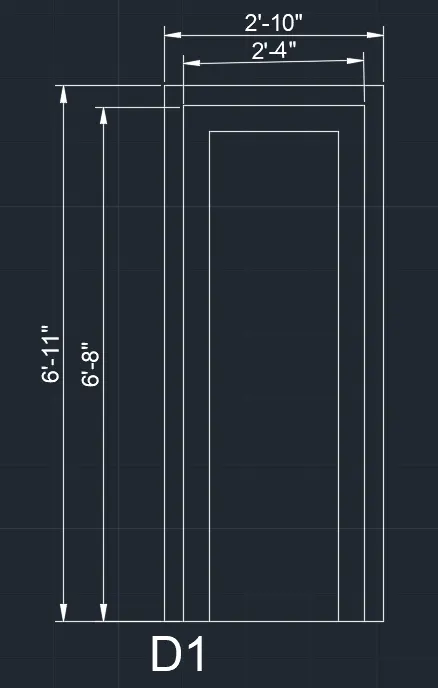
Top Rail and Style has been assumed of thickness 4" and drawn in the door.
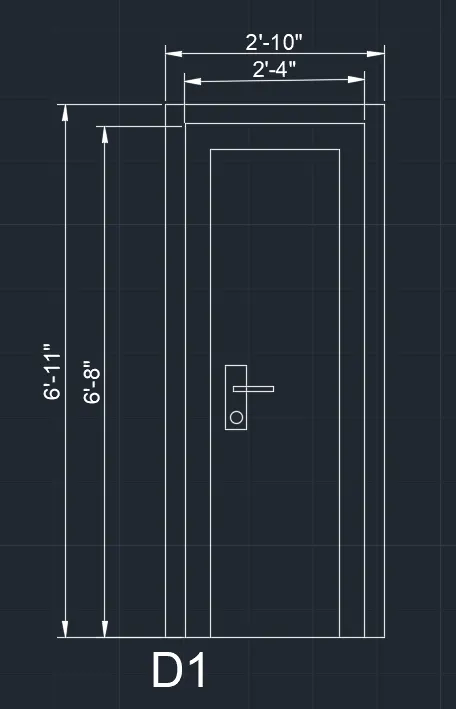
Handle is attached in the door as shown below and Door is saved as block with name D1
------------------------------xxxxxxxxxxxxxxxx----------------------xxxxxxxxxxxxxx----------------------xxxxxxxxxx---------------
D2 DOOR :
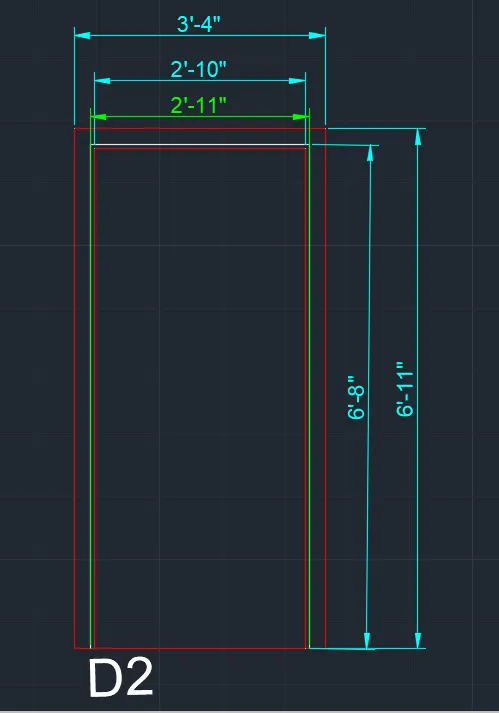
Door Frame outer boundary is created as per dimension given-
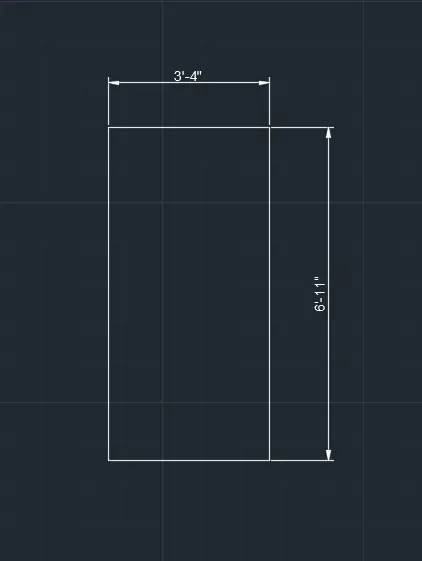
Frame thickness of door is assumed as 3" and Rivet 0.5" and accordingly drawn below-
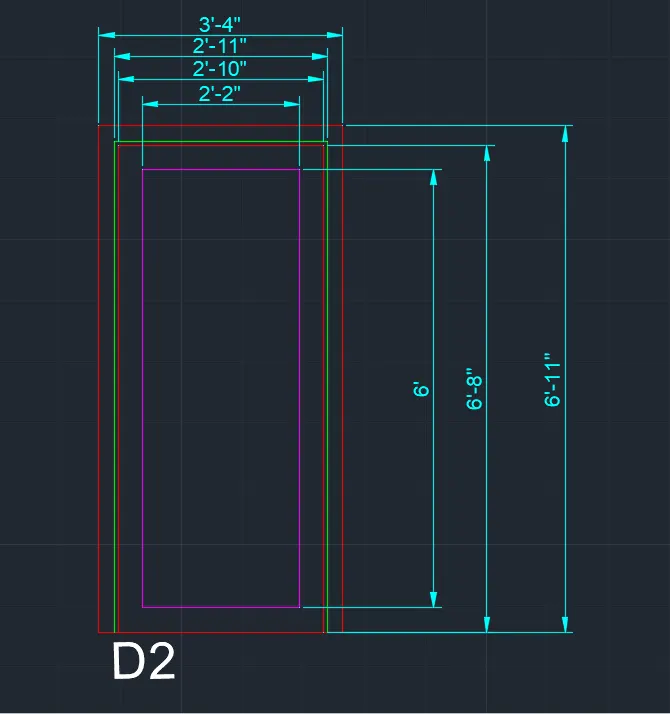
Considering Top rail , Bottom rail and Styles of thickness 4" and drawn in pink colour and door is saved as block with name D2as shown below-
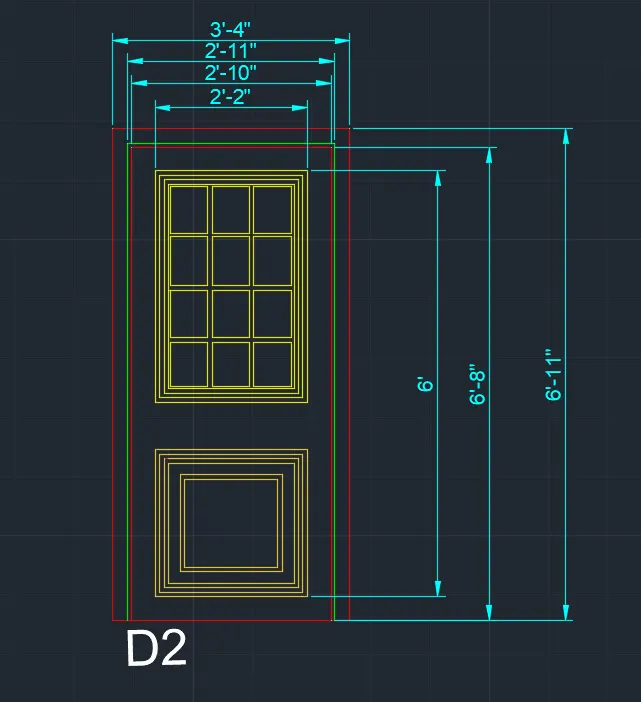
Door panels have been dsigned as given using offset, Trim , Erase, Extend and line command
-------------------------xxxxxxxxxxxxxxxxxx---------------------------xxxxxxxxxxxxxxxxx-----------------xxxxxxxxxxx-------------
D3 DOOR :
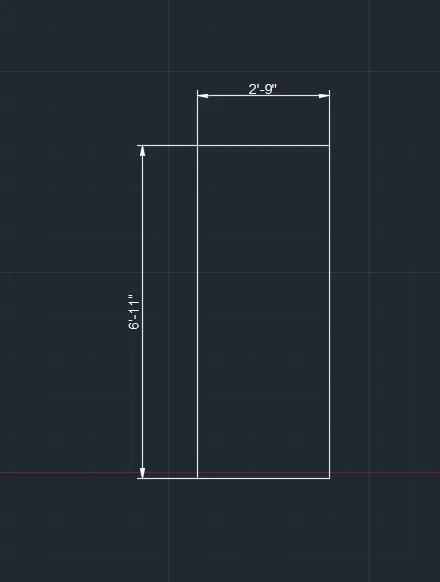
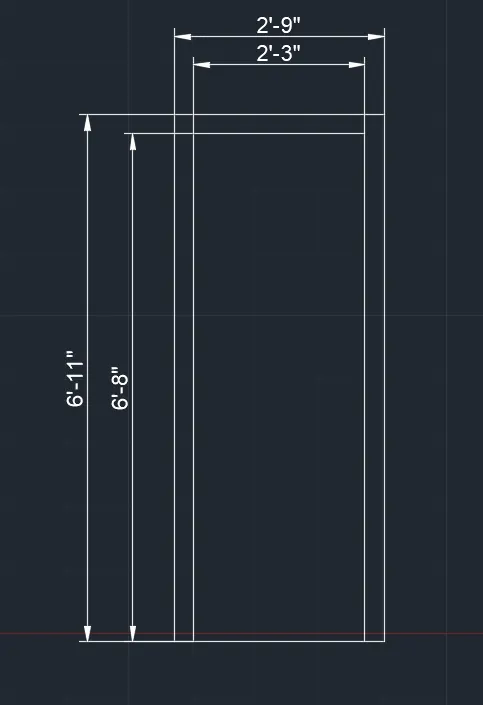
Door frame of size 2'9" x 6'11" ( outerr) is drawn as below using Rectangle command
Width of door frame is assumed as 3" and drawn accordingly as shown below-
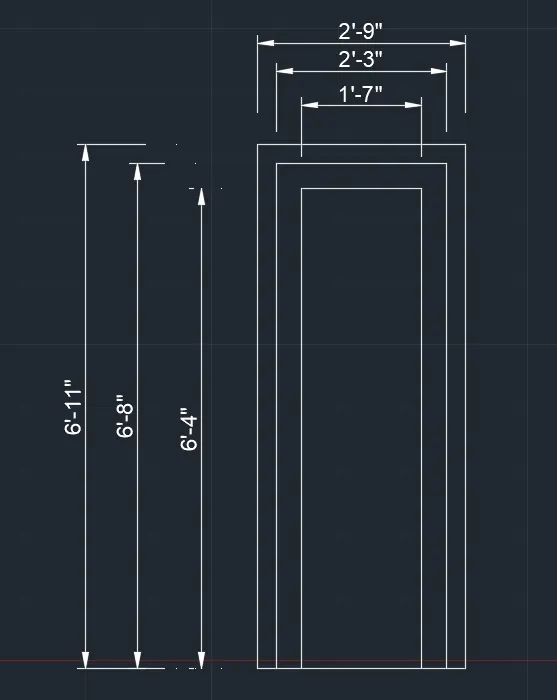
Stile and top rais are assumed 4" wide and drawn as shown below-
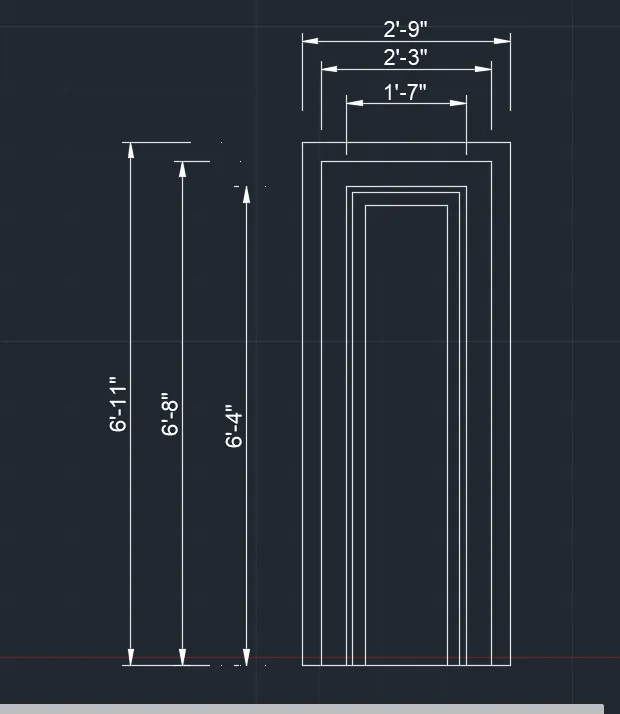
Door panes has been drawn assuming suitable dimension as per industry standard ( 1" and 2" projections)
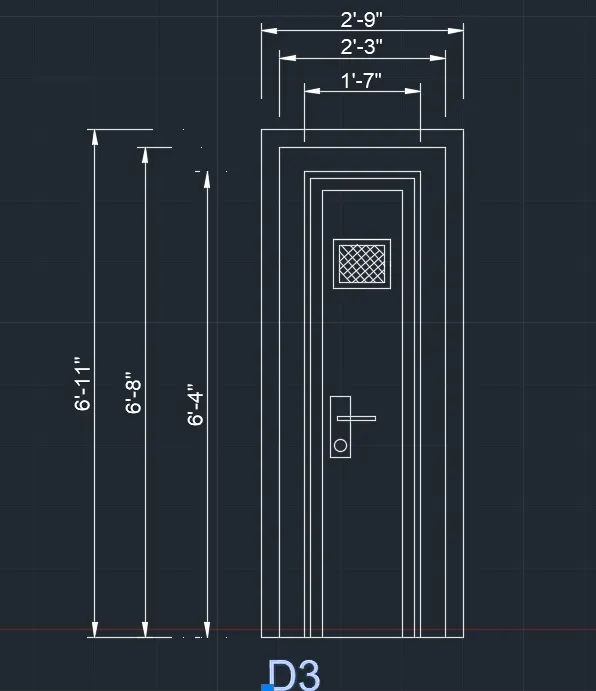
Door is saved as block name D3
------------------------xxxxxxxxxxxxxxxxxxx------------------------xxxxxxxxxxxxxxxxxxxxx--------------xxxxxxxxx-----------------
D4 DOOR :
Using line, Arc, offset, Trim , Extend, Line , Delete commands Door of size ( outer frame) 4' x7'1" is created below-
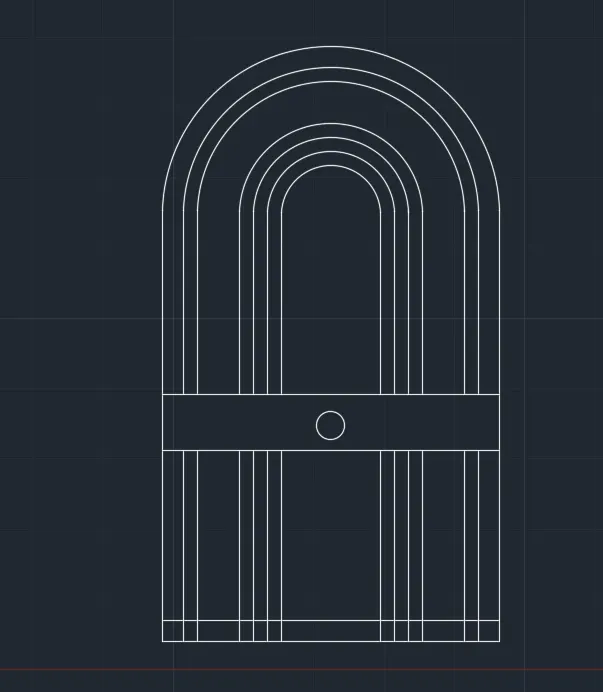

Door size is assumed as 4' x 7'1"
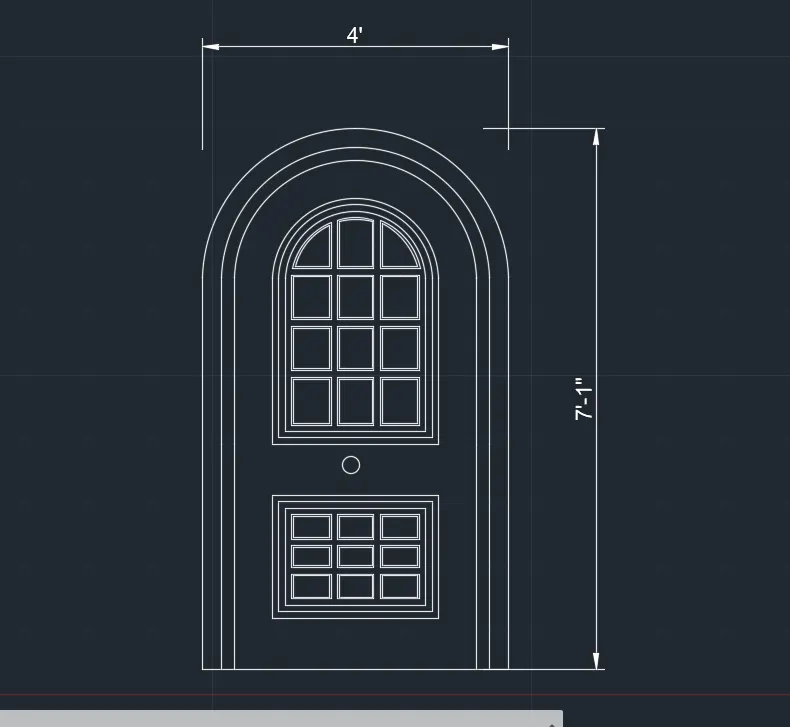
Panels have been created using offset, trim, extend, command with offset distance of 1" as shown-
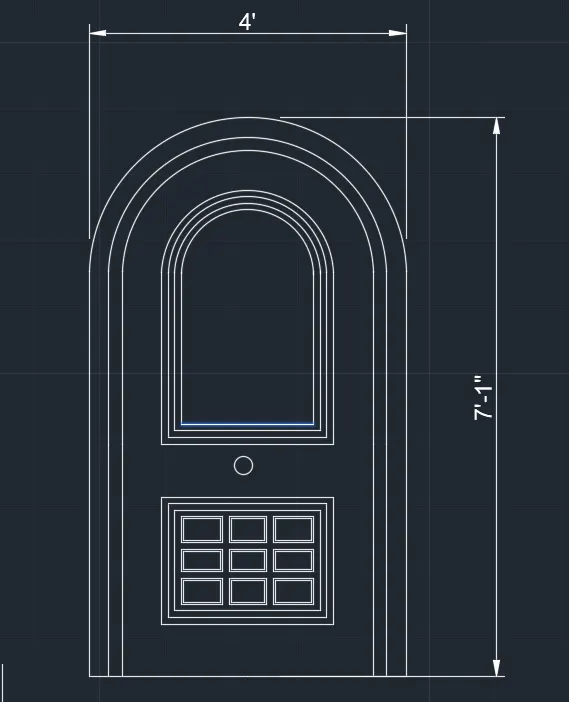
Panel work is completed using offset and Trim command as shown below and Door is saves as Block name D4
-----------------------xxxxxxxxxxx------------------------xxxxxxxxxxxx-----------------------------xxxxxxxxxxxxx----
D5 DOOR
----------------------xxxxxxxxxxxxxxxx--------------------xxxxxxxxxxxxxxxxxxx-------------xxxxxxx----------------
D6 DOOR
RESULT : All Door types ( D1 , D2, D3 & D4) are created as per given data and figure and saved each door as block according to the door type. DWG File is also attached for reference. Door D5 & D6 are repeated design wise but dimension is not given so D2 and D5 are equivalent . Similarly D4 and D6 are als equivalent so similar door types are copied.
------------------xxxxxxxxxx----------------------- END OF Q4 -----------------xxxxxxxxxxxxxx----------------------------
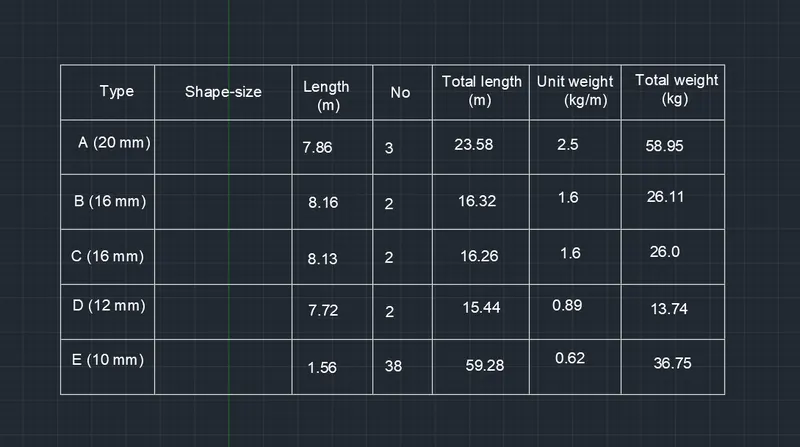
5. Create each shape as a block as shown in the Figure. Save the block and insert them on the table as shown in the Figure.
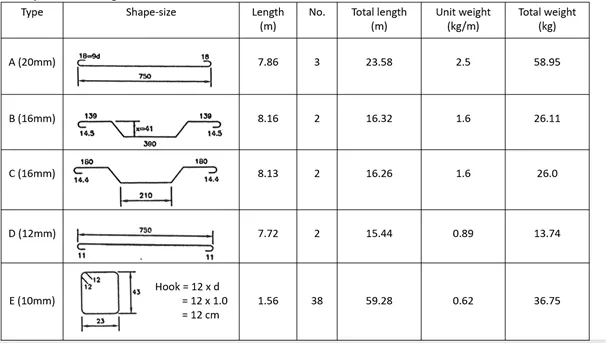
AIM AND INTRODUCTION : Each shape of BBS is required to be created as a block an to be arranged in table as per given figure.
Given : Different shapes in a table
PROCEDURE IN DETAIL :
Table as with number of Rows and Columns as given in the figure is dran using following commands-
- Line command
- Offset command
- Extend command
- Trim command
- Delete command
- M Text coomand
Data as given in the figure are filled in the table using following command-
- Text command
- MT command
- Copy command
- Paste command
- Texts have been made to the appropriate size using property option
Shapes of 20 mm and 12 mm dia bar have been created as block using following commands-
- Line command
- Fillet command
- Dim alligned
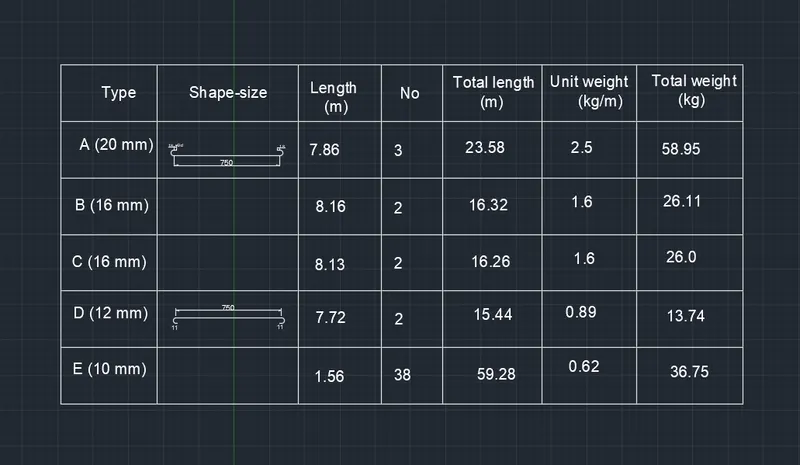
RESULT : tHUS Each shape of BBS is r created as block and arranged them in table as per given figure as desired.
----------------xxxxxxxxxxxxxx------------- END OF CHALLENGE -------------xxxxxxxxxxxxxxxx--------------