Creating Bar Bending schedule, Different Door types, and Creation of standard drawing templates using AutoCad
AIM:
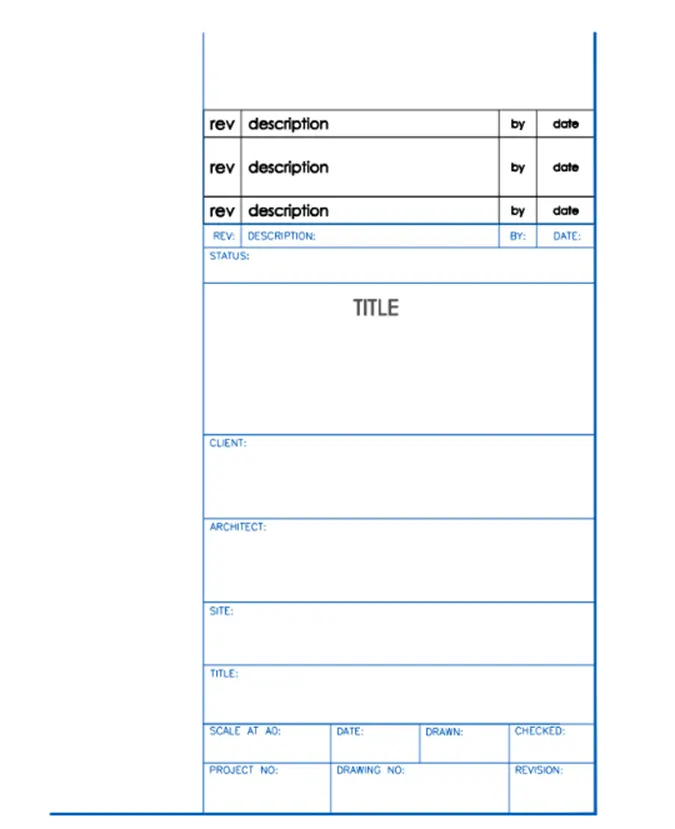
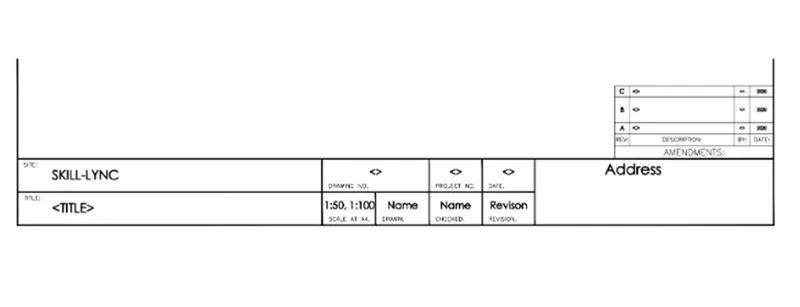
Create the templates as shown in Figures. Take the size of the title block as per industry standards or you can assume it as per the size of the paper. Use text and attributes wherever required. After creating the title block you need to save it as a block with names: Custom1_titleblock and Custom2_titleblock, respectively.
COMMANDS USED:
- Units
- Dimensions
- Limits
- Line
- Trim
- Fillet
- Copy
- Move
- Offset
- Text
- Block
PROCEDURE:
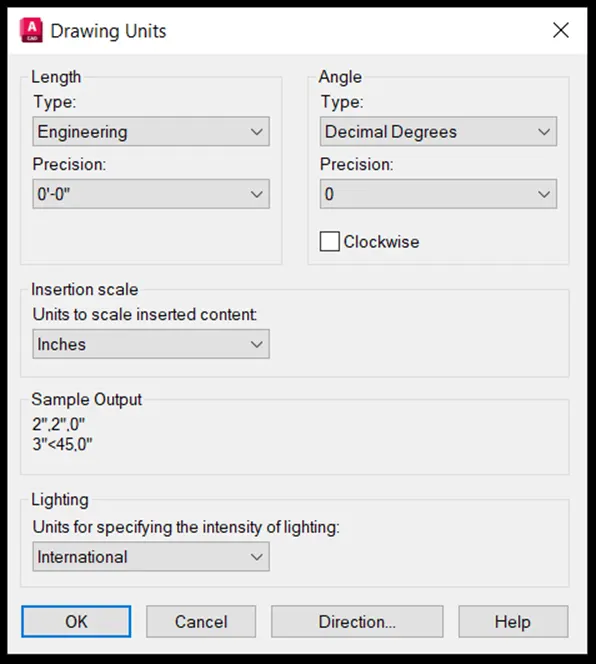
- Set units according to image.
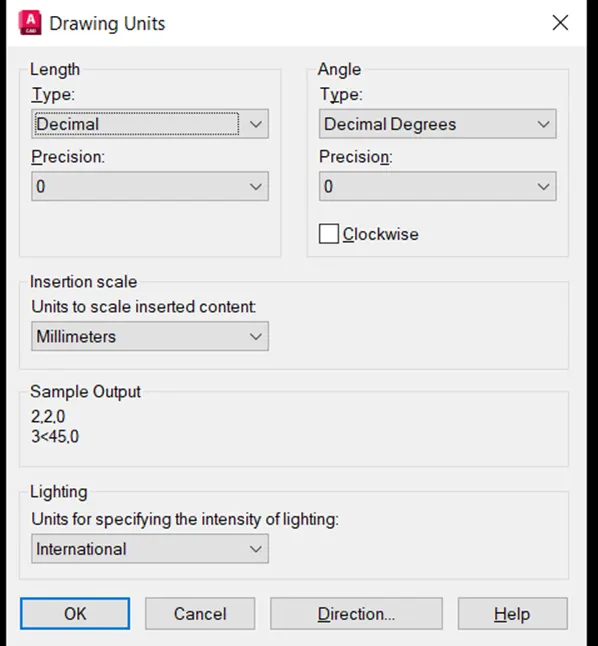
- Also set the dimensions according to requirement.
- Use line command draw the line as per given figure.
- Trim out the unwanted extra line using Trim command.
- Use Text command; specify the rotation angle as 0, and text height as per requirement.
- Use block command, name as Custom1_titleblock and select the area then concert as block.
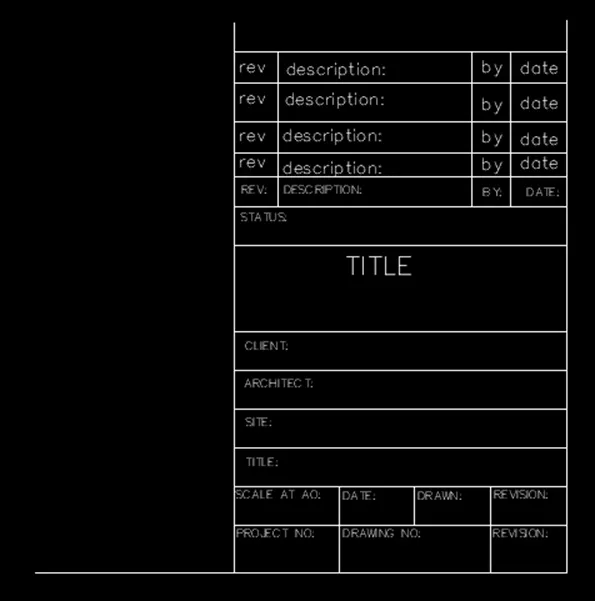
- Similarly use line command draw according to given figure.
- Also use the Text command, give the text according to the given figure by setting the rotation angle and text height.
- Then use block command, specify the pick point and select the object then that area is convert as a block.
- Name the block as Custom2_titleblock
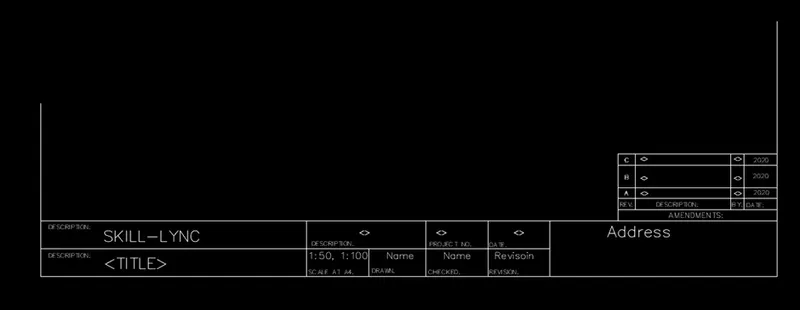
RESULT:
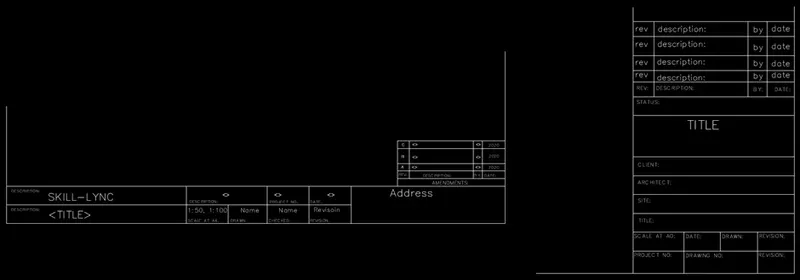
AIM:
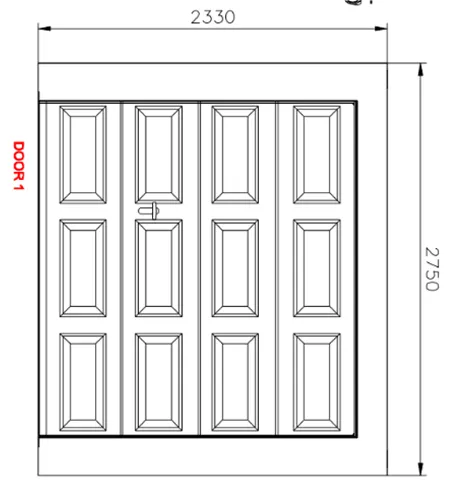
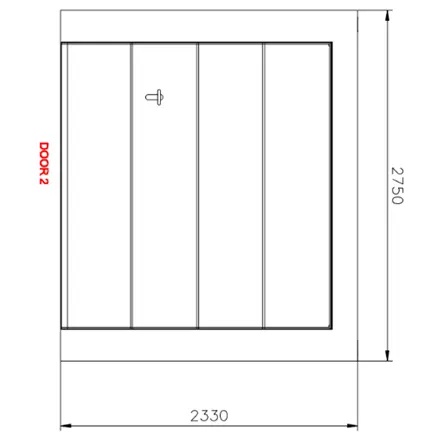
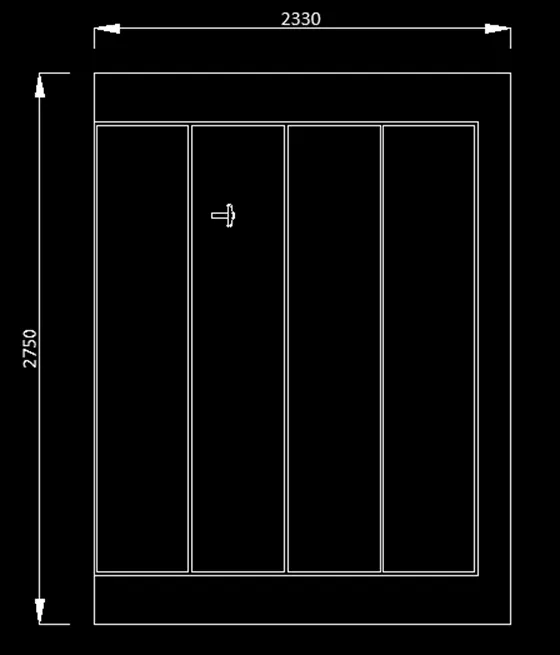
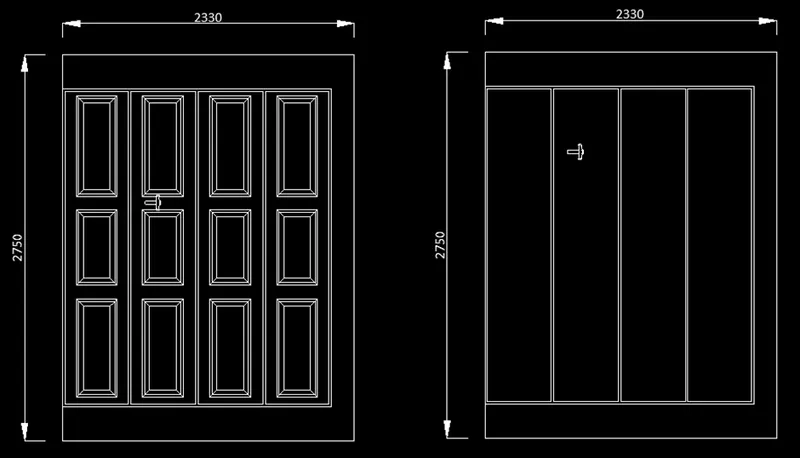
Create the doors type for warehouse as shown in the Figure. You need to create each door type as per standard size or given dimensions. Create the blocks of this door type after creating them.
COMMANDS USED:
- Units
- Dimensions
- Limits
- Line
- Rectangle
- Explode
- Trim
- Fillet
- Copy
- Move
- Offset
- Dimlinear
- Block
PROCEDURE:
- Set units according to image
- Also set the dimensions according to requirement.
- Use Rectangle command and put area as @2330, 2750, then specify on the screen.
- Explode the rectangle by using Explode command.
- Use Offset command from top and bottom offset the line with 300, and 200 from left.
- And design then design the Door 1 as per the figure.
- Then create the block using B command.
- Pick the point, and select the area then name it as Door 1.
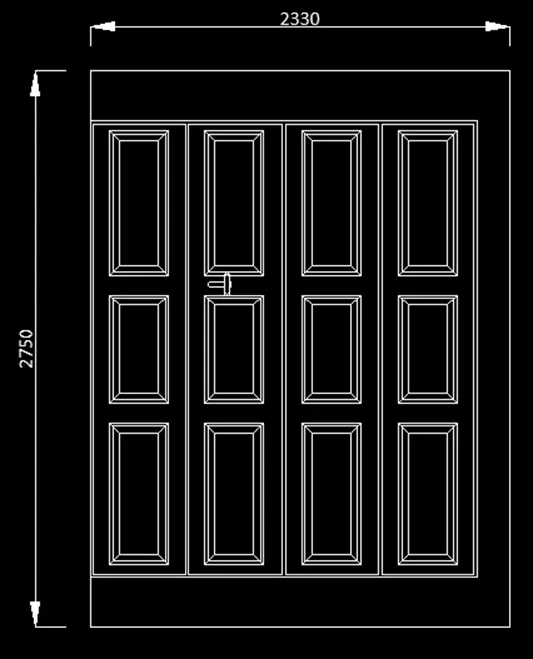
- Use Rectangle command and put area as @2330, 2750, then specify on the screen.
- Explode the rectangle by using Explode command.
- Use Offset command from top and bottom offset the line with 300, and 200 from left.
- And design then design the Door 2 as per the figure.
- Divide the offset line from top in 5 parts.
- Use line command draw the line from divided point to bottom offset line.
- Use offset command; draw the door as per drawing.
RESULT:
AIM:
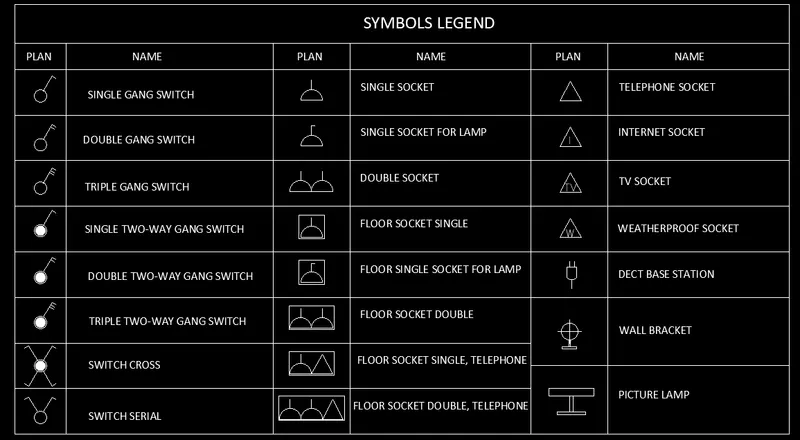
Create each symbol as a block with the name given in the legend. After creating the blocks arrange them in the legend as shown in the Figure.
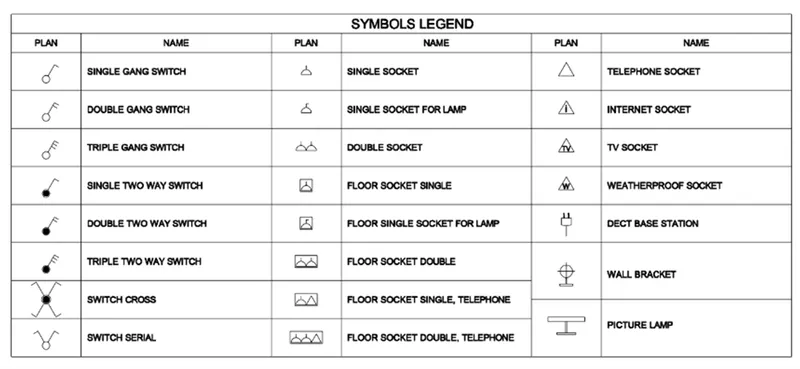
COMMANDS USED:
- Units
- Dimensions
- Limits
- Line
- Arc
- Circle
- Rectangle
- Text
- Point
- Hatch
- Block
PROCEDURE:
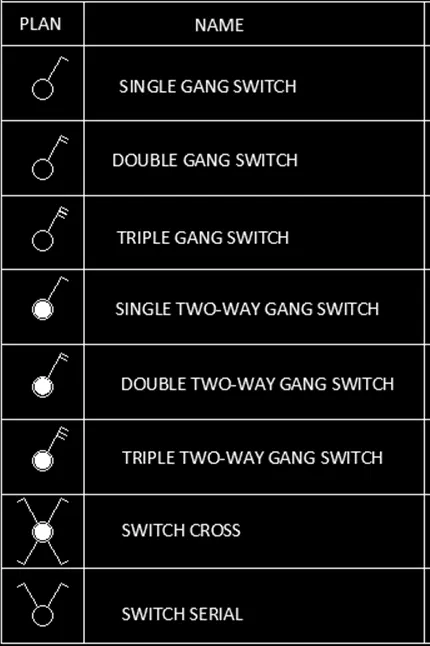
- Initially use circle.
- Set the Polar tracking to 30, 60, 90….
- Then use the line command, specify the point on he circle and extend the line in 60’ polar tracking, then draw the perpendicular line to previously drawn line.
- Similarly draw perpendicular line.
- Use hatch command, Hatch the circle with Solid hatch property.
- Name the symbols specifically.
- Use block command for each symbols then convert them as a block.
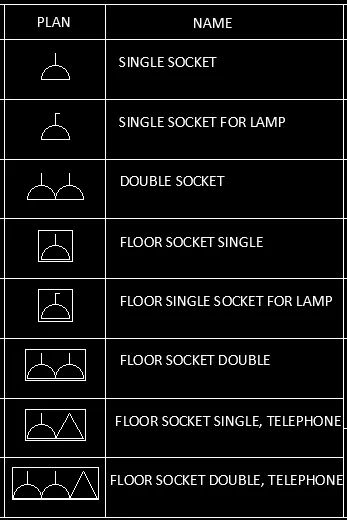
- Here use the circle and divide it in half circle, project the line in top for some length.
- Then draw the perpendicular line with some length.
- Copy the object and paste it beside to that, it touches to one end.
- Use the rectangle and draw it over the half circle object previously drawn one.
- Now use the triangle and place and it touches beside the half circle.
- Name them separately.
- Use block command and convert them blocks as individually.
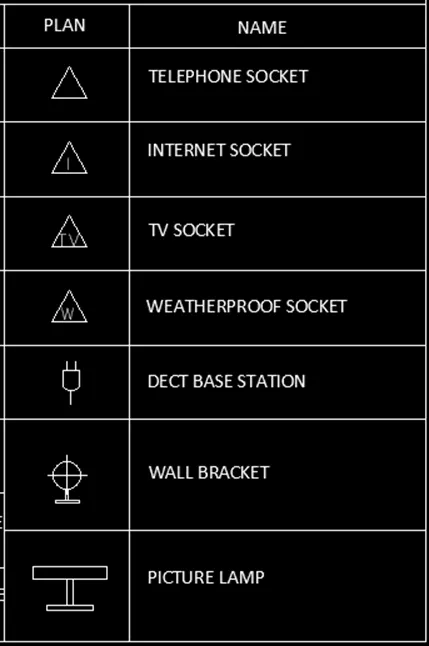
- Now we need to draw the Sockets, Station, Bracket, and Lamp.
- Use the line command; draw the triangle by using polar tracking snap.
- Insert the text inside the triangle.
- Then draw he socket using Line and Arc command for Dect base station..
- Use point by using point command: then draw the wall bracket by using line and copy command.
- Then convert the each symbol to blocks by specifying the name separately.
RESULT:
AIM:
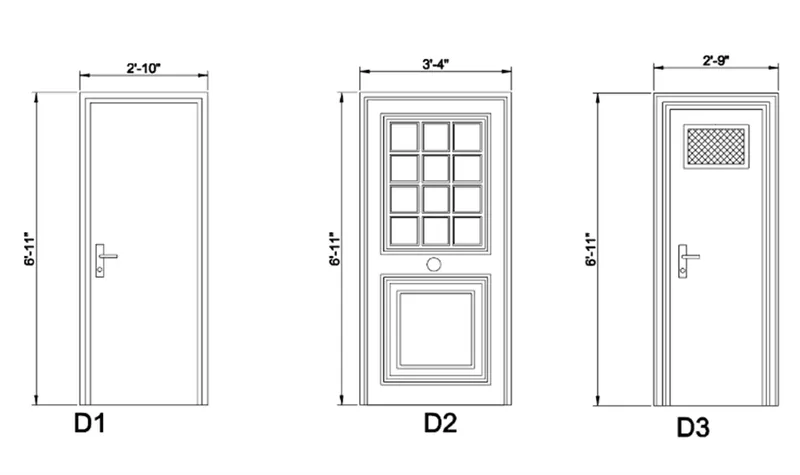
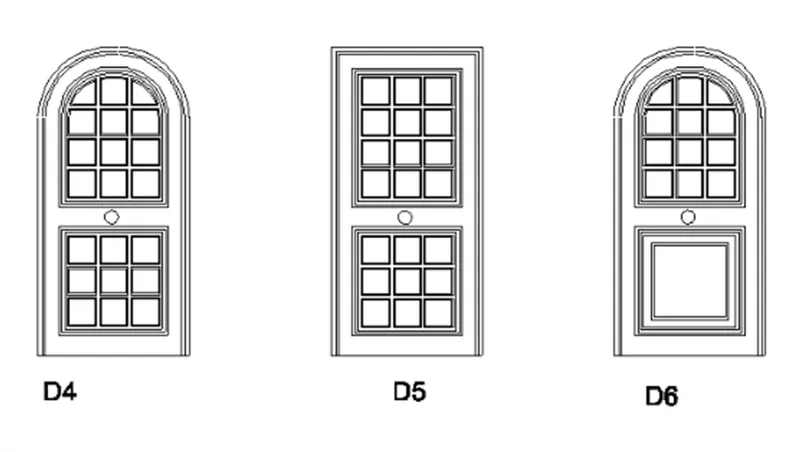
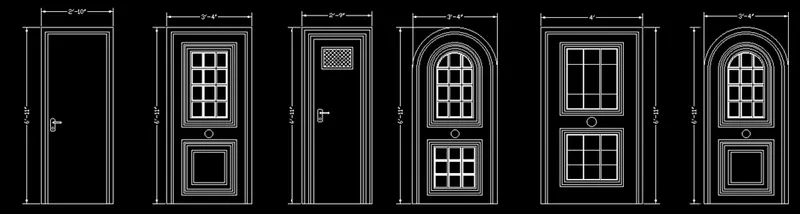
Create the door type for residential building as a block. Save the name of the blocks as type. Use given dimensions or assume dimensions as per industry standards.
COMMANDS USED:
- Units
- Dimensions
- Limits
- Rectangle
- Explode
- Line
- Trim
- Move
- Offset
- Copy
- Fillet
- Hatch
- Block
PROCEDURE:
Set units according to image
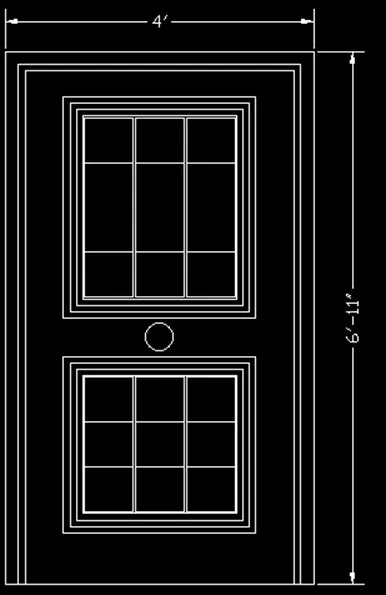
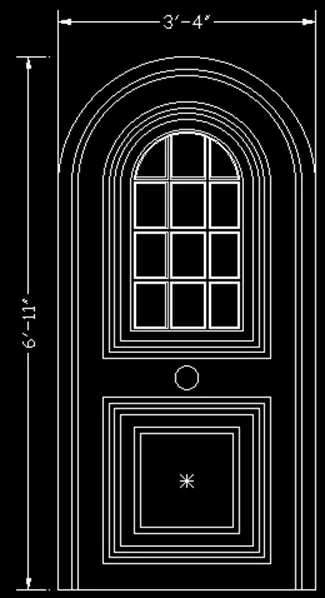
- se rectangle @2’-10”, 6’-11” are once, @3’-4”, 6’-11” are thrice, and @4’, 6’-11” once.
- Use line, offset, copy, fillet, trim and hatch commands design the doors.
- Use the dimline command to check the dimension of doors and mention the dimension.
- After designing the doors, Use block command and name them separately for each door with numbers as D1, D2, D3, D4, D5 and D6.
Design of D1 door:
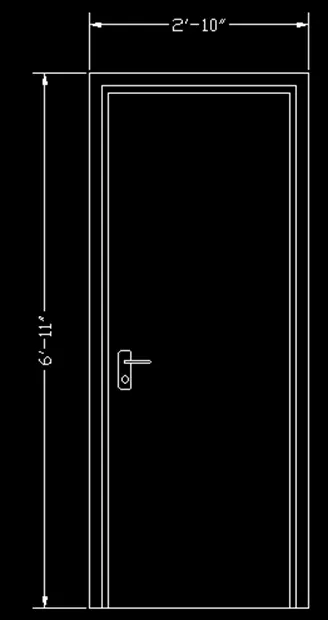
Design of D2 door:
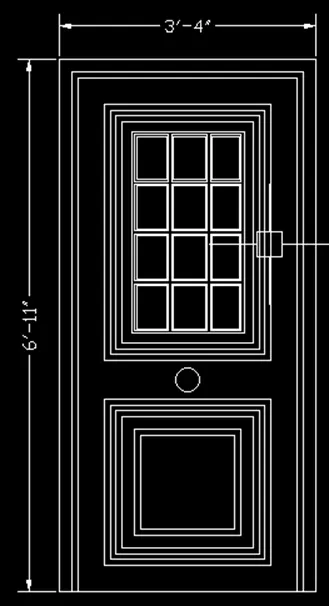
Design of D3 door:
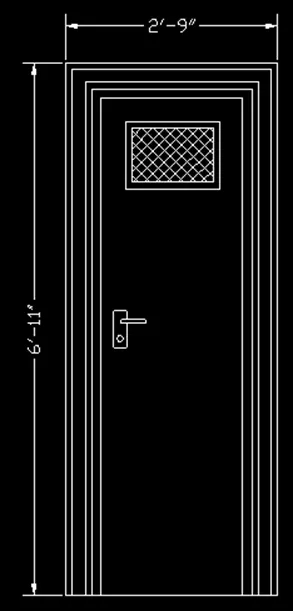
design of D4 door:
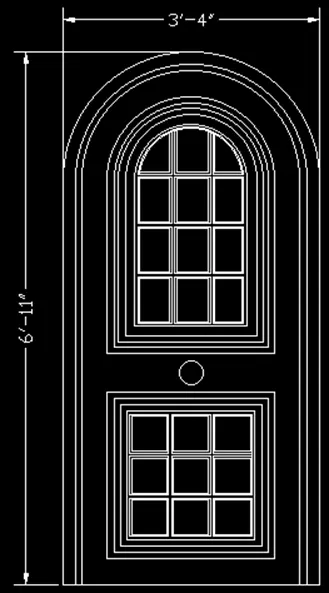
Design of D5 door:
Design of D6 door:
RESULT:
AIM:
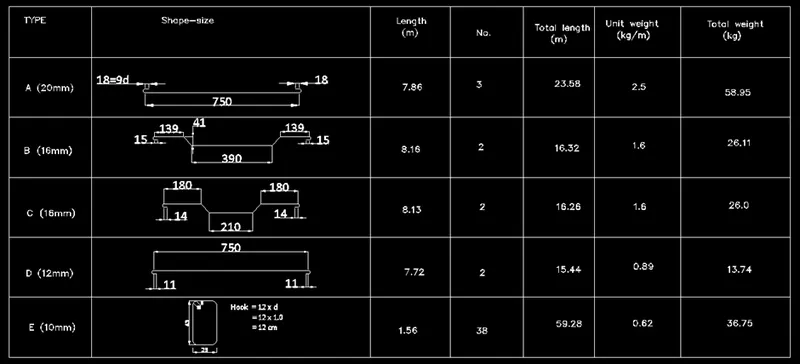
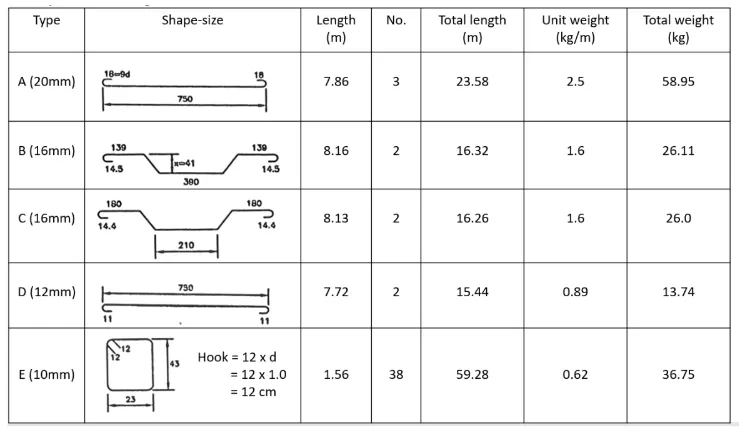
Create each shape as a block as shown in the Figure. Save the block and insert them on the table as shown in the Figure.
COMMANDS USED:
- Units
- Dimensions
- Limits
- Line
- Fillet
- Dimline
- Text
- Block
PROCEDURE:
- Initially set the units.
- Also set the dimensions.
- Use line command and draw the bars schedule according to the given figure.
- Use Polar tracking snap in necessary steps.
- Use fillet command to give the bent shape in bar schedule.
- Use Block command to the entire bar schedule, name them separately for every bars shape.
A (20mm)
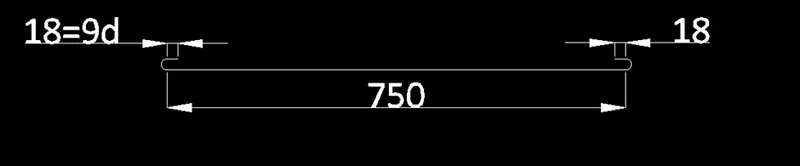
B (16mm)
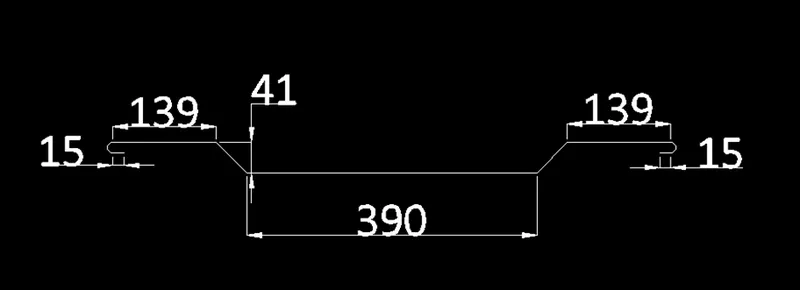
C (16mm)
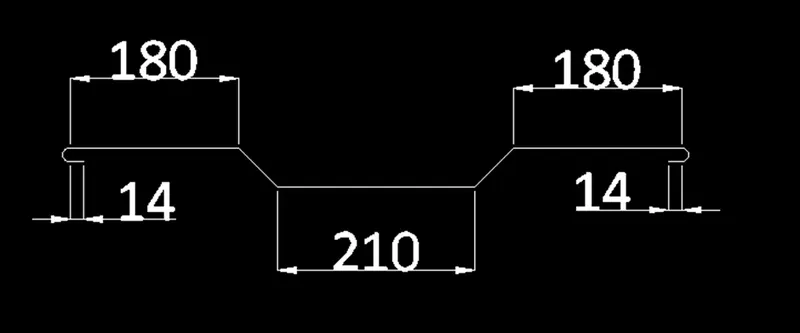
D (12mm)
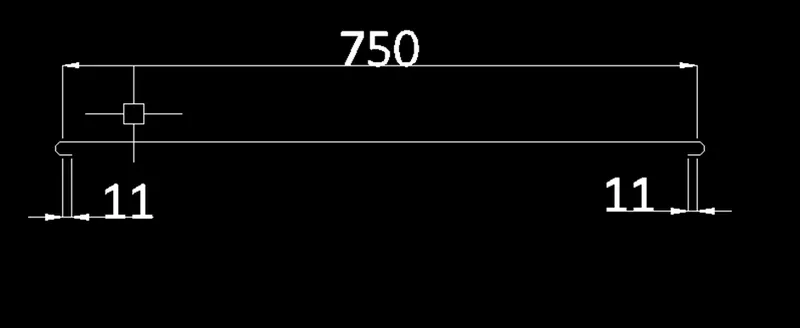
E (10mm)
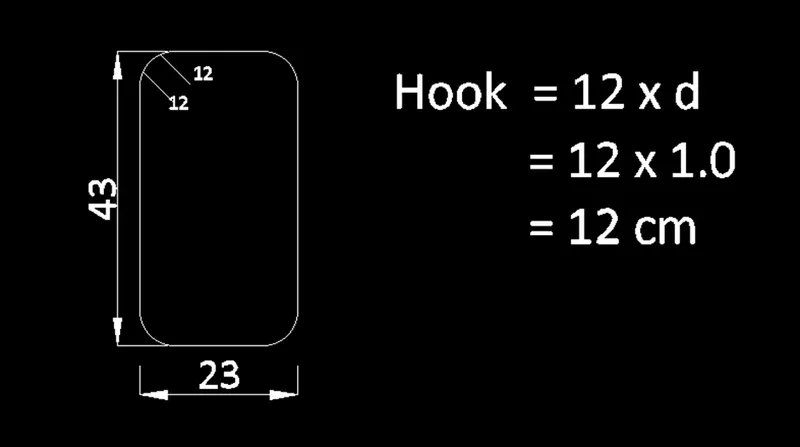
- Finally make the tabe as per given table.
- Use text command and place the text as in the given figure.
RESULT: