Creating a Wardrobe detailed drawing, Floor Plan, Kitchen Layout and Column Detail using AutoCad
1Q
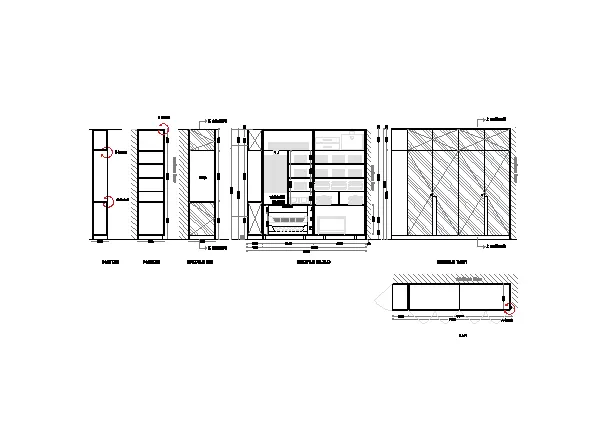
AIM:Draw the elevation and details of a wardrobe as shown in the Figure below. After sketching, you need to provide the dimensions and text with the use of layers. Use proper text styles and dimension methods to document it. Also, assume dimensions, wherever needed.
Note: All dimensions are in mm
PROCEDURE:
Type UN and press enter
Under Drawing Units, select decimal
Now the lower limit is set to 0, 0 and the upper limit to 10000, 10000
Type Z enter to zoom and A enter to all
First, the plan is drawn using line command. Type L and press enter
Specify the first point and draft the with provided dimensions on the plan
now using the OFFSET command and TRIM command draft as shown in below
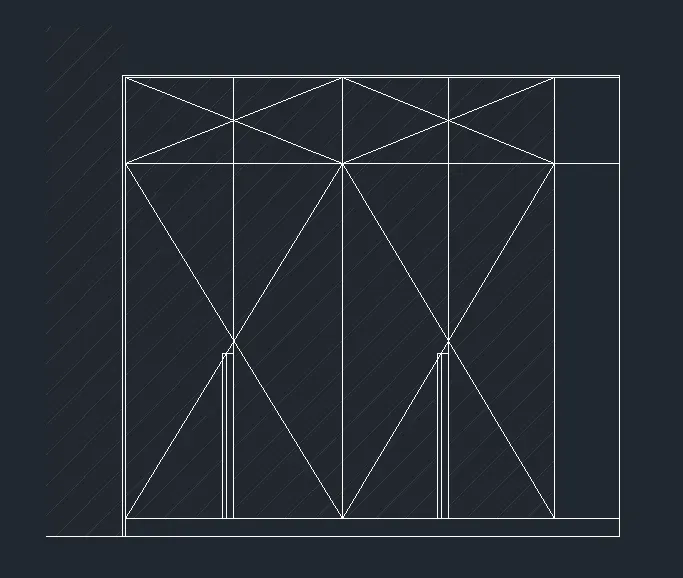
Now copy the drawing from front elevation by using the COPY command it will be carcase elevation
now using the OFFSET and TRIM command and draft the wardrobe according to the plan
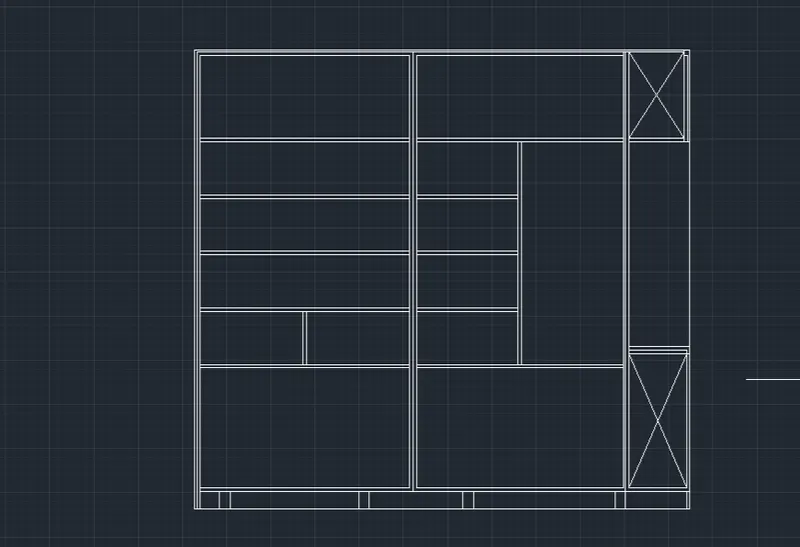
Using the rectangle, arc, lines, offset commands the internal detailing was done with transparency value of 70. Hatching was also done at the side as required
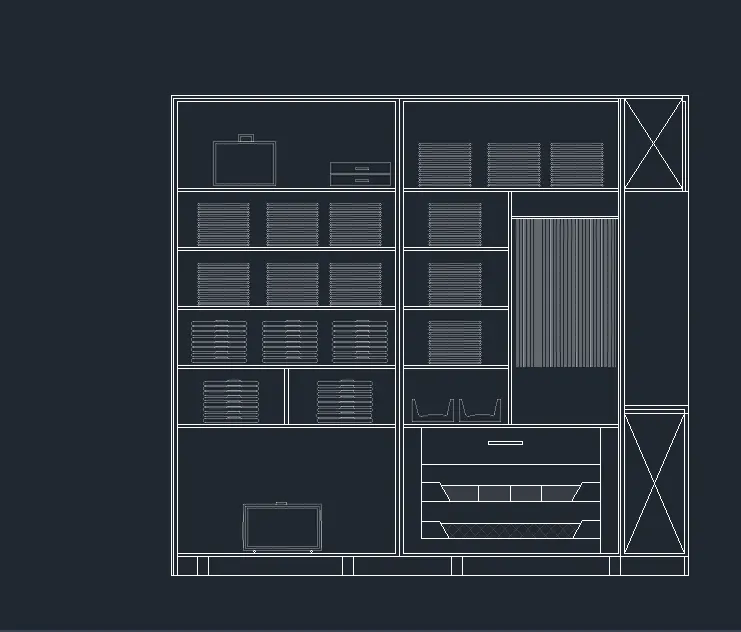
Now using the ORTHO ON draw the side elevation and section of the wardrobe by line command
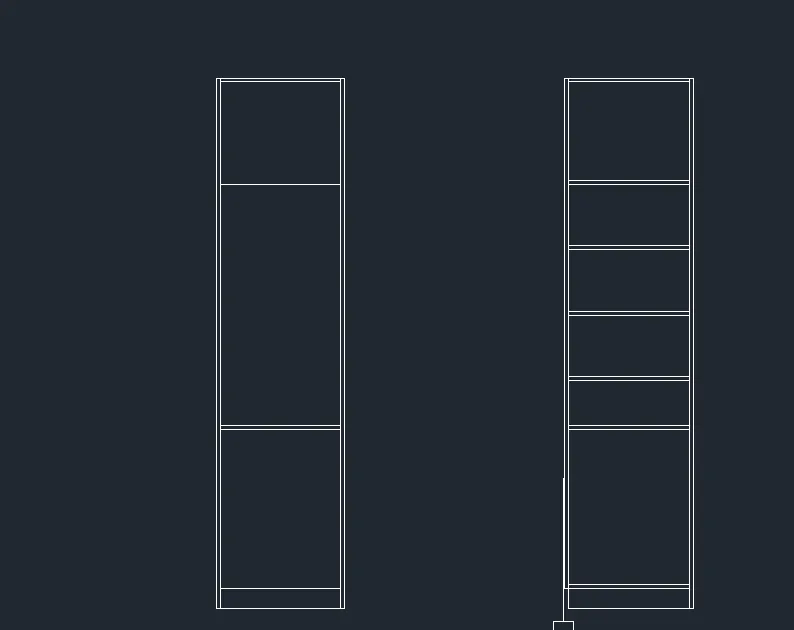
And also by taking the refference from the front elevation draw the plan using LINE command and OTHO ON
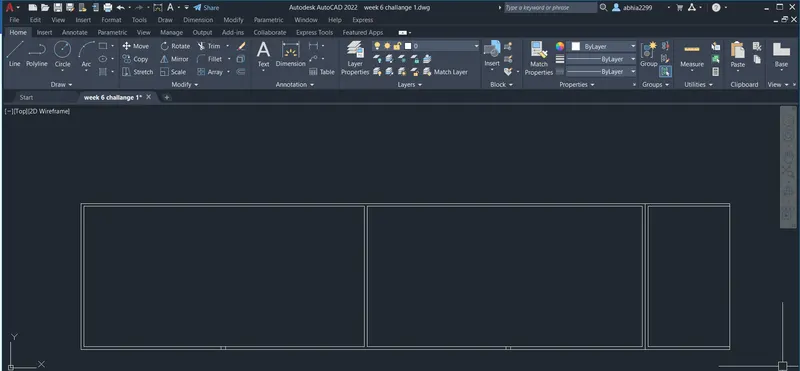
Now Using the DIMLINE command the first dimension is marked and by using DIMCONTINUE command the rest of the dimensions is are shown
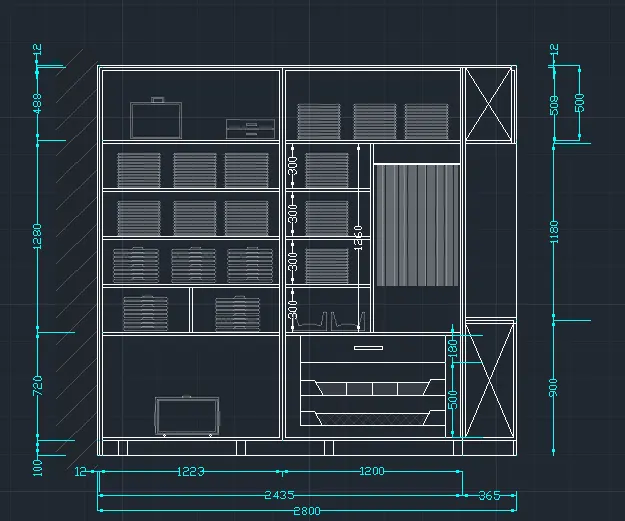
Using MTEXT command and single line text the texts required are made as shown below
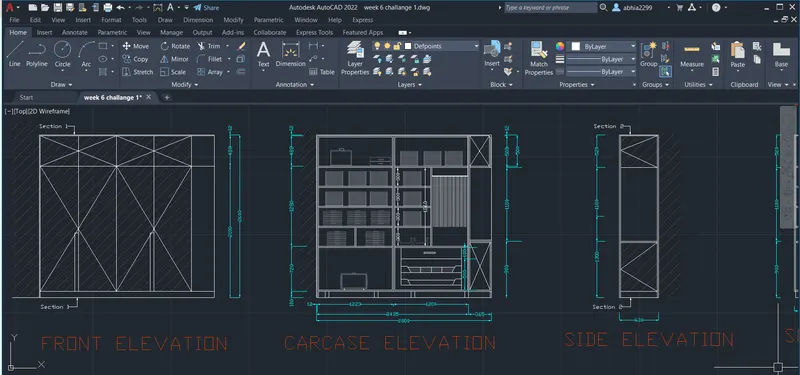
Result - The entire drawing is now complete and the resultant image of the finished drawing is as shown in figure.
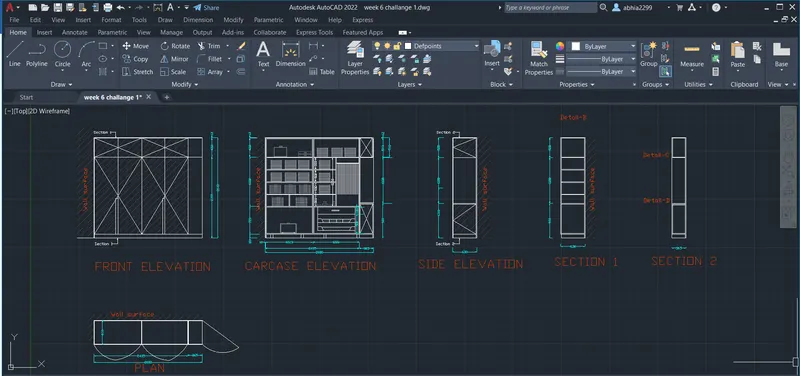
Q2:
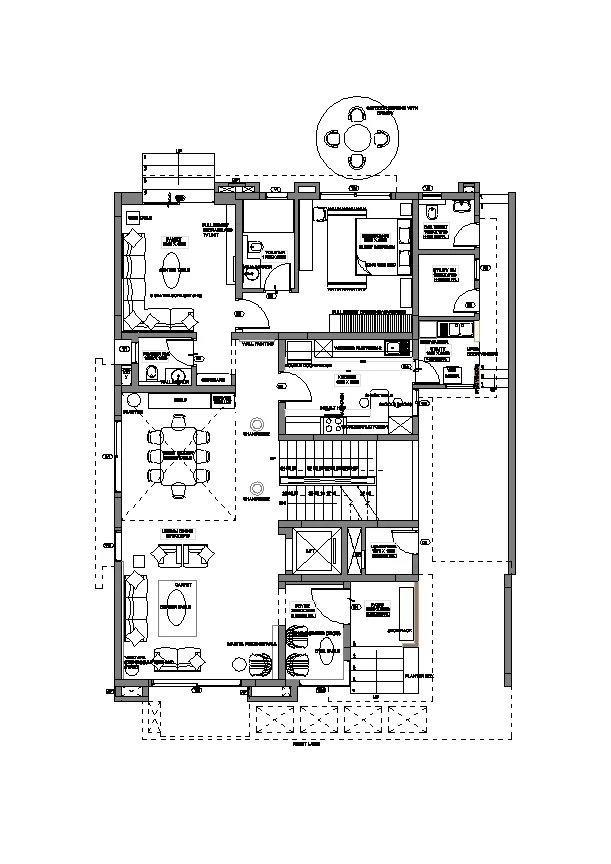
AIM:
Draw the floor plan as shown in the Figure. Use the proper drafting tools to sketch the plan. Do not hatch or draw the furniture. You need to draw the floor plan with the following:
Note: You can also import the Floor_Plan.pdf into your current drawing and start working on the project. You need to scale the imported pdf file using reference option. All dimensions are in mm.
- Walls (Exterior and Interior)
Wall Thickness: Exterior Wall- 230mm, Interior Wall: 150 mm (Wherever Required)
- Doors and Windows: Assume the size of the doors and window.
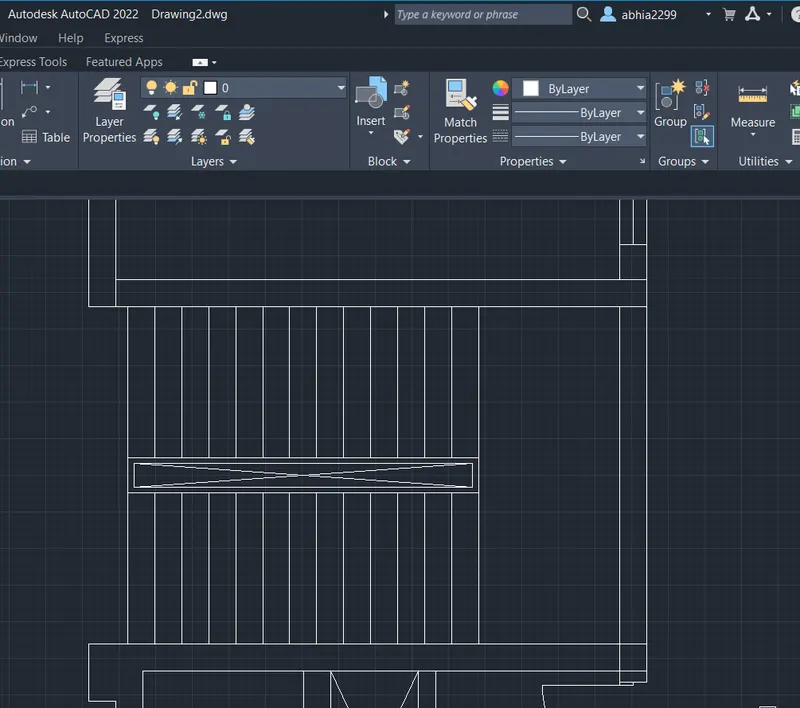
2.1 Stairs: Tread-300mm, Riser-150mm
- Insert Text wherever required
- Insert the dimensions using proper dimension techniques
PROCEDURE:
Type UN and press enter
Under Drawing Units, select decimal
Now the lower limit is set to 0, 0 and the upper limit to 25000, 25000
Type Z enter to zoom and A enter to all
Using the construction line command XL horizontal and vertical lines was created. As the thickness of external walls is 230, an offset of 230 was created both vertically and horizontally. The edges and corners are trimmed off or filleted.
The vertical and horizontal construction lines are again offsetted, trimmed or filleted to get the external walls as per the plan and the following image was obtained
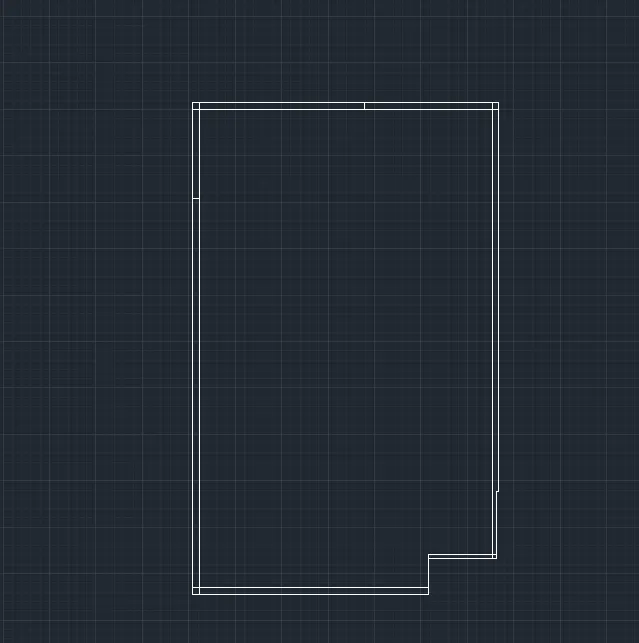
Now using the LINE,OFFSET,TRIM commands draw the interior wall as 150 mm according to the plan
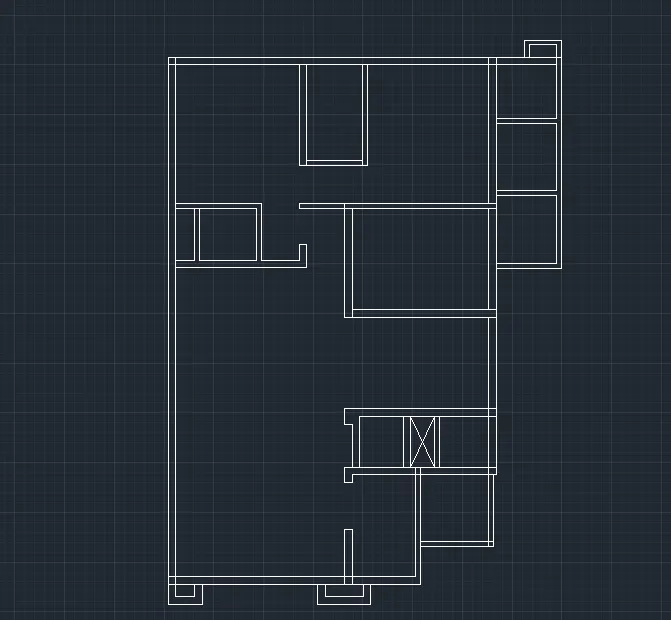
Now using the TRIM,LINE,OFFSET,CIRCLE commands draw the doors windows and ventilators as shown in the below
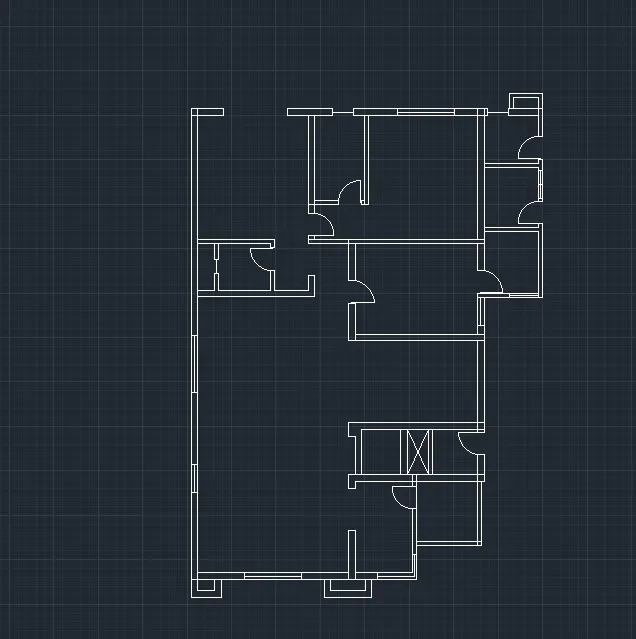
Now draw the staircase by using the OFFSET and TRIM command take the trade as 300
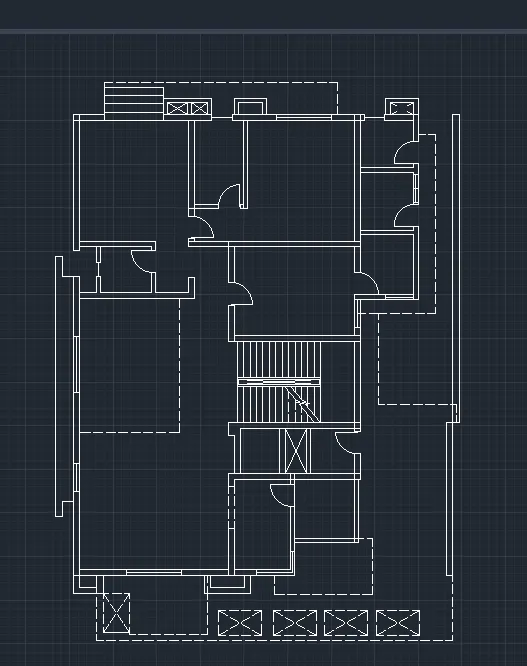
Draw the line according to the plan and using the BYLAYER properties draw the doted lines as shown in the plan
Now using the DIMCONTINUE command show the dimensions of the plan as shown in the below
and give the specific layers for individual
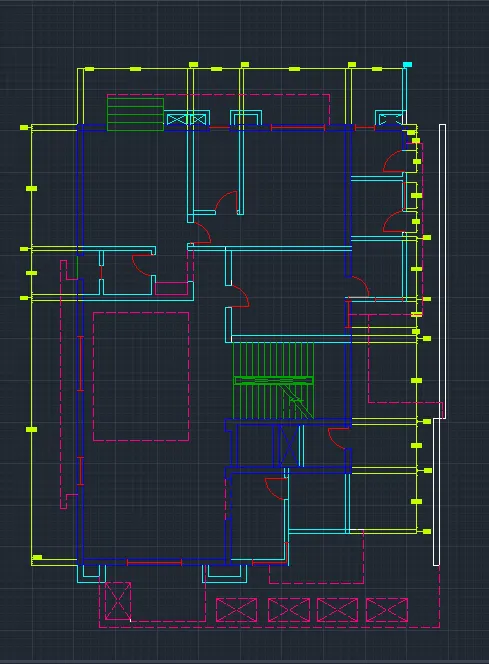
Now using the MTEXT command the texts was made and the following image is obtained
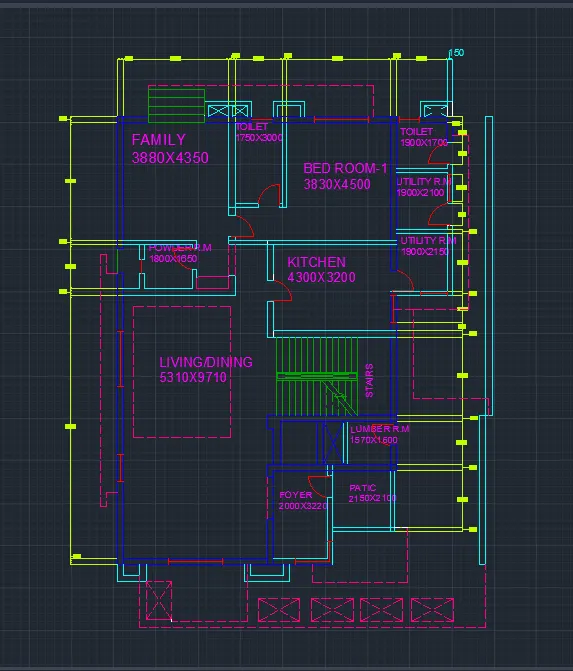
Result - Residential plan was drafted using AutoCAD
Q3:
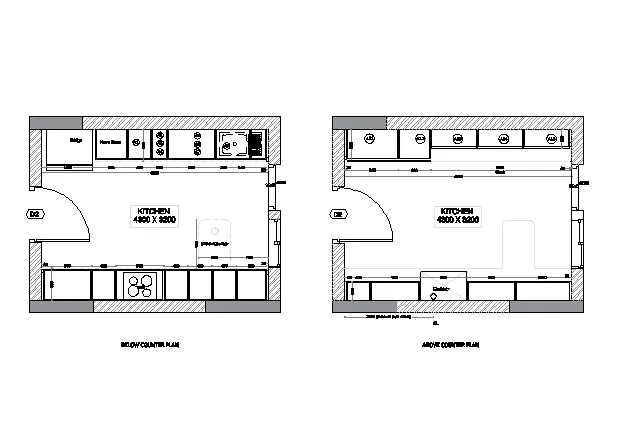
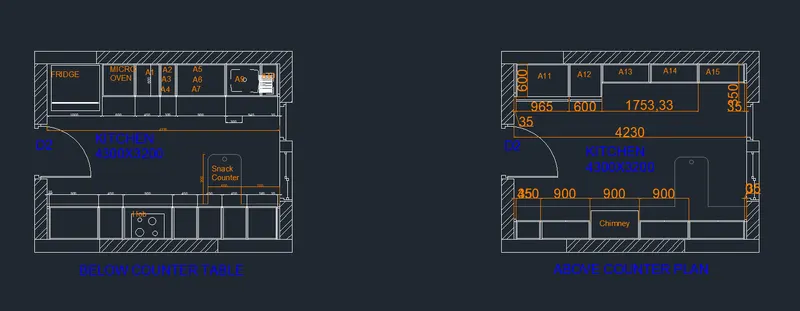
AIM:Create the Kitchen Layout as shown in the Figure below. Also, use proper dimension techniques to dimension the kitchen layout. Also, insert text wherever required. All dimensions are in mm.
PROCEDURE:
Type UN and press enter
Under Drawing Units, select decimal
Now the lower limit is set to 0, 0 and the upper limit to 25000, 25000
Type Z enter to zoom and A enter to all
Draw a rectengle of 4300x3200 and by using the OFFSET command 230mm ouside the rectangle
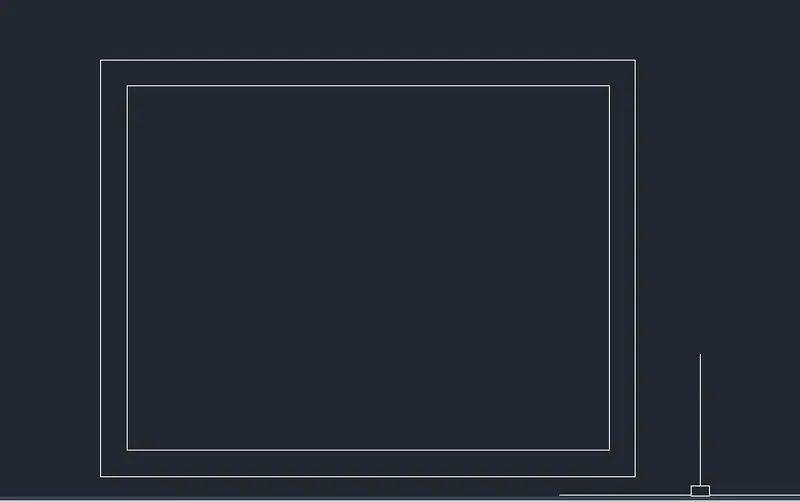
Now using the OFFSET command 600 mm inside the both side of the rectangle and by using OFFSET command draft the kitchen as shown below
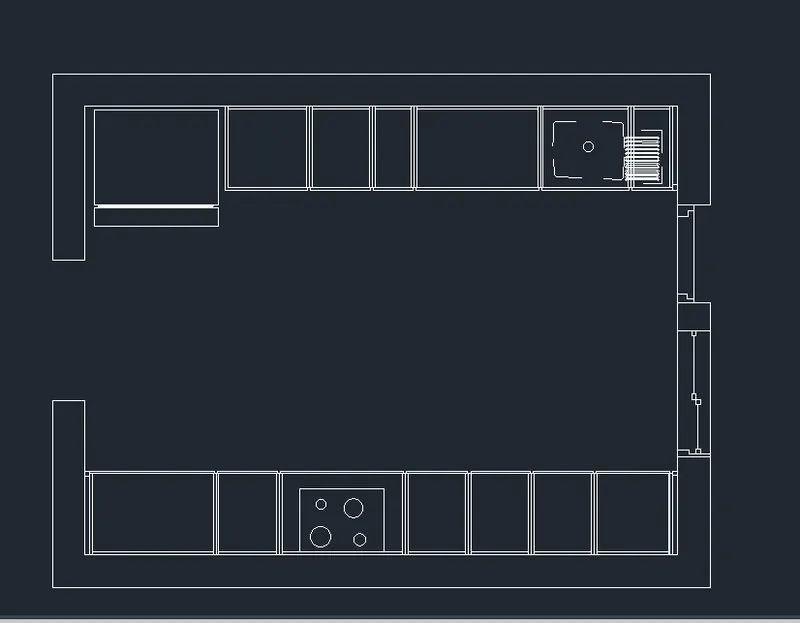
Now using the LINE,CIRCLE,TRIM command draw the doors and windows of the kitchen and by using HATCH command hatch at required places
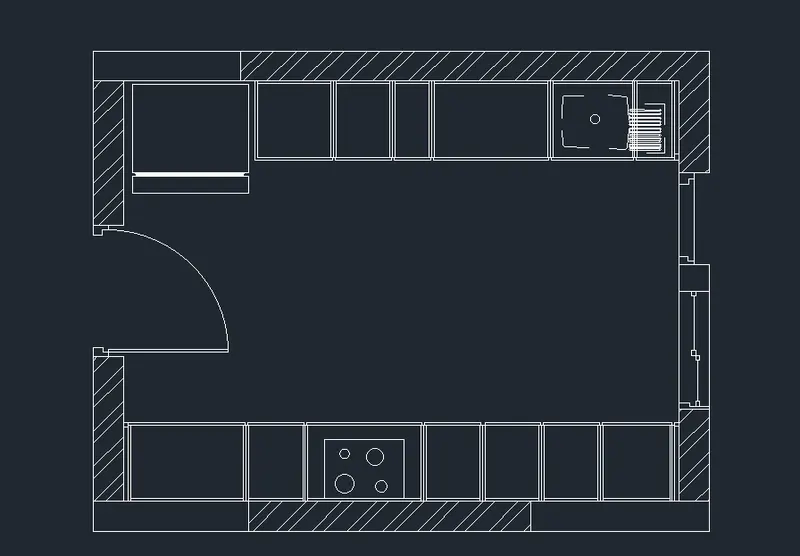
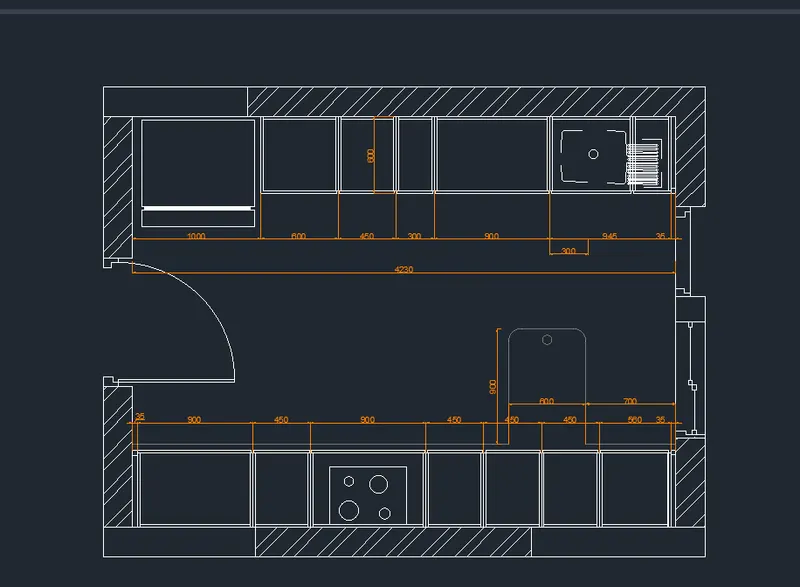
Now using the DIMCONT command show the required dimensions of the kitchen
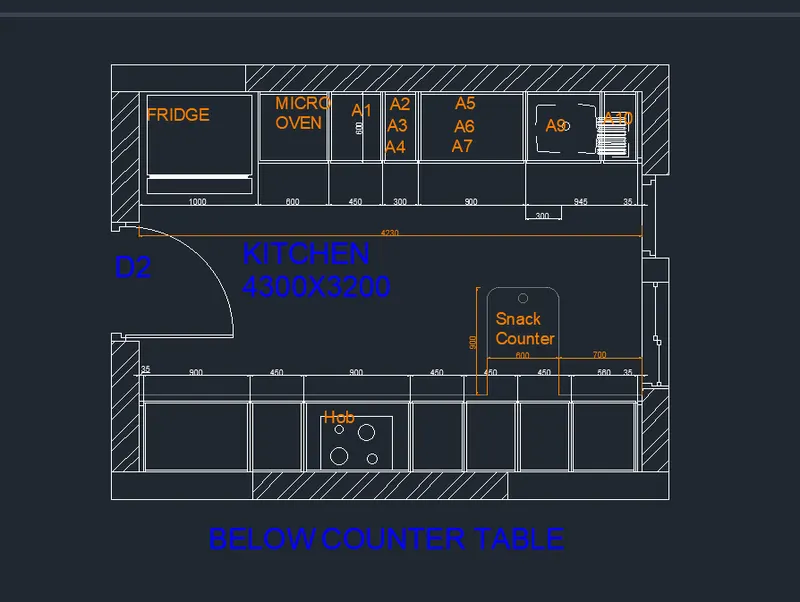
By the MTEXT command text the required information on the drawing
Now using the same procedure draw the above counter line
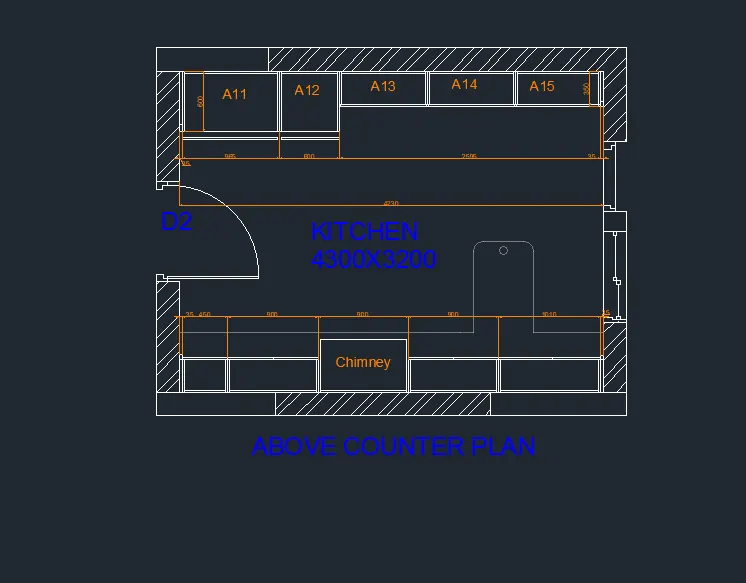
RESULT: Kitchen Layout is completed as shown in the Figure
Q4:
AIM:
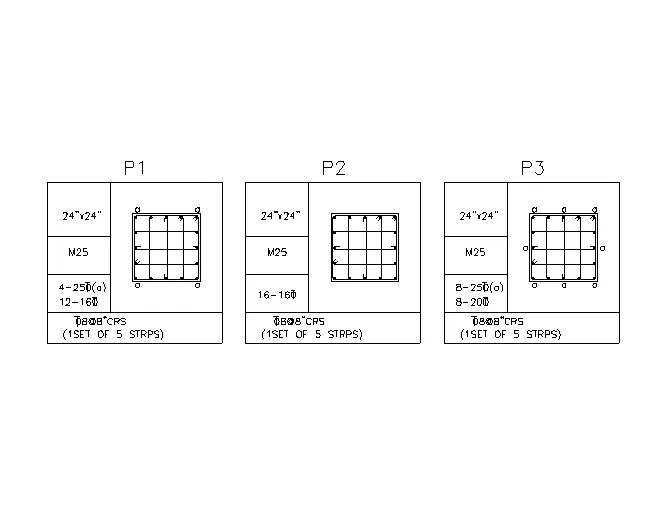
Sketch the column details as shown in Figure. Insert dimensions and text in the figure. Refer to the bar sizes from the schedule.
8mm ---- 0.31 Inches
25mm--- 1 inches
16mm—0.62 inches
PROCEDURE:
Type UN and press enter
Under Drawing Units, select engineering
Now the lower limit is set to 0', 0' and the upper limit to 50', 50'
Type Z enter to zoom and A enter to all
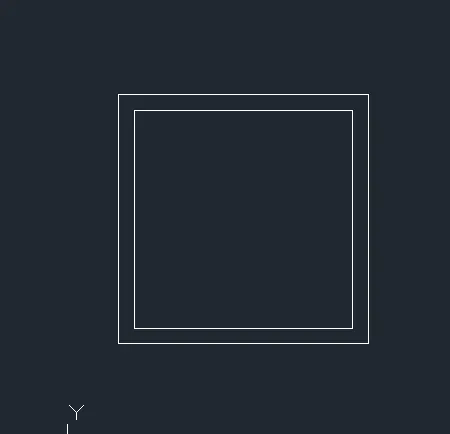
BY using the RECTANGLE command draw a rectange
24" bredth and 24" length
and by OFFSET of 1.5" inside the rectanlge
BY using the DIVIDE command divide into 4 parts horizontal and vertical.
Now draw the lines using the refffernce from points.
From the plan draw the circle of given dimension as shown in the below.
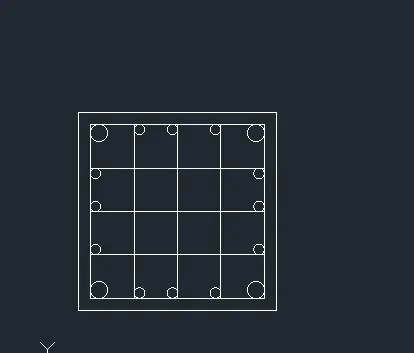
Now using the line command and by the MTEXT command text as showwn in the below
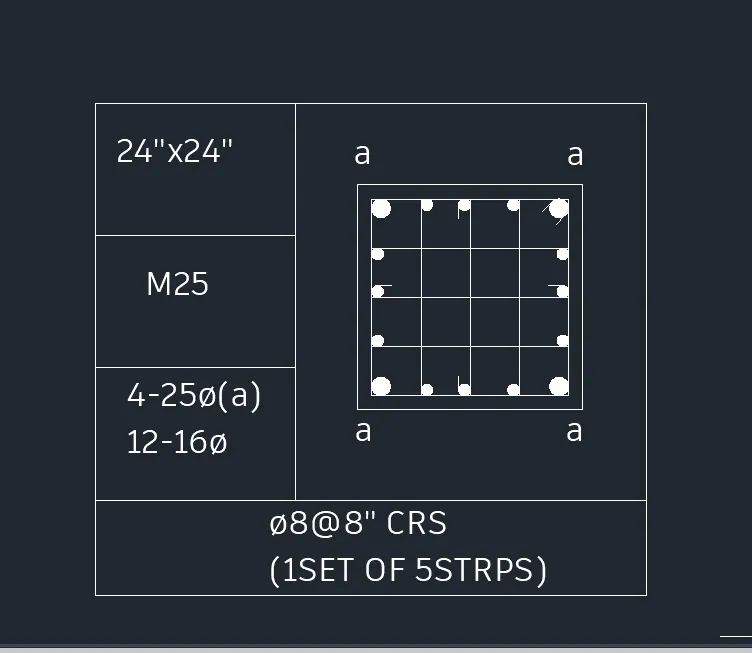
By following the same procedue from the above completed the remaing part of the drawing
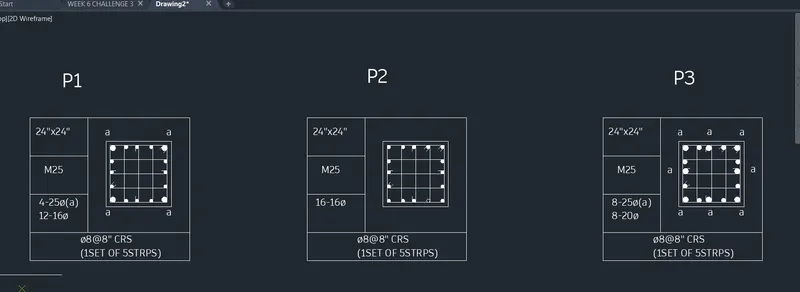
RESULT:Result - Column scheduling is now completed and the final resultant figure is as given
5Q:
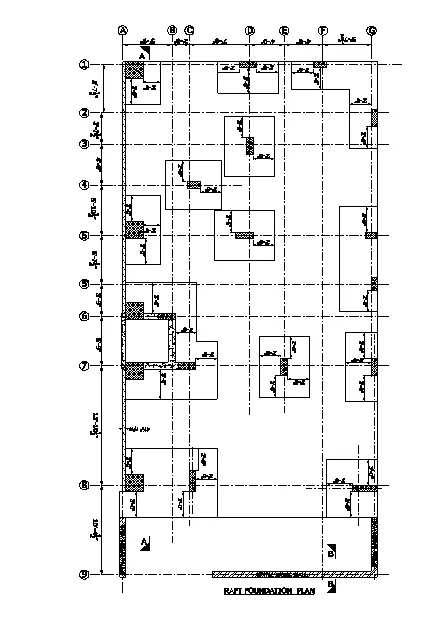
AIM:Draw the Raft Layout as shown in the Figure. Assume the column size as per your knowledge. You can take the sizes as: 24”x24”, 9” x 24”, 9” x 18”, and 9’ x 24”. You can import the raft_foundation.pdf to ensure the missing dimensions.
PROCEDURE:
Type UN and press enter
Under Drawing Units, select engineering
Now the lower limit is set to 0', 0' and the upper limit to 100', 100'
Type Z enter to zoom and A enter to all
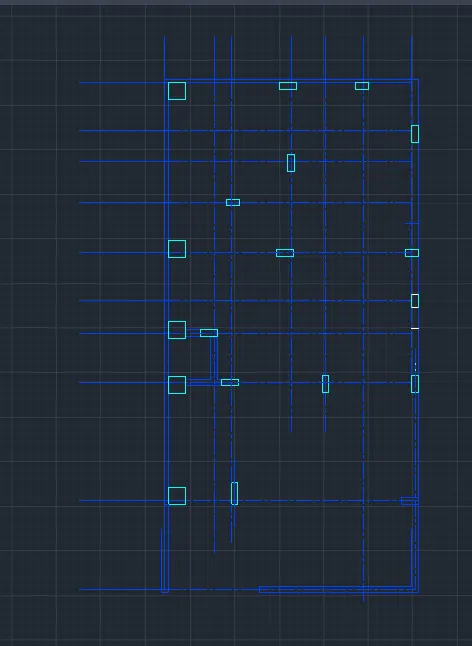
BY using the RECTANGLE command draw a rectange
Using the construction line command XL horizontal and vertical lines was created.
By the offset command draft the lines given in the plan.
Chose the LINE TYPE FILTERS of the drafted line acccording to thhe plan.
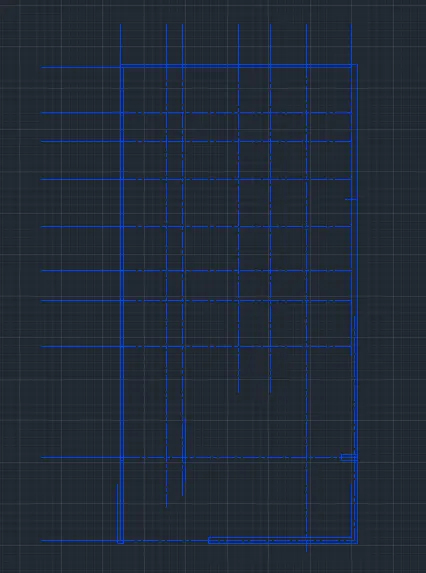
Now using the rectangle command the different sized columns was plotted as per the plan.
The various column sizes is as follows: 24"x24", 9"x24", 9"x18, and 9"x30
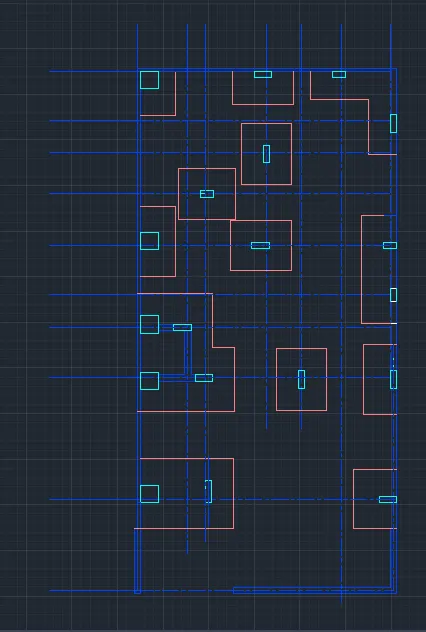
Now, by using the line command the footings of all the columns was drawn as shown.
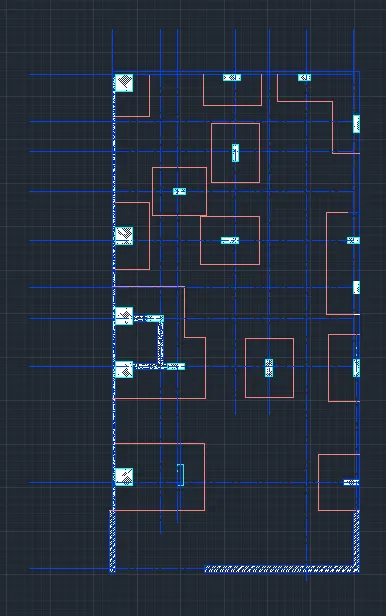
Now by using the HATCH command hatch at requirded places.
Now by using the MTEXT command text the given information on the plan
By using the DIMLIN and DIMCONT give the required dimension on the plan as shown in below.
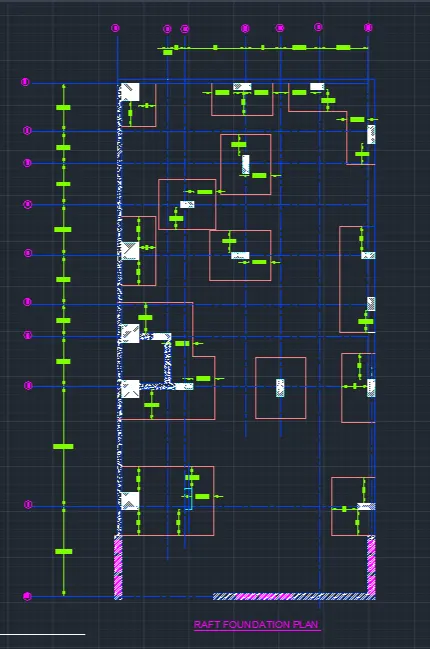
RESULT:The raft foundation plan was completed