Creating a Wardrobe detailed drawing, Floor Plan, Kitchen Layout and Column Detail using AutoCad
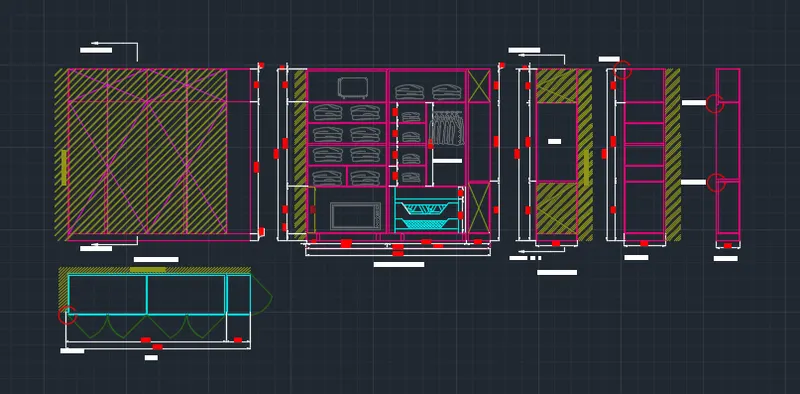
1) AIM :
To draw the elevation and details of a wordrobe as shown in given fig.
PROCEDURE:
Set a dimensions of units.
Limits entry
zoom entry
In the command line type entry.
Draw a rectangular block entry
dimensions are entry
And then draw the plan
ENTRY TO XL LINE TO PROJECTION
Then after enter the line command
Provide the offset command block to the object 608.75 and 365
In the command line type qualeder to mention the annotations
in the command prompt type rectangle>630x2800
In the command line type qualeder to give the annotations
the command prompt type rectangle 2800x2600
with the help of line command drawers and cabinets are created.
using the commands are next line are drawn.
RESULT:
With using to the wardrobe in a autocad drawing software used.
2) AIM:
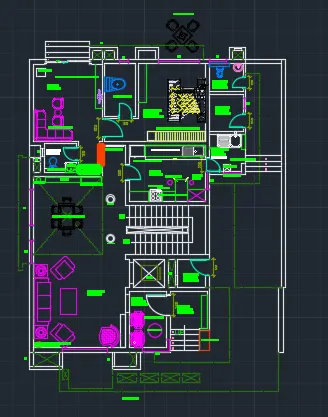
Draw the floor plan as shown in fig. use the proper drafting tools to sketch the plan.
PROCEDURE:
- UNITS ARE SET TO MM
- LIMITS AND LIMAX ARE ALSO SET
- ZOOM COMMAND IS ALSO USED.
In the command prompt type XL to draw the infinite lines.
in the command prompt type offset to offset the line for a particular distance.
using arc command doors are also created.
in command line ( design centre)is typed to get the compents of the plan
in the command "linetype" is typed to get the dotted lines.
in the command line text is typed to get the dimensions and annotations of the plan.
CIRCLE:
- In the menu bar click on the circle>centre,radious.
- specify the centre point as 10,10 and radius 452
- in the menu bar click on circle>centre, radius
- specify line centre point same as the previous circle (10,10) and radius 1398.
SEATS:
- In the menu bar click on rectangular or in the command prompt typr rec
- specify the length of the rectangle as 662.3
- specify the width of the rectangle as 298.0
- in the command prompt type FILLET > RADIUS >100.00
- In themenu bar > 2-point (2 points or the end points of the top line)
- inthe menu bar > circle >centre diameter.
- centre is the mid point of the line, diameter is 777.2
- now, extend the centre line and trim the extra's
- in the menu bar click fillet > blend curves >and select the arc.
RESULT: USED TO THE AUTOCAD
3) AIM:
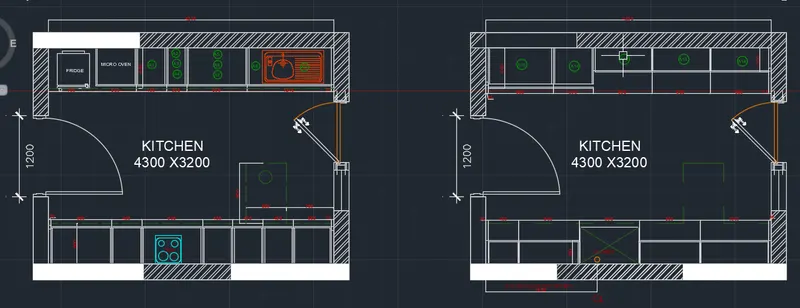
TO create the kitchen layout and also, use proper dimension techniques to dimension the kitchen layout.
PROCEDURE:
Units are set in MM
limits are also set.
zoom command is also used.
- in the command prompt type rec and the dimensions are 4734 x 3688 mm
- in the command prompt type offset and offset to the distance of 230 mm
- in the command prompt type offset and offset it to the horizontal distance of 350,450,900,450,450,and 560
- in the command prompt type offset and offset it to the vertical distance of 600.
- in the command prompt type trim to trim the extras
- in the command prompt type line type and load the dotted lines..
- in the command prompt even the leader command is used to name the dimensions.
RESULT: USING TO THE AUTOCAD SOFTWARE.
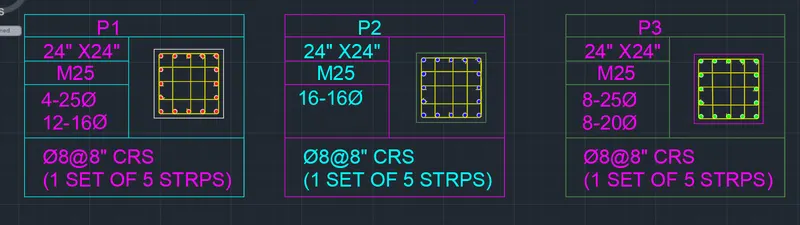
4)AIM:
SKETCH THE COLUMN DETAILS AS SHOWN IN FIG.
PROCEDURE:
8 MM -- 0.31 INCH
25MM--1 INCH
16MM--0.62INCH
- UNITS ARE SET TO MM
- LIMITS ARE ALSO SET
- ZOOM COMMAND IS ALSO USED.
- USING RECTANGLE AND LINE COMMAND THE TABLE ARE DRAWN.
- USING THE TEXT COMMAND FOR GIVING TEXT.
- IN THE COMMAND PROMPT TYPE LINE AND CIRCLE COMMAND AND DRAW THE REINFOREMENT.
RESULT:
USING AUTOCAD
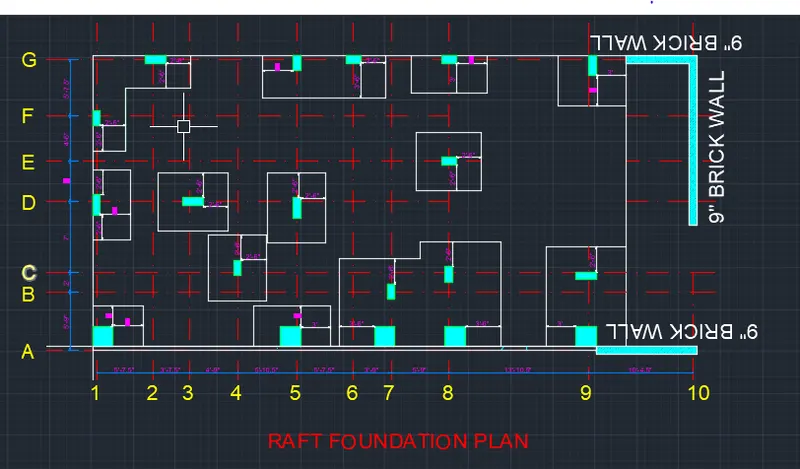
5)AIM:
To draw the raft layout.
PROCEDURE:
UNITS ARE SET TO ENGINEERING > INCHES.
LIMITS ARE ALSO SET.
ZOOM COMMAND IS ALSO USED.
- IN THE COMMAND PROMPT TYPE RECTANGLE > DIMENSIONS ARE 29'-7" AND 60'
- WITH THE HELP OF DOTTED LINES AND OFFSET COMMAND THE GIRDS ARE DRAWN.
- IN THE COMMAND PROMPT OFFSET THE DISTANCE TO 4"
- IN THE RIBBON > HATCH AR-CONC
- IN THE COMMAND PROMPT TYPE REC > 2 X 2
- IN THE RIBBON BAR SELECT HATCH > ANS137
- IN THE COMMAND PROMPT TYPE rec TO DRAFT THE COLUMNS
- IN THE RIBBON TAB> ANNOTATE >TEXT >MTEXT TO TEXT THE GIVEN ANNOTATIONS.
- IN THE RIBBON TAB>DIMENSIONS> TO GIVE THE DIMENSIONS.
RESULT: USING TO CENTRELINE METHOD OF FOUNDATION MARKING.