Creating a Wardrobe detailed drawing, Floor Plan, Kitchen Layout and Column Detail using AutoCad
Q1 :-
Aim :-
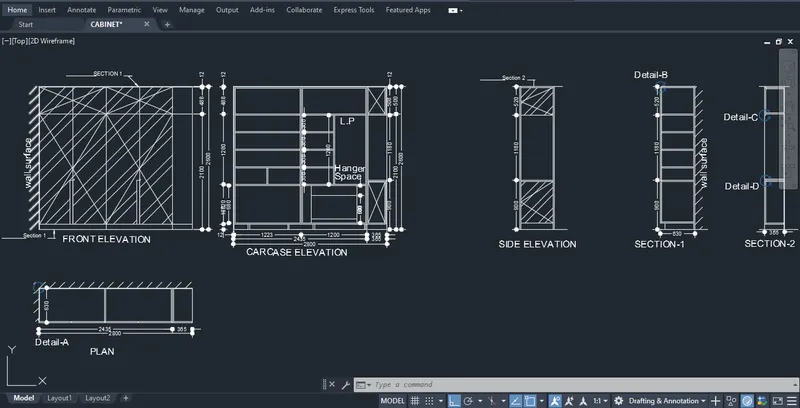
Draw the elevation and details of a wardrobe as shown in the Figure by using Auto CAD.
Procedure :-
* Open the AutoCAD software.
* Startup(start from scratch) with default setting as imperial.
* By using the auto CAD tools draw sketch.
* Dimensions set as milli meter(mm).
* Finally, create the drawing as given specifications.
* After sketching,we need to provide the dimensions and text with the use of layers.
* We can use proper text styles and dimension methods to document it.
Result :-
Successfully draw the elevation and details of a wardrobe as shown in the Figure by using Auto CAD.
Q2 :-
Aim :-
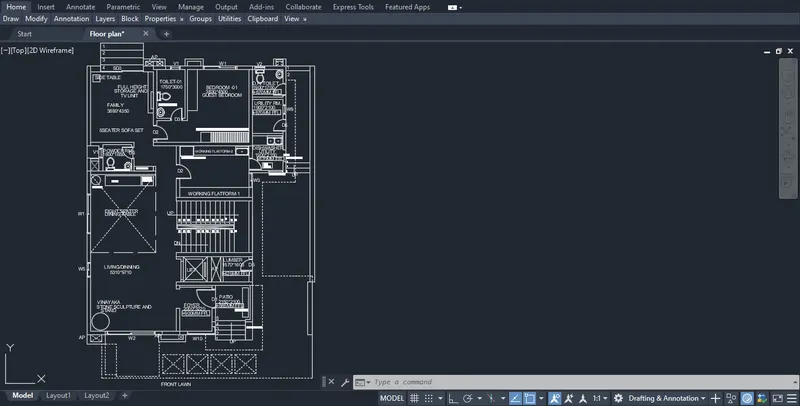
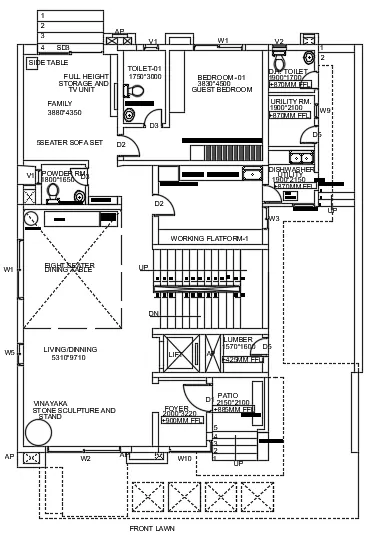
Draw the floor plan as shown in the Figure by using auto CAD.
Procedure :-
* Open the AutoCAD software.
* Startup(start from scratch) with default setting as imperial.
* We can use the proper drafting tools to sketch the plan.
* Dimensions set as milli meters(mm).
* We can use proper text styles and dimension methods to document it.
* We need to draw the floor plan with the following:
a) Walls (Exterior and Interior)
Wall Thickness: Exterior Wall- 230mm, Interior Wall: 150 mm (Wherever Required)
b) Doors and Windows: We can assume the size of the doors and window.
c) Stairs: Tread-300mm, Riser-150mm.
d) Insert Text wherever required.
e) Insert the dimensions using proper dimension techniques
* Finally, create the drawing as given specifications.
Result :-
Successfully complete the elevation and details of a wardrobe as shown in the Figure by using Auto CAD.
Q3 :-
Aim :-
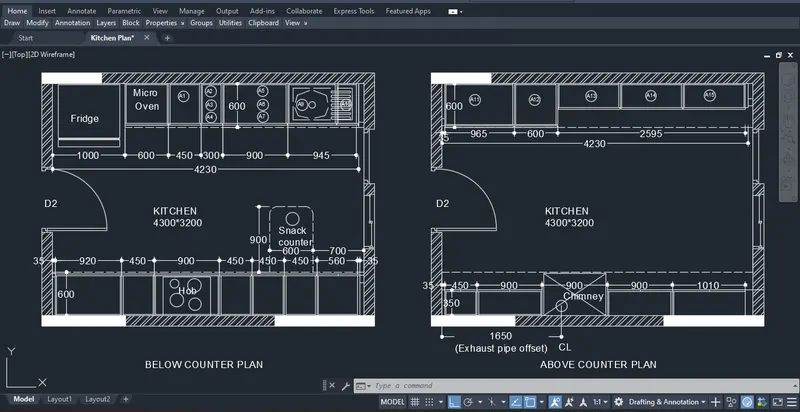
Create the Kitchen Layout as shown in the Figure by using the auto CAD.
Procedure :-
* Open the AutoCAD software.
* Startup(start from scratch) with default setting as imperial.
* We can use the proper drafting tools to sketch the plan.
* Dimensions set as milli meter(mm).
* We can use proper dimension techniques to dimension the kitchen layout.
* We can insert text wherever required.
* Finally, create the drawing as given specifications.
Result :-
Successfully create the Kitchen Layout as shown in the Figure by using the auto CAD.
Q4 :-
Aim :-
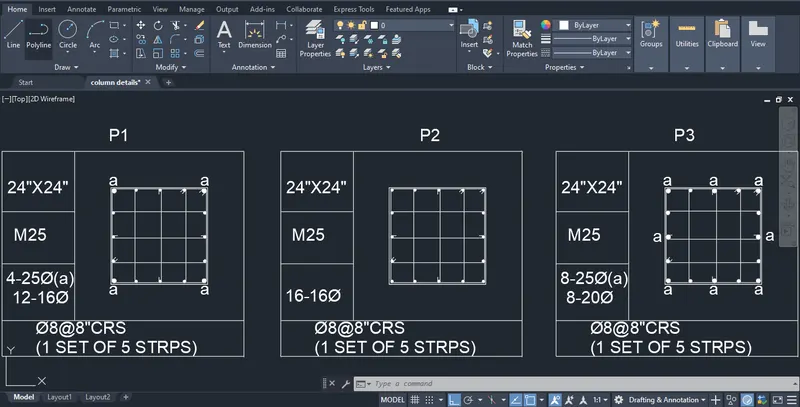
Sketch the column details as shown in Figure by using auto CAD.
Procedure :-
* Open the AutoCAD software.
* Startup(start from scratch) with default setting as imperial.
* We can use the proper drafting tools to sketch the plan.
* Dimensions set as milli meter(mm).
* We can use proper dimension techniques to dimension the kitchen layout.
* Refer to the bar sizes from the schedule.
8mm ---- 0.31 Inches
25mm--- 1 inches
16mm—0.62 inches
* We can insert text wherever required.
* Finally, create the drawing as given specifications.
Result :-
Successfully sketch the column details as shown in Figure by using auto CAD.
Q5 :-
Aim :-
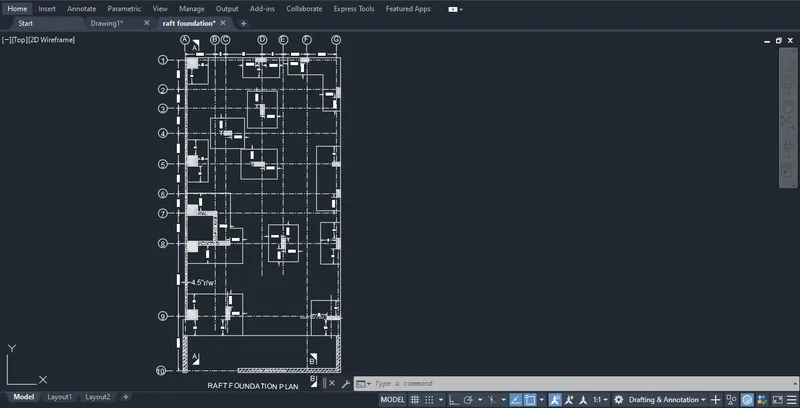
Draw the Raft Layout as shown in the Figure by using auto CAD.
Procedure :-
* Open the AutoCAD software.
* Startup(start from scratch) with default setting as imperial.
* We can use the proper drafting tools to sketch the plan.
* Dimensions set as milli meter(mm).
* We can use proper dimension techniques to dimension.
* Assume the column size as per my knowledge.
* We can take the column sizes as: 24”x24”, 9” x 24”, 9” x 18”, and 9’ x 24”.
* We can insert text wherever required.
* Finally, create the drawing as given specifications.
Result :-
Successufully draw the Raft Layout as shown in the Figure by using auto CAD.