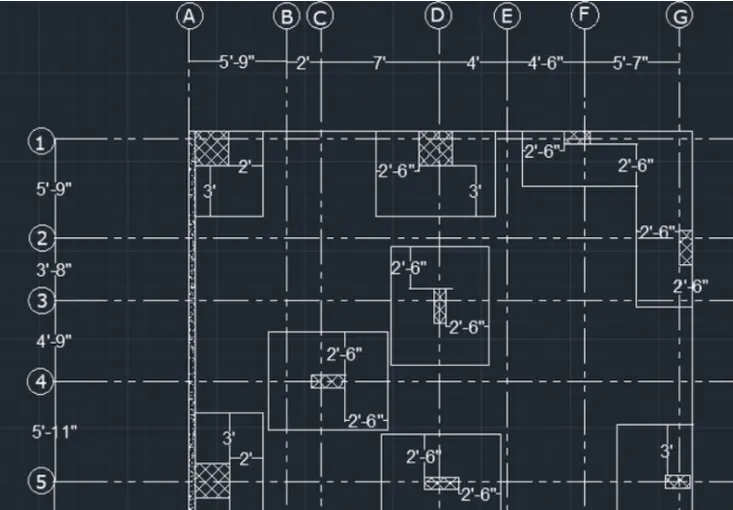
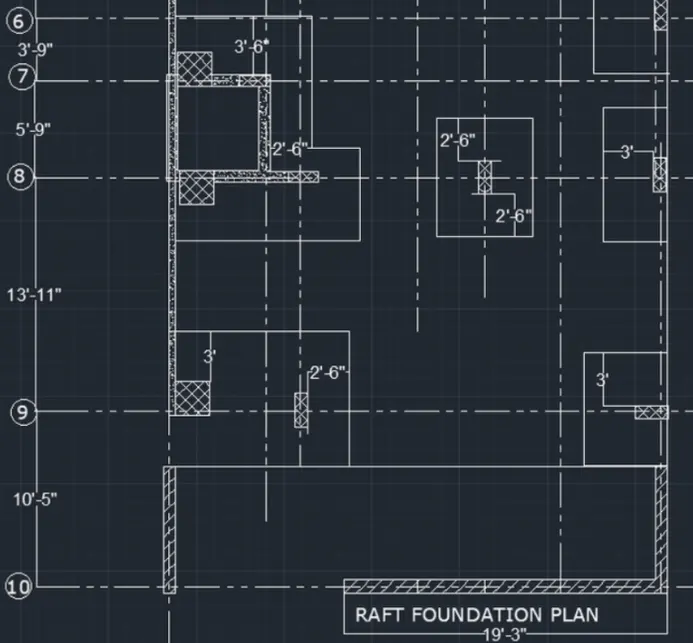
Creating a Wardrobe detailed drawing, Floor Plan, Kitchen Layout and Column Detail using AutoCad
QUE 1]
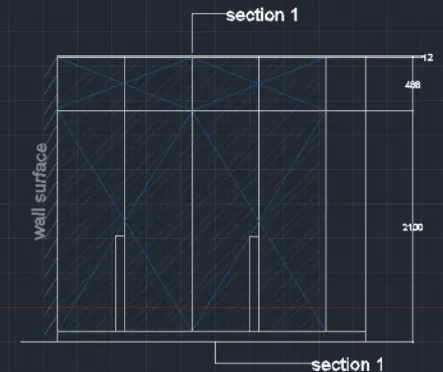
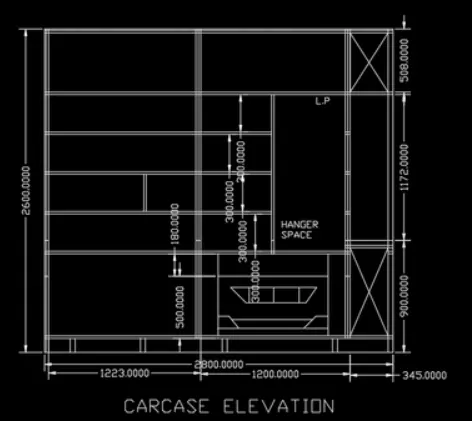
AIM - To drow the elevation and detiles of a wardrobe as shown in the given figure
PROCEDURE
STEP 1
- set the unit in mm
- set the limites and limax
- also set the zoom command
STEP 2
- in the command line type rec and creat a 2800x2600 rec
- then command offset and the offset from top 12' and 488mm
STEP 3
- in the command type offset once agan take the offset from the left side 608.75
STEP 4
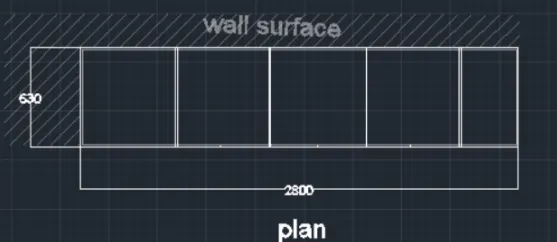
- in the command line type L and by increasing the transparancy to cteate wall surface
in the command line type qleader to mension the annotation
STAPE 5
- in the command prompt type rectangle 630x 2800
- in the command prompt type qleader to give the annotations
STAPE 6
- in the command prompt type rectangle 2800x2600
- with the help of line command drawers and cabinets are created
STEP 7 A
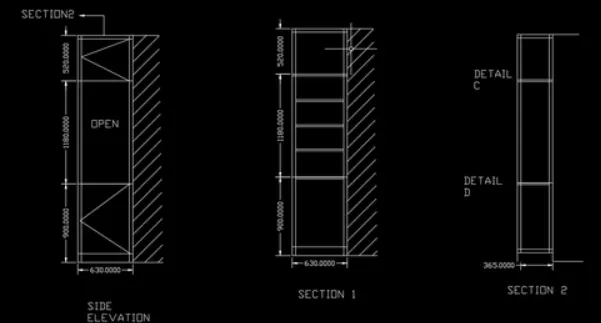
- in the command prompt type rectangle 520x630.1180x 630.900x630 this is repeated 2 times
- using line command the next of the lines are drawn
QUE 2 ]
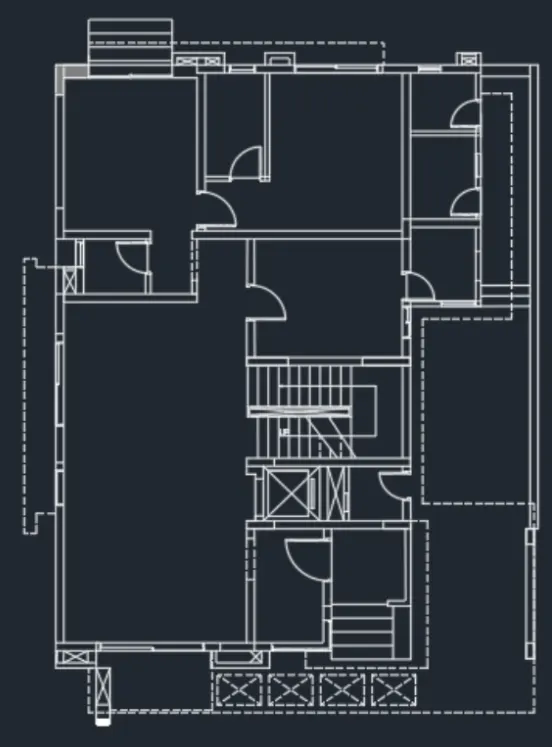
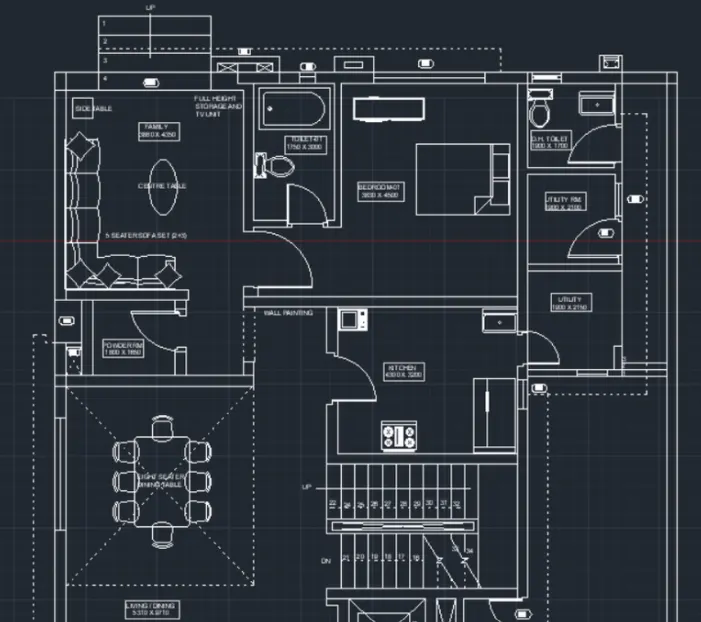
AIM- to draw the given floor plan procedure
STEP 1 -
- units are set to mm
- limits and limax are also set
- zoom command id also used
STEP 2
- take xl command and drow the infinite line horizontal and vertical
- take offset saimmaltiniusly as per wall diminstion
- then trim the unwanted lines
- using arc command doors are also created
STEP 3]
- in the command [adc] is typed to get the componets of the plan
- in the command line linetype is typed to get the dotted lines
- the the command line text is typed to get the dimesion and annotation the plan
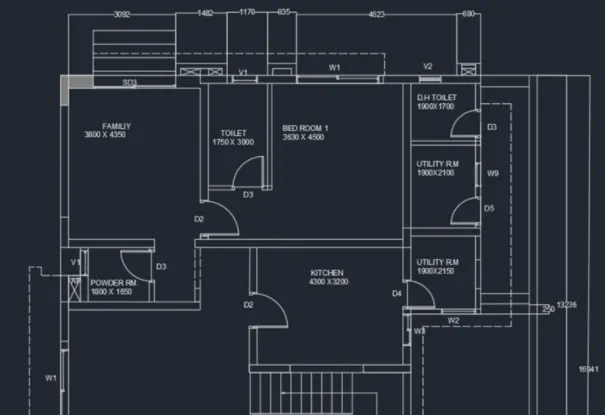
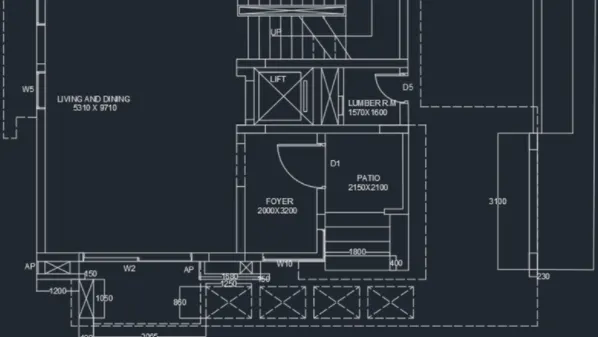
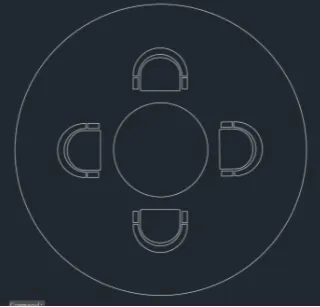
TO drow cannopy
- in the menu bar click circle
- center point fo circle 10,10 and radius 452
- and the second circale is 1398
SEATS
- in the menu bar click on rec
- specify the length 662.3
- specify the width 298
- in the command prompt type fillet radius 100
- in the menu bar circle 2 point arc the end points of the top of the line
- in main bar center diameter
- center is the mmid point of the line dimeter is 719.0
- in the menu bar circle dimeter
- center is the midpoint of the line 777.2
- now extend the center line and trim the extras
- in the menu bar cilck fillet blend curves
RESULT
QUE 3]
AIM - to create the kitchen layout and to also use proper dimesion techiniques to dimesion the kitchen lyout
PROCEDURE
STEP 1]
- units are set to mm
- limits and limax are also set
- zoom command is also used
STEP 2]
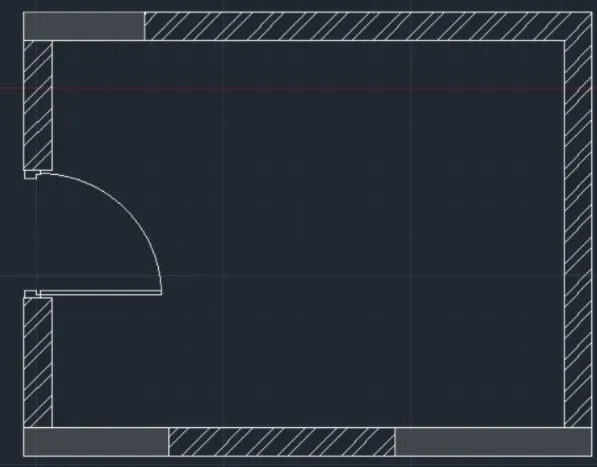
- in the command promt type rec dim 4734x 3688mm
- then take offset at the distance of 230
- using arc and lines the door is drawn
- in the command prompt type hatch to hatch the model
STEP 2 ]
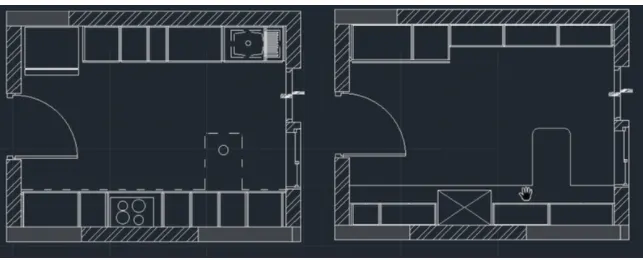
in the command prompt type offset and offset itv to the desired distance to get the microwave
in the command prompt type trim to trim the extra
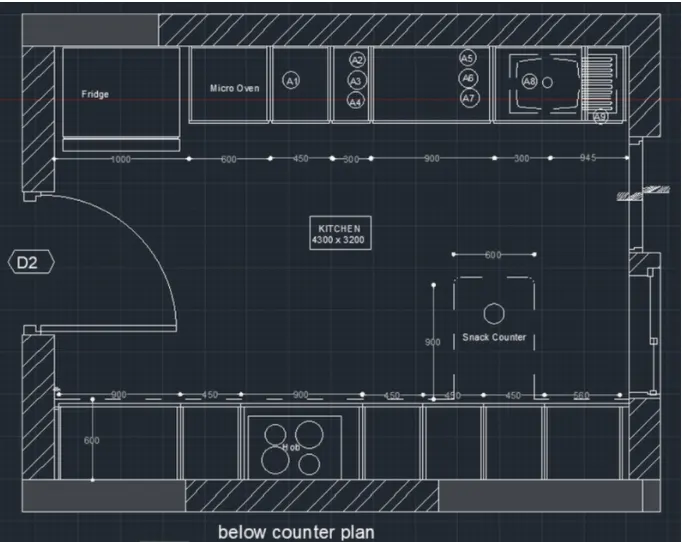
- in the command prompt type and offset it to the horizontal distance of 350, 450,900,450,and 560
- in the command prompt type offset and offset it to the vertical disatncee of 600
- in the command prompt type trim to trim the extrs
- in th command prompt type line and load the dotted lines
STEP 4]
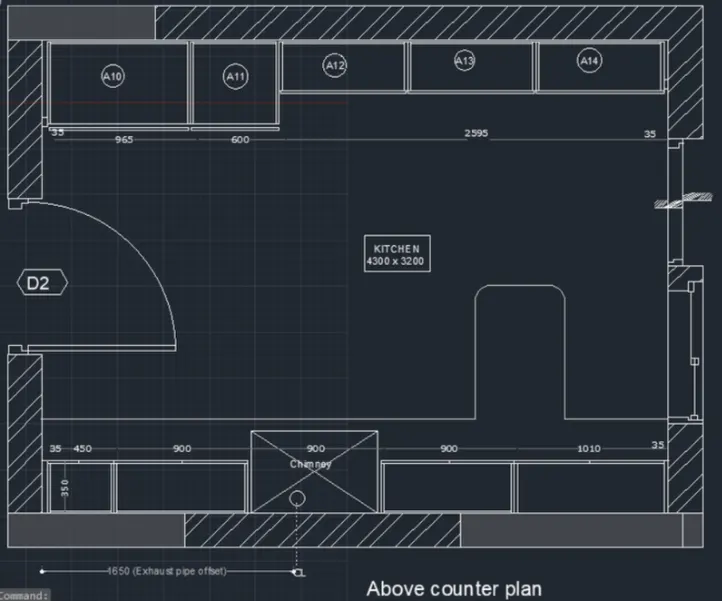
- in the command prompt type text to annotation
- in the command prompt type dimesion
- in the command prompt type leder to used dimensin
and then save
RESULT ]
QUE 4 ]
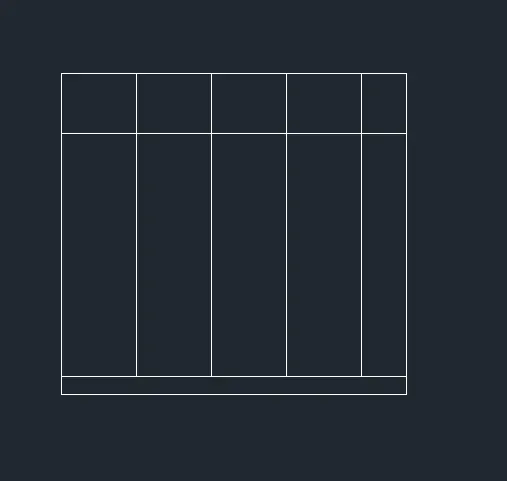
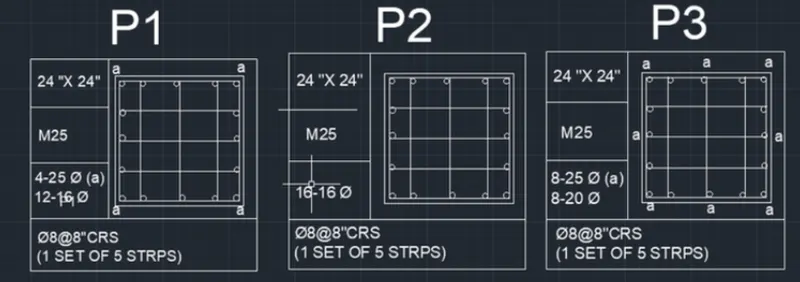
AIM - to sketch the column details
PROCEDURE
STEP 1]
- units are set to mm
- limits and limax are also set
- zoom command is also used
STEP 2]
- using rec line command tablus are drawn
- using text command for giving text
- in the command prompt type line drow the reinforcement
- in the commnad prompt type cicle to drow the reinforcement
RESULT
QUE 5]
AIM]
PROCEDURE
STEP 1]
- units are set to mm
- limits and limax are also set
- zoom command is also used
STEP 2]
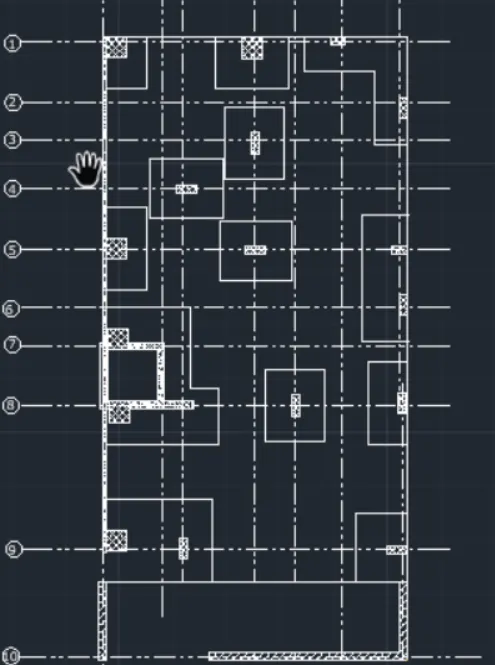
- command prompt typpe rec distance 29'-7" and 60'
- get dotted and type load
- take offset of dotted line
- the offset distance is 4"
- take hatch AR-CONC
- in the command prompt type rec 2'x2'
- in the ribbon prompt bar select hatch ANSI37
STEP 3
- in the ribbon tab annotate mtext
- give the dimension
RESUT ]