Creating a Layout, Section and Elevation with dimensions using AutoCad
Answer -
Aim :
Aim of the given project is to learn to sketch the Plan and Sections of G+3 residential building using proper dimension techniques and dimension styles to document the project & Assuming the sizes of the doors and windows as per construction standards using Autocad.
Introduction :
Project is about sketching Ground plus 3 floors of residential building using Autocad assuming defferent dimensions and understanding the provided sections and plan to prepare the sketch in such a way that it is self explanatory so that site execution team does not need to communicating with the designers and execution can be made easy.
Figure - 1
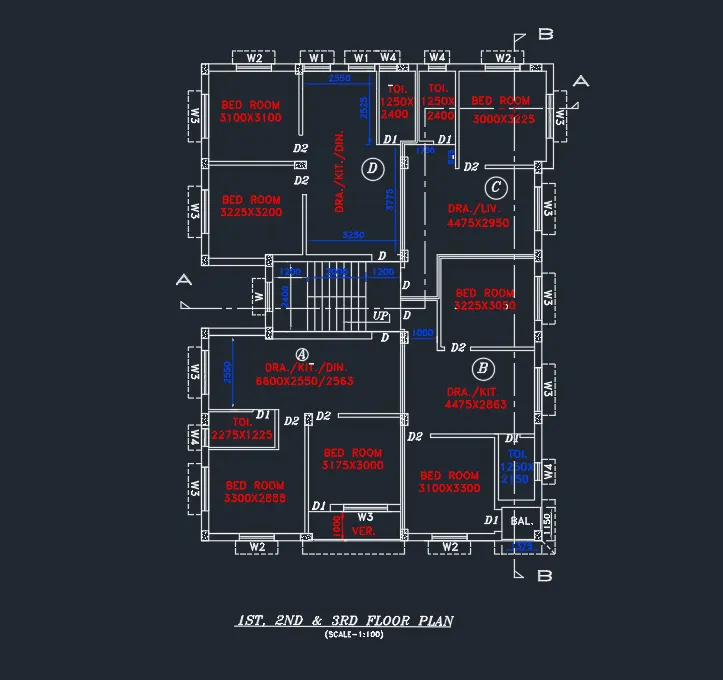
Procedure :
- Turn on Autocad.
- Add 4 Layers separatey for Walls, Doors/Windows, Dimension & Texts.
- Open Layer for Walls.
- Draw the section of walls & stairs with the given dimensions in the figure using Line, Offset, Trim, Extend etc commands.
- Change Linetype to draw outer wall of the given floor plan.
- Leave space for doors & windows.
- Change the layer to doors & windows.
- Add doors and windows as in the figure.
- Once the all doors and windows are added in the figure, change the layer to the Dimension.
- Change the Layer color so as to separate the dimensions from the figure.
- Provide all the neccessary dimensions using appropriate dimension style for the figure.
- Once the dimensions are provided, change the layer to the Texts.
- Change the Layer color so as to separate the Texts from the figure.
- Provide all the neccessary texts in the figure.
Figure - 2
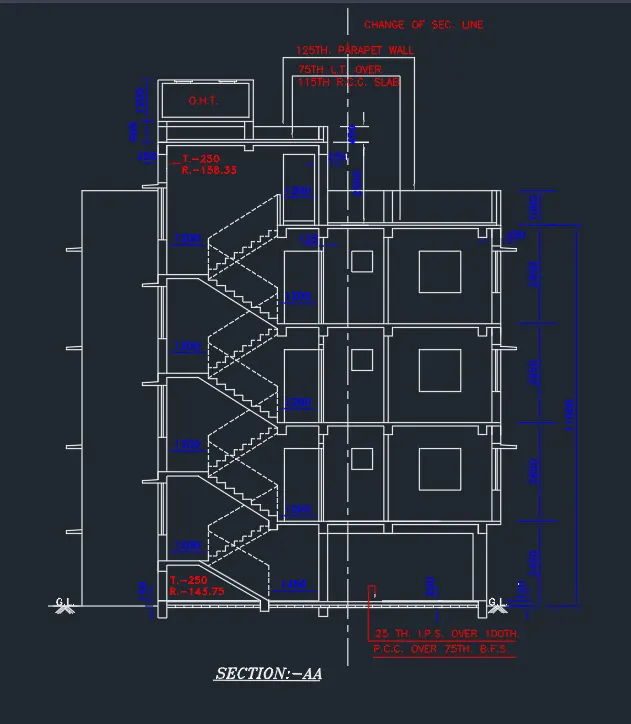
Procedure :
- Turn on Autocad.
- Add 4 Layers separatey for Walls, Doors/Windows, Dimension & Texts.
- Open Layer for Walls.
- Draw the section of walls & stairs with the given dimensions in the figure using Line, Offset, Trim, Extend etc commands.
- Change Linetype to draw outer wall of the given floor plan.
- Leave space for doors & windows.
- Change the layer to doors & windows.
- Add doors and windows as in the figure.
- Once the all doors and windows are added in the figure, change the layer to the Dimension.
- Change the Layer color so as to separate the dimensions from the figure.
- Provide all the neccessary dimensions using appropriate dimension style for the figure.
- Once the dimensions are provided, change the layer to the Texts.
- Change the Layer color so as to separate the Texts from the figure.
- Provide all the neccessary texts in the figure.
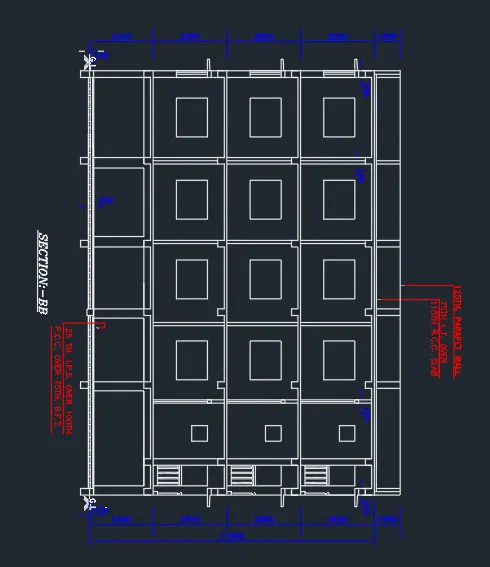
Procedure :
- Turn on Autocad.
- Add 4 Layers separatey for Walls, Doors/Windows, Dimension & Texts.
- Open Layer for Walls.
- Draw the section of walls & stairs with the given dimensions in the figure using Line, Offset, Trim, Extend etc commands.
- Change Linetype to draw outer wall of the given floor plan.
- Leave space for doors & windows.
- Change the layer to doors & windows.
- Add doors and windows as in the figure.
- Once the all doors and windows are added in the figure, change the layer to the Dimension.
- Change the Layer color so as to separate the dimensions from the figure.
- Provide all the neccessary dimensions using appropriate dimension style for the figure.
- Once the dimensions are provided, change the layer to the Texts.
- Change the Layer color so as to separate the Texts from the figure.
- Provide all the neccessary texts in the figure.