Challenge 9 : Project : Technical Surfacing Kia Sportage
Technical Surfacing Kia Sportage
- Objective:-
The objective of this project is to make 3D model of KIA SPORTAGE 2018 model with the help of Blue Print.
- Introduction:-
Concept modeling is modeling where 3d data begins to take shape. This is an important part of the process because each part involved in the design process depends on the actual idea, how the design came out, its size and experience. This process starts from the point where the design has reached the final stage. In this model we will divide the whole model into parts. Since we have already made 3D models of the parts, we have a good idea of the approach to make these parts. The add-on in this model is that after making the parts we will continue to make other parts so that we get the complete model of the car. Here we can divide the model into front bumper, side fender, hood, rear bumper, side panels and roof. With a blueprint with all the views available to us, it will be easy to see how the surfaces flow. In case of difficulty or confusion, 3 quarter view can be viewed to get a better idea about the surface flow. We will try to make square patches wherever possible to control the surfaces and get better and more consistent models. After making the Sharp model we will give fillets where needed.
- Design methodology:-
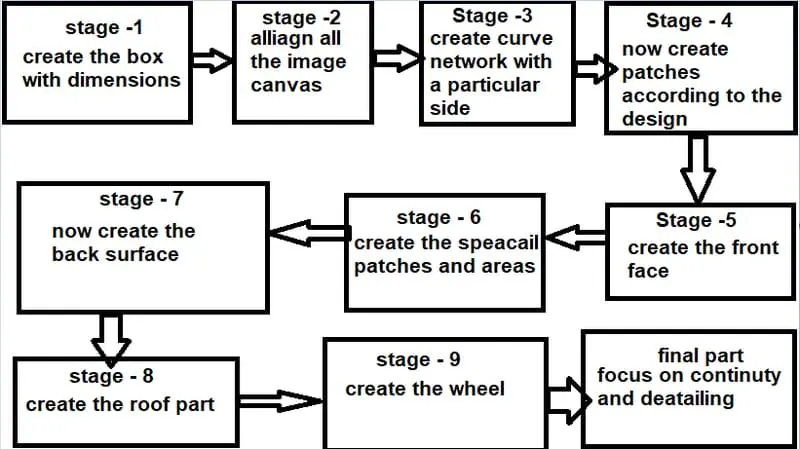
- Description:-
The following tools were used to create the model:
1. Curve CV curve under the toolbox option in the palette. The CV curve tool is used to curve. It is one of the primary tools available to give users any desired shape. The ep curve tool can be used in a similar way.
2. Blend Curve Toolbox This tool is used to round the corners by combining two curves so that the resulting curve is correct and continuous. The next editing tool in the same toolbox enables the user to handle the mix curve to the desired size.
3.0bject Editing Toolbox: Tools Used Under
1. Extended Tools: Used to increase or decrease the size of curves.
2. Query editing tool: It is used to check and change the construction history of the surface.
3. Detach tool: It is used to separate a curve or a part of a surface from the rest of the shape.
4. Align: This is used to align the two surfaces to each other as required by their position.
4. Surface Toolbox: The most important toolbox for surfacing is the toolbox. It has various tools for creating surfaces for the user. Surfaces can be made using different tools according to the needs of the user. The ones used in this model are listed below:
1. Skin: Used between two curves to create a surface.
2. Rail: It is used to create surfaces by assigning generation curves and railway curves.
3. Square: Four curved continuities are required to form this surface.
4. Planner: It prepares the planar surface for the closed curve.
5. Free Form Bend Tool: It forms the surface between selected curves.
6. Surface fillet tool: It combines the edges of two surfaces to make it soft.
5. Surface Editing Toolbox: This toolbox is used to edit surfaces as needed. The tools used are listed below:
1. Project tool: It is used to project curves on the surface required to use the trim command.
2. Intersect tool: This tool is used to create the intersection of two surfaces which is used to trim the surface.
3. Trim tool: It removes unnecessary parts from the surface.
4. Untrim Tool: It undoes the trim tool.
5. Trim Convert Tool: It converts surface patches and creates new surfaces.
6. Diagnostic scheduling can be accessed either from the Control Panel or from the Object Display option in the top toolbox. It has various shading options to check the consistency of user-created surfaces. Commonly used diagnostic shades are:
1. Listed as shdnon of shading.
2. Listed as Multicolor Malcolm.
3. Horizontal / vertical listed as horver. Now, we have adopted the step by step method to make this model. We have divided the model into parts like front bumper, side fender, hood and so on.
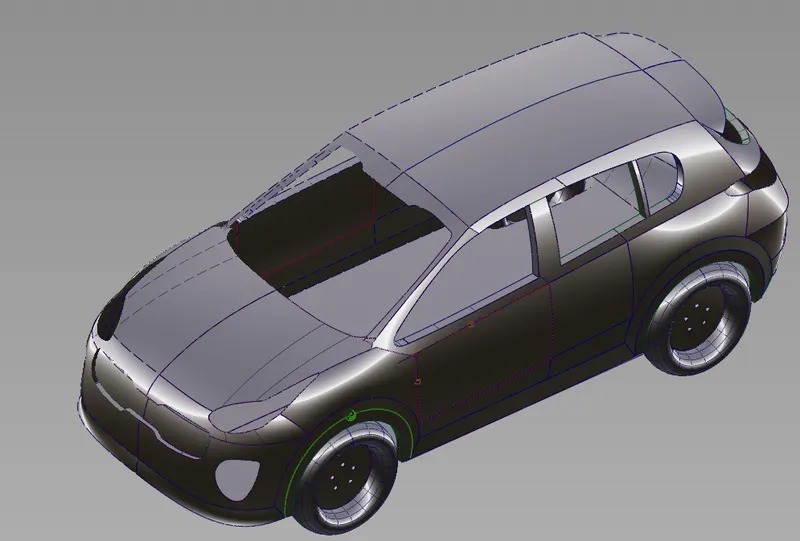
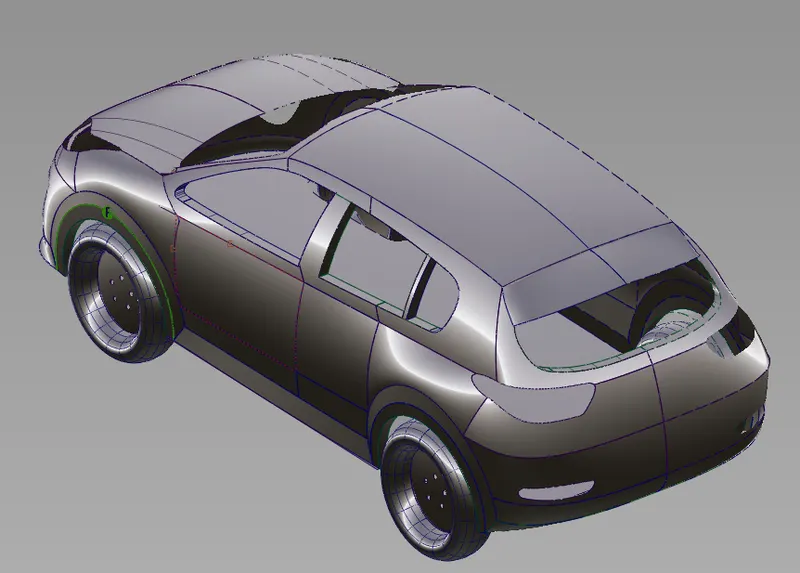
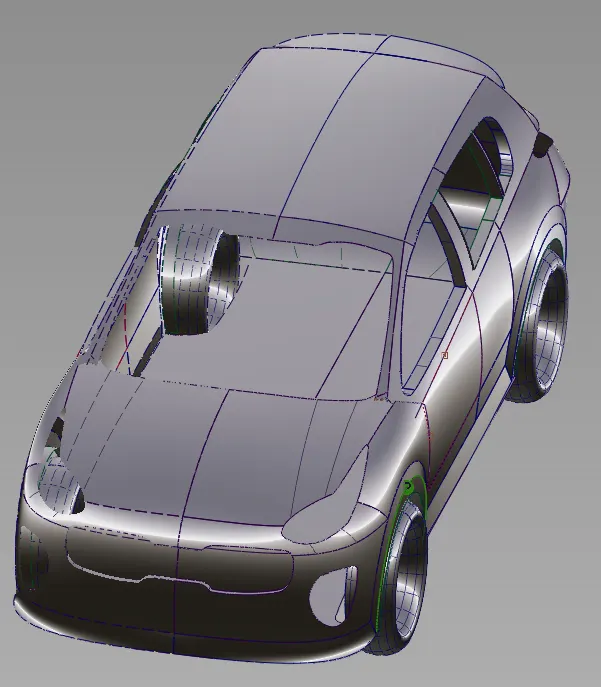
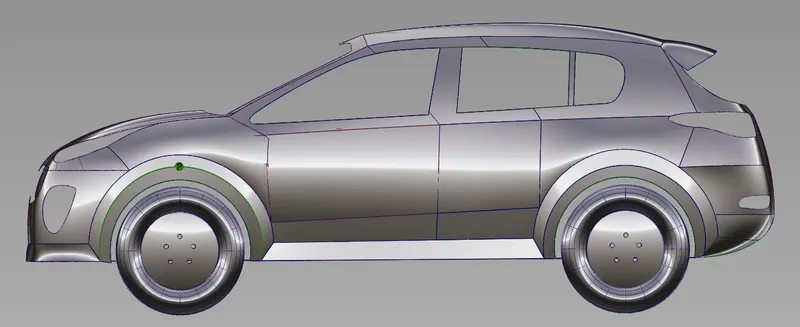
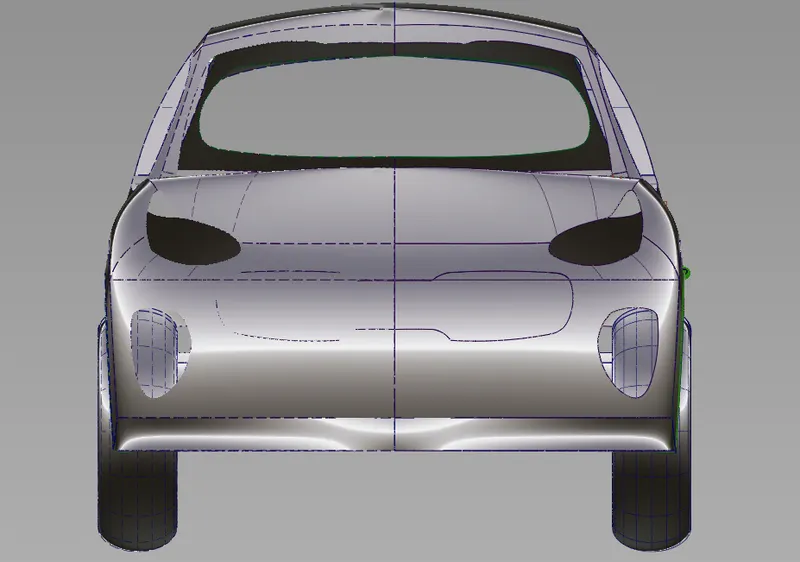
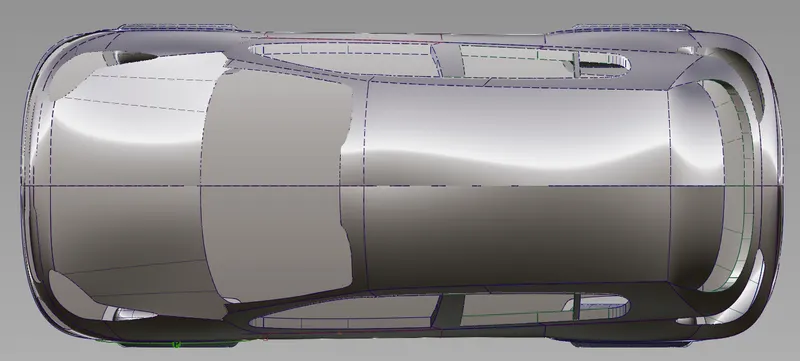
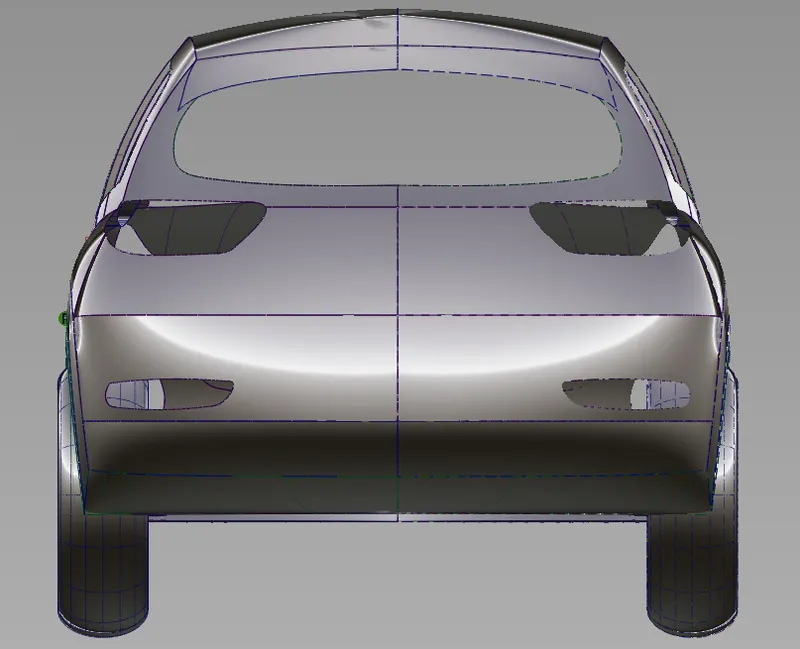
- Conclusion:- The concept Technical surfacing of Kia Sportage Car using the blueprint is Completed.