Assignment 2-RADIOSS Engine File Editing & 3D Meshing Challenge
Objective:
The objective of this study is to edit the RADIOSS engine file to modify the analysis settings and perform the mesh generation operation on the given components. Giving fundamental understanding of the mesh operation and the engine file of RADIOSS.
a. Objectives for Engine file of RADIOSS,
- Calculate the speed of sound in the given material of the component.
- Calculate the time required to travel the shock wave from one end to another end.
- Change the engine file such that the stress wave can be monitored from one end to another end during the impact, i.e Termination time greater than or equal to the time taken for the soundwave to travel from one end to another end.
- Set the Frequency of the animation output to a time that will result 20 steps of animation.
b. Meshing of the components
- Mesh the given parts with the standard target size and maintain the mesh quality.
Solution:
a. Engine file for RADIOSS
Calculation of speed of sound in the given material.
For this first it is important to know the material properties defined to the component. There are two ways to check the material properties. First is by checking via the Starter file 0000.rad using Notepad or opening the same file in hypermesh.
Using Hypermesh,
Import the 0000.rad file >> In Model Browser select the Material Entity >> Select the Steel Material >> The material properties
Using Notepad,
Open the 0000.rad file in Notepad,
From the Material Card get the material data in the defined unit system.
After checking the material data from any of the way, following are the material properties defined to the component in g,mm,ms.
Density = 7.8e-3
Youngs Modulus = 210000 MPa
Speed of Sound (C) is given by,
`C = sqrt (E/rho)`
where `E` is Youngs Modulus and `rho` is density of material.
`C= sqrt(2100000/0.0078) = 5188.745 (m/s)`
Time taken by the shock wave to pass through the enitre 1000mm distance.
`Speed = {Distance} / {Time}`
Hence Time is given by,
`Time = {1000}/{5188.75} = 0.19ms`
This is the same time required for the sound to travel through the length of the rail.
Edit the engine file of RADIOSS to change the analysis settings:
First the termination time is changed to 0.19. Import the 0001.rad file in hypermesh with RADIOSS profile or open the 0001.rad in notepad as shown below.
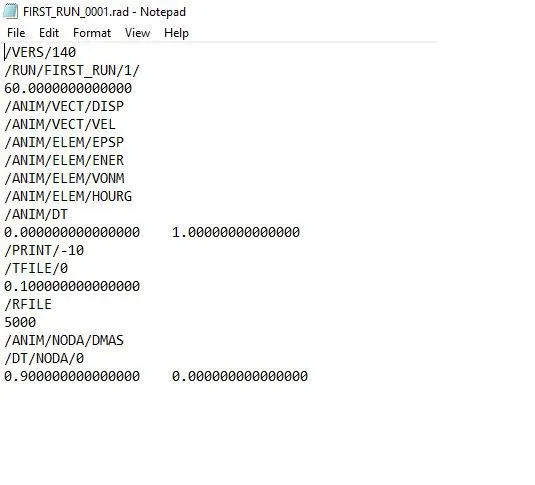
In this file change the RUN card details, i.e currently it has termination time of 60ms change it to 0.19ms.
Second is to change the animation time such that total 20 frames are printed, for this the ANIM/DT card needs to be changed. As the total time is 0.19 hence for single frame the time interval is 0.19/20 which results into 0.0096ms.
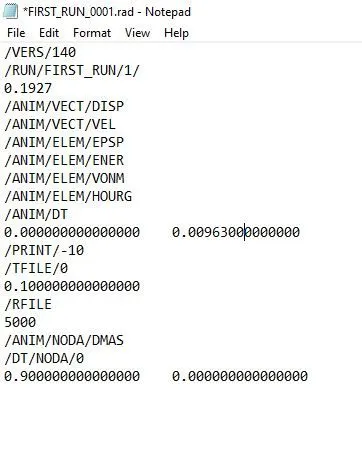
This is how the 0001.rad file will look like after the changes.
b. Meshing of the components
The housing component has two components i. Cover and ii. Hub
i. Cover
Following figure shows the model of the cover,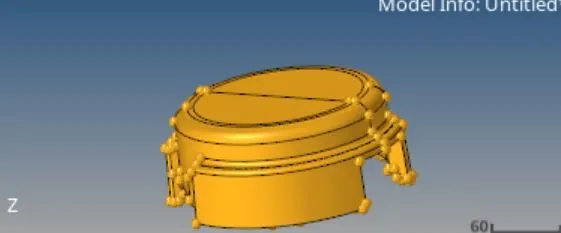
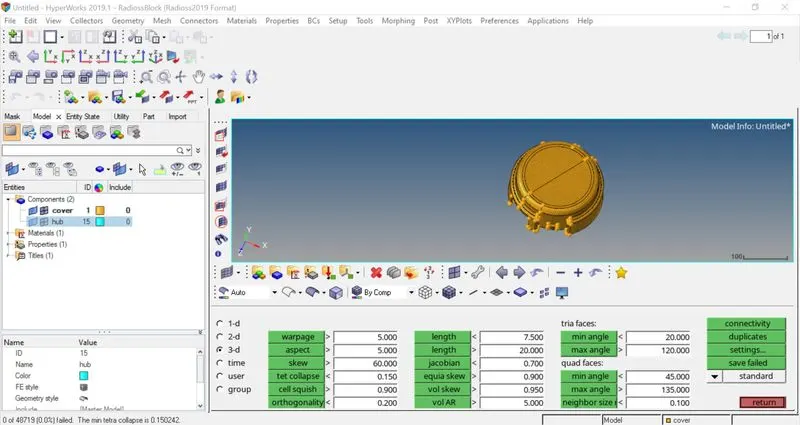
The cover component is meshed with element size of 5mm and tet collapse set to 0.15 in element quality check. Here the component is meshed with volume tetra mesh.
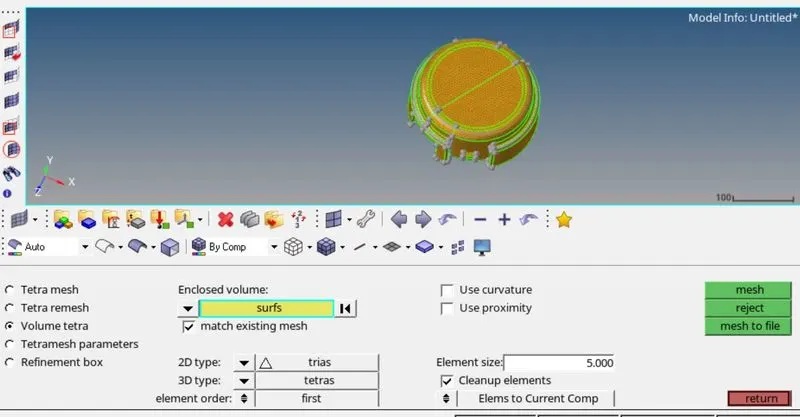
After meshing the mesh is checked for tet collapse and 0 elements fail for the quality standard.
ii. Hub
The hub is also meshed using the volume tetramesh with an element size of 5mm and tet collapse is set to 0.15
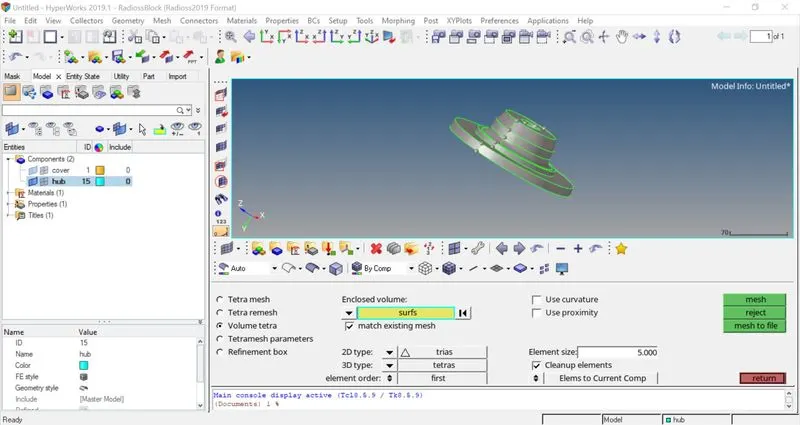
After meshing the tet collapse is checked and it can be seen that the tet collapse is within the acceptable range.
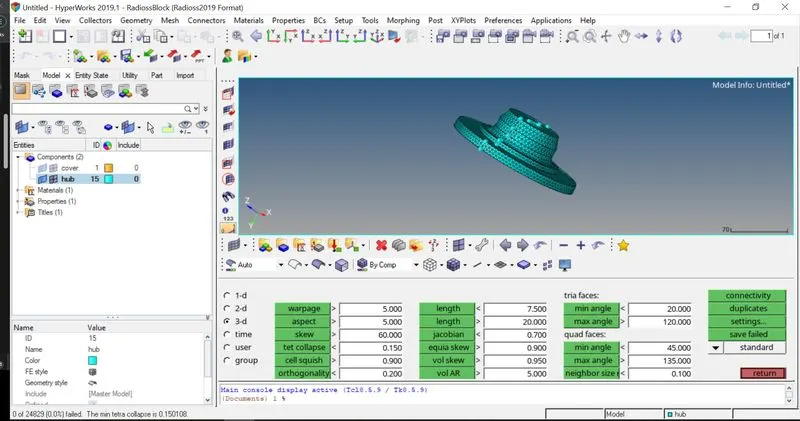
Apart from the tet collapse the connectivity and duplicates are also checked. There are no any elements wiht questionable connectivity and duplicates.
Hence both the components of housing assembly are meshed with 0 failed elements.
iii. Arm Bracked
The arm bracket component is supposed to be meshed with hex mesh, there are four different regions of the bracked, a- Base b- Arm Curve c- Arm Straight and d- Boss. The schematic of the Arm Bracket is shown below,
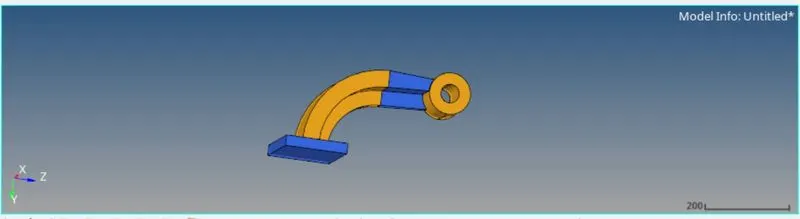
The meshing is started with the base part, the base is meshed with 2D elements i.e QUAD elements with 10mm element size as shown below,
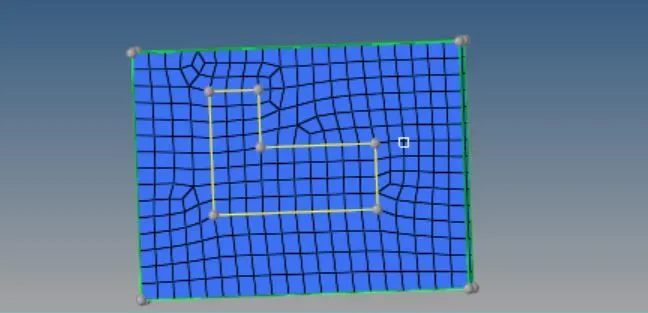
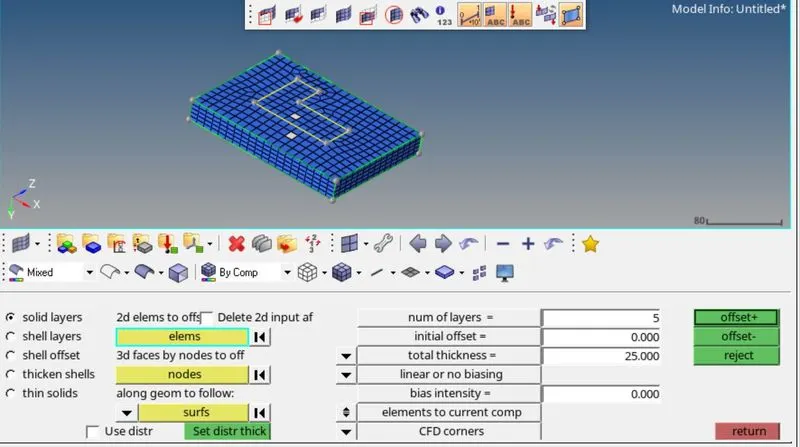
Using the element offset command the 3D mesh is created in the base as shown below, the number of layers are kept to 5 as the total thickness is 25 mm and the surface elements i.e 2D elements created are selected following allowing the orthogonal surfaces are selected which results the 3D mesh.
Arm Curve
The arm curve is connected to the base. The surface 2D elements of the base are spinned using 3D Spin option. The section as shown is selected to spin.
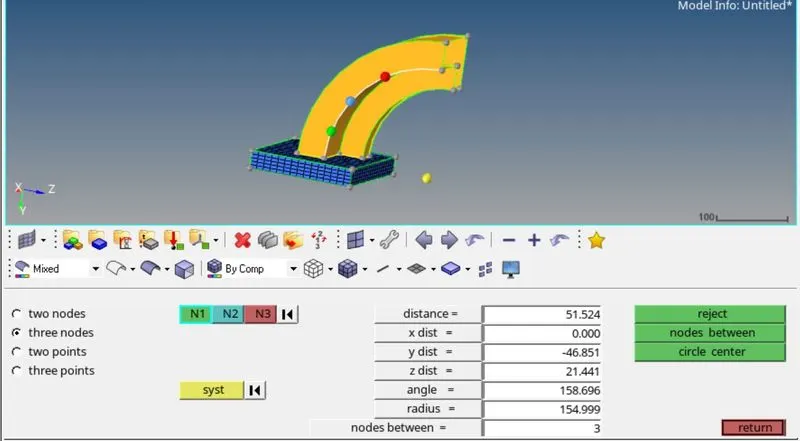
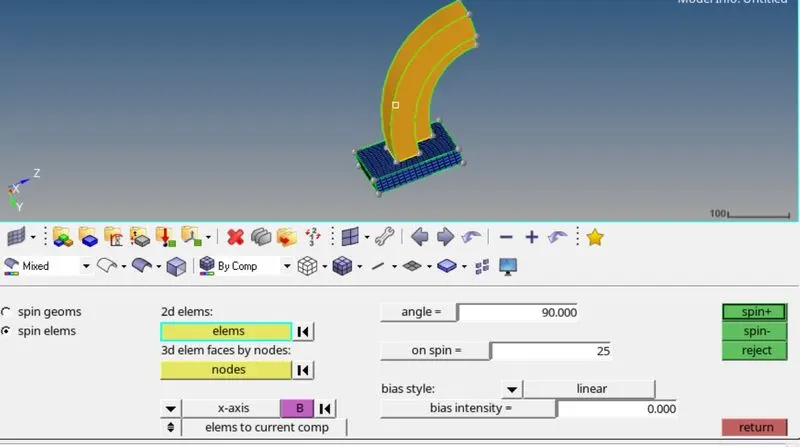
A centre node is created using the curvature of the arm this node is selected as the point about which the spin operation is to be performed.
The angle is 90 degree with 25 elements about the spin. Following figure shows the mesh on the arm,
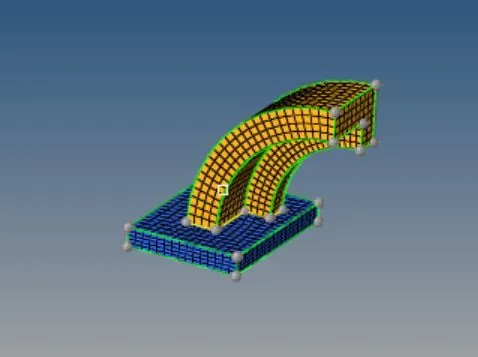
Arm Straight
This secction is a tapered section attached to the arm curve one end and boss to other end.
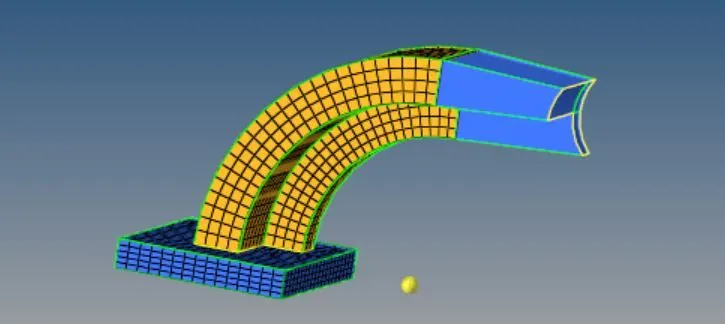
The section is meshed with 3D linear solid option. For this option source and destination elements on the faces to be similar. For this 2D elements are created on the other end as well. So for this find faces option is used to create a 2D mesh.
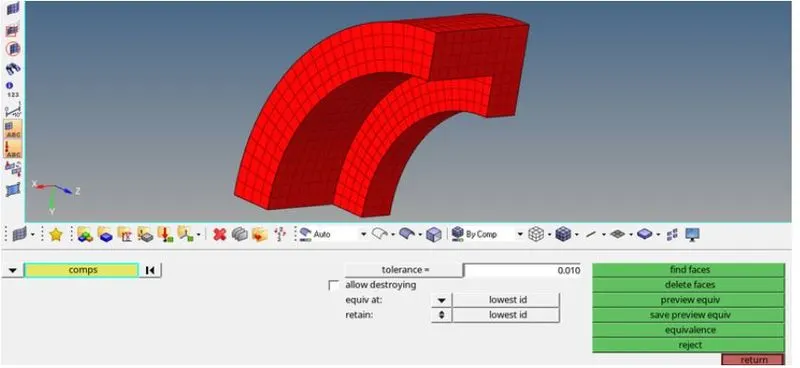
The 2D mesh is created on the other surface end and the linear solid option is used as shown below,
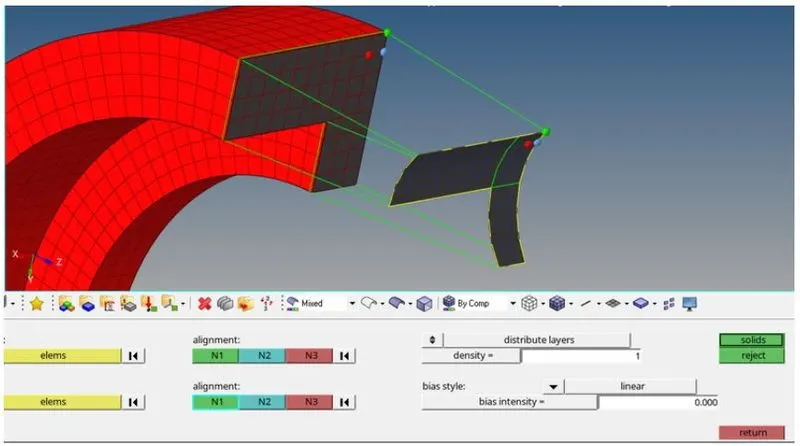
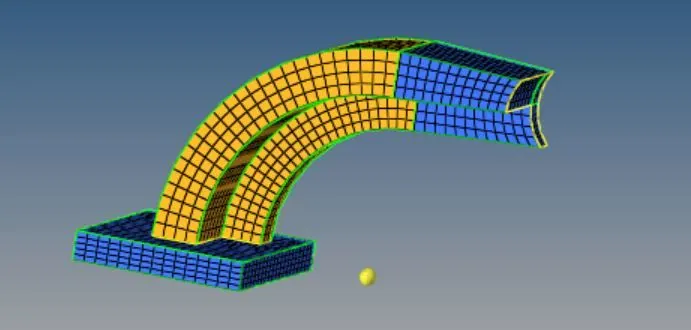
The final mesh looks as shown below,
Boss:
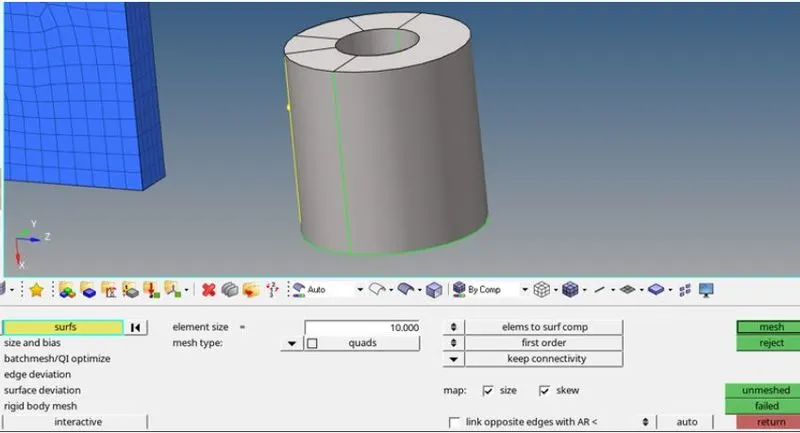
For meshing the boss section, the drag option is incorporated. The surface of the boss which is circular in shape is meshed with 2D elements. And later this 2D mesh is dragged along the node path.
The final mesh of the component looks like as shown below,
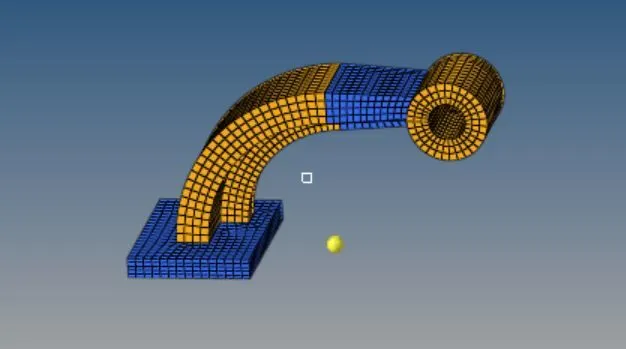
The 3D elements are checked for the connectivity and duplicate. There are no any elements that are questionable for the connectivity or duplicates.
Conclusion:
All the objectives of the assignment are meet with the engine file editing and the meshing of the components using hypermesh. The corresponding files are attached in the section.