ANSA - CAD Cleanup of a Car Model
AIM :
perform the CAD cleanup of the car model.
The car model should be free of any errors.
write a detailed report explaining how you cleaned the model in ANSA step-by-step with snapshots for each step.
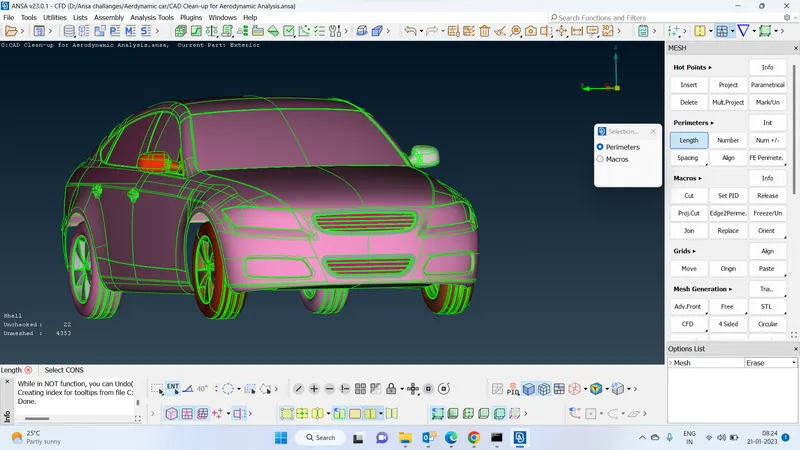
1. Increase the Resolution :
Initially, We will have to do a resolution to capture the geometrical errors.
Mesh deck > perimeters >length (1)
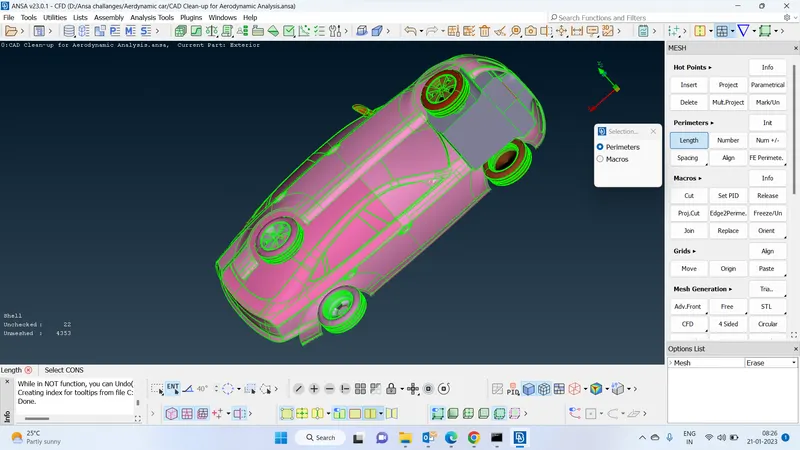
2. Hide the parts which are not symmetrical :
by hide the parts which are not symmetrical so that we can do the geometrical clean up only for one half and reduce the process of geometry cleanup
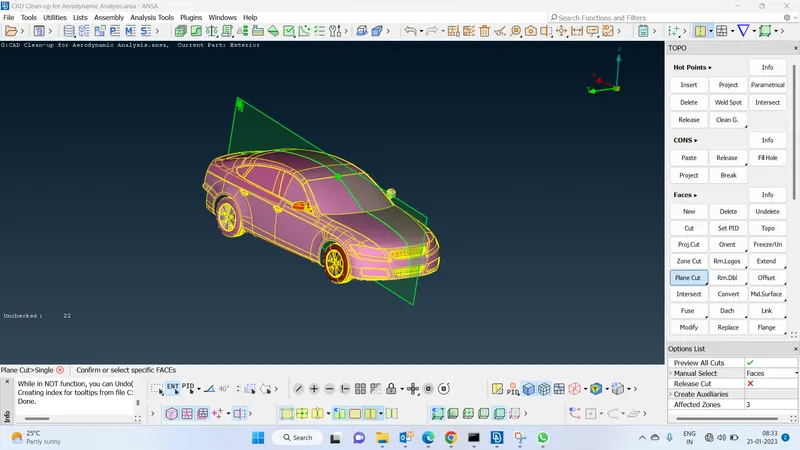
3. Cut the geometry into two halves :
topo deck > faces >plane cut
Select any 3 points of the direction which we want to cut the planan dmiddle click it will create a plan so that we can remove the one half of the part
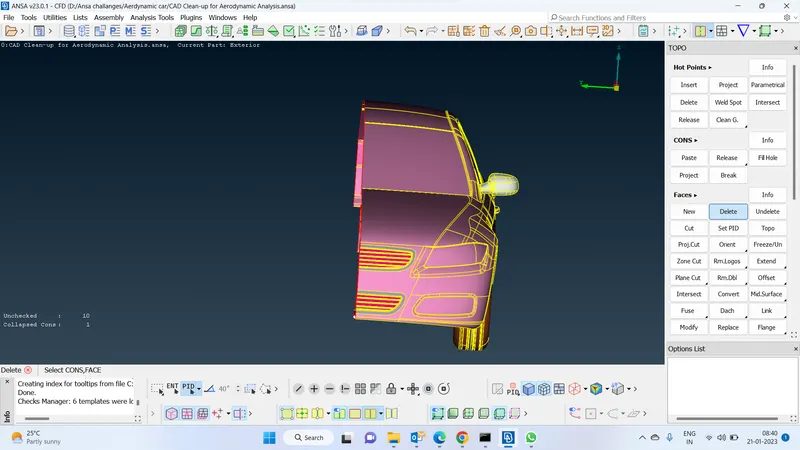
4 . check the one-half which is having more errors :
By clicking the ctrl+shift we can see in which half there was more no of errors.
we can clearly observe there are more errors on the left hand side so we have dele the face
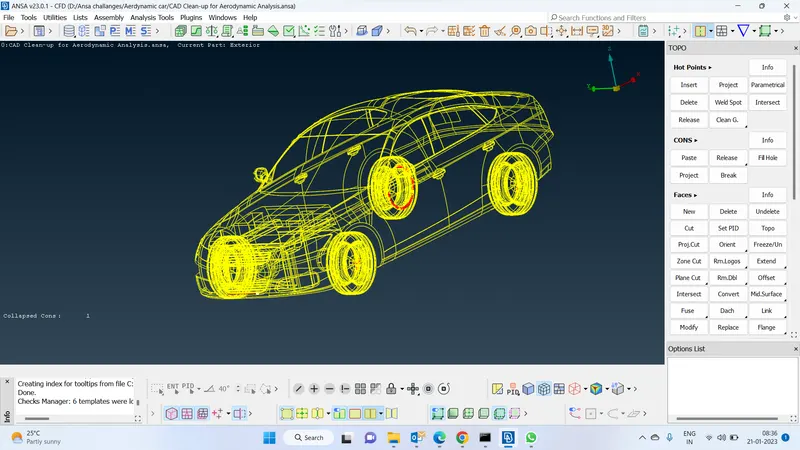
5. Remove one side which is having more no errors :
By selecting all the faces to delete all the faces on the left-hand side
we can go universal delete or the faces delete option here
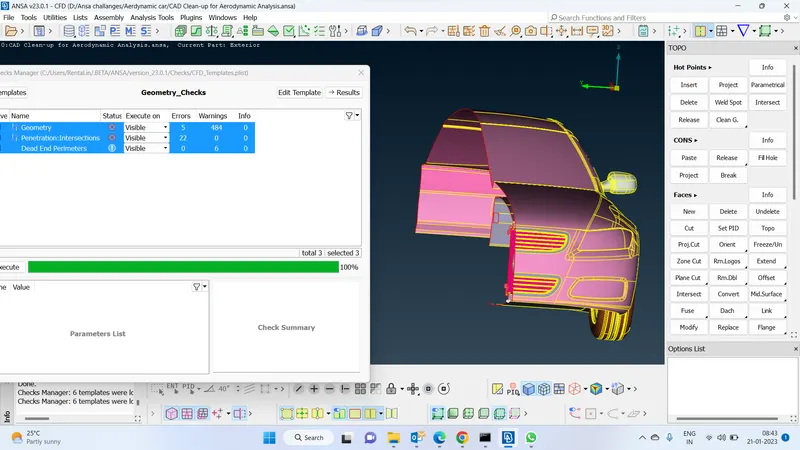
Check the errors in 1st stage of the cleanup :
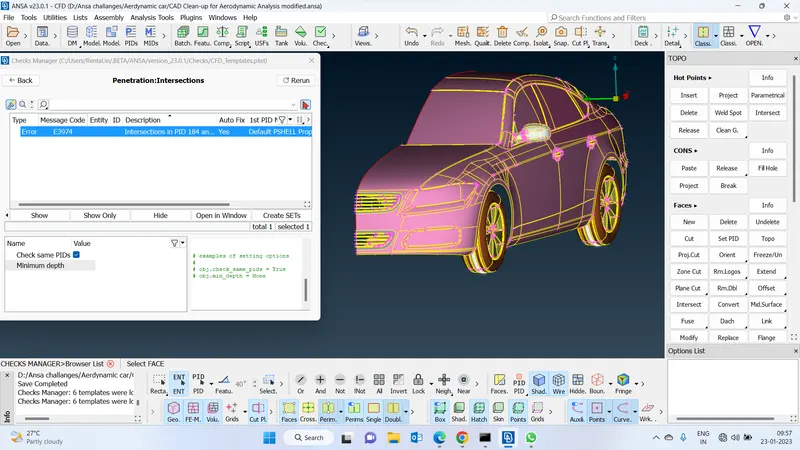
go to the check manager tab in utilities and find out the no of errors which is having tin the geometry cleanup.
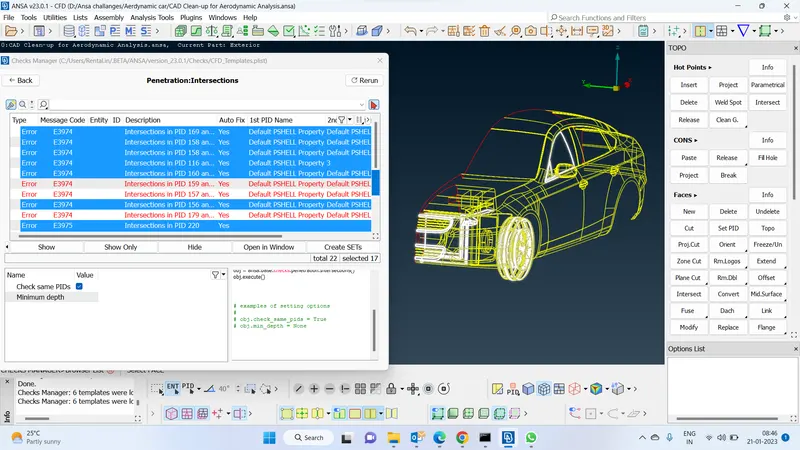
Intersection errors :
initially, we will have to go for the intersection errors the reason behind this is if we go with this we might get remove the other errors parallelly I
here in this image i have highlighted the intersectio errors in the geometry
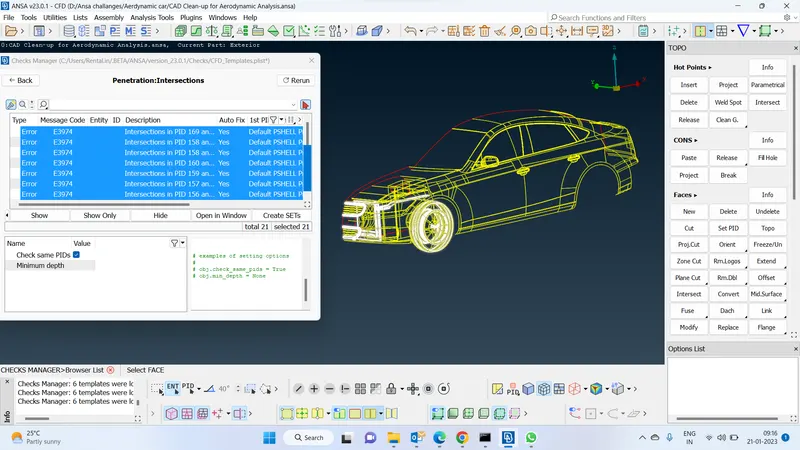
Removed intersection errors :
Removed the intersection errors in the side mirror so we can compare the previous image to compare.
The process I did was projecting the coons on the surface where ever the intersection occurs. and deleting the overlapping faces and also deleting the unwanted faces which are not going to contact the fluid.
I used coons> project faces > delete function to complete the process
we can observe there were no intersection errors at the side mirror
Create a new face where ever it's required :
delete the unwanted faces and create new faces wherever it's required
by doing this we can reduce the no of elements while doing meshing.
used faces delete option
used create new face coons option to do this processs
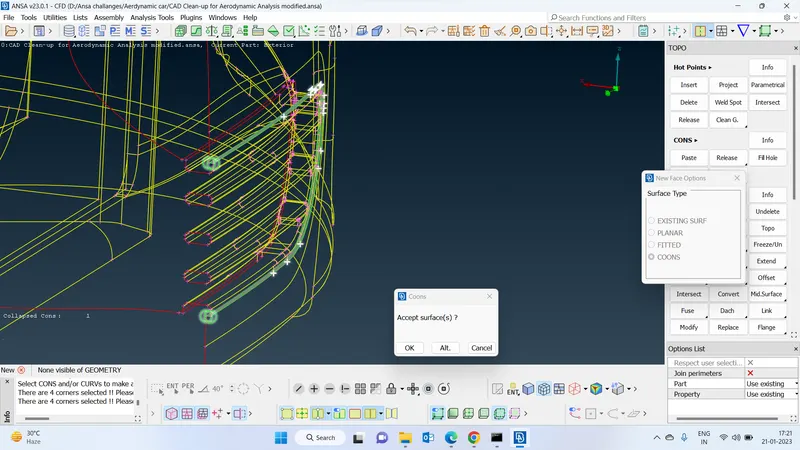
Mirror cleanup :
This is how the side mirror of the car after deleting the overlapping and also the unwanted faces
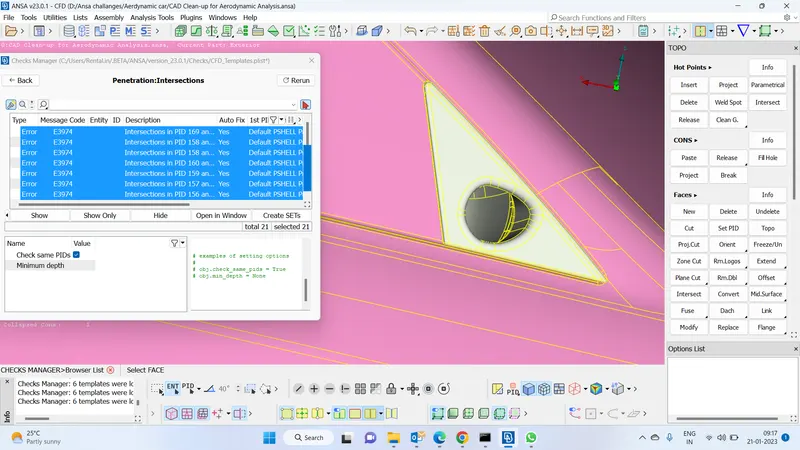
Grill intersection cleaned up :
In this step, we try to clean the intersection errors on the grills and delete the overlapping faces and crate new faces where ever it's required
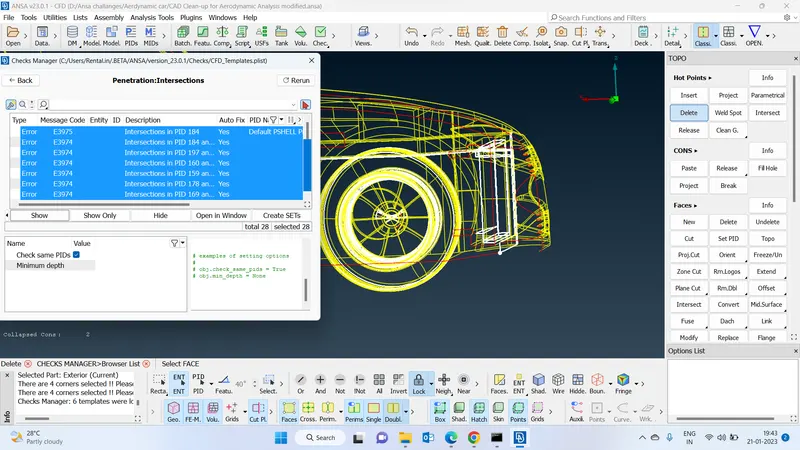
delete the sharp edges of the rim and create a new face wherever it's required :
Delete the sharp faces and create a new face over there to get rid of the sharp edges.
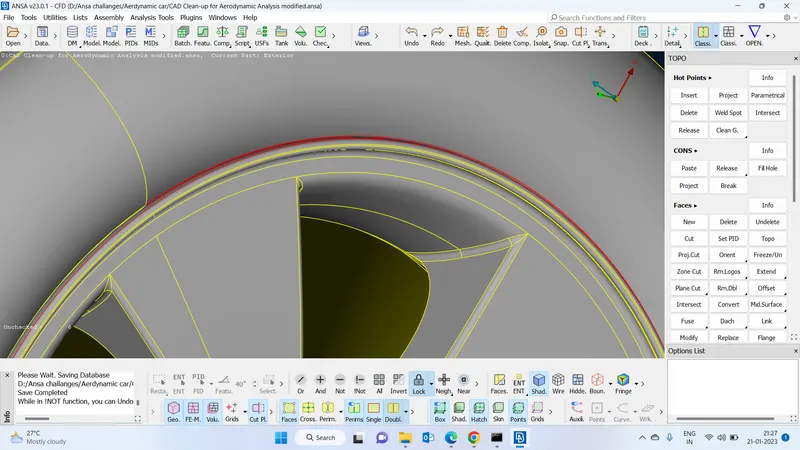
do the same above process on the other side of the wheel :
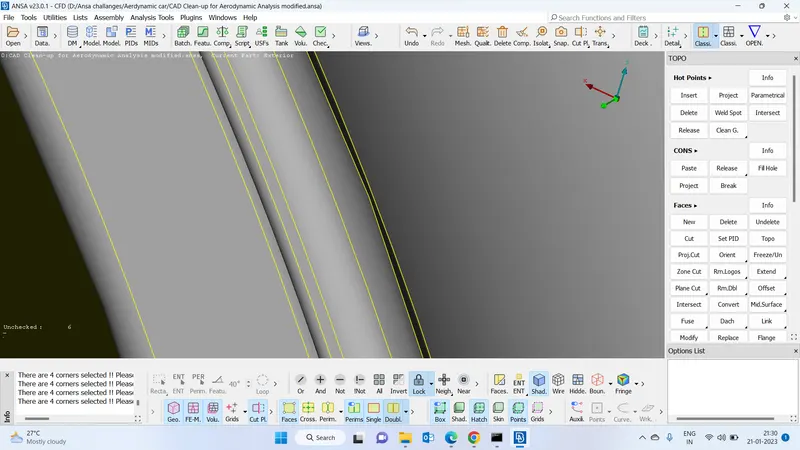
Tyre error-free :
We can clearly see that there is no any error or its error free
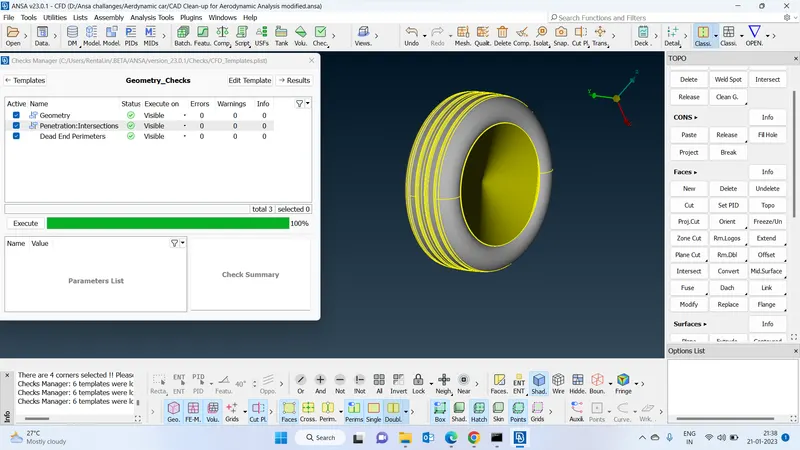
Tyre surface close :
close the open surface of the tyre
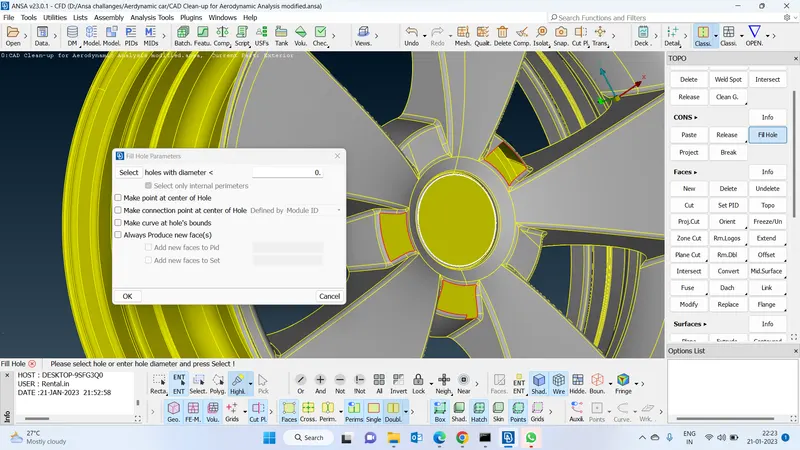
Create a surface over the tire holes :
Create a new surface on the holes to create a water tight model for the geometry
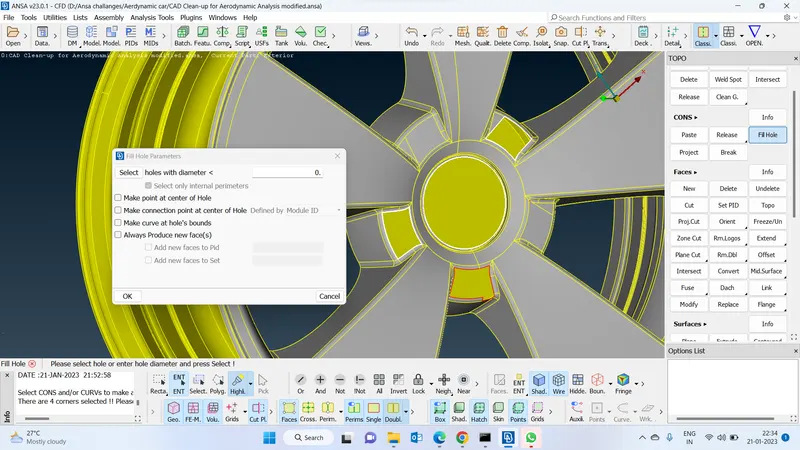
Error-free of the tire and its rim :
we have cleared all the errors in the tire rim
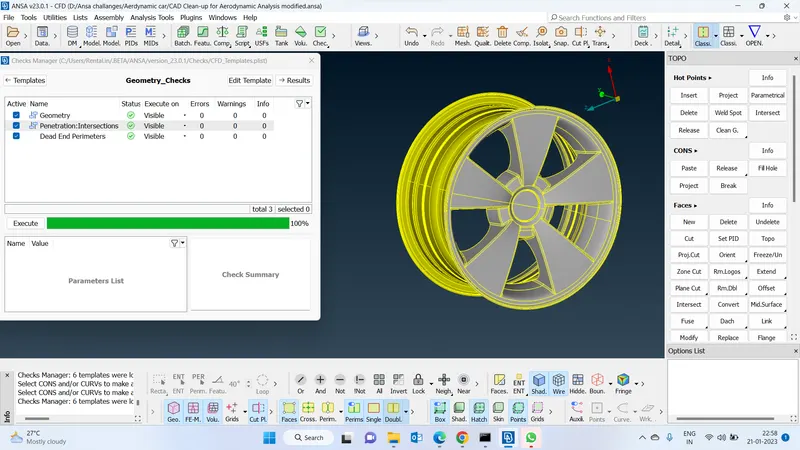
copy the error-free wheel to the back side by using copy and center of gravity option by selecting the entities of the error-free tire:
If we complete the cleanup of the geometry of the front wheel go and select the points > cog option and select the circle for the reference
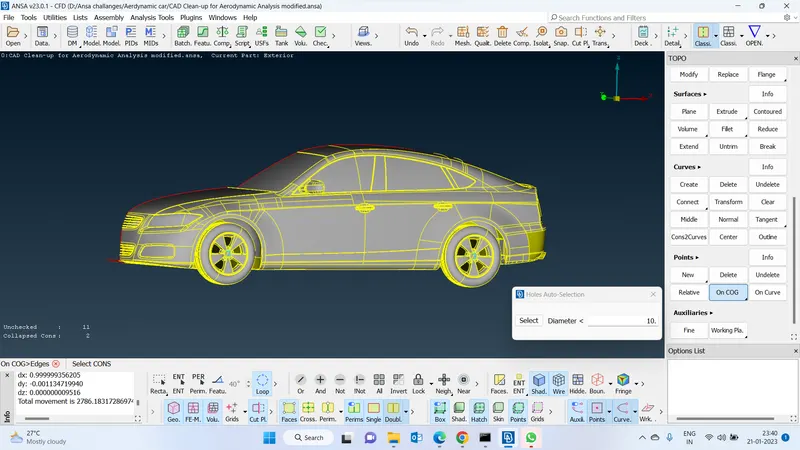
use the entities option to select the error-free tyre and copy that using the transform copy function and select the translate
and select the direction and select the center of gravity points
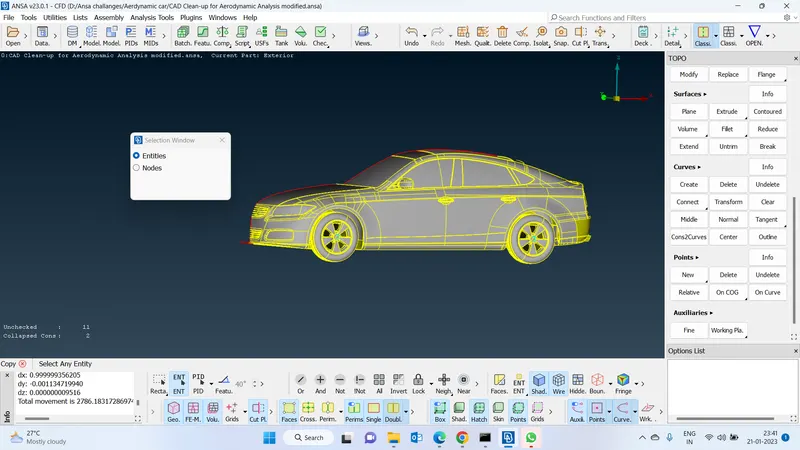
once after providing the direction and select the COG point and middle click will start copying the tyre to rear wheel
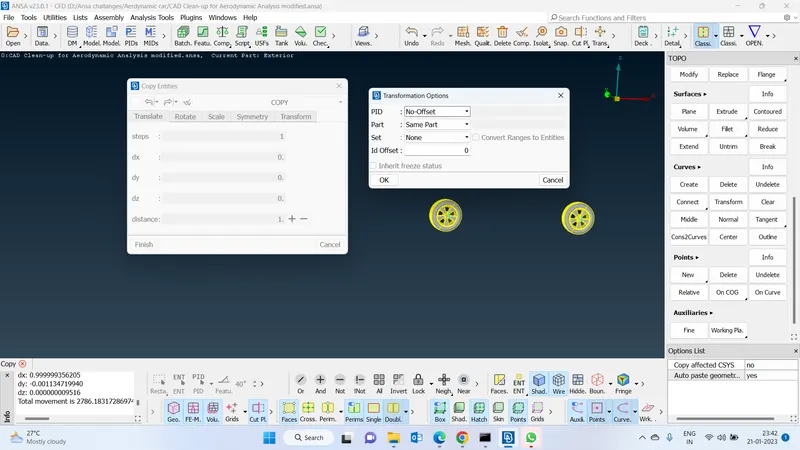
Cleanup the radiator :
Clear the overlapping and also unwanted faces means that the fluid is not going to interact.
use the face delete function to delete faces and use project coons face delete option to delete overlapping and also the unwanted faces
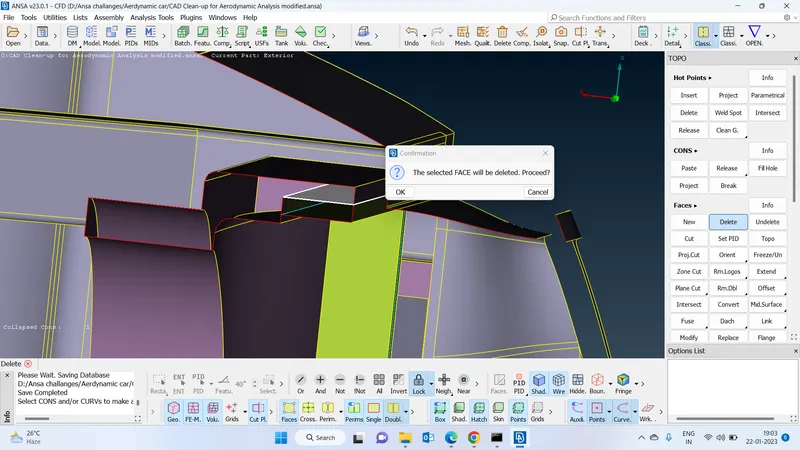
delete unwanted parts on the radiator :
Deleted the unwanted parts in the radiator to reduce the no of cell counts at the time of meshing which will help us to reduce the time taken to converge the solution
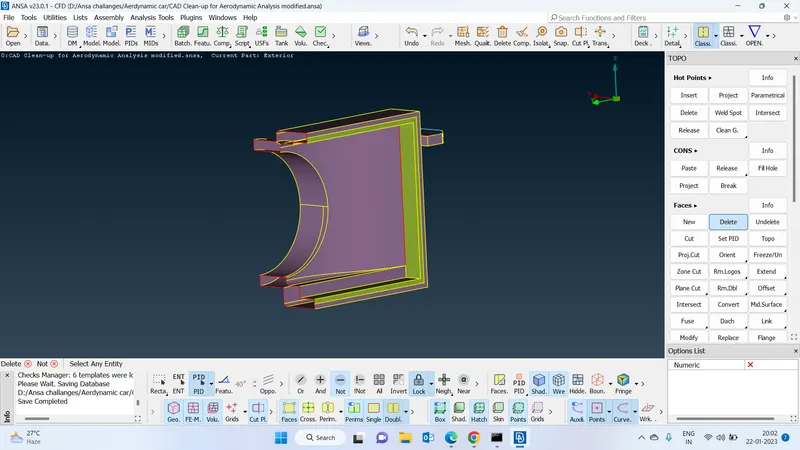
Cleared all the intersections at the radiator :
the below picture shows that there are no errors in the radiators. cleared all the errors and made the radiator error free
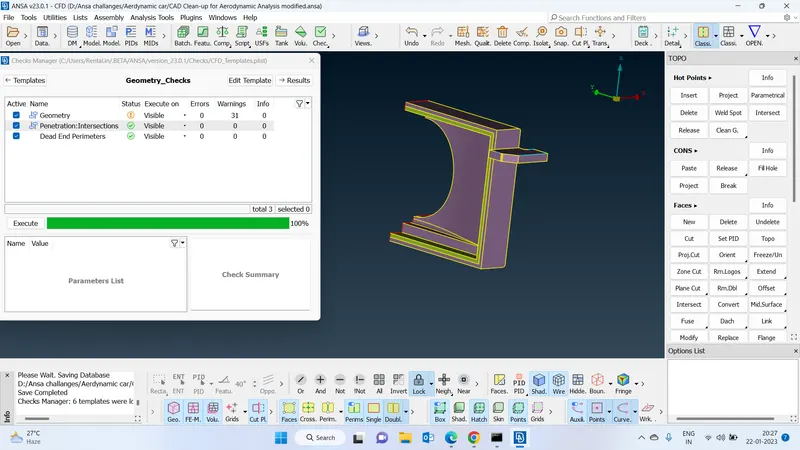
cleared all the intersection errors at the shroud part :
-Cleared all the intersection errors
-cleared all or delete all the unnecessary parts
-Create a new surface where its required.
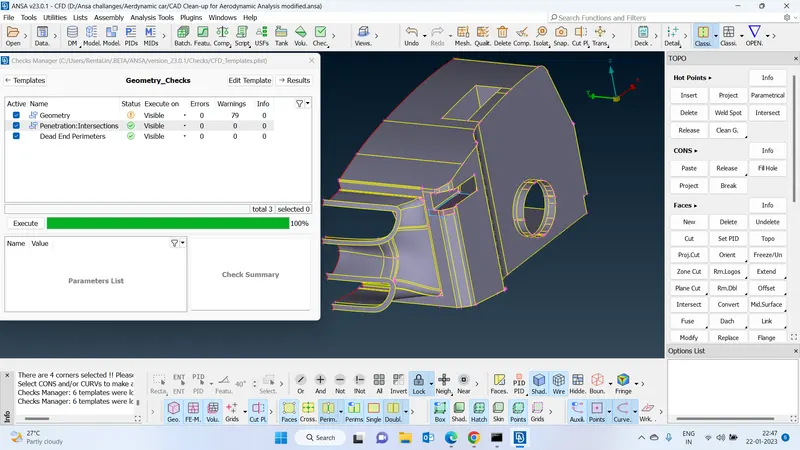
Error checking at the last stage of the symmetrical body cleanup :
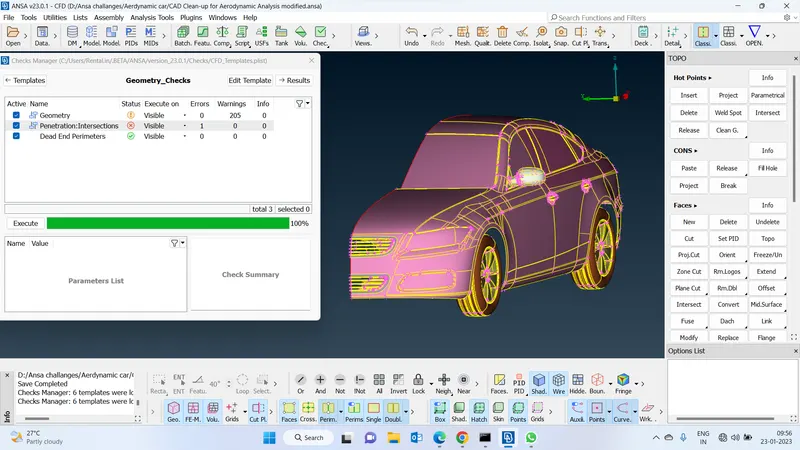
The intersection at tires:
By increasing the resolution and deleting the sharp edges and creating a new surface we can get out from the intersection at tyres
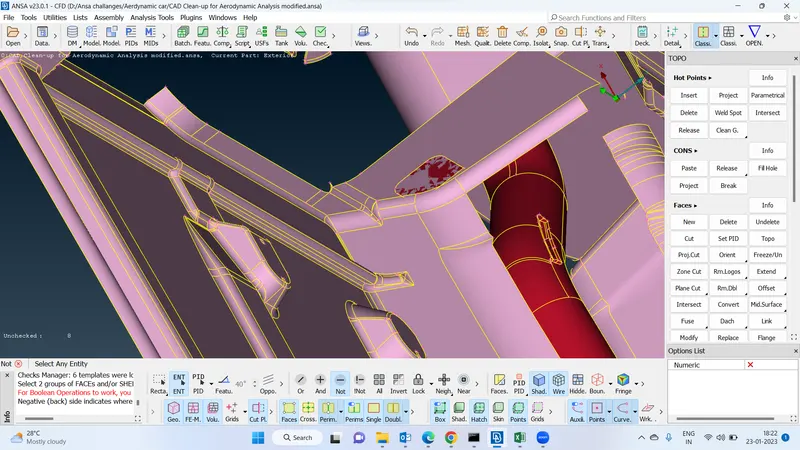
Delete the exhaust port closed surface :
Delete the overlapping face at coupling :
deleted the overlapping face at the coupling and make it error free
projecting the coons with the surface can remove the intersection error
After Deleting the overlapping face at coupling :
After deleting the overlapping face at the coupling we can see there is no any type of error over there
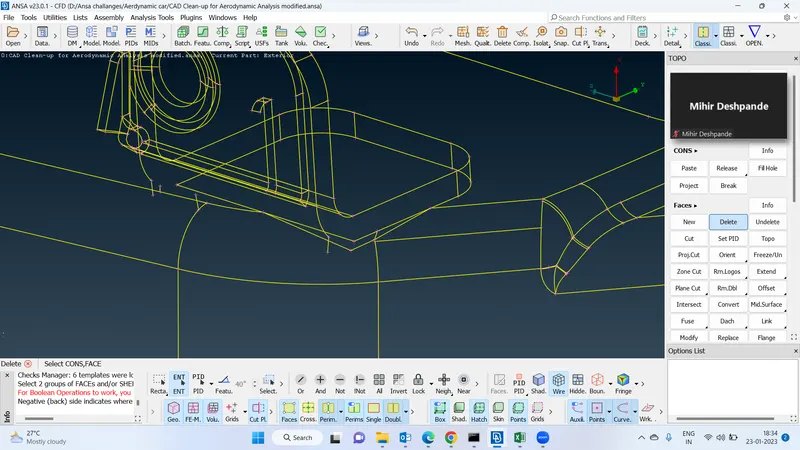
Duct cleanup :
Same we will have do delete the unwanted faces at the duct side and also project coons option used to remove the intersection error
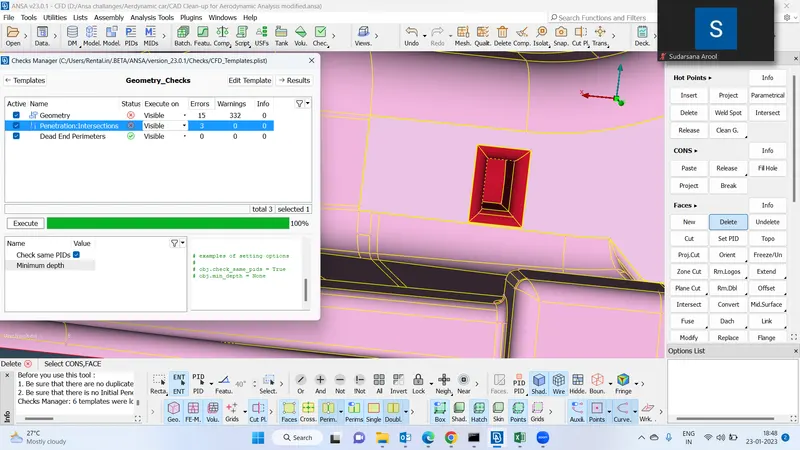
Cleared all the intersection errors on the transmission box :
Remove the unwanted faces and create new faces on the transmission box.
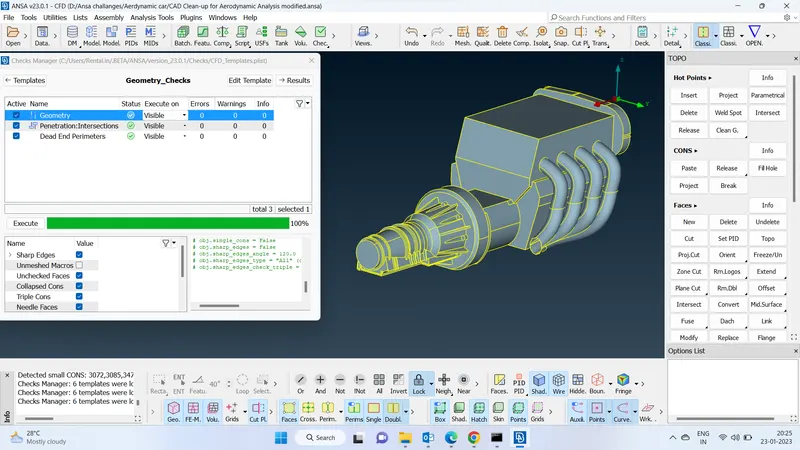
Create another half of the body :
-We have cleard all the geometrical errors earlier for one half and mirror that geometry create another half of the body
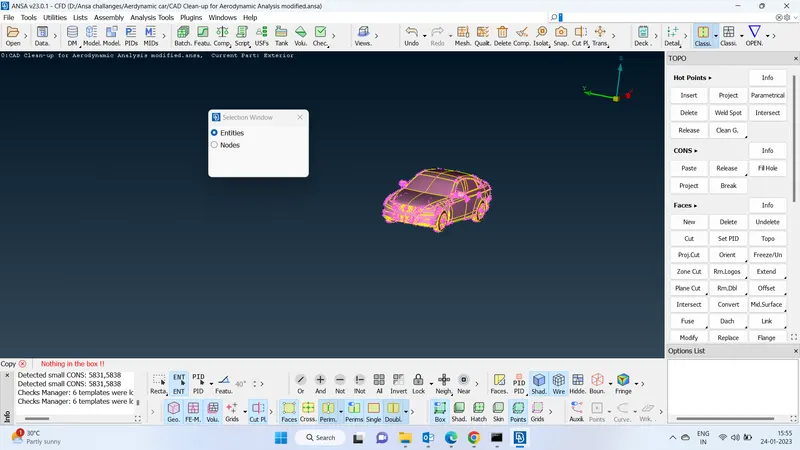
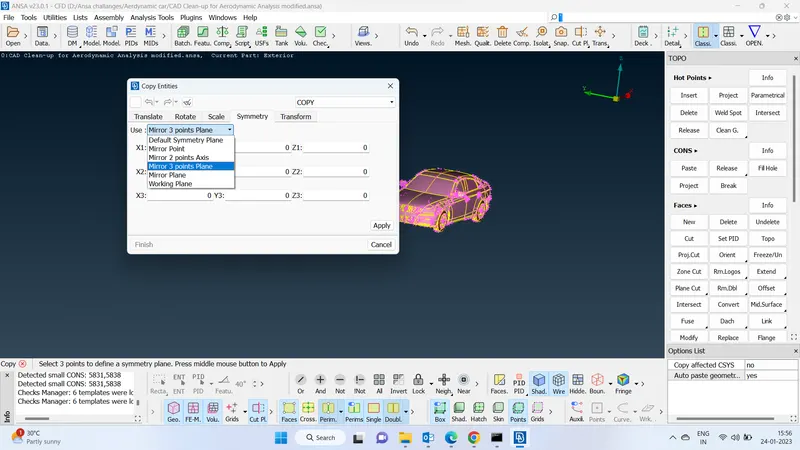
Use 3 points curve:
utilities transform > symmetry > mirror 3 point plane apply will give the mirror face of the body
Clean radiator overlapping :
Now its time clean the radiator part once after cleaning the radiator part we will have to merge this part into the car
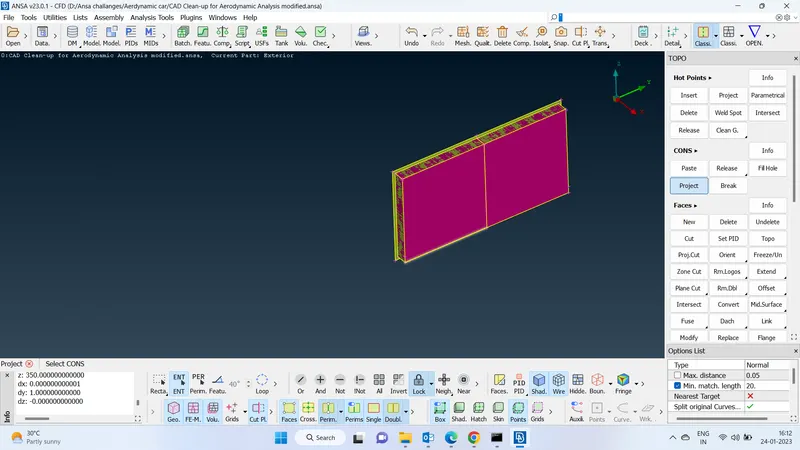
Once after completed the geometry cleanup of the car now is time to create a wind tunnel based on the previous research done by the researchers.
Based on the length and breadth and width of the car wind tunnel size has to be finalized to get an accurate result.
the length of the car is 4600 so we will have to create a wind tunnel face 3*Length to create a wind tunnel front face.
The height of the car is 2000 and we will have to create a face on the top 4*Height.
The width of the car is 2000 so we will have to create side faces of the wind tunnel with a distance of 3000 form the middle of the car
Wind Tunnel Creation :
from the front face of the car, we will have to create a relative point with a distance of 3*l
by taking that reference point we will have to create a face at the bottom to create relative points on both sides from the middle this will help to create all faces of the wind tunnel wind tunnel.
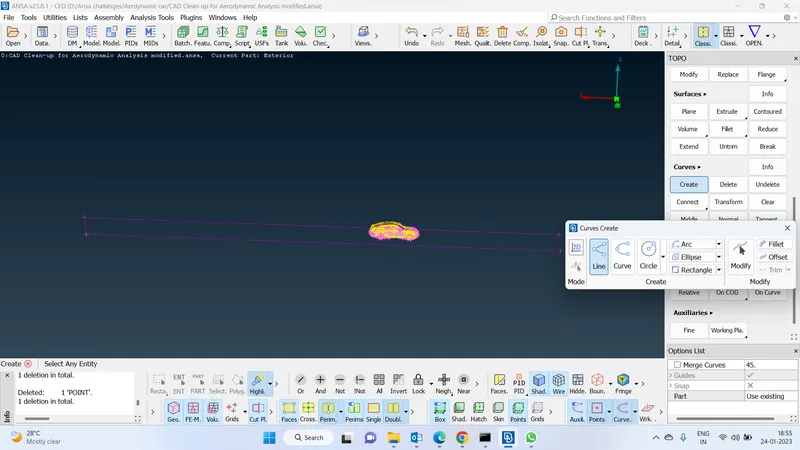
by using these relative points we will have creat a relative point on the rear side of the car and connet all this with the curves
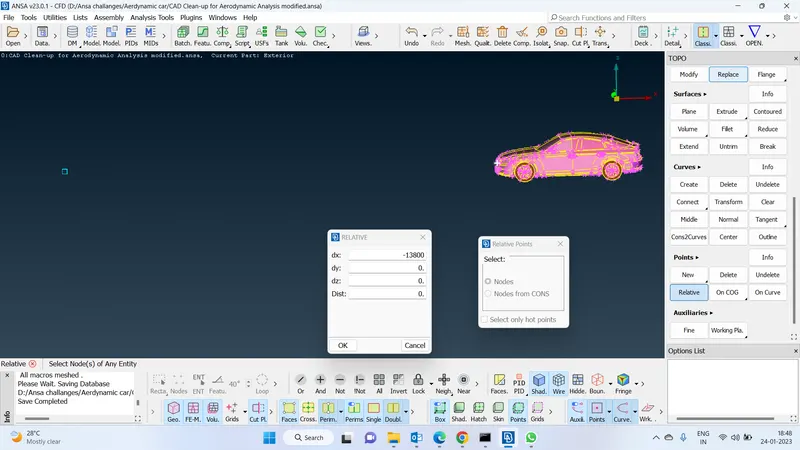
Use curves or lines for the bottom surface :
Offset the bottom face and create the top face of the wind tunnel :
create a new face by using the curve we have created and delete the reference curves. and do the offset and provide the distance by selecting the direction. it will create a top face of the wind tunnel
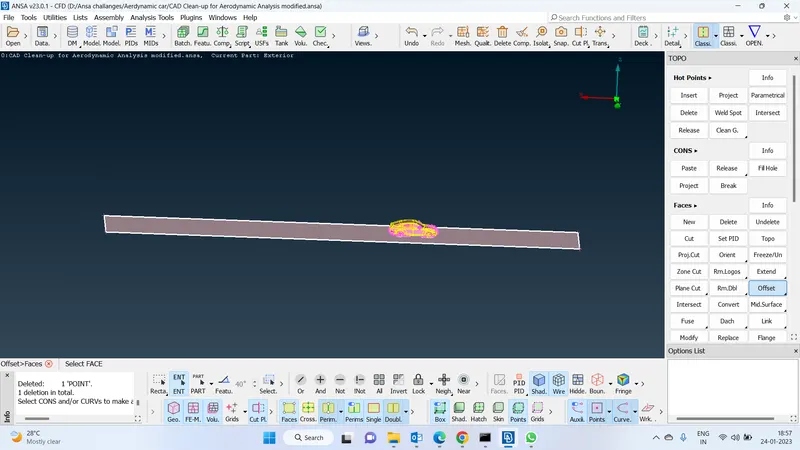
Creating faces and names of the wind tunnel :
We will have to create a pid of the wind tunnel base don the faces and its location to identify easily while assigning the boundary conditions.
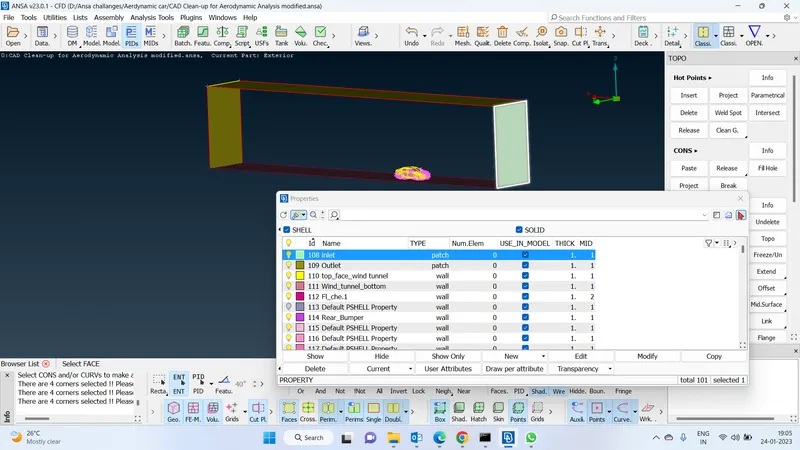
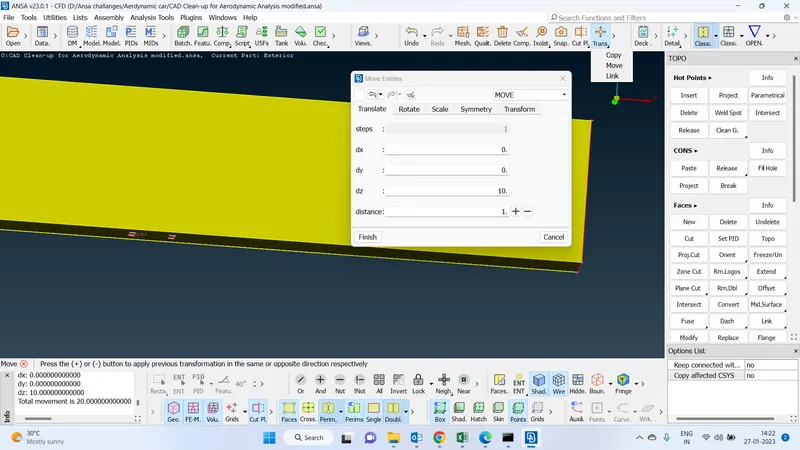
Wind tunnel move :
we will have to define compression between the tires and the bottom face of the wind tunnel by projecting the tires with the bottom face of the wind tunnel by moving 10 mm height of the wind tunnel
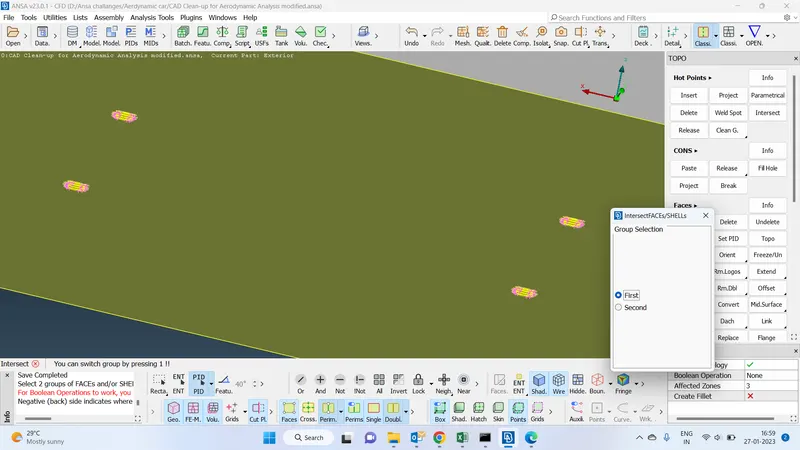
Intersecting the bottom surface of the wind tunnel and the tyres :
Intersecting the bottom face of the wind tunnel with all thtyres and remove the intersections
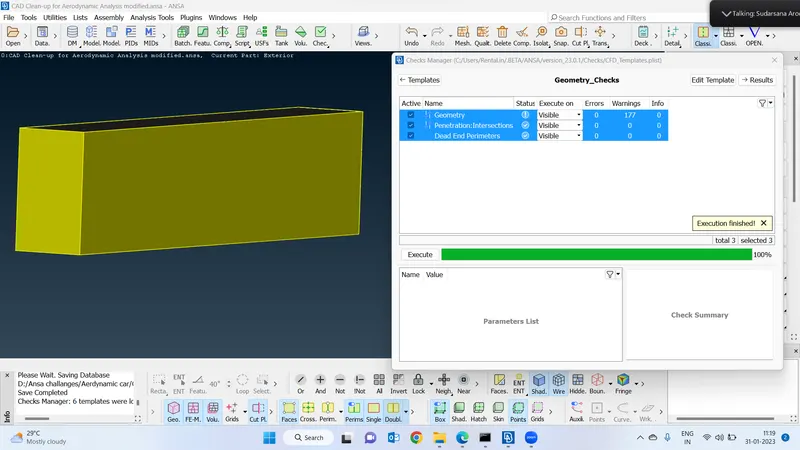
this is how the final checks of the geometry errors.
by doing all the geometry cleanup up the process we were able to remove all the errors
Google drive link to the geometry :https://drive.google.com/drive/folders/14SPXxNGGhR8XoT8LLkotdWKfjMXYPA9u?usp=share_link