Advanced Sheet Metal Design Using NX Cad Challenge_2_Box Assembly
NX_Box_Aseembly_Abhishek-Sonwale
- Objective
In this assembly, we will learn complicated shapes used in metal sheet like Hinges, Bead, Closed corner, Hem Flange and other commands. This Box assembly is complicated, but useful for understanding conspects is used in industry.
- INTRODUCTION:
Design of sheet metal, we consider complicated concept to order assembly of box (made by metal sheet).in the Box assembly there are some advanced command to create box assembly like Mirror Feature, Normal Cutout, Bead, Adding a Datum Plane etc.
- Design Methodology:
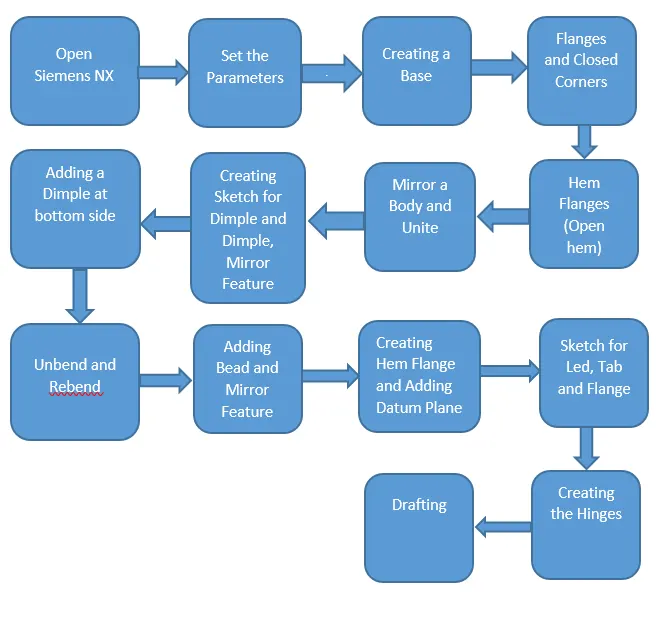
- Description:
- Open Siemens NX:
Firstly, to create model in NX. Open Siemens NX and Select Model, Sheet metal in millimeter.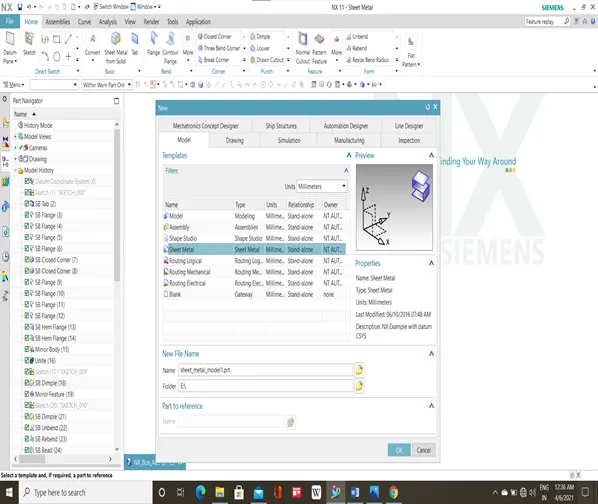
In name change into NX_BOX_ASSEMBLY_ABHISHEK-SONAWALE and click on OK button.
Note: you change the path of File by Folder.
- Set the Parameters:
In NX sheet metal, to set the default design parameter value, Menu-Preferences-Sheet metal option is used.
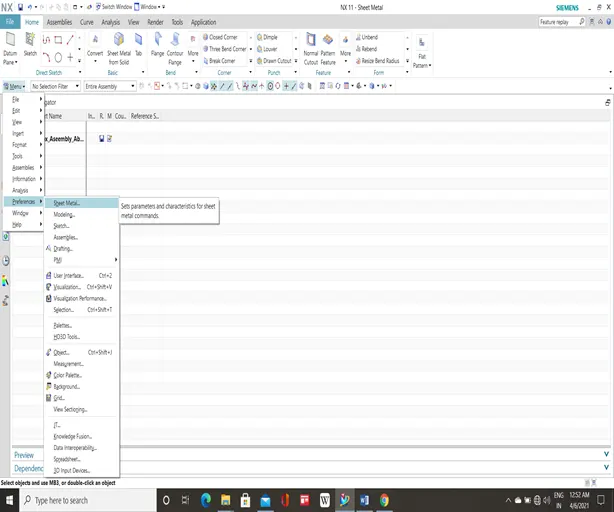
In the sheet metal preferences
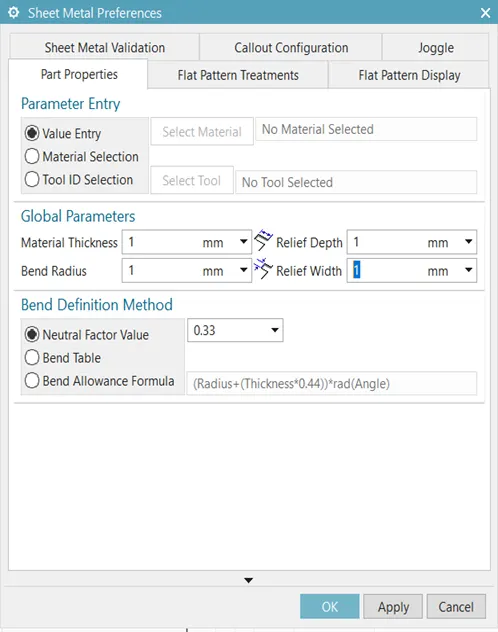 all the global parameters are set to 1mm, while the neutral factor (K-factor) value is kept at 0.33 and click on OK button
- Create a Base:
In creating a base, firstly select Tab command and click on sketch mode in dialog box. After selecting sketch mode, it asks for selecting Datum Plane. Then select XY plane. Draw a rectangular sketch of dimensions 200*150 is created, in the XY plane and origin at the mid of the left edge.
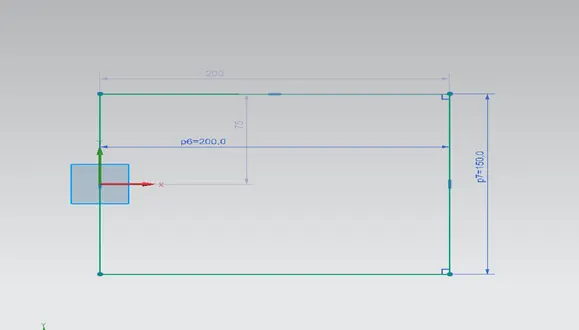
Exit the sketch mode then create Tab of default 1mm thickness
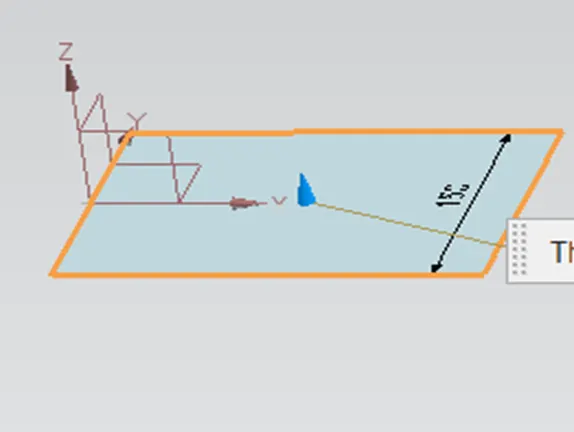
- Flanges and Closed Corners:
- Adding Flanges:
Normal flanges of length 200mm is created with the Flange command and bend radius of 10mm.
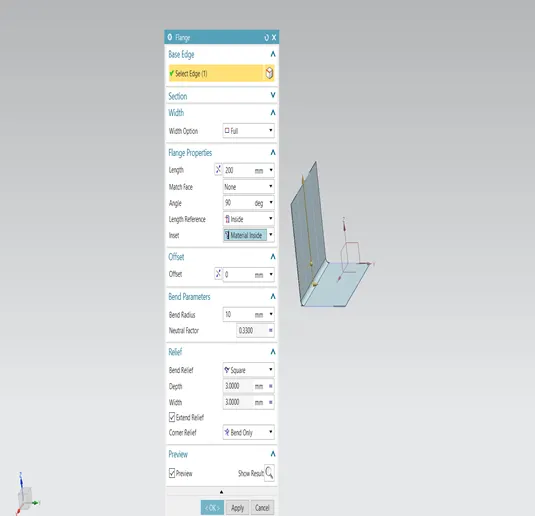
Redo the procedures for another side of Tab.
Again adding Flanges of 70mm with bend radius 10mm
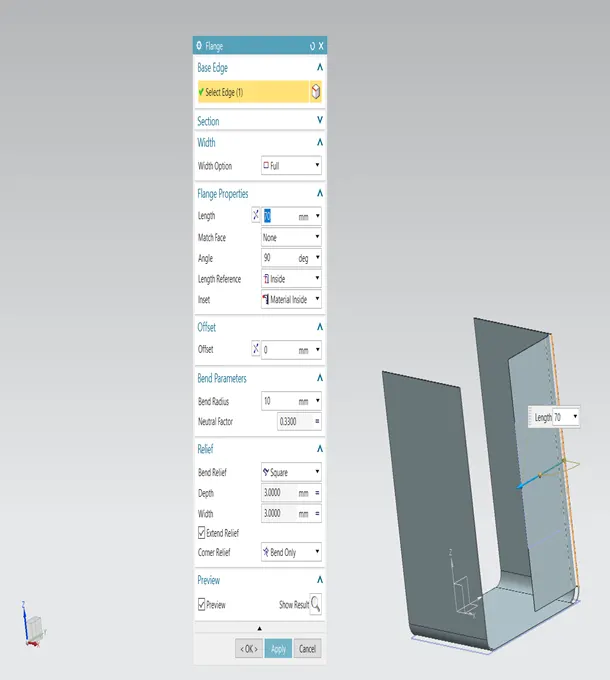
Redo the procedure for another Flange
- Closed Corner:
In ribbon click on the closed corner command and select the “select Adjacent bend”. Click on the bend of two nearly for closed corner. Then in the
Treatment and also Overlap dialog box, select the closed option. Click on the OK button
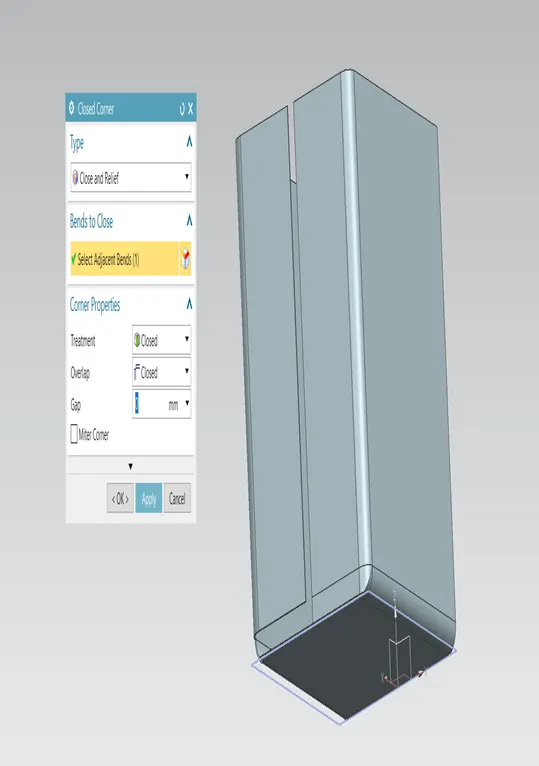
Redo the Procedure for another bend in
- Hem Flanges (Open hem):
5.1 Adding a normal flange:
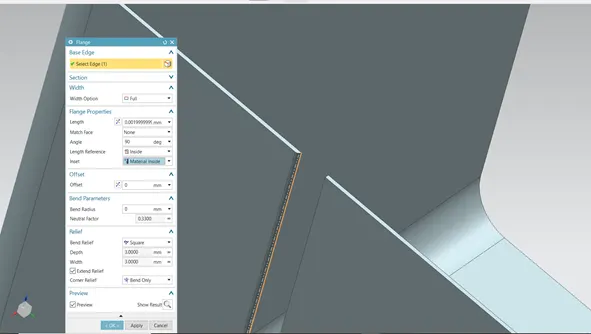
Redo the procedure for Right side of Flange (but this time opposite side)
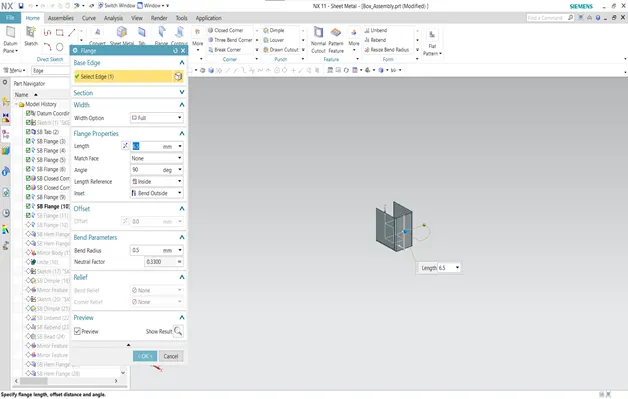
Again Add Flange of 6.5mm, but this time Bend Radius will be 0.5mm. Redo the procedure another side.
After that select the Hem Flange and select the type of Hem is Open. In Hem Dialog Box Bend Radius will be 0.5mm and Flange will be 5mm.
Redo procedure for another side.
6. Mirror a Body and Unite:
Select the Mirror command in More option and select the whole body. After selecting whole body select the YZ plane and click on OK button.
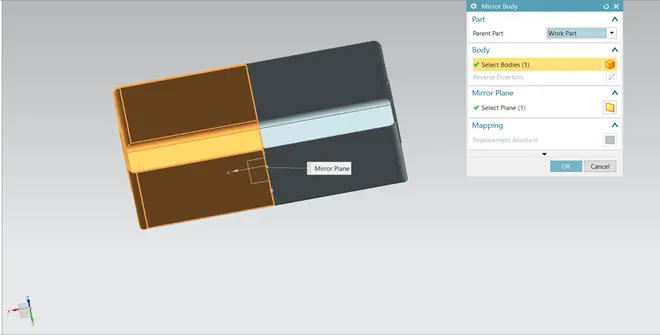
Select the Unite command in More option and select Both body. Click on OK button and all body will be Unite.
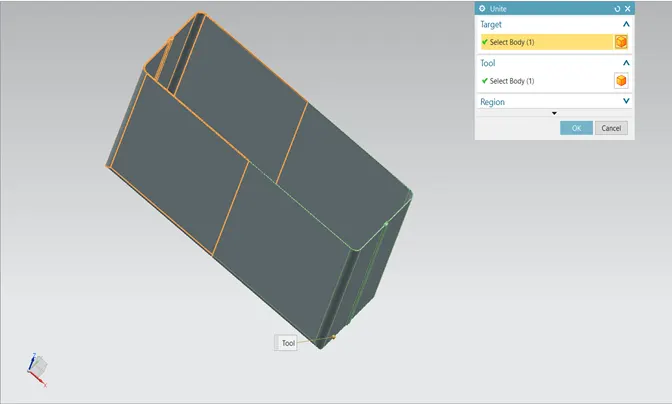
7. Creating Sketch for Dimple and Dimple, Mirror Feature:
Select the Dimple command in Ribbon and select the Vertical face of body is parallel to XZ plane. Draw the sketch and Exit the Sketch mode.
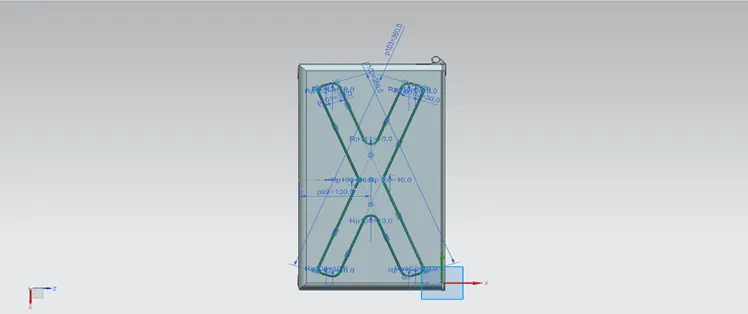
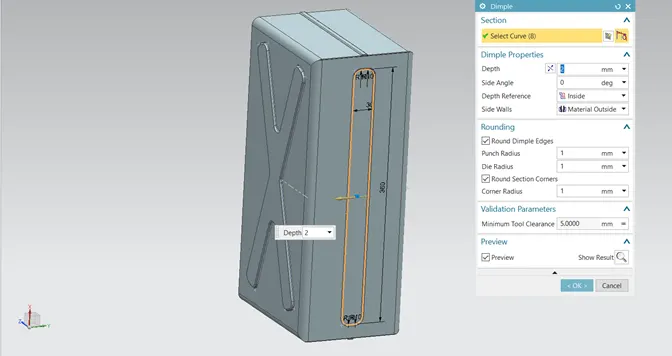
In Dimple Dialog box, Depth will be 2mm and Set the angle of Side angle in 0degrees. Set the Depth Reference in inside, Side walls in Material Outside and in Rounding all value in 1mm.
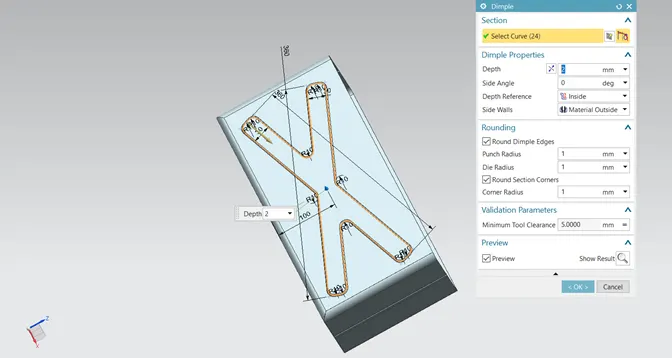
Click on OK button. After Adding the Dimple, select the Mirror Feature command and select the Dimple. (Note: In Mirror command, Sketch must be selected.)
In Mirror Feature, select the XZ plane and click on OK button.
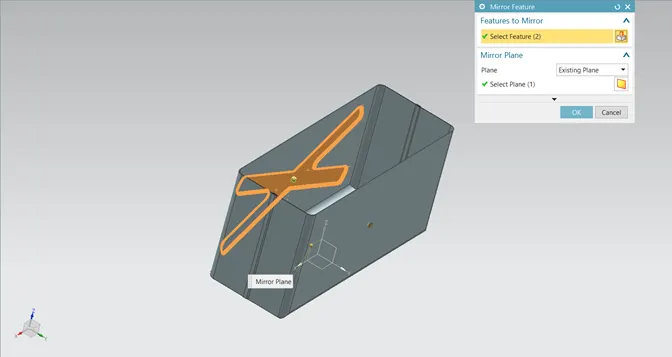
8. Adding a Dimple at bottom side:
Again select the Dimple command and select the Sketch option. Draw sketch on face of Bottom side of Body and Exit the sketch mode.
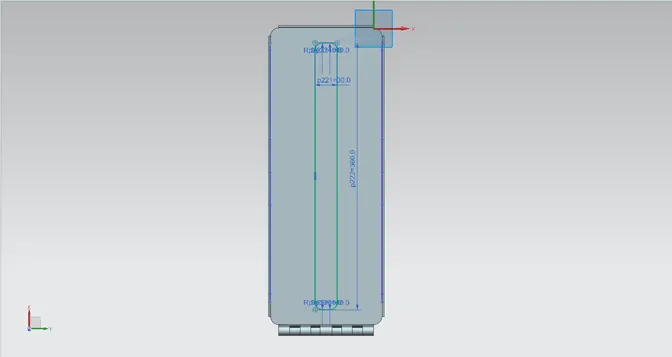
In Dimple Dialog box all value are same in previous Dimple. So, we no need the change the value, Just click on OK button.
9. Unbend and Rebend:
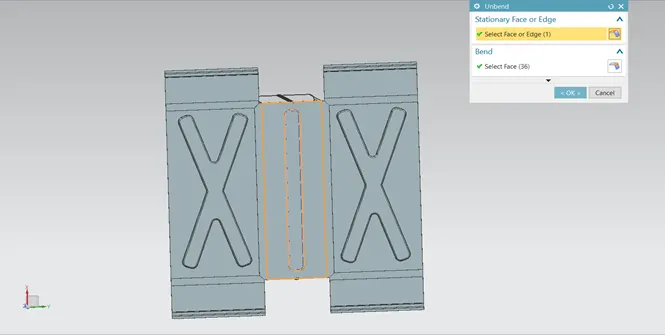
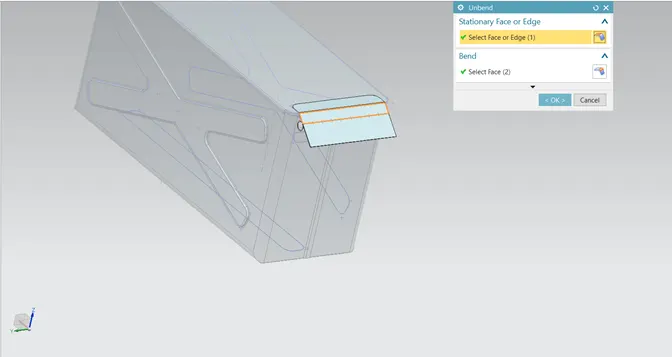
After that select the Unbend command. In the Unbend Dialog box select the Face and Bend. Click on ok Button.
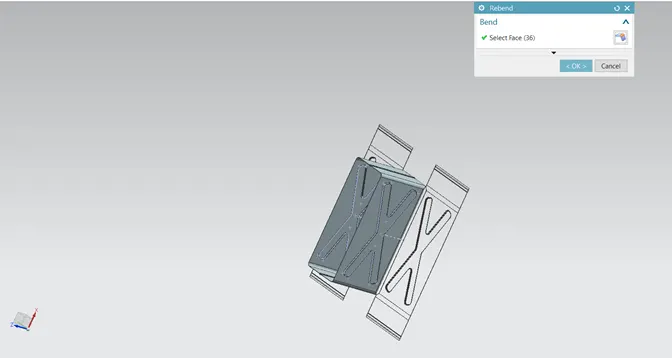
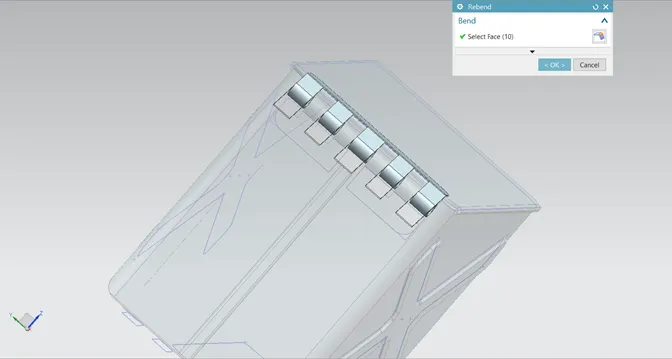
Use the Rebend command for Previous shape of metal sheet.
10. Adding Bead and Mirror Feature:
Bead are created on bottom side. For this circle of diameter 5mm are sketched.
The circle is then selected in the Bead feature and Depth of 1mm along with the Radius of 3mm is specified, to create the Bead.
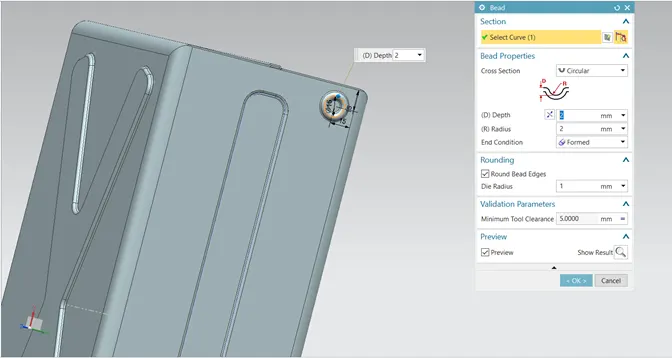
This bead is then mirrored using the Mirror Feature option to create the rest of the beads
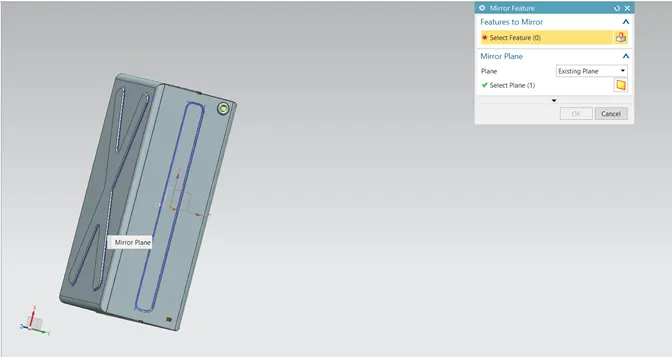
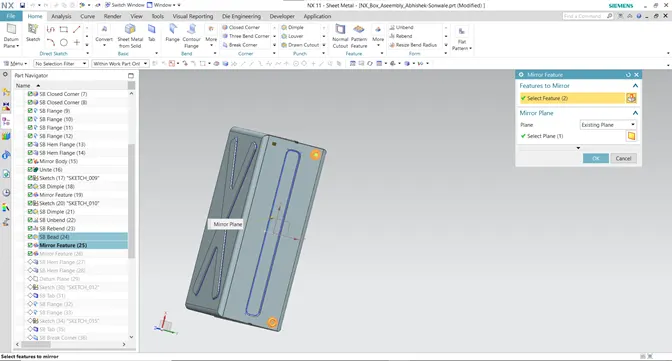
11. Creating Hem Flange and Adding Datum Plane:
Closed Hem flanges are created with a flange length of 2mm on the upper edges with the inset as Bead Outside.
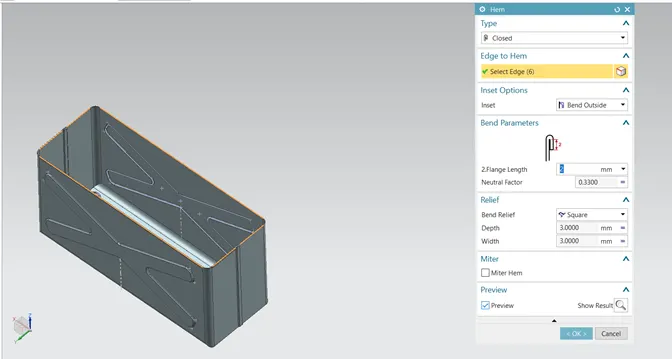
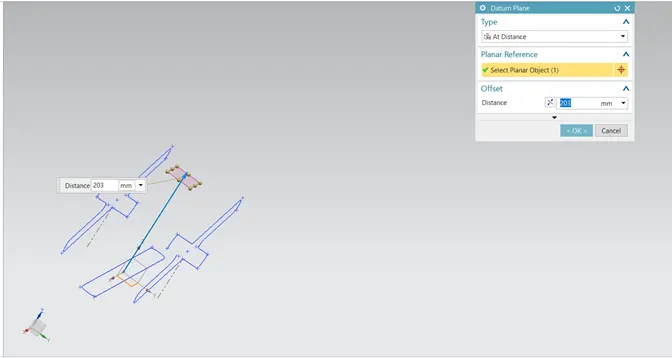
For designing the Lid, we need the plane. Firstly, Create Datum plane at the 203mm w.r.t XY plane.
12. Sketch for Led, Tab and Flange:
Create sketch on Added Datum plane and exit the sketch mode.
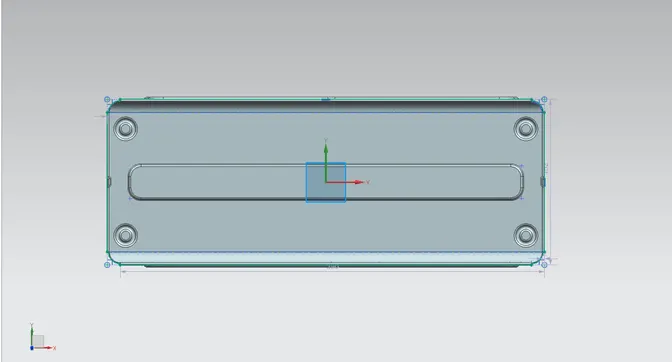
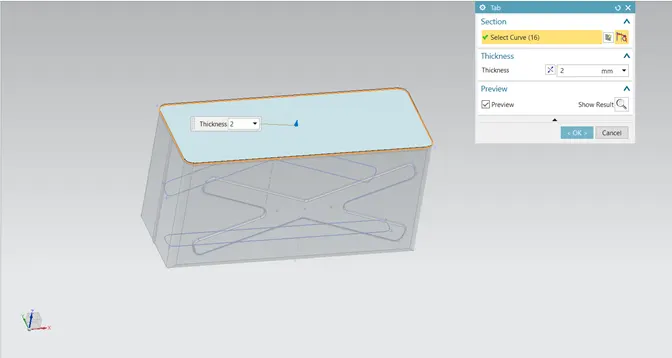
Select the Tab command and select the Sketch (As drawn at plane). In Tab Dialog box, Thickness will be 2mm and click on OK button.
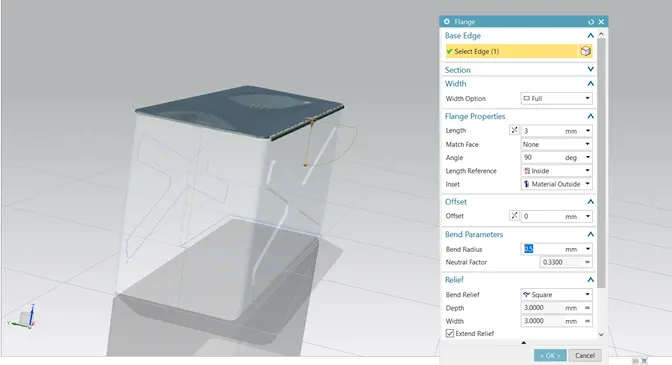
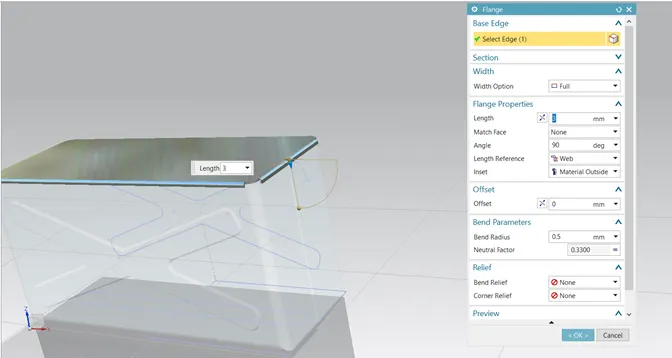
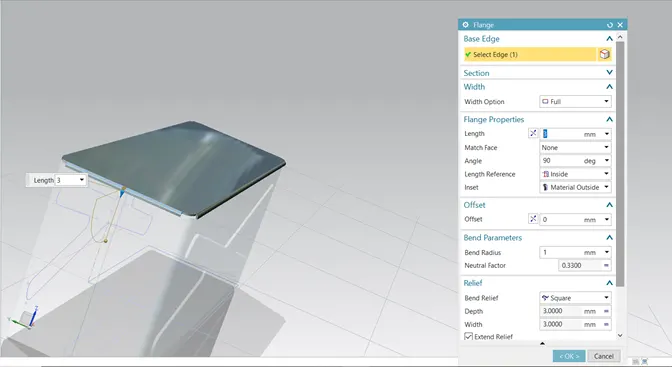
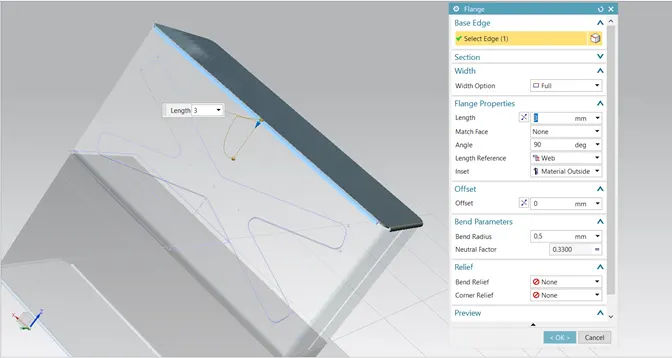
Small Flanges of length of 3mm and a bend radius of 0.5mm are provided on the all the sides of the lid.
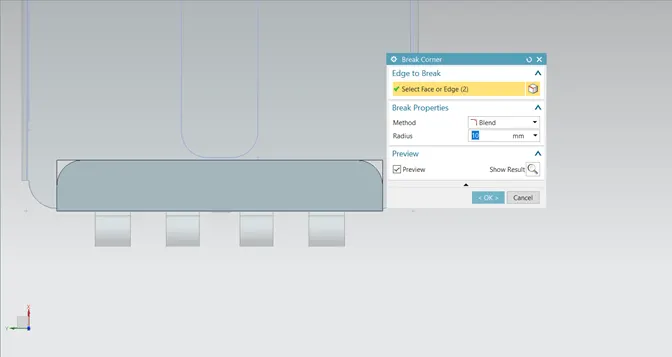
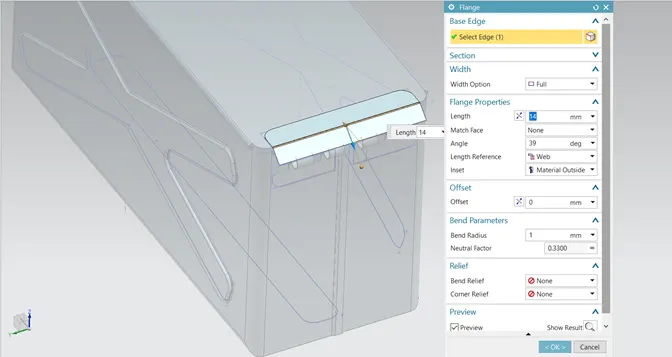
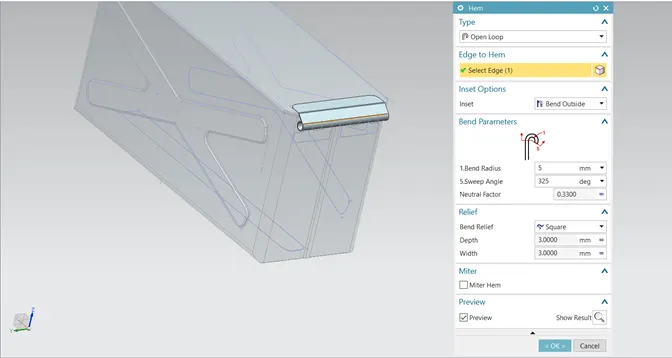
13.Creating the Hinges:
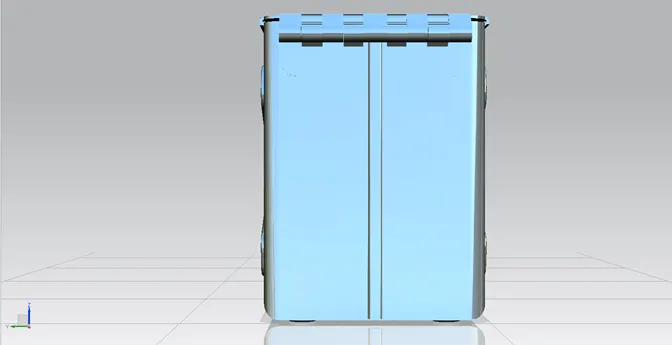
To create the Hinges, Tab Flange and Hem Feature are used. The Hem type chosen here is Open with an angle of 325degrees.
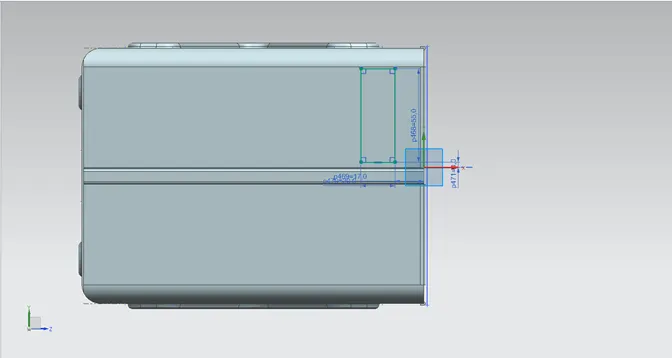
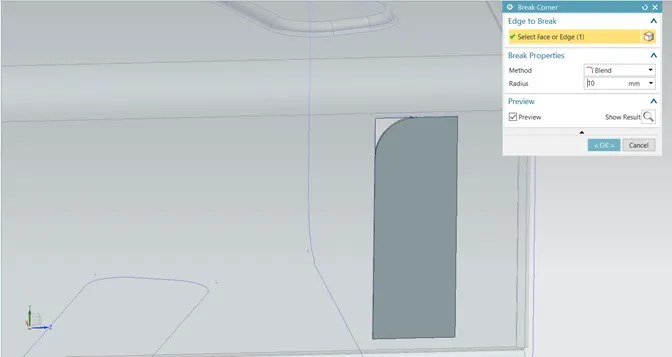
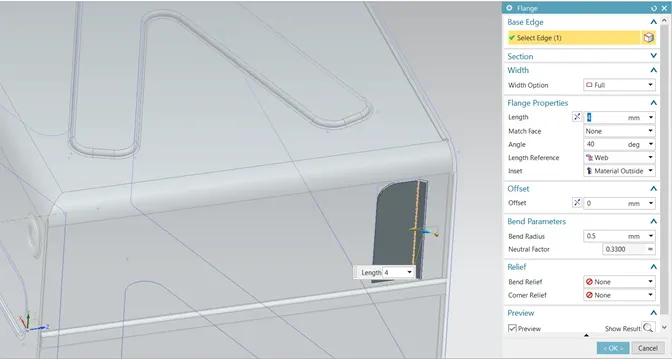
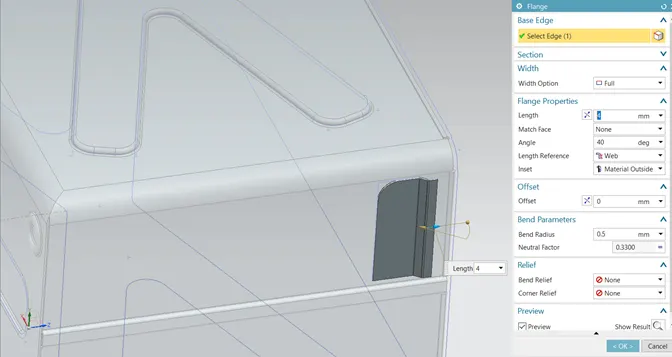
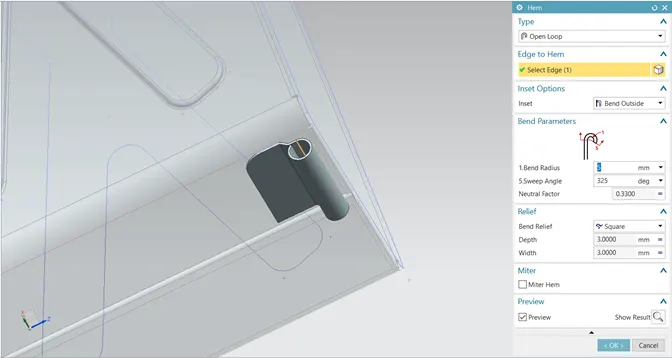
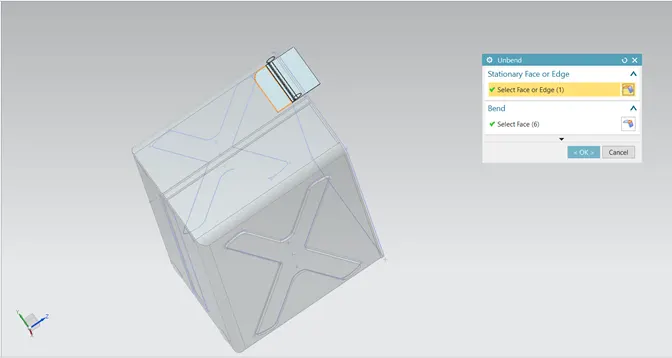
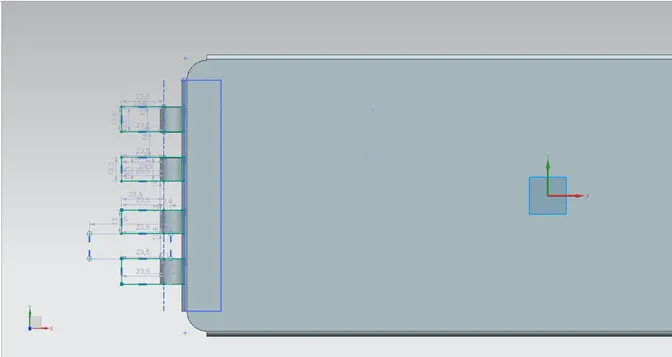
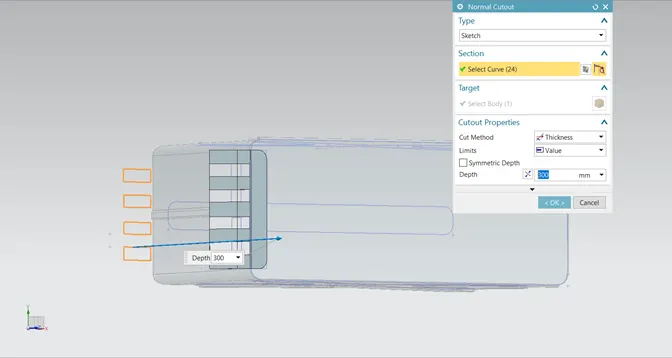
The formed shape is then flattened using the unbend command to create cuts using the Normal Cutout option. It is then again re-bent using the Rebend command
The hinge body is then mirrored w.r.t to the XY plane, using the Mirror Body option.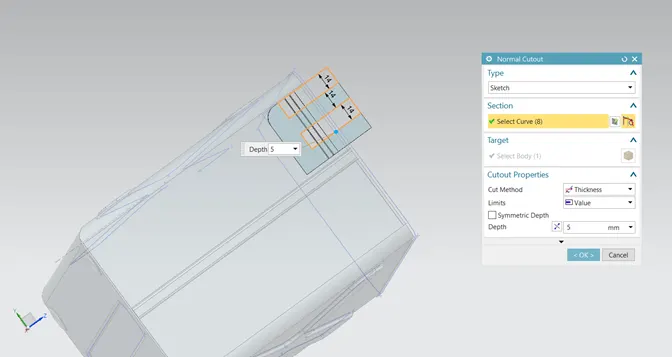
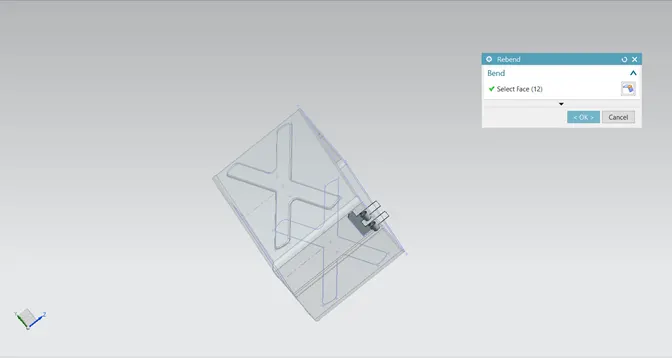
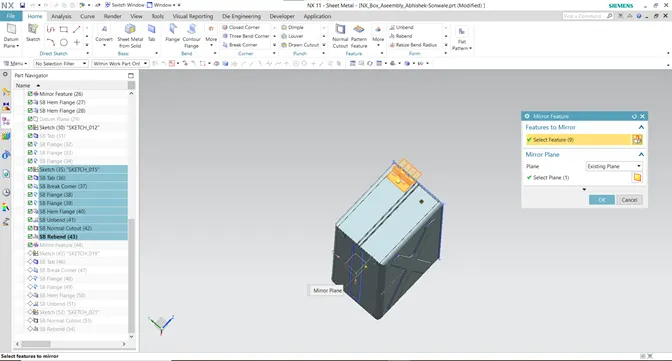
Similar hinges are created on the Lid as well.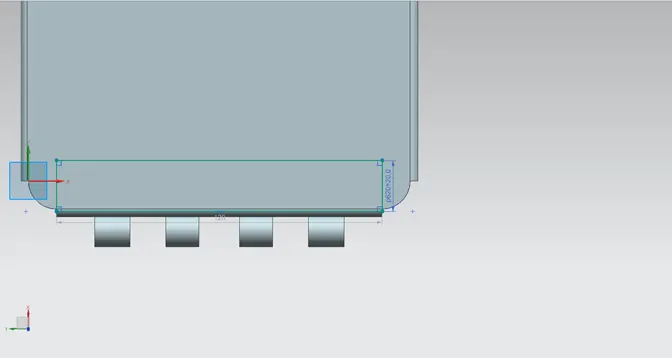
This completes the entire procedure of Modeling Design the Box Assembly.
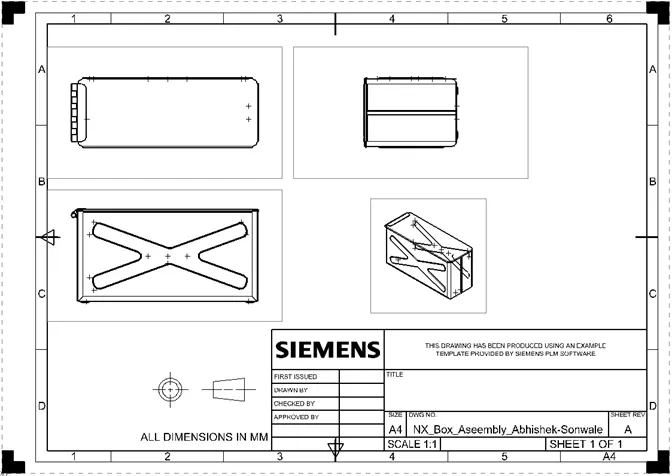
14. Drafting:
For Drafting select the Drafting Option in Application.
After the creating sheet select the View Creation Wizard. In the View Creation Wizard, click on the orientation and select the View.
Set the scale in the option.
We will get drawing after the clicking OK.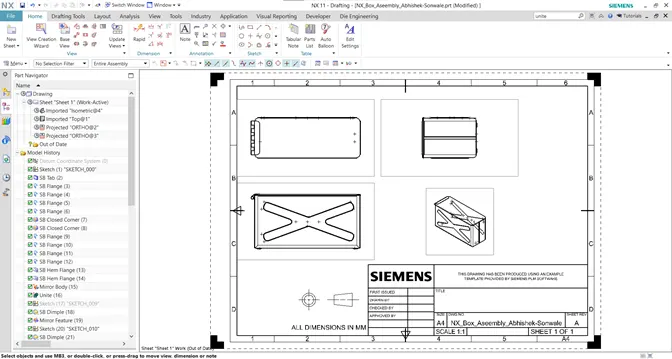
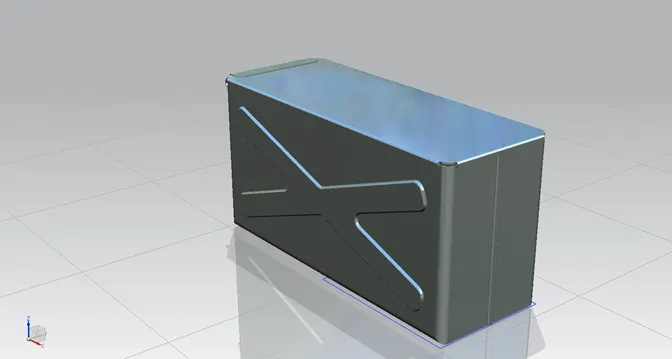
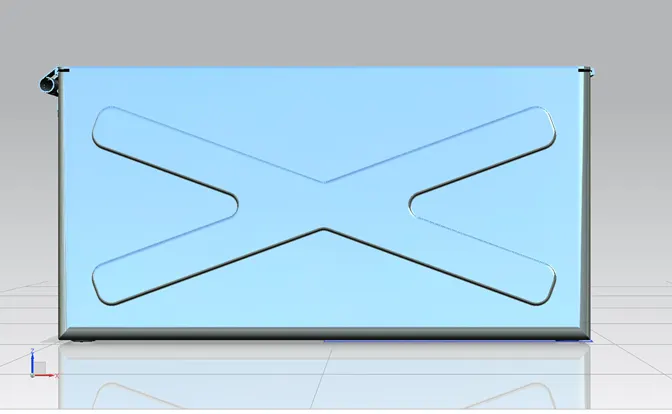
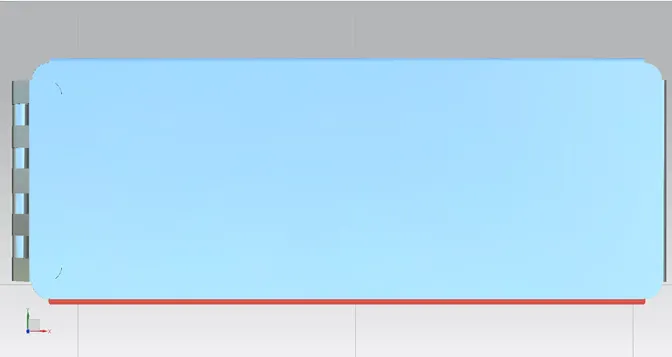
- View:
- Drawing sheet:
- Conclusion:
All the various commands. We get the Final Model and the Drawing Sheet.