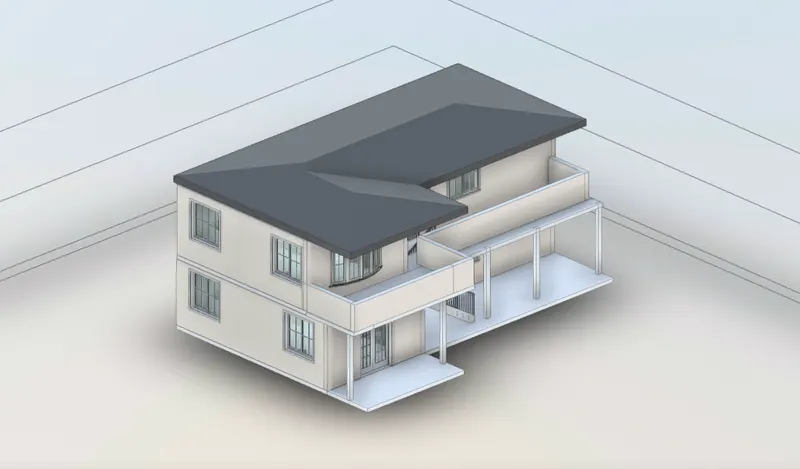
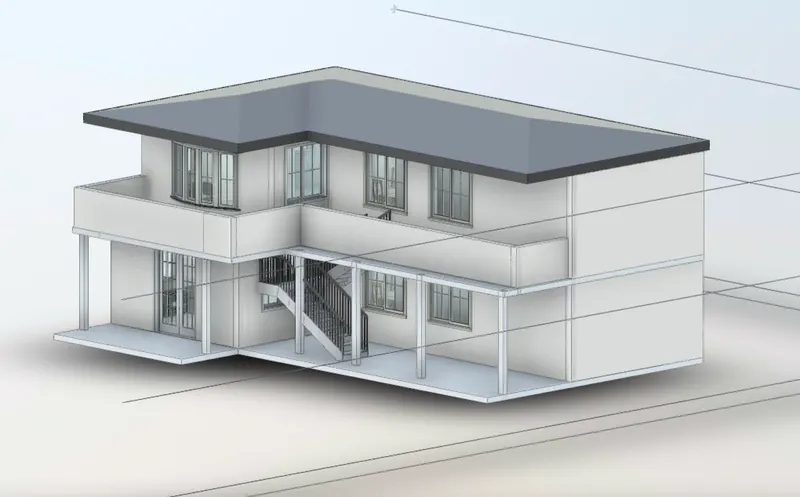
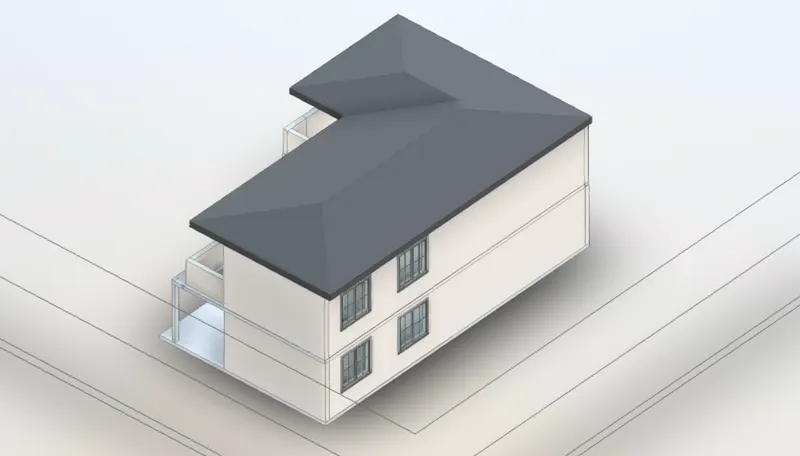
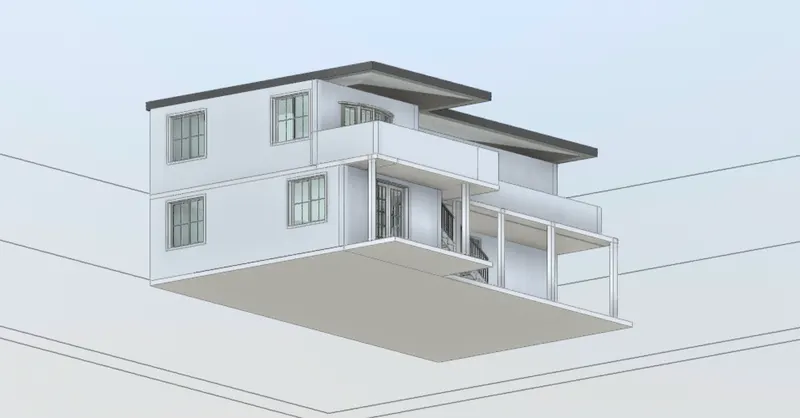
3D Creation of Celing, Roof, Architectural plan, Structural plan, Sectional view, Elevation view and Camera specific view for a house plan using REVIT
QUESTION-1
ANSWER:
AIM: Based on the project saved from Week 3, proceed from the First Floor Level. Model a Ceiling from the architecture tab above the walls at the first-floor level
INTRODUCTION: In this Question, we have to create the ceiling from the Architectural Tab. TO create the ceiling we have to use Architectura tab.
PROCEDURE: TO COMPLETE THE ANSWER TO THE QUESTION WE FOLLOW THE FOLLOWING STEP:
REVIT PROJECT FILE LINK:
STEP-1
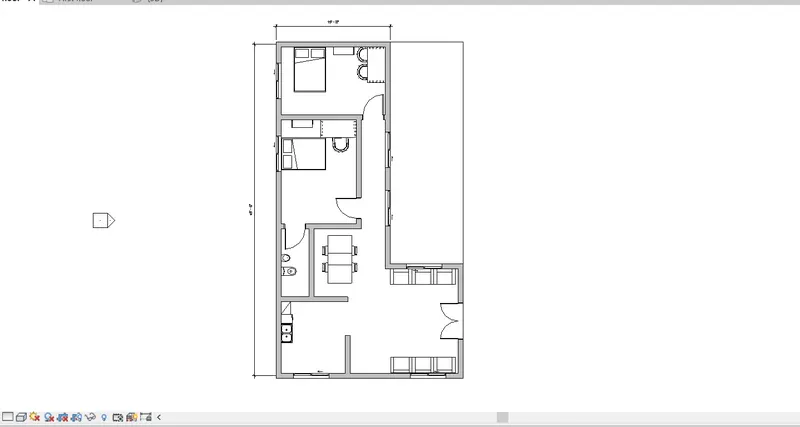
- To answer the question we will take the drawing of challenge 3rd.
- This is the Architectural drawing of challenge no. 3rd
- Now we are trying to make the ceiling of the house.
STEP-2
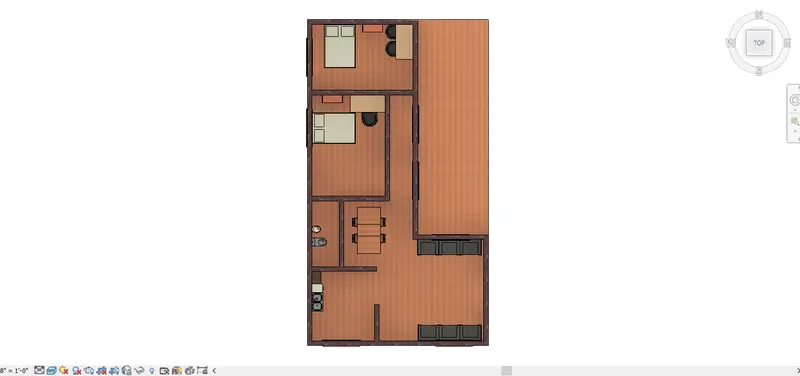
- Go to the first floor from the property browser.
- now go to the architectural tab
- and click on the Ceiling option.
STEP-3
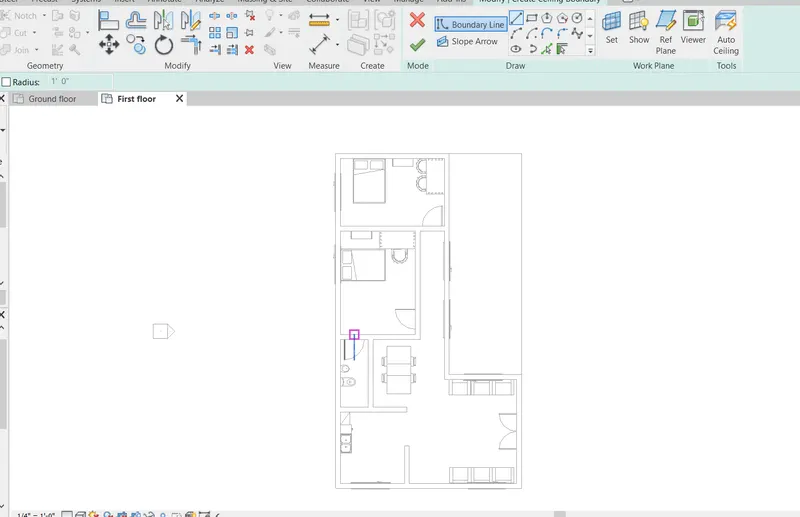
- Now we can see the other options automatic ceiling and sketch ceiling.
- Click on the Sketch ceiling.
- and we can see the different options like (line, rectangles, polyline, picking line, etc.)
- Take line command and start sketching the ceiling path.
- draw the ceiling path with the help of a line tool and conned the
- go to apply button.
STEP-4
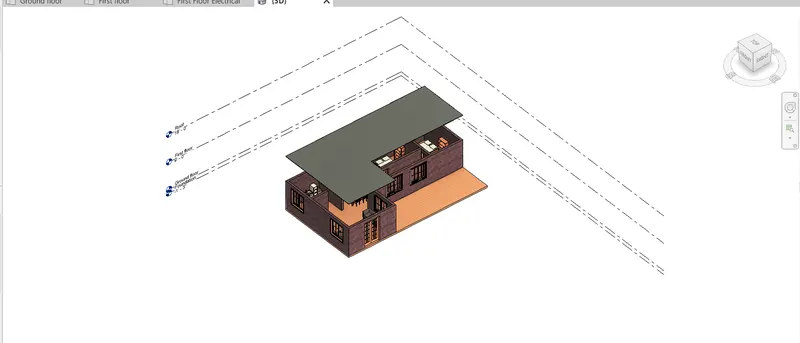
- Now go to 3d view to check the ceiling of the building
- After this we can set the ceiling height from the ground floor.
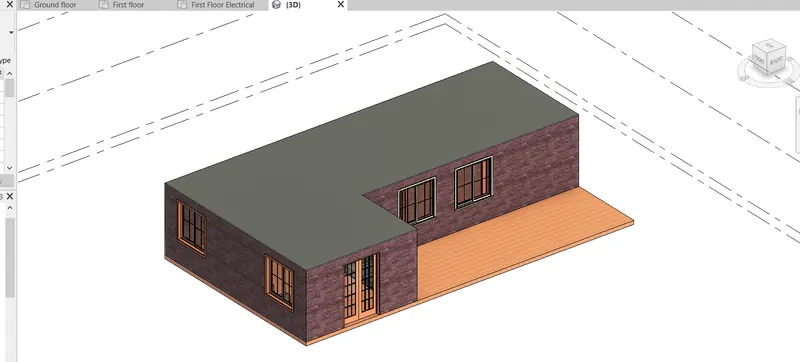
RESULT: I HAVE CREATED THE CEILING IN THIS QUESTION WITH THE HELP OF REVIT SOFTWARE. AFTER GIVING THE ANSWER TO THE QUESTIONS SCREENSHOTS ARE ATTACHED WITH THE RESULTING DRAWING.
QUESTION-2
ANSWER:
AIM: Model a roof above the ceiling by selecting the footprints of the ceiling. Using the adjustment toolbars appearing on-screen adjust the roof slope to 10 degrees
INTRODUCTION: In this Project we Have to created the roof above the celing. after created adjust the roof slope as 10degree.
PROCEDURE: TO COMPLETE THE ANSWER TO THE QUESTION WE FOLLOW THE FOLLOWING STEP:
STEP-1
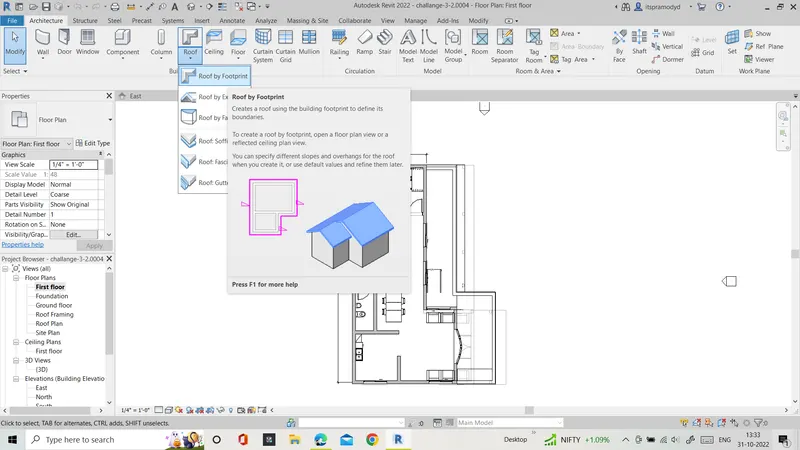
- In this Question we have to draw the roof of the building.
- to Create the roof of the buildinng first of all we have to go to the architectural tab of the revit Software.
- Now Go to the roof by footpring.
STEP-2
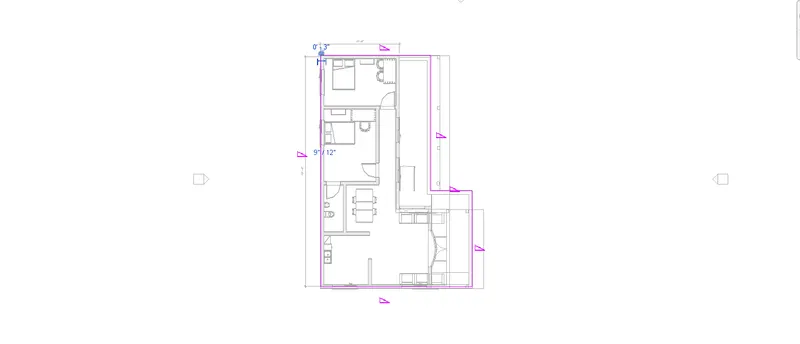
- Now click on the line option and create the roof by line path.
- and connect them
STEP-3
- Go to the 3d view and set the Slop as 10 degree
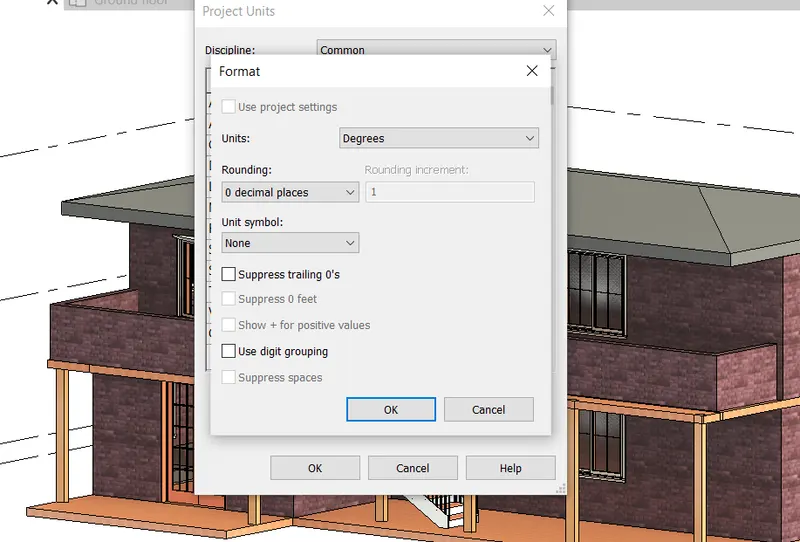
- To set the slop first of all go to the manage tab
- Now go to the unit option and set the slop as a degree.
- Now press ok.
STEP-4
- now selec the roof and Go to the Property Browser and set the slop 10degree
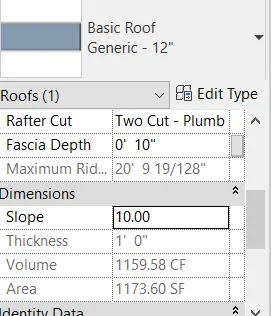
STEP-5
- After puttinng the slop 10 degree we can see the slope is created as 10degree
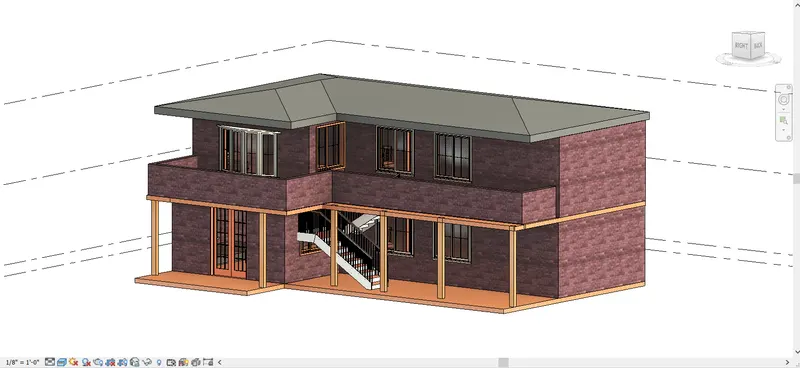
RESULT: I HAVE CREATED THE ROOF IN THIS QUESTION WITH THE HELP OF REVIT SOFTWARE. AFTER GIVING THE ANSWER TO THE QUESTIONS SCREENSHOTS ARE ATTACHED WITH THE RESULTING DRAWING.
QUESTION-3
ANSWER:
AIM: Using the file saved from weeks 2 to 4, create plan views for the ground-floor level and first-floor level including all the walls, floors, and components. Separate them to
architecture and structural plans
a. Architecture plan must have walls, floors, and all the components placed within the building
b. The structure plan must have details of only walls, floors, and columns
REVIT PROJECT FILE LINK:
PROCEDURE: TO COMPLETE THE ANSWER TO THE QUESTION WE FOLLOW THE FOLLOWING STEP:
STEP-1
- Open the Revit Software and open the Project which was already drawn in the previous challenge.
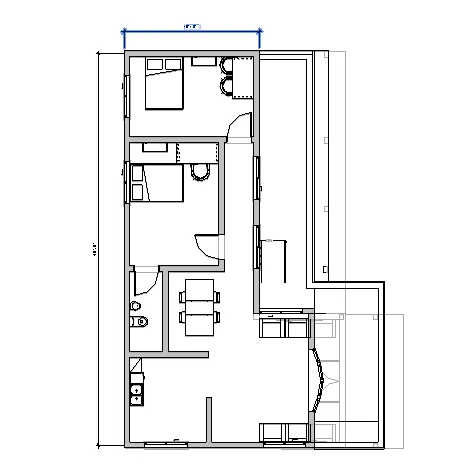
STEP-2
SEPARATE THE PLANS AS A ARCHITECTURAL AND STRUCTURAL:
ARCHITECTURAL PLAN:
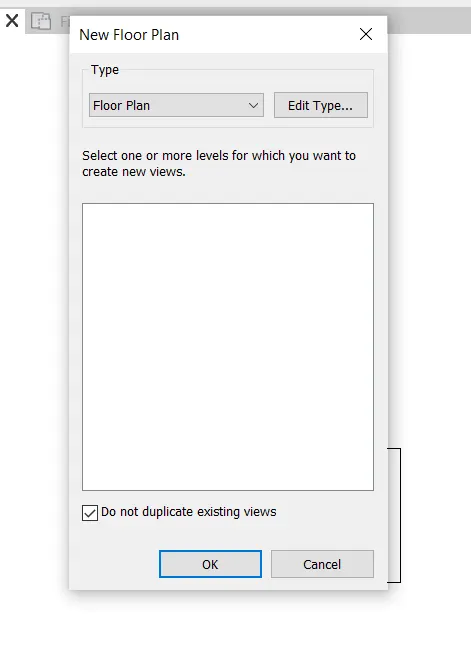
- To separate the Architectural plan first of all go to the view tab.
- then click on the plan view
- and click on the structural option we can see the different floors
- like the first floor, second floor, ground floor, and roof
- one by selecting and setting it separately in the property browser
STEP-3
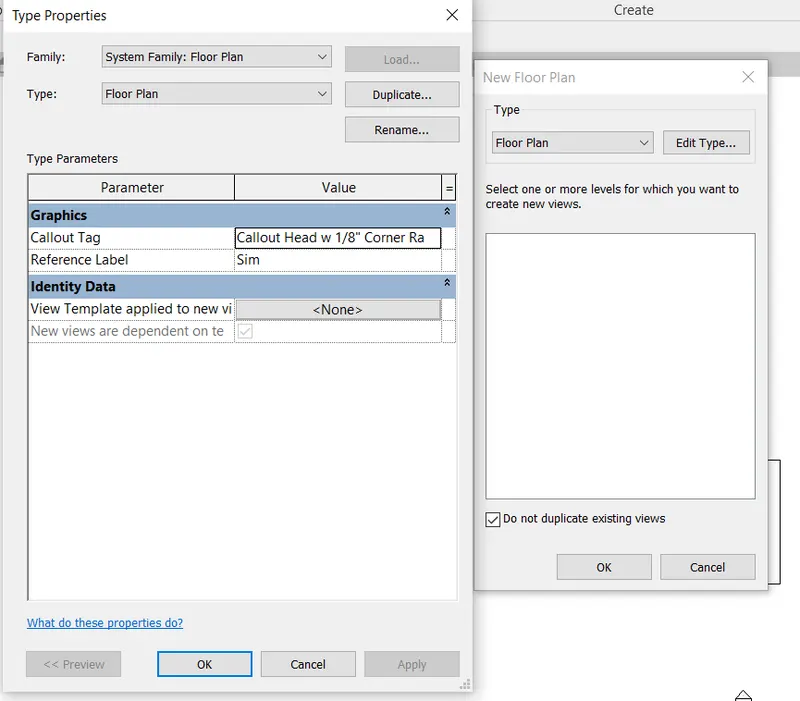
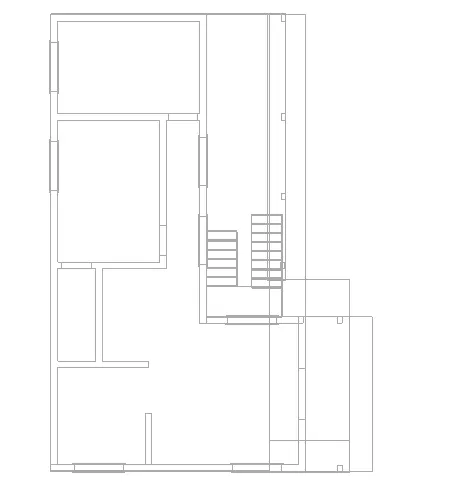
AFTER SEPRATING THE PLANS WE CAN SEE THE DIFFRENT PLANS WITH THE HELP OF THE PROPERTY BROWSER:
ARCHITECTURAL FIRST FLOOR PLAN
ARCHITECTURAL FOUNDATION PLAN:
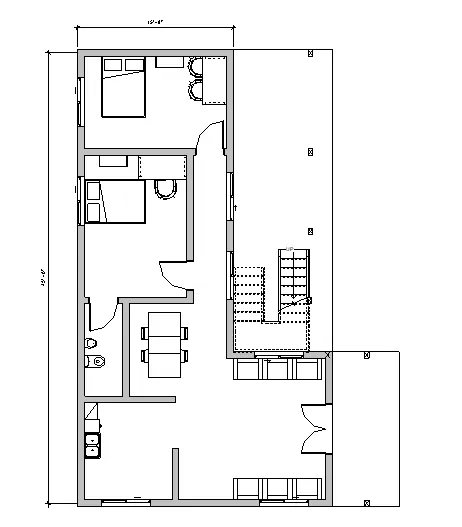
ARCHITECTURAL SECOND FLOOR PLAN:
ARCHITECTURAL ROOF
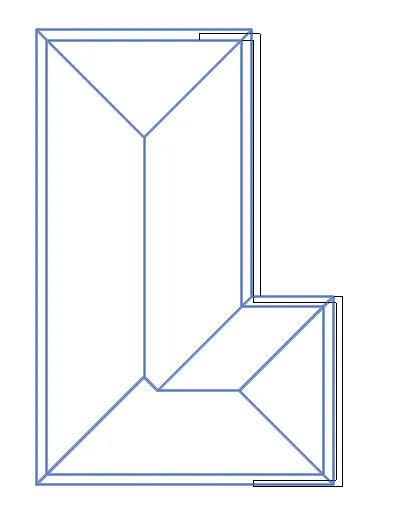
- We can see in the Architecture plan have walls, floors, and all the components placed within the building.
STEP-4
STRUCTURAL PLAN:
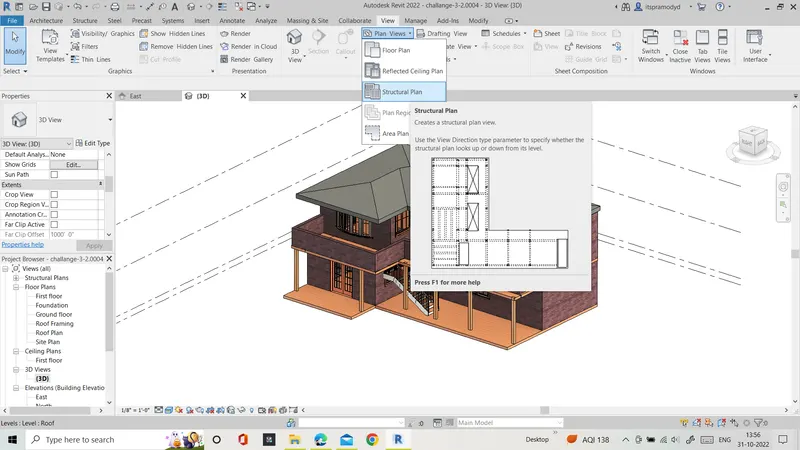
- To separate the structural plan first of all go to the view tab.
- then click on the plan view
- and click on the structural option we can see the different floors
- like first floor, second floor, ground floor, and roof
- one by selecting and setting it separate in the property browser.
STEP-5
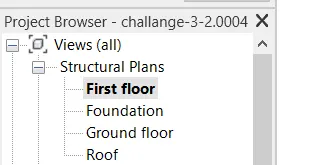
- with the help of Property browser we can see the different structural plans
- ground floor Structural Plan, Roof Structural plan , First floor structural plan
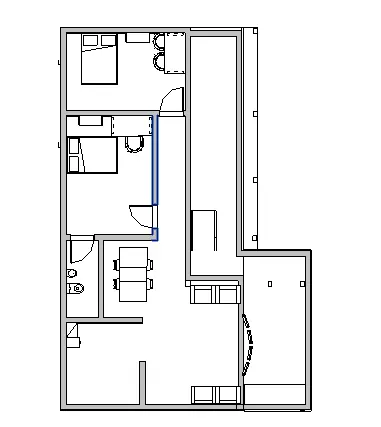
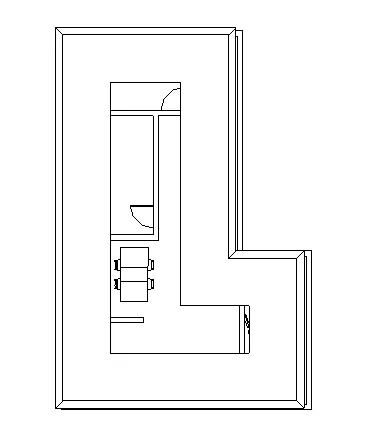
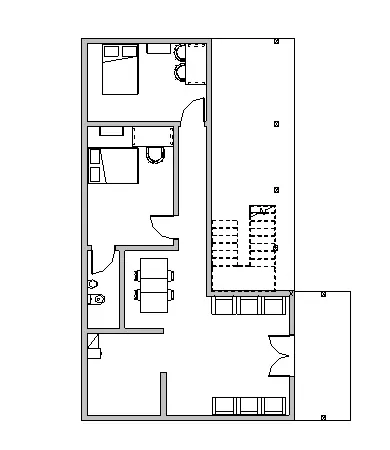
- We can see in the Structure plan must have details of only walls, floors, and columns.
RESULT: I HAVE CREATED SEPARATE THE ARCHITECTURAL AND STRUCTURAL PLANS FOR THIS QUESTION WITH THE HELP OF REVIT SOFTWARE. AFTER GIVING THE ANSWER TO THE QUESTIONS SCREENSHOTS ARE ATTACHED WITH THE RESULTING DRAWING.
QUESTION-4
ANSWER:
AIM: Using annotate toolbar add dimensions to all the walls and floors with reference to the longitudinal and transverse grids created in the project file
a. The architecture plan dimensions include details on where the components are placed within the buildings in relation to grids. Overall dimensions are sufficient for architectural plans
b. The Structure plan dimensions must include details on the position of all the walls and interior walls with reference to grids. Locate all the framing components of the building with reference to a fixed point using Structural plans
INTRODUCTION: In this question, we have to provide the dimensions linear and aligned with the help of the annotate tab also provide the dimensions separately in the architectural Plan and Structural Plans.
REVIT PROJECT FILE LINK:
PROCEDURE: TO COMPLETE THE ANSWER TO THE QUESTION WE FOLLOW THE FOLLOWING STEP:
STEP-1
DIMENSION FOR ARCHITECTURAL
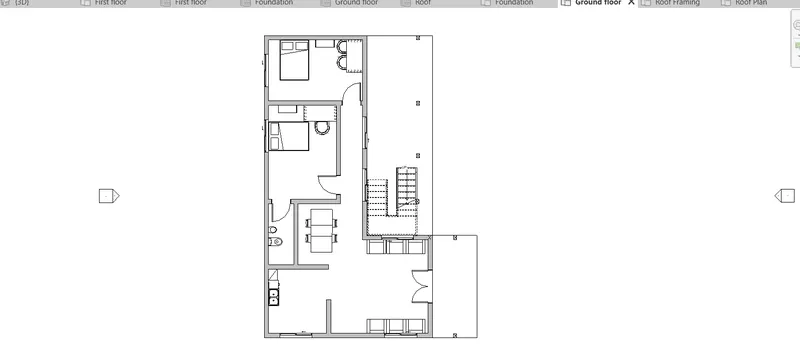
- To Answer the Question we have to take the Previous drawing for annotation.
- Now open the drawing
- Go to the ground Floor.
STEP-2
- Now Go to the Annotate Tab.
- Select the linear dimension
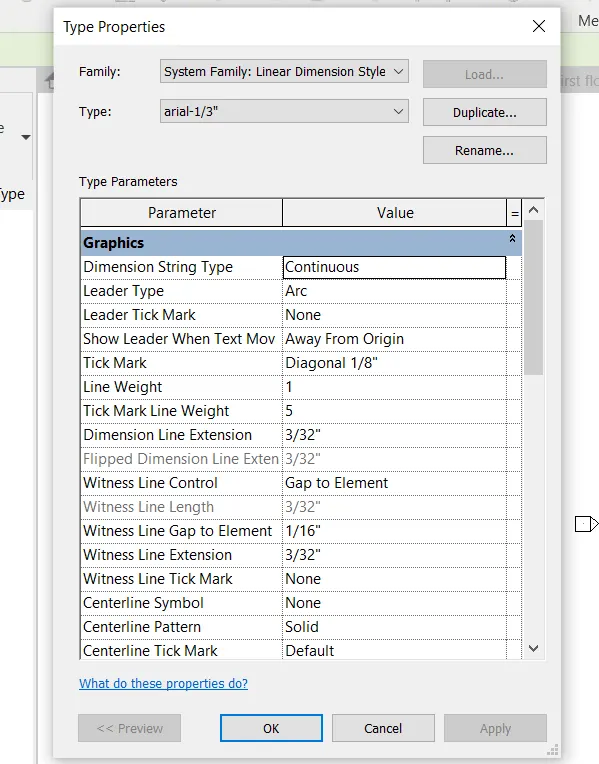
- After Selecting the dimension go to the edit types Properties to set the dimension size and color
- set the size 1/3" and color which you want i set blue.
STEP-3
LINEAR-DIMENSION
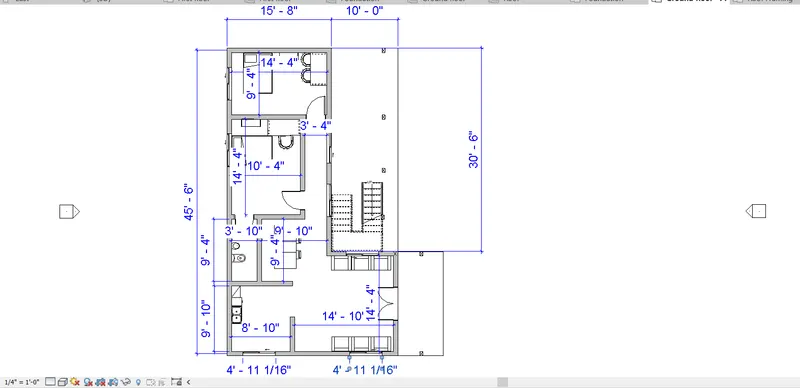
- Now Take linear dimension from annotated and start putting with the line and room dimensions.
- according to this again put the dimension for Rooms, Bath-room, living areas, and other rooms.
ALIGNED-DIMENSION
- Now Take the Aligned dimension from annotated and start putting it with the upper corner point to the lower corner point room dimensions.
- According to this again put the dimension for Rooms, Bath-room, living areas, and other rooms.
STEP-4
DIMENSION FOR STRUCTURAL:
- Now we start putting the dimension in the structural part of the plan
- For putting in the structural Part First of all go to the Annotate option of the Revit Software
LINEAR-DIMENSION
- Now Take linear dimension from annotated and start putting with the line and room dimensions.
- according to this again put the dimension for Rooms, Bath-room, living areas, and other rooms.
ALIGNED-DIMENSION
- Now Take the Aligned dimension from annotated and start putting it with the upper corner point to the lower corner point room dimensions.
- According to this again put the dimension for Rooms, Bath-room, living areas, and other rooms.
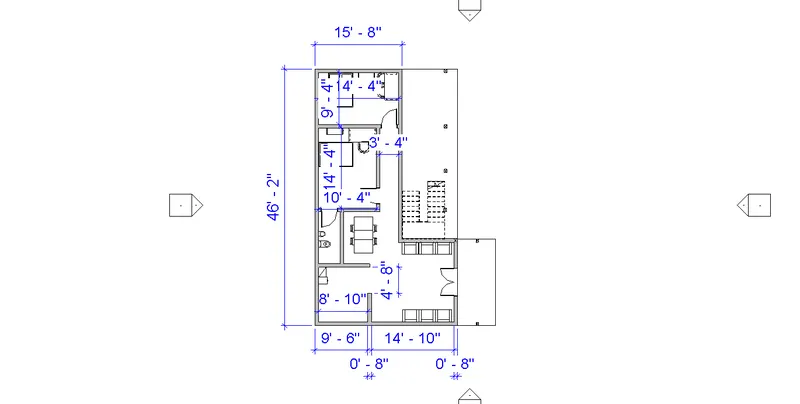
RESULT: I HAVE PUT ALL THE LINEAR AND ALIGNED DIMENSIONS OF THE FLOOR FOR THE ARCHITECTURAL PLAN AND STRUCTURAL PLAN OF THE BUILDING IN THIS QUESTION WITH THE HELP OF REVIT SOFTWARE. AFTER GIVING THE ANSWER TO THE QUESTIONS SCREENSHOTS ARE ATTACHED WITH THE RESULTING DRAWING.
QUESTION-5
ANSWER:
AIM: Create a sheet template from the view tab and adjust the parameters on the sheet to add appropriate views
INTRODUCTION: In this Question, we have to create the Sheet Template from the view Tab and also adjust the parameters on the sheet to add Appropriate views.
REVIT PROJECT FILE LINK:
PROCEDURE: TO COMPLETE THE ANSWER TO THE QUESTION WE FOLLOW THE FOLLOWING STEP:
STEP-1
- Go to the Revit software.
- Now Click the View tab from the ribbon.
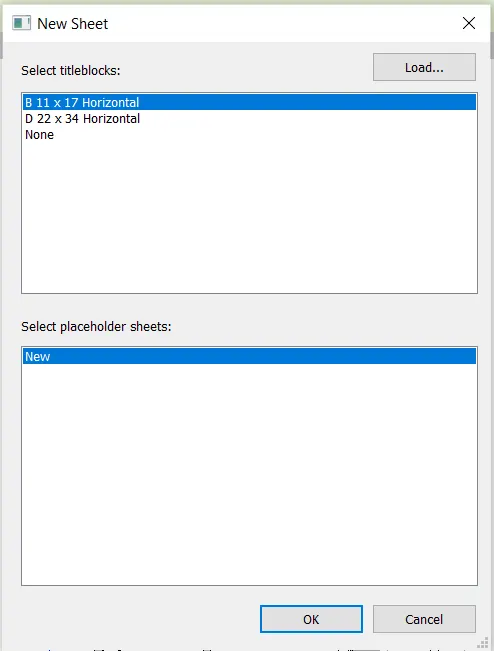
- After this click on the sheet option and we can See the following table.
STEP-2
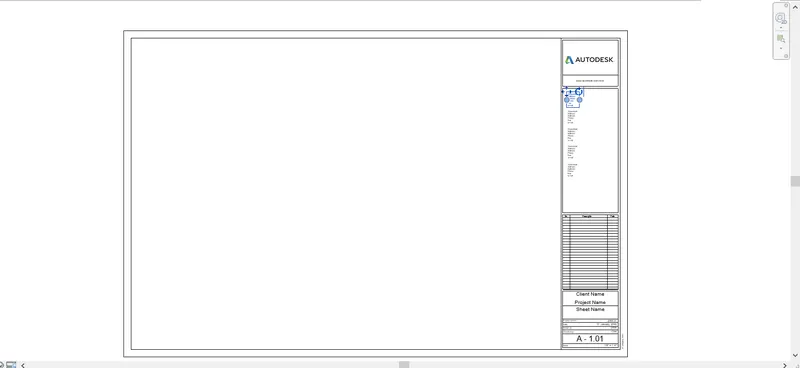
INSERT THE SHEET
- After this select the size of the Paper from the table.
- Now we can see the template is inserted in the Revit Model.
STEP-3
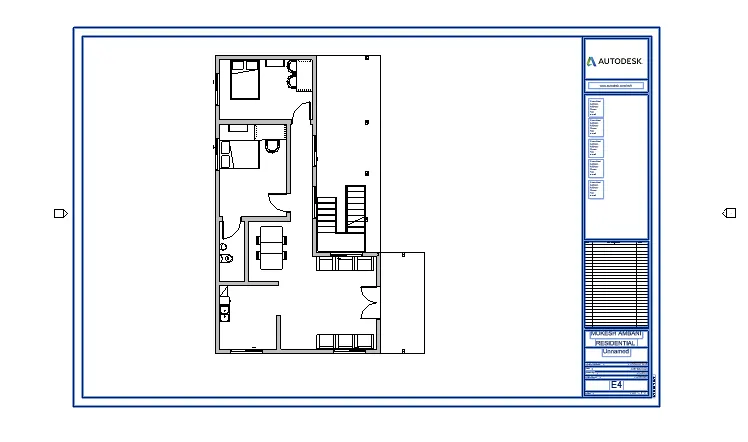
DRAG THE PROJECT INTO THE SHEET TEMPLATE:
- Now start to drag the plan into the template
- For dragging the plan
- in the Property browser check the Ground Floor option
- And Directly pick up the ground floor and put it in the template sheet.
- we can adjust the size of the plan with the help of Scale
- The scale is shown in the Property browser.
- Click then and set according to the template size
STEP-4
UPDATE PROJECT INFORMATION:
- We can update the information in the template or We can update this From the manage tab.
- To update the information go to the manage tab
- After clicking on the project information.
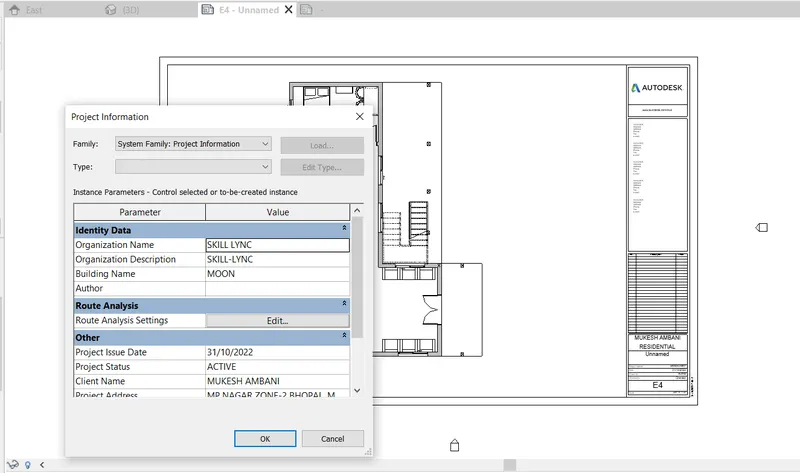
RESULT: I HAVE INSERTED THE FLOOR IN THIS TEMPLATE SHEET IN THE REVIT SOFTWARE. AFTER GIVING THE ANSWER TO THE QUESTIONS SCREENSHOTS ARE ATTACHED WITH THE RESULTING DRAWING.
QUESTION-6
ANSWER:
AIM: Using the elevation tab create the elevation views, looking at your building from East, North, South, and West
INTRODUCTION: In this question, we have to create an elevation view in the drawing and also show the East, North, South, and West views of the drawing.
REVIT PROJECT FILE LINK:
PROCEDURE: TO COMPLETE THE ANSWER TO THE QUESTION WE FOLLOW THE FOLLOWING STEP:
STEP-1
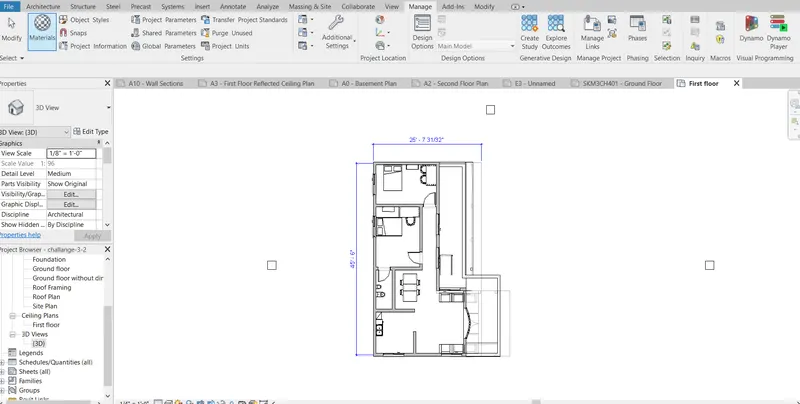
- To answer the question we have to take the previous drawing for use
- In the Previous drawing Elevation views are already created first of all i deleted the views
- Now we can see the Property browser Not show any Elevation in the list.
STEP-2
CREATE THE ELEVATION:
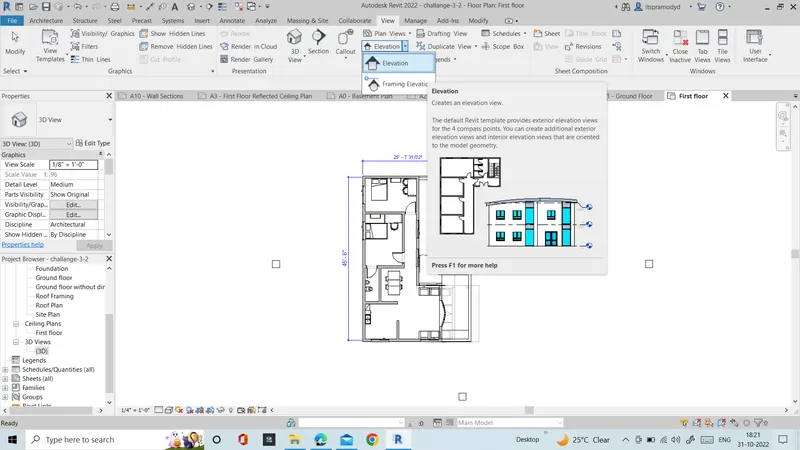
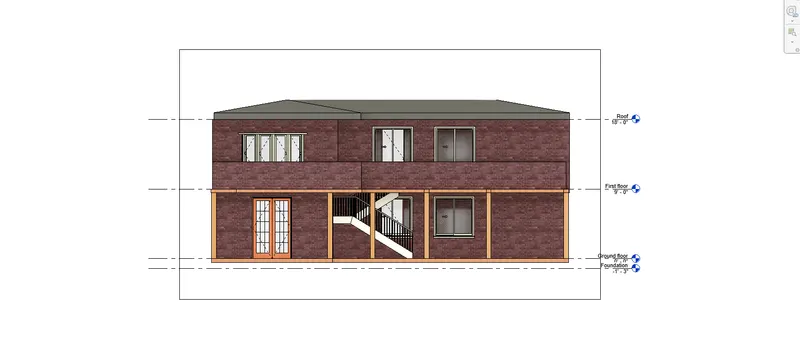
EAST- ELEVATION:
- After this we go to the view Tab from the ribbon.
- Now Click on the Elevation option.
- After this put the Elevation in the direction of East.
STEP-3
EAST ELEVATION OF THE BUILDING:
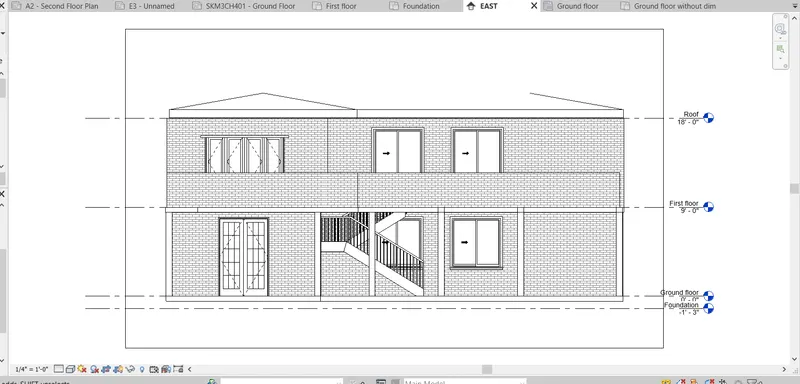
REALISTIC VIEW:
STEP-4
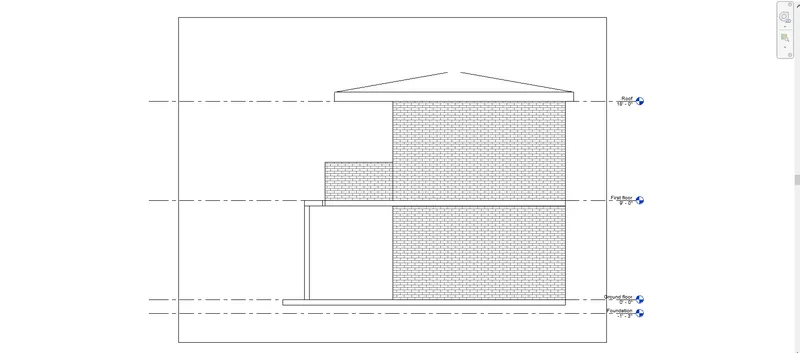
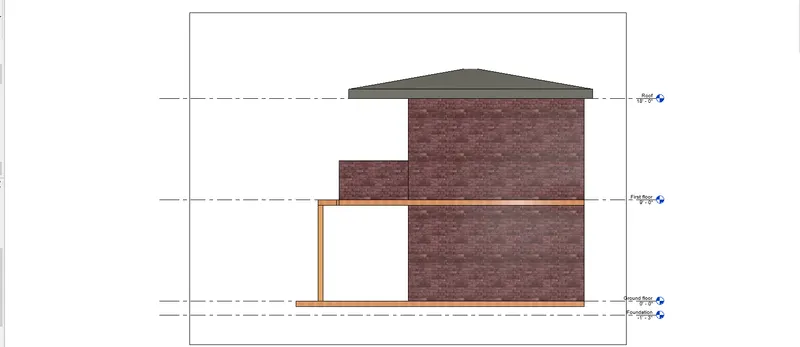
SOUTH-ELEVATION:
- After this we go again to the view Tab from the ribbon.
- Now Click on the Elevation option.
- After this put the Elevation in the direction of the south.
REALISTIC VIEW:
STEP-5
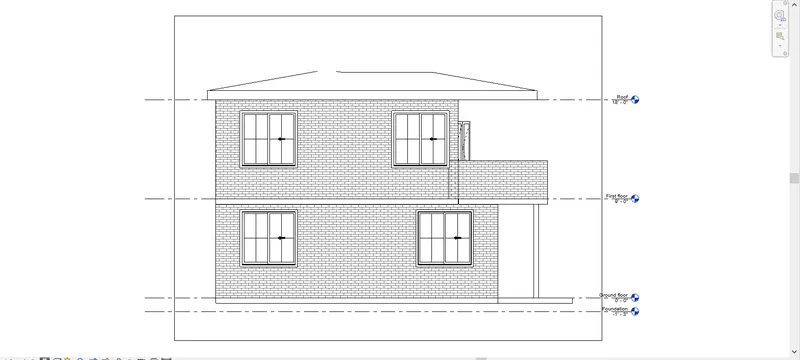
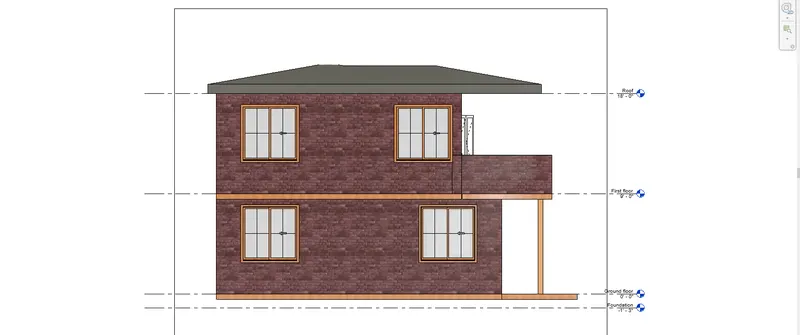
NORTH-ELEVATION:
- After this we go again to the view Tab from the ribbon.
- Now Click on the Elevation option. the
- After this put the Elevation in the direction of the North.
REALISTIC VIEW:
STEP-6
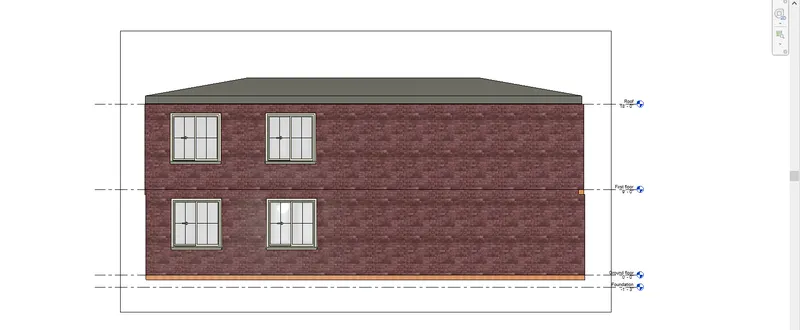
WEST-ELEVATION:
- After this we again go to the view Tab from the ribbon.
- Now Click on the Elevation option.
- After this put the Elevation in the direction of the West.
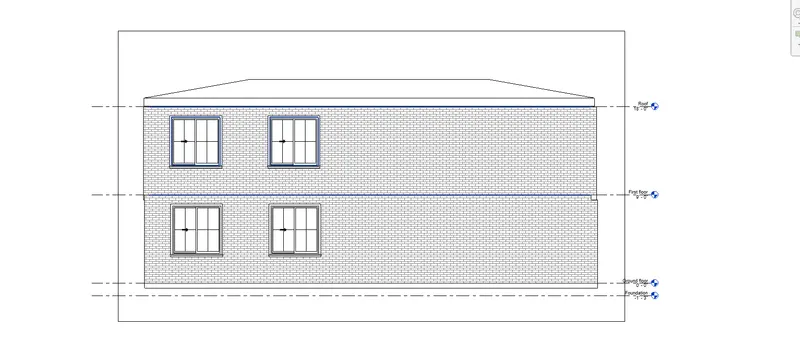
REALISTIC VIEW:
RESULT: I HAVE CREATED ALL THE ELEVATION VIEWS EAST NORTH , SOUTH , WEST IN THE DRAWING WITH THE HELP OF REVIT SOFTWARE. AFTER GIVING THE ANSWER TO THE QUESTIONS SCREENSHOTS ARE ATTACHED WITH THE RESULTING DRAWING.
QUESTION-7
ANSWER:
AIM: Produce section cut through each room either cutting across longitudinally or in a transverse direction
INTRODUCTION: In this question, we have to draw the section Part of the drawing. we have to cut the two sections
a. longitudinally or in the Transverse direction.
REVIT PROJECT FILE LINK:
PROCEDURE: TO COMPLETE THE ANSWER TO THE QUESTION WE FOLLOW THE FOLLOWING STEP:
STEP-1
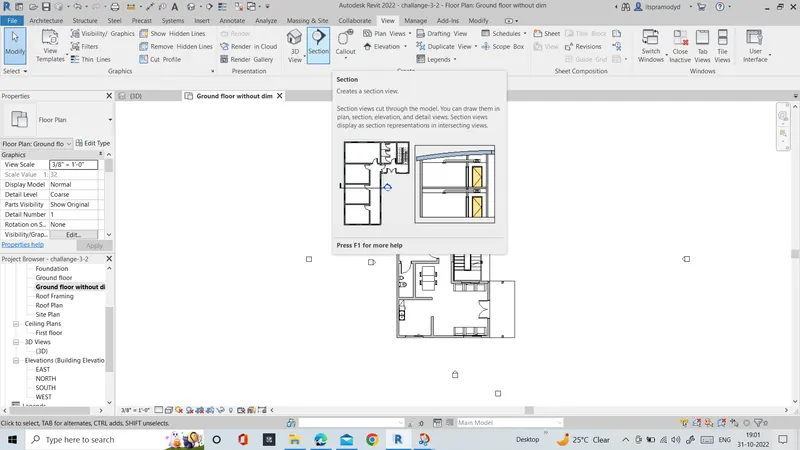
- Now to answer this Question we have to open the Revit software.
- For that just Go to the view tab.
- see the dedicated option "SECTION" and click then.
STEP-2
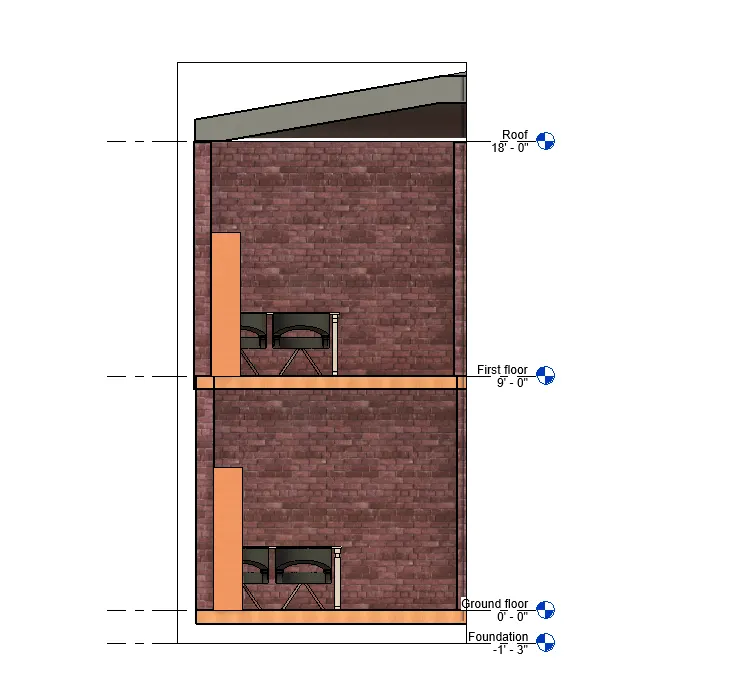
With the help of the section option, we can create different sections like bedroom section, bathroom section, room, SECTION-AA , SECTION-BB.
- Click the section and cut the room from one side to the opposite side
SECTION VIEW OD BEDROOM:
- For that just Go to the view tab.
- See the dedicated option "SECTION" and click then.
- After clicking the section option create the section longitudinally from one wall to another wall.
- as it is created transversally.
- in the Property browser we can see the section options are created.
- Now Click then and Rename the view as a section- Bed-room
- All section views created according to this and Rename that.
STEP-3
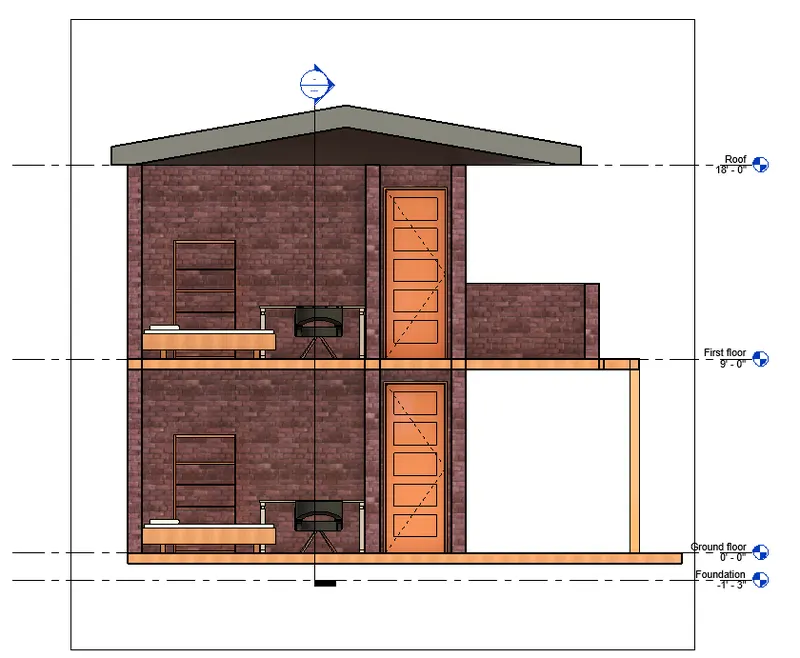
TRANSVERSE SECTION VIEW OF THE BUILDING:
- For that just Go to again the view tab.
- See the dedicated option "SECTION" and click then.
- After clicking the section option create the section transversally. from one wall to another wall.
- in the Property browser we can see the section options are created.
- Now Click then and Rename the view as a SECTION-BEDROOM2
- All section views created according to this and Rename that.
STEP-4
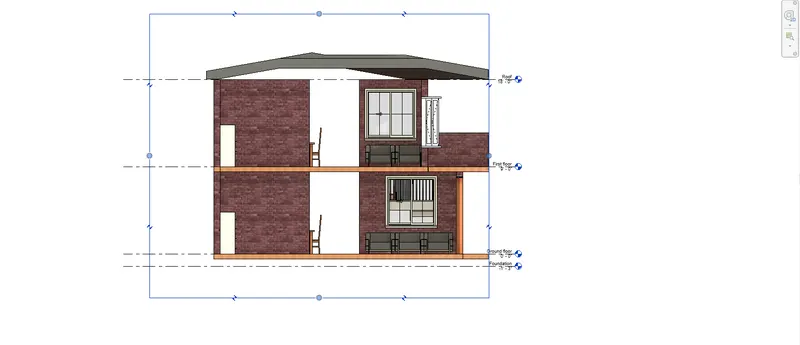
TRANSVERSE SECTION VIEW OF THE HALL:
- For that just Go to again the view tab.
- See the dedicated option "SECTION" and click then.
- After clicking the section option create the section transversally. from one wall to another wall.
- in the Property browser we can see the section options are created.
- Now Click then and Rename the view as a SECTION-HALL
- All section views created according to this and Rename that.
STEP-5
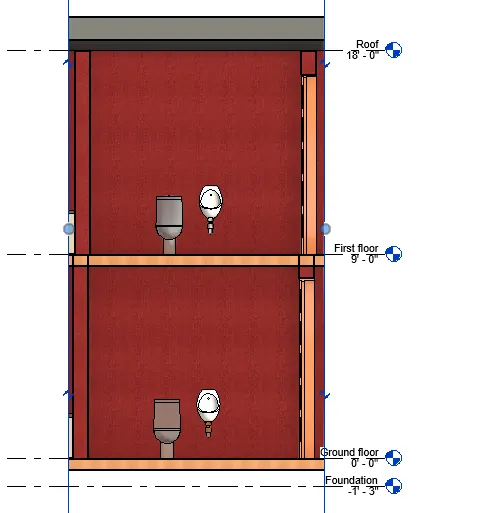
SECTION VIEW OF THE TOILET:
- For that just Go to again the view tab.
- See the dedicated option "SECTION" and click then.
- After clicking the section option create the section transversally. from one wall to another wall.
- in the Property browser we can see the section options are created.
- Now Click then and Rename the view as a SECTION-TOILET
- All section views created according to this and Rename that.
STEP-6
SECTION VIEW OF THE LIVING AREA:
- For that just Go to again the view tab.
- See the dedicated option "SECTION" and click then.
- After clicking the section option create the section transversally. from one wall to another wall.
- in the Property browser we can see the section options are created.
- Now Click then and Rename the view as a SECTION-LIVING AREA
- All section views created according to this and Rename that.
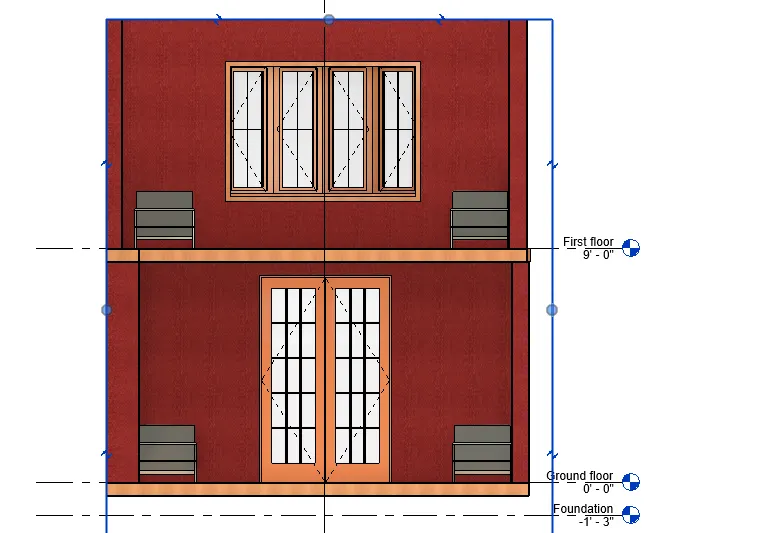
STEP-7
FULL SECTION VIEW OF THE BUILDING WITH REALISTIC VIEW:
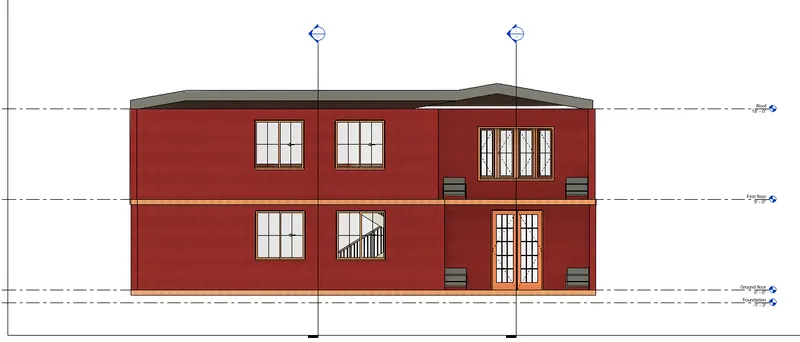
RESULT: I HAVE CREATED THE ALL-SECTION VIEW IN THIS DRAWING WITH THE HELP OF REVIT SOFTWARE. AFTER GIVING THE ANSWER TO THE QUESTIONS SCREENSHOTS ARE ATTACHED WITH THE RESULTING DRAWING.
QUESTION-8
ANSWER:
AIM: Classify the views, Plan Views, Section Views, and Elevation views to either Design or Documentation category using Properties browser
INTRODUCTION: In This Question, We have to Classify the different Views like Plan View, Section View, Elevation View .and design or Documentation.
REVIT PROJECT FILE LINK:
PROCEDURE: TO COMPLETE THE ANSWER TO THE QUESTION WE FOLLOW THE FOLLOWING STEP:
STEP-1
PLAN VIEW:
- Answer to the question first of all we take the previous drawing and attach all the files which are asked.
- Now we are starting to show the view
First Floor Plan View:
- open the File click on the floor plan
- after this click on the first floor plan.
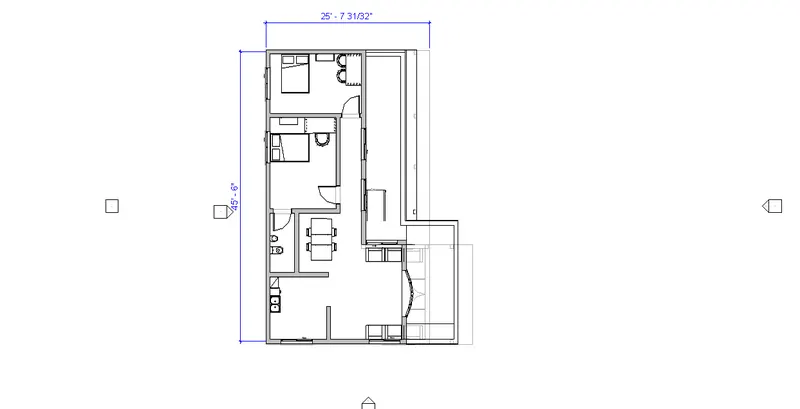
STEP-2
Foundation Plan View:
- open the File click on the floor plan
- after this click on foundation plan
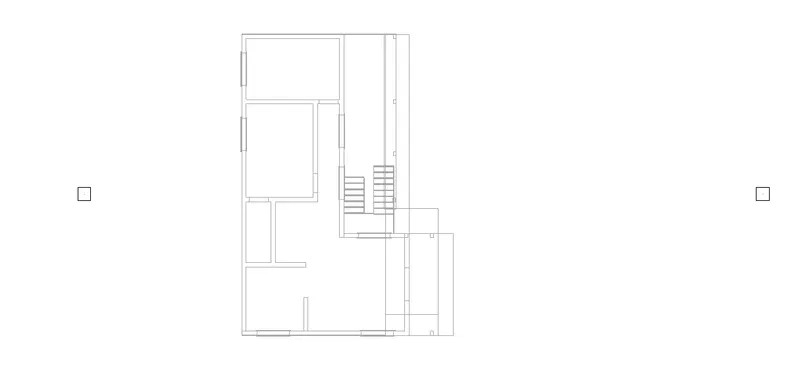
STEP-3
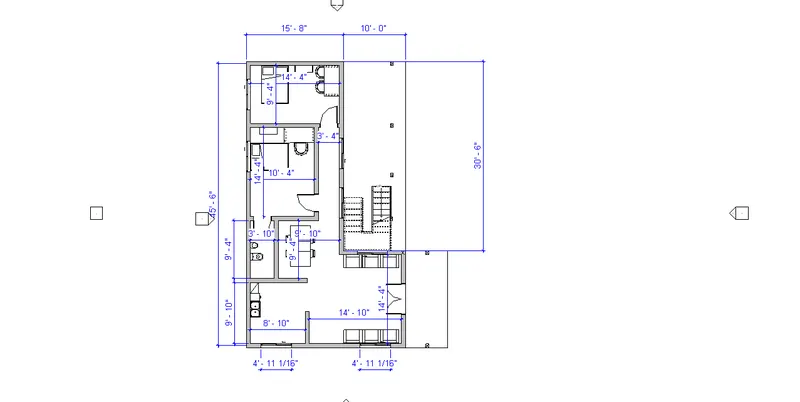
First Floor Plan View
- Open the File click on the floor plan
- after this click on the first floor plan.
STEP-4
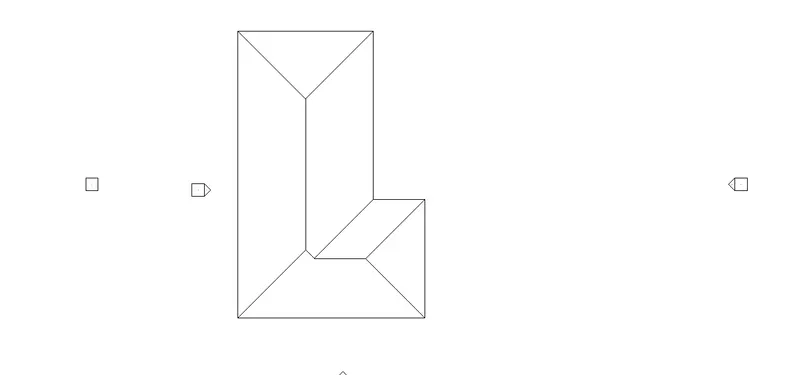
Roof Plan
- Open the File click on the floor plan
- After this click on the roof plan.
STEP-5
SECTION VIEW:
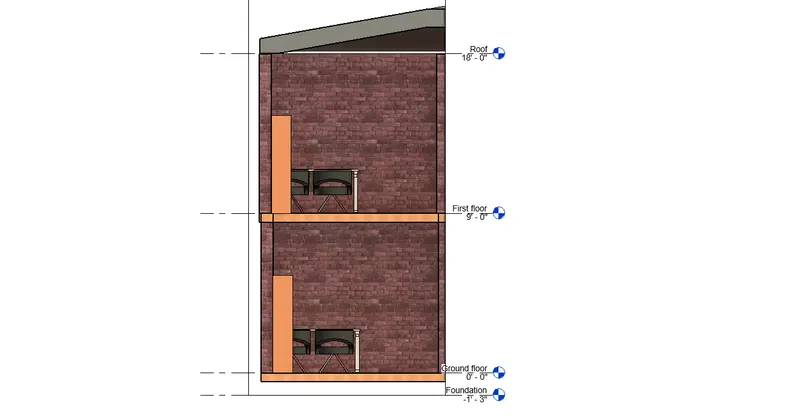
Section view of Bedroom:
- Go to Property Browser
- Click on the section part
- we can see different option
- Click the section of the bedroom.
STEP-6
Section View of the Hall:
- Go to Property Browser
- Click on the section part
- we can see different option
- Click the section of the hall
STEP-7
Section View of the other Bedroom:
- Go to Property Browser
- Click on the section part
- we can see different option
- Click the section of the other bedroom.
STEP-8
DESIGN & DOCUMENTATION
- Now we come to the documentation part of the drawing for go to view tab click sheet option and select the size of the Paper from the table.
- Now we can see the template is inserted in the Revit Model.
DRAG THE PROJECT INTO THE SHEET TEMPLATE:
- Now start to drag the plan into the template
- For dragging the plan
- in the Property browser check the Ground Floor option
- And Directly pick up the ground floor and put it in the template sheet.
- we can adjust the size of the plan with the help of Scale
- The scale is shown in the Property browser.
- Click then and set according to the template size
STEP-9
ELEVATION VIEW:
Front Elevation:
- To see the elevation view Again go to the Property browser
- click on the front Elevation.
STEP-10
Side Elevation:
- To see the elevation view Again go to the Property browser
- click on the side Elevation.
STEP-11
Side2 Elevation:
- To see the elevation view Again go to the Property browser
- click on the side2 Elevation.
STEP-12
Back Elevation:
- To see the elevation view Again go to the Property browser
- click on the back Elevation.
STEP-13
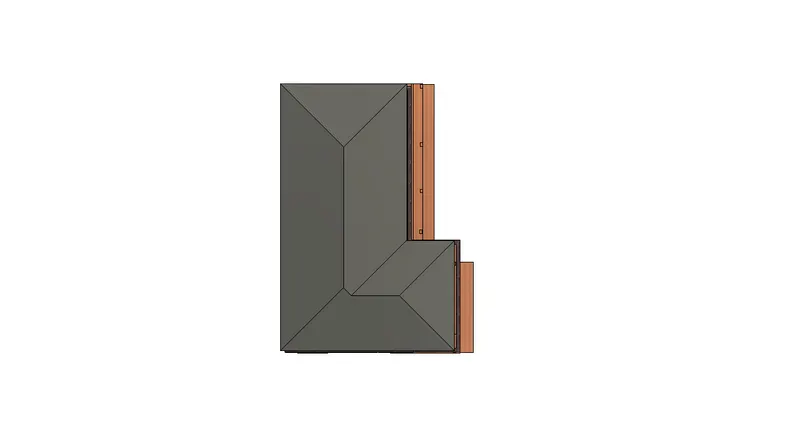
Top Elevation:
- To see the elevation view Again go to the Property browser
- click on the Top Elevation.
STEP-14
3D VIEW:
ISOMETRIC 3D VIEW:
- Now go to the 3d View of the building.
- click on the isometric view1
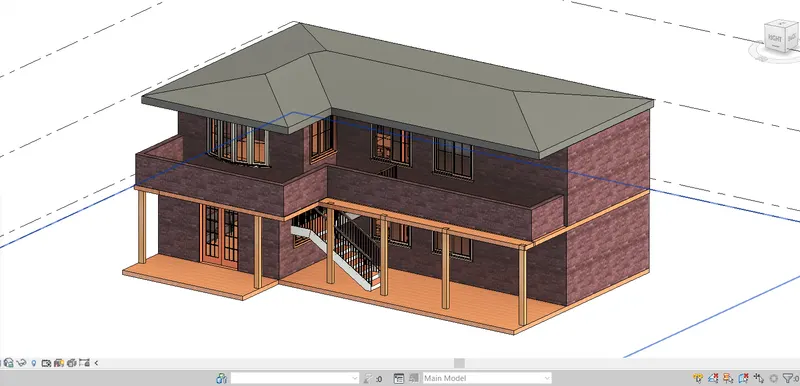
ISOMETRIC 3D VIEW:
- Now go to the 3d View of the building.
- click on the isometric view2.
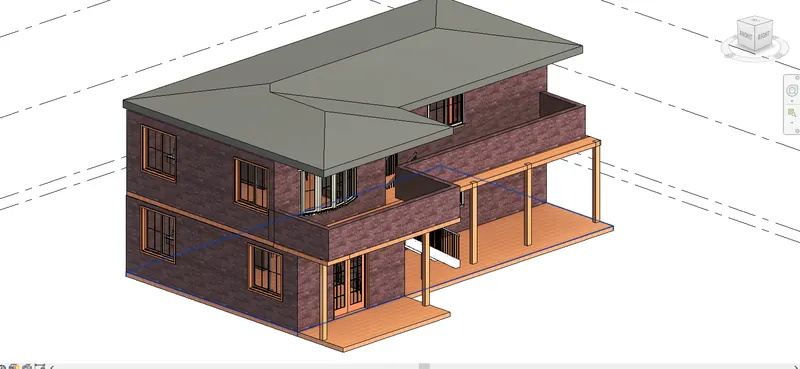
STEP-15
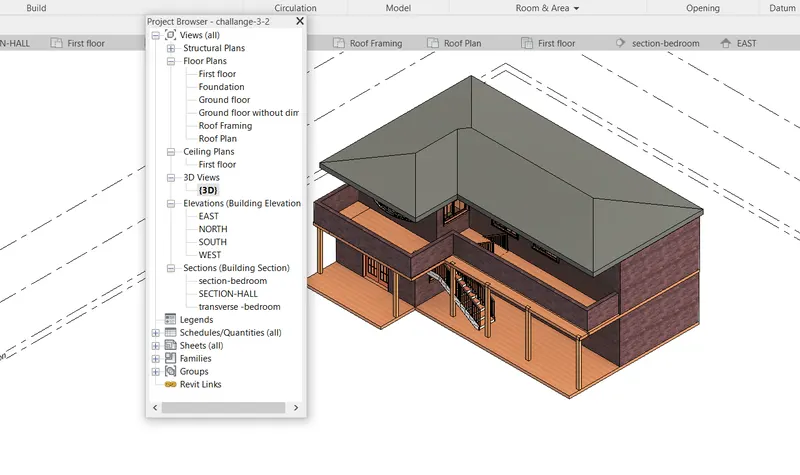
PROPERTY BROWSER:
WITH THE HELP OF THE PROPERTY BROWSER WE CAN ACCESS ALL VIEWS IN THE ONE HAND. NOW WWE SEE THE FOLLOWING VIEWS IN THE ATTACHED FILE.
THIS IS ALL THE VIEW OF THE BUILDING.
RESULT: I HAVE CREATED THE ALL VIEW PLANS, SECTIONS, ELEVATION, DESIGN AND DOCUMENTATION WITH THE HELP OF REVIT SOFTWARE. AFTER COMPLETING THE ANSWER TO THE QUESTIONS SCREENSHOTS ARE ATTACHED WITH THE RESULTING DRAWING.
QUESTION-9
ANSWER:
AIM: Using the sheet template produced create multiple sheets as follows
a. A 101- Ground Floor Architecture Plan
b. A 102- First Floor Architecture Plan
c. A 103- Roof Plan
d. S 101- Ground Floor Structural Plan
e. S 102- First Floor Structural Plan
f. S 103- Roof Framing Plan
g. A-201- North-South Elevations
h. A-202- East-West Elevations
Add additional sheets based on the sections created in your Revit file
INTRODUCTION: In this question we have to create the multiple sheets like 101, 102, 103.....202. with given name.
REVIT PROJECT FILE LINK:
PROCEDURE: TO COMPLETE THE ANSWER TO THE QUESTION WE FOLLOW THE FOLLOWING STEP:
STEP-1
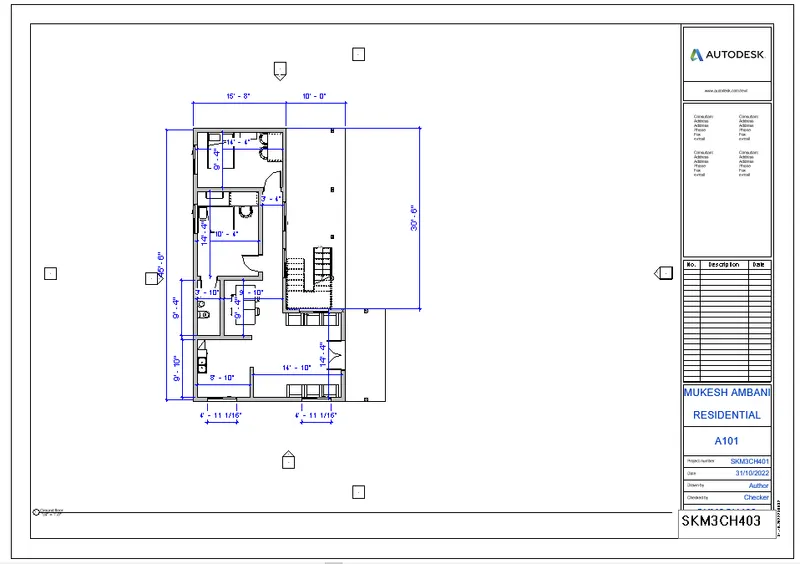
A101-Ground Floor Architecture Plan
- Now open the Revit software and go to the view Tab
- Then create the sheet
- Go to the view tab click the sheet option and select the size of the Paper from the table.
- Now we can see the template choose metric1 is inserted in the Revit Model.
DRAG THE PROJECT INTO THE SHEET TEMPLATE:
- Now start to drag the plan into the template
- For dragging the plan
- in the Property browser check the Ground Floor option
- And Directly pick up the ground floor and put it in the template sheet.
- we can adjust the size of the plan with the help of Scale
- The scale is shown in the Property browser.
- Click then and set it according to the template size
- Now double click on the name option in the template and put the name 'A101'
STEP-2
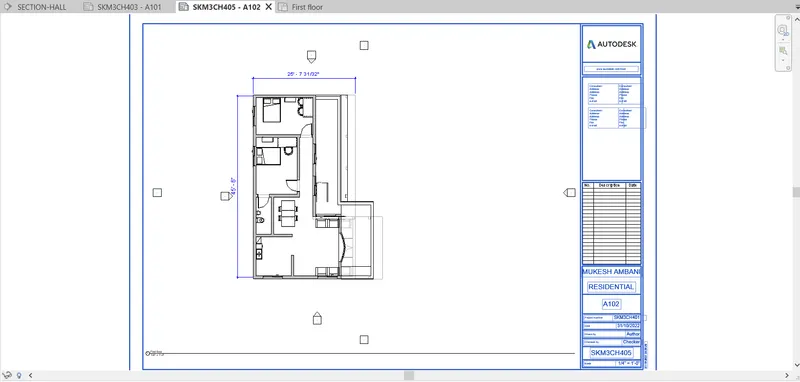
A102-First Floor Architecture Plan
- Now open the Revit software and go to the view Tab
- Then create the sheet
- Go to the view tab click the sheet option and select the size of the Paper from the table.
- Now we can see the template choose metric1 is inserted in the Revit Model.
DRAG THE PROJECT INTO THE SHEET TEMPLATE:
- Now start to drag the plan into the template
- For dragging the plan
- in the Property browser check the First Floor Architecture Plan option
- And Directly pick up the ground floor and put it in the template sheet.
- we can adjust the size of the plan with the help of Scale
- The scale is shown in the Property browser.
- Click then and set it according to the template size
- Now double click on the name option in the template and put the name 'A102'
STEP-3
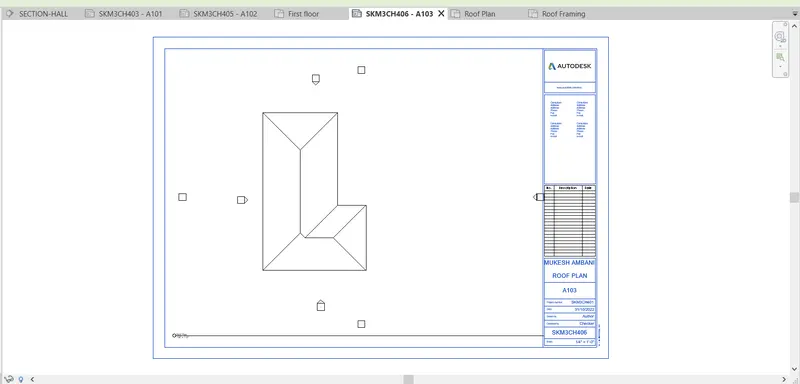
A103-Roof Plan
- Now open the Revit software and go to the view Tab
- Then create the sheet
- Go to the view tab click the sheet option and select the size of the Paper from the table.
- Now we can see the template choose metric1 is inserted in the Revit Model.
DRAG THE PROJECT INTO THE SHEET TEMPLATE:
- Now start to drag the plan into the template
- For dragging the plan
- in the Property browser check the Roof Plan option
- And Directly pick up the ground floor and put it in the template sheet.
- we can adjust the size of the plan with the help of Scale
- The scale is shown in the Property browser.
- Click then and set it according to the template size
- Now double click on the name option in the template and put the name 'A101'
STEP-4
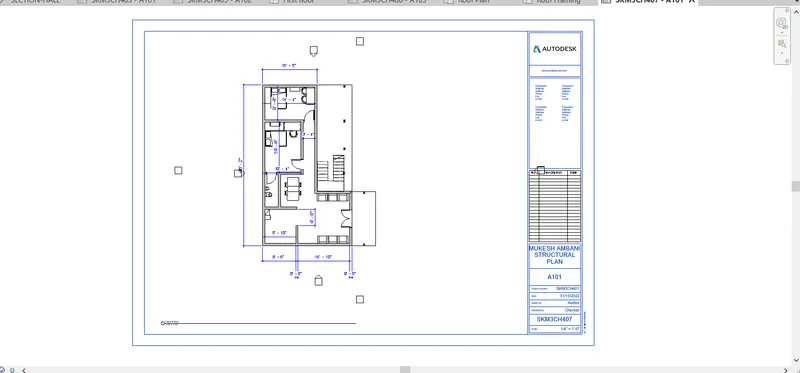
S101-Ground Floor Structural Plan
- Now open the Revit software and go to the view Tab
- Then create the sheet
- Go to the view tab click the sheet option and select the size of the Paper from the table.
- Now we can see the template choose metric1 is inserted in the Revit Model.
DRAG THE PROJECT INTO THE SHEET TEMPLATE:
- Now start to drag the plan into the template
- For dragging the plan
- in the Property browser check theGround Floor Structural Plan option
- And Directly pick up the ground floor and put it in the template sheet.
- we can adjust the size of the plan with the help of Scale
- The scale is shown in the Property browser.
- Click then and set it according to the template size
- Now double click on the name option in the template and put the name 'S101'
STEP-5
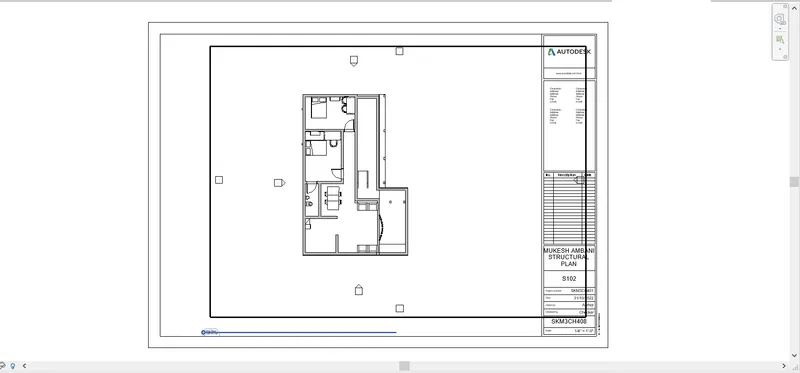
S102-First Floor Structural Plan
- Now open the Revit software and go to the view Tab
- Then create the sheet
- Go to the view tab click the sheet option and select the size of the Paper from the table.
- Now we can see the template choose metric1 is inserted in the Revit Model.
DRAG THE PROJECT INTO THE SHEET TEMPLATE:
- Now start to drag the plan into the template
- For dragging the plan
- in the Property browser check the First Floor Structural Plan option
- And Directly pick up the ground floor and put it in the template sheet.
- we can adjust the size of the plan with the help of Scale
- The scale is shown in the Property browser.
- Click then and set it according to the template size
- Now double click on the name option in the template and put the name 'S102'
STEP-6
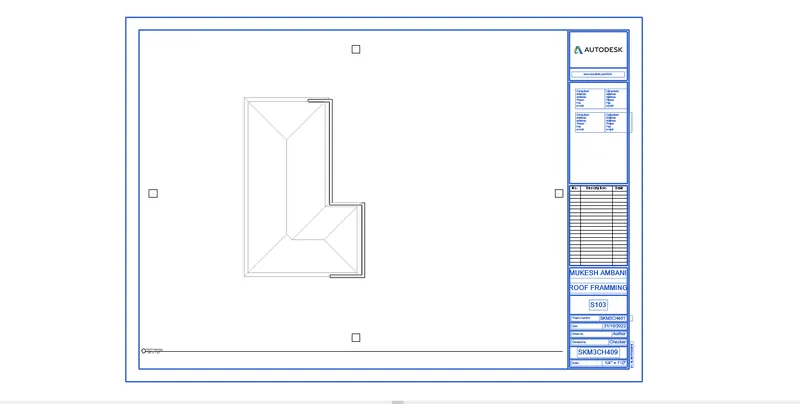
S103-Roof Framing Plan
- Now open the Revit software and go to the view Tab
- Then create the sheet
- Go to the view tab click the sheet option and select the size of the Paper from the table.
- Now we can see the template choose metric1 is inserted in the Revit Model.
DRAG THE PROJECT INTO THE SHEET TEMPLATE:
- Now start to drag the plan into the template
- For dragging the plan
- in the Property browser check the Roof Framing Plan option
- And Directly pick up the ground floor and put it in the template sheet.
- we can adjust the size of the plan with the help of Scale
- The scale is shown in the Property browser.
- Click then and set it according to the template size
- Now double click on the name option in the template and put the name 'S103'
STEP-7
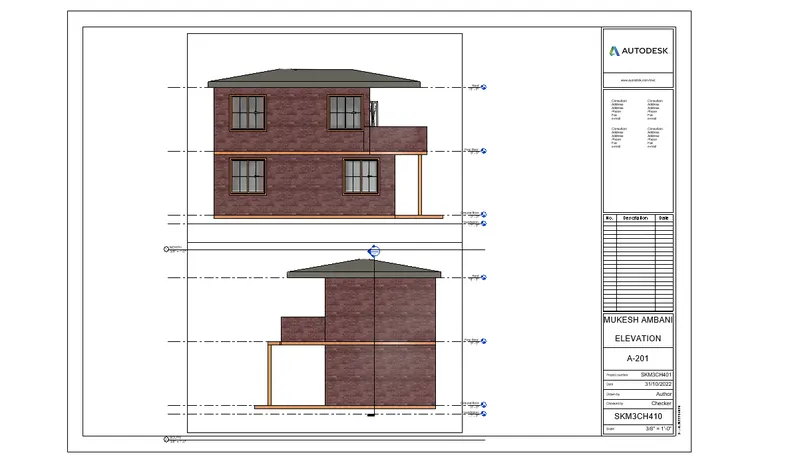
A201-North-South Elevation
- Now open the Revit software and go to the view Tab
- Then create the sheet
- Go to the view tab click the sheet option and select the size of the Paper from the table.
- Now we can see the template choose metric1 is inserted in the Revit Model.
DRAG THE PROJECT INTO THE SHEET TEMPLATE:
- Now start to drag the plan into the template
- For dragging the plan
- in the Property browser check the North-South Elevation option
- And Directly pick up the ground floor and put it in the template sheet.
- we can adjust the size of the plan with the help of Scale
- The scale is shown in the Property browser.
- Click then and set it according to the template size
- Now double click on the name option in the template and put the name 'A201'
STEP-8
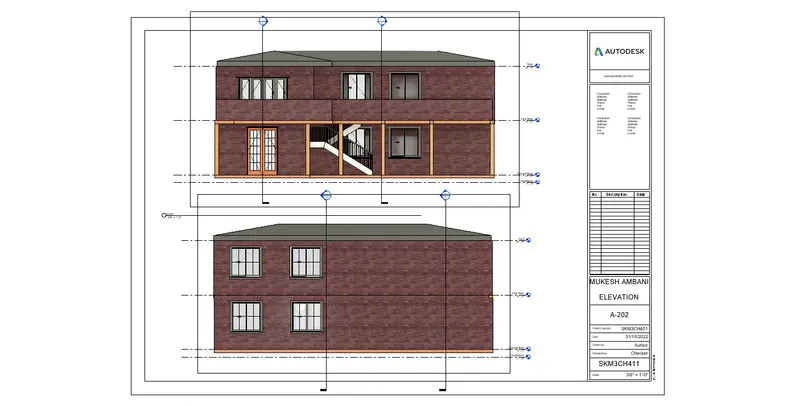
A202-East-west Elevation
- Now open the Revit software and go to the view Tab
- Then create the sheet
- Go to the view tab click the sheet option and select the size of the Paper from the table.
- Now we can see the template choose metric1 is inserted in the Revit Model.
DRAG THE PROJECT INTO THE SHEET TEMPLATE:
- Now start to drag the plan into the template
- For dragging the plan
- in the Property browser check the East-west Elevation option
- And Directly pick up the ELEVATION and put it in the template sheet.
- we can adjust the size of the plan with the help of Scale
- The scale is shown in the Property browser.
- Click then and set it according to the template size
- Now double click on the name option in the template and put the name ' A202'
RESULT: I HAVE CREATED THE FLOOR IN THIS QUESTION WITH THE HELP OF REVIT SOFTWARE. AND ALSO PUT THE MATERIAL IN THE FLOORING PART. AFTER GIVING THE ANSWER TO THE QUESTIONS SCREENSHOTS ARE ATTACHED WITH THE RESULTING DRAWING.
QUESTION-10
ANSWER:
AIM: Create a camera-specific view or a 3D view in each room ( living, dining, bedroom). Based on the views create a new set of sheets starting A-501 (you can add as many sheets after, 502, 503.. n)to place the 3D view images. Produce the sheets as a part of project drafting.
INTRODUCTION: In this question, we have to create the camera view or 3d view in each room like living room, dining room, bedroom, etc. based on the view also create a new set of sheet starting A-501 TO place the 3D view images.
REVIT PROJECT FILE LINK:
PROCEDURE: TO COMPLETE THE ANSWER TO THE QUESTION WE FOLLOW THE FOLLOWING STEP:
STEP-1
WE CREATE THE FOLLOWING CAMERA VIEWS:
- 3DV-BEDROOM1
- 3DV-BEDROOM2
- 3DV-TOILET
- 3DV-KITCHEN
- 3DV-LIVING AREA
- 3DV-STAIR
- 3DV-DINING AREA
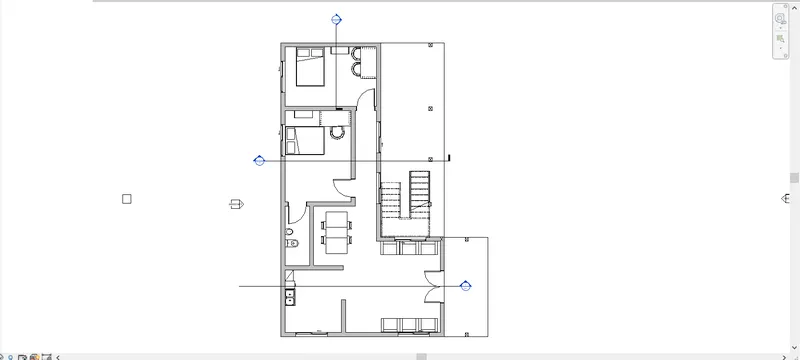
PLAN:
- Now to answer the question we take the previous drawing for camera views
- Go to the Property browser and click on the ground floor plan.
STEP-2
- Create the 3d camera view first go to the 3d view option.
- Drop down then, now we can see the camera option.
- Click the camera option and go to the plan.
- drag the camera which you want.
- After this we can see the view is created.
- with the help of the outer line of the view adjust the view according to you.
- After that go to the Property browser and Rename the view.
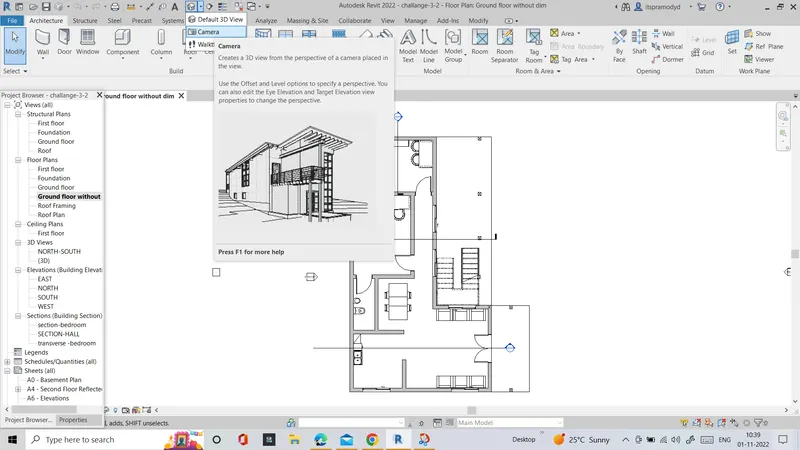
3D CAMERA DRAGING:
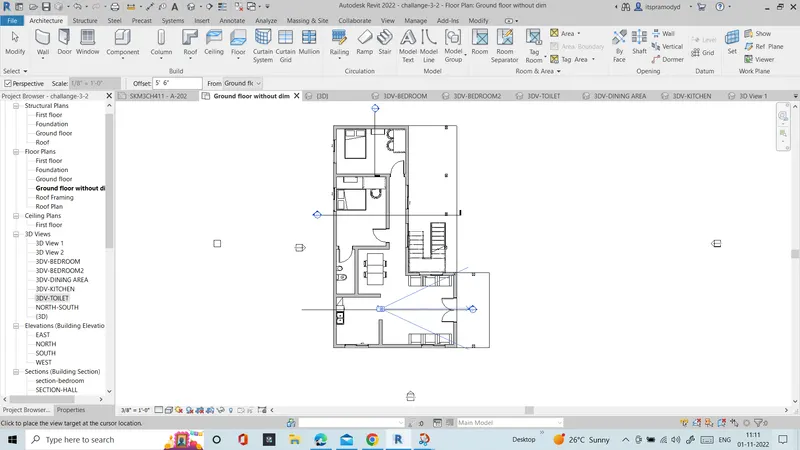
STEP-3
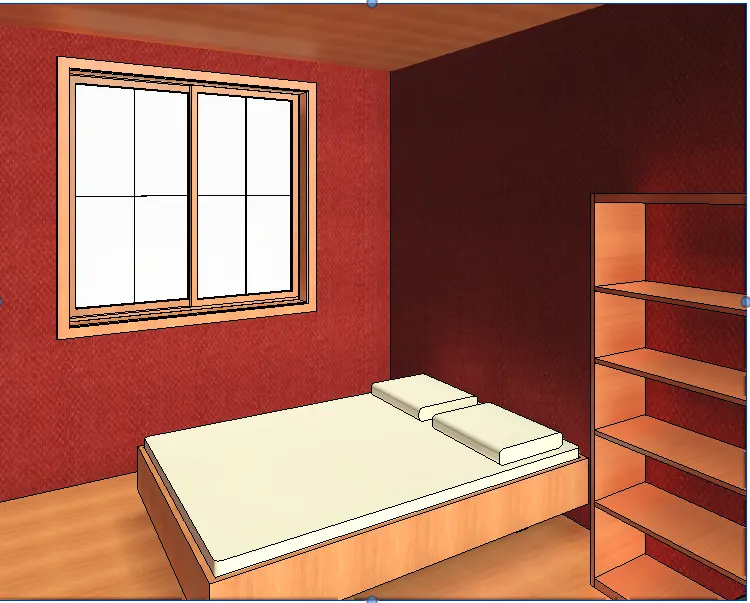
3DV-BEDROOM1
- Create the 3d camera view OF bedroom1
- Drop down then, now we can see the camera option.
- Click the camera option and go to the plan.
- drag the camera which you want.
- After this we can see the view is created.
- with the help of the outer line of the view adjust the view according to you.
- After that go to the Property browser and Rename the view3DV-BEDROOM1.
STEP-4
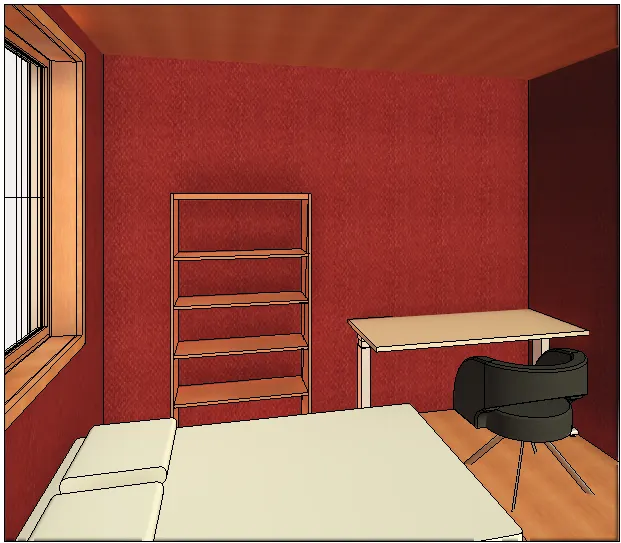
3DV-BEDROOM2
- Create the 3d camera view OF bedroom2
- Drop down then, now we can see the camera option.
- Click the camera option and go to the plan.
- drag the camera which you want.
- After this we can see the view is created.
- with the help of the outer line of the view adjust the view according to you.
- After that go to the Property browser and Rename the view3DV-BEDROOM2.
STEP-5
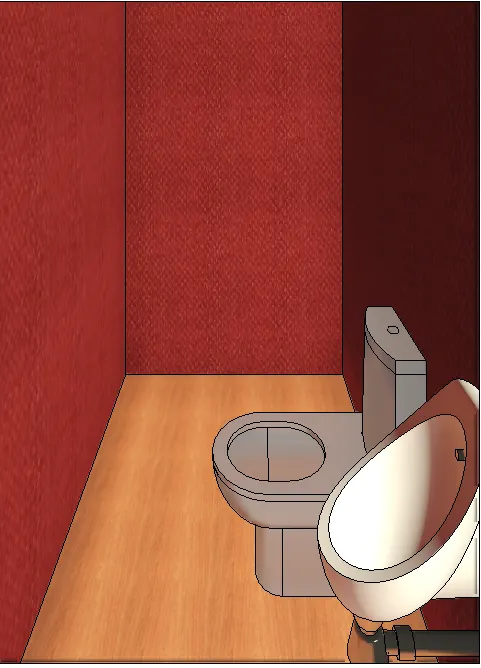
3DV-TOILET
- Create the 3d camera view OF 3dv-toilet
- Again Drop down then, now we can see the camera option.
- Click the camera option and go to the plan.
- drag the camera which you want.
- After this we can see the view is created.
- with the help of the outer line of the view adjust the view according to you.
- After that go to the Property browser and Rename the view 3DV-TOILET.
STEP-6
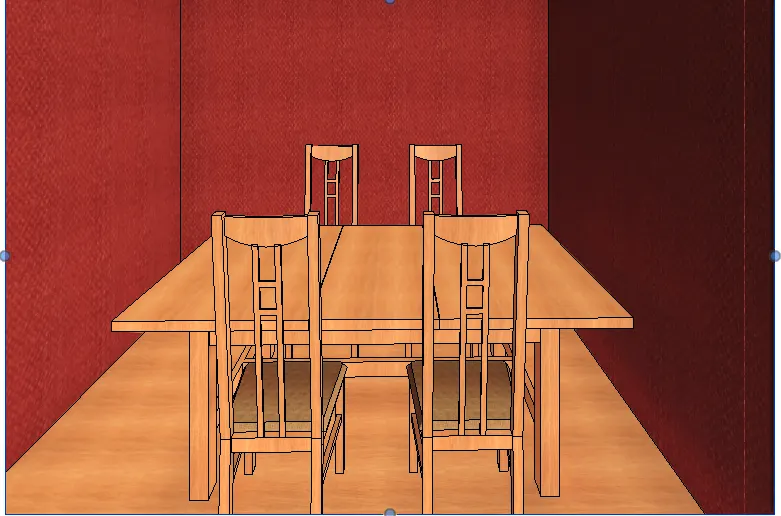
3DV-DINING AREA
- Create the 3d camera view OF 3dv-dining area
- Again Drop down then, now we can see the camera option.
- Click the camera option and go to the plan.
- drag the camera which you want.
- After this we can see the view is created.
- with the help of the outer line of the view adjust the view according to you.
- After that go to the Property browser and Rename the view 3DV-DINING AREA.
STEP-7
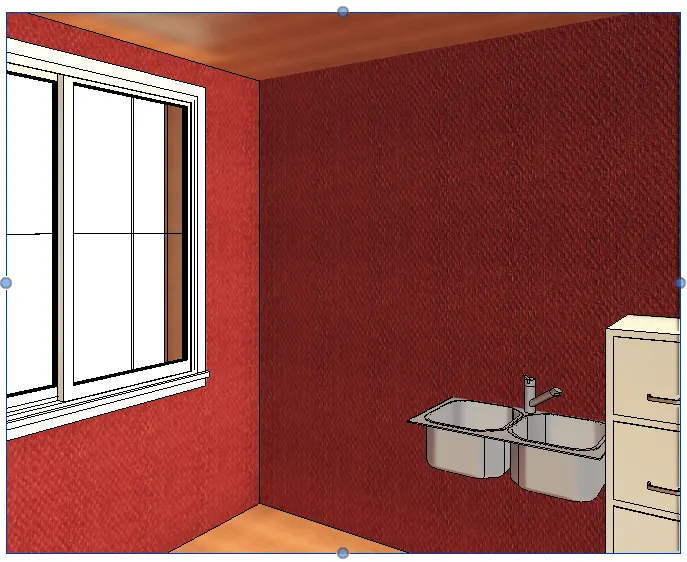
3DV-KITCHEN
- Create the 3d camera view OF 3dv-Kitchen
- Again Drop down then, now we can see the camera option.
- Click the camera option and go to the plan.
- drag the camera which you want.
- After this we can see the view is created.
- with the help of the outer line of the view adjust the view according to you.
- After that go to the Property browser and Rename the view 3DV-KITCHEN.
STEP-8
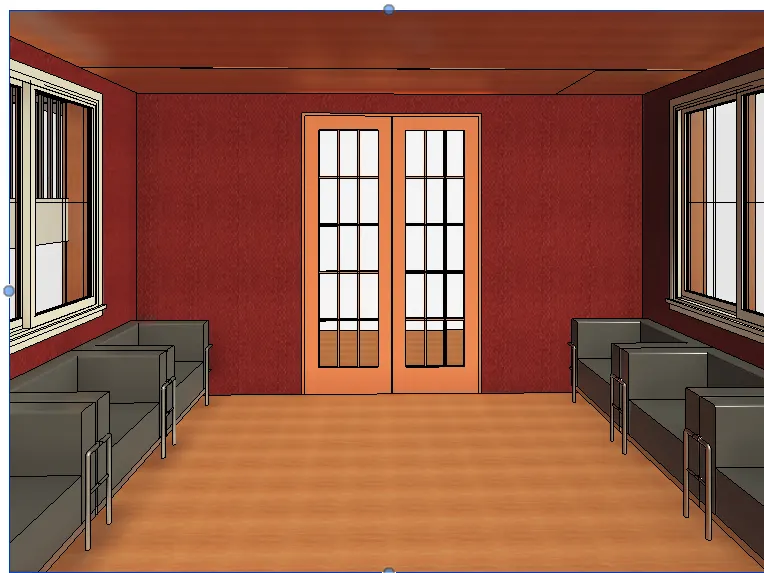
3DV-LIVING AREA
- Create the 3d camera view OF 3dv-living area
- Again Drop down then, now we can see the camera option.
- Click the camera option and go to the plan.
- drag the camera which you want.
- After this we can see the view is created.
- with the help of the outer line of the view adjust the view according to you.
- After that go to the Property browser and Rename the view 3DV-LIVING AREA
STEP-9
3DV-STAIR
- Create the 3d camera view OF 3dv-stair
- Again Drop down then, now we can see the camera option.
- Click the camera option and go to the plan.
- drag the camera which you want.
- After this we can see the view is created.
- with the help of the outer line of the view adjust the view according to you.
- After that go to the Property browser and Rename the view 3DV-STAIR
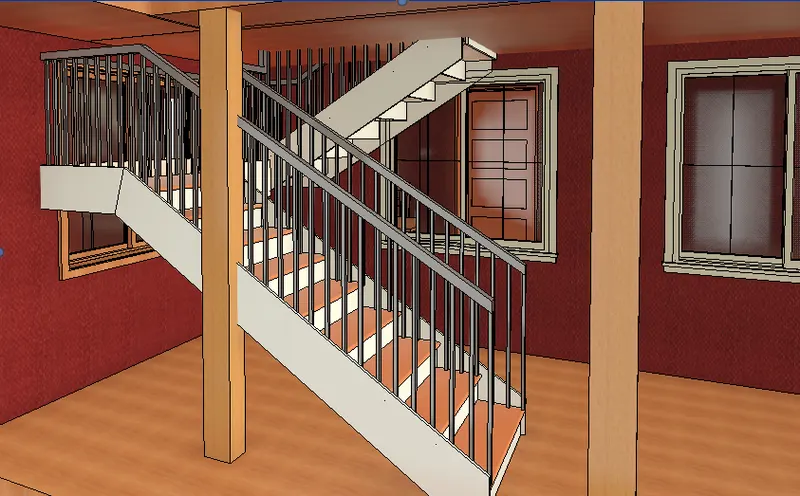
AFTER CREATING THE 3D-CAMERA VIEW WE START TO CREATING THE SHEETS
SET 3DV-BEDROOM1 VIEW:
- Now open the Revit software and go to the view Tab
- Then create the sheet
- Go to the view tab click the sheet option and select the size of the Paper from the table.
- Now we can see the template choose metric1 is inserted in the Revit Model.
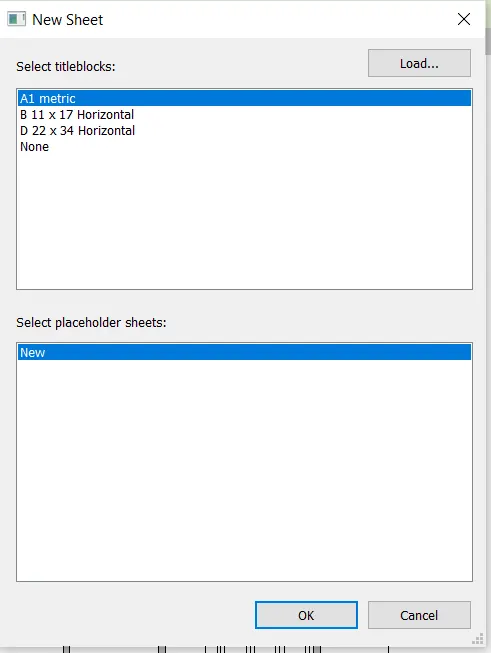
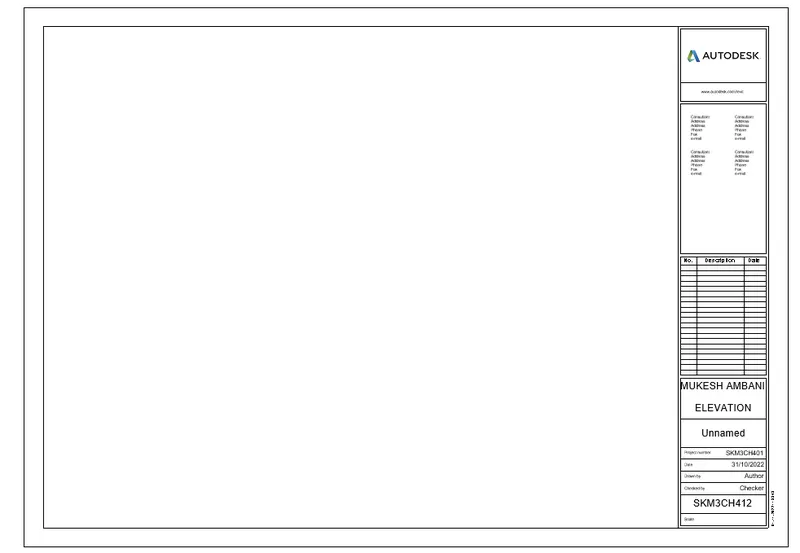
DRAG THE PROJECT INTO THE SHEET TEMPLATE:
- Now start to drag the plan into the template
- For dragging the plan
- in the Property browser check the 3DV-BEDROOM1 option
- And Directly pick up the ground floor and put it in the template sheet.
- we can adjust the size of the plan with the help of Scale
- The scale is shown in the Property browser.
- Click then and set it according to the template size
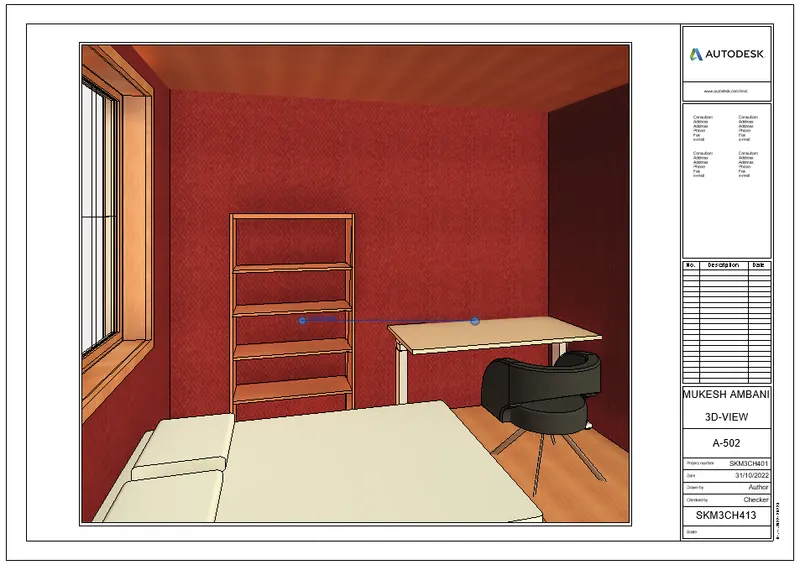
- Now double-click on the name option in the template and put the name 'A-501'
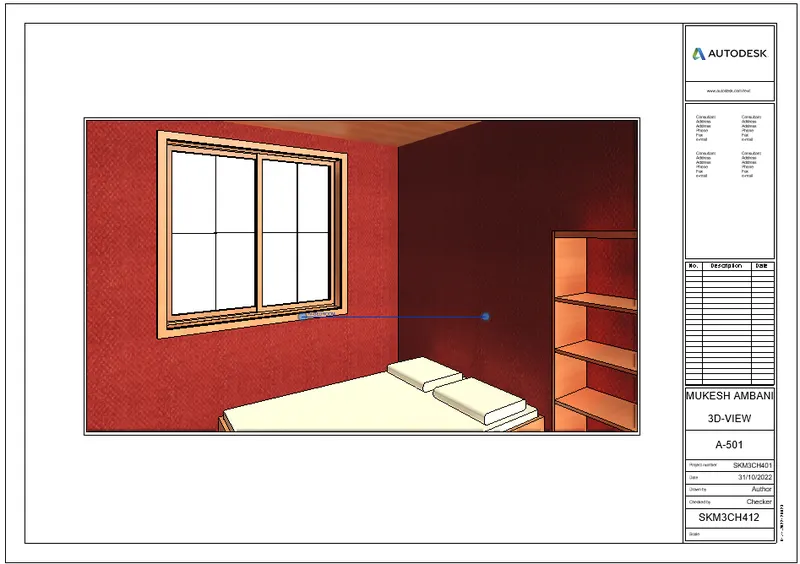
SET 3DV-BEDROOM2 VIEW:
- Now open the Revit software and go to the view Tab
- Then create the sheet
- Go to the view tab click the sheet option and select the size of the Paper from the table.
- Now we can see the template choose metric1 is inserted in the Revit Model.
DRAG THE PROJECT INTO THE SHEET TEMPLATE:
- Now start to drag the plan into the template
- For dragging the plan
- in the Property browser check the 3DV-BEDROOM2 option
- And Directly pick up the ground floor and put it in the template sheet.
- we can adjust the size of the plan with the help of Scale
- The scale is shown in the Property browser.
- Click then and set it according to the template size
- Now double-click on the name option in the template and put the name 'A-502'
SET 3DV-DINING AREA VIEW:
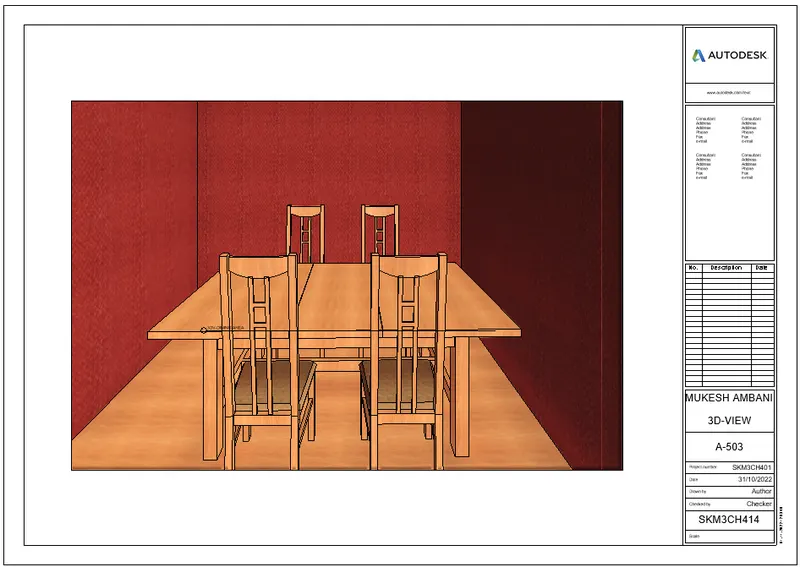
- Now open the Revit software and go to the view Tab
- Then create the sheet
- Go to the view tab click the sheet option and select the size of the Paper from the table.
- Now we can see the template choose metric1 is inserted in the Revit Model.
DRAG THE PROJECT INTO THE SHEET TEMPLATE:
- Now start to drag the plan into the template
- For dragging the plan
- in the Property browser check the 3DV-DINING AREA option
- And Directly pick up the ground floor and put it in the template sheet.
- we can adjust the size of the plan with the help of Scale
- The scale is shown in the Property browser.
- Click then and set it according to the template size
- Now double-click on the name option in the template and put the name 'A503'
SET 3DV-KITCHEN VIEW:
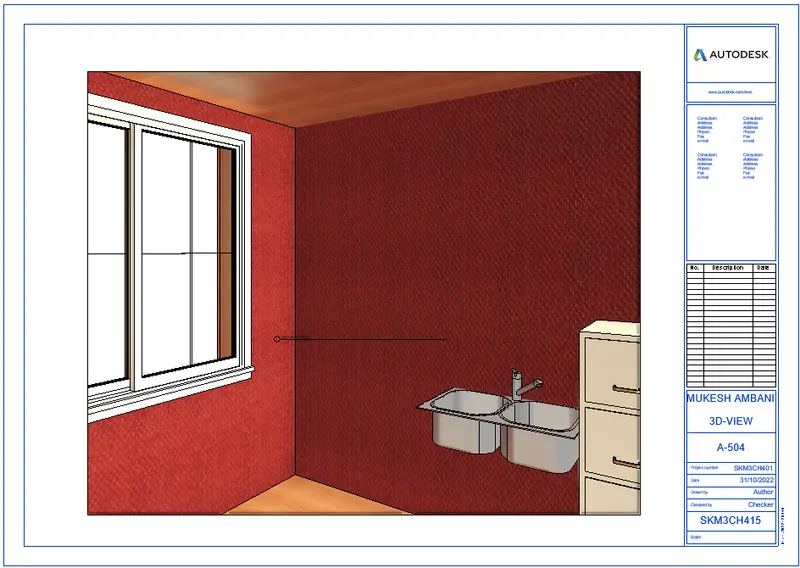
- Now open the Revit software and go to the view Tab
- Then create the sheet
- Go to the view tab click the sheet option and select the size of the Paper from the table.
- Now we can see the template choose metric1 is inserted in the Revit Model.
DRAG THE PROJECT INTO THE SHEET TEMPLATE:
- Now start to drag the plan into the template
- For dragging the plan
- in the Property browser check the 3DV-KITCHEN option
- And Directly pick up the ground floor and put it in the template sheet.
- we can adjust the size of the plan with the help of Scale
- The scale is shown in the Property browser.
- Click then and set it according to the template size
- Now double-click on the name option in the template and put the name 'A-504'
3DV-LIVING AREA
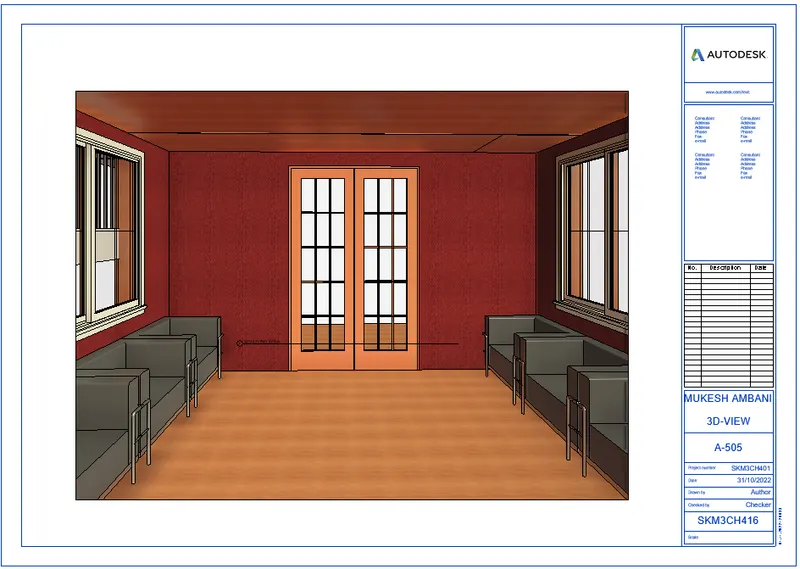
- Now open the Revit software and go to the view Tab
- Then create the sheet
- Go to the view tab click the sheet option and select the size of the Paper from the table.
- Now we can see the template choose metric1 is inserted in the Revit Model.
DRAG THE PROJECT INTO THE SHEET TEMPLATE:
- Now start to drag the plan into the template
- For dragging the plan
- in the Property browser check the 3DV-LIVING AREA option
- And Directly pick up the ground floor and put it in the template sheet.
- we can adjust the size of the plan with the help of Scale
- The scale is shown in the Property browser.
- Click then and set it according to the template size
- Now double-click on the name option in the template and put the name 'A-505'
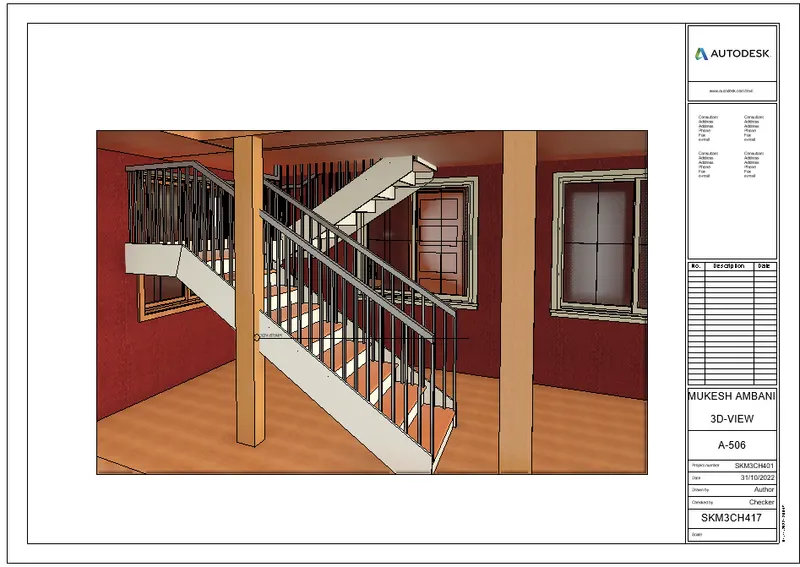
SET 3DV-STAIR VIEW:
- Now open the Revit software and go to the view Tab
- Then create the sheet
- Go to the view tab click the sheet option and select the size of the Paper from the table.
- Now we can see the template choose metric1 is inserted in the Revit Model.
DRAG THE PROJECT INTO THE SHEET TEMPLATE:
- Now start to drag the plan into the template
- For dragging the plan
- in the Property browser check the 3DV-STAIR option
- And Directly pick up the ground floor and put it in the template sheet.
- we can adjust the size of the plan with the help of Scale
- The scale is shown in the Property browser.
- Click then and set it according to the template size
- Now double-click on the name option in the template and put the name 'A-506'
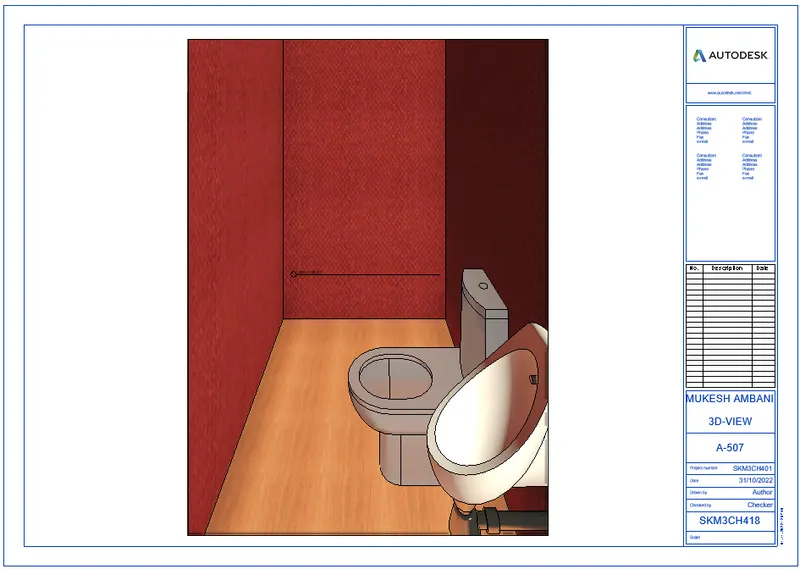
SET 3DV-TOILET VIEW
- Now open the Revit software and go to the view Tab
- Then create the sheet
- Go to the view tab click the sheet option and select the size of the Paper from the table.
- Now we can see the template choose metric1 is inserted in the Revit Model.
DRAG THE PROJECT INTO THE SHEET TEMPLATE:
- Now start to drag the plan into the template
- For dragging the plan
- in the Property browser check the 3DV-TOILET option
- And Directly pick up the ground floor and put it in the template sheet.
- we can adjust the size of the plan with the help of Scale
- The scale is shown in the Property browser.
- Click then and set it according to the template size
- Now double-click on the name option in the template and put the name 'A-507'
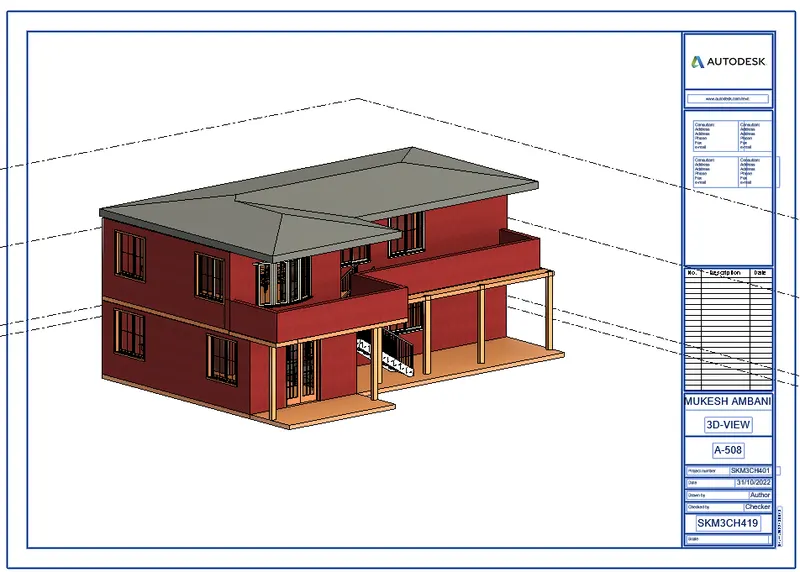
3D-VIEW
- Now open the Revit software and go to the view Tab
- Then create the sheet
- Go to the view tab click the sheet option and select the size of the Paper from the table.
- Now we can see the template choose metric1 is inserted in the Revit Model.
DRAG THE PROJECT INTO THE SHEET TEMPLATE:
- Now start to drag the plan into the template
- For dragging the plan
- in the Property browser check the 3D-VIEW option
- And Directly pick up the ground floor and put it in the template sheet.
- we can adjust the size of the plan with the help of Scale
- The scale is shown in the Property browser.
- Click then and set it according to the template size
- Now double-click on the name option in the template and put the name 'A-508'
RESULT: I HAVE CREATED ALL THE 3D CAMERA VIEWS OF THE BUILDING WITH THE HELP OF REVIT SOFTWARE. AFTER GIVING THE ANSWER TO THE QUESTIONS SCREENSHOTS ARE ATTACHED WITH THE RESULTING DRAWING.