3D Creation of Celing, Roof, Architectural plan, Structural plan, Sectional view, Elevation view and Camera specific view for a house plan using REVIT
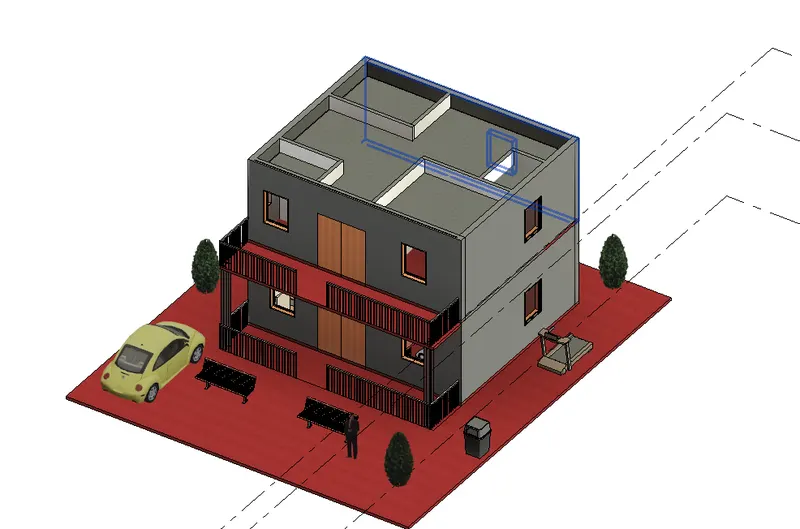
3D RESIDENTIAL MODEL WITH CEILING
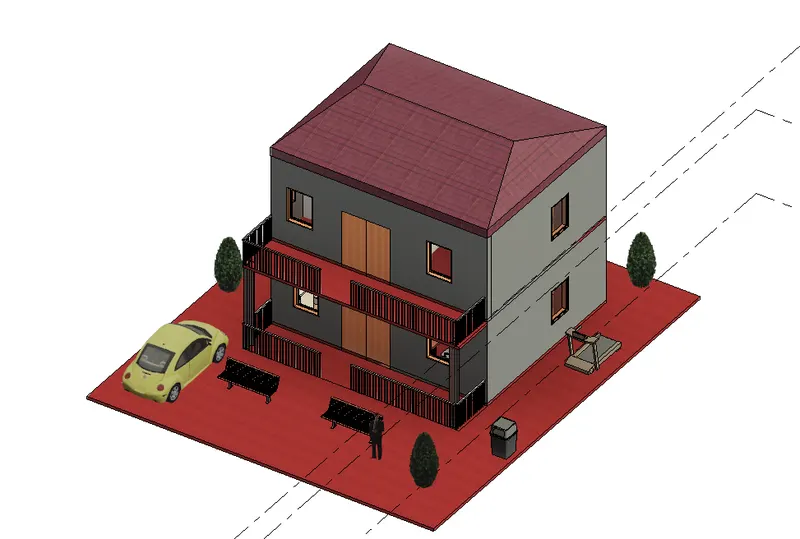
3D RESIDENTIAL MODEL WITH ROOF
AIM:To creat the ceiling and roof a building by the REVIT software.
PROCEDURE:
- First open the revit software and open and select the week-3 project created.
- Next select the roof and remove and then go to architect tool bar select the ceiling tool and create the ceiling in the first of the residential building.
- After creating the ceiling and then go to the architect tool bar select roof and then creat roof above the ceiling.
THE WEEK-2 ARCHITECTURAL AND STRUCTURAL PLANS WITH WALLS,WINDOWS,FLOORS AND COMPONENTS ARE GIVEN BELOW:
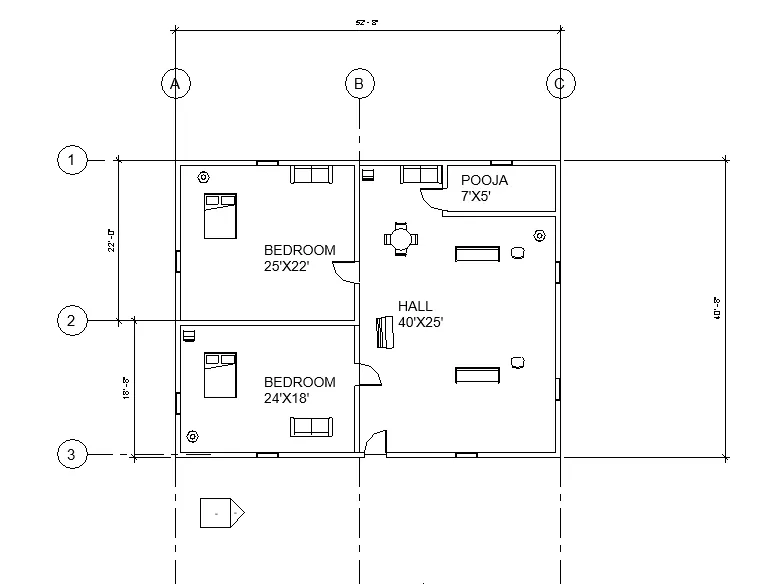
WEEK -2 ARCHITECTURAL PLAN WITH ALL COMPONENTS
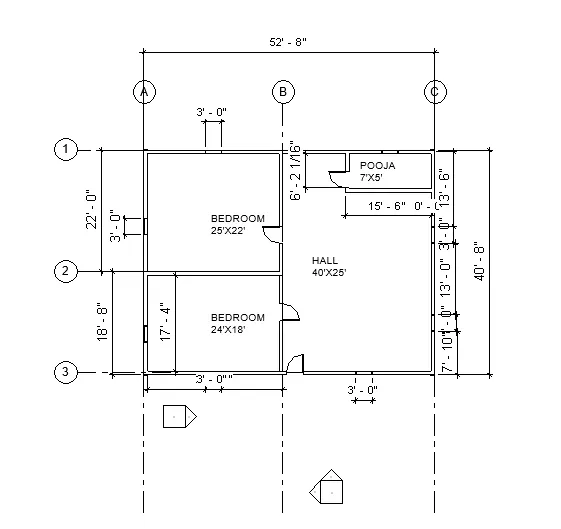
WEEK-2 STURCTURAL PLAN
- After that go to week-2 ground floor project plan and draw the structural and architectural plans as shown above.
- In the above drawins all the texts and dimensions are created by using the annotate tool bar in the ribbon section.
- All the components,families,and elements are created by using insert tool bar.
THE WEEK-3 ARCHITECTURAL AND STRUCTURAL PLANS ARE GIVEN BELOW:
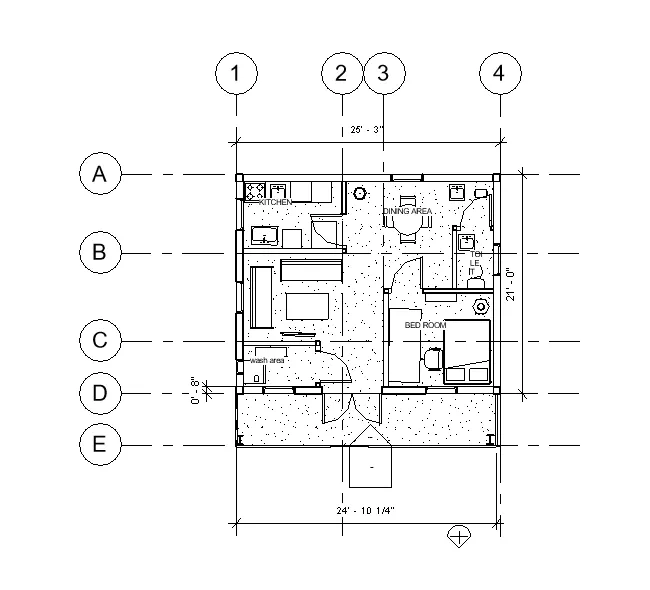
WEEK-3 GROUND FLOOR ARCHITECTURAL PLAN WITH ALL COMPONENTS
WEEK-3 FIRST FLOOR ARCHITECTURAL PLAN WITH ALL COMPONENTS
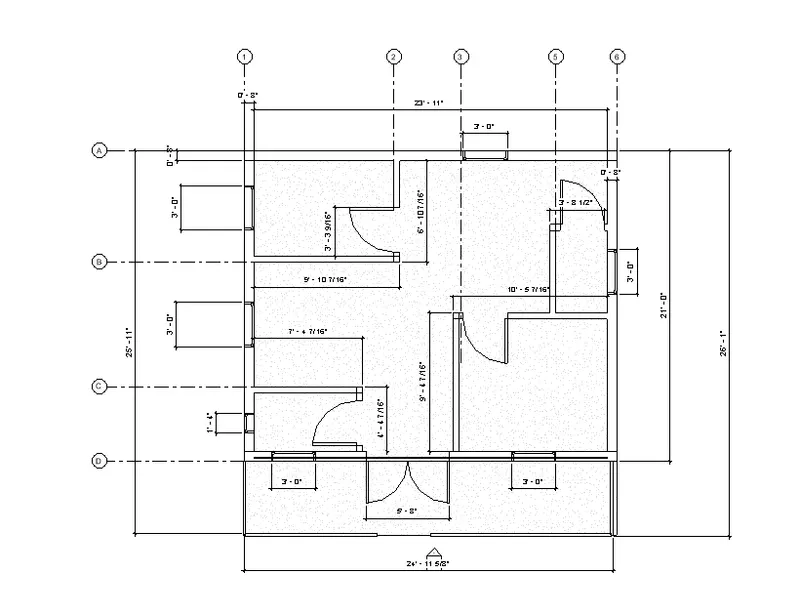
WEEK-3 GROUND FLOOR STRUCTURAL PLAN
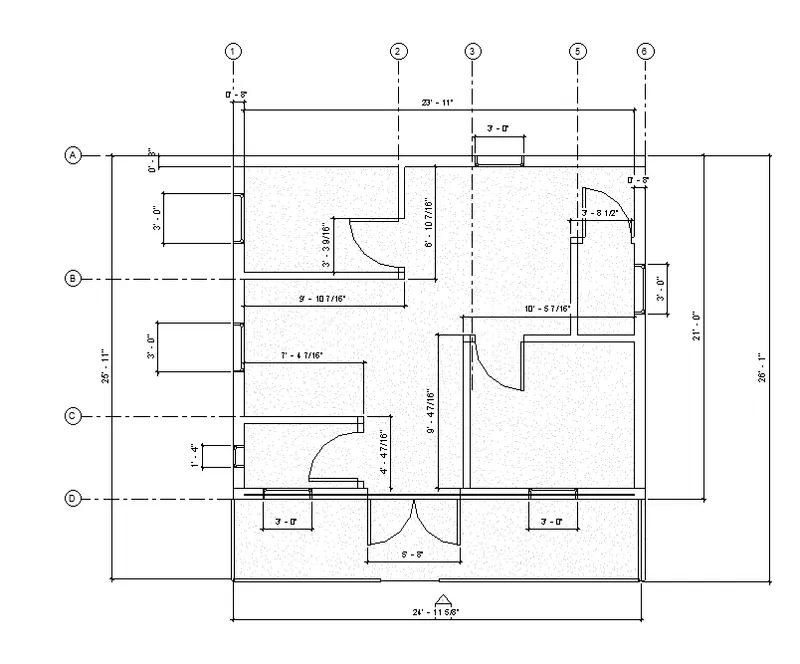
WEEK-3 FIRST FLOOR STRUCTURAL PLAN
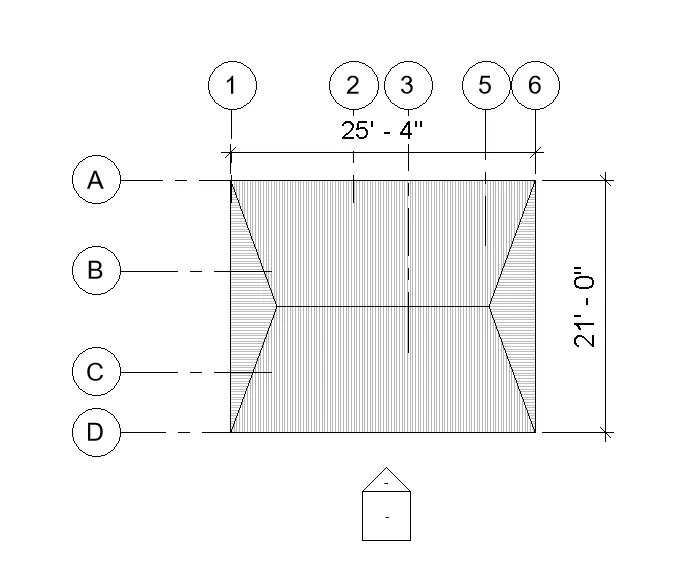
WEEK -3 ROOF FRAMED
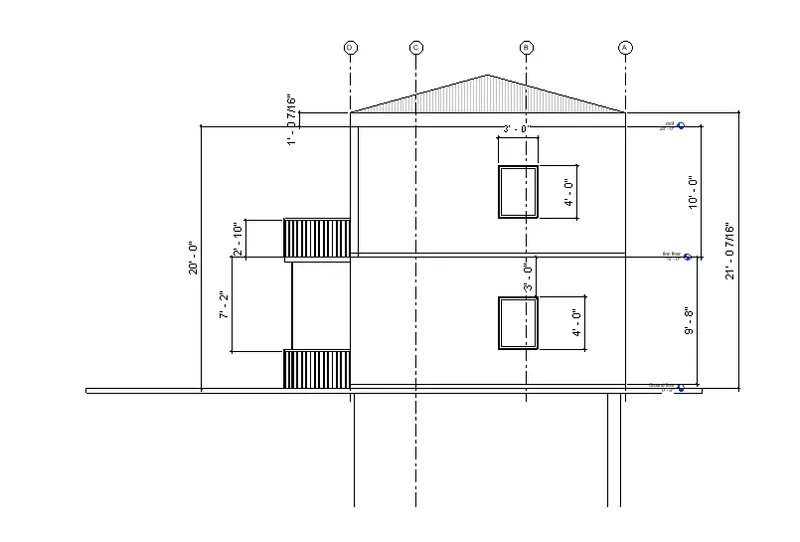
ELEVATION FROM SOUTH VIEW
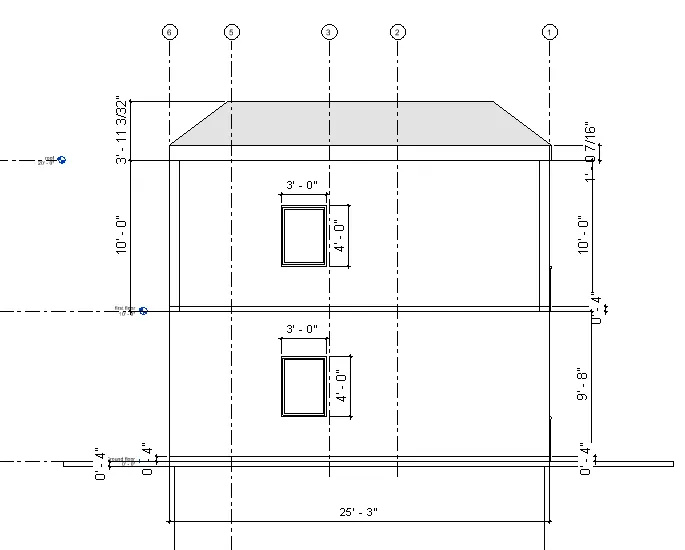
ELEVATION FROM THE NORTH VIEW
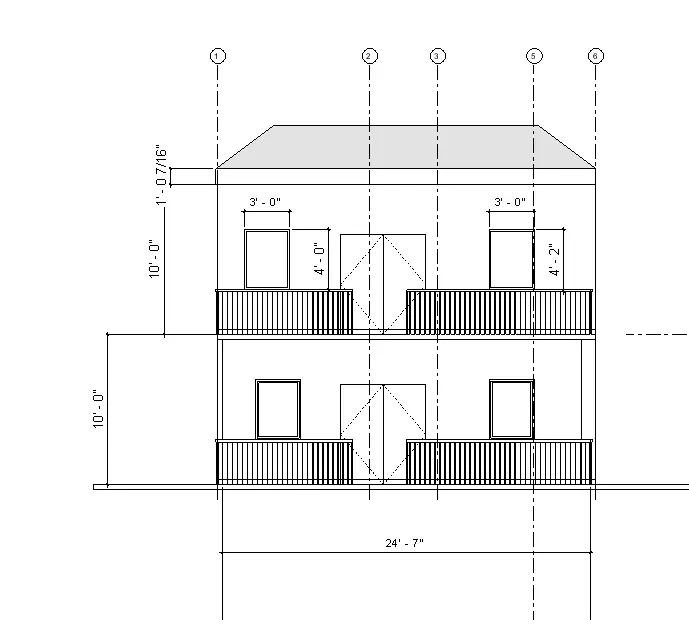
ELEVATION FROM THE SOUTH VIEW
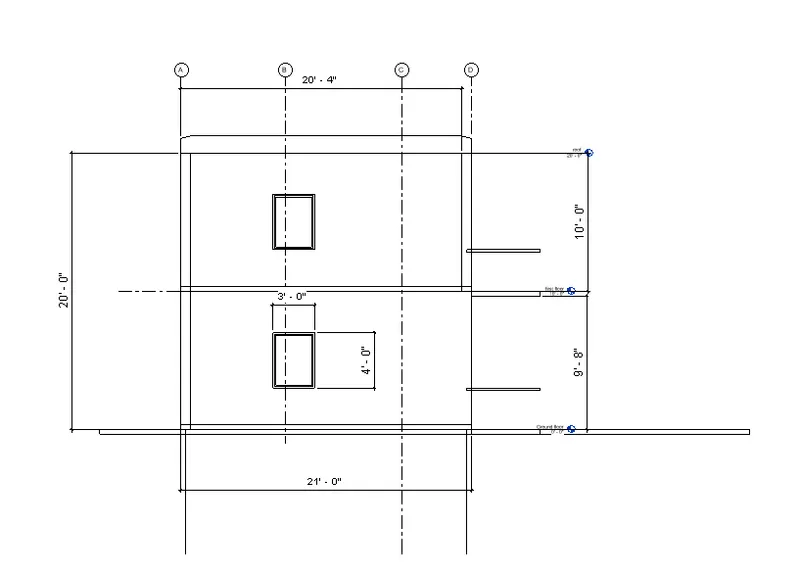
ELEVATION FROM THE WEST VIEW
- After draw the week-2 structural and architectural drawings next open revit and select the week-3 project.
- Then go to the ground floor plan and creat structural and architectural drawings as shown above by diffenrent tool bars in the ribbon.
- After creating the ground floor plans next go to first floor and creat the first floor structural and architectural plans using the different tool bars.
- Then go to elevations of the 3d resideential model and create different view elevations like north side elevation,east side elevation,west side elevation and south side elevation by using the view tool bar.
- The different elevations of a residenitial as shown above.
- After creating all the drawings as shown in the above and then creat sheet templats for plans and elevations of the 3d residential model as shown in the below.
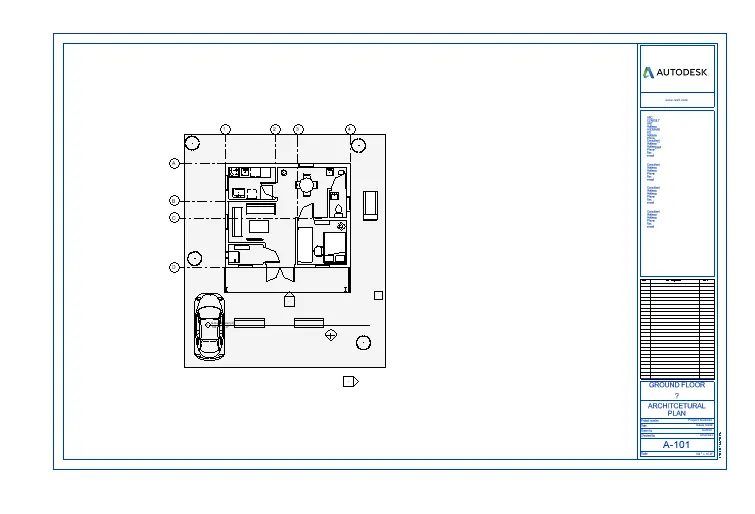
GROUND FLOOR ARCHITECTURAL PLAN WITH SHEET TEMPLATE
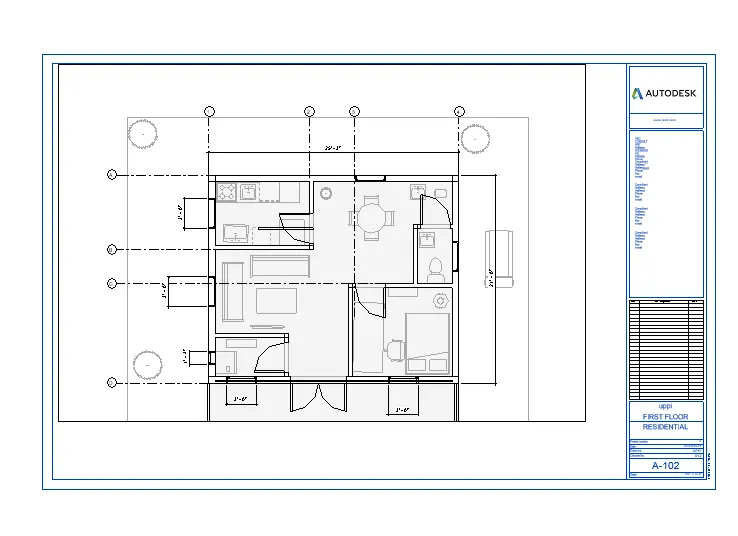
FIRST FLOOR ARCHITECTURAL PLAN WITH SHEET TEMPLATE
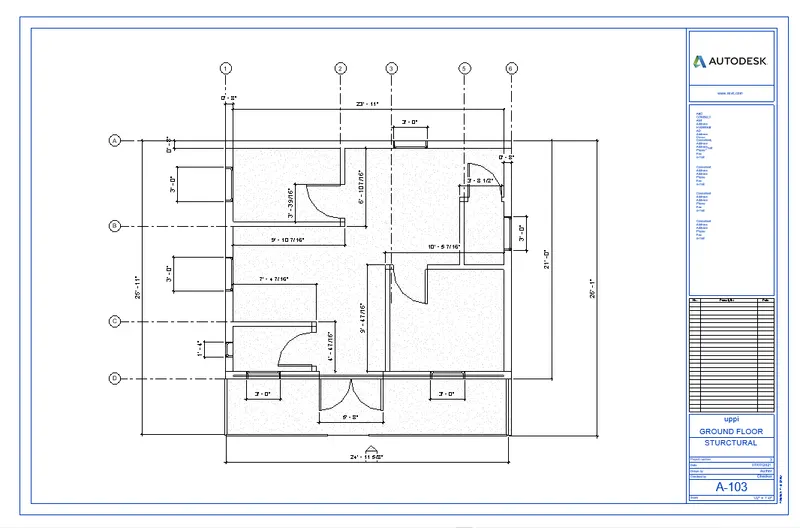
GROUND FLOOR STRUCTURAL PLAN WITH SHEET TEMPLATE
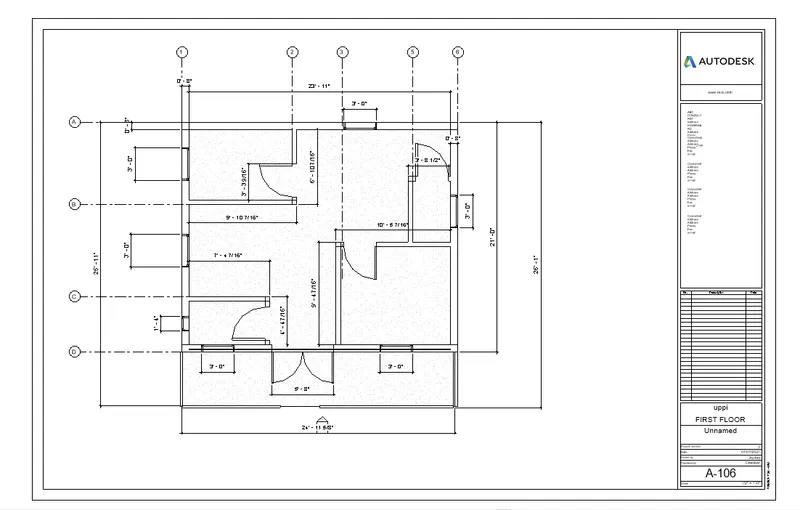
FIRST FLOOR STRUCTURAL PLAN WITH SHEET TEMPLATE
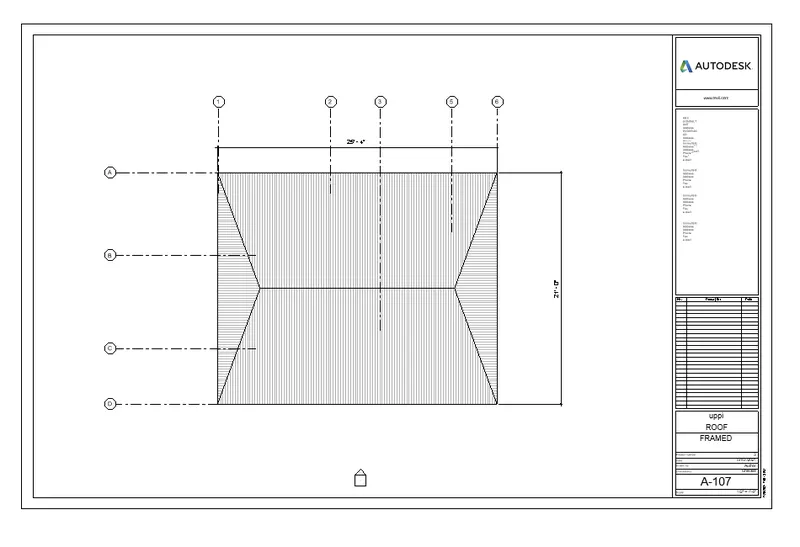
ROOF FRAMED RESPRESENTED WITH SHEET TEMPLATE
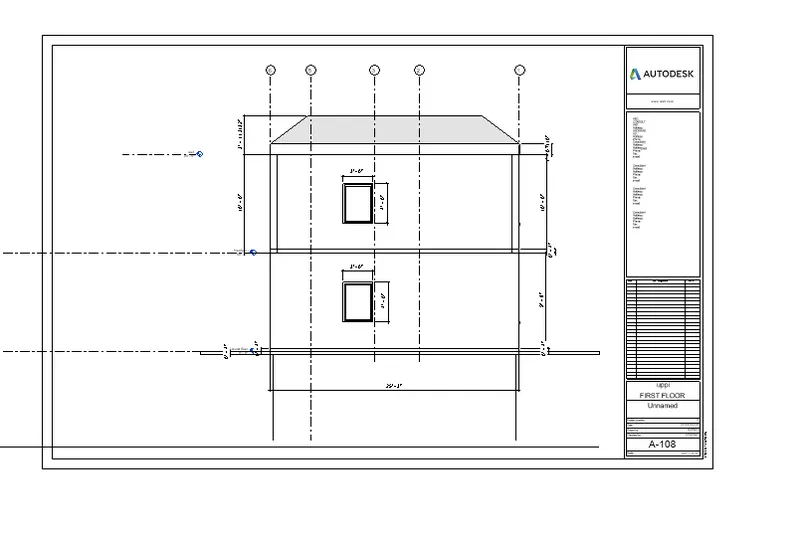
NORTH ELEVATION VIEW REPRESENTED WITH SHEET TEMPLATE
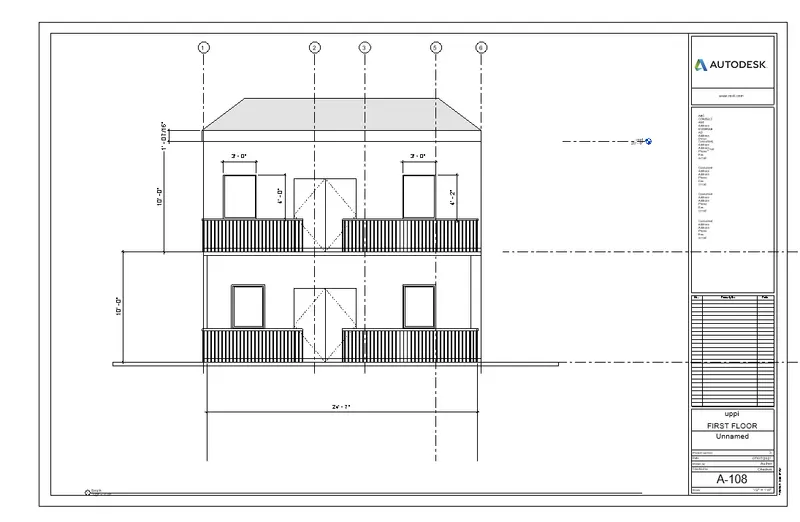
SOUTH ELEVATION VIEW REPRESENTED WITH SHEET TEMPLATE
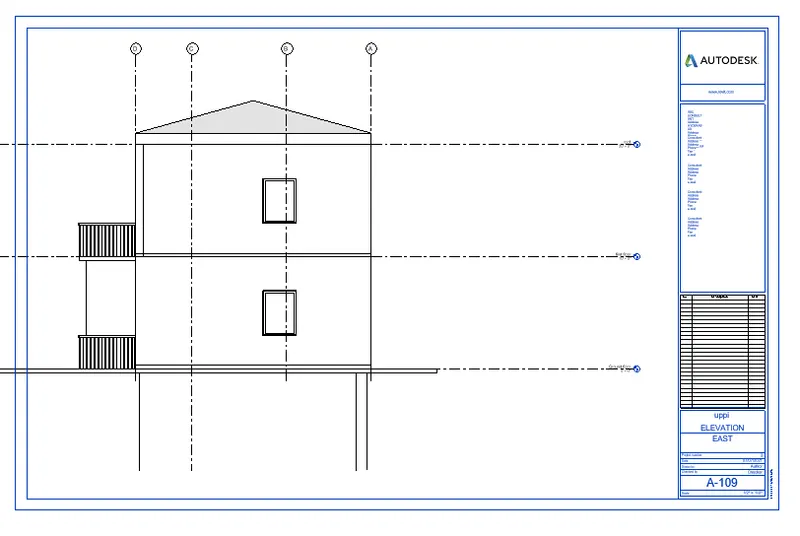
EAST ELEVATION VIEW REPRESENTED WITH SHEET TEMPLATE
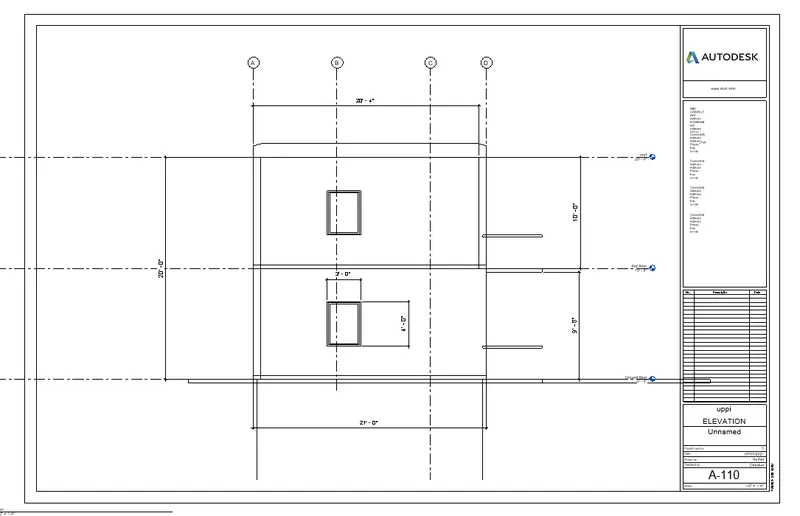
WEST ELEVATION VIEW REPRESENTED WITH SHEET TEMPLATE
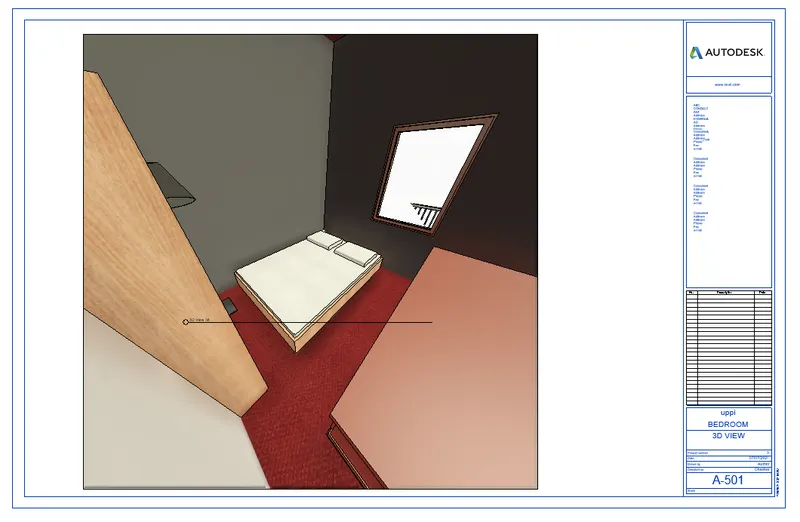
BEDROOM 3D VIEW OF A BUILDING WITH SHEET TEMPLATE
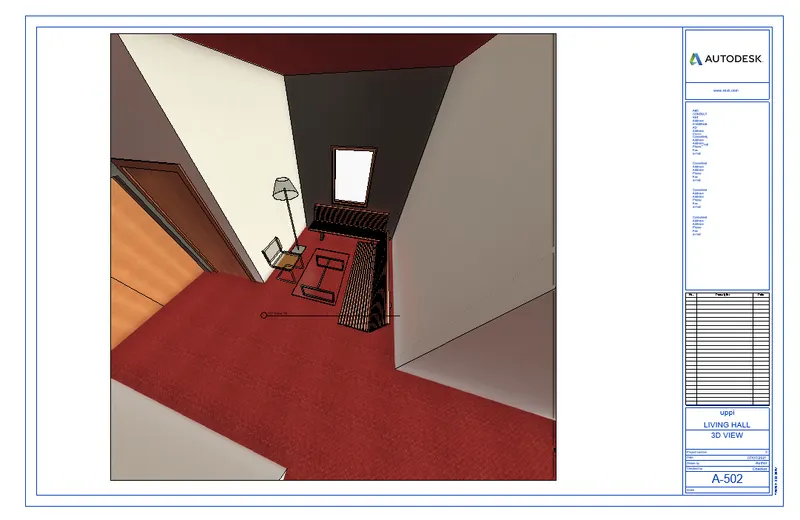
LIVING HALL 3D VIEW OF A BUILDING WITH SHEET TEMPLATE
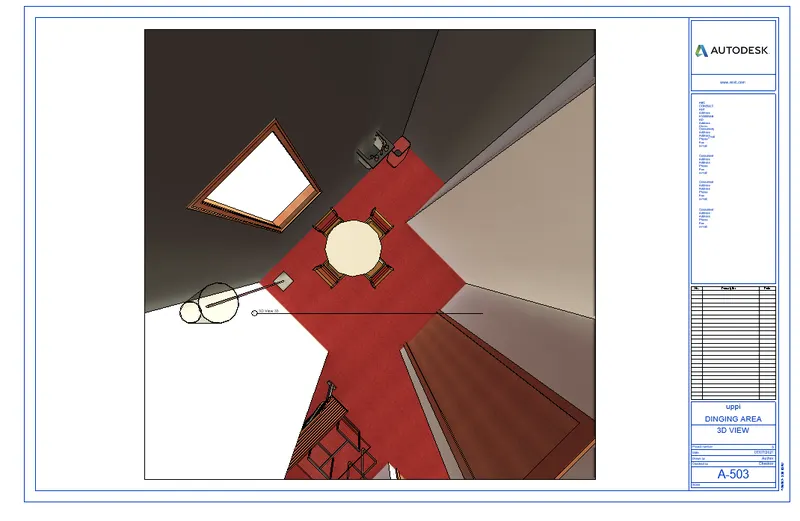
DINGIN AREA 3D VIEW OF A BUILDING WITH SHEET TEMPLATE
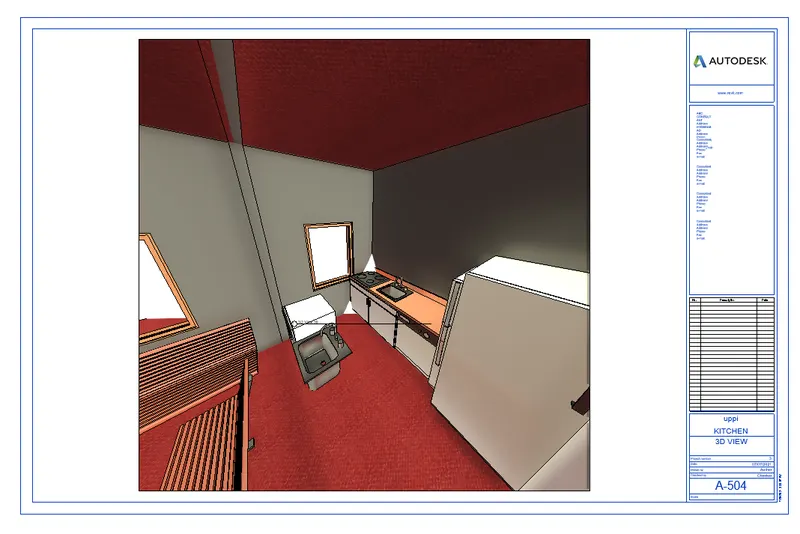
KITCHEN 3D VIEW A BUILDING WITH SHEET TEMPLATE
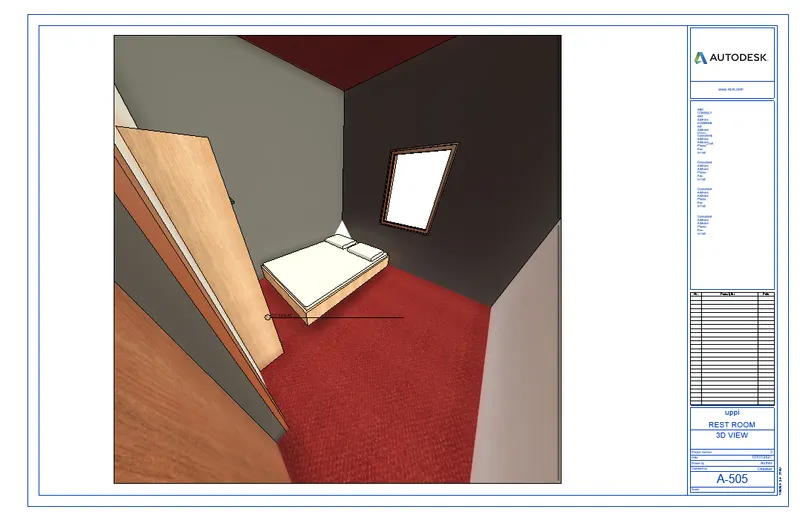
REST ROOM VIEW OF A BUILDING WITH SHET TEmplate
- To respresents the plans ,3D models ,3D views of a building and elevation of a building in the sheet templates as shown in above.
- Also creat the camera view of living ,dingin,kitchen,bedroom,and rest room in the sheets by using the view toolbar.
- First go to view tool bar in that select sheets and after selecting the sheet select the reuired title blocks from the load families.
- After selecting the sheet edit the name ,address,project name,project numbar ,issue date ,etc by the properties of the sheet.
- Then select add view in that select view and inserted the view in to the sheet and place it and increase or decrease the viewport by editing the view scale of the viewport.
- At last save the sheet by giving some name to it.
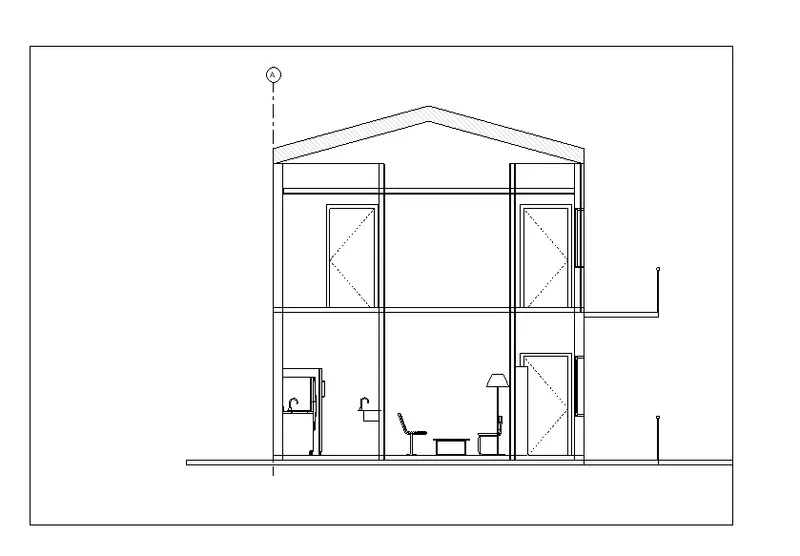
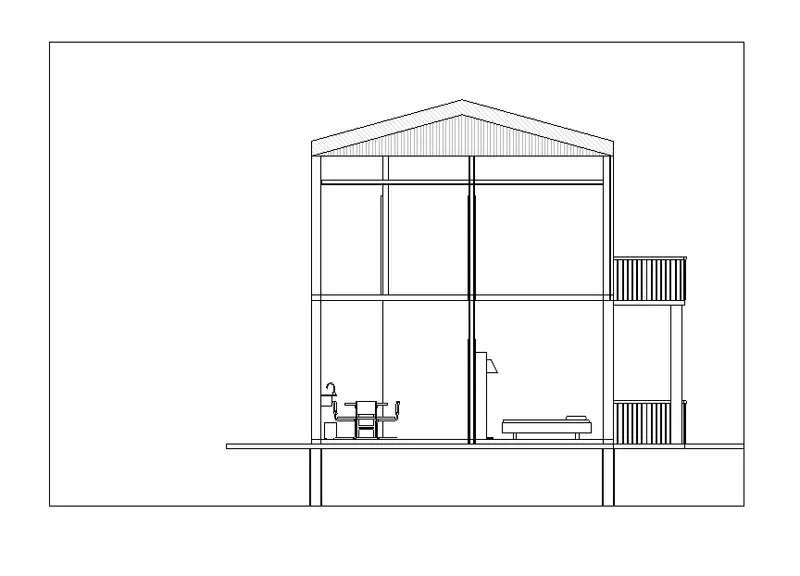
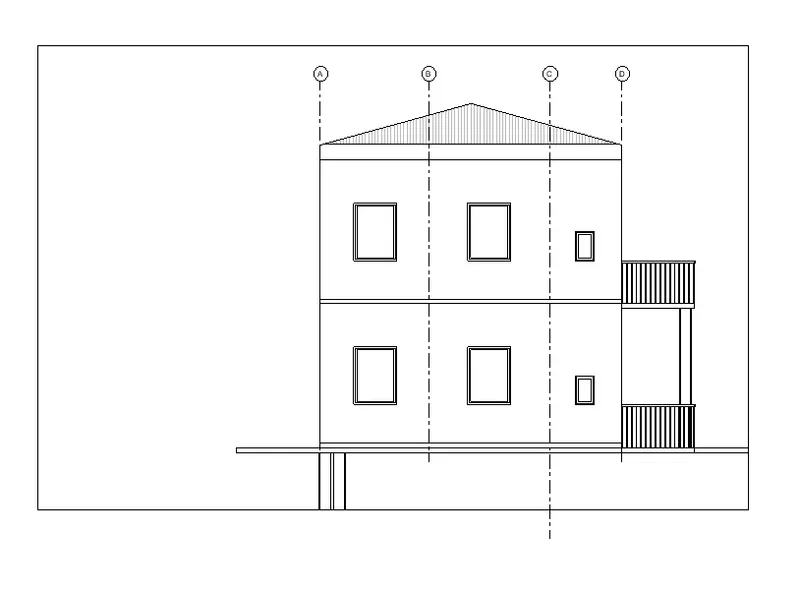
THE ABOVE ARE THE SECTION VIEWS OF 3D RESIDENTIAL BUILDING
- The section drawings are drawn by using the view tool bar in that select section tool and select the section area you required and click enter.
- Then in section family the different sections are created and view sections by selecting the sections.
THE TOOL BARS USED FOR THE ABOVE DRWAINGS ARE:
- Architect toolbar
- view toolbar
- insert toolbar
- manage toolbar
- modify toolbar
- Annotate toolbar
- section tool.