3D Creation of Celing, Roof, Architectural plan, Structural plan, Sectional view, Elevation view and Camera specific view for a house plan using REVIT
1.0
AIM: To create ceiling elements to building model in revit software.
INTRODUCTION: In this challenge information and folllowing building elements modeling is done with proper explaination.
- modeling of ceiling element to building
- Modeling roof of building and changing properties.
- Making of sheets for differents view.
- Section Drafting information.
- Adding elevation of building model.
- Adding plan, elevation and section view to sheets.
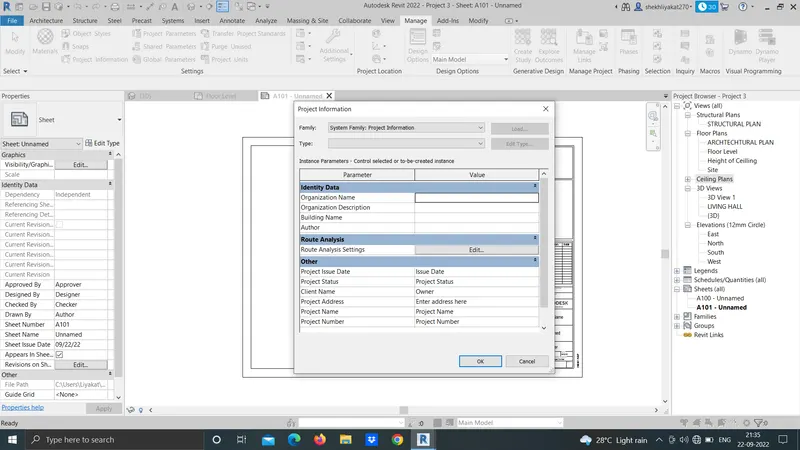
- Editing the poject information
All above points are cover in this challenge.
PROCEDURE:
Open a new sheet and set units as feet and inches.
Taken the ceiling area by selecting use of project browser.
In above the toolbar, click the ceiling option and make the drawing.
Set into the floor plan using ceiling on project browser.
Use the sketch option to draw the ceiling.
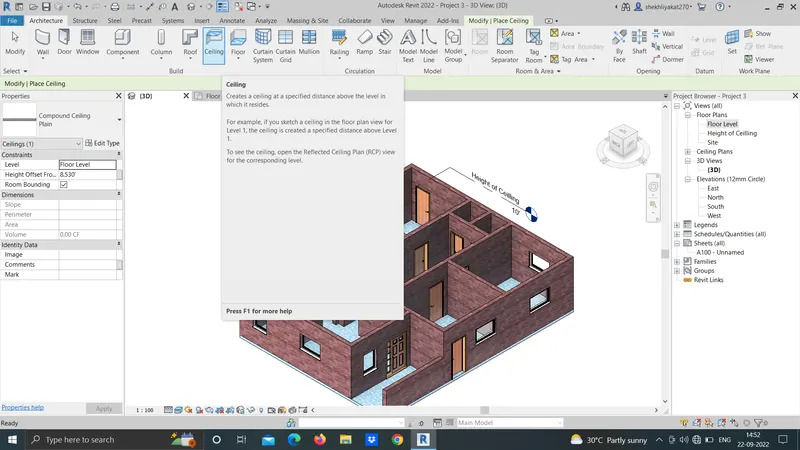
Select the out boundry of ceiling using pick line option from modify tab.
After drawing the ceiling give the offset height of ceiling.
Open 3D view to see the ceiling.
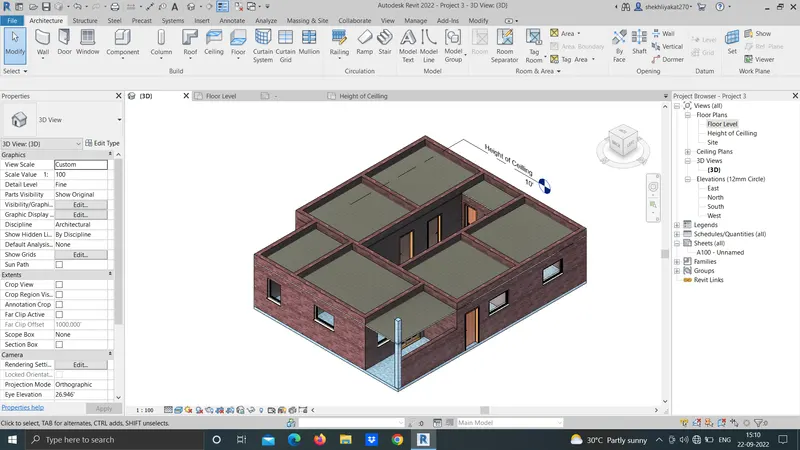
RESULT: I understood how to add the ceiling element and how edit its properties in revit software.
2.0
AIM:
To model a roof above the ceiling by selecting the footprints of the ceiling. Using the adjustment toolbars appearing on-screen adjust the roof slope to 10 degrees.
INTRODUCTION: In this challenge information and folllowing building elements modeling is done with proper explaination.
- modeling of ceiling element to building
- Modeling roof of building and changing properties.
- Making of sheets for differents view.
- Section Drafting information.
- Adding elevation of building model.
- Adding plan, elevation and section view to sheets.
- Editing the poject information
All above points are cover in this challenge.
PROCEDURE:
In the toolbar taken a roof option.
We have to select the footprint in roof option.
Pick the sketch boundary line option.
Sketch the boundary line.
Click OK.
In the properties browser given the slope value as 10 degree.
Click OK.
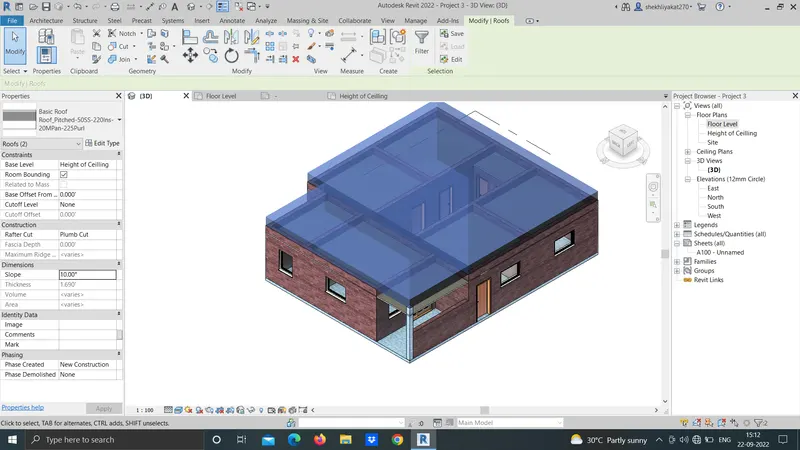
For view see 3D view of model.
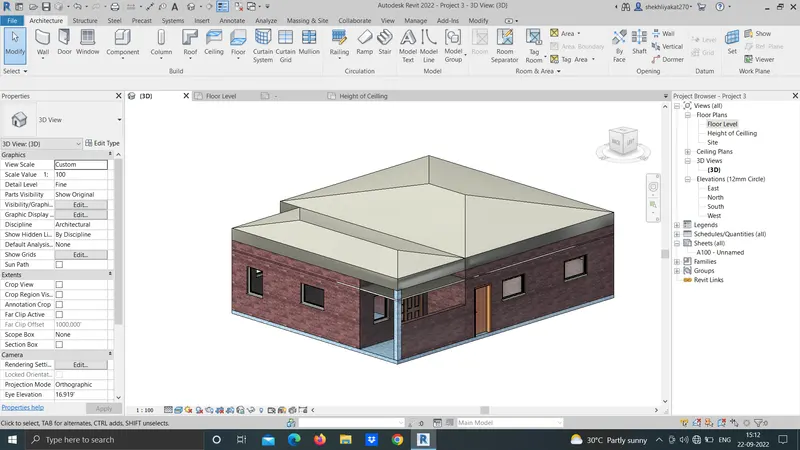
RESULT: I understood how to add roof to building model and how to change properties of roof in revit software.
3.0
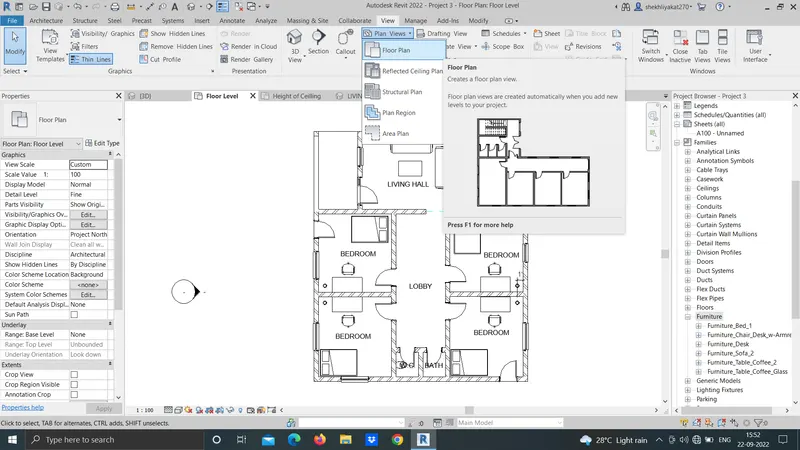
AIM: From the previous week challenge, separating the structural and architectural plan of building with floor, wall and column components.
INTRODUCTION: In this challenge information and folllowing building elements modeling is done with proper explaination.
- modeling of ceiling element to building
- Modeling roof of building and changing properties.
- separating the structural and architectural plan from building model.
- Making of sheets for differents view.
- Section Drafting information.
- Adding elevation of building model.
- Adding plan, elevation and section view to sheets.
- Editing the poject information
All above points are cover in this challenge.
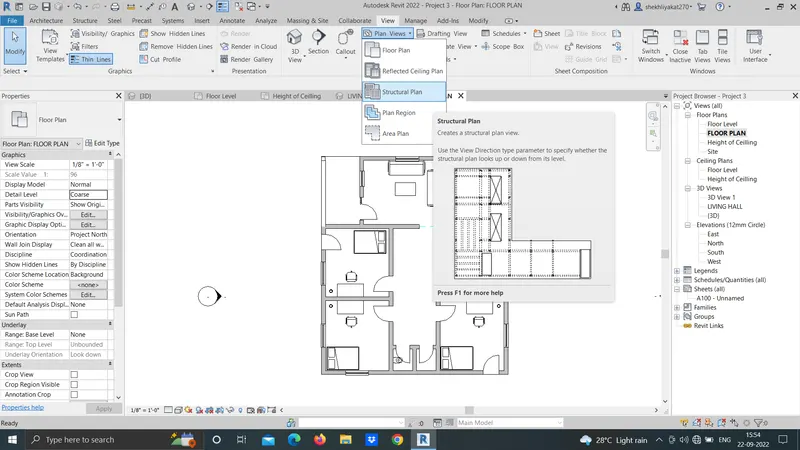
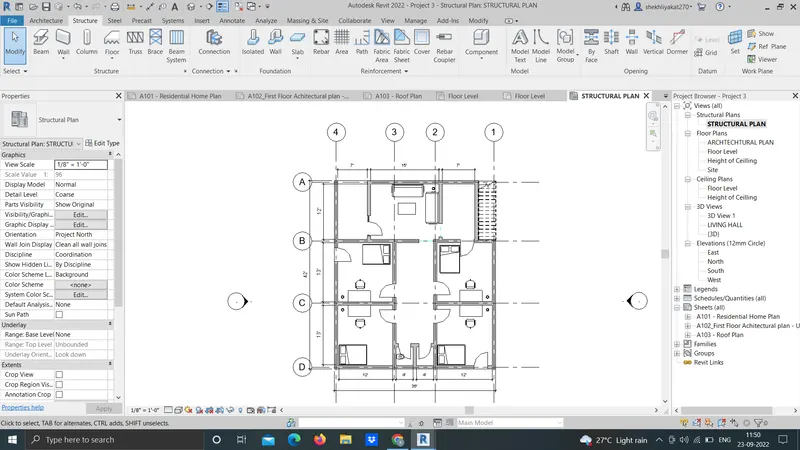
AIM:
To use the annotate toolbar add dimensions to all the walls and floors with reference to the longitudinal and transverse grids created in the project file.
INTRODUCTION: In this challenge information and folllowing building elements modeling is done with proper explaination.
- modeling of ceiling element to building
- Modeling roof of building and changing properties.
- separating the structural and architectural plan from building model.
- Annoatation to the architectural and structural plan
- Making of sheets for differents view.
- Section Drafting information.
- Adding elevation of building model.
- Adding plan, elevation and section view to sheets.
- Editing the poject information
All above points are cover in this challenge.
PROCEDURE:
In the above tool bar pick the annotate option.
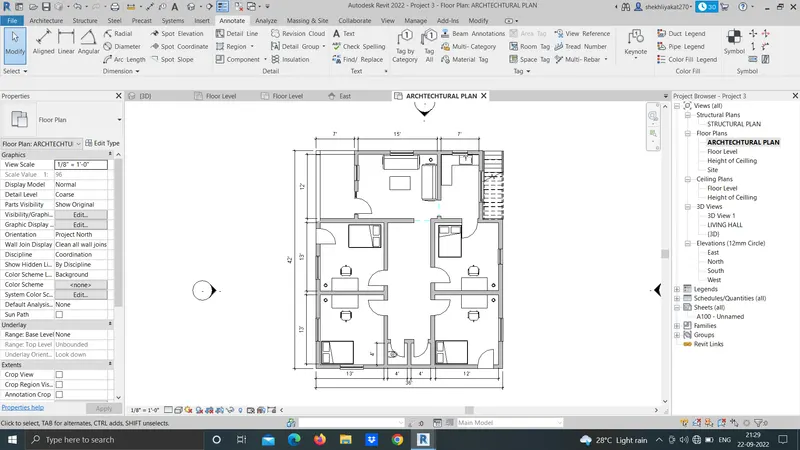
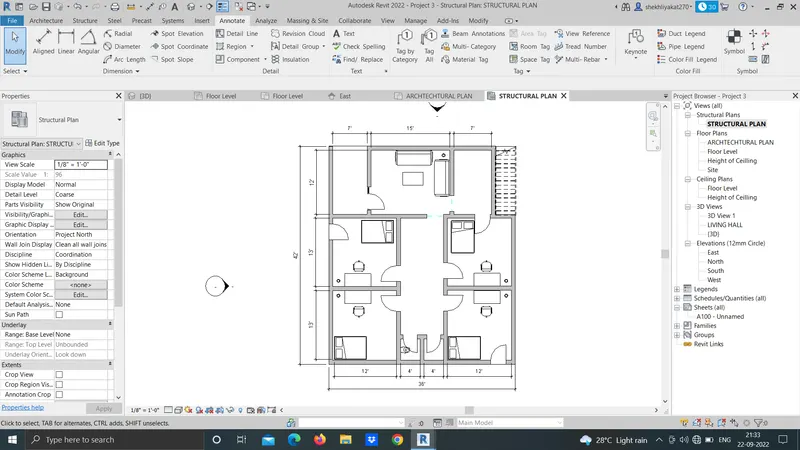
INTRODUCTION: In this challenge information and folllowing building elements modeling is done with proper explaination.
- modeling of ceiling element to building
- Modeling roof of building and changing properties.
- separating the structural and architectural plan from building model.
- Annoatation to the architectural and structural plan
- Making of sheets for differents view.
- Section Drafting information.
- Adding elevation of building model.
- Adding plan, elevation and section view to sheets.
- Editing the poject information
All above points are cover in this challenge.
- Open the Revit project.
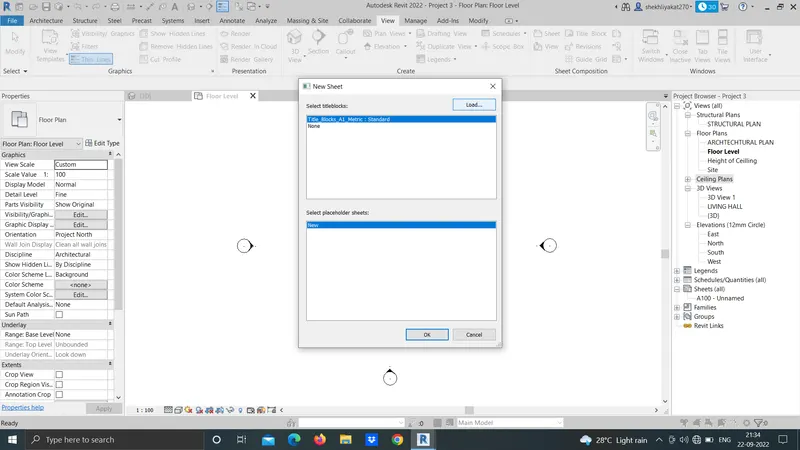
- Click View tab>Sheet Composition panel>Sheet
- In the New Sheet dialog, select a title block from the list. If the list does not show the desired title block, click Load. In the Library folder, open the Titleblocks folder, or navigate to the folder where the title block resides. Select the title block to load, and click Open.Select None to create a Sheet without a title block.
- Click OK.Select a title block, as follows
- For information about title blocks, see Title Blocks.
- Enter information in the title block of the sheet.See Specifying Title Block Information for Sheets.
- Add views to the sheet.See Adding Views to a Sheet.
- Change the default number and name that Revit Architecture assigned to the sheet.
- See Renaming a Sheet. The sheet number and name display in the Project Browser under Sheets all.
PROCEDURE TO ADD VIEW:
Select the sheet option in the above toolbar.
Edit the sheet size as what you want like (A0,A1,A2,A3,A4).
Pick a sheet.
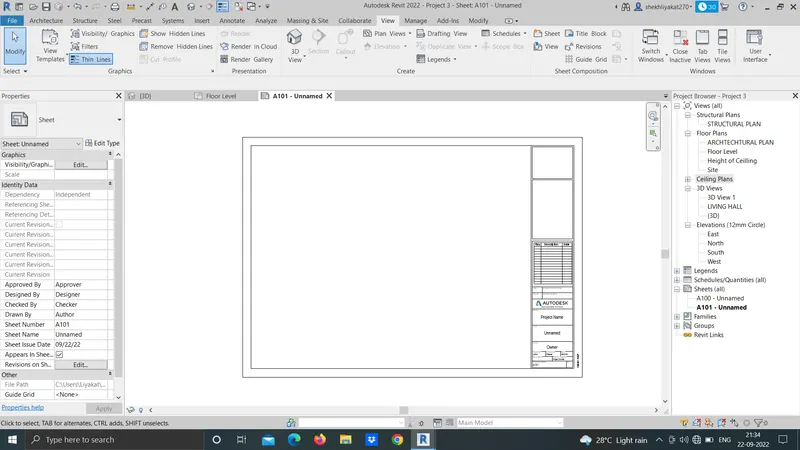
And pick the floor plan and drag into the sheet.
And edit the size of the picture use the scale option in properties box.
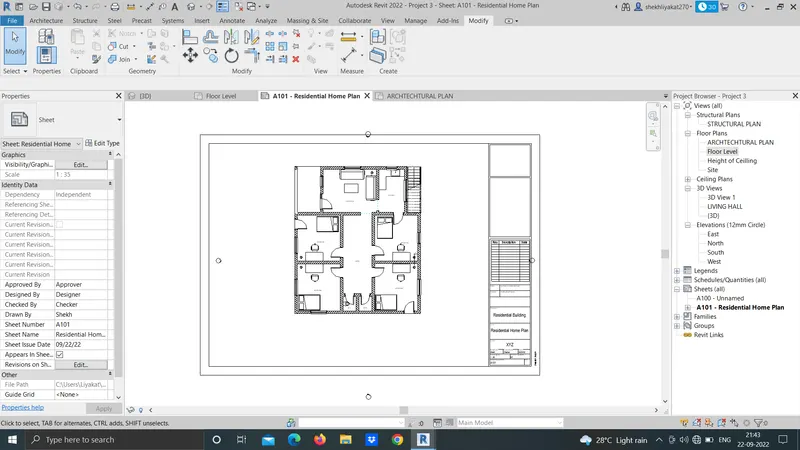
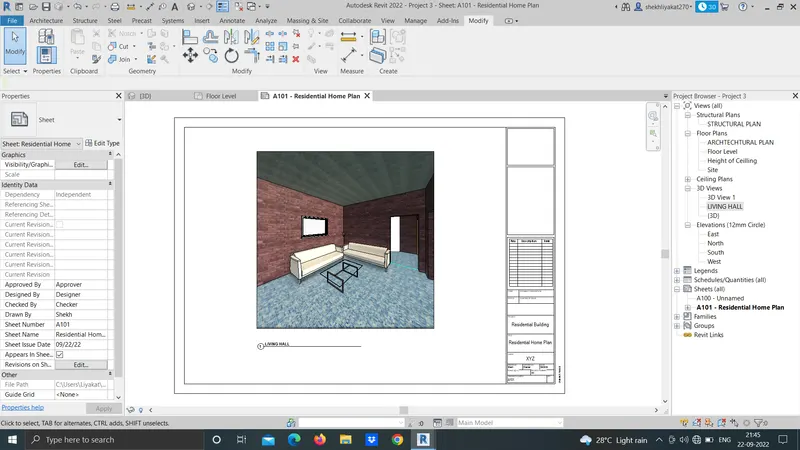
RESULT: I understodo how to add desirable view to the sheet in revit software.
6.0
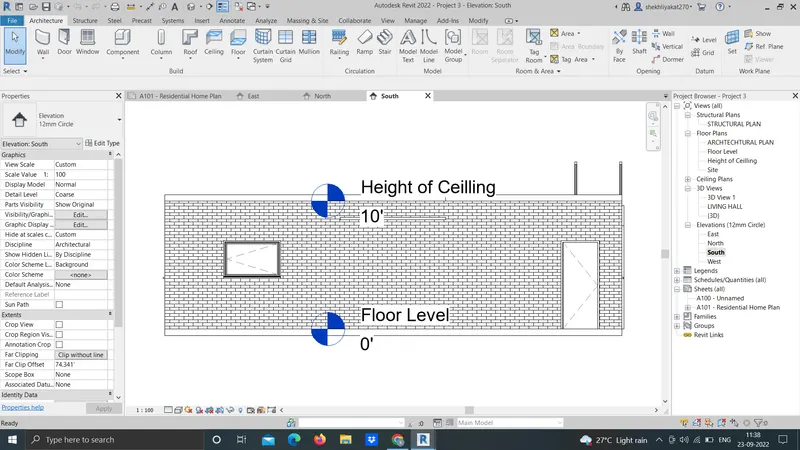
AIM: Creating elevation in East, West, North and south direction using view tab in revit software.
INTRODUCTION: In this challenge information and folllowing building elements modeling is done with proper explaination.
- modeling of ceiling element to building
- Modeling roof of building and changing properties.
- separating the structural and architectural plan from building model.
- Annoatation to the architectural and structural plan
- Making of sheets for differents view.
- Section Drafting information.
- Adding elevation of building model.
- Adding plan, elevation and section view to sheets.
- Editing the poject information
All above points are cover in this challenge.
PROCEDURE:
After finishing the diagram in 3d model.
Pick the elevation in view tool bar.
After taken the elevation option and place into the screen.
It depends upon the diagram.
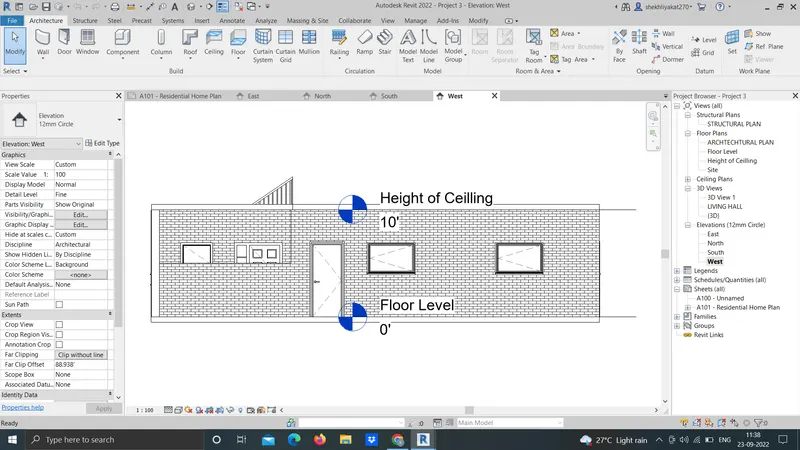
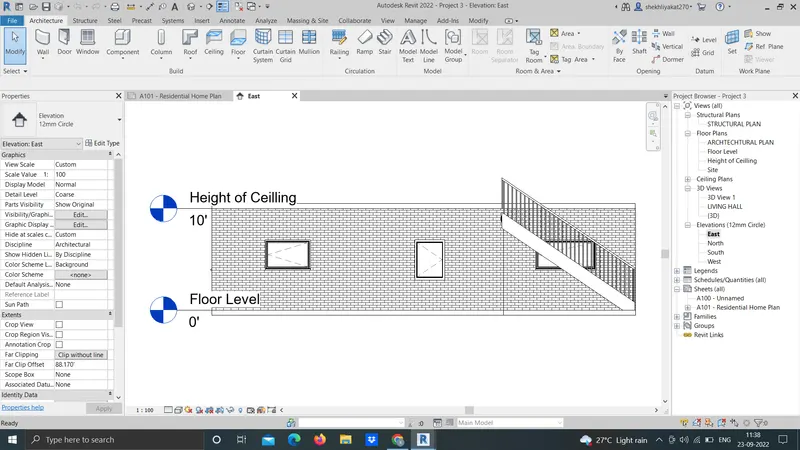
We can place the elevations in four sides_ North, South, West , East.
Check the elevation in project browser.
RESULT: I understood creating the elevation of building model.
WEST ELEVATION
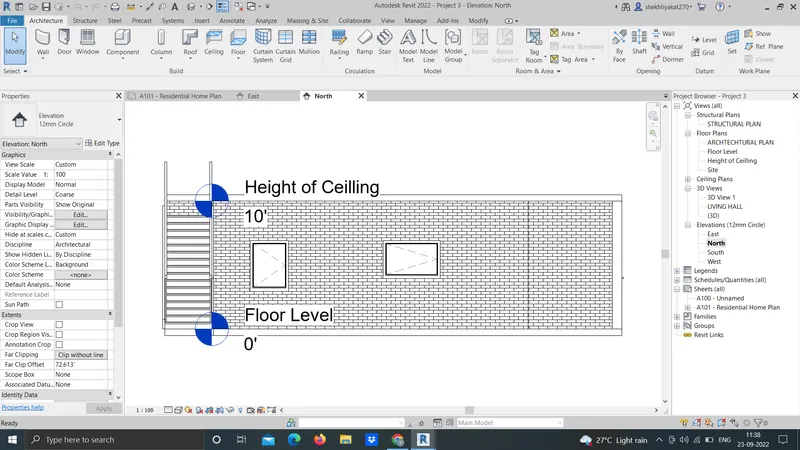
NORTH ELEVATION
EAST ELEVATION
SOUTH ELEVATION
7.0
AIM:
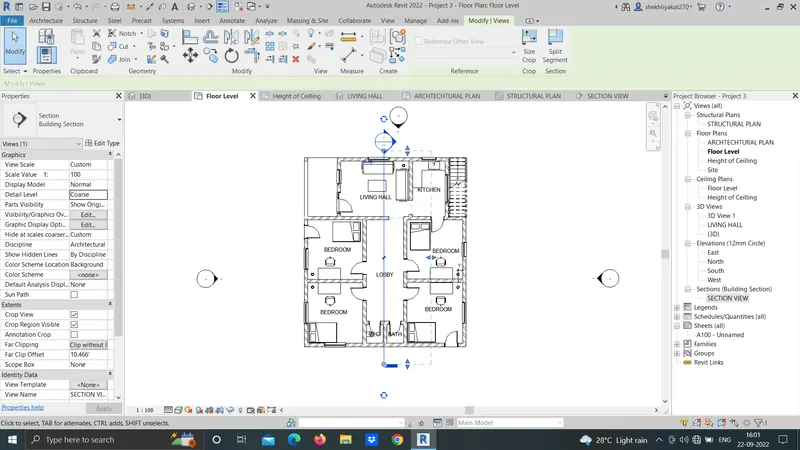
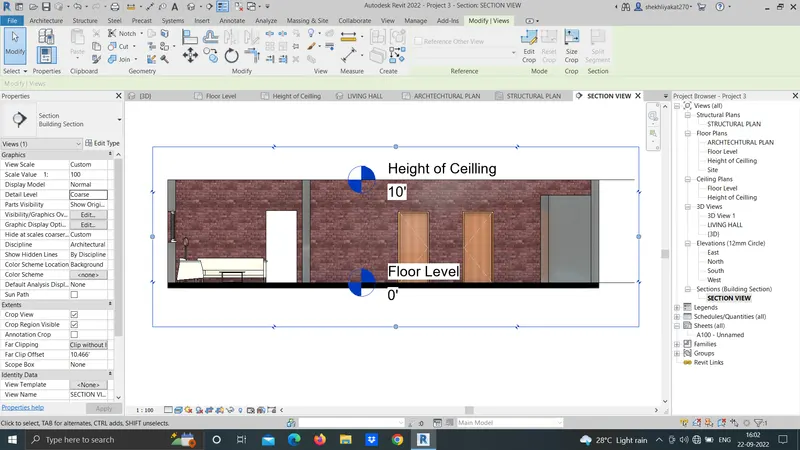
To produce section cut through each room either cutting across longitudinally or in a transverse direction.
INTRODUCTION: In this challenge information and folllowing building elements modeling is done with proper explaination.
- modeling of ceiling element to building
- Modeling roof of building and changing properties.
- separating the structural and architectural plan from building model.
- Annoatation to the architectural and structural plan
- Making of sheets for differents view.
- Section Drafting information.
- Adding elevation of building model.
- Adding plan, elevation and section view to sheets.
- Editing the poject information
All above points are cover in this challenge.
PROCEDURE:
Create the section view with use of section option.
And cut the plan view with use of section.
And saw the section in the section view on project browser.
Check on the 3d view with use of section in project browser.
RESULT: I am able to create section of building model.
SECTIONAL VIEWS HAVE BEEN CREATED SUCESSFULLY.
8.0
AIM: To classify the views, Plan Views, Section Views, and Elevation views to either Design or Documentation category using Properties browser.
INTRODUCTION: In this challenge information and folllowing building elements modeling is done with proper explaination.
- modeling of ceiling element to building
- Modeling roof of building and changing properties.
- separating the structural and architectural plan from building model.
- Annoatation to the architectural and structural plan
- Making of sheets for differents view.
- Section Drafting information.
- Adding elevation of building model.
- Adding plan, elevation and section view to sheets.
- Editing the poject information
All above points are cover in this challenge.
PROCEDURE:
Open project.
Use the sheet option in views on toolbar.
Set new sheet and modify the size.
Taken the ground floor and drag into the sheet and modify the size with use of scale.
Taken the first floor and drag into the sheet and modify the size with use of scale.
Taken the section plan and drag into the sheet and modify the size with use of scale.
Taken the elevation and drag into the sheet and modify the size with uses of scale.
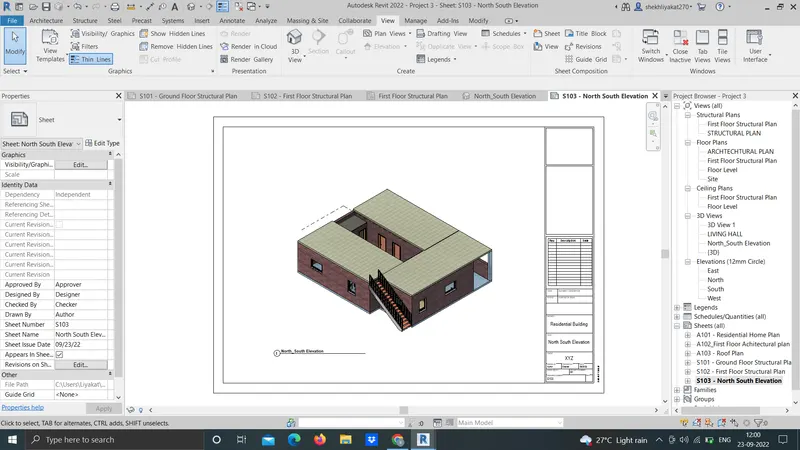
RESULT: I understood how to create documentary presentation of building modeling.
9.0
AIM: To use the sheet template produced create multiple sheets.
INTRODUCTION: In this challenge information and folllowing building elements modeling is done with proper explaination.
- modeling of ceiling element to building
- Modeling roof of building and changing properties.
- separating the structural and architectural plan from building model.
- Annoatation to the architectural and structural plan
- Making of sheets for differents view.
- Section Drafting information.
- Adding elevation of building model.
- Adding plan, elevation and section view to sheets.
- Editing the poject information
All above points are cover in this challenge.
PROCEDURE:
- Open the Revit project.
- Click View tab>Sheet Composition panel>Sheet
- In the New Sheet dialog, select a title block from the list. If the list does not show the desired title block, click Load. In the Library folder, open the Titleblocks folder, or navigate to the folder where the title block resides. Select the title block to load, and click Open.Select None to create a Sheet without a title block.
- Click OK.Select a title block, as follows
- For information about title blocks, see Title Blocks.
- Enter information in the title block of the sheet.See Specifying Title Block Information for Sheets.
- Add views to the sheet.See Adding Views to a Sheet.
- Change the default number and name that Revit Architecture assigned to the sheet.
- See Renaming a Sheet. The sheet number and name display in the Project Browser under Sheets all
TO ADD VIEWS TO SHEETS:
- Open the sheet.
- To add a view to the sheet, use one of the following methods
- In the Project Browser, expand the list of views, locate the view, and drag it onto the sheet.
- Click View tab>Sheet Composition panel>Place View. In the Views dialog, select a view, and click Add View to Sheet.
- As you move the cursor over the sheet in the drawing area, a viewport for the selected view moves with it. Click to place the viewport in the desired location. Use the Guide Grid for precise placement on sheets.
- Repeat Steps 2 and 3 to add more views to the sheet, if desired.
- If needed, you can modify the individual views on the sheet as follows
- To change the view title that displays on the sheet, double-click the title, and edit it. See View Titles on Sheets.
- To move the view to a new location on the sheet, select its viewport, and drag it. You can align views to grid lines for precise placement. See Aligning Views on a Sheet.
We can see our all sheets in project browser in sheets.
STEP BY STEP PROCEDURE:
Open the project.
Use the sheet option in views on toolbar.
Set new sheet and modify the size.
Here we can also set the name and number of the sheet individually.
Here we want 8 sheets as per challange.
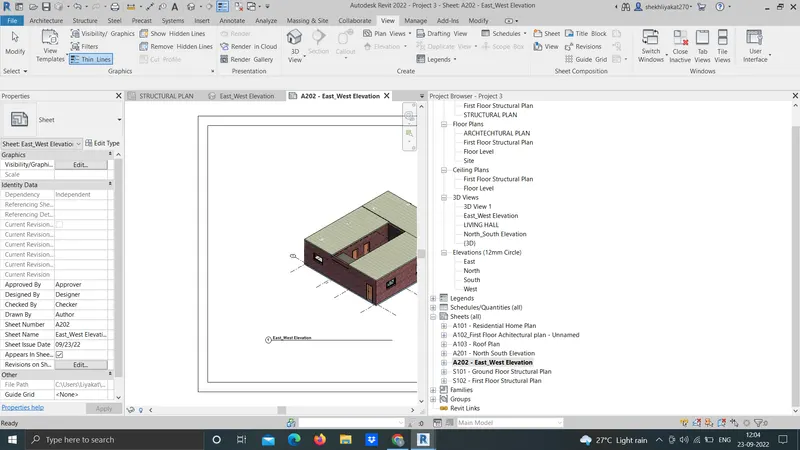
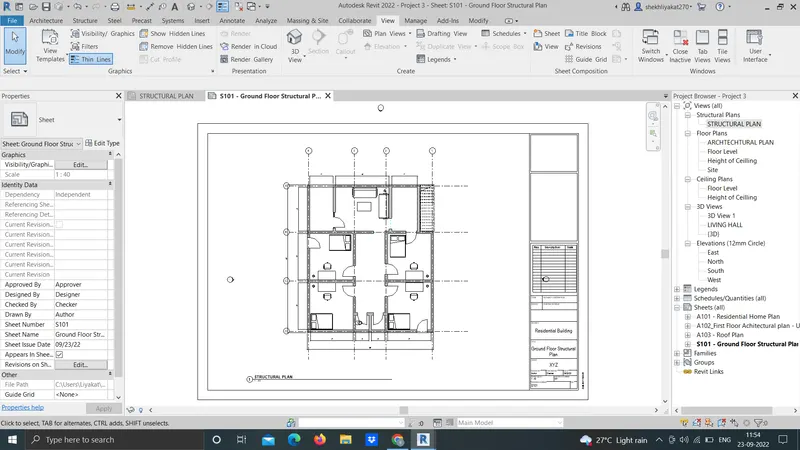
In the project browser we see the sheet option and see the sheet option and create a sheet.
First we take A-101- ground floor architectural plan and modify the size of the diagram.
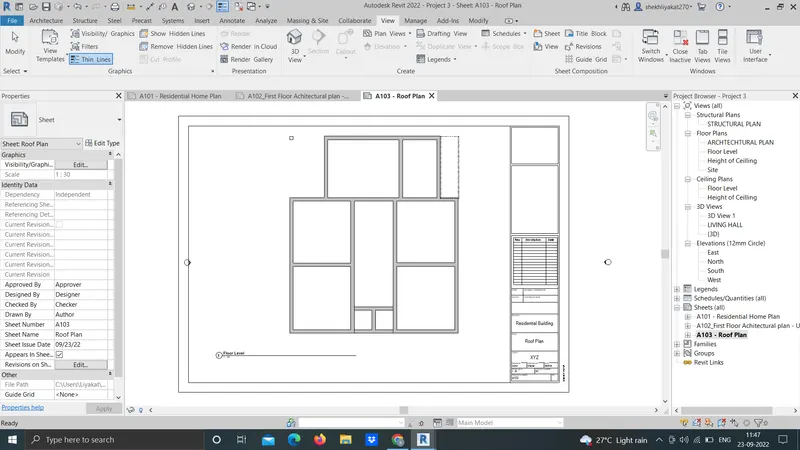
As we move a drawing or schedule onto a sheet, a viewport displays. A viewport is a representation of the drawing or schedule when it is placed on a sheet.
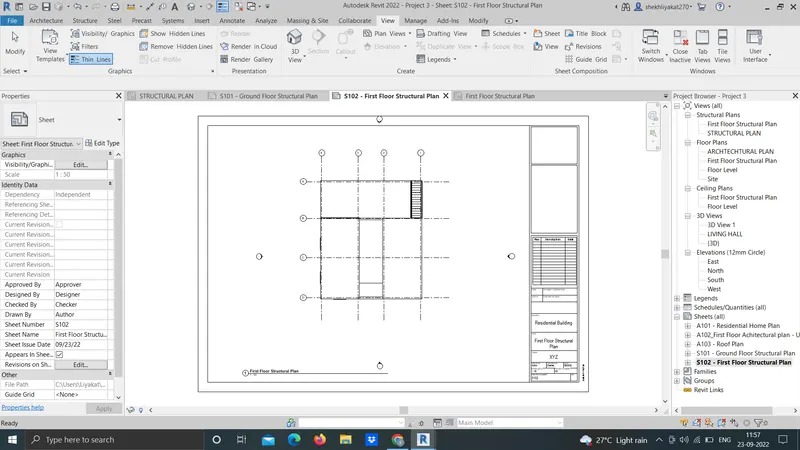
In similar fashion take on by one sheet, drag the view and modify it.
A-103
S-101
S-102
A-201
A-202
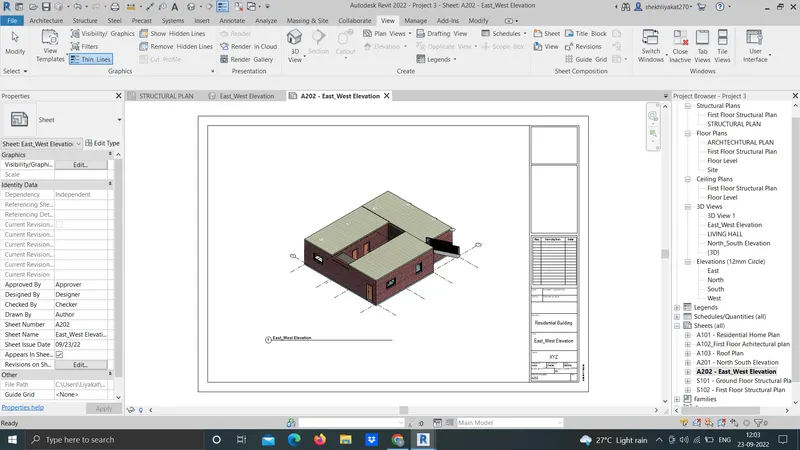
RESULT: I understood how to create sheet of differents view and plans of building.
10.0
AIM:
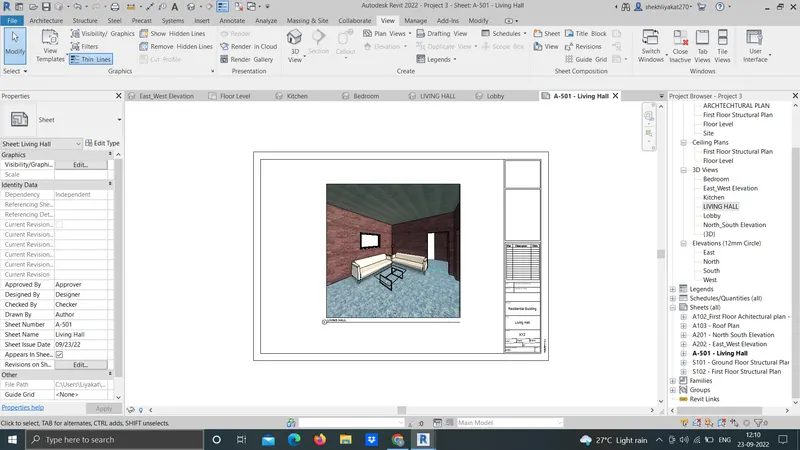
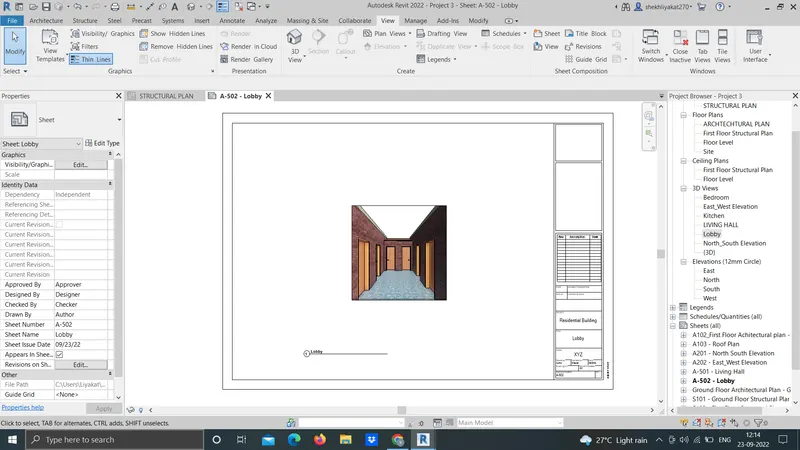
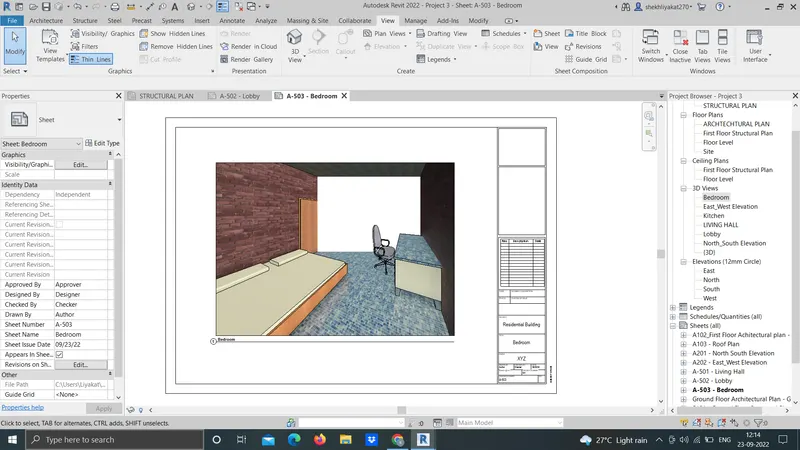
To Create a camera-specific view or a 3D view in each room. Based on the views create a new set of sheets. Produce the sheets as a part of project drafting.
INTRODUCTION: In this challenge information and folllowing building elements modeling is done with proper explaination.
- modeling of ceiling element to building
- Modeling roof of building and changing properties.
- separating the structural and architectural plan from building model.
- Annoatation to the architectural and structural plan
- Making of sheets for differents view.
- Section Drafting information.
- Adding elevation of building model.
- Adding plan, elevation and section view to sheets.
- Editing the poject information
All above points are cover in this challenge.