Wiring harness routing & packaging Rules Week 3 Challenge
P Clamp:
P Clamp is one of the Supporting Component for Electrical Wiring Harness.Its Support for Cables and electrical Components.Verious Support Clips are there in the system,they are,
1.P Clamp
2.Furr tree Clip
3.Stick Clamp
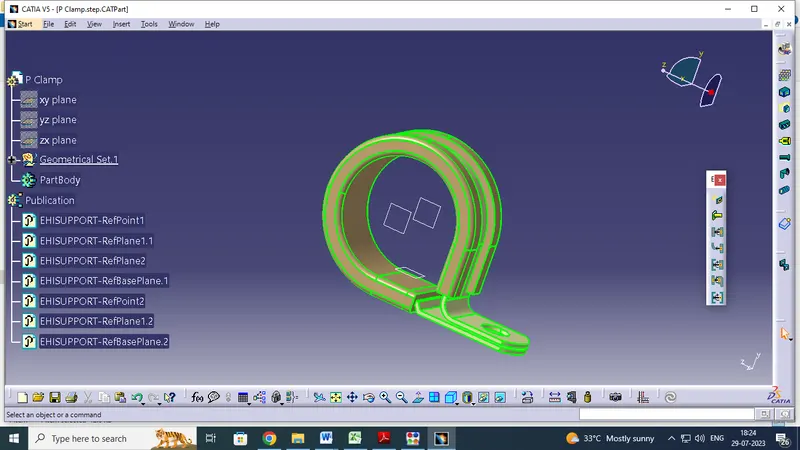
Download the cadfile for P clamp in TE.COM ans open the file in CATIA V5 Part workbench .Then Open the file first identify the what are Entry point ,Exit Point and base in clamp component.How to identify the Entry exit and base are clamp.Cable routing entry side is entry point of the clamp , Cable exit side exit point of the component,then inbetween of the entry and exit sides at same time the cable bottom will touch on clamp that side is base point or plane of clamp.
And the we have choose on Point & plane tools its create the point & plane on the entry,exit & base side.Select the piont option , create the point in middle of the entry side .next create point on middle of the exit side.then select plane tool creat the plane in entry side center of the pont by use offset from plane method.The same process doing on the extit side also .finally base plane create the base side on calmp.
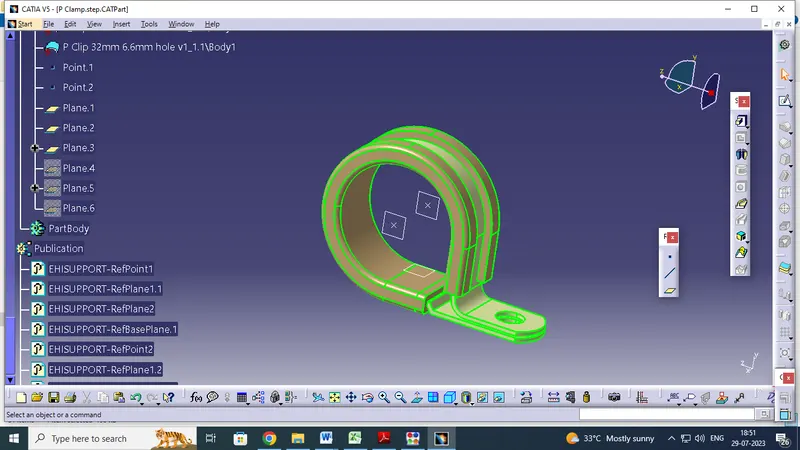
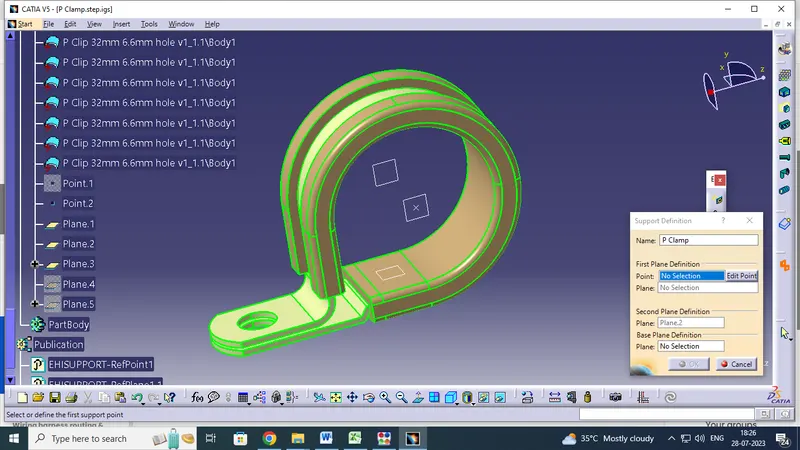
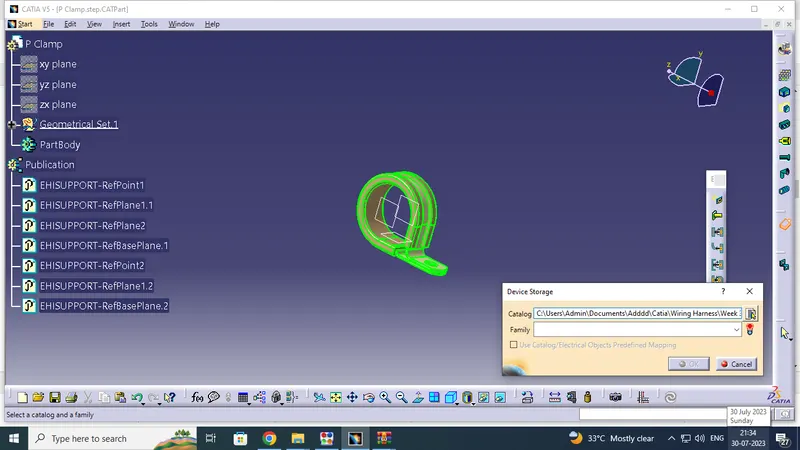
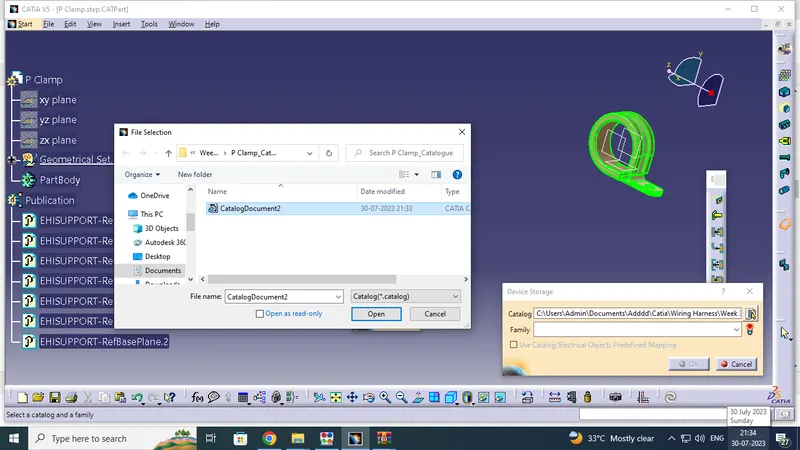
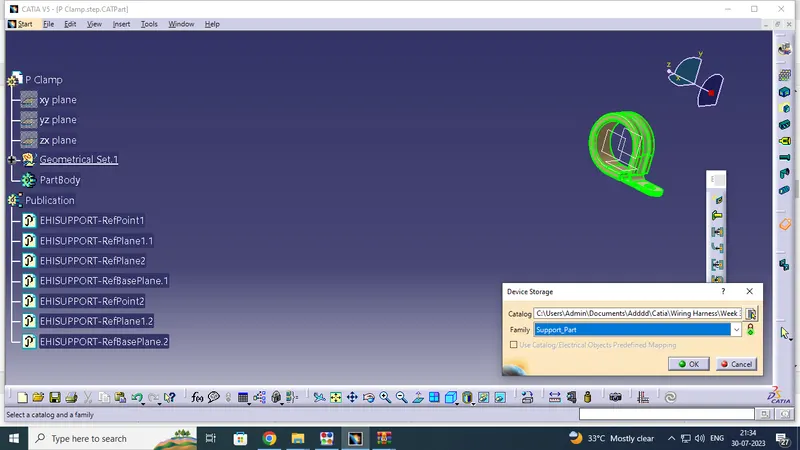
After completing the point and plane creation go change on workbench is electrical part design.select on define support part tool and pick on the p clamp .open the window give the some details like first point & plane , second plane ,base plane and say ok . next again pick on option give detailes for first point and plane ,second plane is here in default then base plane and say ok, the component have ready for electrical wiring harness assembly work bench.finally save on new catalogue by using storage device option.
Catalogue Document Creation :
2.Tyco 1738312-1- Back shell connector.
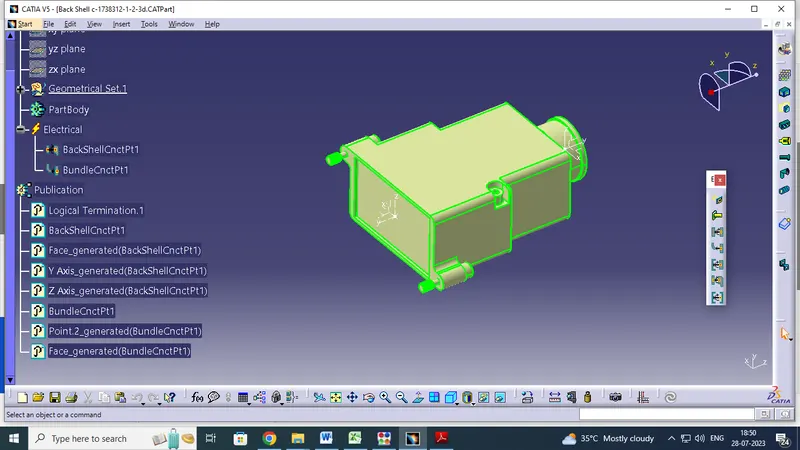
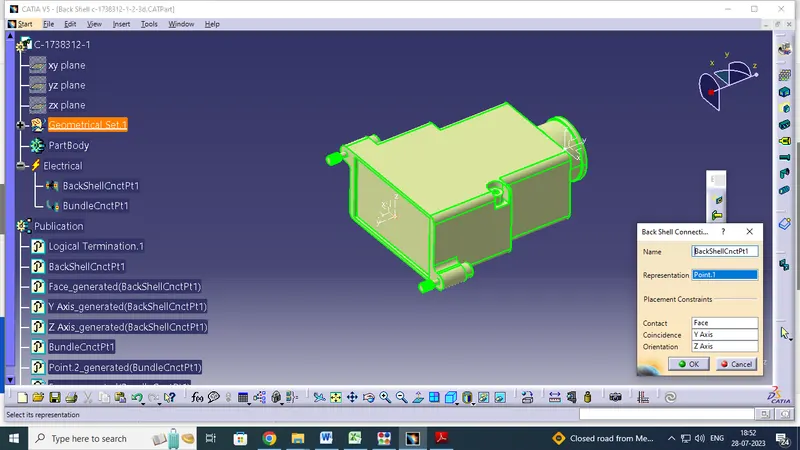
Back shell are plastice molded parts used at wire entry side to connectors either for protection or to improve aesthertics/apperience of harness. They are not mandatary for wiring harness its only optional.Download the cadfile for Back shell in TE.COM ans open the file in CATIA V5 Part workbench .Then Open the file first identify the which side back shell to connector side and which side Bundle connection point side of component.after identify the back shell and bundle creat point and axis in that side . creat the point and axis give required direction like Mounting direction is Y its Coincidence ,Z direction is Orientation,X direction is side face .
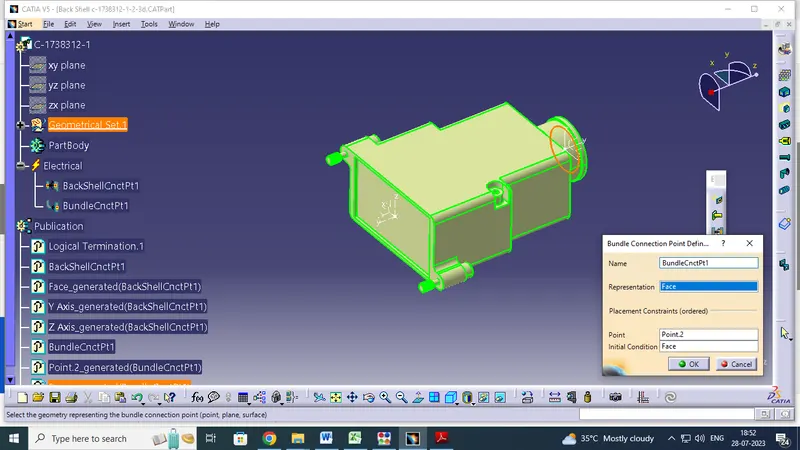
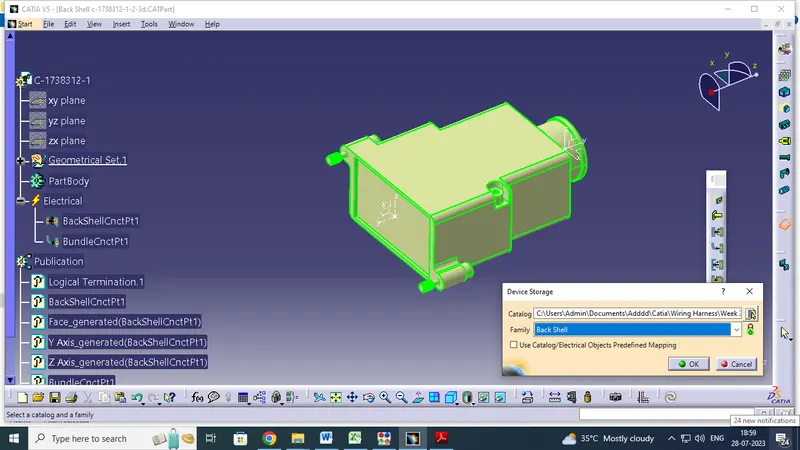
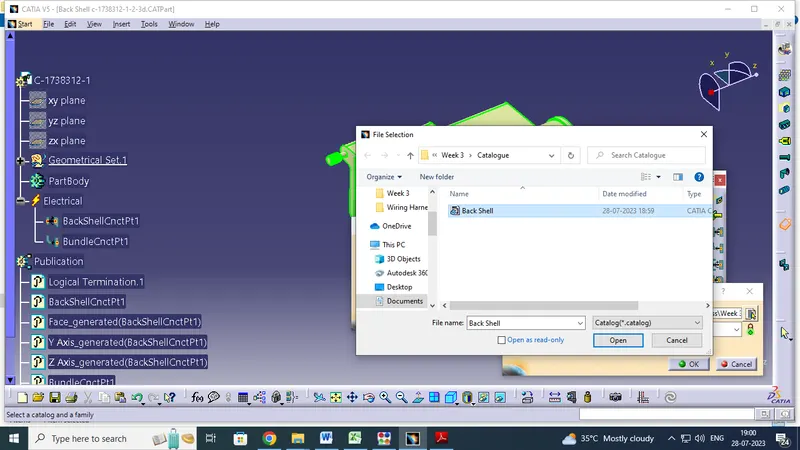
First of all select define back shell tool and pick the component the define back shell window will be open.after open give the detailes are part nember - Tyco 1738312-1 and extra length - unset and say ok .Then select the define back shell connector point give the values like Part name ,Representation point,Contact - face, Coincidence - y direction , Orientation - z Direction and say ok. and then we have create bundle connection point give the valves like Name - Buldle Ctrl part , Representation - Face , Point - Point2, Initial Condition - Face and say ok and component have ready for electrical wiring harness assembly work bench. finally save on new catalogue by using storage device option.
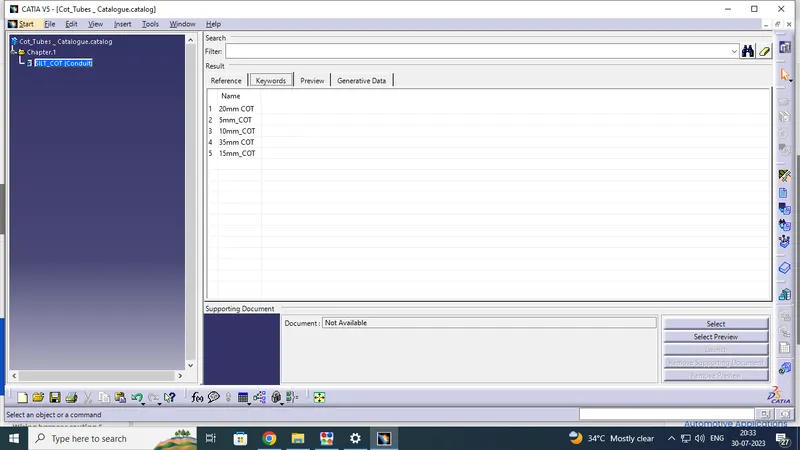
CATALOGUE DOCUMENT :
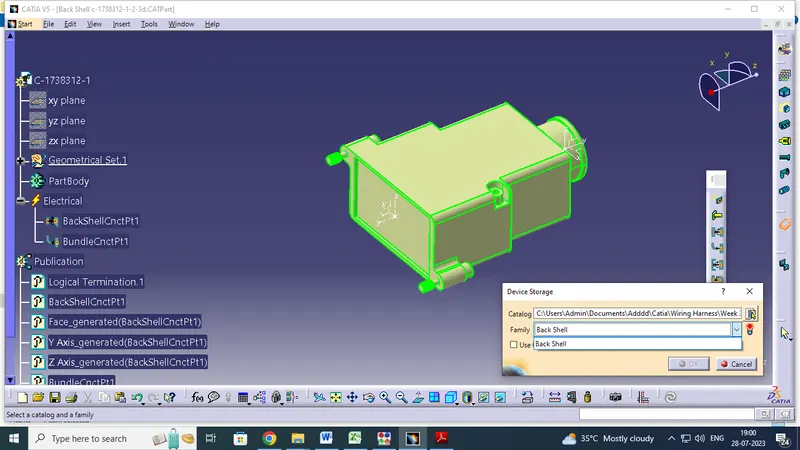
3.Corrugated tubes :
Corrugated tubes are Protect for wiring cables prevent for any other enviromental causes,heavy heat temperature and other causes.its made by two type of materials.
1.PVC Corrugated tube
2.Cotton /Polemer Made Corrugated tube.
PVC Materials is basically plastic material poly viniel cloried (PVC ) Cotton tube is made by polemer material its high heat resistence compare to PVC Corrugated tubes.
15mm COT:
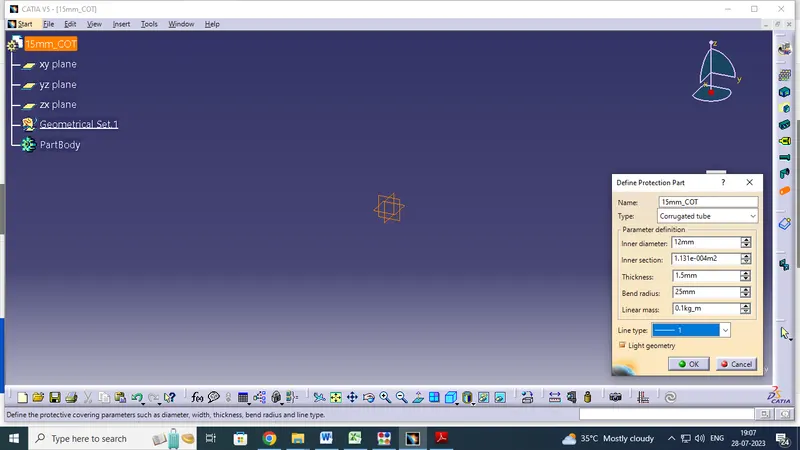
corrugated tube creation is doing on electrical part design workbench first open on new part workbench then change to electrical part design workbench then go to click define protection part option and click part body on Geometry tree structure .
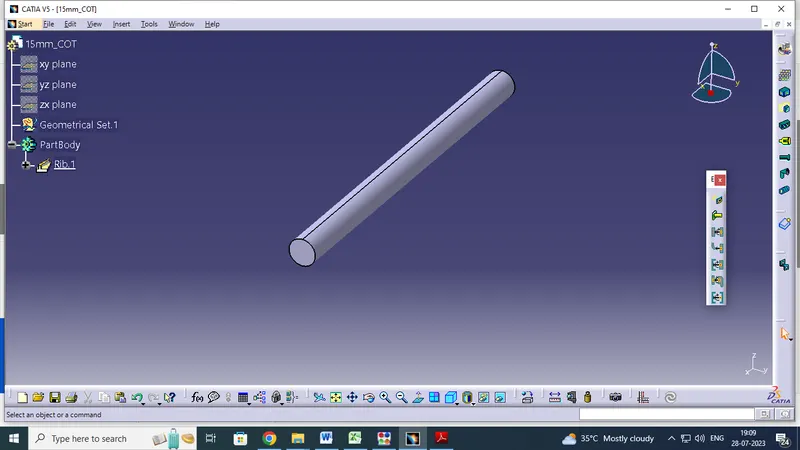
The option will be open and give required values like : Name ,Type - Corrugated tube , Inner diameter - 12mm ,Inner section is Creat automaticaly depensupon the inner diameter values ,Thickness - 1.5mm,Bend radius - 25mm ,Linear mass - 0.1 kg and line type - straight line symbol and say ok.The covering tube would be creat and then go to save.
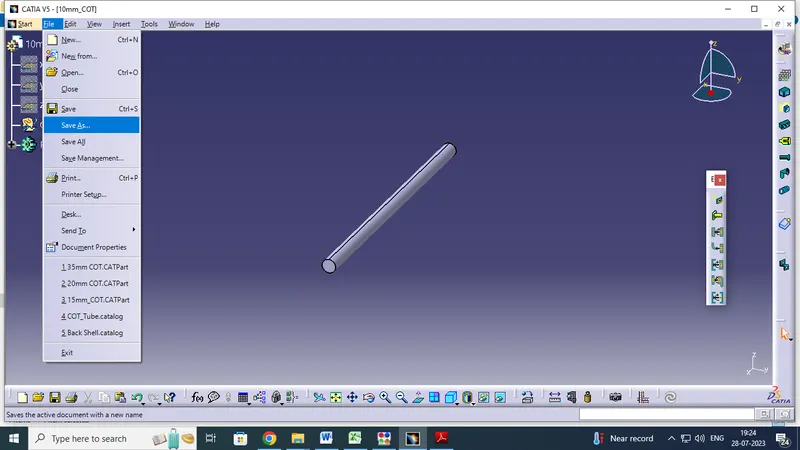
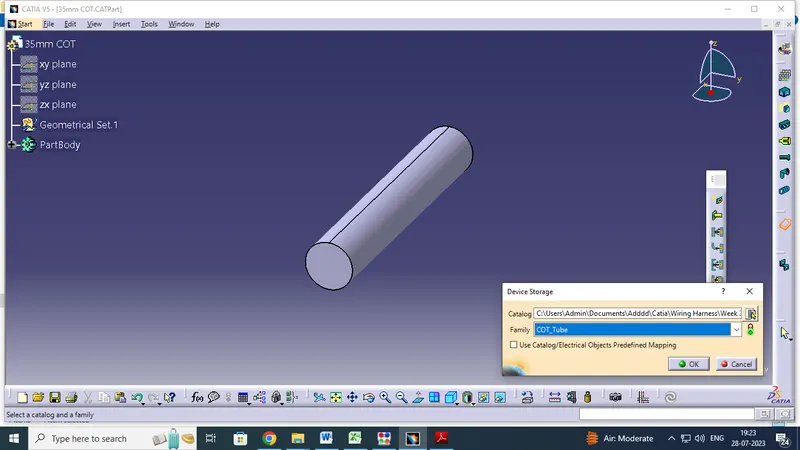
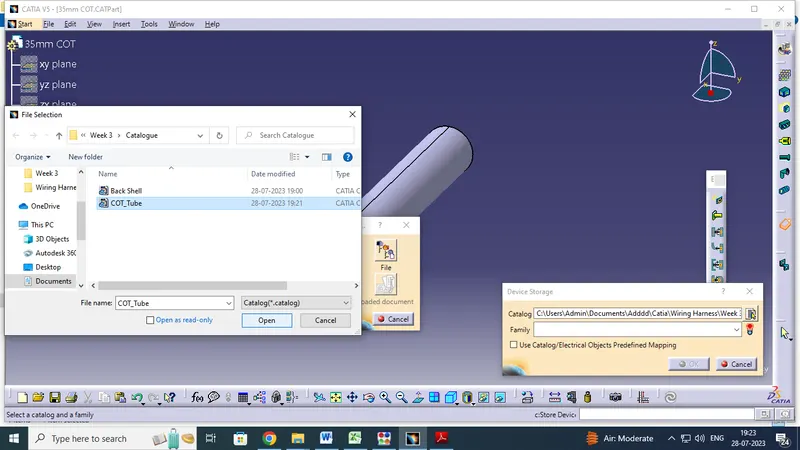
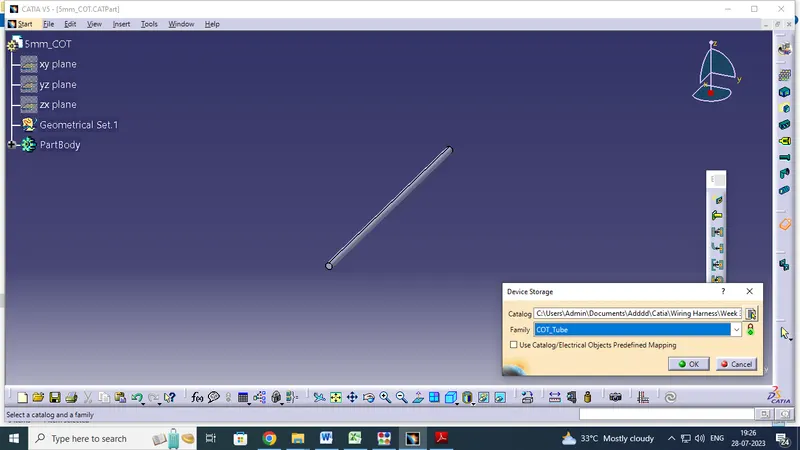
Next the part will be add on storage device .if you add family first we want catalogue document.so create the catalogue document by using File - new - click catalogue document option the catalogue window open and give name and select which type we want to save ex : conduit , then say ok. next pick add part familly option open window default name and select which type of part then say ok .
finally open the electrical part design work bench select device storage tool click on add familly go to folder location pick on catalogue document file and say ok. then come to storage device select familly and say ok .the part have been saved on catalogue document.
10mm COT:
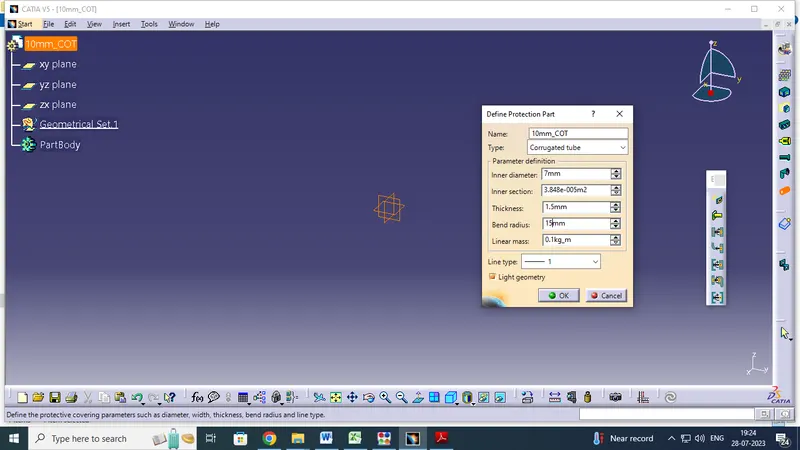
Select electrical part design workbench first open on new part workbench then change to electrical part design workbench then go to click define protection part option and click part body on Geometry tree structure .
The option will be open and give required values like : Name ,Type - Corrugated tube , Inner diameter - 7mm ,Inner section is Creat automaticaly depensupon the inner diameter values ,Thickness - 1.5mm,Bend radius - 15mm ,Linear mass - 0.1 kg and line type - straight line symbol and say ok.The covering tube would be creat and then go to save.
35mm COT:
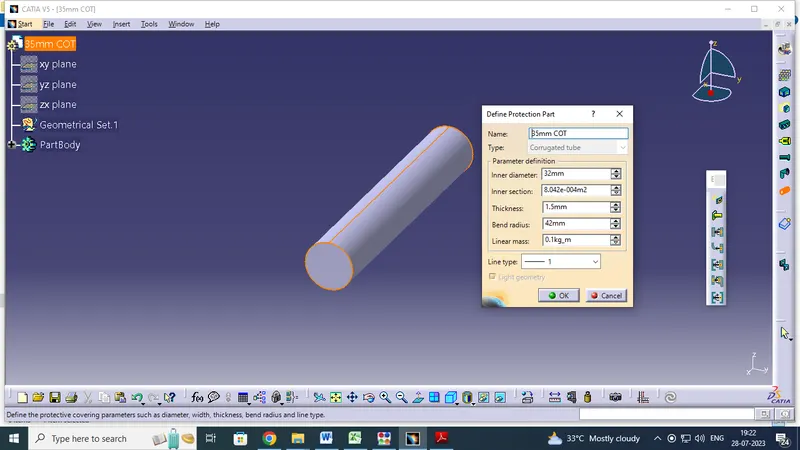
35mm COT is same on previous conduit creation ,electrical part design workbench first open on new part workbench then change to electrical part design workbench then go to click define protection part option and click part body on Geometry tree structure .
The option will be open and give required values like : Name ,Type - Corrugated tube , Inner diameter - 32 mm ,Inner section is Creat automaticaly depensupon the inner diameter values ,Thickness - 1.5mm,Bend radius - 45 mm ,Linear mass - 0.1 kg and line type - straight line symbol and say ok.The covering tube would be creat and then go to save.
5MM COT:
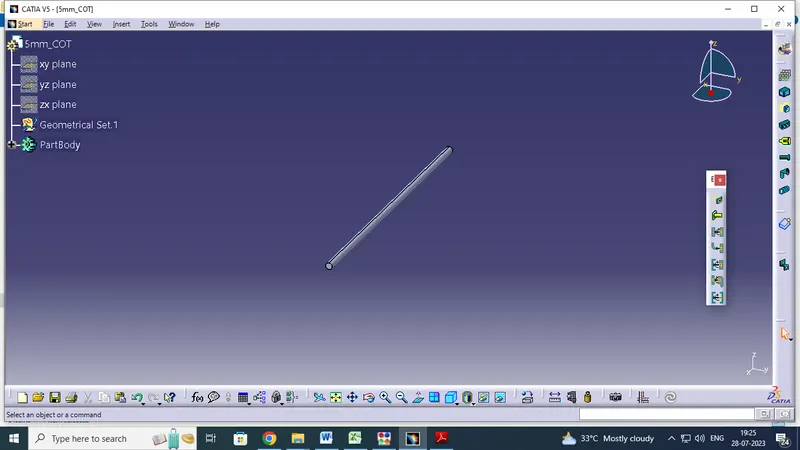
Same method doing again on corrugated tube creation is doing on electrical part design workbench first open on new part workbench then change to electrical part design workbench then go to click define protection part option and click part body on Geometry tree structure .
The option will be open and give required values like : Name ,Type - Corrugated tube , Inner diameter - 3 mm ,Inner section is Creat automaticaly depensupon the inner diameter values ,Thickness - 1 mm,Bend radius - 10 mm ,Linear mass - 0.1 kg and line type - straight line symbol and say ok.The covering tube would be creat and then go to save.
20 mm COT:
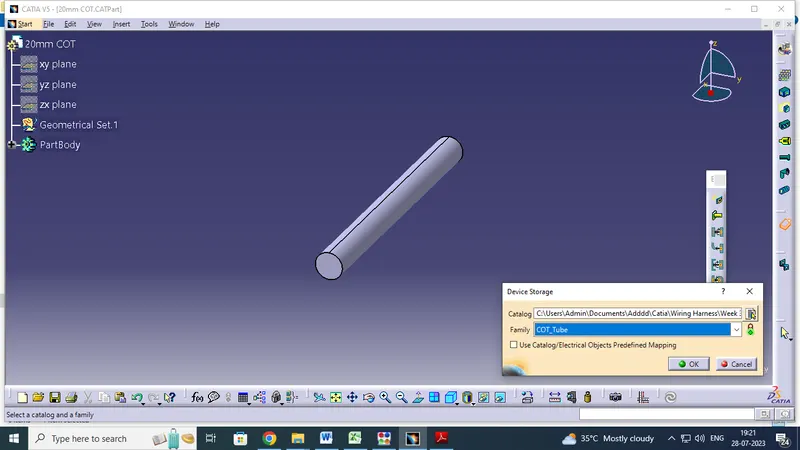
The option will be open and give required values like : Name ,Type - Corrugated tube , Inner diameter - 17 mm ,Inner section is Creat automaticaly depensupon the inner diameter values ,Thickness - 1.5 mm,Bend radius - 30 mm ,Linear mass - 0.1 kg and line type - straight line symbol and say ok.The covering tube would be creat and then go to save.
CATAOLOGUE DOCUMENT CREATION:
Next the part will be add on storage device .if you add family first we want catalogue document.so create the catalogue document by using File - new - click catalogue document option open the window click on Add family option open on small window . thwe window ask for name - SLIT_COT and select which type we want to save ex : conduit , then say ok. next pick add part familly option open window default name and type -Conduit then say ok .
finally open the electrical part design work bench select device storage tool click on add familly go to folder location ,pick on catalogue document file and say ok.next come to storage device window select family SLIT_COT and say ok the part will have been saved on catalogue document.