Wiring harness routing & packaging Rules Week 3 Challenge
1Ans.
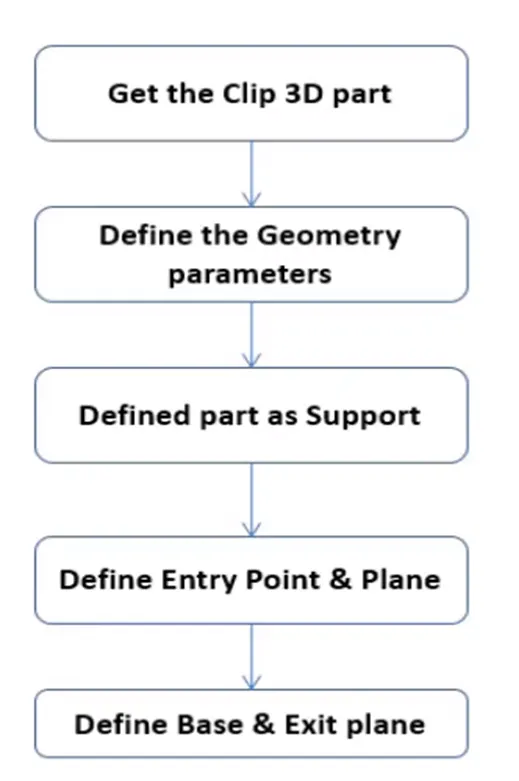
Steps:
- After downlodoading the file , use CATIA V5 to open it .
- In accordance with the part design model , entry , exit, base point , and planes are defined.
- Open the files in Electrical part design once point and planes have been establised.
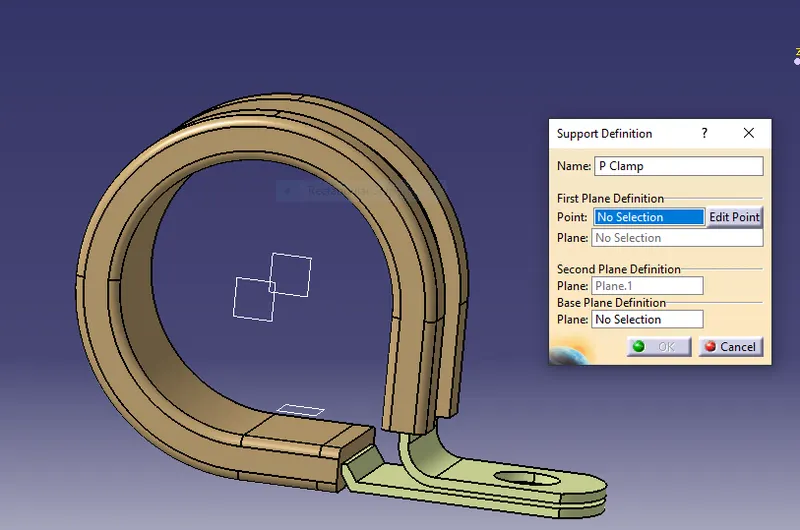
- Using the define support part command , we must now define the part as a support.
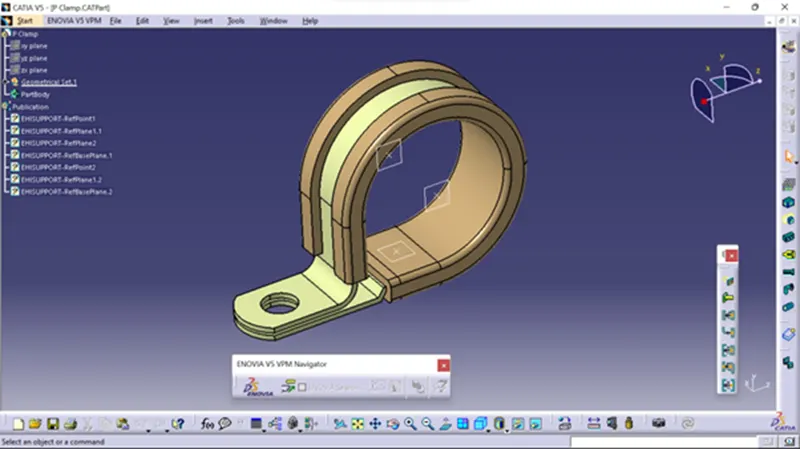
- Here we use the required point and planes as an entry and exit of the clamp for one side .
- Select the point opposite the initial support definition while maintaining the same base plane , and then utilise the support definition once more to provide an entrance point on the opposite side .
- After providing the necessary properties save the file.
P_Clamp
2.Ans
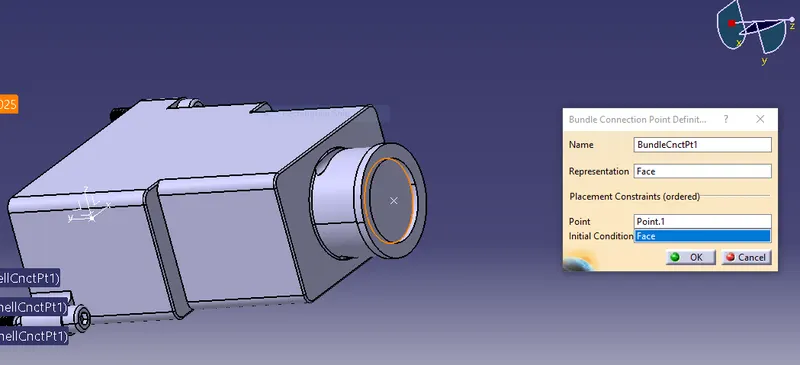
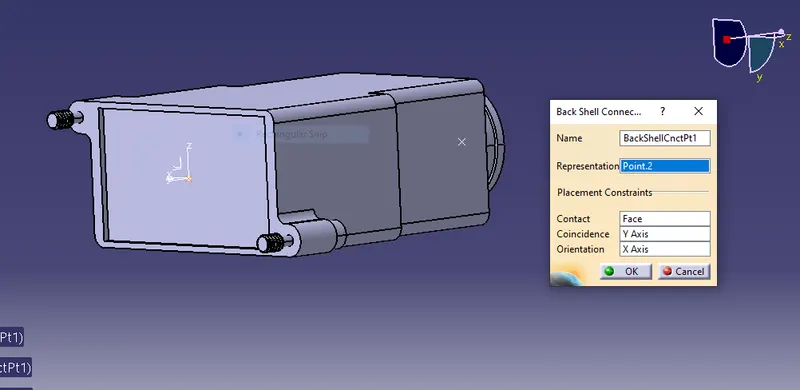
First specify the shell fixing point and the bundel entering point . Ensure that you also add the axis system to the fixing point .
The axis is in same direction as of connecctor .
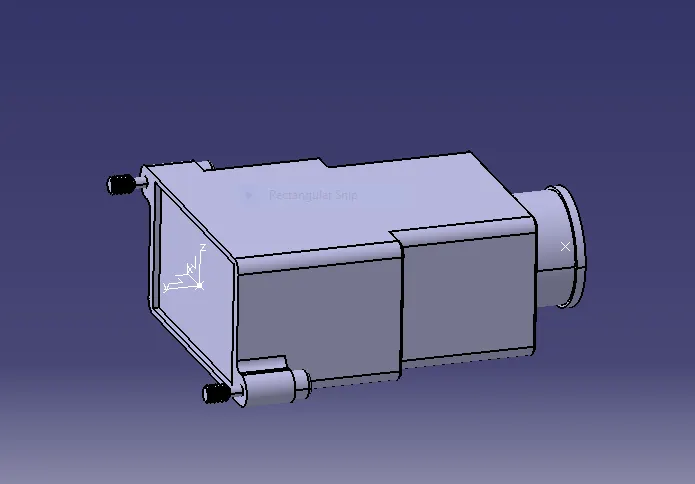
Define the shell as an electrical body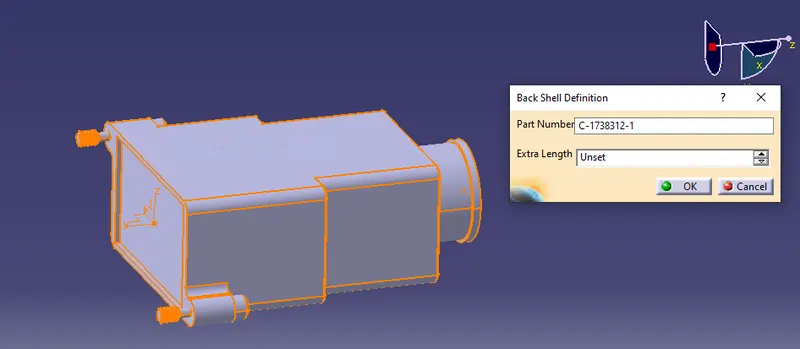
Add bundle entry parameter
Add the back shell parameter
3Ans.
|
Name |
ID (mm) |
OD (mm) |
Thickness (mm) |
|
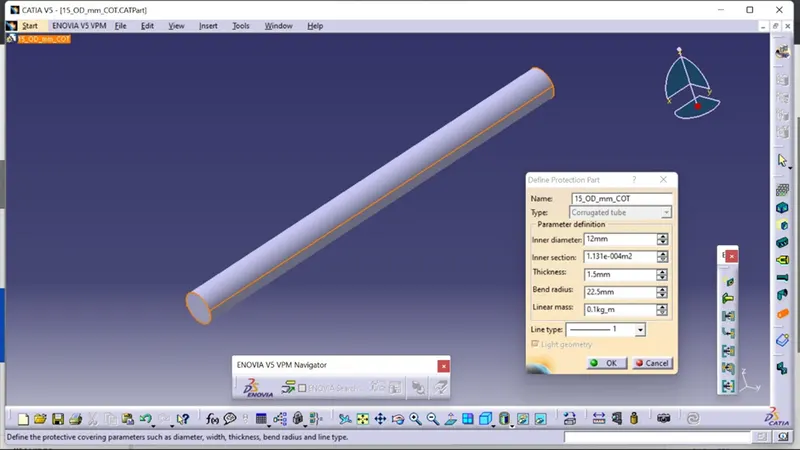
15mm COT |
12 |
15 |
1.5 |
|
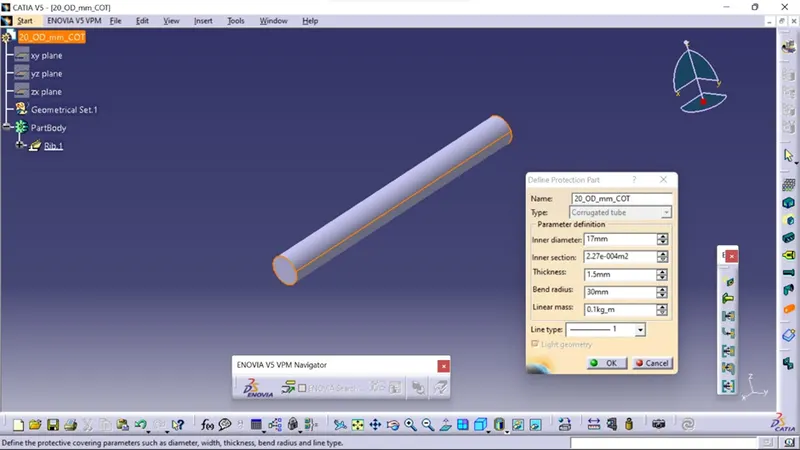
20mm COT |
17 |
20 |
1.5 |
|
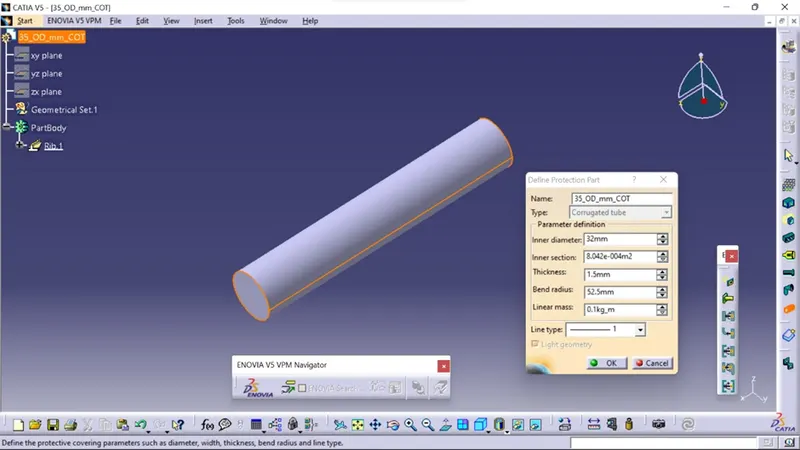
35mm COT |
32 |
35 |
1.5 |
|
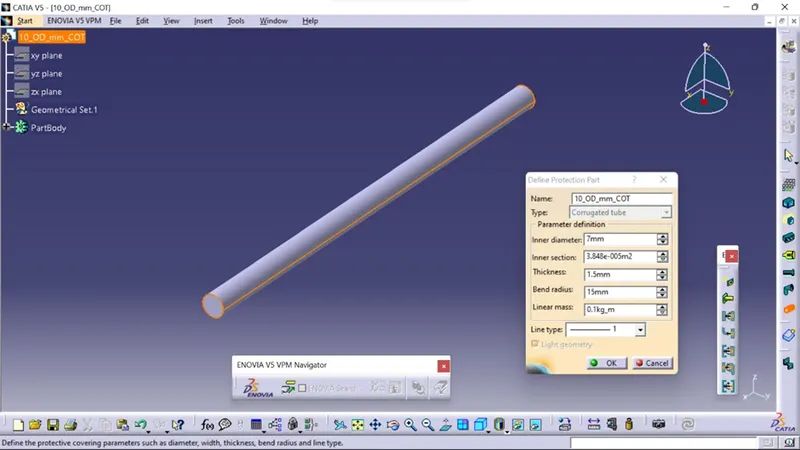
10mm COT |
7 |
10 |
1.5 |
|
5mm COT |
3 |
5 |
1 |
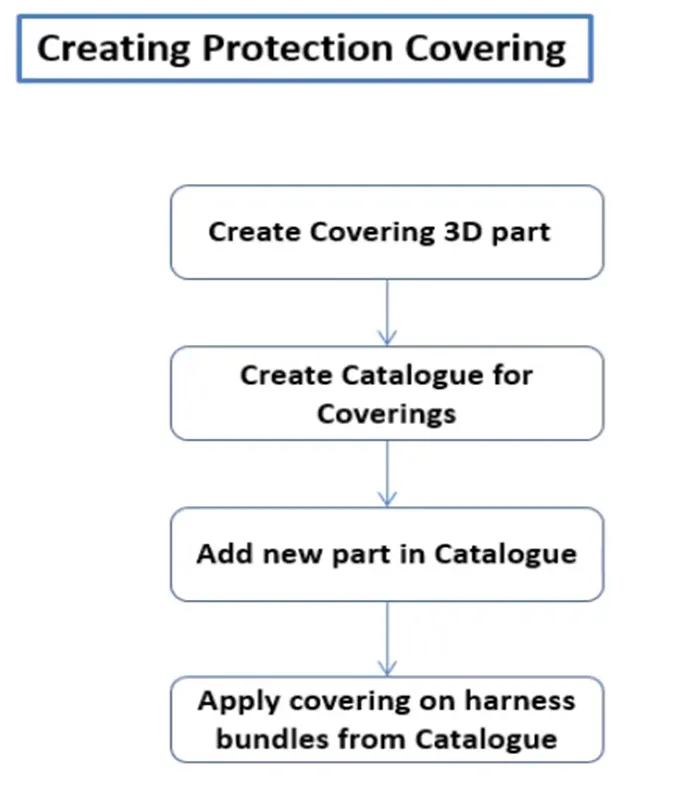
- Open CATIA V5 with Electrical part design model
- Using Define Protection Part
- Select the type as corrugated Tube
- Give the Required parameter dia , Thickness,Bend radii
- Click on OK
- After giving the necessary properties save the file .
15 mm COT
20mm COT
35mm COT
10mm COT
5 mm COT