Wiring harness design in CATIA V5 - 3D modeling Week 7 Challenge
CHALLENGE 8
Task 1
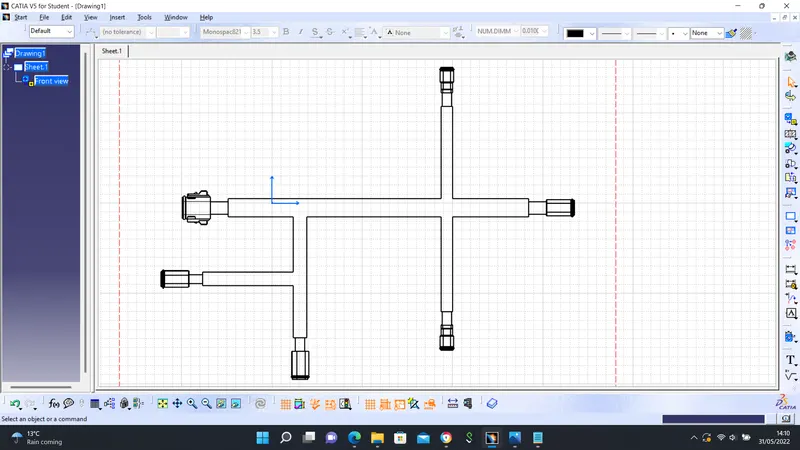
The task involves flattening. The challenge from week 4 was used to perform the operation. Corrugated tubes of different diameters and protective tapes were used in the task all set at a 15 mm distance from the connector end reference points.
FRONT VIEW
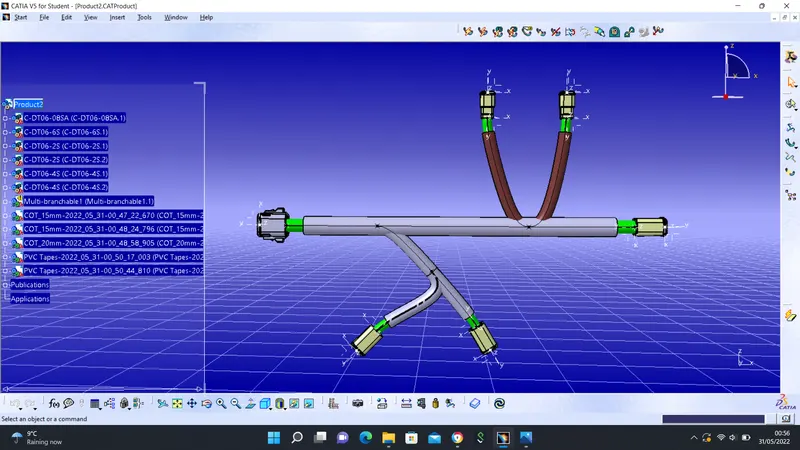
SIDE VIEW
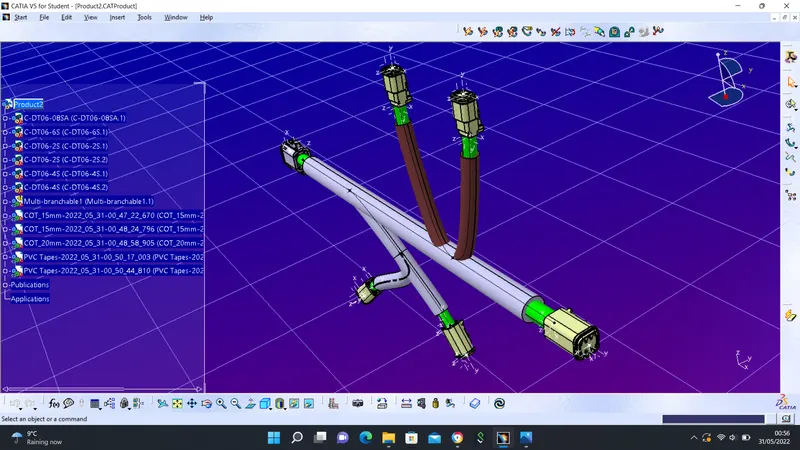
Task 2
After the creation of the product file, it was switched to the Electrical Harness Flattening workbench. Certain operations were defined before the task which includes:
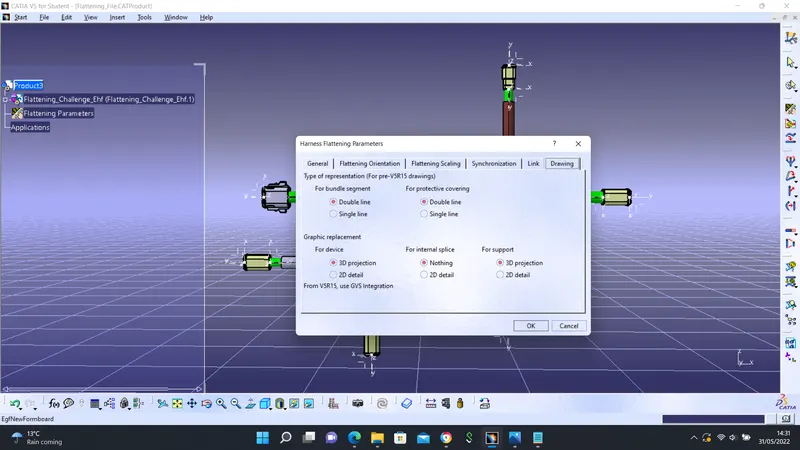
- Harness Flattening Parameters defined. Here, are some conditions such as representation for Bundle Segment, Protective Covering, and so on.
- The extract command was used to import the product file into the Electrical Harness Flattening workbench.
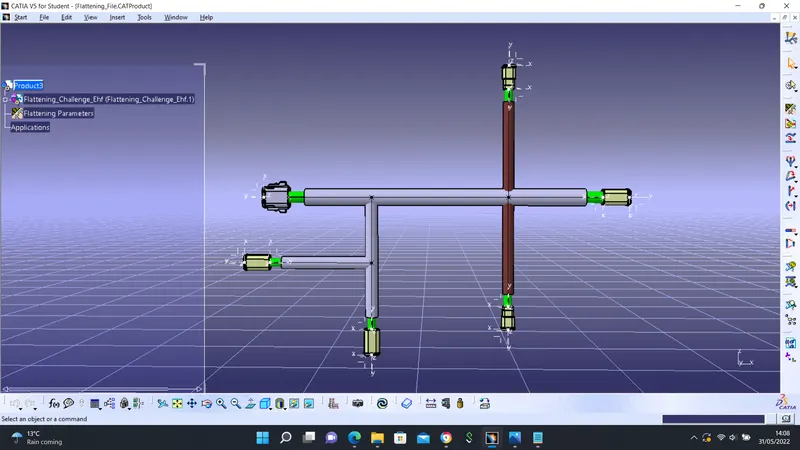
- The Flatten command was used to flatten the product.
HARNESS FLATTENING PARAMETERS IMAGE
TOOLS
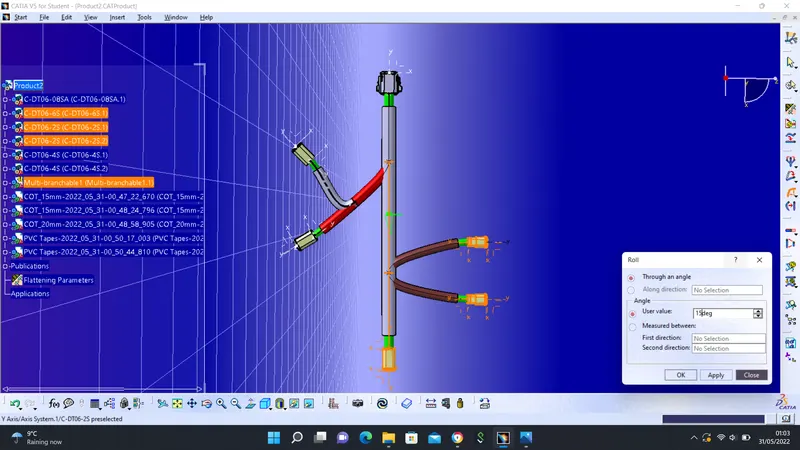
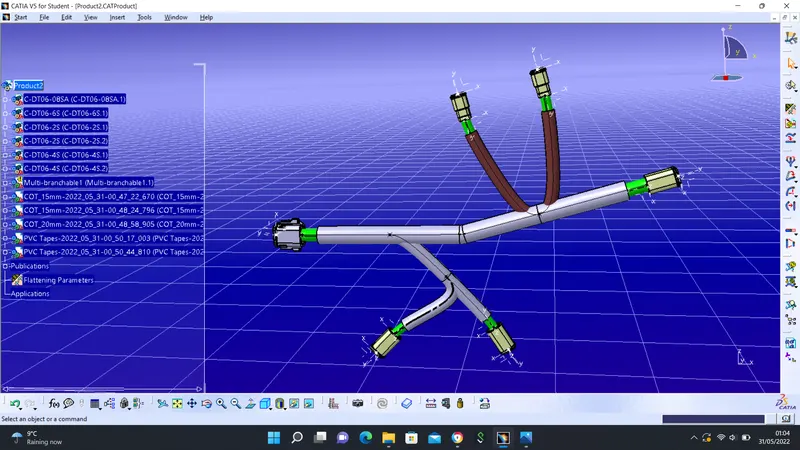
There are a couple of useful tools available in the workbench to modify the harness. An example of the tools used includes the Roll command. The Roll command rolls the bundle at a given reference. Other available commands include:
- Bend
- Scale
- Quick roll
- Arrange junction, etc.
Roll Operation 1
Roll Operation 2
Straighten Command
Another important command is the Straighten command. The command was used to straighten the bundle. There is also an option to scale up the bundle for clarity and adjust the drawing view.
DRAWING
A new drawing file was created. Using commands such as the Front View, the bundle was exported into the Drawing File. This created a drawing from Flattening.
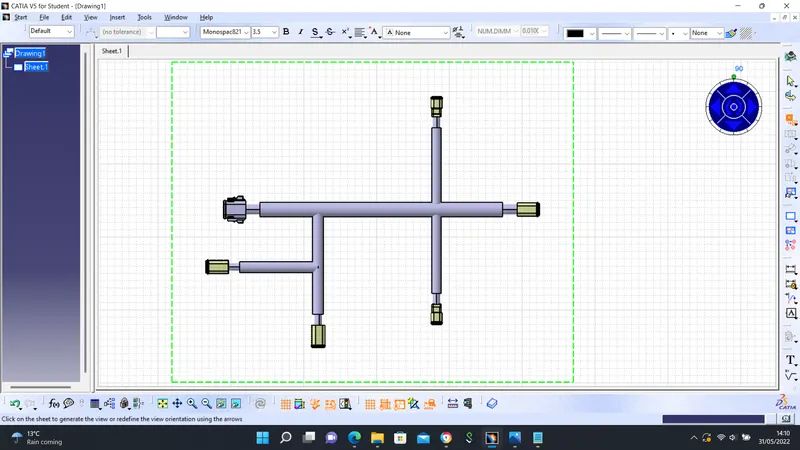
Certain Data are created on the Drawing for the manufacturing team or third party to understand. Certain parameters such as:
- Protection size, Dimensions, Connector Views, Harness Layout.
- Bill of Materials BOM, Connection Tables, Orientation, etc.