Wiring harness design in CATIA V5 - 3D modeling Week 7 Challenge
AIM:
To Define the mechanical parts electrically and the prepare bundle flattening has to be done in the CATIA flattening workbech. To create a 2D drawing of the bundle with connector representation and diffrent colour coding for bundle with protective covering.
We have already the done the challenge in week 4 challenge so, we directly take the assmebly from the there and let provide the bundle flattening in the CATIA flattening workbech.
QUICK SUMMARY OF WEEK 4 CHALLENGE:
Download connector 3D data from www.te.com
- DT06-4S
- DT06-6S
- DT06-2S
- DT06-08SA
After downloading the connector part from the website. we have to create required geometrical parameter.
- connection point
- Bundle connection point
- Axis system of the connector connection point
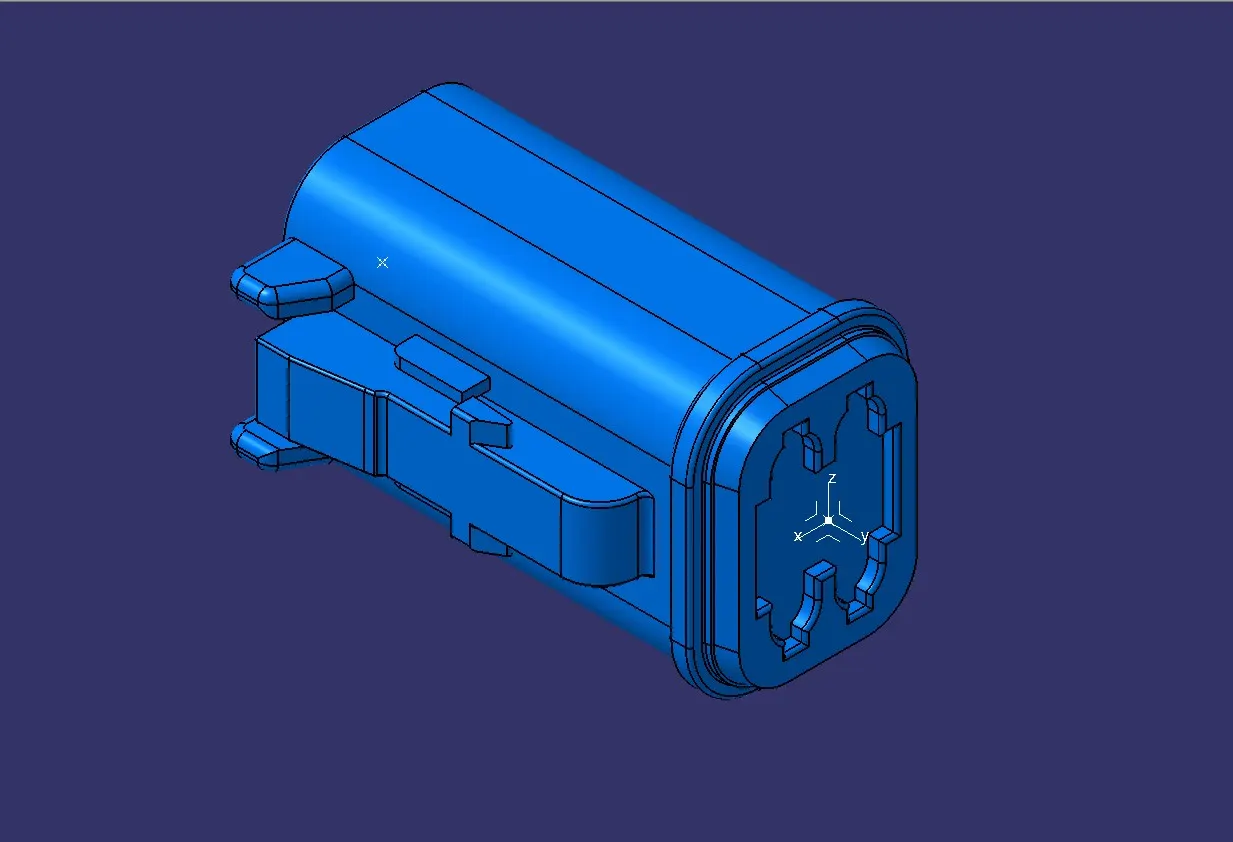
Do the same for all connectors we downloaded.
After creating the geometrical parameter in connector then move on to.
- Define as connector
- Connector connection point
- Bundle connection point
- Axis system of the connector connection point.
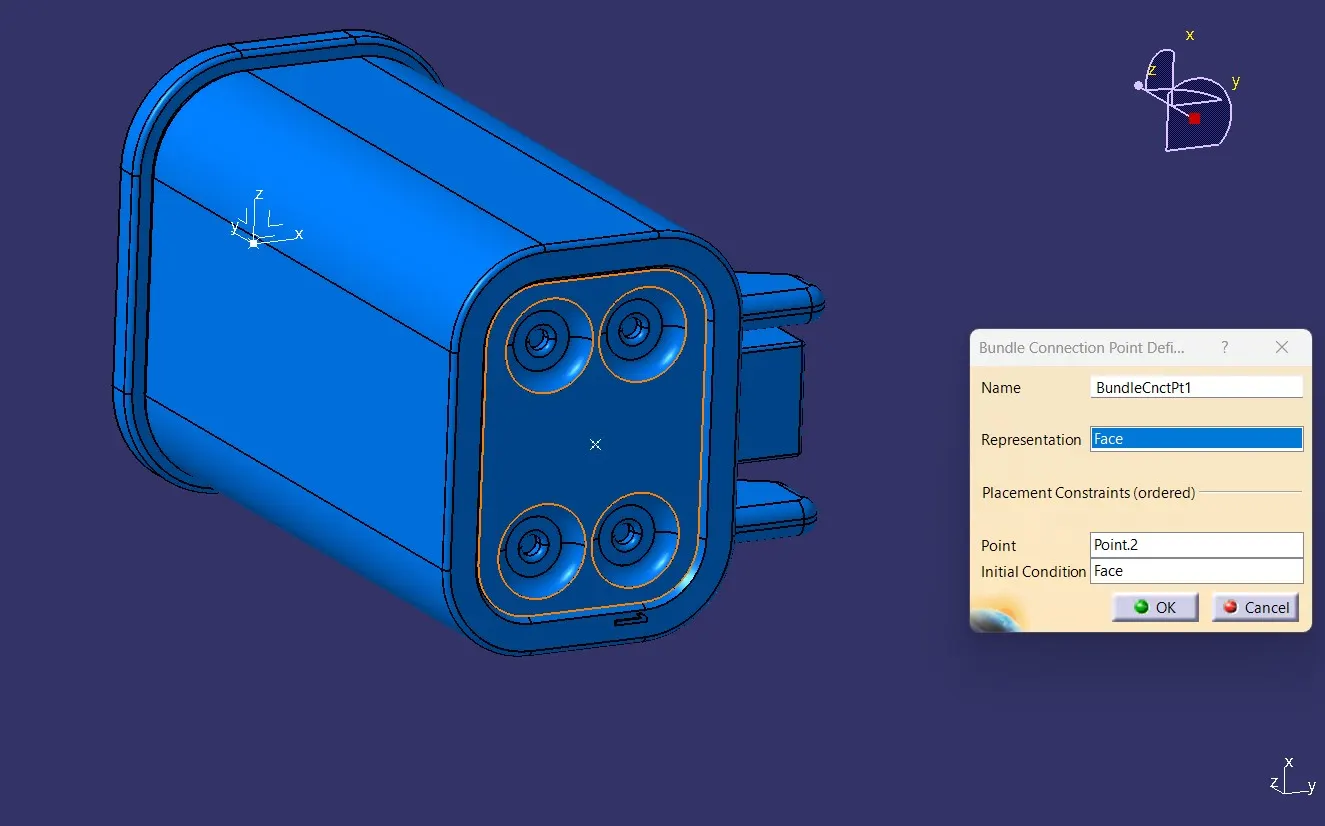
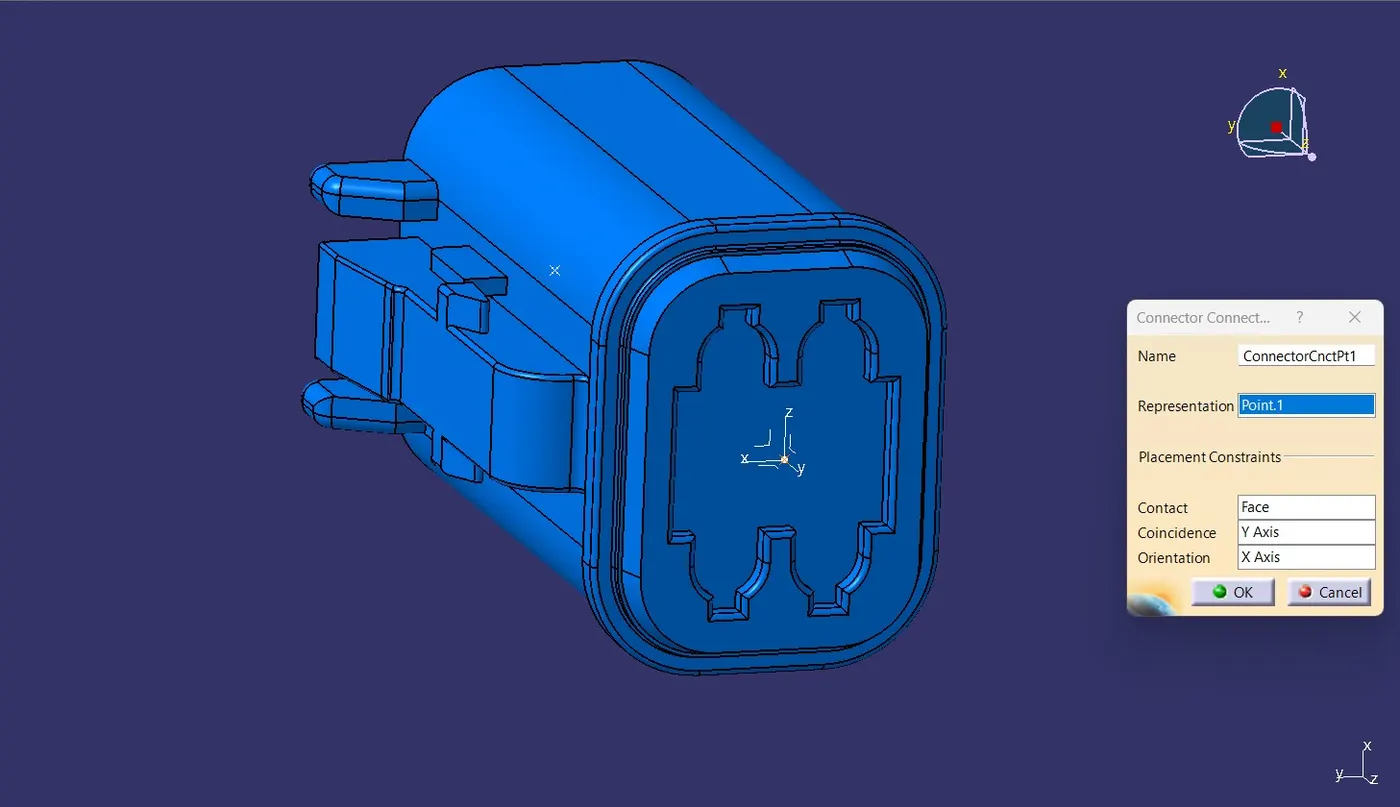
After the we create the basic layout for the routing where the connector should be placed according to the given input. After that Start the Assembly Design Workbench in Catia V5 and place the connectors in their appropriate places according to the given layout also rotate them into proper orientation.
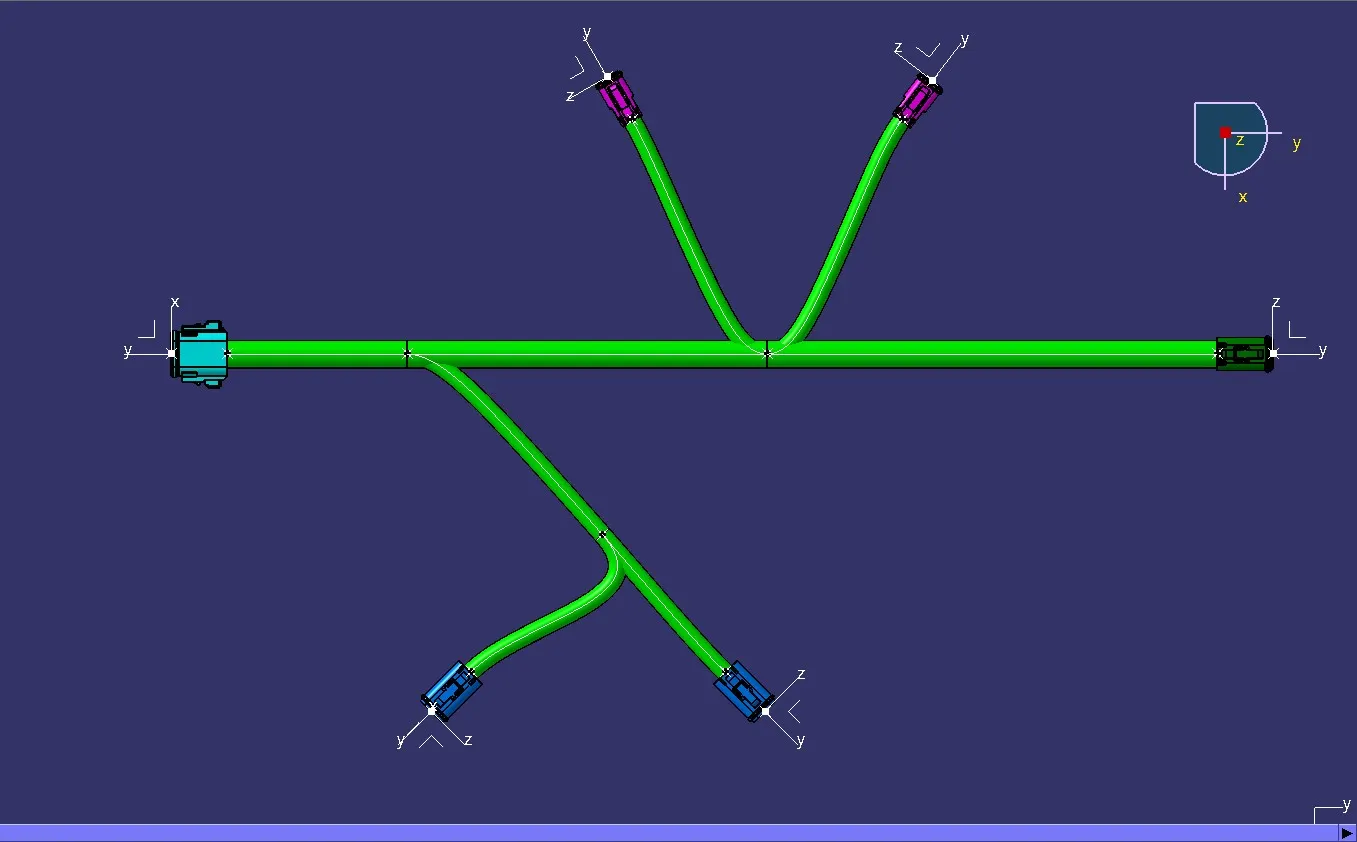
Now start the Electrical Harness Assembly Workbench. We convert the mechanical product into an electrical product by selecting the Geometrical Bundle option from the toolbars and then selecting the product name from the feature tree.
Then we will create the branches to connect the different connectors with one another by selecting the Multi-Branchable Document option from the toolbars and the giving the values of branch diameter, bent radius, and slack% in the dialog box.
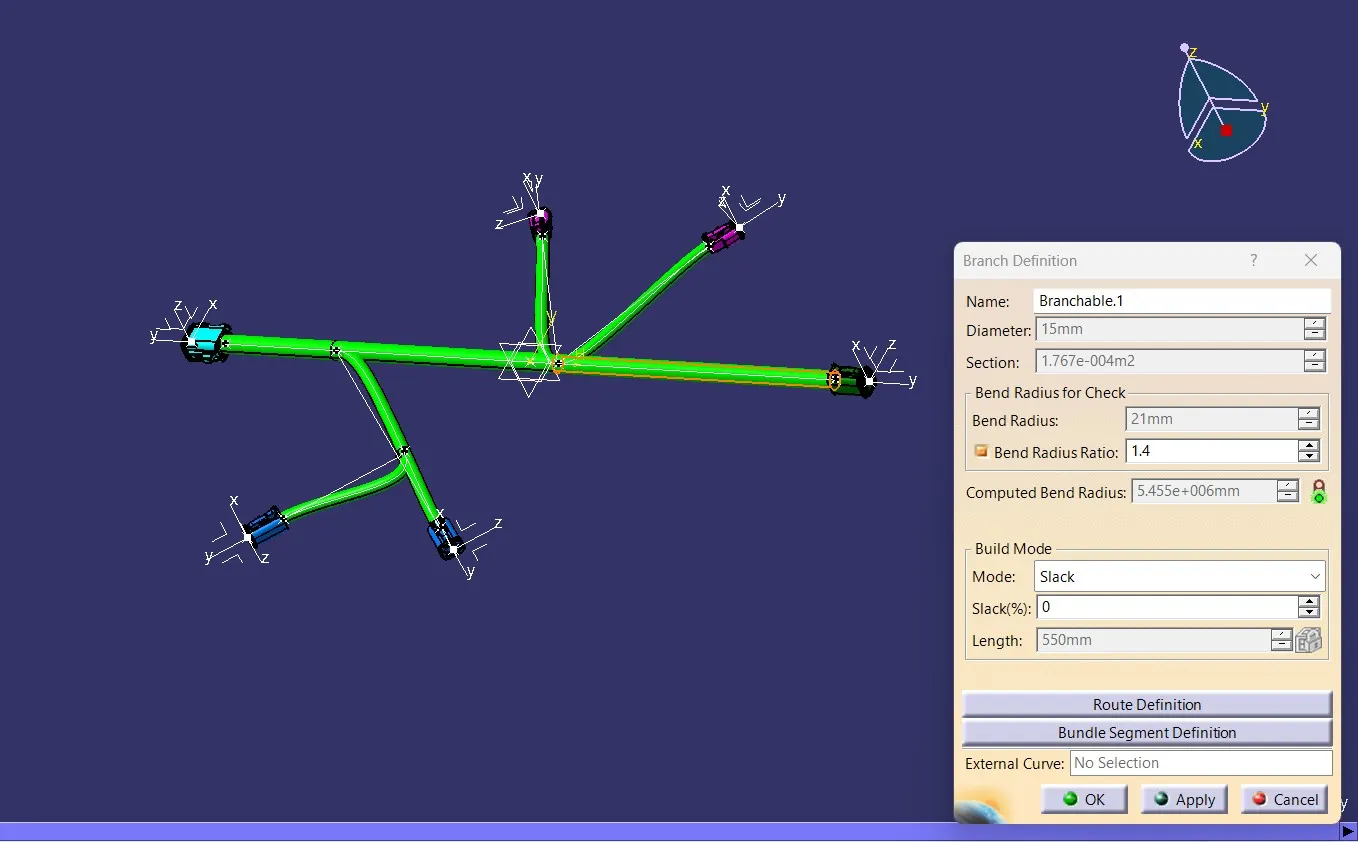
After that we will click on the Route Defination option from same dialog box and then select the two connectors between which the branch is to be created. Click ok. We will repeat the same process for all the connectors.
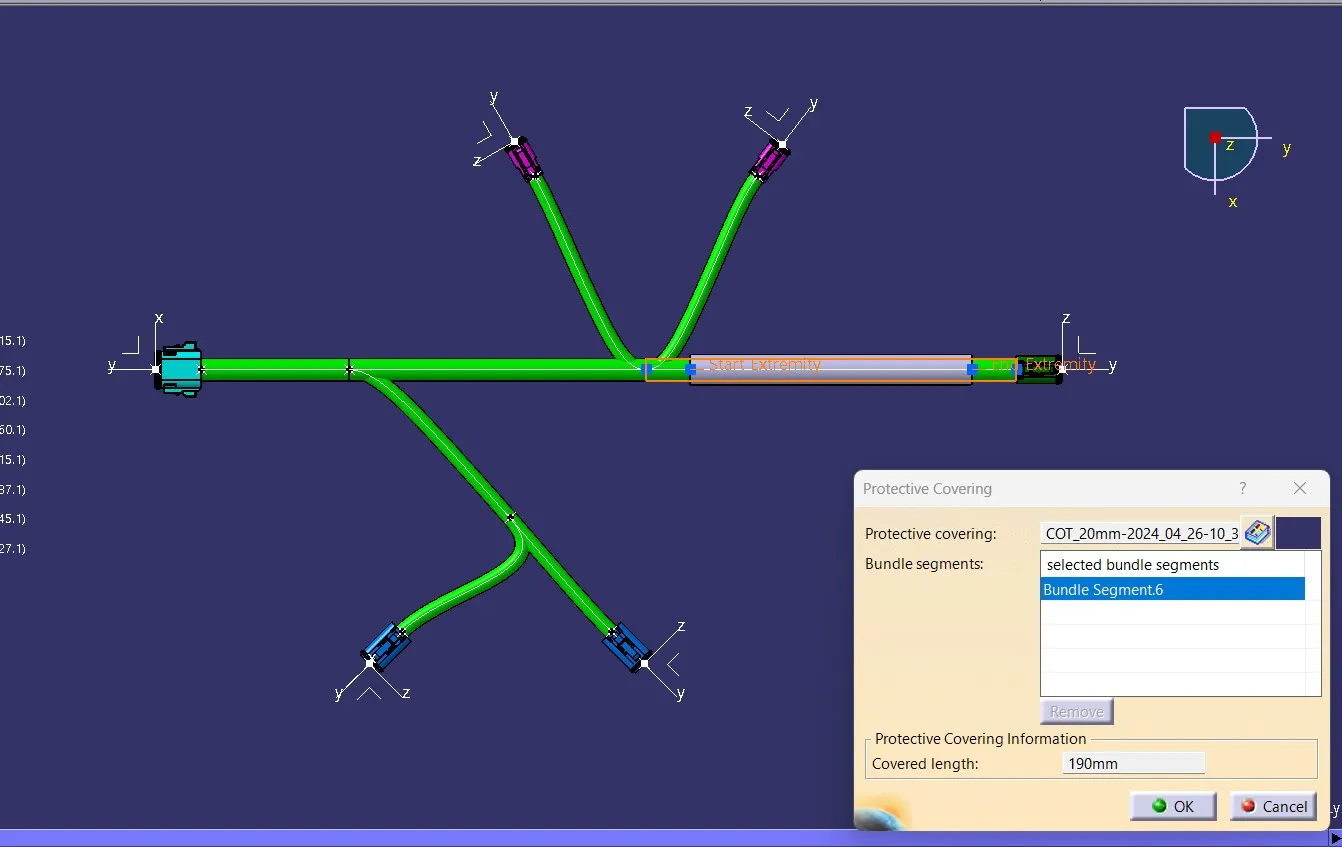
We will then add protective covering on all the branches connected to the connectors by selecting the Protective Covering option from the toolbars and then selecting the branch on which we want to add the covering and then browse for the required covering from the catalog browser option and then adding it to the branch.
FINAL ASSEMBLY:
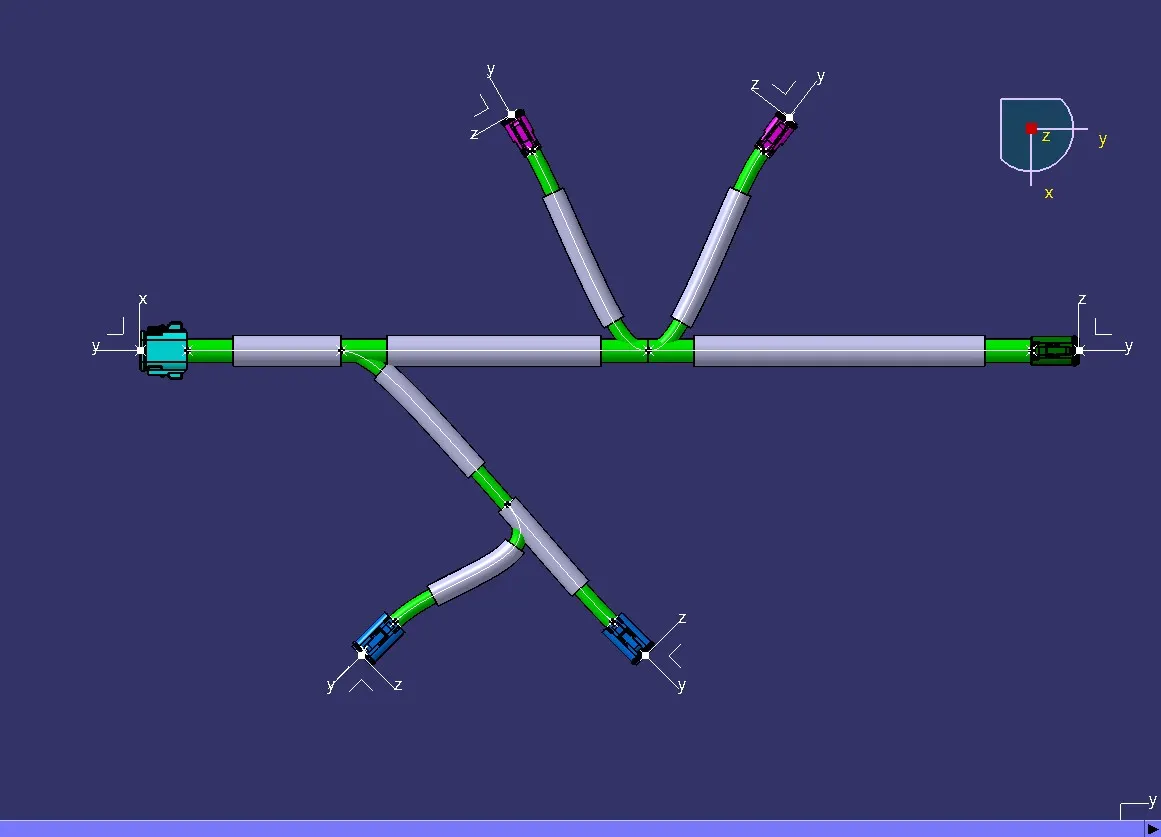
From this assembly we have to do the bundle flattening.
- Create a new product file in Catia.
- Start the Electrical Harness Flattening Workbench and select the Harness Flattening Parameters option from the toolbars.
- A Harness Flattening Parameters dialog-box will appear and we have to set out our required parameters.
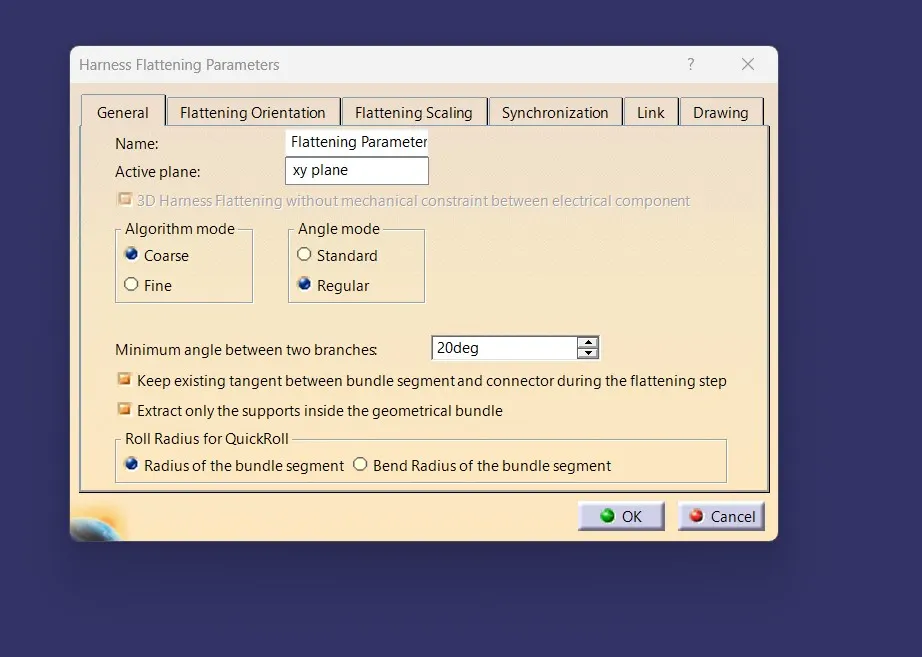
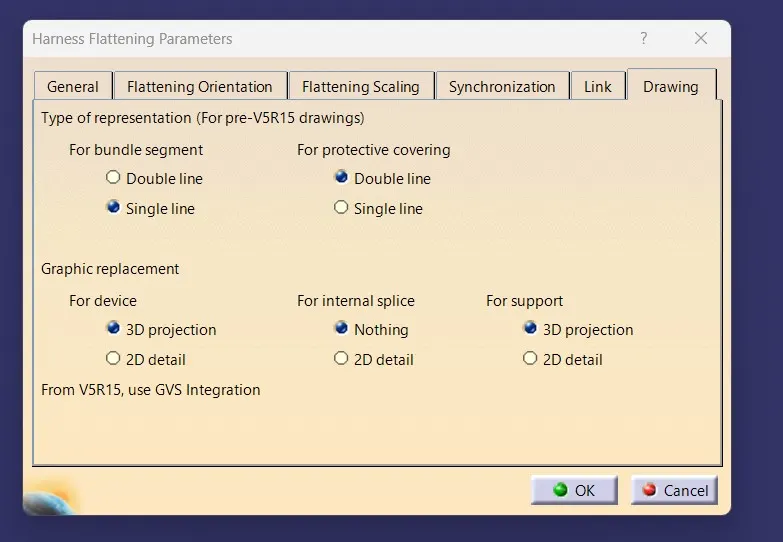
Update the setting as mention in the above image.
After that,
create the product > Switch to Electrical Flattening Workbench > Create the flattening Parameter
By using windows vertically > Extract command > to extract the Geometrical Bundle in to the Flattening Product.
Then we have to open our previous product file of the Wiring Harness Assembly and then go to the Electrical Harness Flattening Workbench.
Select the Extract option from the toolbars and then if our assembly is fully connected then the file gets extracted to the second product file. If our file fails to extract then that means that our assembly is not fully connected then in that case we have to check our connections bundle continuity again.
After that we have to select the Flatten option from the toolbars and then select any face of our assembly with respect to which we want to flatten our assembly and then select all oue wire bundles and click ok. Our harness assembly then gets converted into a flattening assembly.
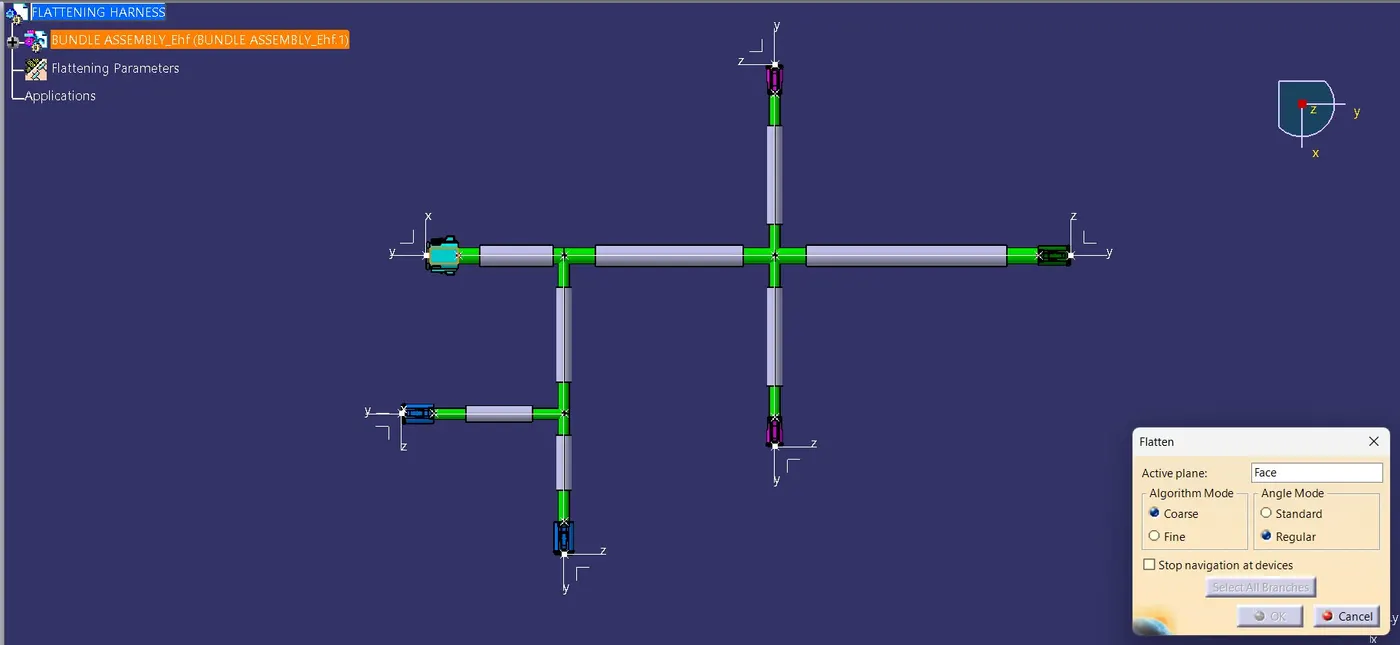
And we have result as mention below.
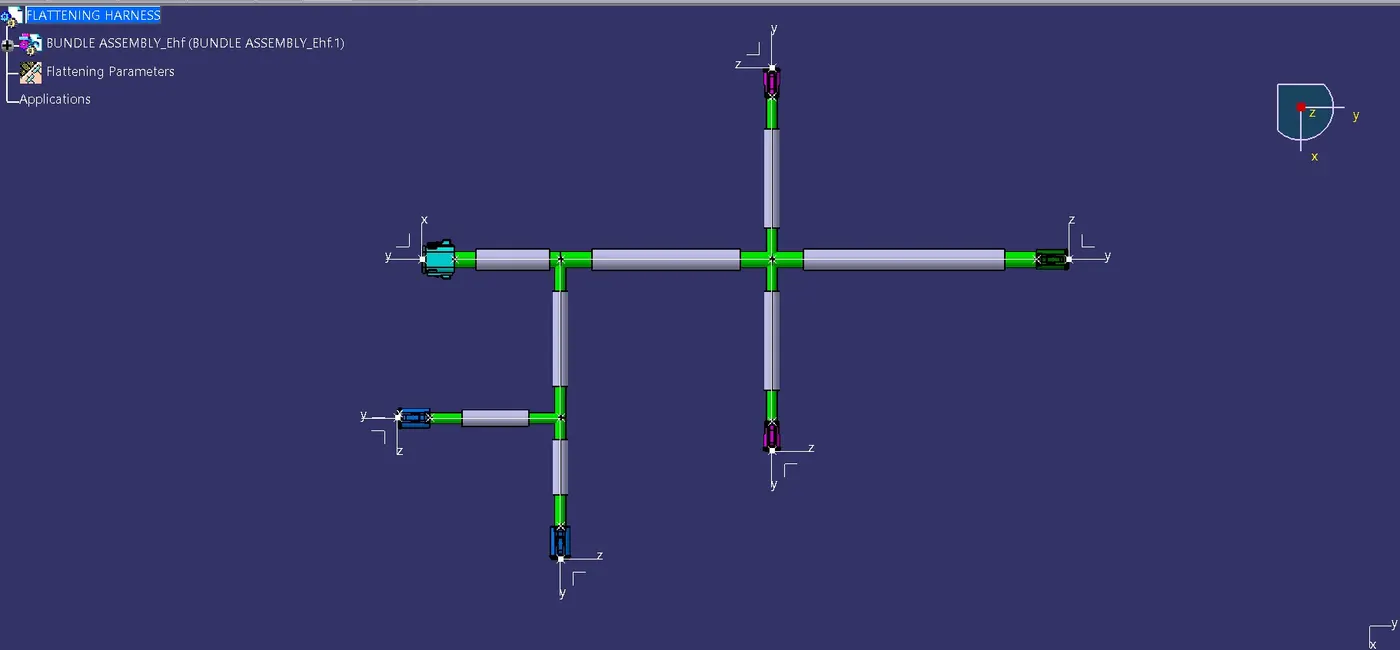
After that we have create the 2D drawing for that assembly.
For creating the Flattening Product Drawing:
Setting properties for the drawing mention below:
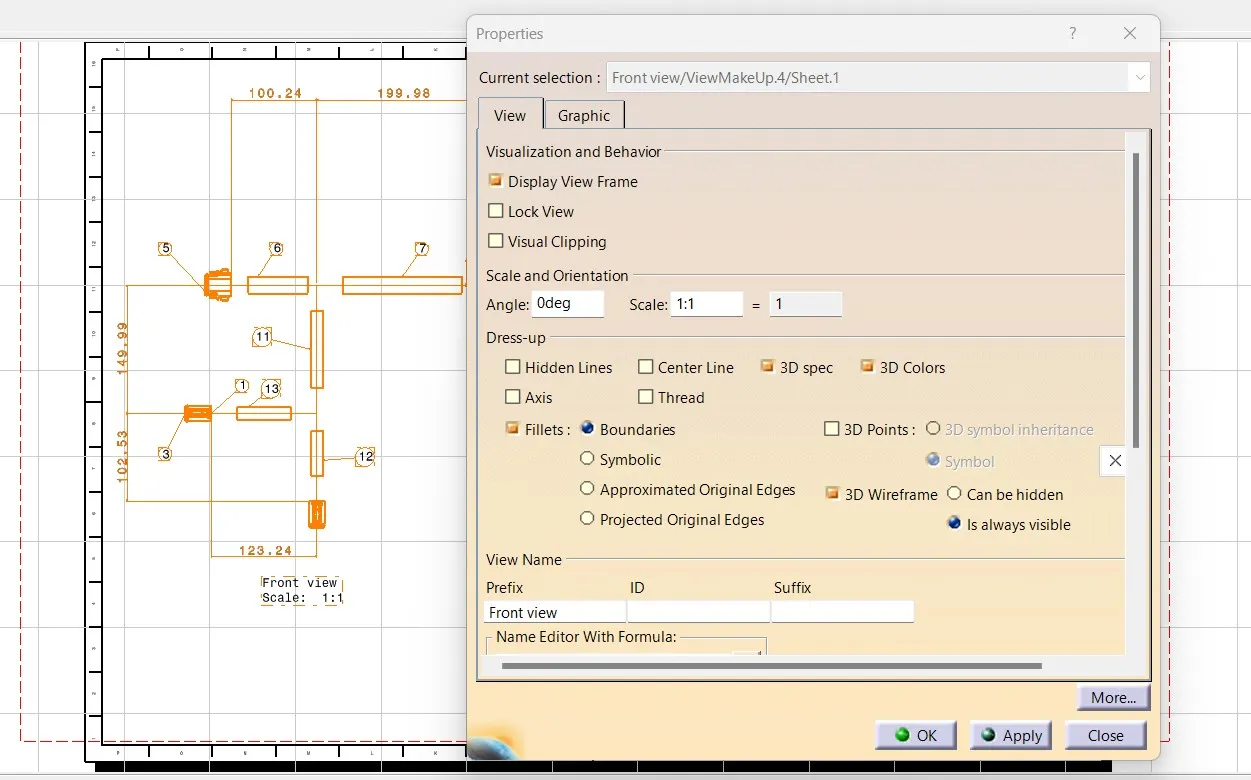
- Create a new Drawing file.
- Select the Front View option from the toolbars and then open the Wiring Harness Flattening window and select the same face that we had selected for our flattening.
- The Flattening Assembly gets converted into a drawing file.
- We add a tiltle box, ballon, and bill of materials to the drawing. Save the file.
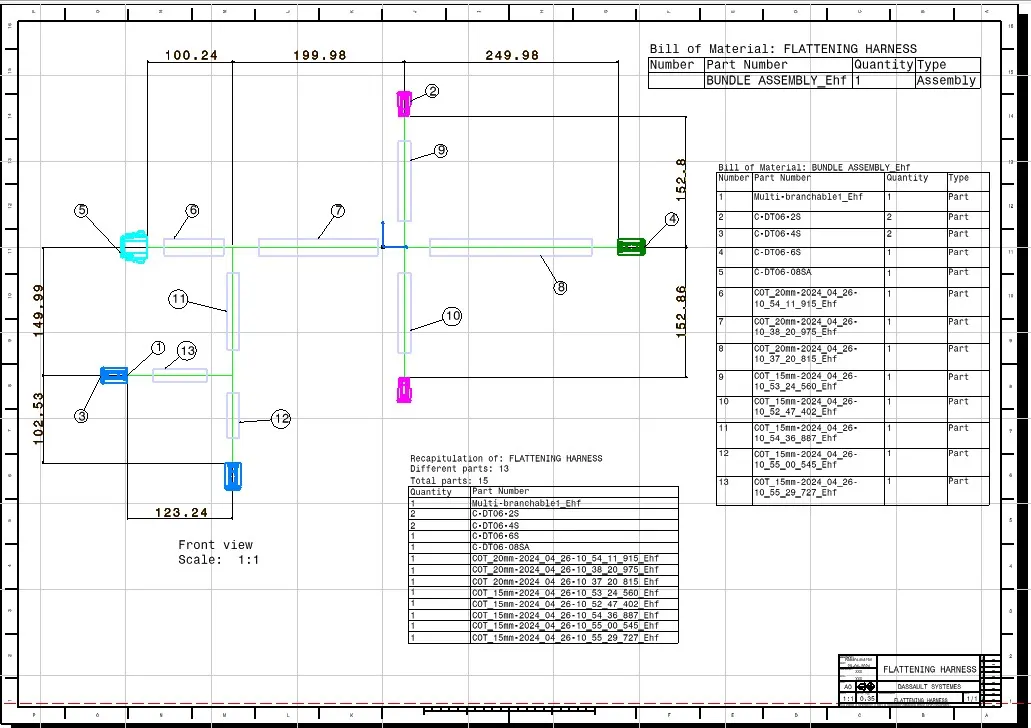
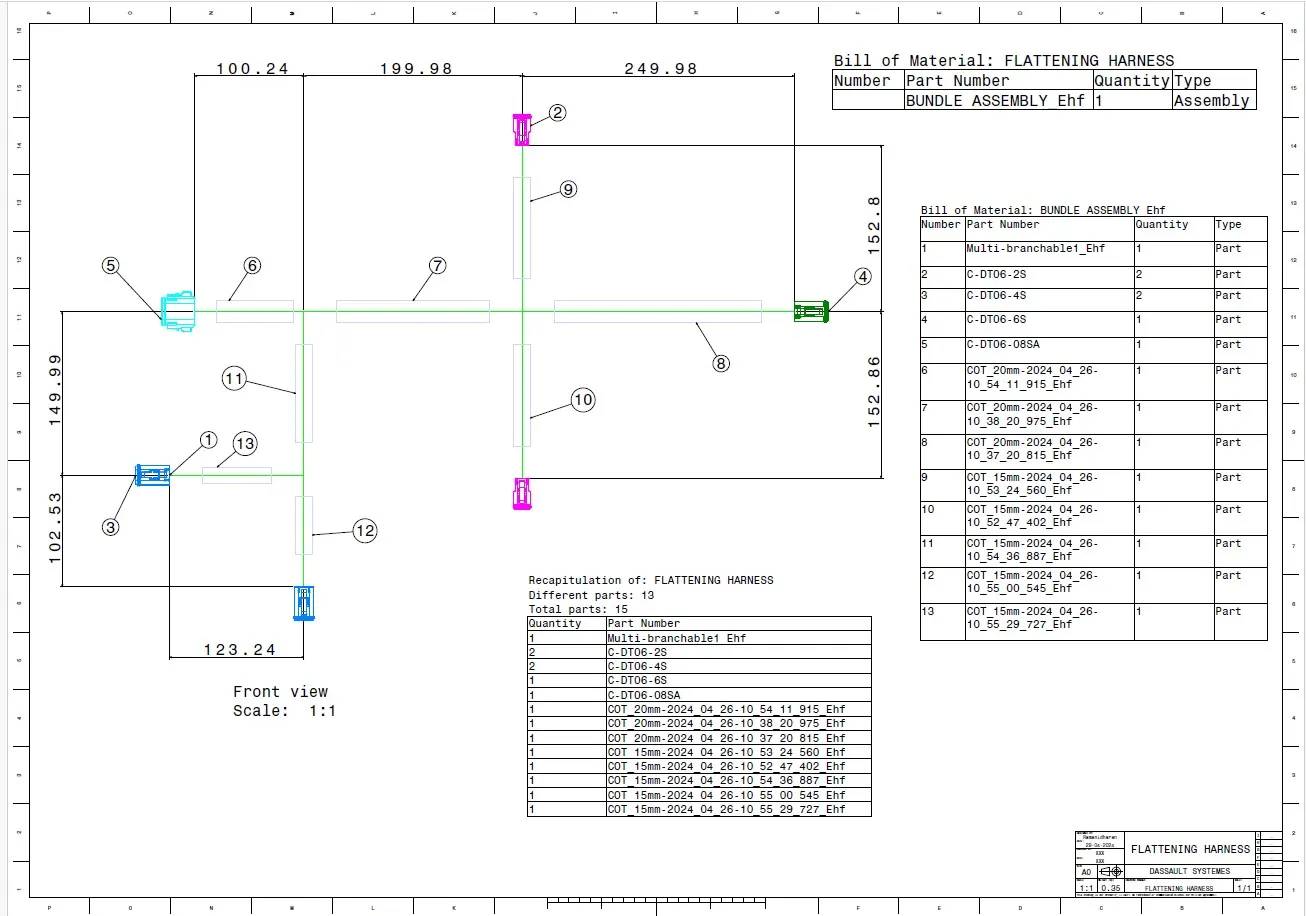
The bundle with connector representation in green in single line and different colour coding for bundle with protective covering with grey colour in double line and Connector also in different colour. Shown in above image.
CONCLUSION:
We Define the mechanical parts electrically and the prepare bundle flattening has to be done in the CATIA flattening workbech. To create a 2D drawing of the bundle with connector representation and diffrent colour coding for bundle with protective covering.