Wiring harness design in CATIA V5 - 3D modeling Week 2 Challenge
Aim:
Electrically defined the given connecters and connecter clip with the help of geometry and assemble by the electrical wiring harness workbench.
Wiring harness:
Systematic bound of electric wires and electric parts This process is doing in CAD for assembly and production. E.g.: wire, connecters, back shell etc.
CONNECTOR 1:
Part Design:
Connecters:
It is connecting electrically one function with another or connect the wires.
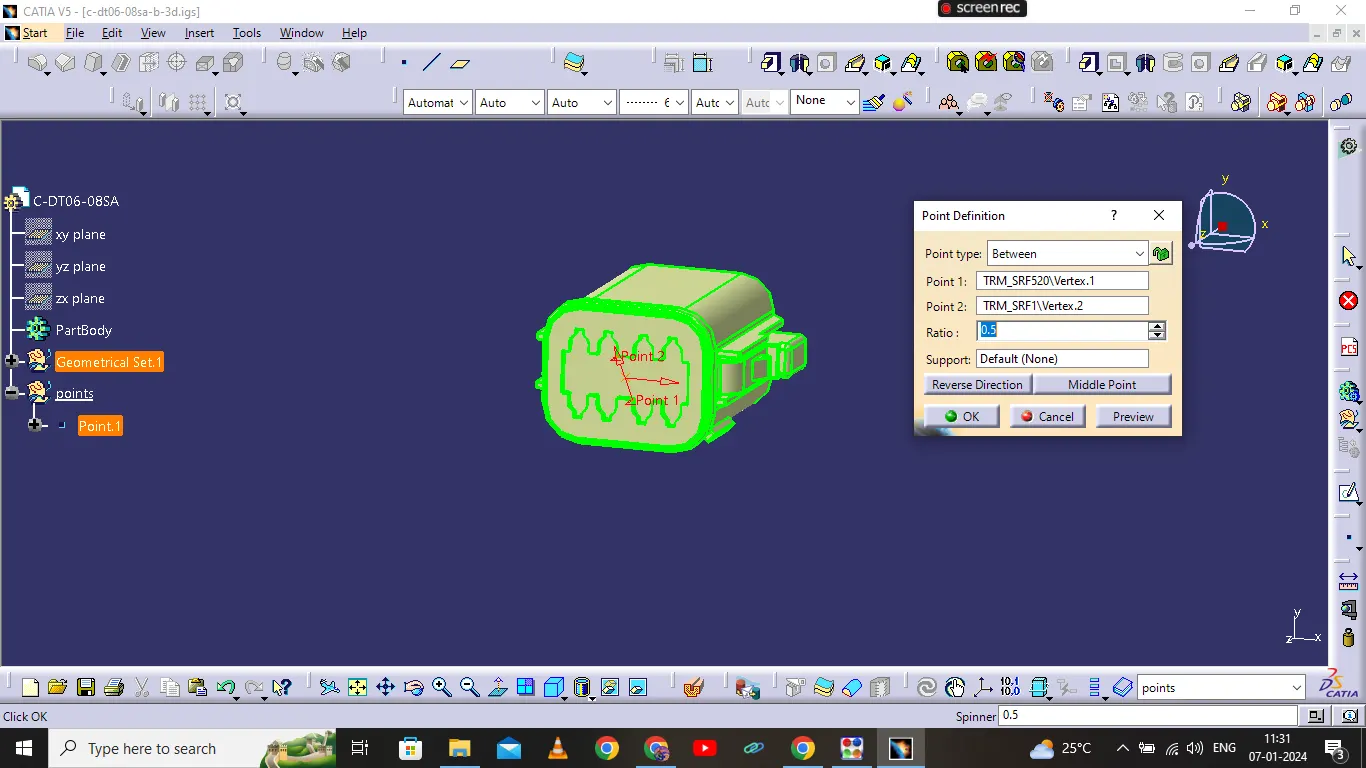
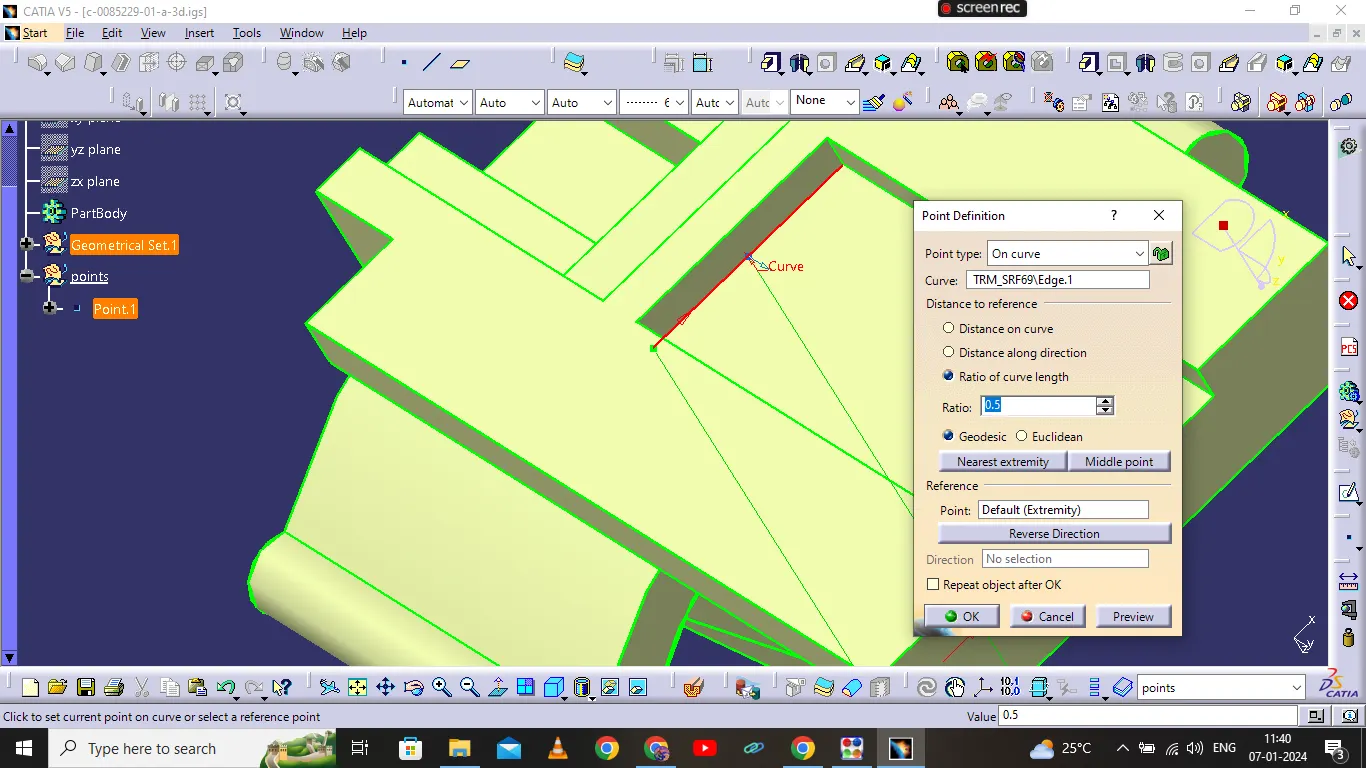
Point:
It indicates one location. This tool is used to create between two points in the centre of face.
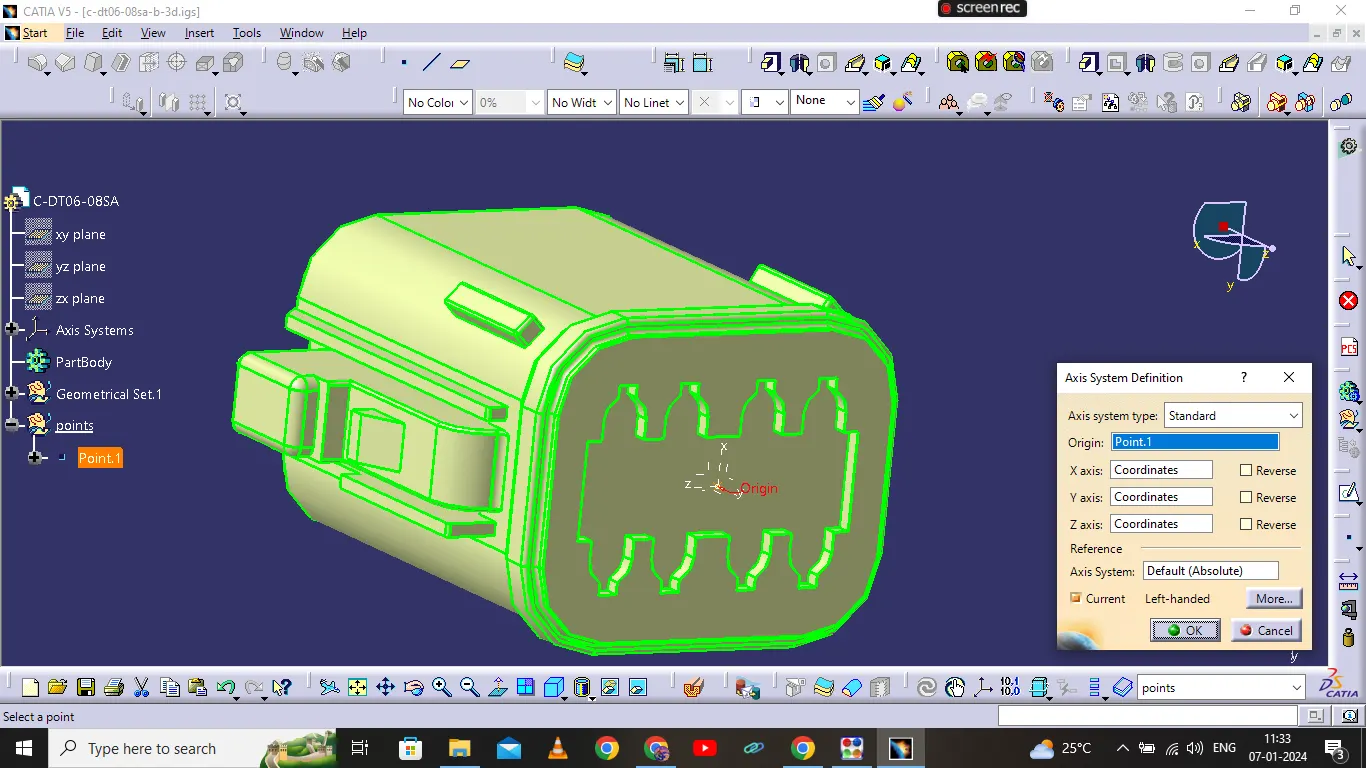
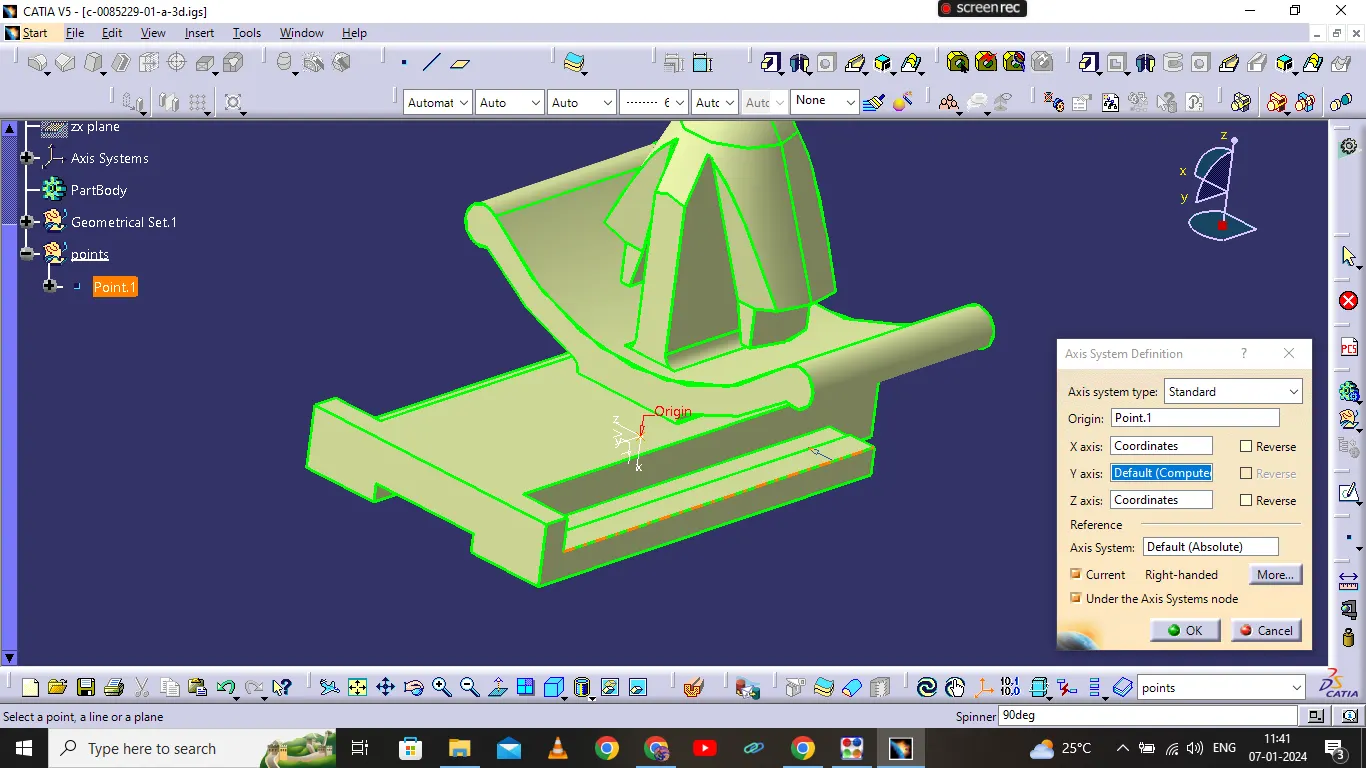
Axis system:
It is fixed on a point and give X, Y, Z direction and plane in the location which is used to define and assemble the electrical parts.
Electric Part Design:
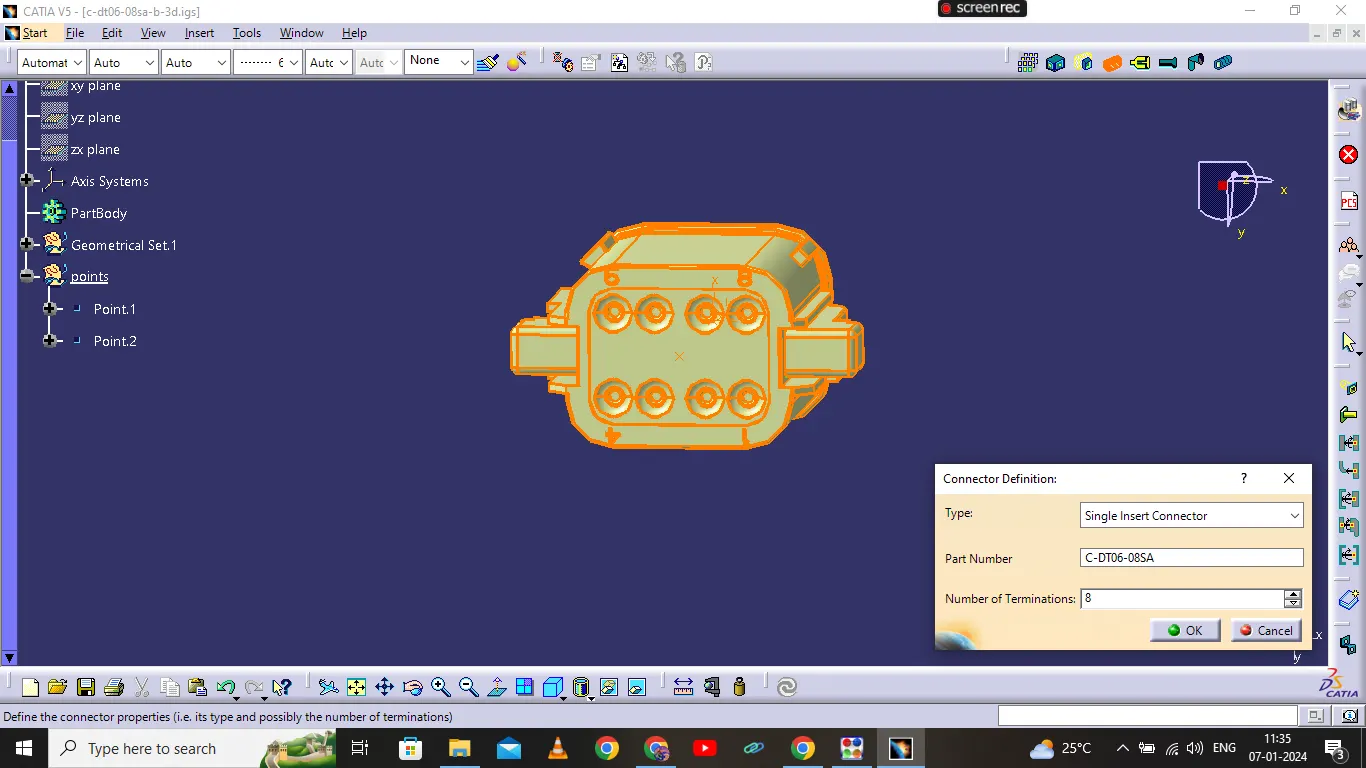
Define connecters:
This option is used to define the connecter with buddle entry points. After this process CATIA will take the part as connecter.
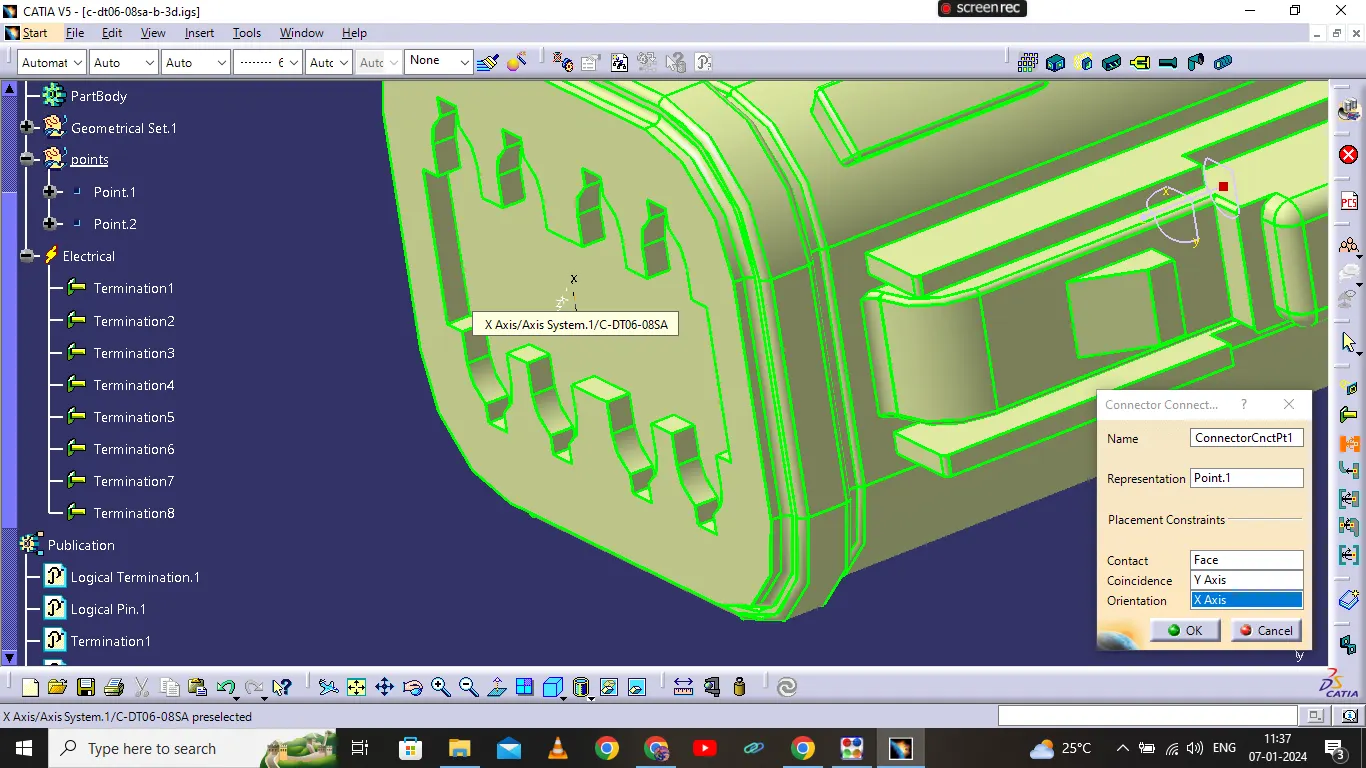
Define connecter connection point:
This option is used to define the connecter connection point with the help representation, contact, coincident and orientation which are given by point, surface and axis system.
- Create midpoint
- create Connector connection point
- create Connector connection axis system
- create cavity connection point
- create cavity connection axis system
- Switch to Electric part design and define part as connector
- Define Connector connection point and cavity connection point
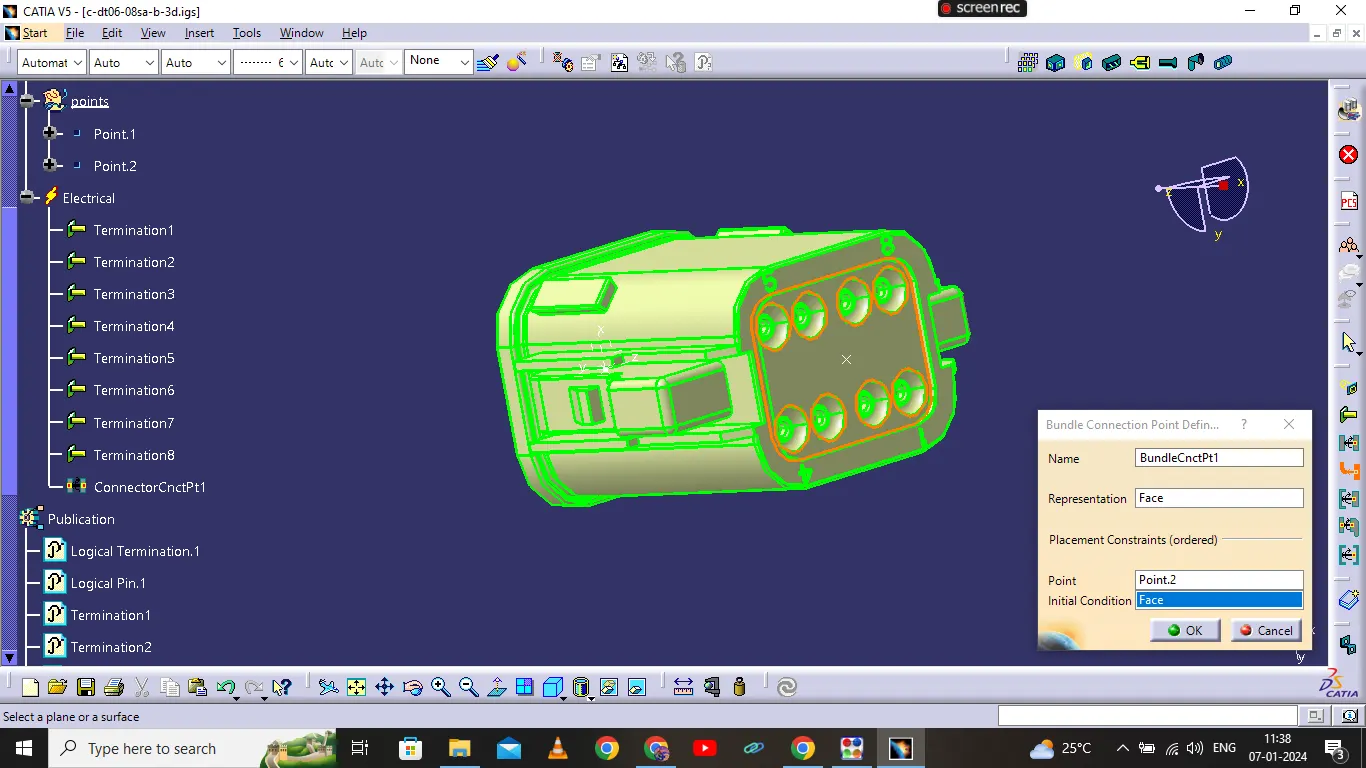
Define bundle connection point:
This option is used to define the bundle entry point of connecter with the help representation, contact, coincident and orientation which are given by point, surface and axis system.
CAVITY:
Part Design:
Clips:
Generally, clips are mounding some parts. In this model clips are mounding the connecters.
- Create midpoint
- create cavity connection point
- create cavity connection axis system and orientation should be same as in connector
- Switch to Electric part design and define part as Mounting Equipment
- Define cavity connection point
Axis system:
It is fixed on a point and give X, Y, Z direction and plane in the location which is used to define and assemble the electrical parts.
Electric Part Design:
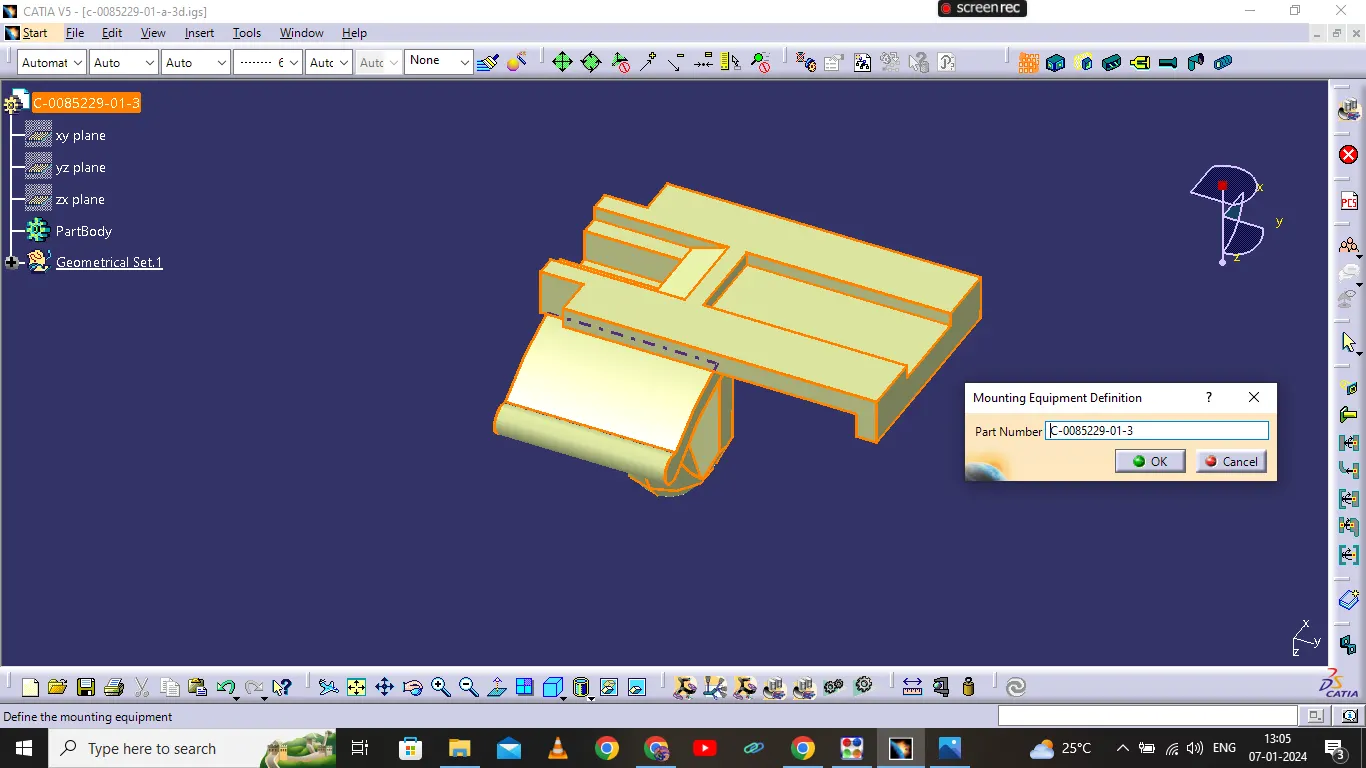
Define mounding equipment:
This option is used to define as mounding equipment. After this process it take as mounding equipment.
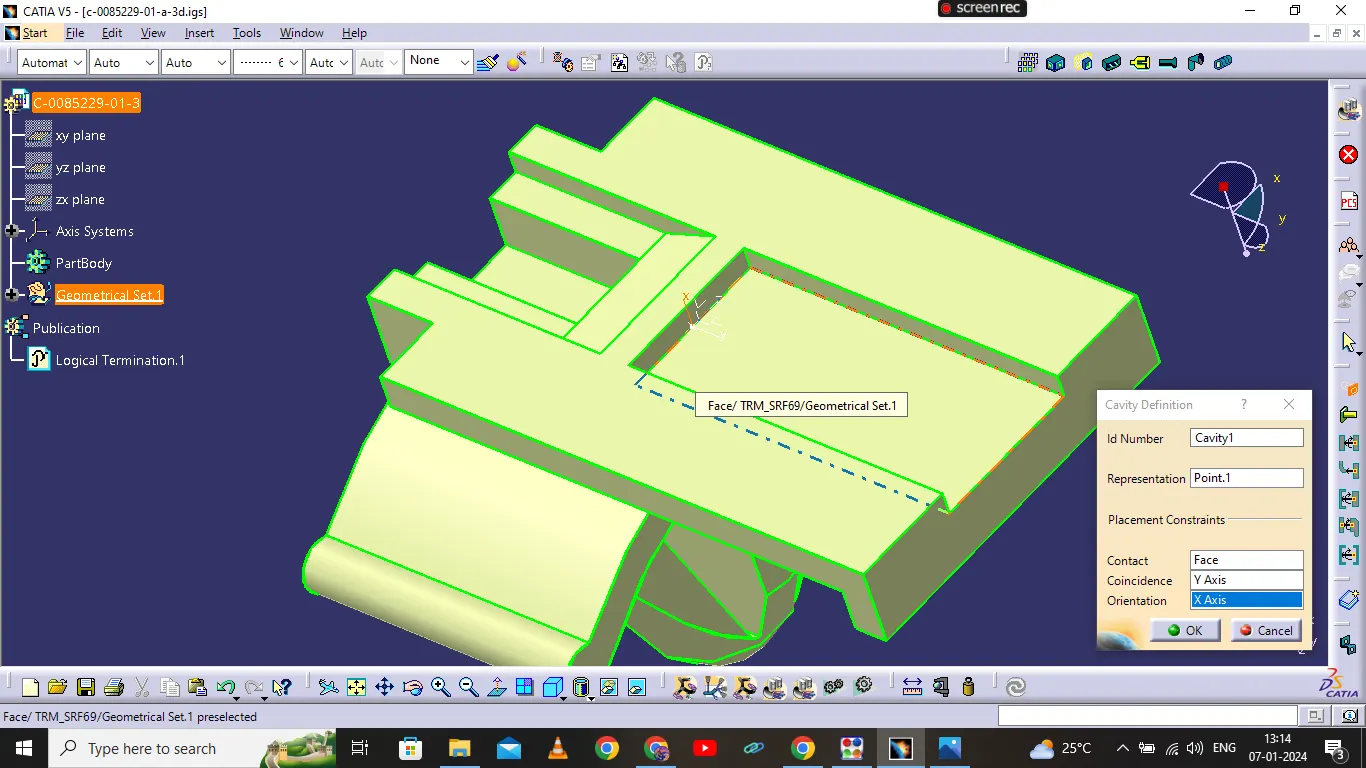
Define cavity:
This option is used to define the cavity connection point of mounding equipment with the help representation, contact, coincident and orientation which are given by point, surface and axis system
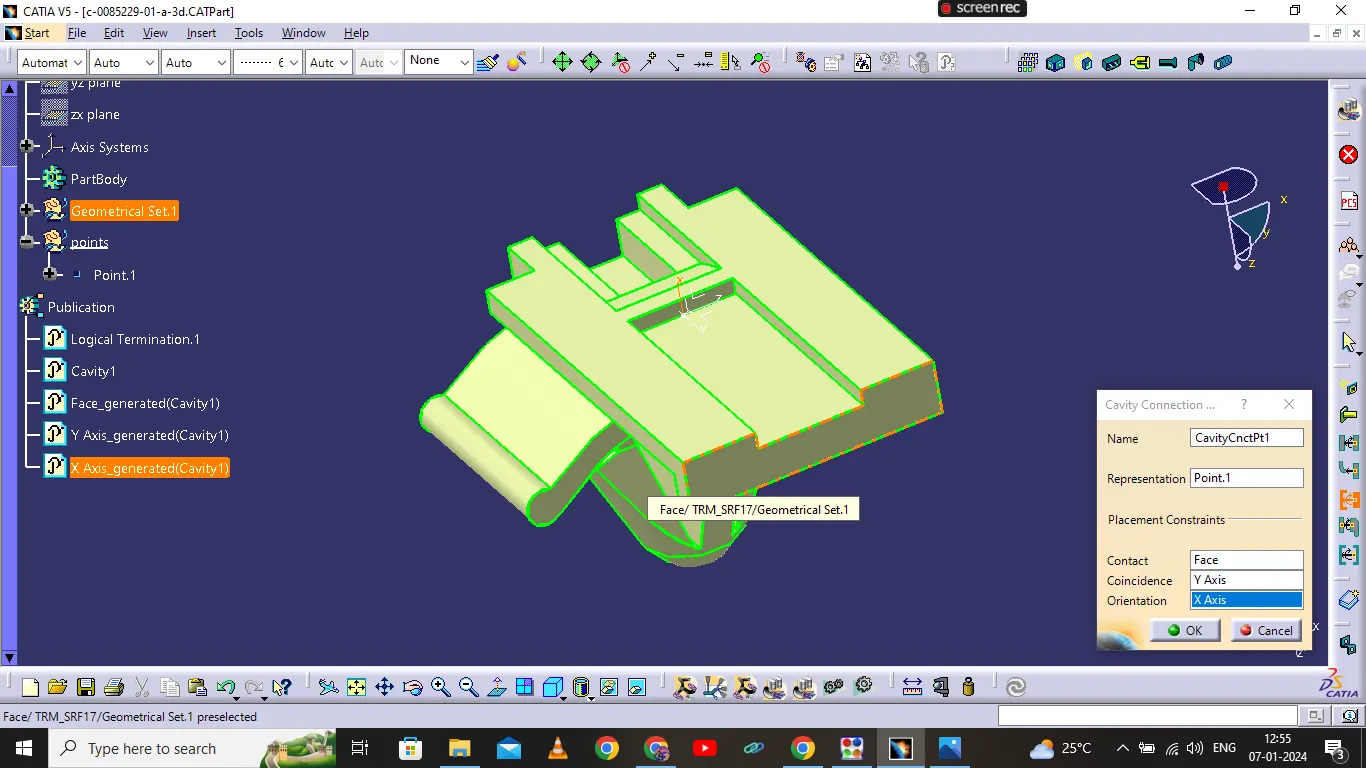
Define cavity connection point:
This option is used to define the cavity connection point of connecter with the help representation, contact, coincident and orientation which are given by point, surface and axis system.
CONNECTOR 2 :
Part Design:
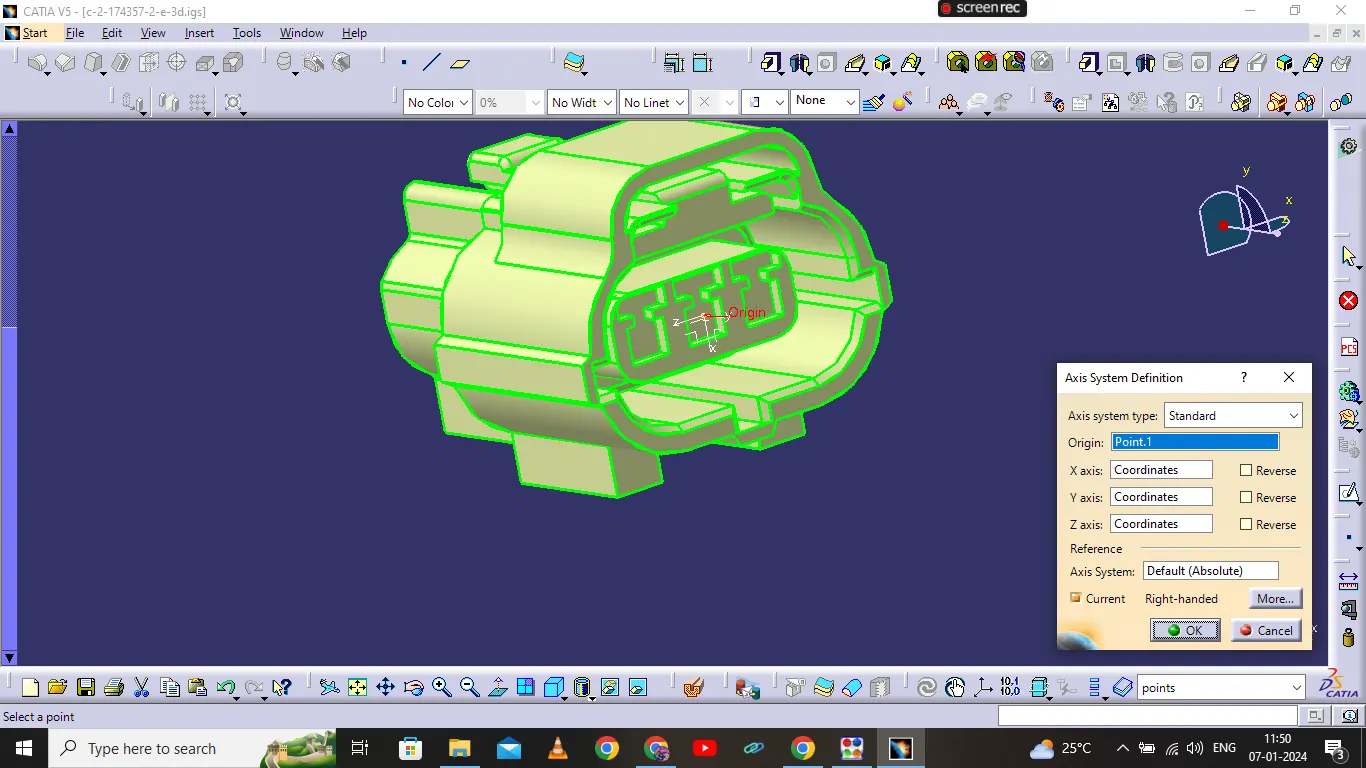
Axis system:
It is fixed on a point and give X, Y, Z direction and plane in the location which is used to define and assemble the electrical parts.
Electric Part Design:
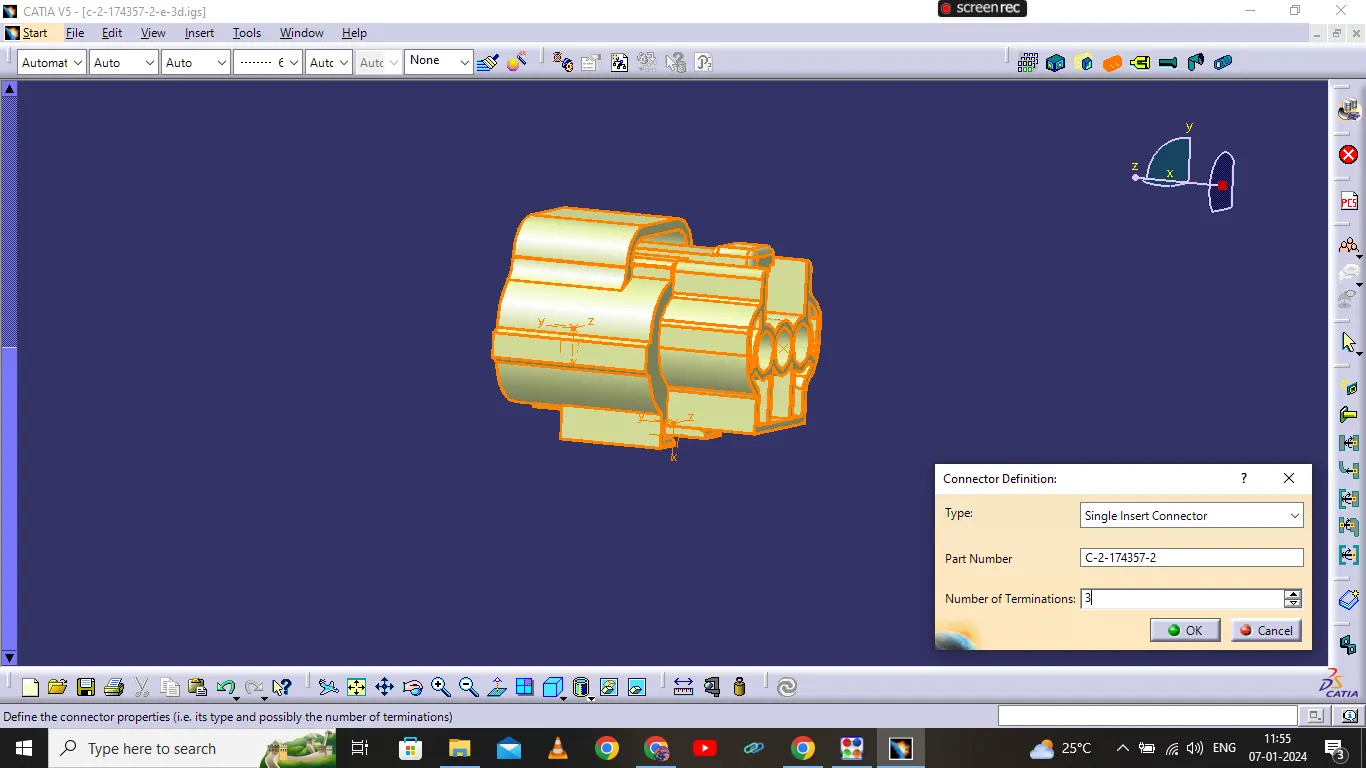
Define connecters:
This option is used to define the connecter with buddle entry points. After this process CATIA will take the part as connecter.
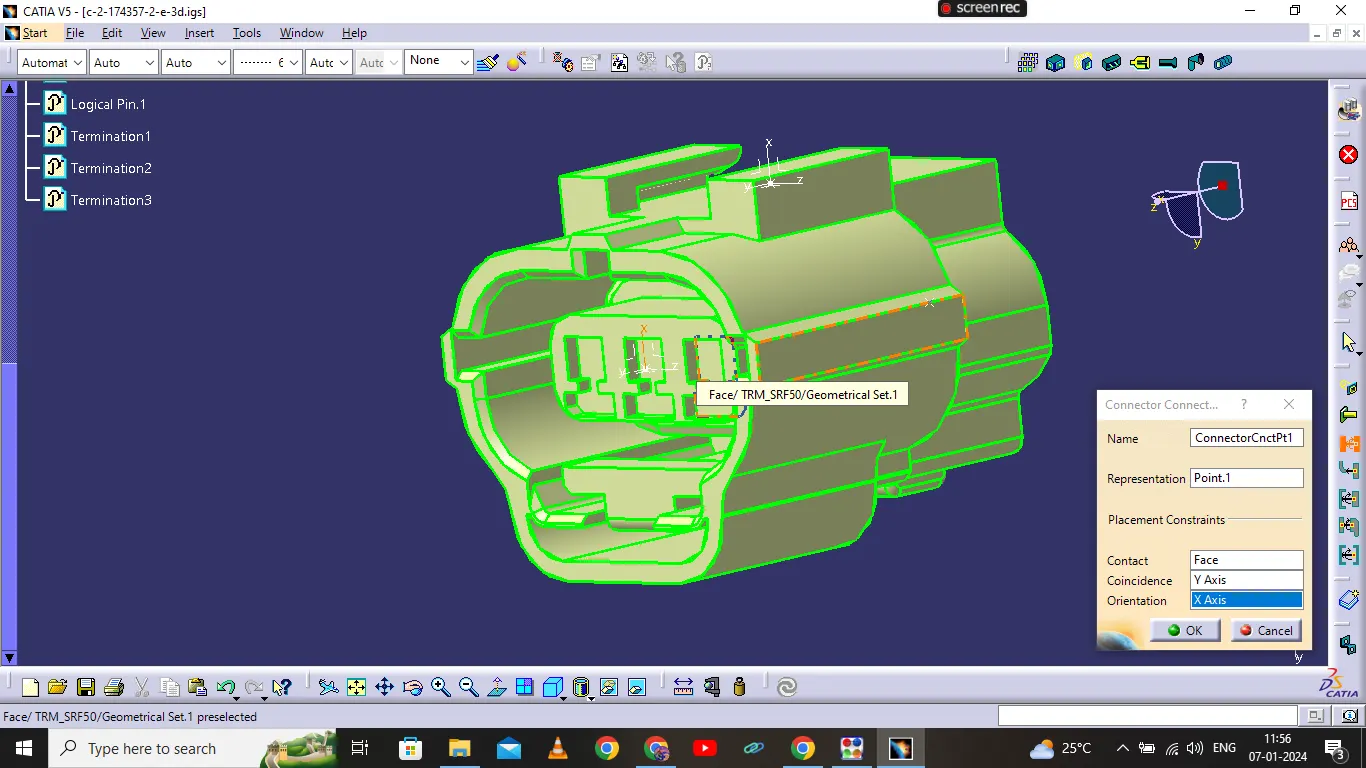
Define connecter connection point:
This option is used to define the connecter connection point with the help representation, contact, coincident and orientation which are given by point, surface and axis system.
- Create midpoint
- create Connector connection point
- create Connector connection axis system
- create cavity connection point
- create cavity connection axis system
- Switch to Electric part design and define part as connector
- Define Connector connection point and cavity connection point
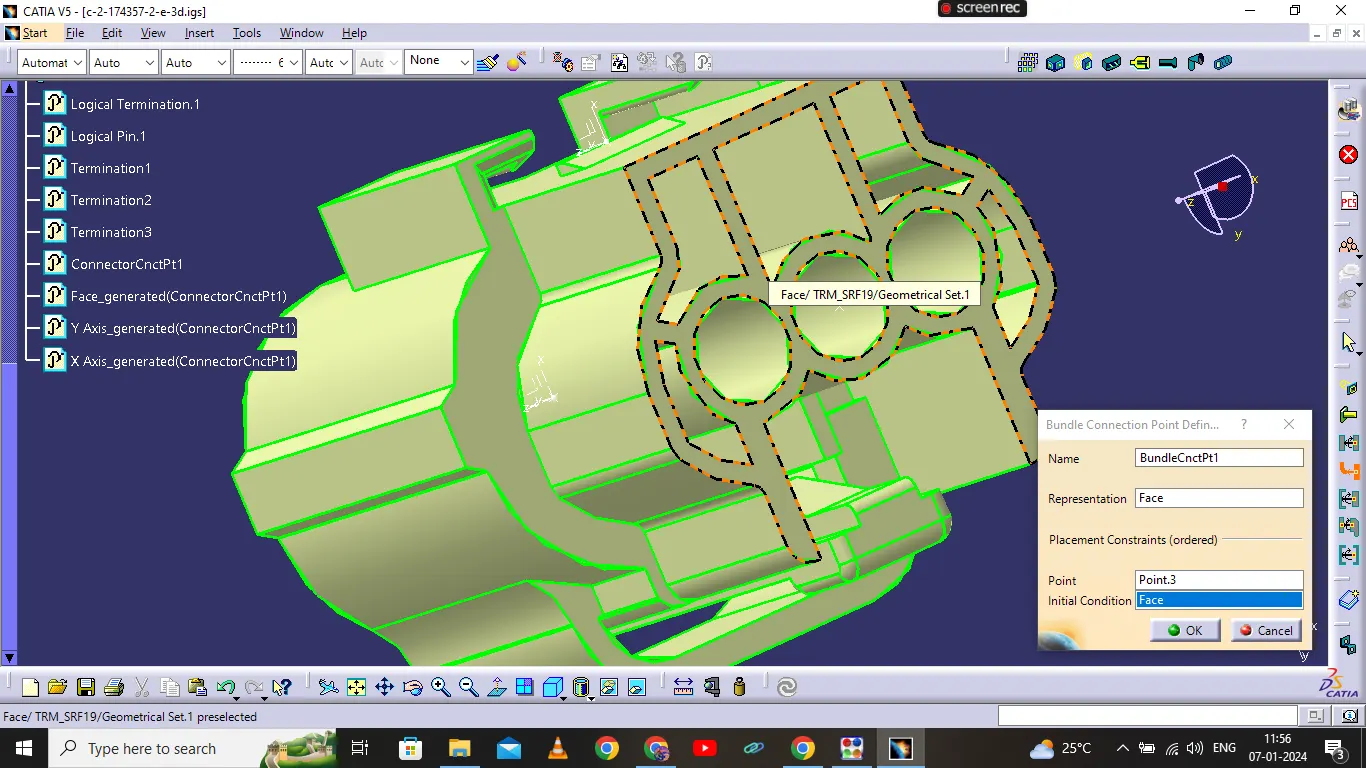
Define bundle connection point:
This option is used to define the bundle entry point of connecter with the help representation, contact, coincident and orientation which are given by point, surface and axis system.
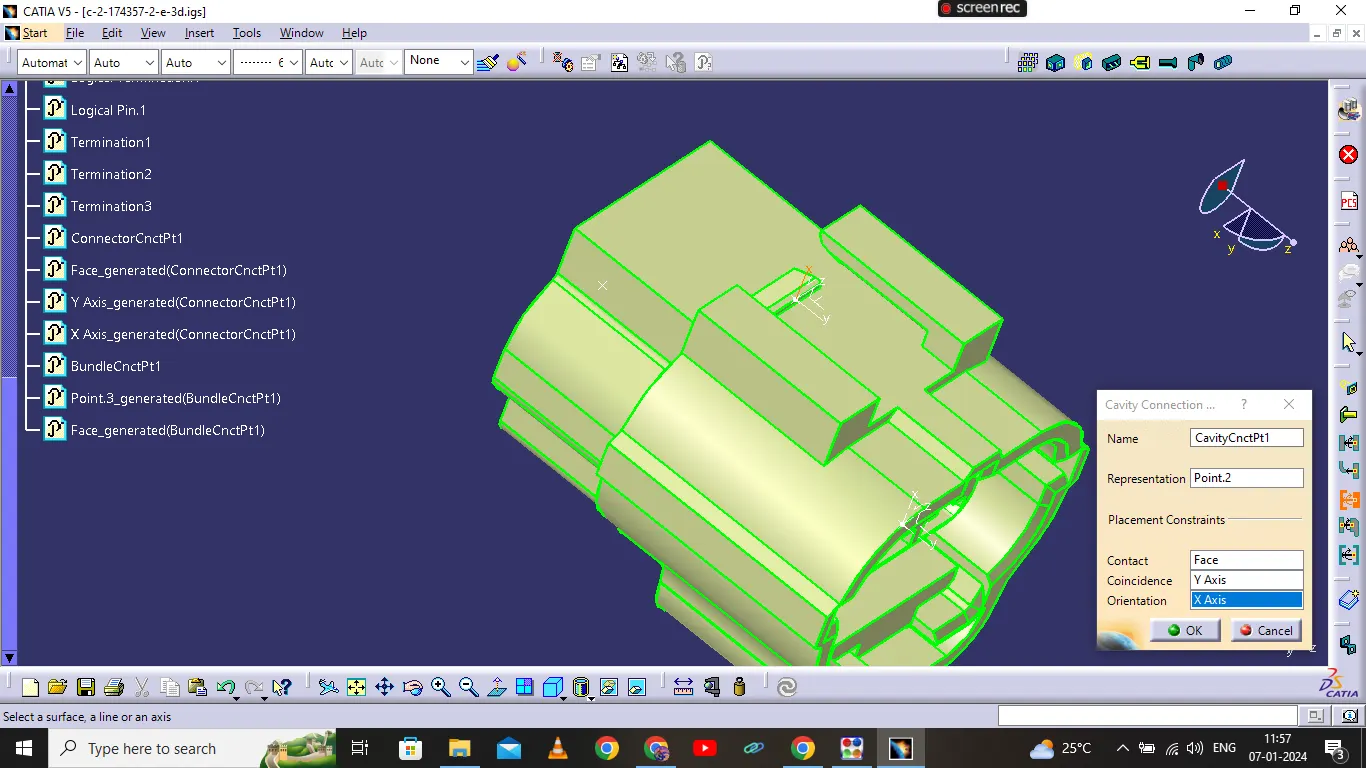
Define cavity connection point:
This option is used to define the cavity connection point of connecter with the help representation, contact, coincident and orientation which are given by point, surface and axis system.
- Create midpoint
- create cavity connection point
- create cavity connection axis system and orientation should be same as in connector
- Switch to Electric part design and define part as Mounting Equipment
- Define cavity connection point
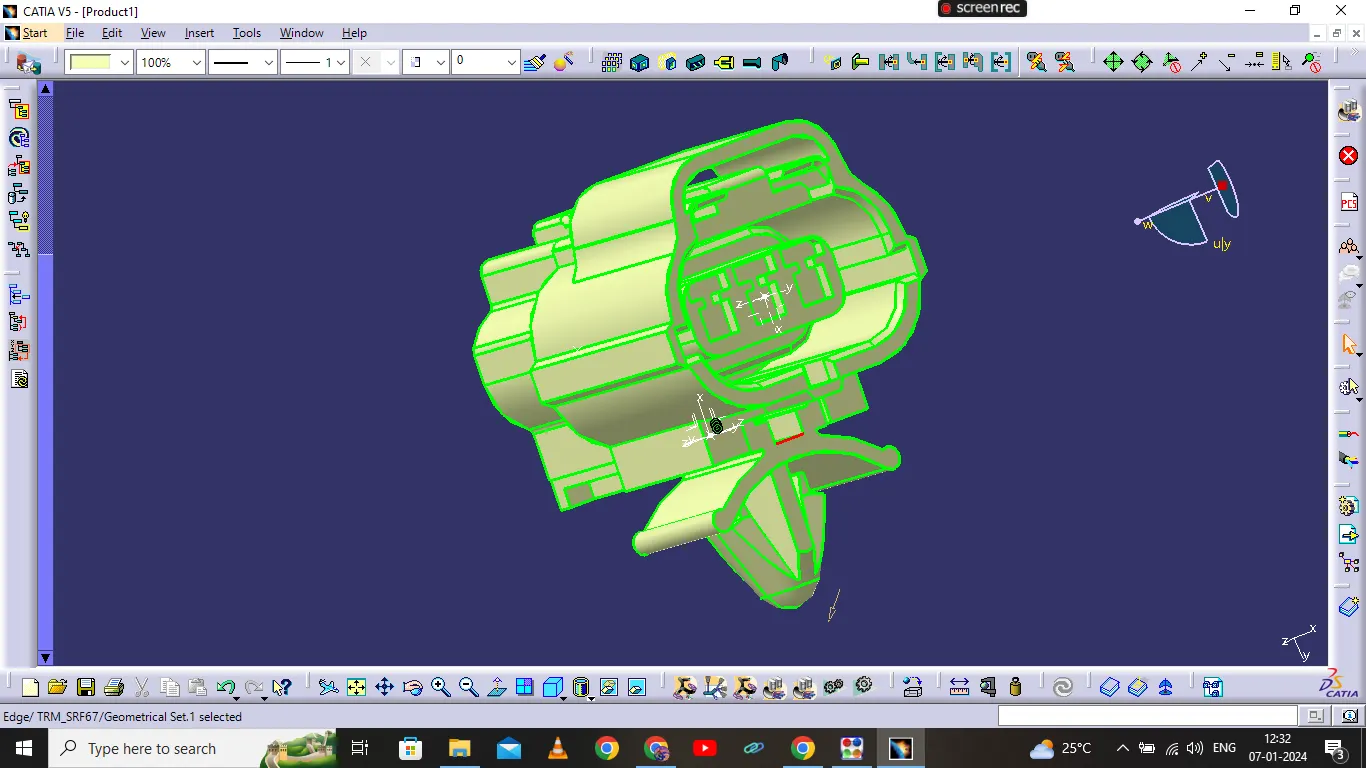
Elctric Assembly Design:
Connect electrical device:
This option available in electrical assembly bench. This option is used to connect the two electrical devices. Arter defines the electrical device if we click the part it automatically assemble with help of point, axis, face of surface from electrical define.
- import Connector and cavity / mounting clip.
- Select Defing Eelectric connection
- select cavity and then connector.
Disconnect electrical device:
This option is used to disconnect the two electrical devices from connected devices.
- Select disconnectelectical device
- select male connector and then female connector.