Design B-Piller of car
Introduction
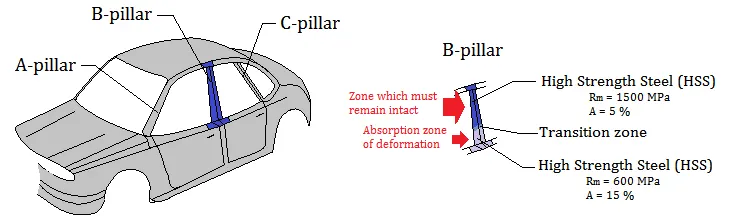
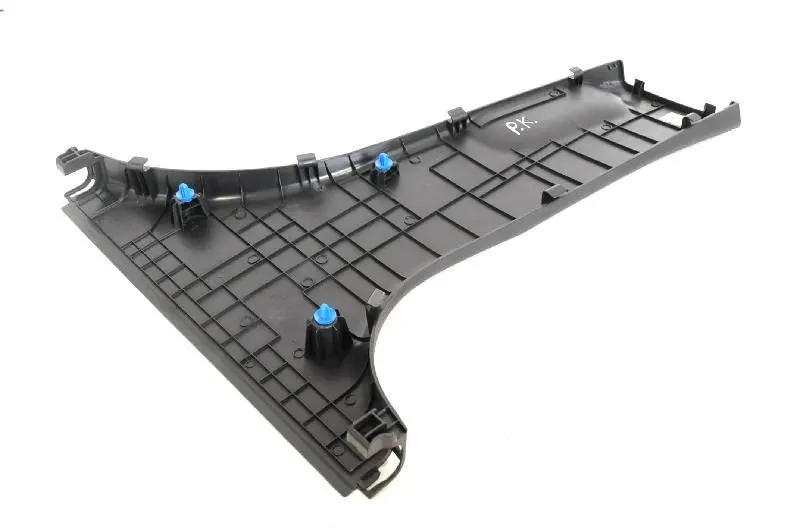
B Pillar is the most complex component or structure of the vehicle body. This is because the front door attaches to the B pillar and the rear door hinges to the B pillar. The B-pillar trim is attached to the B-pillar and improves the aesthetic look of the car. Mostly the trims are manufactured by the injection molding process. The design of the B-pillar is carefully done to make the part manufacturable and usable in the interior. While manufacturing a part through injection molding a lot of defects can occur on the plastic part which will destroy the look of the panel. The design has to made in such a way that all the errors can be rectified.
Objective
To design B-Piller through Master section development
Master section
Master Sections Are the Guides for Design Requirements which shapes the Component after technical styling Of Class A Surfaces
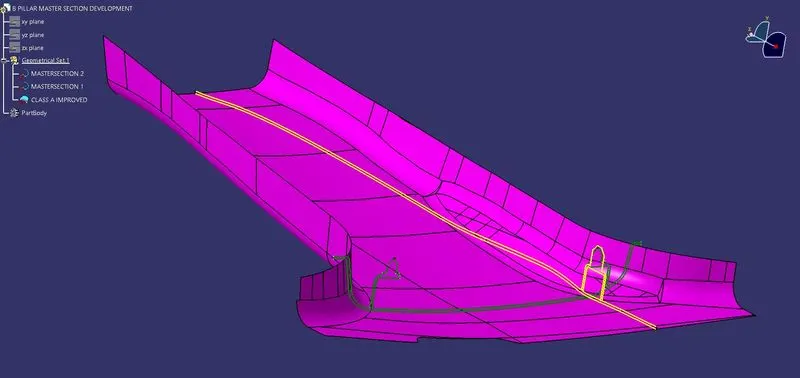
Fig:1 [ Master section with A surface]
Theory
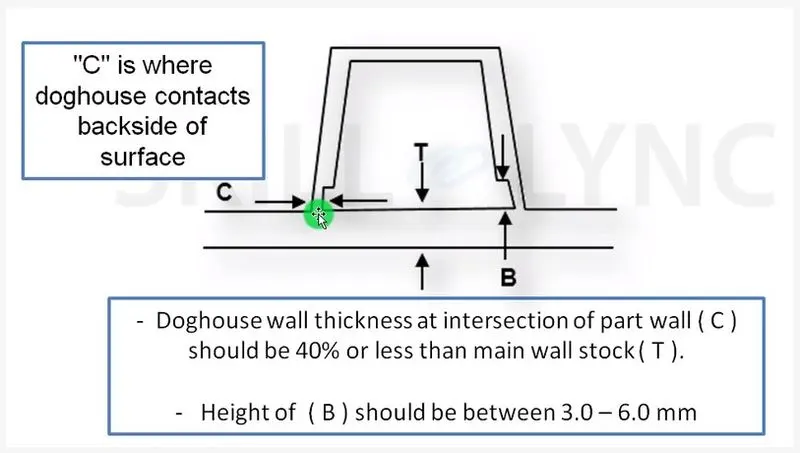
Dog House design rules
- A minimum draft angle of 0.5 degrees should be given to the faces of the dog houses.
- Dog house wall thickness at the intersection of the part wall should be 40% or less than the main wall thickness.
- Side core axis should be created in order to clear the draft direction of the internal faces of the dog house.
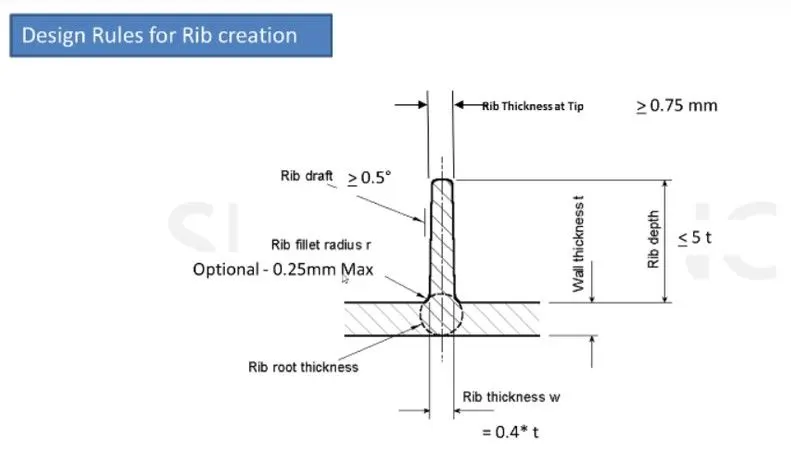
Ribs Design Rules:
Rib draft angle: 0.5 degree
Rib fillet radius : 0.25 mm
Procedure
1. Import the model to Catia drawing area, the imported surface is the A surface. Inside that master sections are marked to develop the B surface and C surface. And also need to develop the Dog house with 4 way locator
2. First the main Tool axis need to be developed inorder to avoid problems in manufacturing the product in Injection molding. In injection molding the core and cavity is developed using this Main tooling axis.
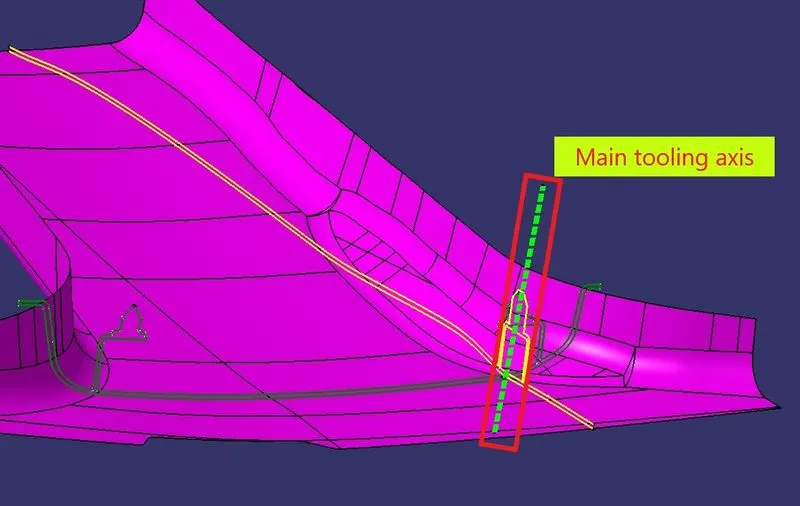
Fig:2 [Main Tooling axis]
3. In the master section the A surface is having Flange area, so that Flange need to be developed on the A surface and B surface and trim both C surface.
4. By using the master section flange in A surface is developed
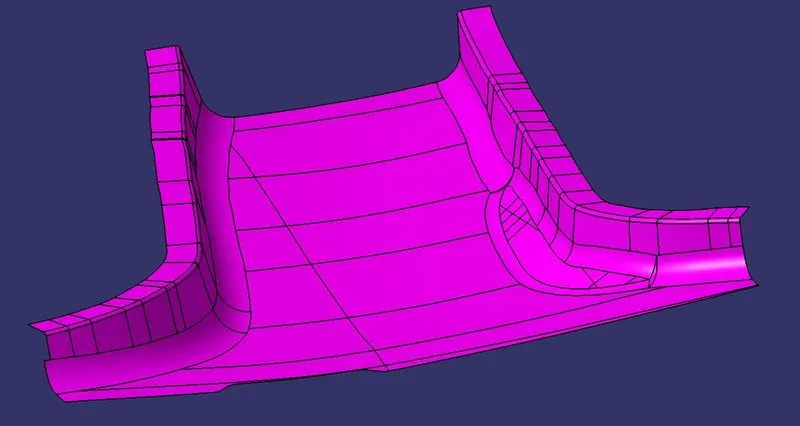
Fig:3 [ A-surface with Flange]
5. Next A surface need to be offseted to 2mm above and clear all the surface issues by creating the surface on the surface area problems. After clearing all the issues Class B surface with flange is developed
6. After creating the A and B surface , C surface need to developed inorder too connect both surface. For this C surface need to Sweep from A surface and B surface need to be extrapolated to intersect with C surface. After all this operation a closed surface will be developed.
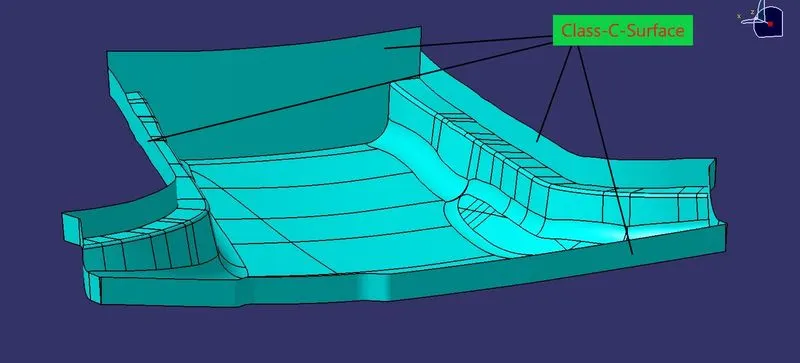
Fig:4 [Class A surface with Class C surface]
7. Inorder to have Closed volume of the surface we developed need to go to part design and select Close surface option with reference to surface which is developed recentely.
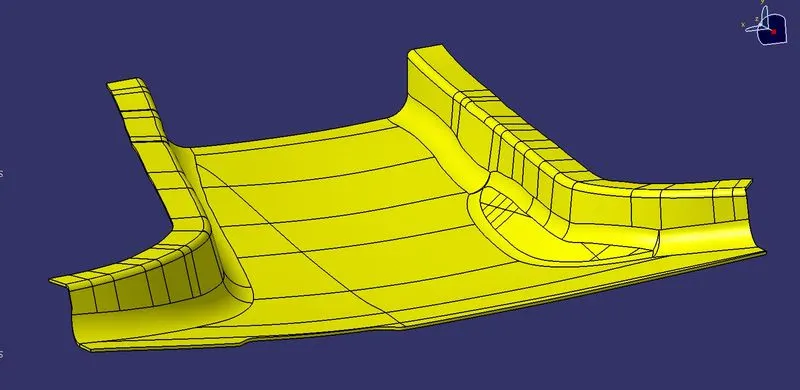
Fig:5 [Cloased body]
8. Next step is to create the dog house from the master surface section. WIth reference to the master section extract is developed and extrude the extract and create a surface. From this surface thickness need to be applied on the surface of 2mm and the lower boundary need to extended to below the A surface.
9. Then need to construct the 4 way locator on the dog house. With the height given in the master section , 4 way locator is developed. After all that into the Dog house body 4 way locator body need to be Untrim , inorder to remove the extra surface.
10. After this inorder to avoid sink mark a C cut need to be constructed below of the dog house. Then this body need to added to the main body.
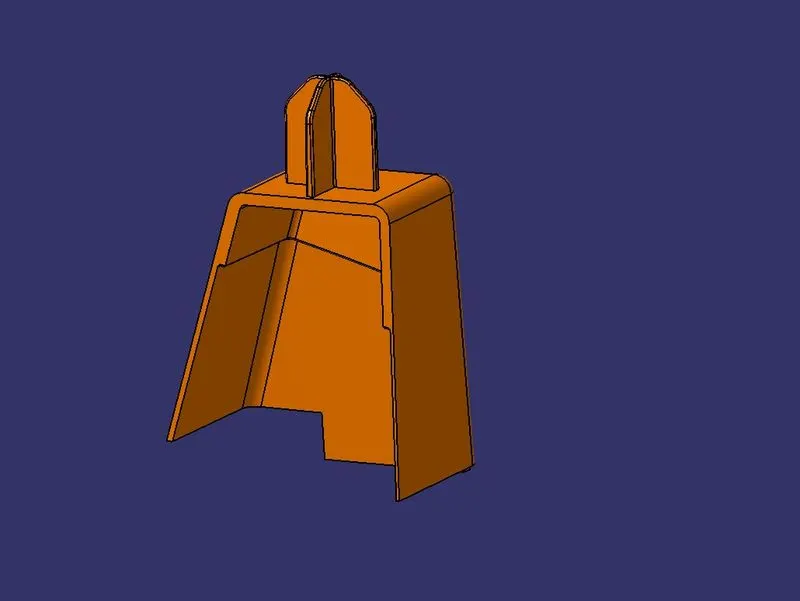
Fig:6 [Dog House-1 with 4 way locator]
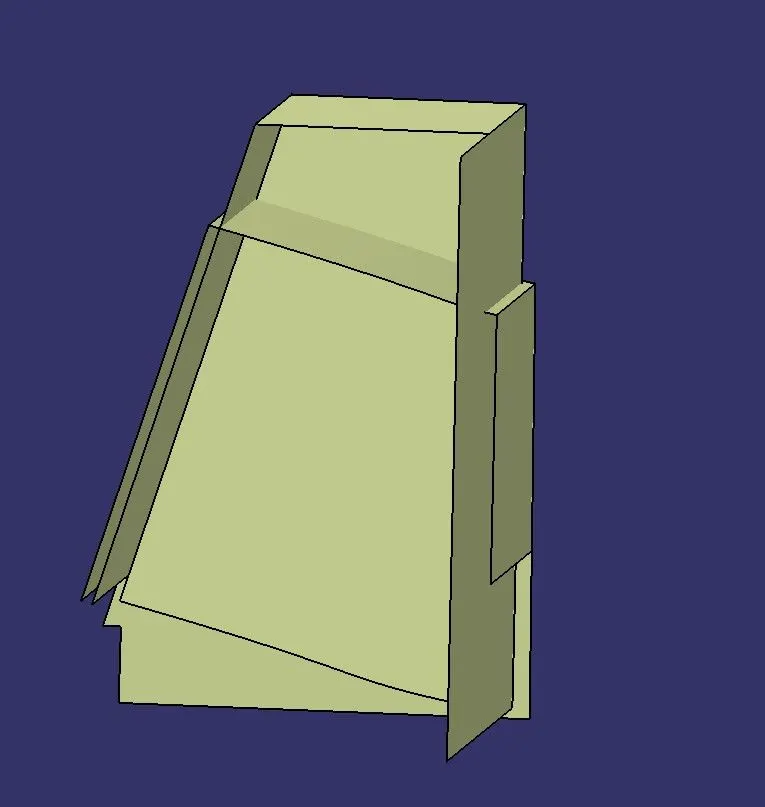
Fig:7 [Sink mark cut structure]
11. As last step fillets need to be applied on the sharp area regions and need to do the symmeterical operation to other side of the closed body. So that Dog house with 4 way locator is developed on the opposite side of the Dog house.
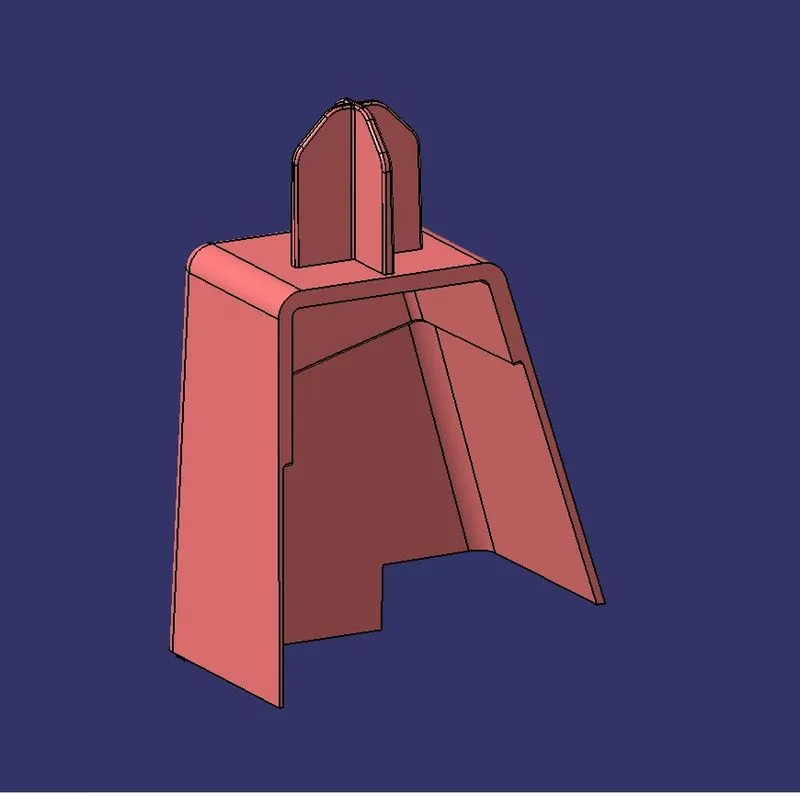
Fig:8 [Dog house -2 with 4 way locator]
12. The newly constructed Dog house with 4 way locator also need to be added on the main body.
13. For having stiffness to the main body, Ribs need to be constructed on the main body.
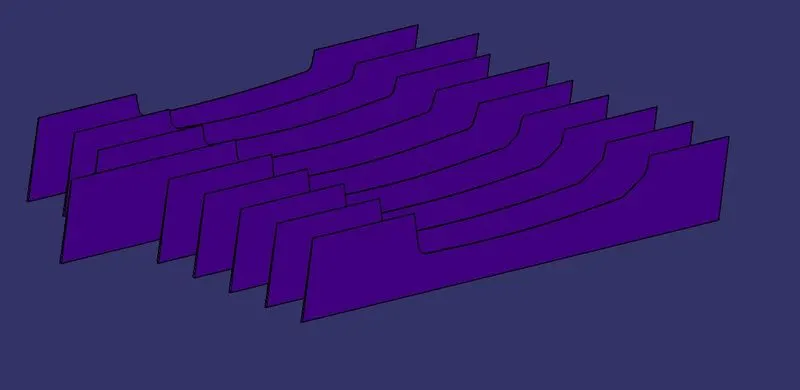
Fig:9[Ribs]
14. All this features should be constructed on basis of Main tooling axis which is developed at first. And also Side core axis need to constructed for the inside portion of the dog house.
15. The features are constructed with draft angle of 0.5 degree and the main body is constructed with draft angle of 3 degree.
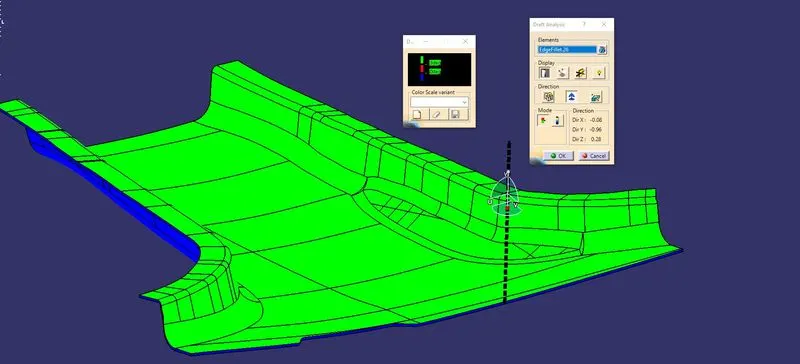
Fig:10 [Draft analysis for the main body with draft angle of 3 degree]
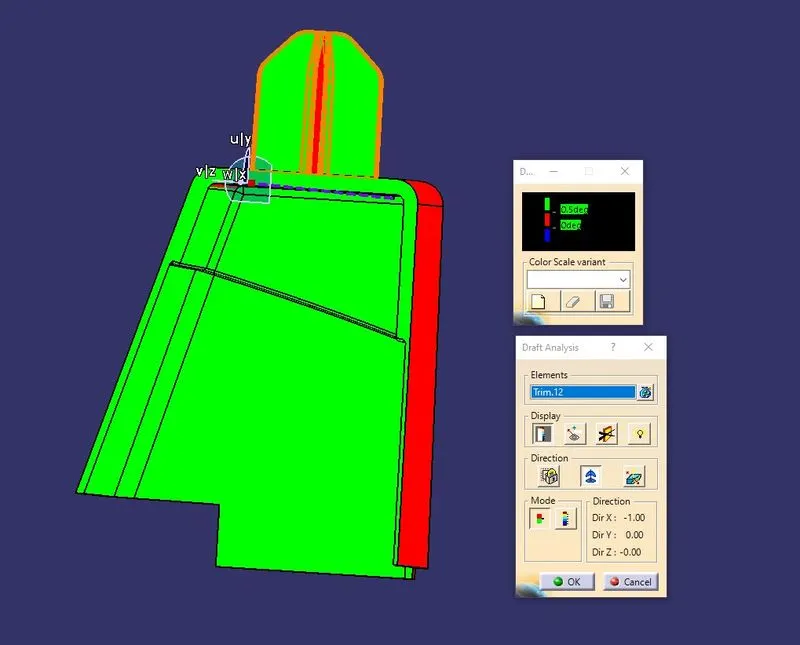
Fig:11 [ Draft analysis inside the Dog house with side core axis with draft angle of 0.5 degree]
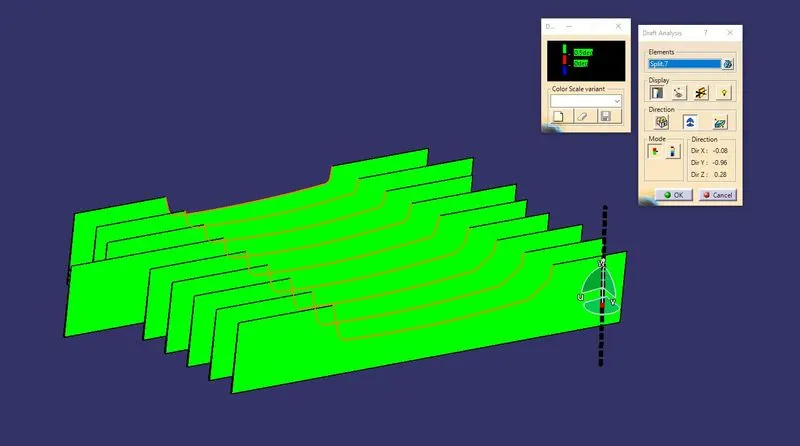
Fig:12 [ Draft analysis for the Rib with draft angle of 0.5 degree]
Conclusion
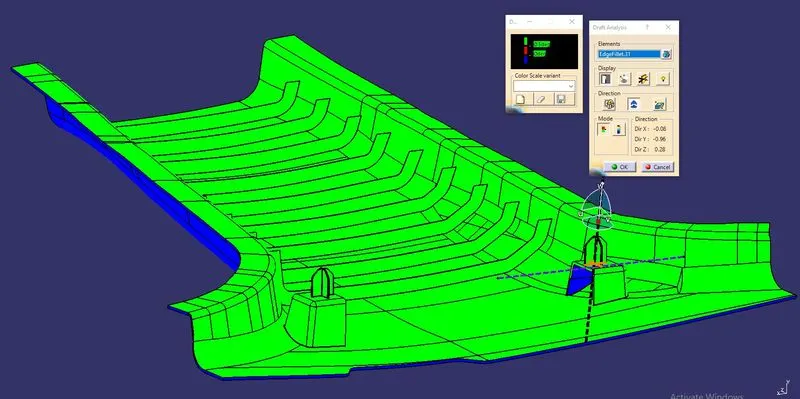
Fig:13 [Full body with draft analysis]
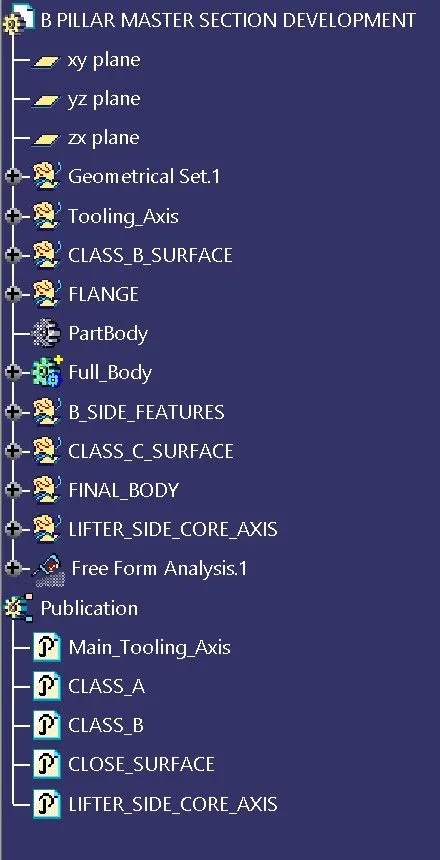
Fig:14 [Tree Structure]
Thus a tooling axis is created and a open aesthetic Class A surface is developed into a closed surface with all plastic design rules and a final part body is created out of it in catia surface work bench. The design is then validated with master section and understood the use of master section development in product design through development of B pillar cover used in the car interiors.