Week 9-Creation of 1D Connectors Challenge
Aim: To mesh the given geometry and create connector and attach the various parts of the given model
using appropriate comector.
Objective:
1. Right_Rail_2 & Front_truss_1:- Seam-Quad(angled+capped+L)
2. Left_Rail_2 & Front_truss_1:- Quad elements
3. Front_truss_2, Front_truss_1 & Right_Rail_1:- Spot weld with 2 Layers and 5 mm Diameter
4. Front_truss_2, Front_truss_1 & Left_Rail_1:- Hexa (Adhesive)
5. Rear_truss_2 & Right_Rail_2:- Bolt Connector
6. Rear_truss_2 & Left_Rail_2:- Bolt Connector
7. Right_Rail_1 & Right_Rail_2:- Spot-weld with Rigid Elements
8. Left_Rail_1 & Left_Rail_2:- Spot-weld with Spring Elements
9. Rest all the component left Join them with suitable connectors
Procedure:
1. We need to import the .hm file which is need to be operated, and mesh every geometry individually
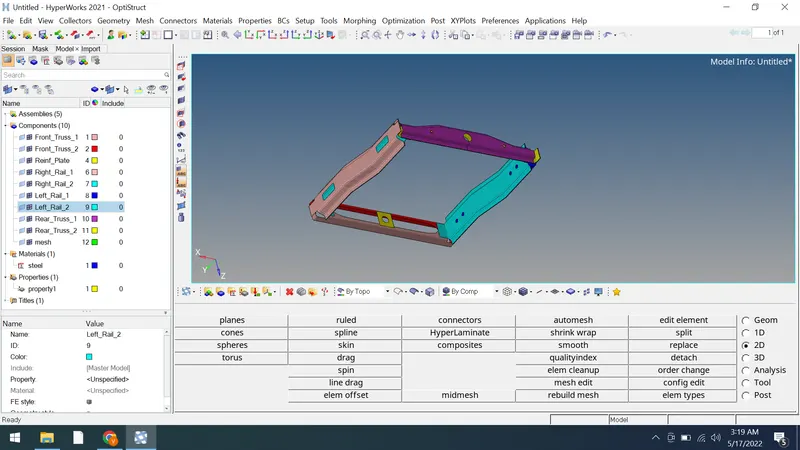
2.Once the mesh is generated we need to go for the quality check in the quality index panel and rectify the mesh unlesss the desired mesh quality is achived using multiple options from QI settings from quality index
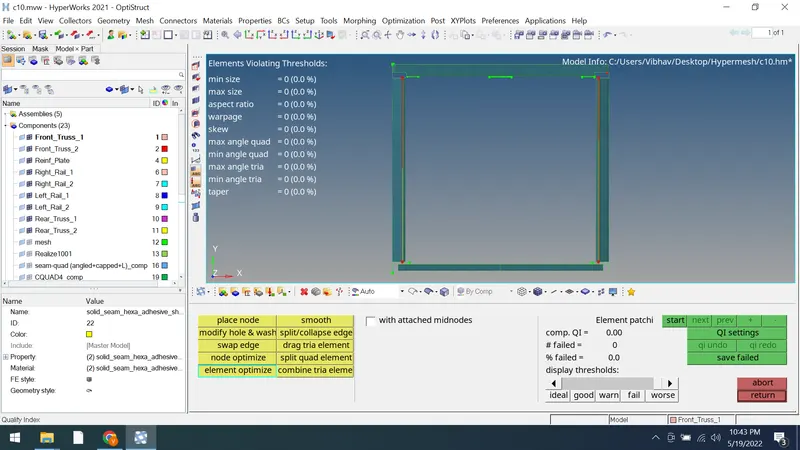
3. Once we've successfully generated the mesh we are ready to move furter to work on given objectives in the problem statement.
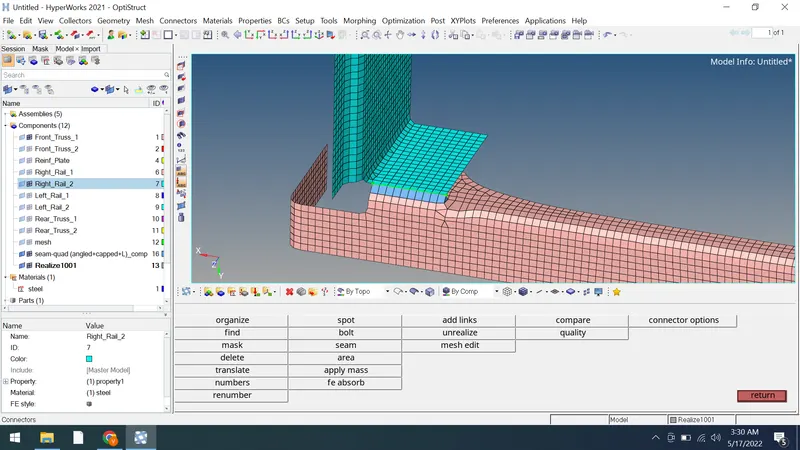
1. Right_Rail_2 & Front_truss_1:- Seam-Quad(angled+capped+L)
- To creat a seam weld we need to go with following process, 2D > Connectors > Seam
- Here we select nodes by path option on one of the component and select the node path which are needed to be connected.
- tolerance (search distance) 10
- select the weld type as Seam-Quad(angled+capped+L) and select the two components
- specify the weld angle and provide spacing accordinng to the element size and create.
2. Left_Rail_2 & Front_truss_1:- Quad elements
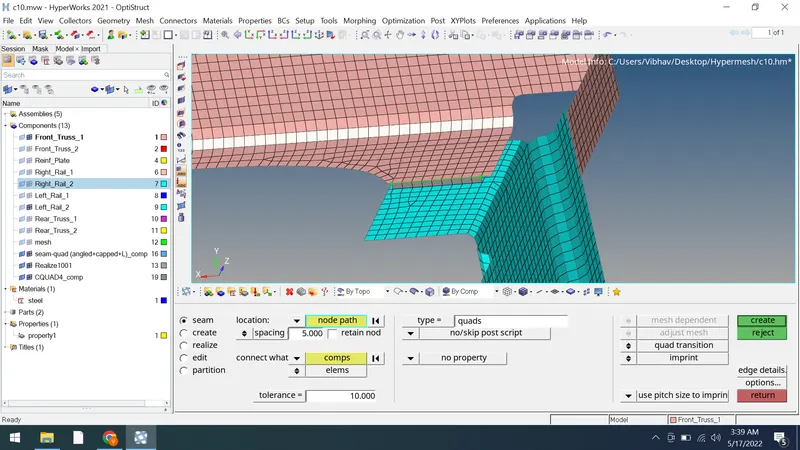
- To creat a seam weld we need to go with following process, 2D > Connectors > Seam
- Here we select nodes by path option on one of the component and select the node path which are needed to be connected.
- tolerance (search distance) 10
- select the weld type as Seam-Quad and select the two components
- specify spacing accordinng to the element size and create.
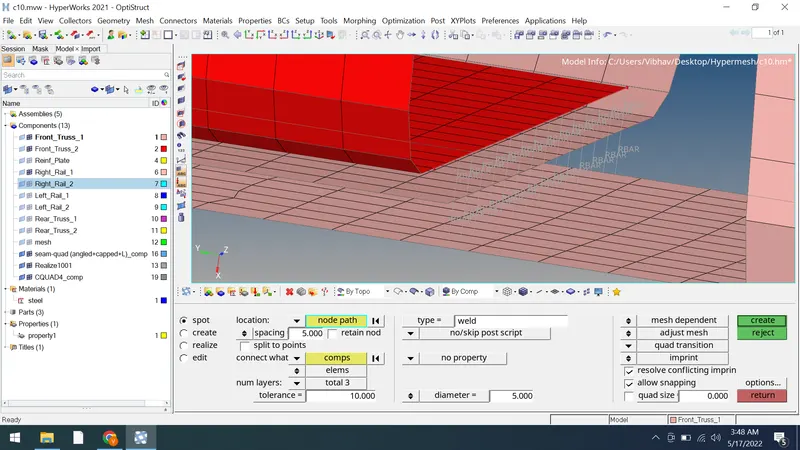
3. Front_truss_2, Front_truss_1 & Right_Rail_1:- Spot weld with 2 Layers and 5 mm Diameter
- To creat a spot weld we need to go with following process, 2D > Connectors > Spot
- Here we select nodes by path option on one of the component and select the node path which are needed to be connected.
- tolerance (search distance) 10
- select the weld type as spot-weld and select the three components
- specify the diameter as 5 as given and layer as 3 since 3 layers are component need to be connected.
- Create
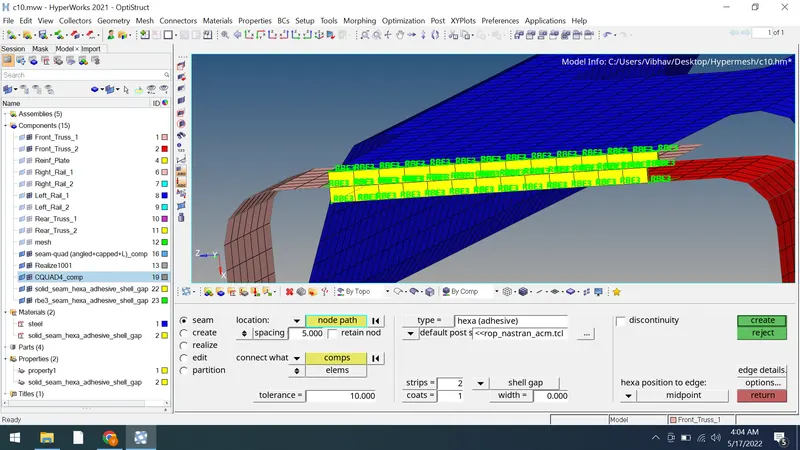
4. Front_truss_2, Front_truss_1 & Left_Rail_1:- Hexa (Adhesive)
- To creat a spot weld we need to go with following process, 2D > Connectors > Seam
- Here we select nodes by path option on one of the component and select the node path which are needed to be connected using adhesive.
- tolerance (search distance) 10
- select the type as Hexa (Adhesive) and select the two components
- specify the strip value as 2 and coat as 1.
- Create
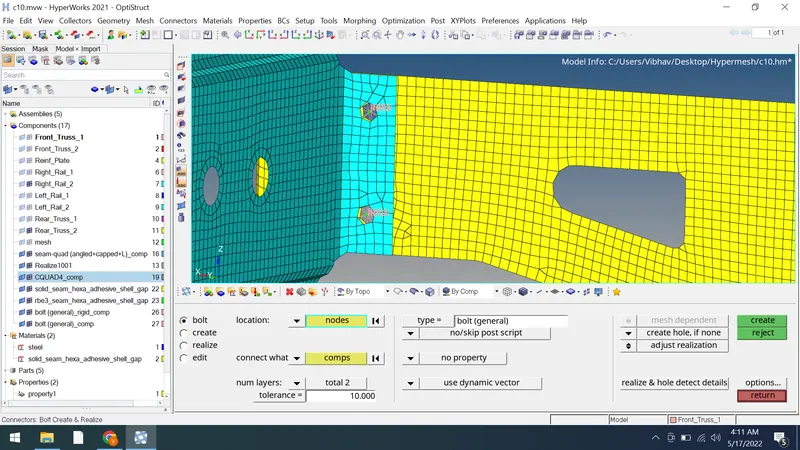
5. Rear_truss_2 & Right_Rail_2:- Bolt Connector
- To creat a spot weld we need to go with following process, 2D > Connectors > Bolt
- Here we select nodes on one of the component which are needed to be connected using bolt.
- tolerance (search distance) 10
- select the type as Bolt and select the two components
- select the option "create hole to define bolt as physical component
- create
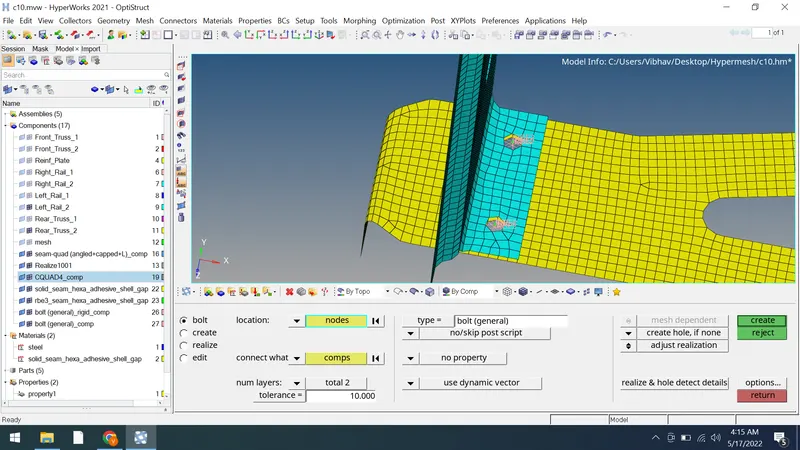
6. Rear_truss_2 & Left_Rail_2:- Bolt Connector
- To creat a spot weld we need to go with following process, 2D > Connectors > Bolt
- Here we select nodes on one of the component which are needed to be connected using bolt.
- tolerance (search distance) 10
- select the type as Bolt and select the two components
- select the option "create hole to define bolt as physical component
- create
7. Right_Rail_1 & Right_Rail_2:- Spot-weld with Rigid Elements
- To creat a spot weld with rigid elements we need to go with following process, 2D > Connectors > spot
- Here we select nodes on one of the component which are needed to be connected using bolt.
- tolerance (search distance) 10
- select the type as rigid and select the two components
- specify the diameter and number of layers as 2
- create
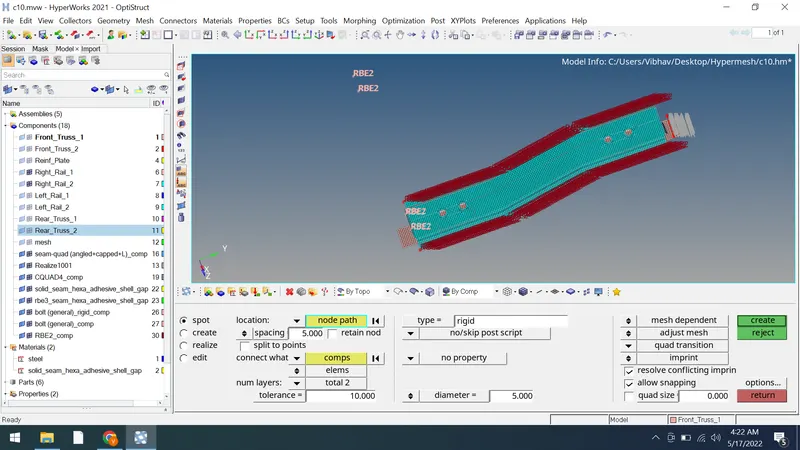
8. Left_Rail_1 & Left_Rail_2:- Spot-weld with Spring Elements
- To creat a spot weld with spring elements we need to go with following process, 2D > Connectors > spot
- Here we select nodes on one of the component which are needed to be connected using bolt.
- tolerance (search distance) 10
- select the type as spring and select the two components
- create
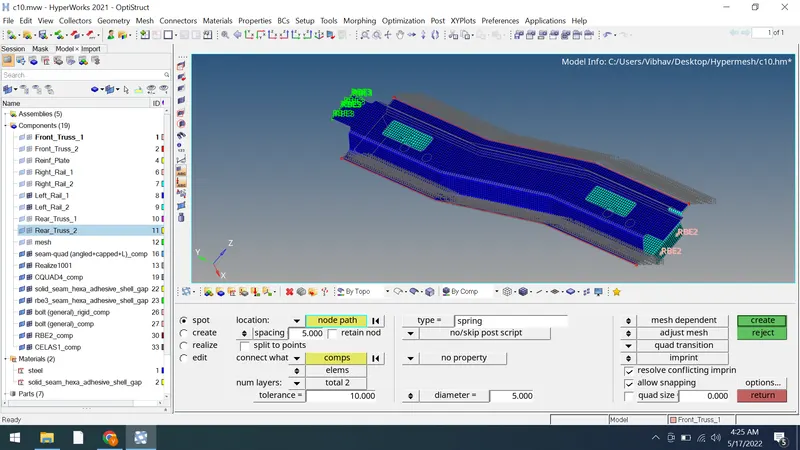
9. Rest all the component left Join them with suitable connectors
- Adhesive
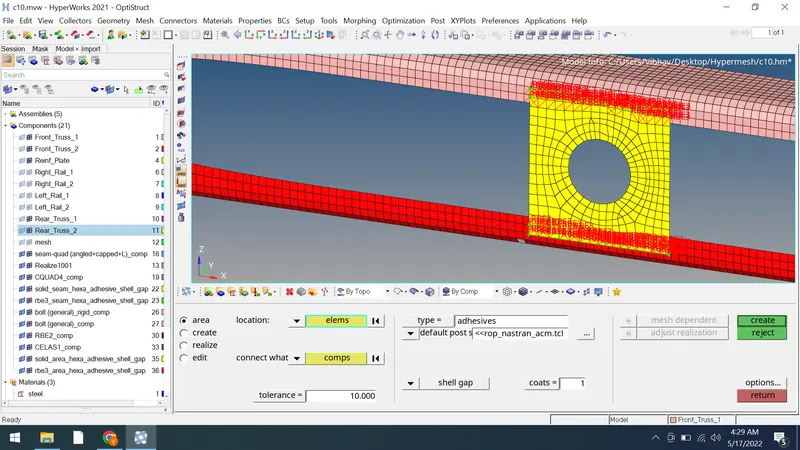
- Seam weld (vertical+angle)
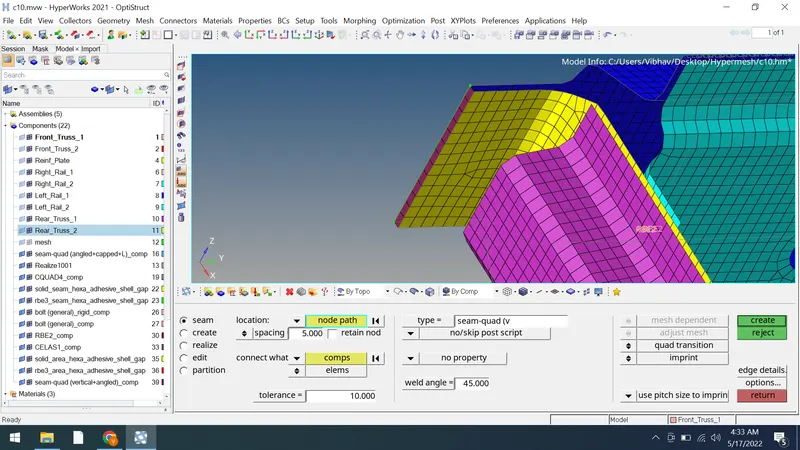
Final model after connection:
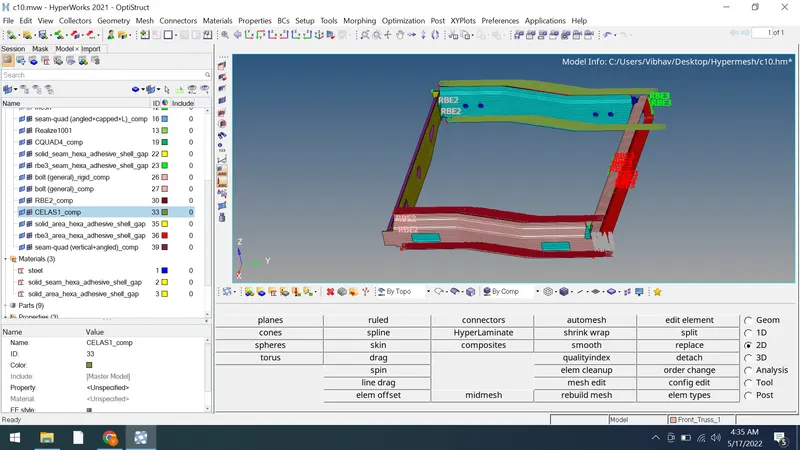
Conclusion:
So we've provided the required connections to the components successfully and the connections are successfully realised