Creating connection for Rear door
CREATING CONNECTIONS FOR REAR DOOR
AIM :- To perform the connections on the rear door by using 1D elements
PROCEDURE :-
Step 1 :-
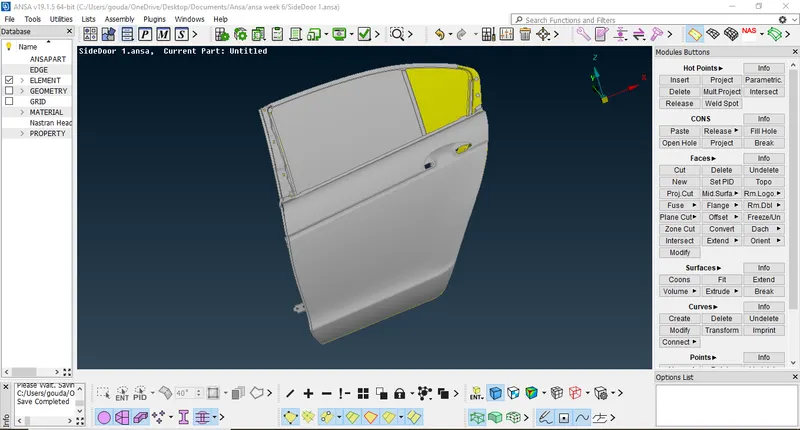
- To perform the connections on any model, first we have to do the midsurfacing of the model and then we gave to obtain the meshing on the model.
- But for the given rear door model, the midsurfacing and meshing is done.
- so, first download the model and open the model in the ANSA.
Step 2 :-
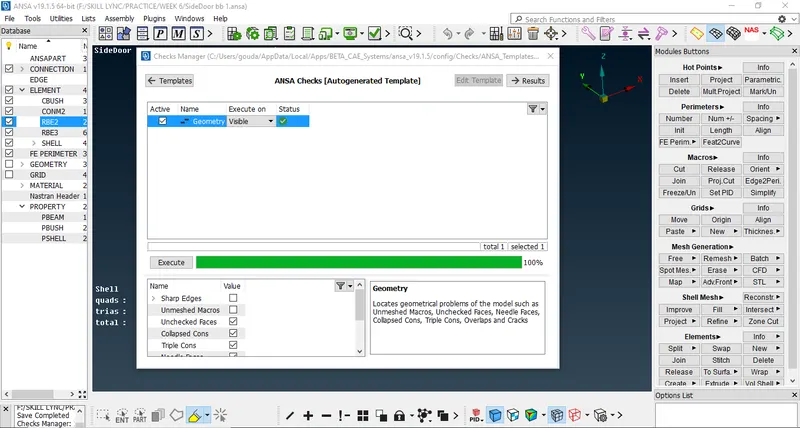
- After the model is uploded we have to first do the geometry clean up on the model by using TOPO in the FACES command which is in the TOPO modules buttons.
- After that the geometry of the model need to be checked by the check << geometry option which is in the TOOLS.
Step 3 :-
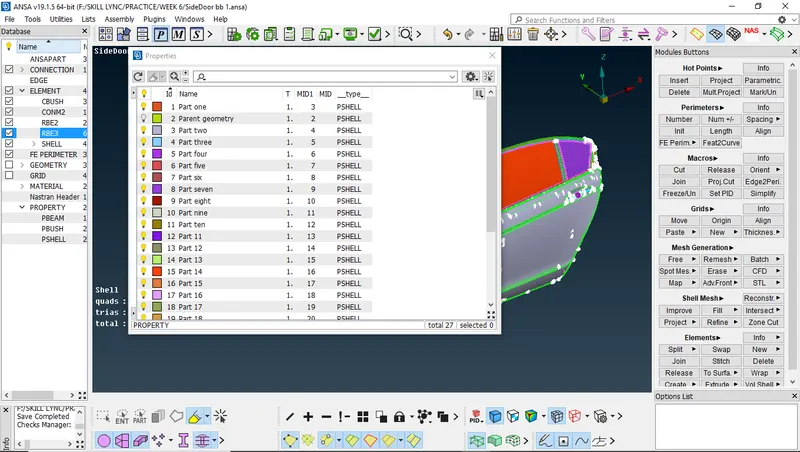
- After the geometry check up we have to assign different PID for differents parts of the given door model.
- For doing this we have to go to the PROPERTIES option in the LIST.
STEP 4 :-
- After the properties are assigned for each part of the model, now we have to perform the connections on the given model where ever the connections are required.
- so, to perform the connections first, we need to o to deck module and select NASTRAN DECK.
- In the Nastran deck we have different commands to perform the connections.
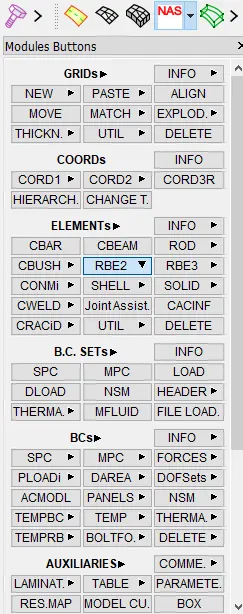
- For the rear door model which is given we need to perform different connections like RBE2, CBUSH etc.
- To perform RBE2 connections we have different ways, first we can choose RBE2 in the elements option in the nastran deck module.
- For some rotating parts or moving parts we need to check the degree of freedom.
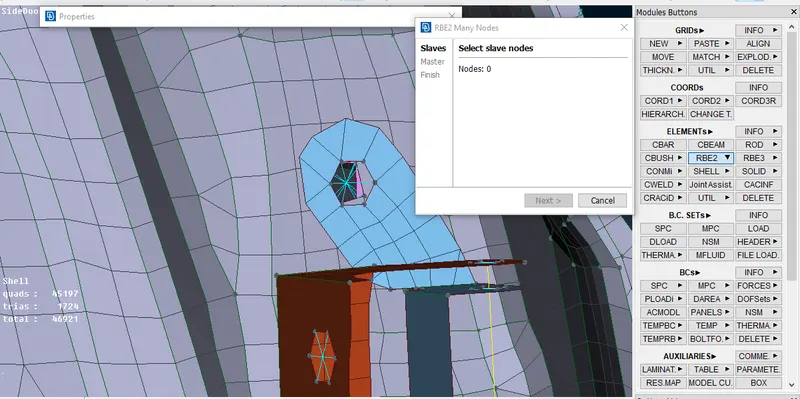
- we can also create automatic RBE2 connections by using ASSEMBLY tab, connection like bolts and spotwelds are created by using a point and then converting the point into bolt or a spotweld point.
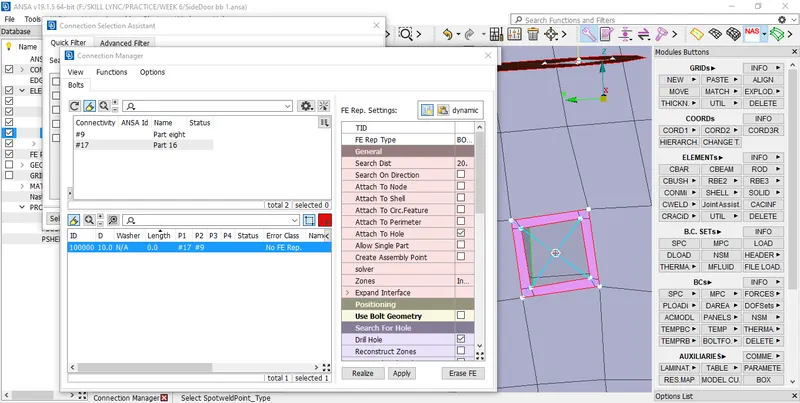
- we have to select the converted point and specify the point and the parts where the rigids have to be created and then apply and realize the connection so hat the connection s executed like wise we can do ny connections automatically by using connetion manager in the assemly tab.
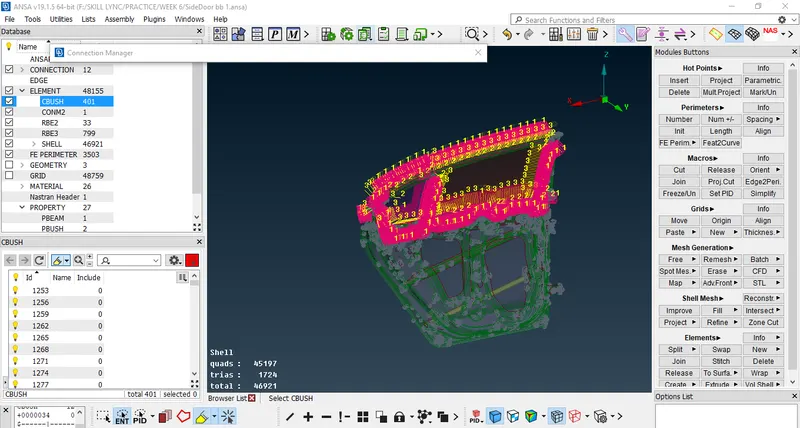
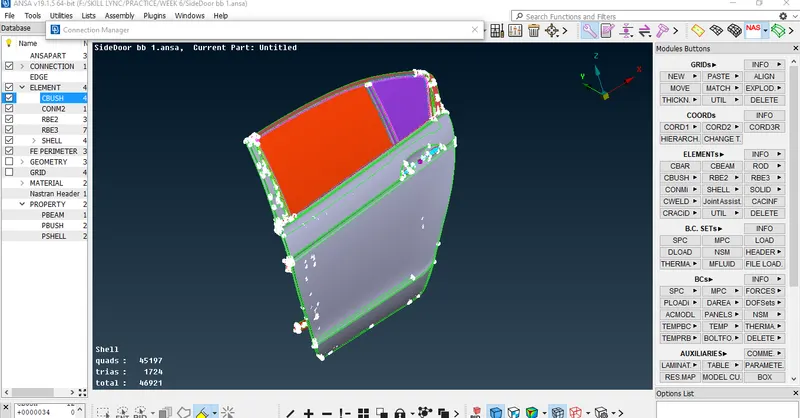
- For the weather strips of the door windoes we have to create the CBUSH connections, so to create the cbush connections we have to first we have to create the curves
- To create the curves we have to use feat2curve option in the perimeters command which is in mesh module.
- After creating the curve we have to convert the curve into the spot line, to do that in the assembly option we have to go to convert option and choosle curves and convert it into spotline.
- After the curve is converted to spot ine e have to do to connections manager in the assembly module and select the spotline and then apply the CBUSH connections on the spot line.
- We have to specife the parts and the distance between the parts and then connections are applied and realised.
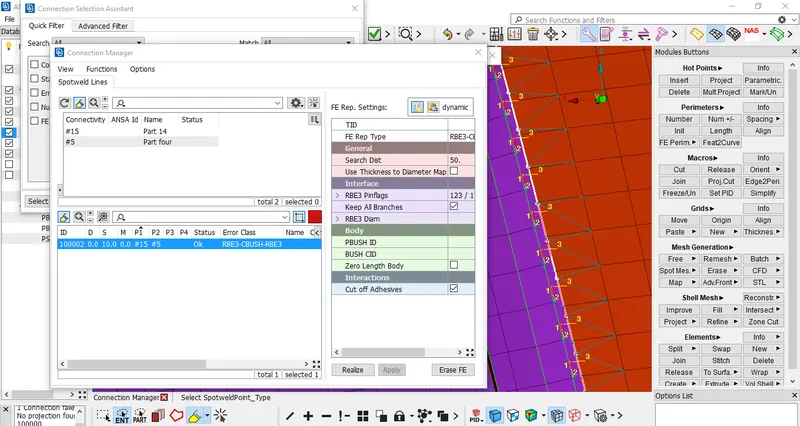
- The local coordinates and the global coordinates should be allined.
LEARNING OUTCOMES :-
- Learned how to uplode the model in the ANSA.
- Learned how to check the geometry and do the topo cleanup.
- Learned hoe to create the PIDs for each different parts of the model.
- Learned how to do mannual RBE2 connections.
- Learned how to do automatic connections by assembly.
- Learned how to convert the points and curves to 3d points and spotlines respectively.
- Learend how to perform CBUSH connections using the spotlines.
- Learned how to alline the global and local coordinate sysems.
CONCLUSION :- The connections are created on the rare door of a car by using mannul RBE2 and automatic connections using the connections manager in the assembly.