Week 9 - Attachment Feature Creation (Ribs & Screw Boss) - Challenge 1
Attachment Feature Creation (Ribs & Screw Boss)
AIM:
- To Create the Door Handle Component from the given Class-A surface.
- To Create the tooling axis for the given Class-A Surface meeting the requirements of the draft angle.
- To Attach B side Features in the component.
- To perform the Draft analysis on the model.
DESCRIPTION:
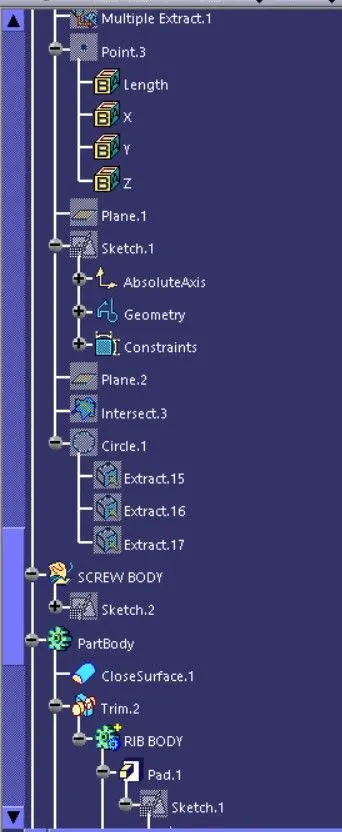
CREATING TOOLING AXIS -
The Tooling Direction is basically the direction that the mold pulls a part. The mold is built in two separate pieces, basically. You have a Cavity side and you have the Core side. The Core pulls apart from the Cavity and that's the Dye line or the Tooling Direction.
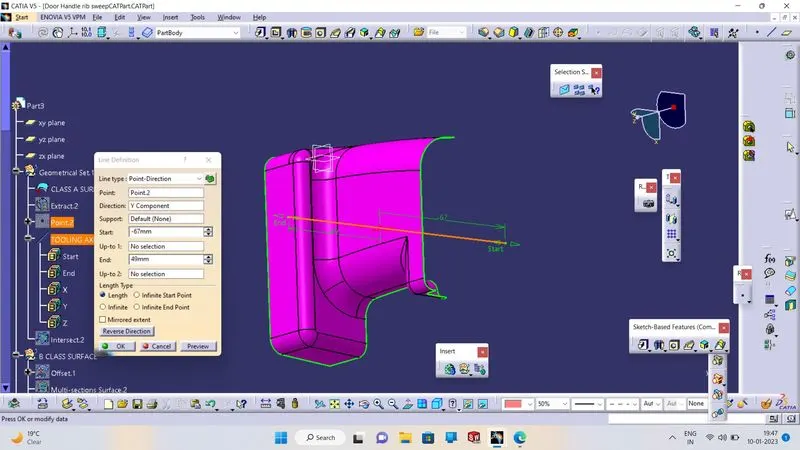
Tooling Axis creation:
It is defined as the direction in which the mould/core and cavity open. Selection of the direction of the tooling axis depends on the ease at which components can be easily ejected.
By analysing the component the most easily ejectable direction is somewhere close to the Z direction,(might be inclined to it) so we have made a sketch on the YZ plane of Axis System) to create a bisecting line considering the 2 faces which might be difficult to be tooled.
Class- A Surface:
- In automotive design, a class A surface is any of a set of freeform surfaces of high efficiency and quality.
- It is the visible aesthetic surface of any automotive component.
- Class A surface refers to those surfaces which are visible and abide to the physical meaning, in a product.
- This classification is primarily used in the automotive and increasingly in consumer goods industry.
- It is a requirement where aesthetics has a significant contribution.
- For this reason, the exterior of automobiles is deemed Class-A.
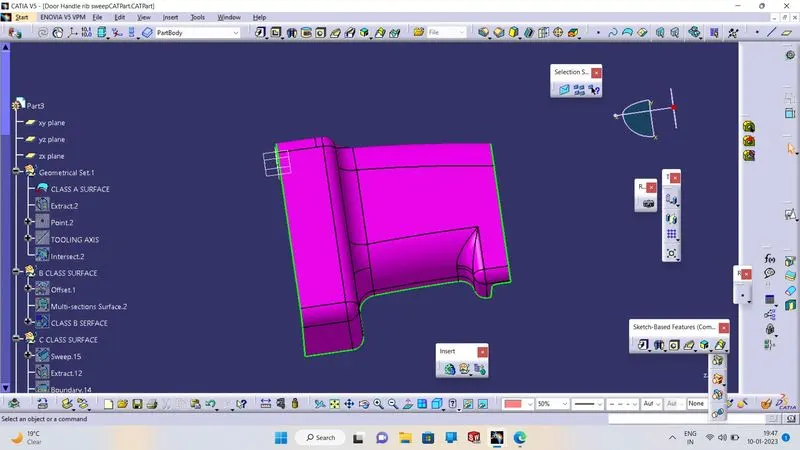
METHODOLOGY:
In this model we have focused on the following things:
Tooling axis
Draft analysis
Class-B surface
Class-C surface
Making a solid model from surface.
Following tools were used to reach the final step:
Extract
Un-trim
Trim
Extrapolate
Offset
Edge fillet
Boundary
Sweep
Join
Close (part design) and pad
CREATING CLASS B SURFACE:
- From the Class A surface , offset a set of Surface for to create the Class B surface by Using Extract Command From Below Image.
- We can use extract command for all surface we needed for to create Class B Surface and used multiple extract tool to get guide curves.
- Used multi-section surface tool for to fill up patches on the offseted surface.
- Extract the surfaces from the class A using multiple extract and untrim them.
- Use Extrapolate to make sure that all the untrims are properly intersected to trim and offset the surfaces to 2.5 mm to create the thickness.
- Trim the extra surfaces using trim command.
- Insert them into new geometrical set and name it with respective part names.
- Apply fillets to the model after creating the entire surface.
- If the edges are outside the fillet value will be added to the thickness of the component and if the edges are inside, the fillet value will be subtracted from the thickness of the component, for instance the thickness of the component Is 2.5mm the fillet value is 15mm so the outside portion value should be 17.5mm and inner eges should be filleted 12.5mm to get uniform thickness.
- Perform trims one at a time so that it will be clear to understand.
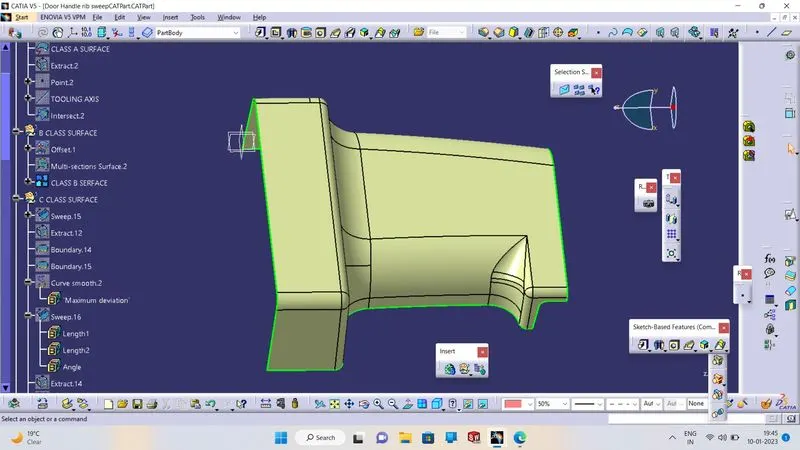
CREATING CLASS C SURFACE
- Extract the boundary from the class A surface using boundary command.
- Using disassemble tool to divide the boundary as the boundary contains domains.
- Use sweep command > choose profile type line > subtype as with draft direction > choose guide curve and draft direction > draft angle as 3 degree > preview.
- After getting sweep then trim the output with class B surface to get final output.
- Now open part design workbench and using close body surface create a solid of the component.
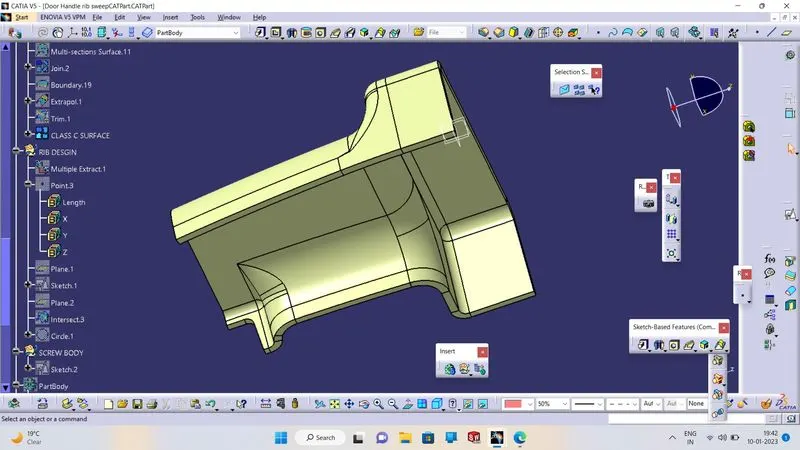
RIB Design:
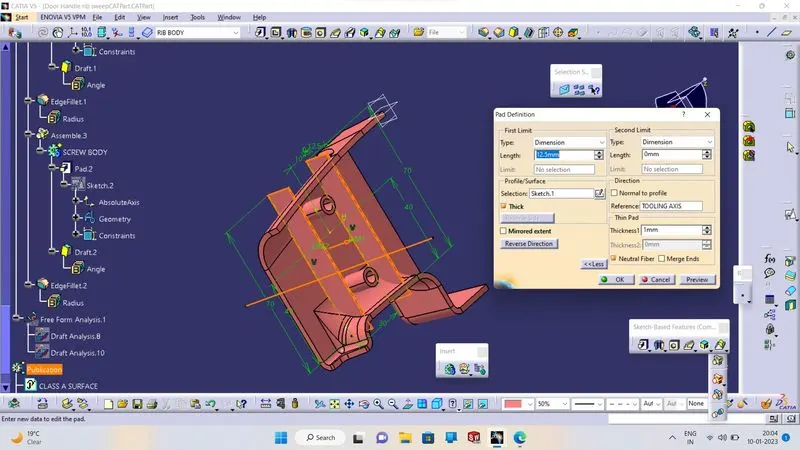
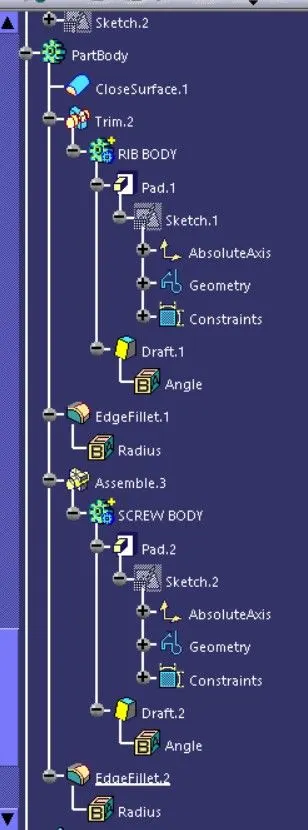
I create a line sketch for the rib and I created the two lines in the sketcher workbench and I padded the sketch to 12.5mm length.And thikness 1mm.
I gave a 0.5deg of draft angle to the ribs, and I taken union trim the rib with the part body to remove the extra surface of the rib, by union trimming the rib with the part body the ribs gets added to the main part body without the unwanted extra part. After adding the rib to the part body, I gave the fillet to the ribs with a radius of 0.25mm.
SCREW BOSS Design:
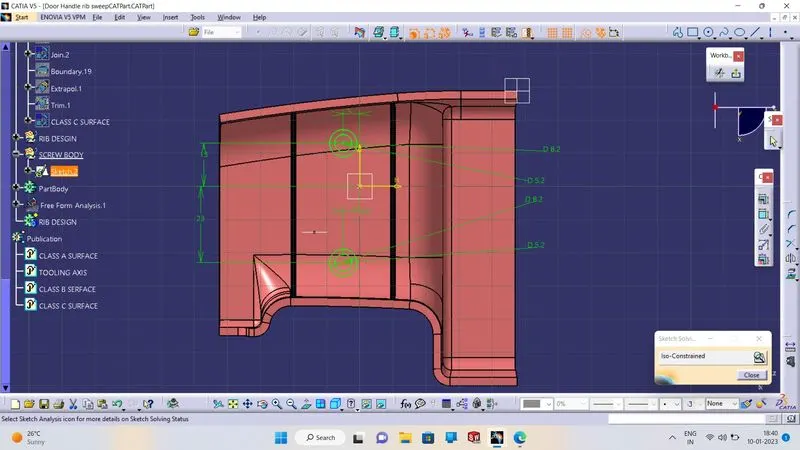
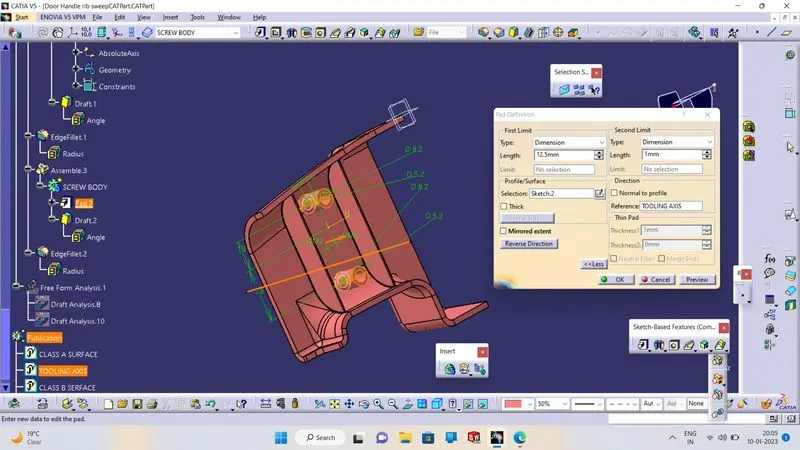
To create the screw boss, I created the circulars sketch in the sketcher workbench and I padded the sketch to 12.5mm. Now, I drafted the inside and outside surfaces with 0.5deg in the tooling axis direction. After creating the screw boss, I gave 0.25mm of the fillet to all sides.
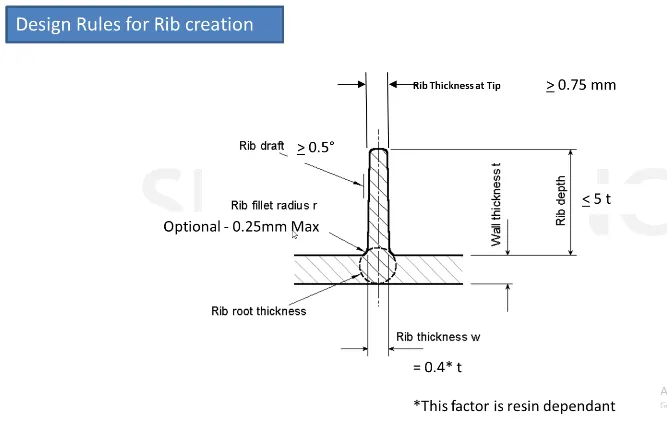
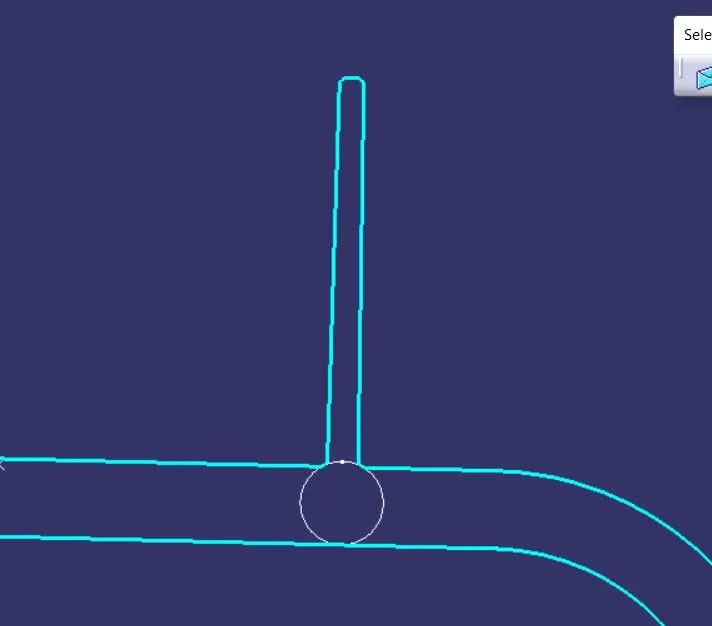
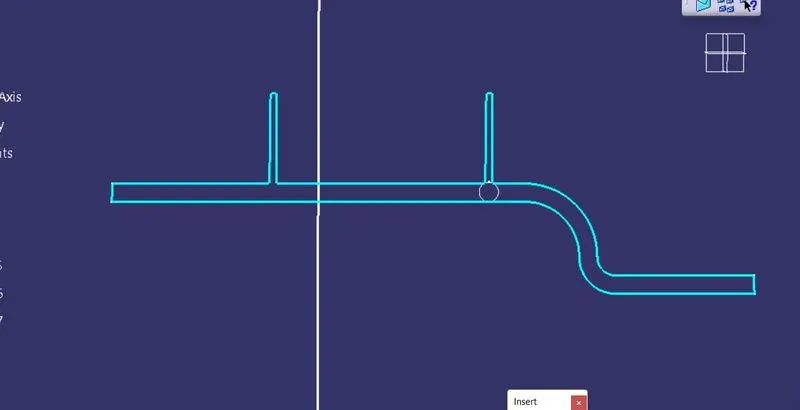
To check the rib root thickness, I created a plane which is perpendicular to the base surface .After taking the intersection for the body and plane, we need to create a tri-tangental circle at the bottom of the rib. To create the circle, we need to extract the faces of the intersection (if we directly select the faces without extracting the required faces the input may take the entire intersection surface as an input) which we need to give as input for the tri-tangental circle.
Draft Analysis
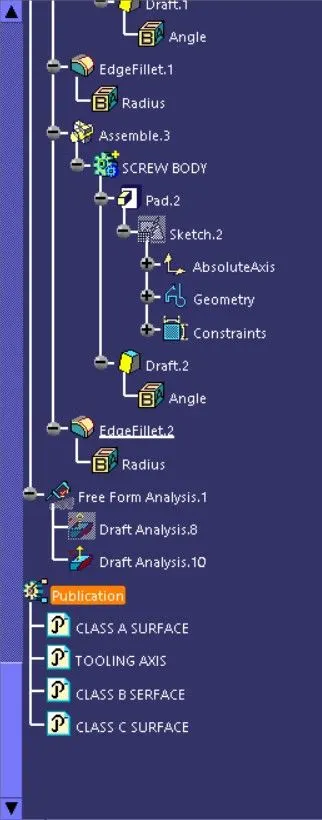
The Draft Analysis command enables you to detect if the part you drafted will be easily removed. This type of analysis is performed based on color ranges identifying zones on the analyzed element where the deviation from the draft direction at any point, corresponds to specified value.
Draft
The draft is the amount of taper for moulded or cast parts perpendicular to the parting. line. Draft angles are a design consideration that makes it much easier for a part to release cleanly from a mould. A draft angle is calculated as a degree measurement (or, less often, an inch or millimetre measurement) from the vertical axis of a mould, and it helps account for thermoplastic shrinkage, a practical reality of the injection moulding process for most materials.
Draft angles are generally a requirement of injection moulding design (though there are a select few soft materials, like nylon, that can get away with draft angles of zero). The draft should be a part of the design for manufacture, and all stakeholders and contributors should be aware of its need at the outset of the design process. This includes product designers, design engineers etc and this allows considerations for design requirements to be taken into account. Any draft is always better than no draft.
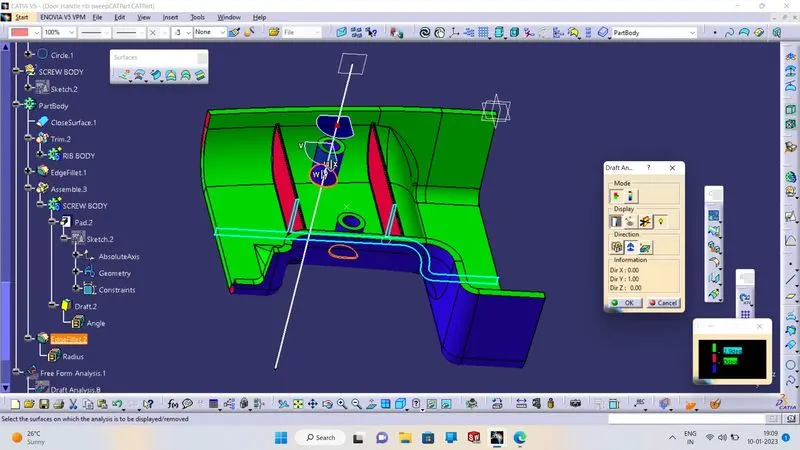
NOTE:- THE TOOLING AXIS MADE BY TAKING A POINT IN THE EXTRACTED SURFACE OF THE CLASS A ,THE CLASS A SURAFACE IS NOT PERFECT WHEN WE CREATE A DRAFT ANALYSIS,
THAT'S WHY DRAFT ANALYSIS IS NOT PERFECT.
T
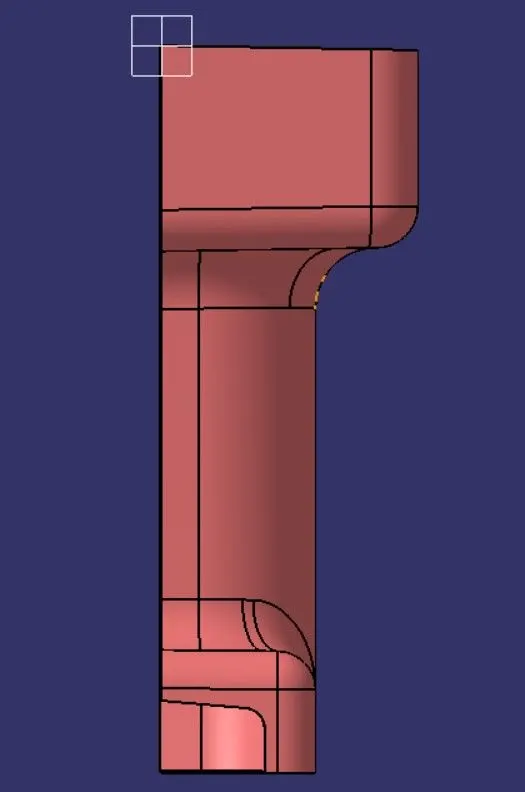
FRONT VIEW
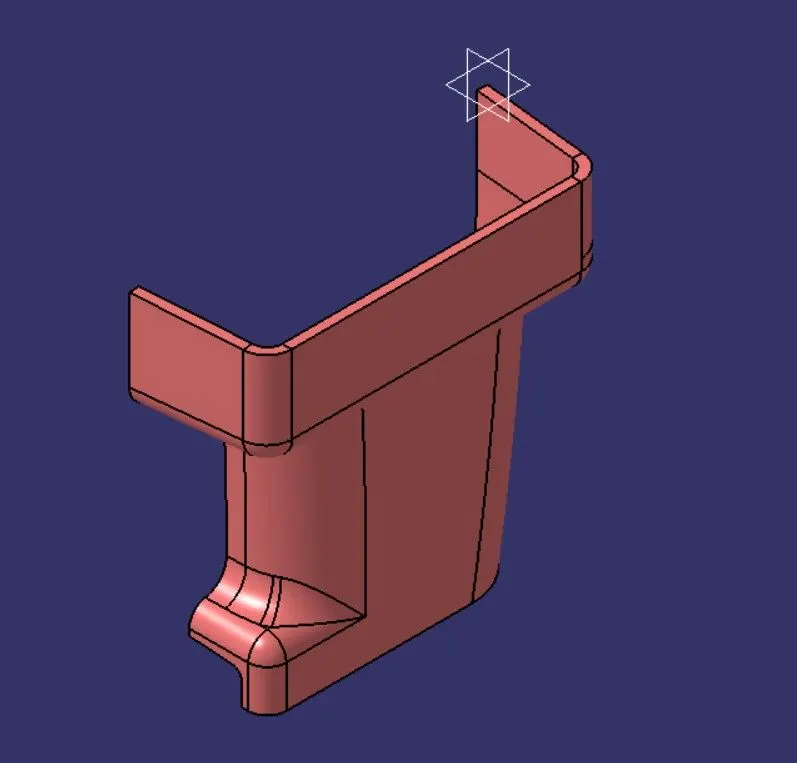
ISOMETRIOC VIEW
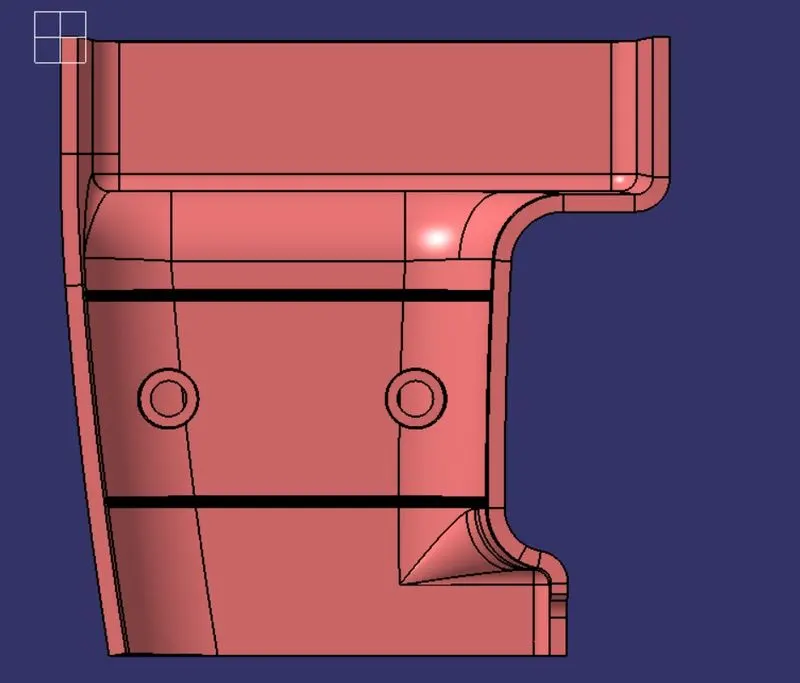
SIDE VIEW
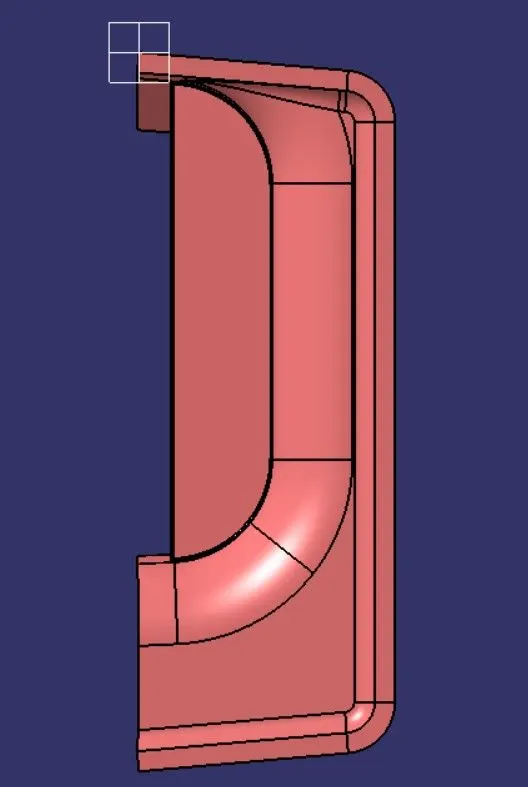
TOP VIEW
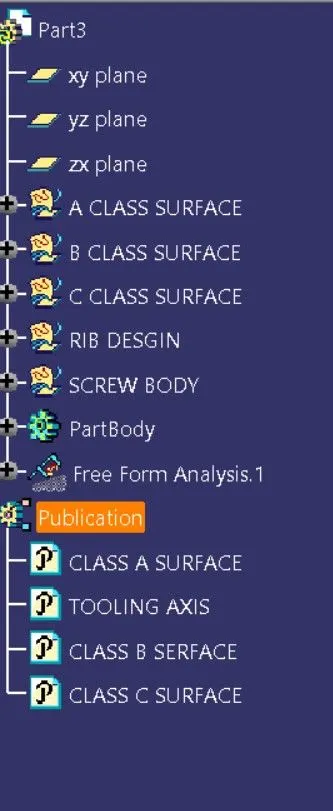
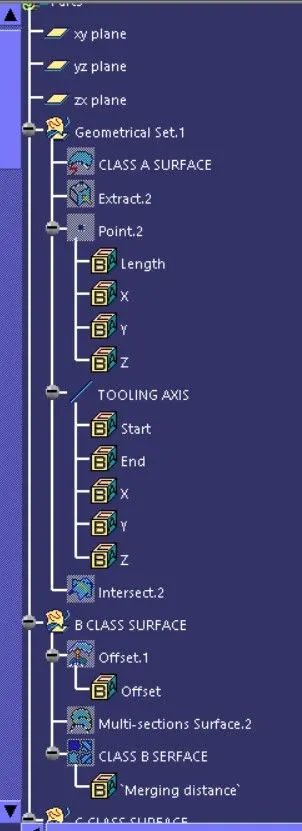
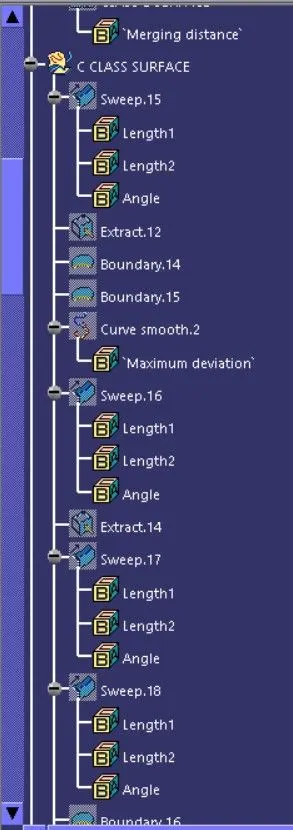
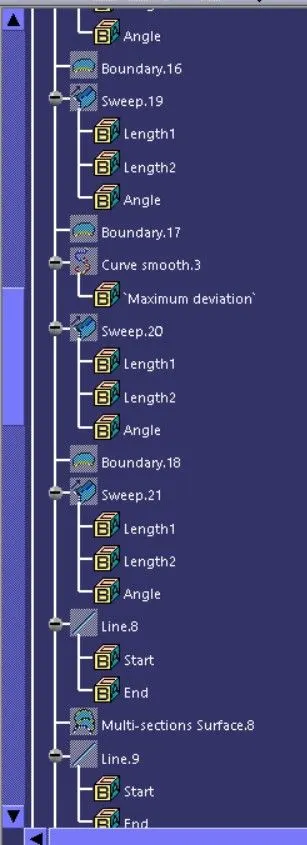
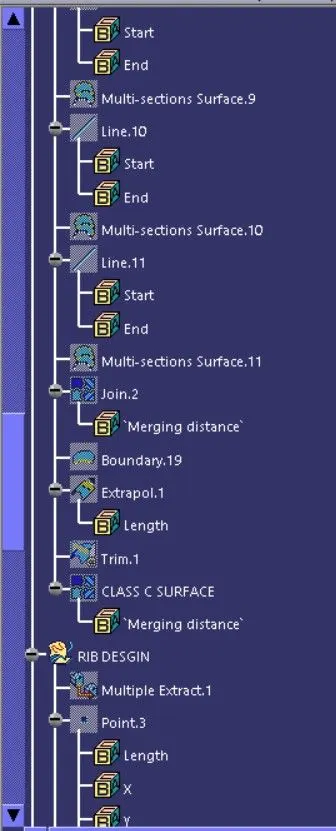
ENTIRE TREE OF STRUCTURE
CONCLUSION:
- The main tooling axis has been created successfully using the feature draft analysis tool.
- Final closed surface has been created by using the trim and join feature.
- The part body has been created by using closed surface tool.
- Draft analysis has been successfully done on the part body.
- Rib and Screw creation has been done.
- Thus the above challenge has been finished with the proper input and all the required documents are attached.
[REPORT:- THE TOOLING AXIS MADE BY TAKING A POINT IN THE EXTRACTED SURFACE OF THE CLASS A ,THE CLASS A SURAFACE IS NOT PERFECT WHEN WE CREATE A DRAFT ANALYSIS,
THAT'S WHY DRAFT ANALYSIS IS NOT PERFECT.]