Week 9 - Attachment Feature Creation - Challenge 2
DOOR TRIM AND DOG HOUSE
1 - DOOR TRIM
First of all when I got class a surface then I created the tooling axis, b surface, c surface, close surface and close body in several steps.
TOOLING LINE – For tooling line I extract a surface from class A and create a point using surface method gave the value zero. After that I created a line using point direction method and for direction I gave it as y component. After that I named it as tooling axis.
CLASS B SURFACE – for class b I offset the class A with 2.5mm which is the thickness of component. After that I extract the offset in five parts. For four part I used multiple extract command and extract that and one part I extract it by extract command.
1 - After that I take the boundary of multiple extract 1 and extrapolate it with curvature continuity by 12mm. After that I take the outer boundary of extrapolate 1 and extrapolate it with curvature continuity by 10mm. after that I created a spline and split the extrapolate 2. After that I extrapolate the split edge with curvature continuity by 23mm.
2 – In this step I extrapolate the multiple extract with curvature continuity by 6mm and gave point continuity as propagation. After that I extrapolated the extrapolate 4 by 7mm with curvature continuity. After that I extrapolated the extrapolate 5 with curvature continuity by 8mm. after that I take the boundary of extrapolate 6 and extrapolate it with curvature continuity by 5.5mm.
3 – In this step I extrapolate the multiple extract 3 with curvature continuity by 14mm for propagation I gave it point continuity.
4 – In this step extrapolate the multiple extract 4 with curvature continuity by 10mm for propagation I gave it point continuity.
5 - In this step extrapolate the multiple extract 5 with curvature continuity by 10mm for propagation I gave it point continuity
6 – In this step untrimmed the extract 2. After that I extrapolate it by 16mm with curvature continuity. After that I extrapolated the extrapolate 11 by 18mm with curvature continuity. After that I extrapolated the extrapolate 12 by 107mm with curvature continuity. After that I extrapolated the extrapolate 13 by 9mm with curvature continuity.
7 – In this step I trim the extrapolate 3, extrapolate14 and extrapolate 7. After that I trimmed the trim 1 with extrapolate 8, extrapolate 9, extrapolate 10. After that I measure the fillets value and gave the fillet for one surface where I gave the minimum fillet value 0.5mm because there differentiation of fillet value and thickness of component became zero. At last I named it as b surface.
C SURFACE - For c surface take boundary of class a in two part. After that I took the sweep command with reference surface and for guide curve pick the boundary 7 and for reference surface I pick the class a and gave the angle 93 degree and for length one side gave 4mm and for another gave 1mm.After that I took the sweep command with reference surface and for guide curve pick the boundary 8 and for reference surface I pick the class a and gave the angle 90degree and for length one side gave 5mm and for another gave 1mm. After that I extrapolate the sweep 1 edge by 6mm with curvature continuity. After that I extrapolate the extrapolate15 edge by 6mm with curvature continuity. After that I extrapolate the sweep 2 edge by 6mm with curvature continuity. After that I extrapolate the extrapolate17 edge by 6mm with curvature continuity. At last I trimmed them together and got a surface then I named it as c surface.
CLOSE SURFACE – For close surface I trimmed the c surface with class a. after that I trimmed the trim4 with b surface but it`s not forming so I took the intersection of b surface and trim4 then I saw that there were some self- intersected surface so I join the c surface and then I created two point on join 1 and created a line using point to point method after I created two another point on join1 and created a line point to point method. After that I extracted two surfaces by extract command from join1. After that I projected the line2 on extract 8 and split join1 and same way I projected line3 on split 2 and split the split2. After that I took the edge of cut surface and create the boundary. After that I created a spline and after that I took the multi-section command for section I pick the boundary10 and split3 edge 24 and for guide I pick the spline 2 and boundary 9. After that I join the multi-section with split3. After that I took the boundary of spline 3 and extrapolate it by 1mm with curvature continuity and then trimmed it with b surface and I got the close surface.
CLOSE BODY – for closing the body I went to part design and took the close surface command and pick trim 5 and I go the close body.
DOG HOUSE
I created the dog house in several steps.
1 – In this step I took the surface of close body and extract it and created a point using surface method and gave the value zero and then I created ZX plane on that point. After that I created position sketch. After that I took the sweep command with draft direction for guide curve pick the sketch 1 and for draft direction pick the tooling axis and gave the angle1.5 degree which is the draft value of dog house and for length I gave one side 21mm and another side gave 6mm for Boolean operation. After that I untrimmed the extract 10 and offset it by 20mm and then I trimmed the sweep3 with offset 2.
2 – In this step I went to part design workbench and took the thick surface command and pick the trim 6 and gave the value 2mm. after that I extract the surface from trim6 and offset it by 23mm and then I extrapolate it by10mm with curvature continuity for propagation gave point continuity. After that I split the extrapolate20. After that I took the draft command and pick the three inner face of split and pulling direction gave side core axis and for neutral gave another inner surface of split and at last gave draft value 0.5degree.
3 – In this step I took the three inner vertical face of draft 1 and extracted by multiple extract command. After that I offset it by 1mm which is the 40 percent of thickness of component and extrapolate it by4mm with curvature continuity and for propagation I gave it point continuity. After that I offset the surface untrim7 by 4mm. After that I trimmed the extrapolate21 with offset7 and then I split it with trim 8. After that I gave the fillets value for outer edges I gave it 3mm because 1mm is fillet value and 2mm is wall thickness. For inner side I gave it 1mm. for c area edges I gave 0.5mm it is the minimum fillet value.
4 – In this step I copy the dog house and done paste special with link on door trim – dog house two time. One for draft analysis and one for Boolean operation. After that I translate one paste of dog house gave the x value -350mm and for z gave it 40mm.
5 – In this step I took close body and add it on part body then I union trim the dog house with it one by one and pick the face which I need to keep.
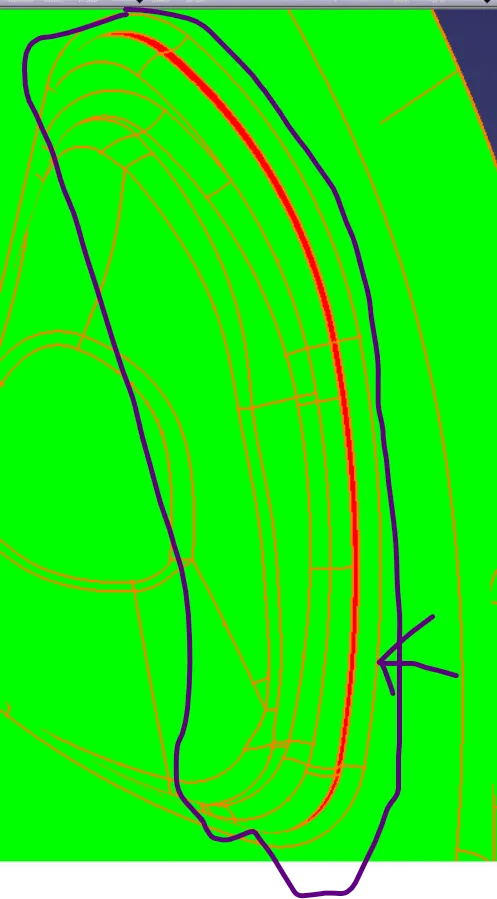
DRAFT ANLYSIS – For draft analysis I pick the compass on tooling line and pick the class a surface and gave the draft value 2.9degree then I saw that there were some surface not clearing. After that I contacted technical support team. They said that there some error in class a so I move forward.
SIDE CORE AXIS – For side core axis I created the line with point direction and pick the point 9 and for direction gave the x component and named it as side core axis.
DRAFT ANALYSIS 2 – For draft analysis of dog house inner side I pick the compass on side core axis and pick the dog house and gave draft value 0.5degree now I saw that it`s clearing all inner side of dog house.
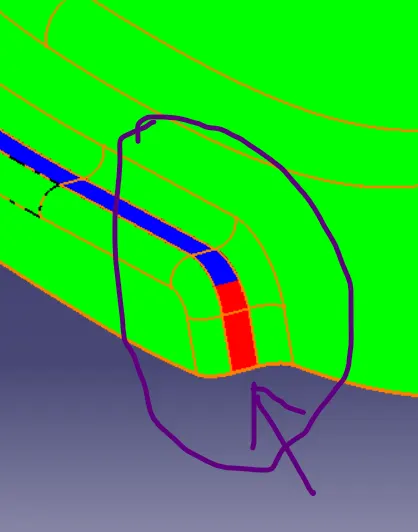
DRAFT ANALYSIS 3 – For draft analysis I pick the compass on tooling axis and pick solid body and gave the draft value 1.45 degree then I saw that outer faces of dog house clearing but some c surfaces are not clearing.