Week - 8 - Morphing
AIM:
This challenge has multiple objectives and they are:
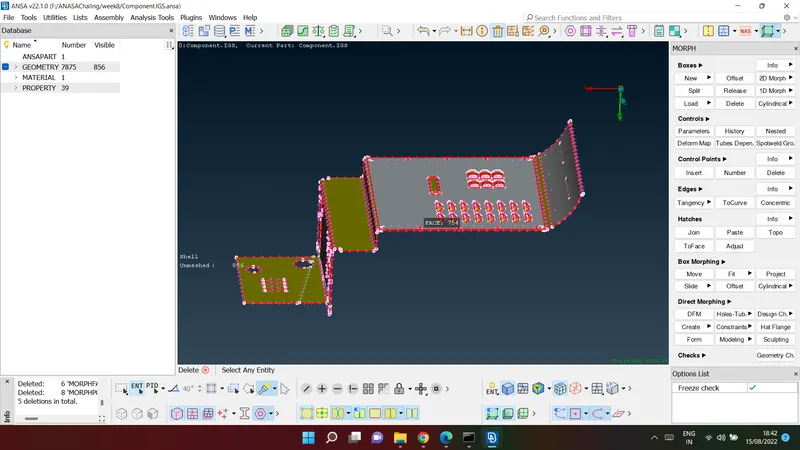
1. To practice morphing techniques discussed in the week 8 video, on the given sheet metal component called ‘Model-1’
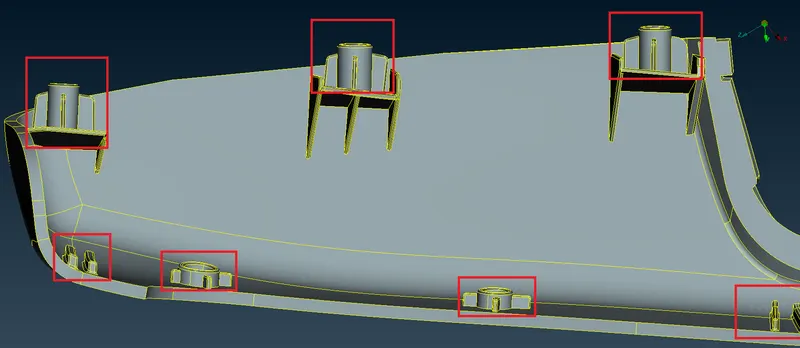
2. To morph ‘Model-2’ by increasing the height of the doghouses and ribs marked in the following screenshot
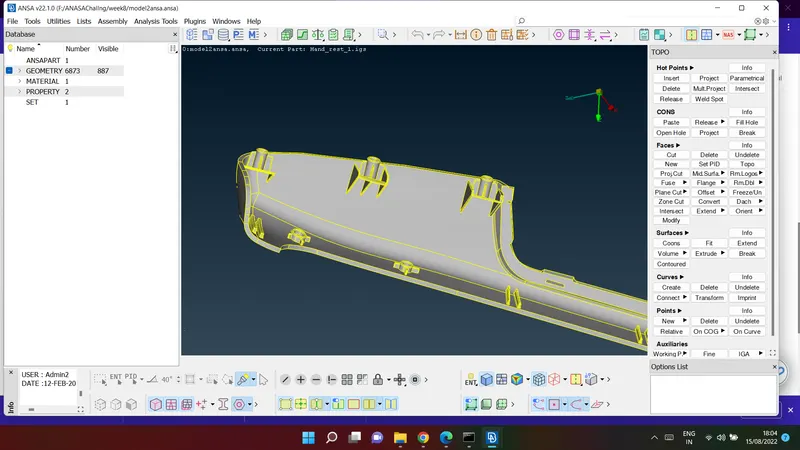
2. To morph ‘Model-2’ by increasing the height of the doghouses and ribs marked in the
following screenshot:
MODEL IMAGES
MODEL-1
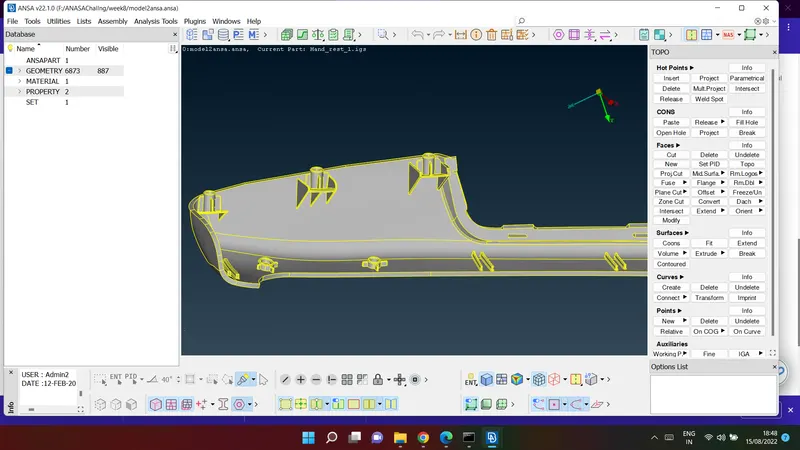
MODEL-2
PROCEDURE
MODEL-1
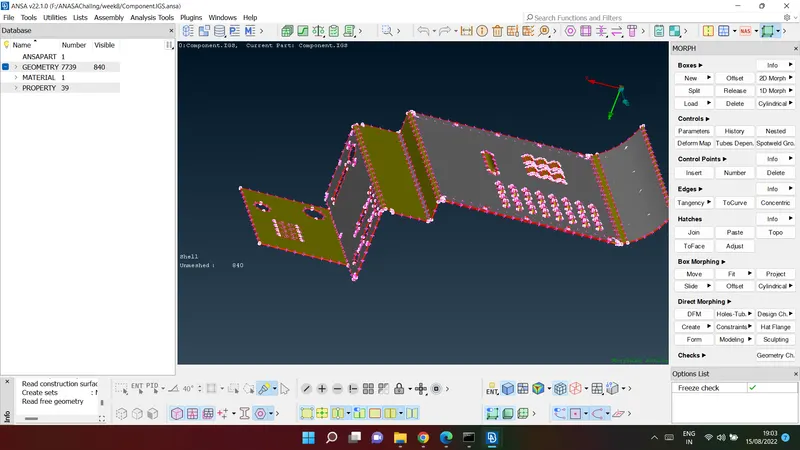
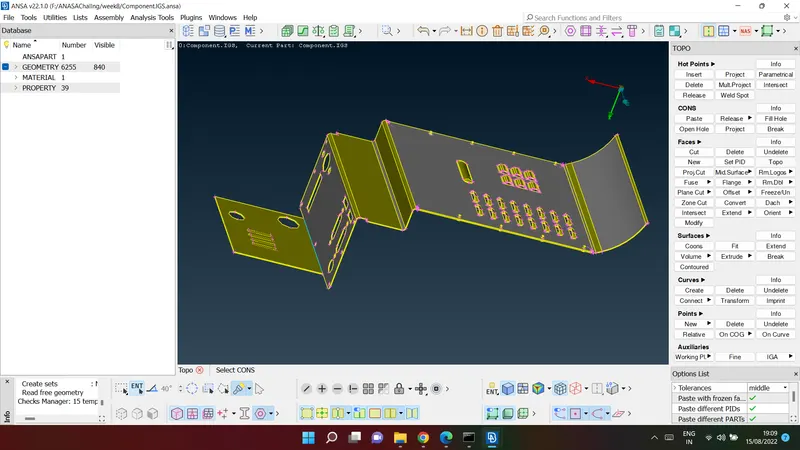
1. Before working on morphing the component, we need to 'prepare' the component and
that involves getting rid of deformities, stray single cons, hot points, etc. This model require
a topological cleanup so we can make use of the topo tool via Faces > Topo from the topo
deck. With the tool activated, we can highlight the entire component and proceed. This
fixes all the single cons, which are now correctly portrayed as double cons, since it is
supposed to be a closed volume.
2. Then, a geometry check and cleanup need to be carried out and ANSA has a tool that
takes care of that. The checks tool can be accessed from the upper toolbar: Checks >
Geometry. With all components visible, the checks can be 'executed'. The geometric
discrepancies will be highlighted by the tool and they can all be selected, right clicked and
fixed by clicking 'fix'
Image Before cleanup the geometry :
after cleanup the geomtery :
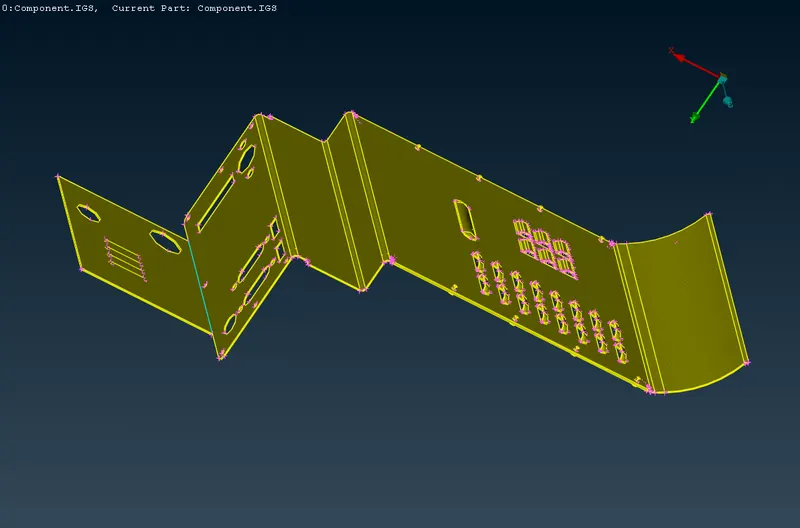
The model is also oriented properly using the orient tool, accessible via Faces > Orient.
image : before orient
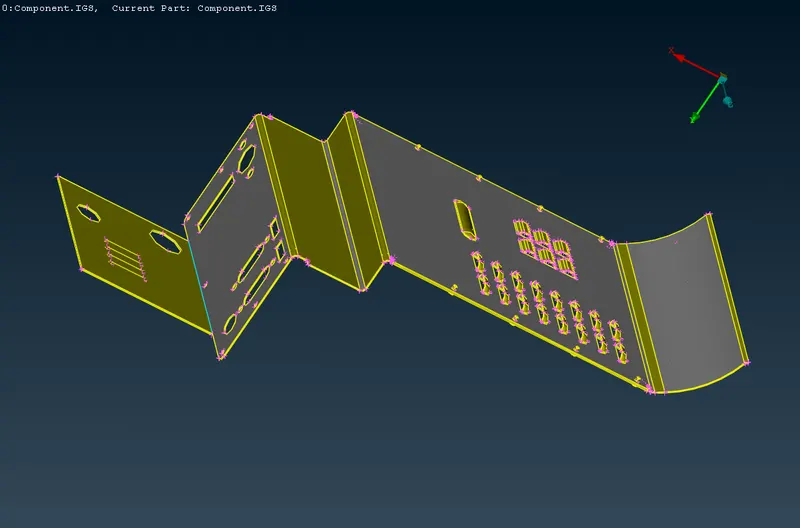
image : after orient :
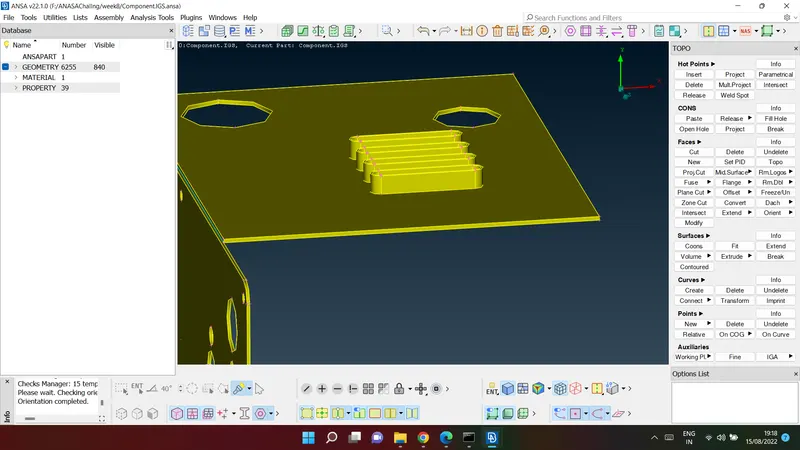
3. Now that the geometry cleanup has been carried out, we can begin with the morphing
process. This region in the component is isolated using one of the focus tools (Not/!Not)
since the protrusions are the ones we shall be morphing.
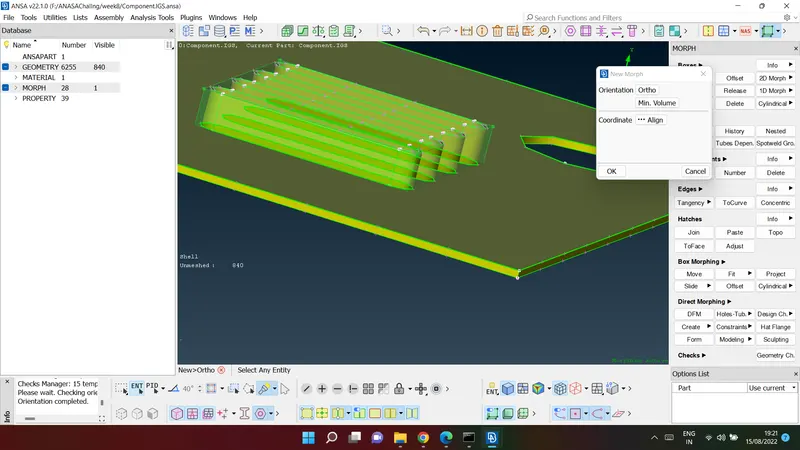
4. Then, we shall go to the ‘Morph’ deck and there we need to go to Boxes > New > Ortho
and then Geometry is selected (since we are working on the actual geometry and not a
mesh). The protrusions are then highlighted (selected).
On proceeding, a ‘morph box’ is formed and this will be the basis of this morphing project.
5. Now we can select Box Morphing > Move to move these control grids on the morph box.
This is essentially ‘morphing’. After accessing the tool and selecting the nodes of the
grid(s), we can move them based on the coordinate system. By right-clicking one of the
nodes on the grid, the tool uses the local coordinate system, which makes the morphing
process more intuitive, personally.
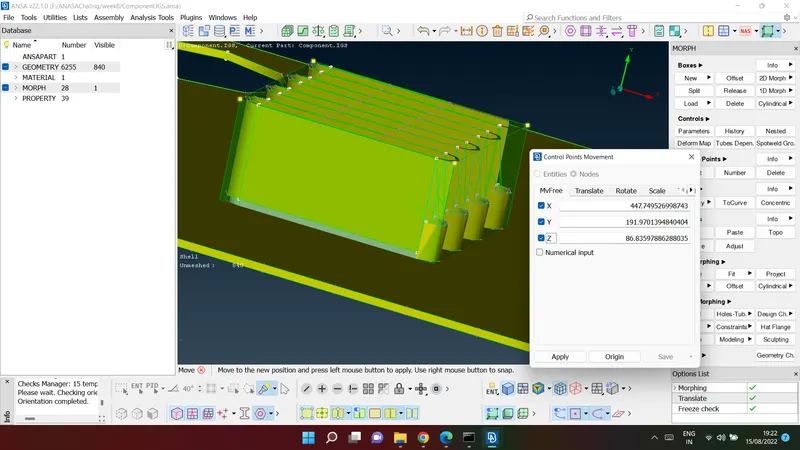
With the nodes selected and the local coordinate system activated, we can select the
coordinate in which we shall be morphing the region. Since the height is to be increased,
the checkbox for the x coordinate will be the only one checked as shown. After that, the
middle mouse is clicked to proceed and merely moving the mouse morphs the region
When achieve the result, we just need to left-click. And click ‘Ok’ to apply the morph.
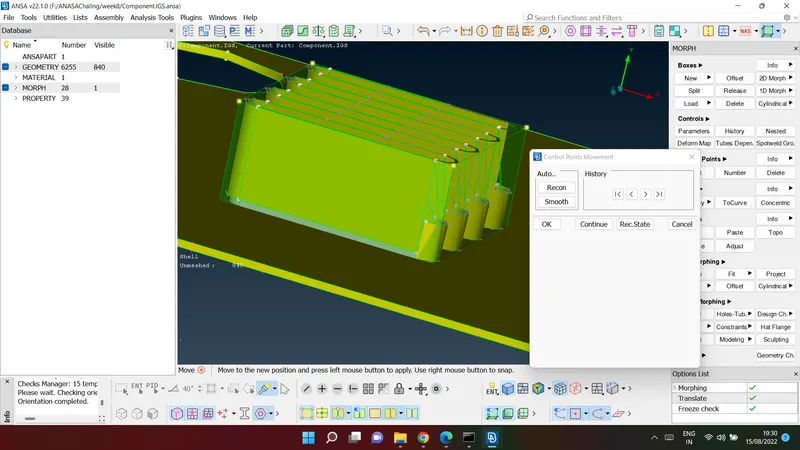
As you can see, there are issues with the geometry after morphing (at the base of the
protrusions). This case can be easily rectified by releasing the affected regions and
extending them to the other surface using the extend tool. Or by simply pasting the cons.
6. Next, we need to work on this region of the component
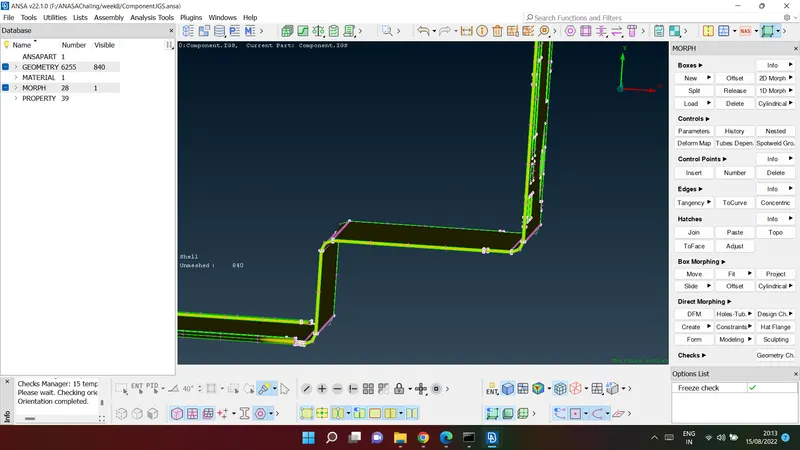
It involves a simple morphing process that is carried from the side view of the region. We
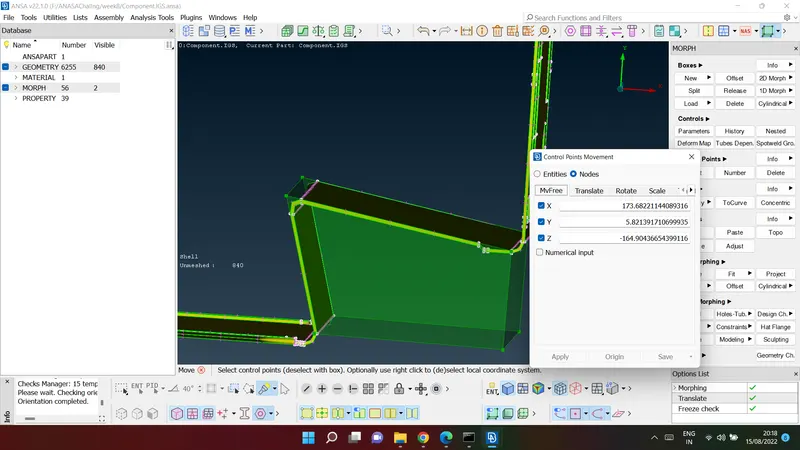
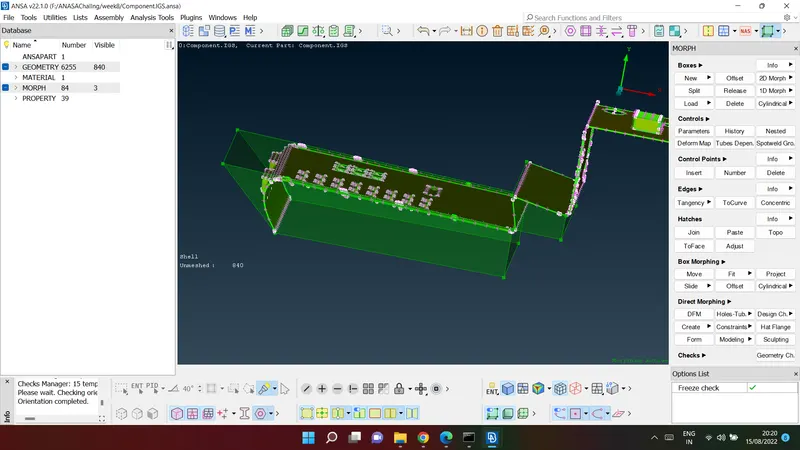
need to repeat the same process of creating a morph box and then moving the grids as
per our requirement.
below image shows some of the changes :
MODEL-2:
1. The requirement in the case of Model-2 is to increase the height of the dog houses and
ribs as shown in the following picture:
2. As we did in the previous component, we are to highlight the particular doghouse & ribs
using Boxes > New > Ortho. Since this is not a mesh and is a geometry, the geometry option
is selected. After highlighting the doghouse and ribs, the middle mouse is clicked and the
morph box is formed as shown:
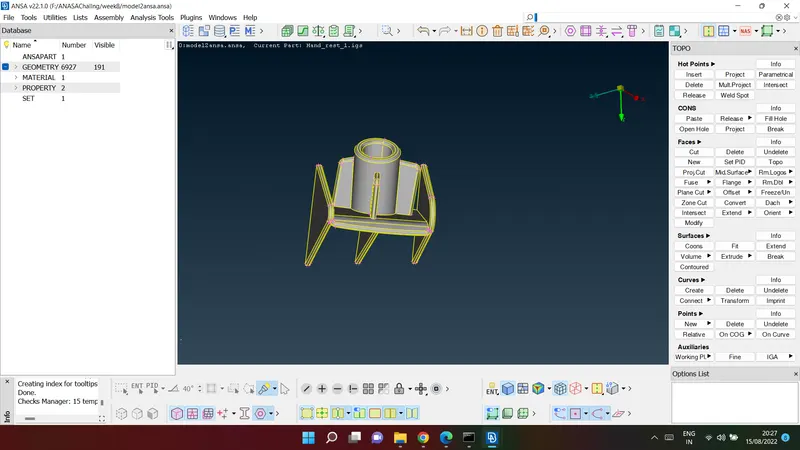
(In the above case, the doghouse/rib region has been isolated with the focus tools)
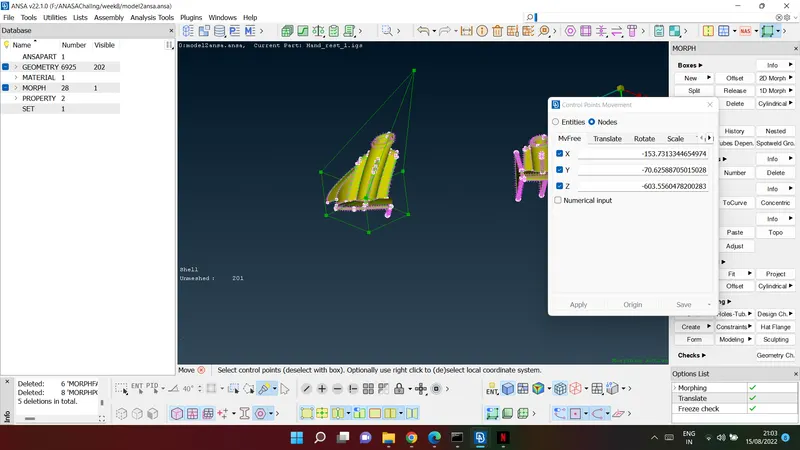
3. After that, we need to make use of the Box Morphing > Move tool to move these control
grids on the morph box. We select the node at the highest point and simply middle-clicking
activates the morphing algorithm. Now we are free to move the doghouse and ribs,
according to the selected coordinates of course. When done, we simply need to middle(click again for the algorithm to apply the morph.
or (In the above case, the doghouse/rib region has been isolated with the focus tools)
APPLICATIONS OF MORPHING
The morphing feature is basically as its name says, an algorithm that lets the user rapidly
morph existing CAD or FE models to match new geometry and/or to new proportions. They
are usually carried out to fit target design features such as styling lines, sections,
proportions etc. precisely.
Morphing is primarily utilized in the automotive industry where it is typically used to match
styling, upper body to carry over under body matching, morphing sedan to station wagon
or SUV etc. can be executed rapidly.
LEARNING OUTCOMES
1. Learned the concept of morphing and morph tools available in the morph deck.
2. Learned about the applications of morphing.
RESULT
Both the given models were morphed as per requirements - the first model was morphed
as per the Week 8 video on morphing and the second model’s ribs and doghouses were
morphed as specified in the given screenshot.
I have attached ansa file with this report thank you