Week - 8 - Morphing
Aim:
For Model 1 - To check for the geometrical errors and practice the morphing techniques that were shown in the video
For Model 2 - To increase the height of the dog houses and ribs for the model using morphing techniques
Procedure:
Model 1:
Importing CAD model and geometrical error check:
1. Import the CAD geometry in ANSA. The faces of the geometry are not stitched and not oriented properly.
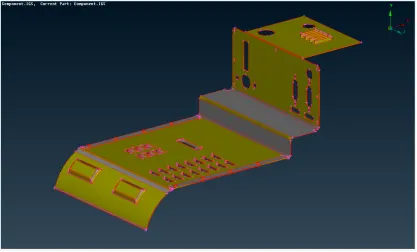
Figure 1 - Imported geometry of given model
2. Using Topo --> Faces --> Topo, the faces of the geometry are stitched together
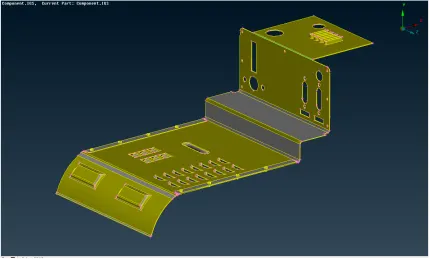
Figure 2 - Stitch the faces using Topo option
3. Using Topo --> Orient --> Select/Visible, the faces of the geometry are oriented properly as shown below:
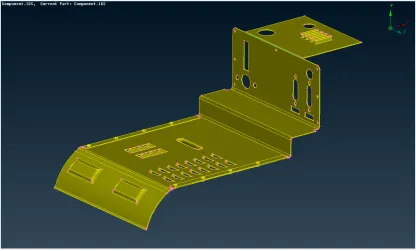
Figure 3 - Faces oriented properly
4. Using Tools --> Checks --> Geometry, the geometry of the model are checked for errors in geometry
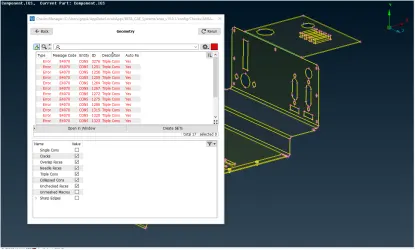
Figure 4 - Checking for errors in geometry
5. Select all the errors, right click and select “Fix” for fixing the errors automatically
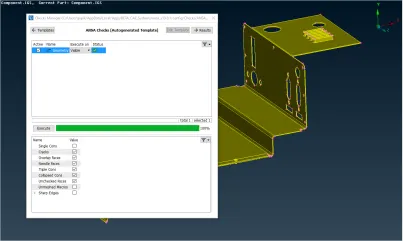
Figure 5 - Automatic Fixing of geometrical errors
Morphing of the model:
The box morphing is done by using following steps:
1. Under Morphing tab, Boxes --> New --> Ortho is selected
2. In the new Morph window, the option Geometry is selected and in Box type, Ortho is chosen
3. Then in the model, the extrusions shown in the below figure are chosen
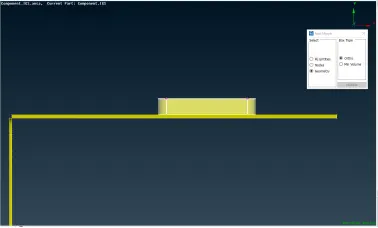
Figure 6 - Choosing the geometry
4. After middle click, the box is created (Ref. Below figure):
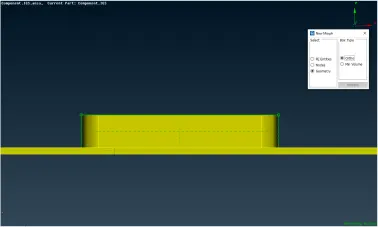
Figure 7 - Box created
5. Then, Box Morphing --> Moveis selected. The control points movement window opens
6. Select the points in the box --> Middle click and the mouse is dragged upward / downward as per the required modification and middle click is given to confirm the displacement of the feature
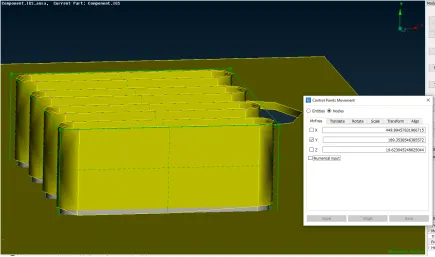
Figure 8 - Feature modified using move option
7. The steps 3 to 6 are repeated for other features in the model as shown in the video. The modifications are shown below:
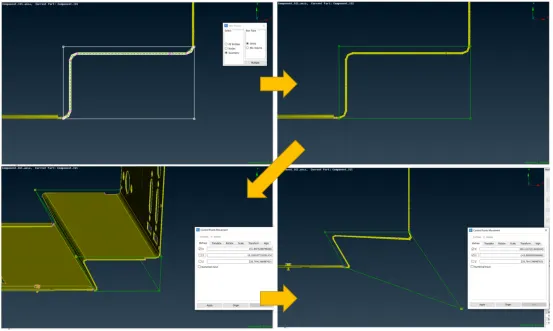
Figure 9 - 2nd morphed feature
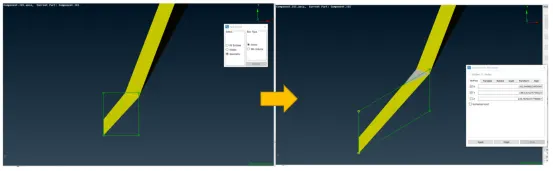
Figure 10 - 3rd morphed feature
8. The model modified using morphing technique is shown below:
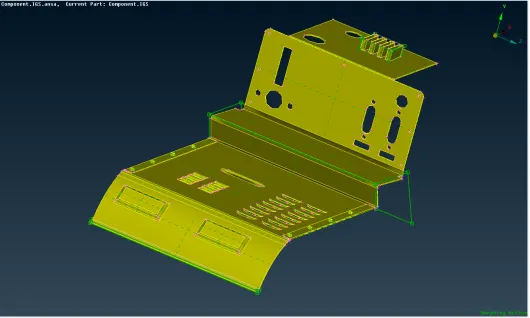
Figure 11 - Modified model using morphing technique
9. The created boxes are deleted using Boxes --> Delete. After deletion, the model is shown below:
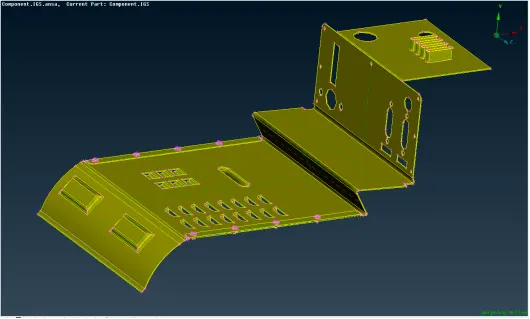
Figure 12 - Morphed model after boxes deleted
10. Next step, instead of a feature in the model being modified, the complete model is morphed. For which the same steps 3 to 9 are repeated. The only difference being that, here the complete model is selected. The steps are shown in the figure below:
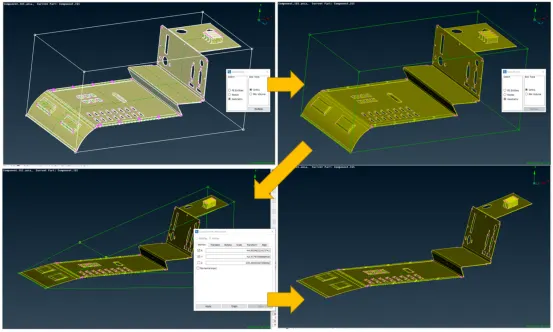
Figure 13 - Morphing of complete model
11. The final morphed model is as follows:
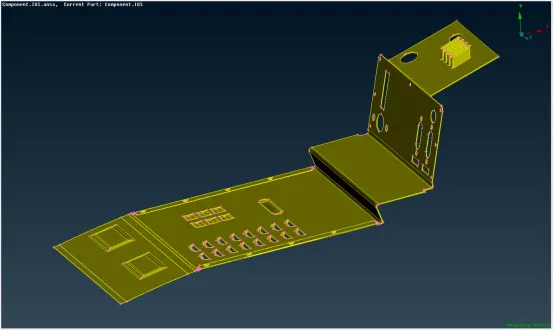
Figure 14 - Final morphed model
Model 2:
1. Import the CAD geometry in ANSA.
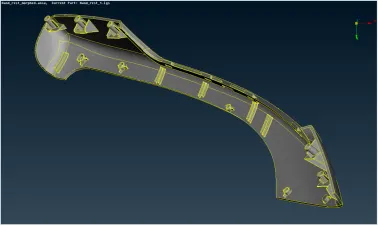
Figure 15 - Imported CAD Model
2. Using Tools --> Checks --> Geometry, the geometry of the model are checked for errors in geometry
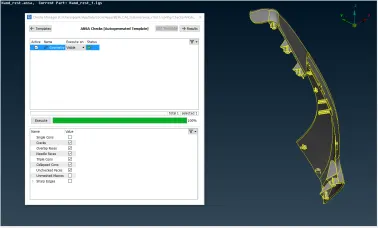
Figure 16 - Check geometry
3. The same procedure as like the steps 3 to 6 of Model 1 is followed for creating the dog house ribs. This has been shown below:
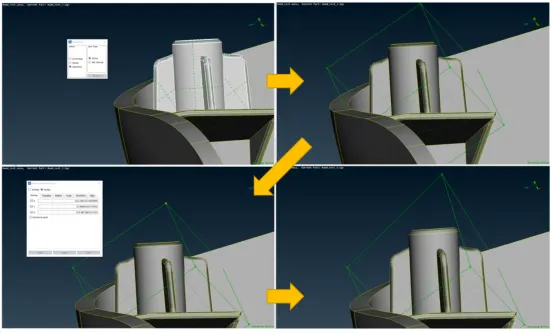
Figure 17 - Morphing operation for dog house ribs
4. For the ribs, the same procedure as like the steps 3 to 6 of Model 1 is followed. But, the box type here is chosen as “Min Volume” since it provides a more accurate morph than “Ortho”
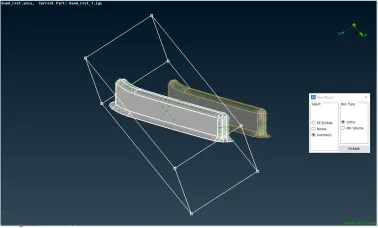
Figure 18 - Rib with "Ortho" box type
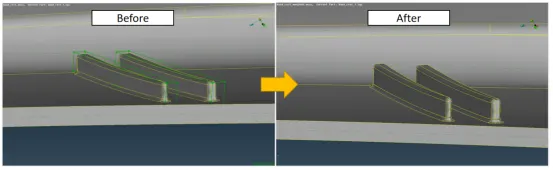
Figure 19 - Morphed Rib
5. The steps are repeated for all the ribs and dog houses of the model
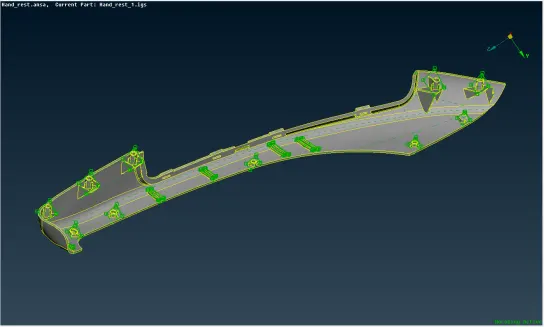
Figure 20 - Morphed model
6. Using Boxes --> Delete, the created boxes are deleted. After deletion, the model is shown below:
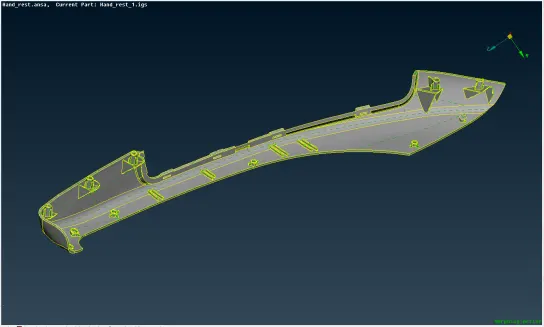
Figure 21 - Final model
Applications of Morphing:
Morphing is a tool in ANSA, using which the FE Model / geometry of the model can be modified without involving numerical inputs and also eliminates the need to return a design to the CAD system for optimization. Since, the design modification can be done directly by a simulation engineer in ANSA without depending on CAD Engineer, it ultimately reduces the lead time in product development.
The morphing techniques available in ANSA are:
- Box Morphing
- Direct Morphing
- Geometry Morphing
- Parametric Morphing
Some of the applications of morphing are discussed below:
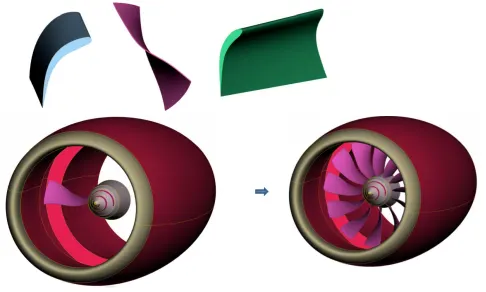
1. Aviation - Blades Morphing for shape optimization:
2. Automotive:
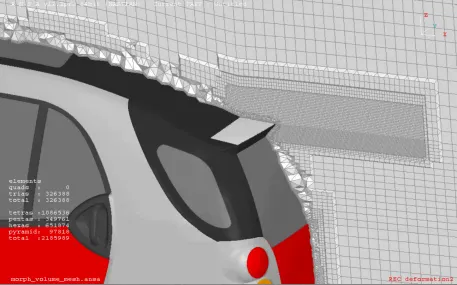
a) Improve external aerodynamic of a car:
The external body shape of a car can be modified and the design of the car for aerodynamics can be optimized.
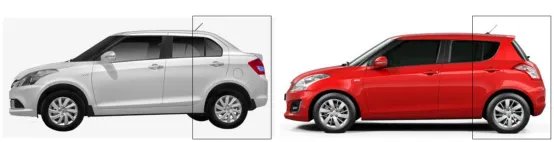
b) Morphing the rear end geometry of the car to various forms like hatchback, sedan .etc.,
The example shown here are Suzuki Swift and Suzuki Dzire. In the below pictures, it can be seen that the differences between them are the presence of luggage storage room in Dzire. Hence, in such a situtation, the geometry of Suzuki Swift can be morphed to geometry of Dzire and vice versa
Learning Outcomes:
Different methods for morphing and its applications
Conclusion:
Thus, for model 1, the morphing techniques discussed in the video have been implemented and for model 2, the dog houses and ribs have been modified using ANSA morphing techniques