Week 8-Challenge
Objective:-
- To understand about tetra meshing
- Understand how to tetra mesh
- To know about the deffects in tetra meshing
- To understand Tet collapse and how to remove it
Procedure:-
- In this challenge we are having 3 models, The chasis and housing model have different componets in it and the other is haveing only one component.
- In this we are doing the tetra meshing for these components with 3 different types of tetra meshing.
- One is the 2d mesh to 3d mesh convertion
- Second is the Quick tetras
- Third is the volume mesh.
What is Tetra mesh?
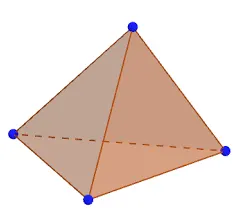
- Tetrahedral is a four- nodded solid element which can be generated through the tria element by creating a volume and also through the existing volume of the geometry. These elements are used where the geometry has high thickness and complexity.
Step 1:- Importing Cad Geometry
- Import the cad model.
- File > Open> Model> select the file open
- or if it is in step or igs file, Use File > Import > geometry.
Step 2:- Geometry Cleanup
- The cad model should be studied and geometry cleanup should be done
- Visually inspect the areas which are small and will fail for minimum length.
- If there are areas with lines which are failing for minimum length errors, it will surely give you tet collapse while 3d meshng
- Also check for the fillets and small teeth like structures, defeature them because they will also make tet collapse errors.
Step 3:- Meshing
Meshing can be done using 3 methods
- 2D to 3D Convertion.
- Quick tetra meshing .
- Volume tetra meshing.
Method 1 :- 2D to 3D Convertion:-
- Import the cad model.
- Delete the Solid from the model.
- go to 2D> Automesh, Select the whole surface, Change the element type to Trias and mesh it.

- In criteria give Minimum length and max length.
- Check for quality criteria of the 2D mesh.
- After the 2D mesh is ok, now we can do the 3D meshing
- For 3D meshing go to 3D>Tetramesh.
- Choose elements under Fixed trias/quads for tetra mesh.
- Select the whole 2D meshed elements.
- Click on Mesh.

- Also after meshing everytime check the mesh by masking some parts to make sure that the tetra mesh is done.
Method 2:- Quick tetra Meshing:-
- Import the model.
- Delete the Solid from cad model.
- Then click on View menu>Browsers>Hypermesh> Utility
- Select Geom/Mesh from the Utility tab
- Then choose Quick Tetra mesh from the mesh tools.
- Then from the Quick tetra tab, click on components and choose the component which we want to mesh.
- Give mesh size
- Choose only Trias from mesh type
- Click on Mesh.
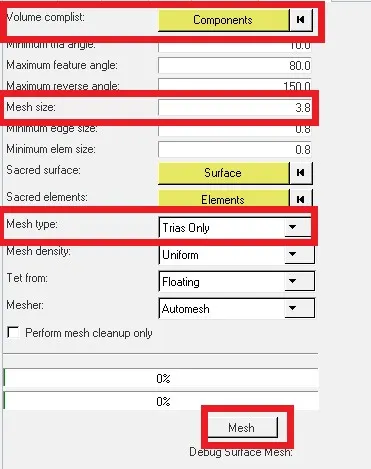
- Then you will see a dialoge as Surface mesh completed Attempted tetramesh Click on OK to proceed
- After Quick tetras in the components list you can see that there is a new component added named Quick tets, this means the quick tetra mesh is done.
- Also we should check and confirm the presence of tetra mesh by masking.
Method 3:- Volume meshing:-
- Import the model.
- In this method we need the solid model.
- For Volume mesh go to, 3D> Tetra mesh> Volume tetra mesh.
- Choose Solids under Enclosed volume.
- Select the solid which we want to mesh.
- Give elements size.
- 2D element type as trias
- 3D elememt type as tetras.
- Wisely check the boxes of Use Curvature, Use Proximity. Because always choseing the both will make some deformations or sometimes make a 2D mesh instead of 3D
- Also for auto cleanup of the solid check the Cleanup elements option.
- Click on mesh.

Step 4:- Eliminating the errors:-
The main error found in the 3D tetra mesh is the tet collapse.
Tet collapse
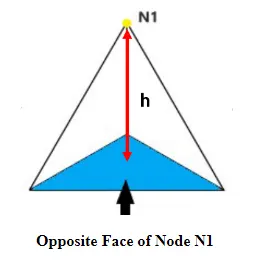
Tet collapse is one of the quality parameters, which will be checked while generating Tetrahedral elements. It can be calculated by measuring the distance of a node from the opposite face, then each of the four values will be divided by the Square root of the opposite face’s area. The minimum of four resulting values is then normalized by dividing it by 1.24.
Generally tet collapse can be calculated by the formula = Min of (h/√A) ÷ 1.24
In that formula, “h” represents the Height, between the Node (N1) and the opposite face of the Triangle.
“A” represents the Area of Opposite Face (area of the Triangle).
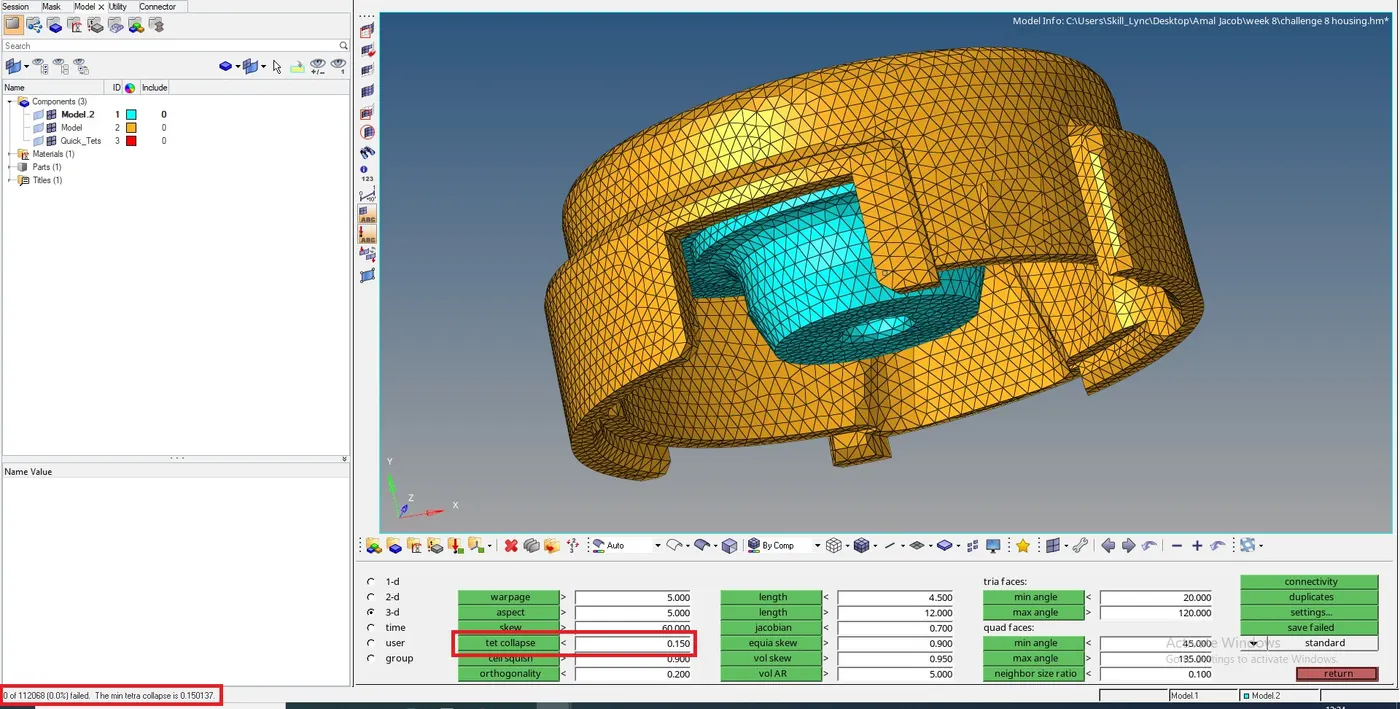
In hypermesh after tetra meshing we can check the tet collapse error by-
Tools > Check elements> 3D> Give the value in tet collapse> click on tet collapse> the at bottom left corner we an see how much elements are failing for our model
There are mainly 2 methods to eliminate the Tet collapse errors
1. Automatically remove it by tetra remesh
2.Manually emove it useing translate option
Method-1:-Tetra remesh
- First we check how many elements are failing for the tet collapse,
- click on Save failed.
- Go to masking option.
- select elements>right click and retrive> cllick on mask> reverse all.
- then we can see the failing tet collapses only and bring the adjesent elements and remesh.
- Or you can go with the full model remeshing.
- Go to 3D> tetra mesh> tetramesh parameters
- Check Max tetra size and minimum tetra size and give values
- Give tet collapse value
- Check fix midnodes, fill voids and smoothing.

- After that go to tetra remesh.
- Select the 3D elements for meshing.
- Click on remesh

Method-2:-Translate method:-
- In this method first we check how many elements are failing for the tet collapse.
- click on Save failed.
- Go to masking option.
- select elements>right click and retrive> cllick on mask> reverse all.
- Then go to Translate option by Shift+f4.
- Choose a node of the elemet which we can increase the height
- Then select the node. show n1, n2, n3 and give a magnitude click on translate+or- as our requirement.

- Give it enough height till the error gets eliminated.
Result:-
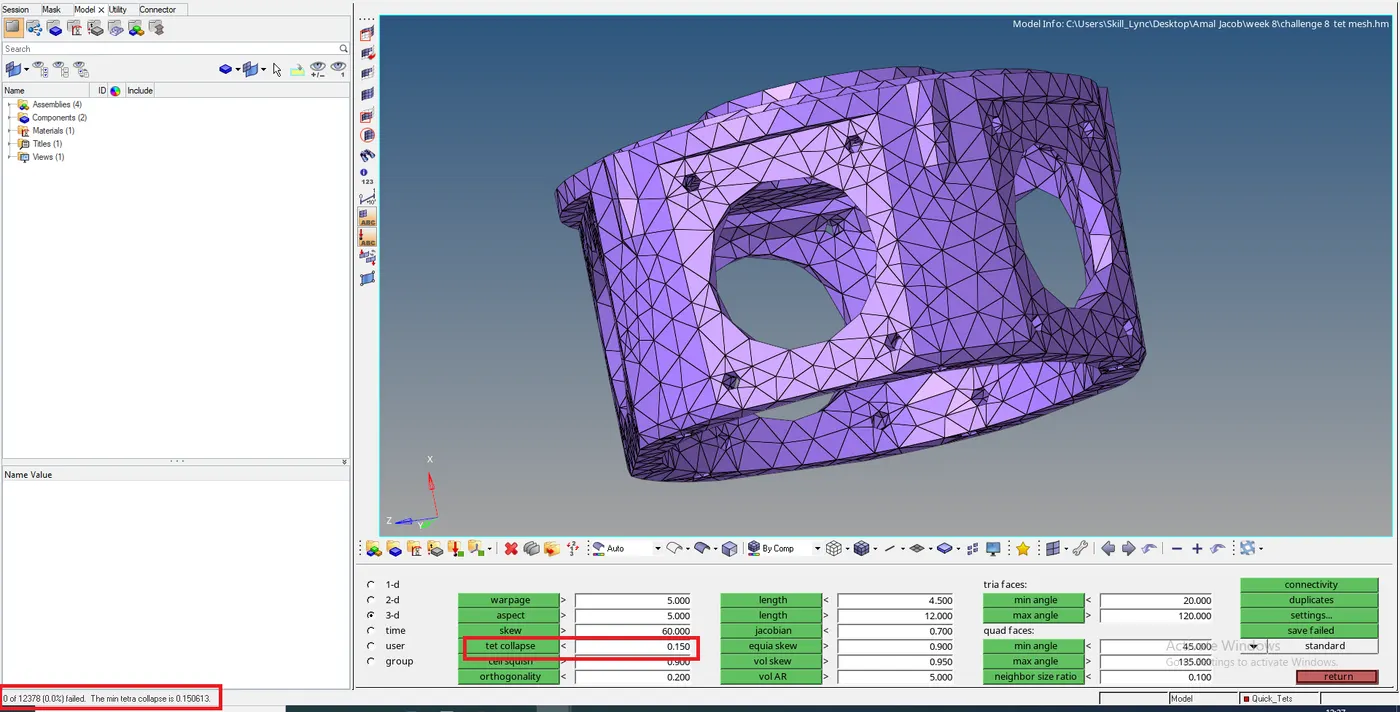
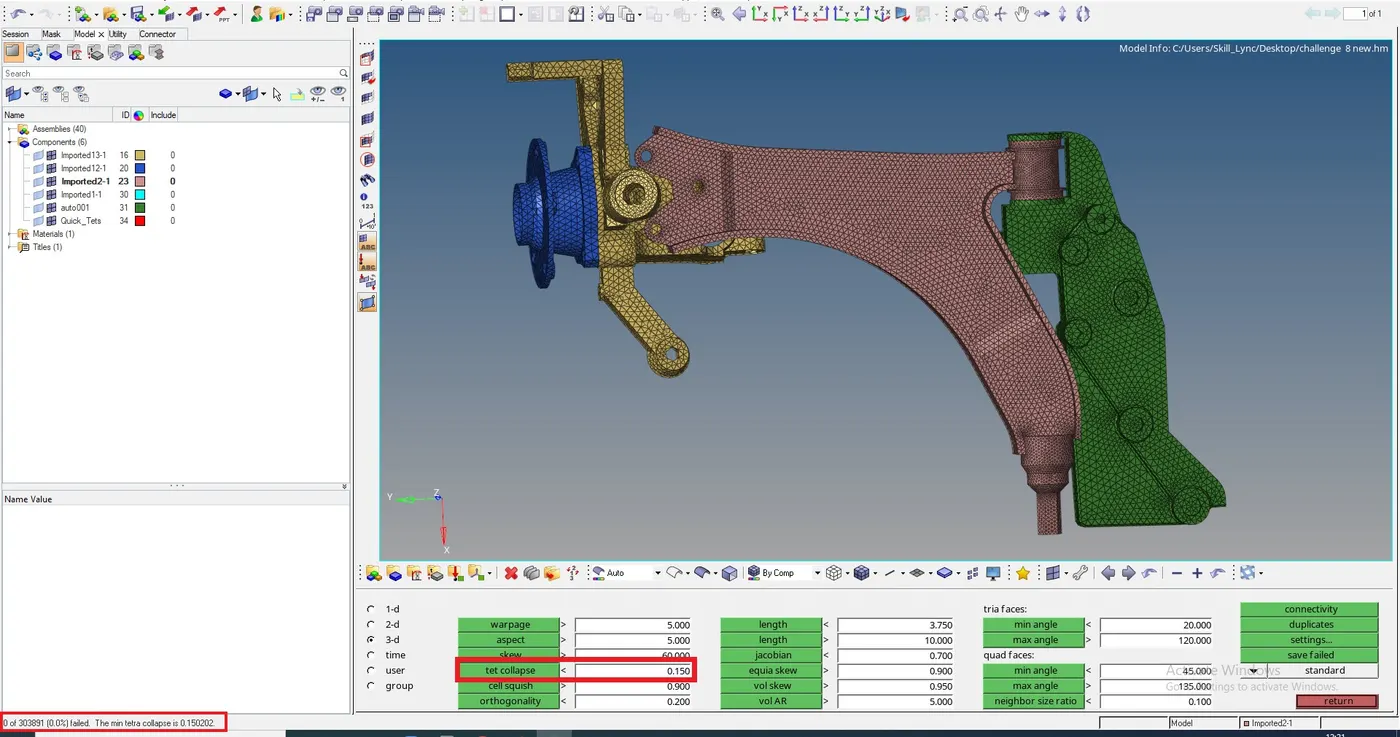
All the 3 models are 3D meshed and errors like tet collapes have be eliminated.
Learning outcomes:-
- Learned to perform tetra meshing in 3 methods
1. 2D to 3D convertion
2. By Quick tetra meshing
3. By Volume meshing
- Learned to eliminate the errors like Tet collapse.