Week 8 - Challenge 5 - Core & Cavity Design
- Aim/ Objective:
Create the Core and cavity blocks for the switch bezel designed in the earlier challenge.
- Terms used:
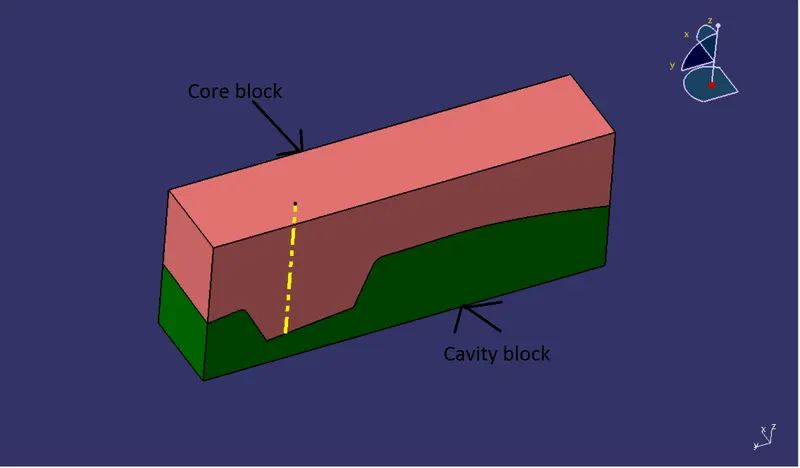
Core Half (B Side): The core is usually the interior or noncosmetic side of the part. The core side also contains the ejection mechanism that pushes the completed part out of the mold. The core is the male part which forms the internal shape of molding.
Cavity Half (A Side): The cavity is the void inside the mold that the molten plastic fills. The cavity is the female part which forms external shape of molding.
Parting Line:
A 'parting line' is the line of separation on the plastic part where the two halves of the plastic injection mold meet. The line actually indicates the parting 'plane' that passes through the part. A parting line, in industrial casting of molds, is the border line in which draft angles change direction. That is, it is the dividing line that splits the core and cavity halves of a molded part. It is sometimes a starting point for the mold parting surface.
Parting Surface:
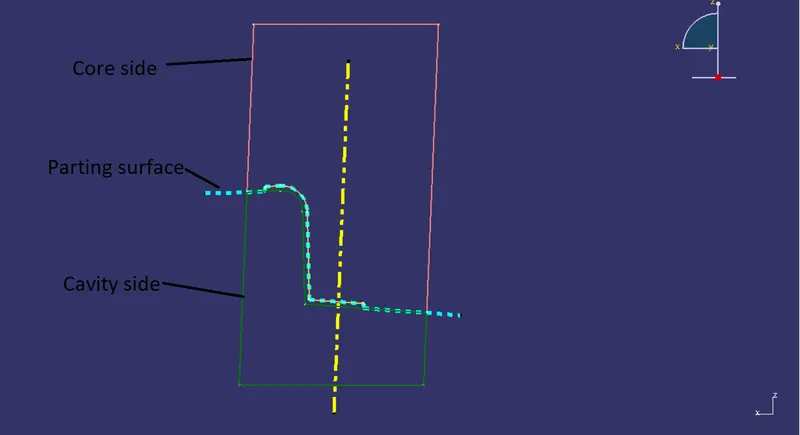
A parting surface is a surface that separates the mold block into two parts – the core and the cavity. The parting surface of a mould are those surfaces of both mould plates adjacent to the impressions which butt together to form a seal and prevent the loss of plastic material from the impression.
Tooling axis: It is the direction in which core & cavity opens & closes.
- Detailed Report:
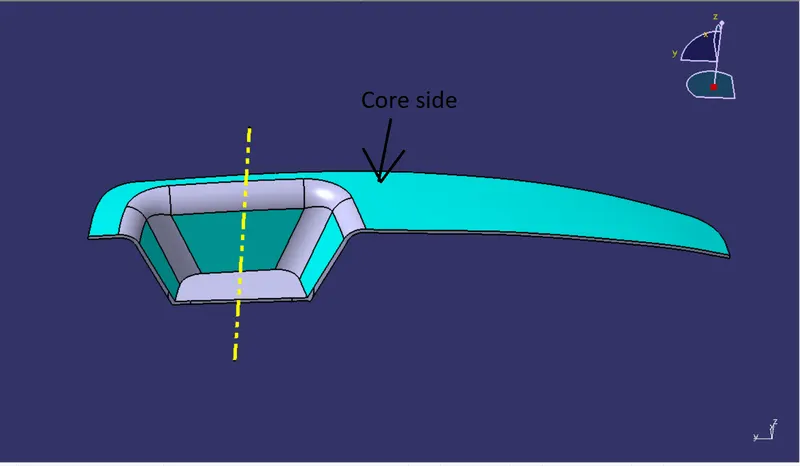
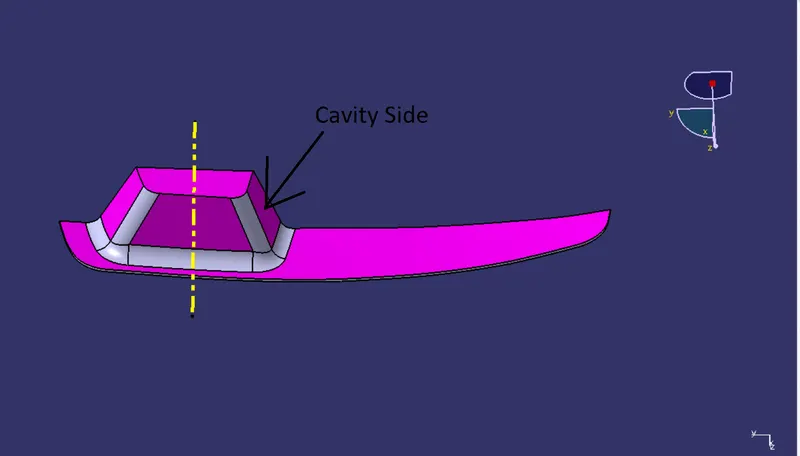
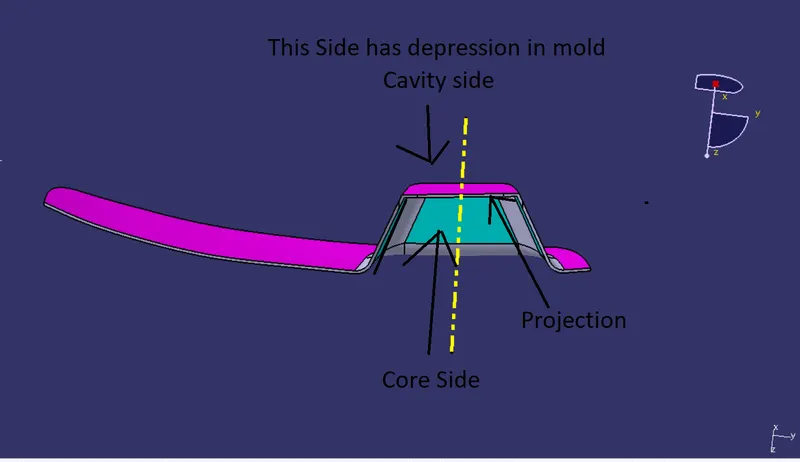
In switch bezel model, Area highlighted in cyan color has projection from mold perspective. Area which has projection in component will have depression in mold. So area highlighted in cyan color is core side & highlighted in pink color is cavity side.
- Core side:
- Cavity side:
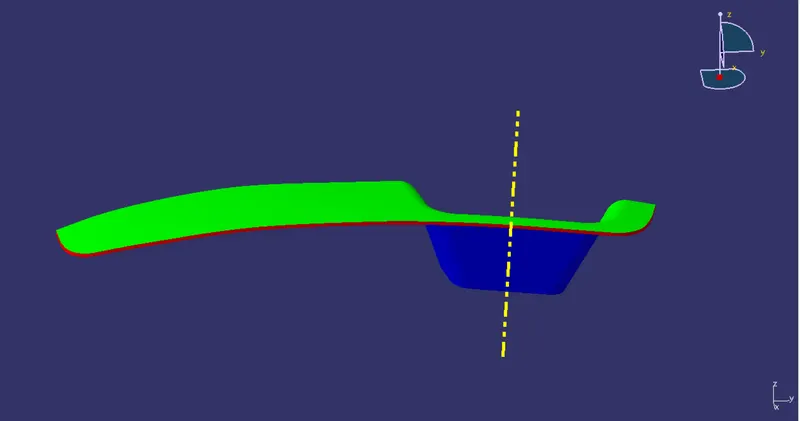
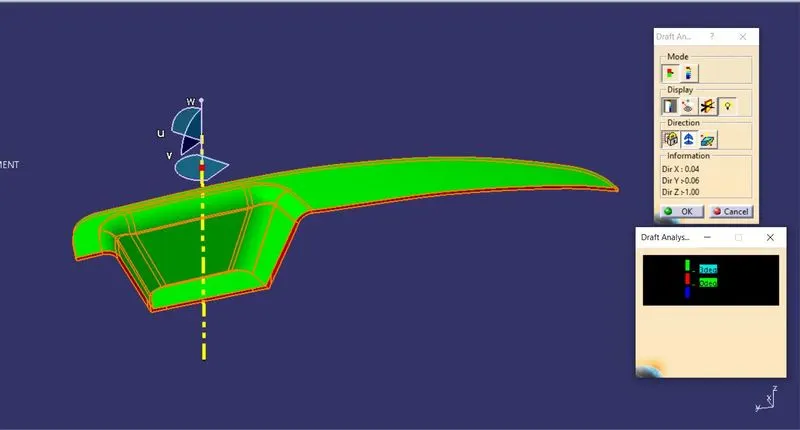
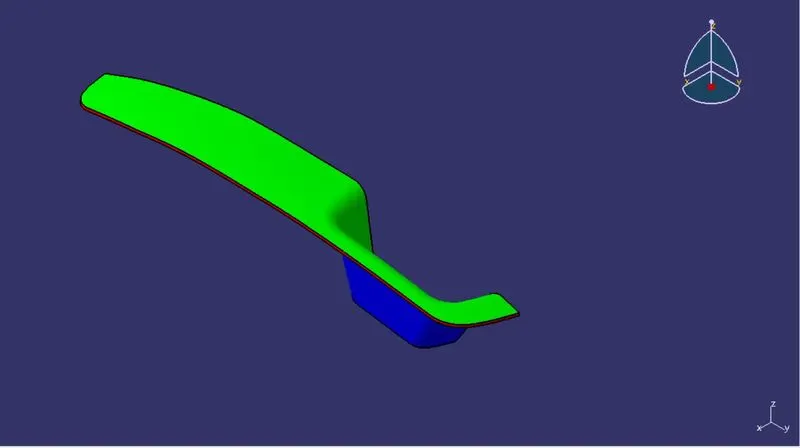
- From below image it is seen that class C surface is tooled along with class A surface. As from draft analysis green & red surface have more than zero degree draft i.e. positive draft angle. So this is the part of core. & blue surface has negative draft angle.
- Method followed in core & cavity design:
1. Creating parting surface.
2. Creating core block.
3. Creating cavity block.
- Creating parting surface
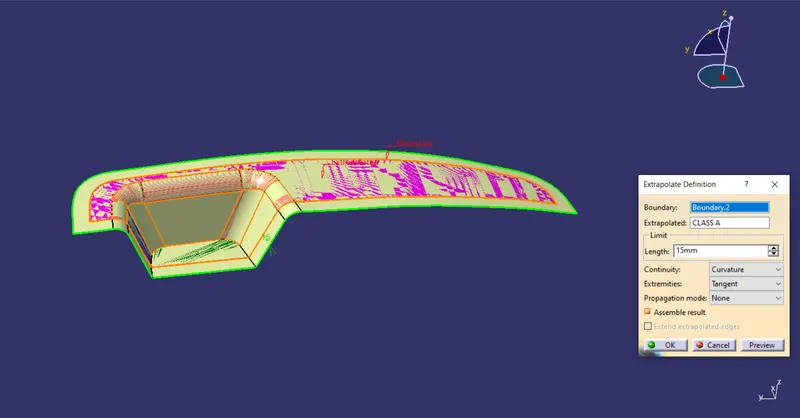
- Extrapolate class A surface by 10 to 15 mm.
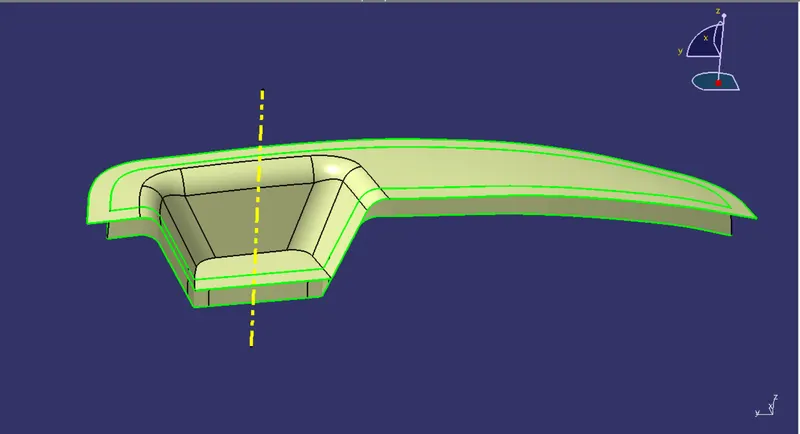
- Trimming class A surface with class C surface keep inside surfaces.
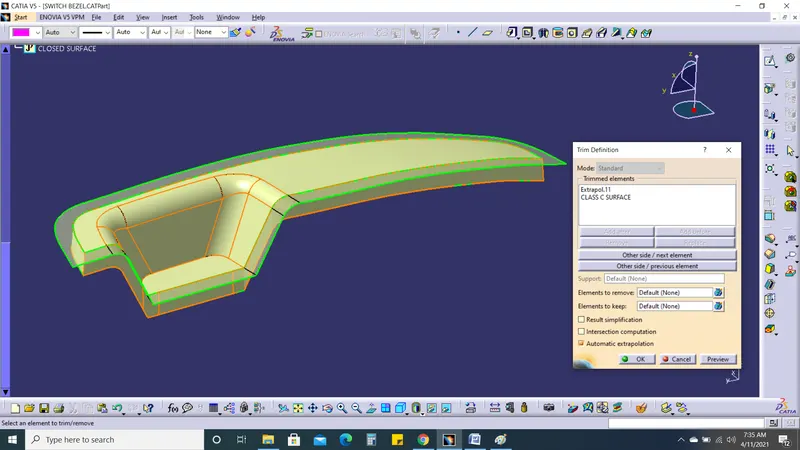
- Trim resulted surfaces with class B surface & this time keep outside surface.
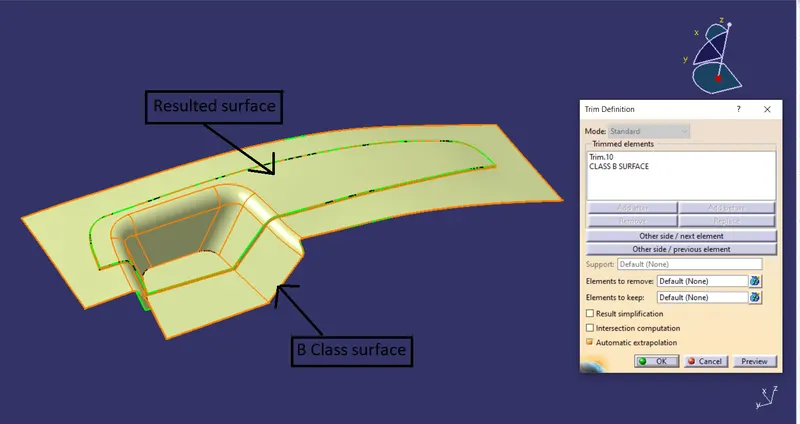
- Finally, we get parting surface with component area as shown in below.
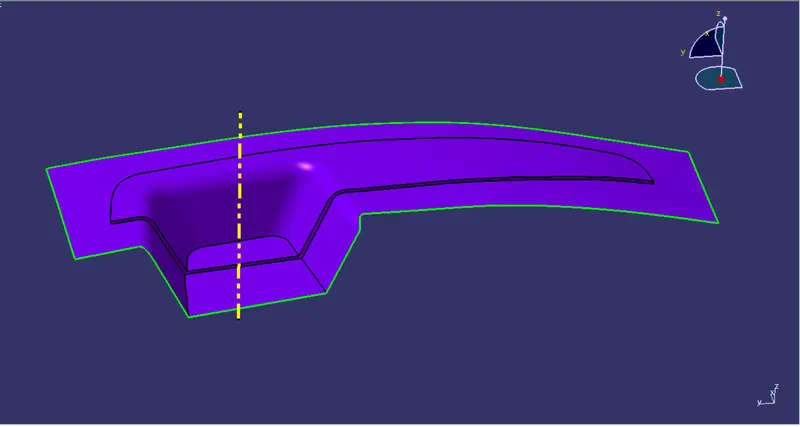
- Creating core block
- To create core block, draw a rectangular block.
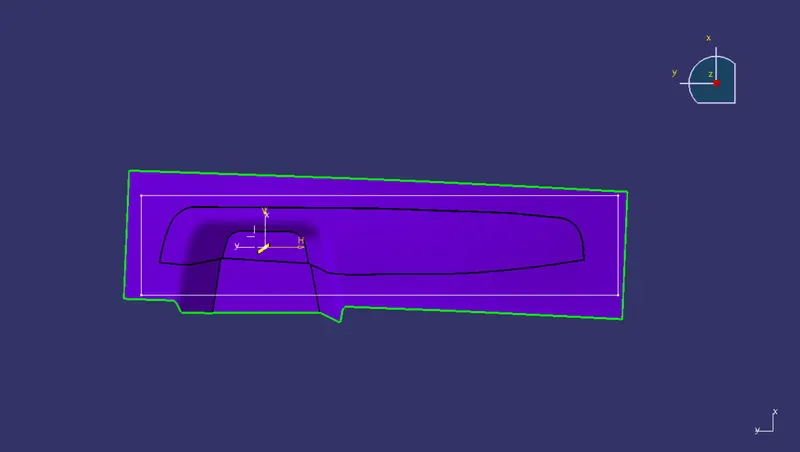
- Extrude it along a tooling axis in upward direction.
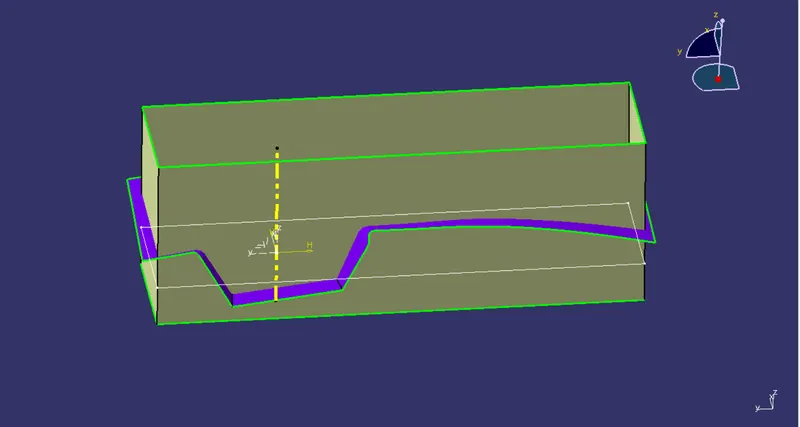
- Trim extruded surface with parting surface & while trimming keep surface above parting surface.
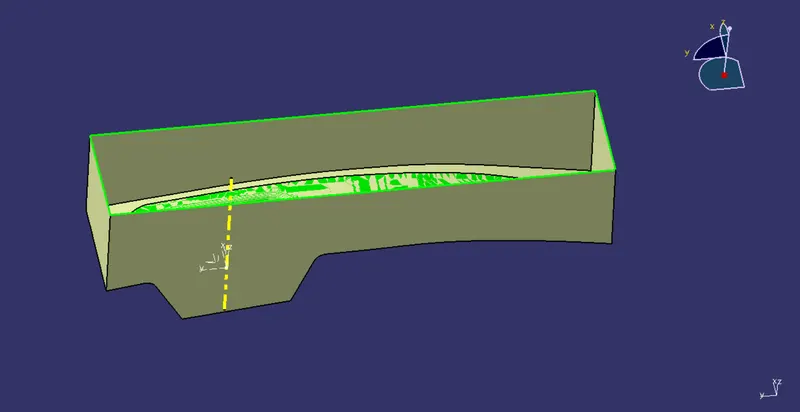
- Create top rectangular surface using fill command.
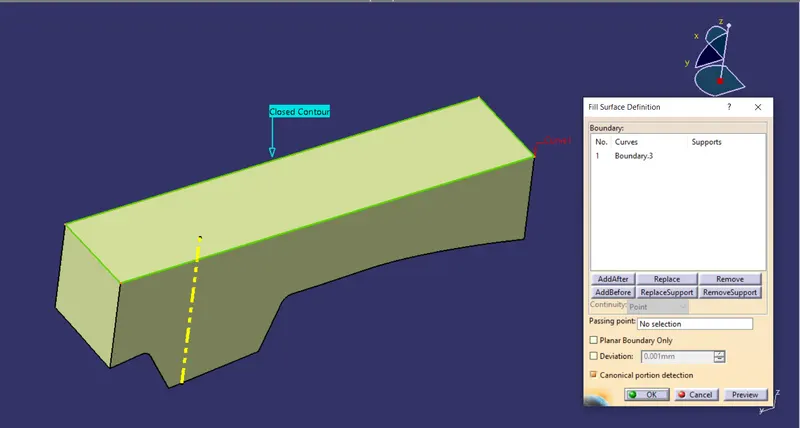
- Join all these surfaces together.
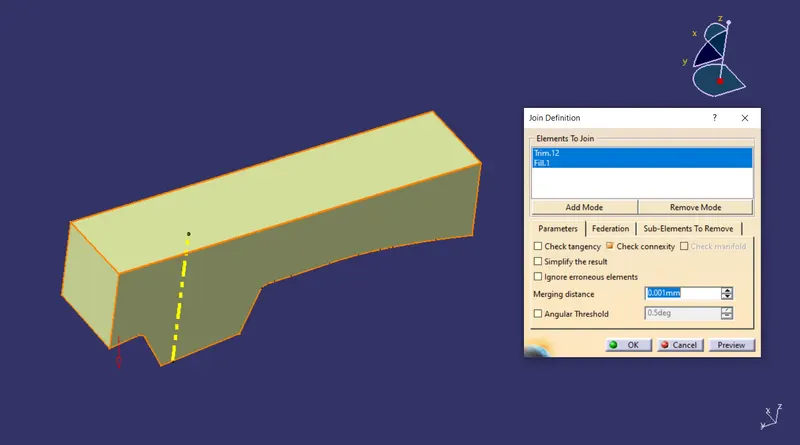
- Create solid block using closed surface command in part workbench
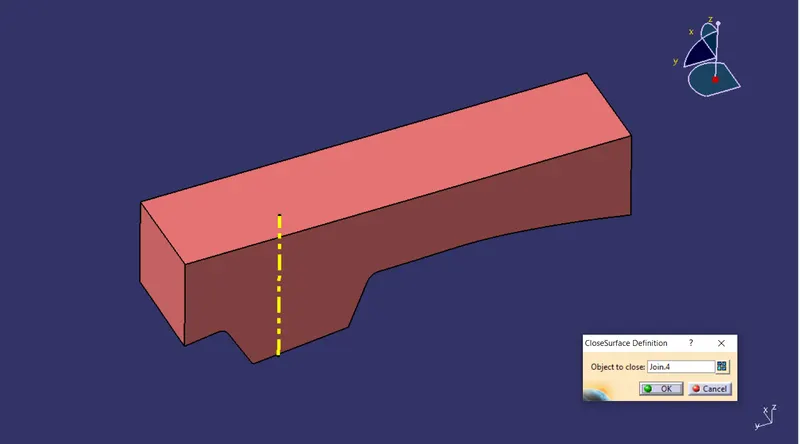
3. Creating cavity block
- To create cavity block use earlier extruded surface.
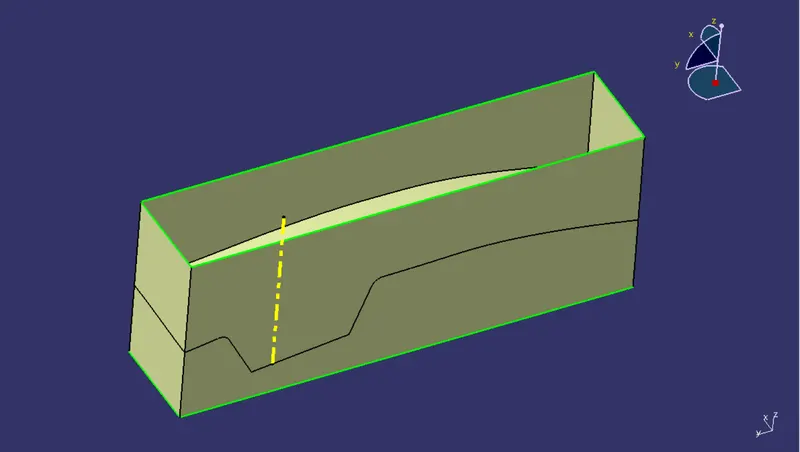
- Trim extruded surface with B class surface so as to ignore component & while trimming keep surface below parting surface.
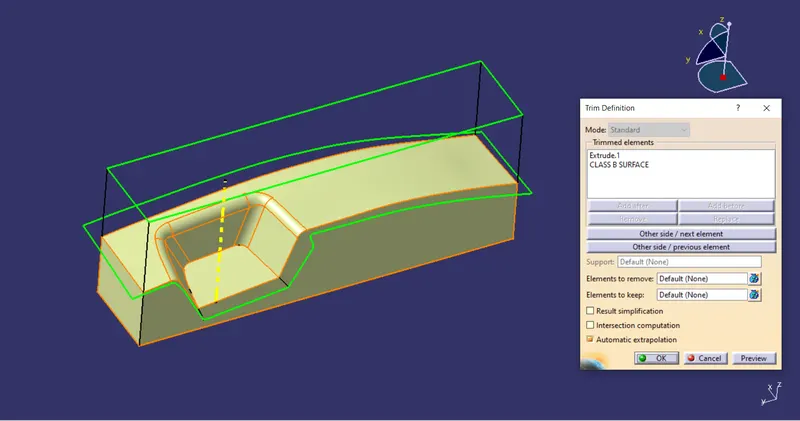
- Create bottom rectangular surface using fill command.
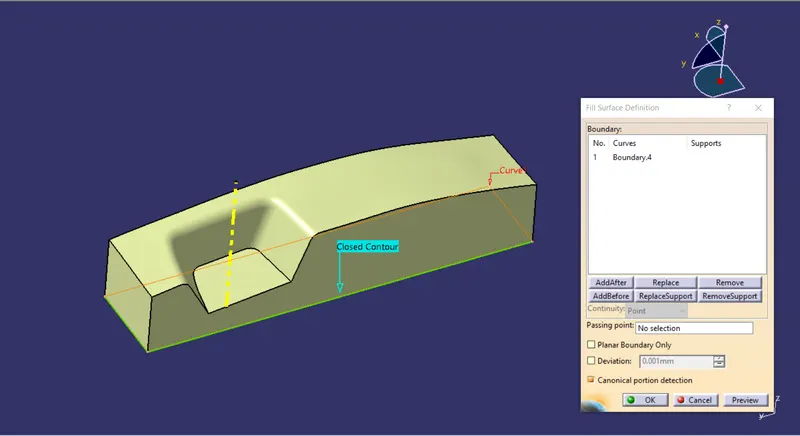
- Join all these surfaces together.
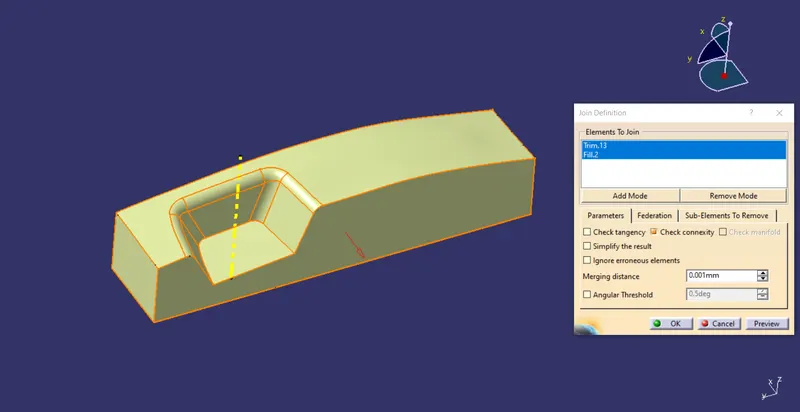
- Create solid block using closed surface command in part workbench.
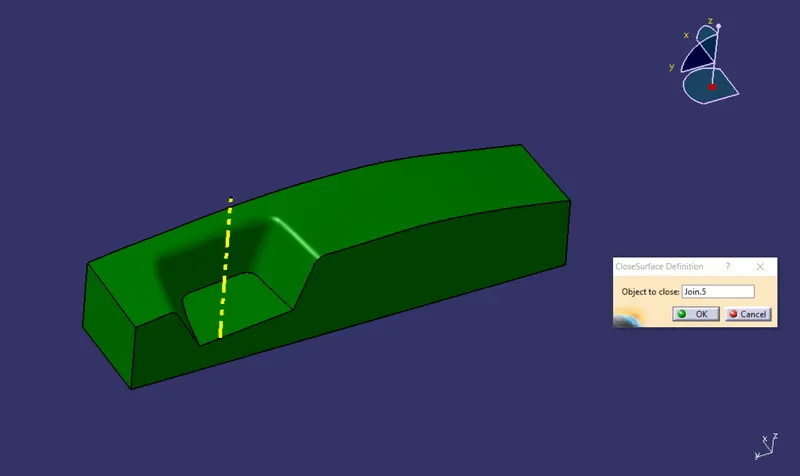
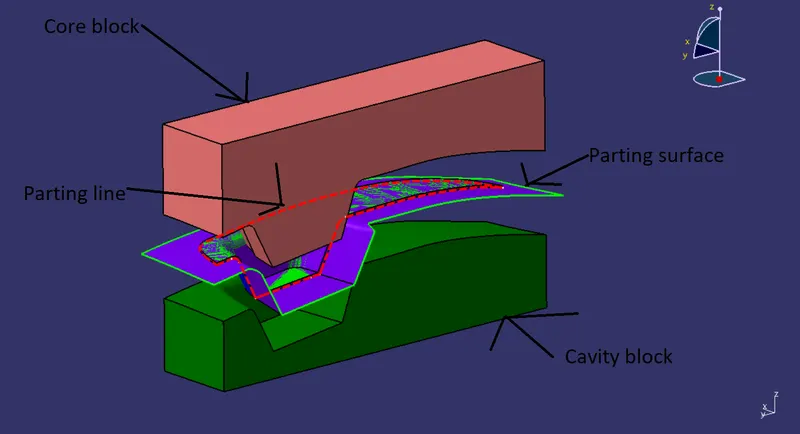
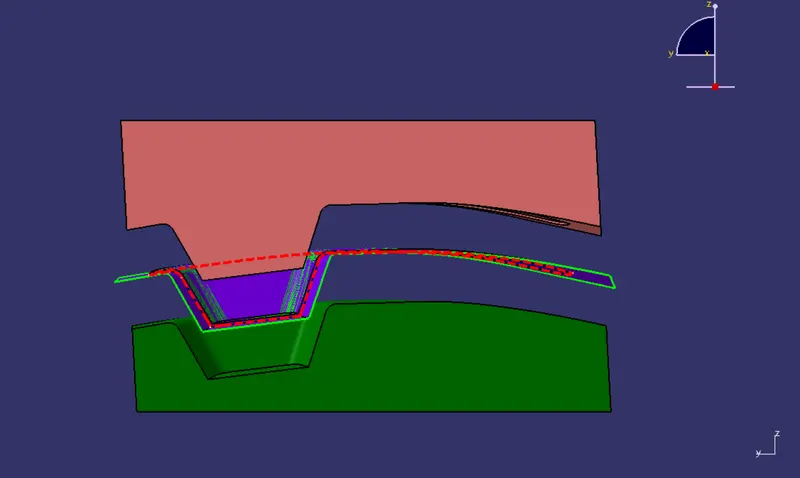
- Here is our output core & cavity block. Brown color block is core & green color block is cavity one.
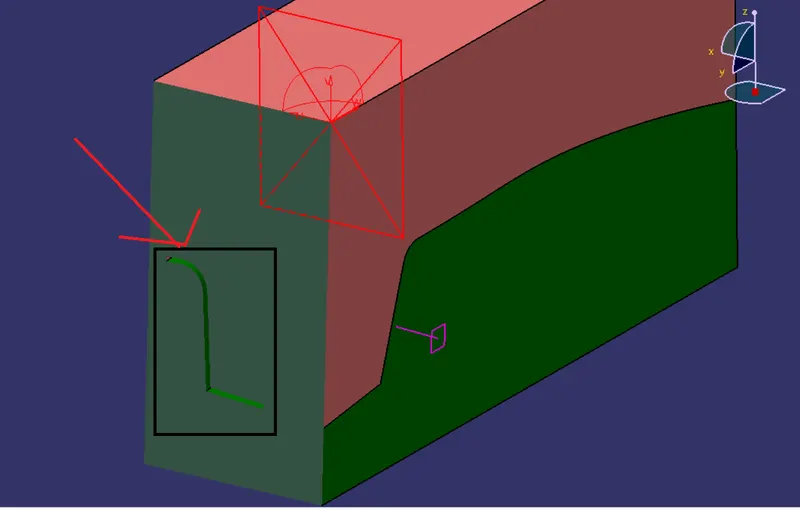
- Here cavity or void formed between core & cavity block is of component shape as marked in below image.
- As shown in below figure, the thick dotted line is parting surface.
- Various orientations of core & cavity blocks:
ISO view:
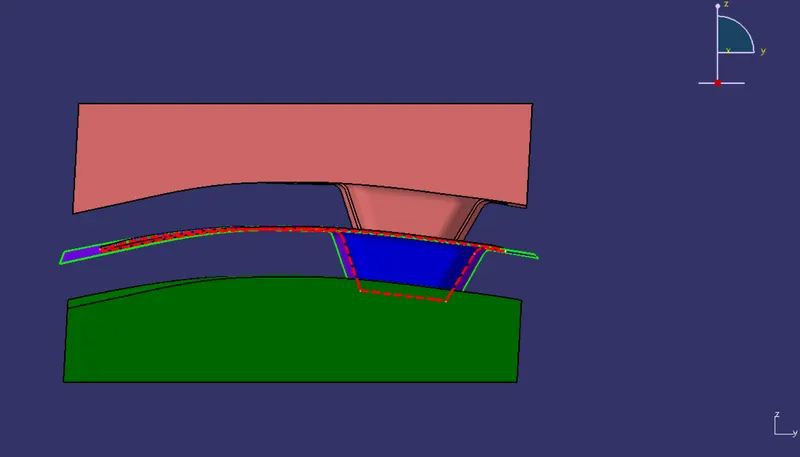
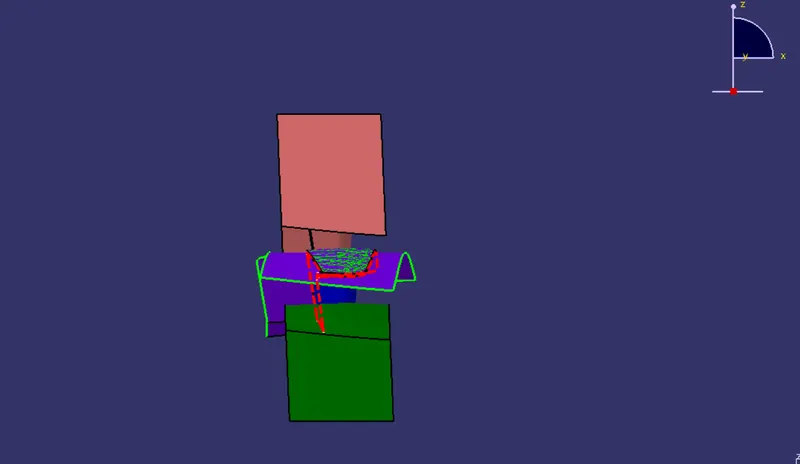
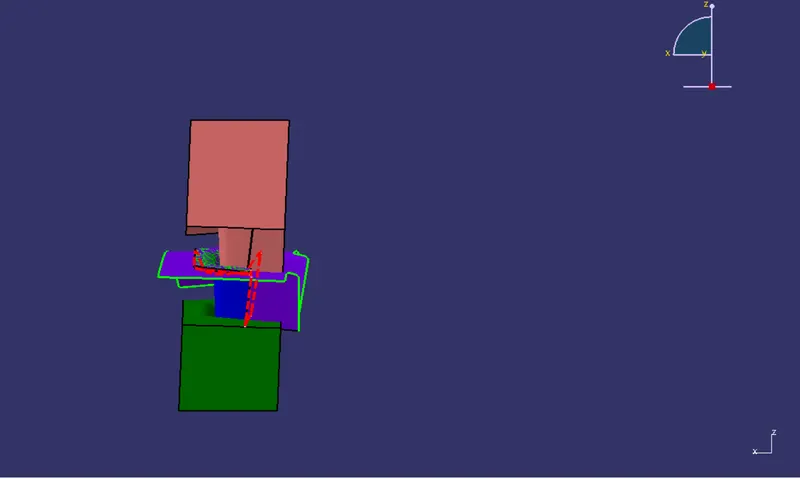
Brown color block is core.
Green color block is cavity.
Blue surface is parting surface.
Dotted red line is parting line.
- Front view:
- Left side view:
- Right side view:
- Back view:
- Draft analysis of class A surface.
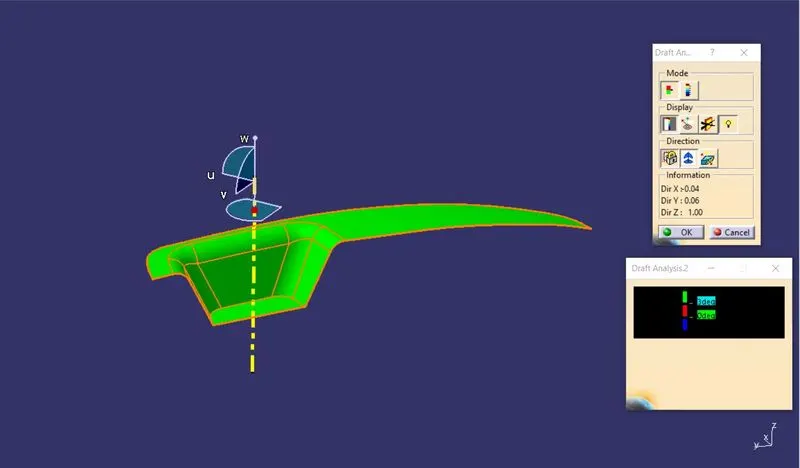
- Draft analysis of switch bezel component.
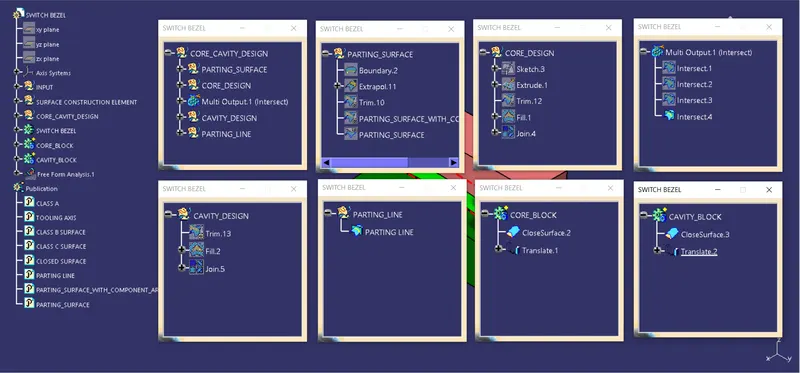
- Image of tree structure of geometrical set & part body:
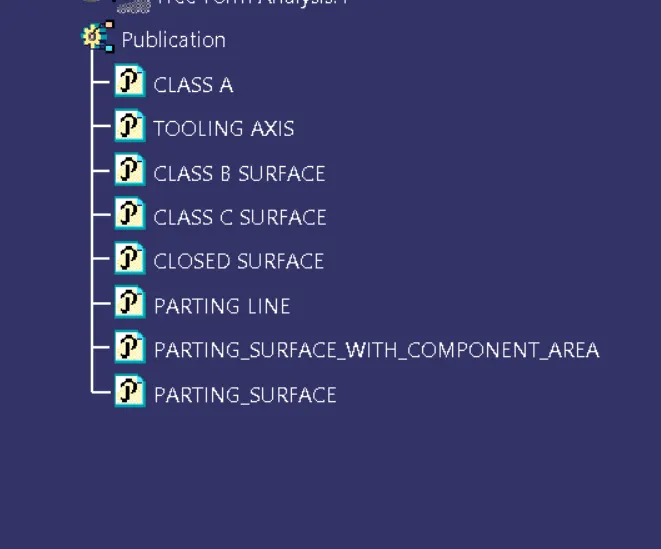
- Image of Publication: