Draft Analysis on a Fan Cover
Aim: Creating the tooling axis for the given Fan cover model meeting the requirements of the draft angle and performing the Draft analysis on the model.
Theory:
Tooling Axis - Tooling Axis is the direction in which the component will be ejecting after the molding process is completed. The rules of selecting an optimum direction of tooling axis for any particular component is as follows :-
- The direction of the tooling axis should be clearing the maximum number of portions of the component once the molding process is completed.
- The direction of the tooling axis should be selected such that the number of side cores required should be minimum, as inserting side cores causes a rise in production cost.
Drafting - Draft is the inclination given to any particular plastic component’s cavity walls in order to achieve easy ejection, once the process is completed.
- Consider that the draft angle between the plastic component and the core is zero.
- When the molten plastic inside the cavity cools, it sticks to the walls of the core.
- During such zero draft condition, the ejection of the plastic component causes friction between them which might bring damage to both the core and the component.
- This damage further leads to inefficiency in the production & also affects the product’s surface finish.
- Hence, a minimum of ½ to 1 deg draft is provided to help in releasing the component.
- However 3 deg draft is widely accepted as a norm in the industry.
Prerequisites before creating the tooling axis and performing draft analysis:
- Ensure that the Class A surface imported should be a single surface.
- This can be checked using the Boundary tool in the Operation Toolbar.
- If the surfaces are disassembled, join them using Join command which is also found in the Operation toolbar.
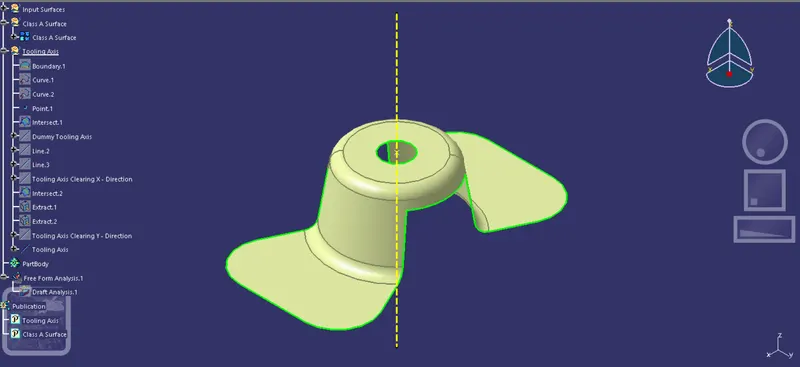
Creation of Tooling Axis - ( CATIA-V5 ):
- Create boundaries using the Boundary tool and disassemble them using the Disassemble tool which both are found in the Operation toolbar.
- Create an axis system along a suitable point according to the boundary and design of the component ensuring the rules of selection of tooling axis direction are not violated.
- Create a dummy tooling axis which will give you an easy visualisation along the direction decided. For the fan cover model we are considering the Z - Direction.
- Intersect the surface with any two of XY / YZ / ZX planes of the axis system.
- Considering the Z direction for tooling axis, intersect the fan cover surface with the ZX and ZY plane.
- Analyze the profile obtained and create lines (say P lines) along the profiles which you think might create problems in ejection of the component.
- Create the bisecting lines between the P lines along the origin of the axis system / the point created separately.
- This procedure will create two tooling axes clearing the parts of the component in X and Y directions.
- Further Bisect these tooling axes clearing X & Y directions along the same point as previous to create the main Tooling Axis of the whole component.
Significance:
- The Fan cover on which we are working has equal draft on both faces. Creating a line along Z - direction gives us the Tooling Axis for the component but still we followed the procedure of bisecting lines. Why?
- In more complex components the faces might have an unequal draft. Therefore we cannot predict the exact direction of the tooling axis and hence we create a Tooling Axis following the procedure of bisecting lines.
Draft Analysis of the Fan Cover model:
- Draft Analysis is performed on the component in order to check whether the component can be manufactured or not.
- This Draft Analysis tool in Catia allows us to analyze the drafts provided on the surface.
- We can check whether they follow industry standards and if not we can modify it accordingly.
The procedure of Draft Analysis is as follows-
- Before starting the draft analysis ensure that the ‘Materials’ option is selected under Customize View Parameters in order to view the results of the analysis.
- Click on Insert >> Analysis >> Feature Draft Analysis.
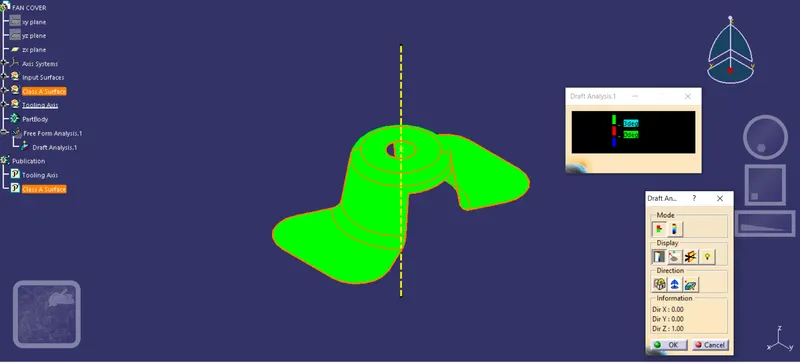
- Draft analysis window will be opened having three sections - Mode , Display and Direction.
- In the Display section select the compass and drag it onto your component. Place it along the tooling axis.
- Lock the direction of the draft.
- Another window will be displaying ranges of draft on the component. The ranges are - Green for more than zero , Red for zero and Blue for negative draft value.
- Assign the lower limit as 3 deg to the Green range from the value edition dialogue box.
- Once you do it, click on the component to see the results.
- You can also check the draft value at any point using the ‘Analysis under running point' option in the Display Section.
Significance:
Thus using Draft analysis we can check whether the component designed follows the design rule of draft and is easily and efficiently manufactured.
Different Views of The component:
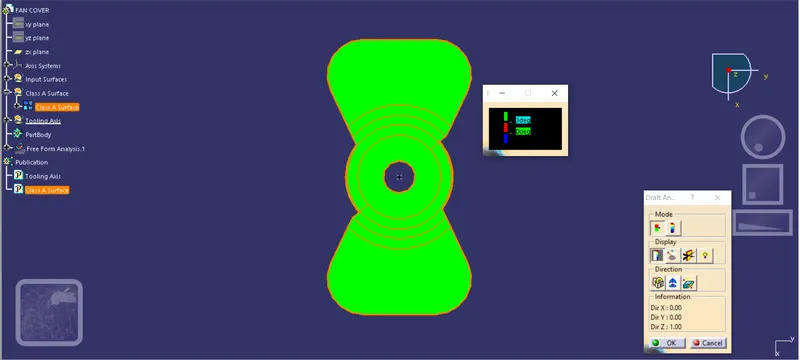
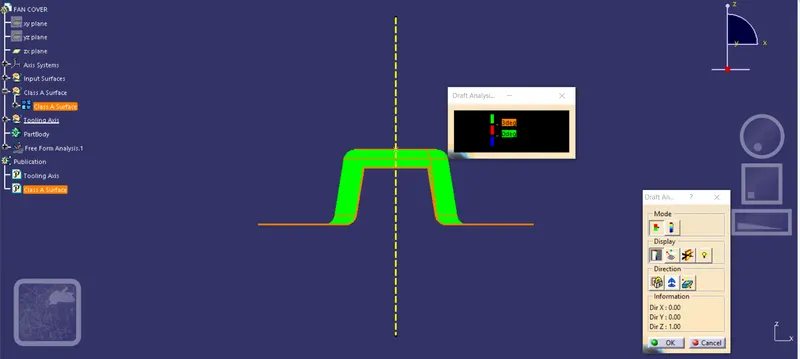
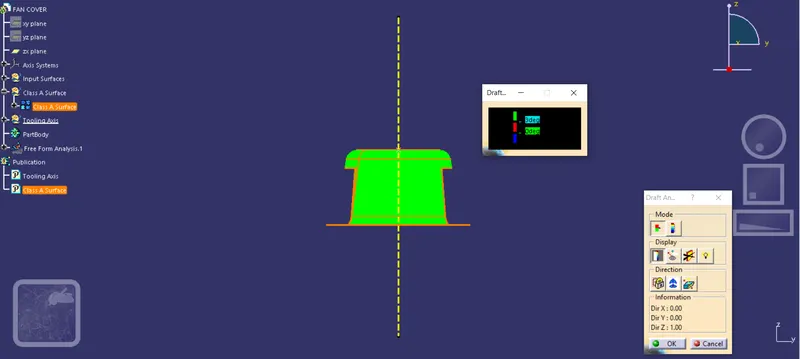
Conclusion: Hence we have successfully created a Tooling Axis and performed Draft Analysis on the Fan cover model.