Week 6-Meshing of Hood Challenge
Objective -to mesh the hood
Hood has four components
Inner extract
Outer extract
Latch
Hinge
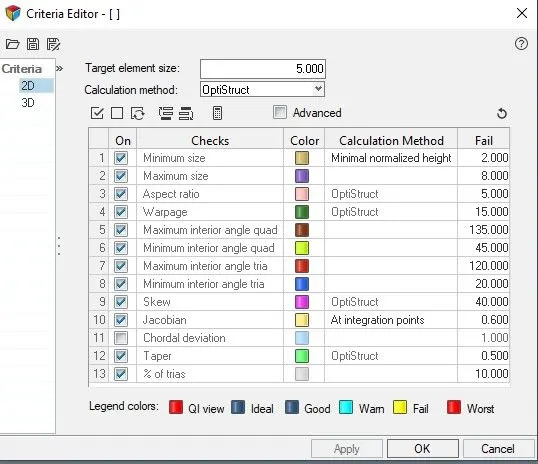
Quality criteria
To set the criteria go to preference -criteria settings
Solution
Import the hood.hm file by going to file-import-model-hood.hm
To mesh the hood
We will do it one by one i.e. selecting one component at a time
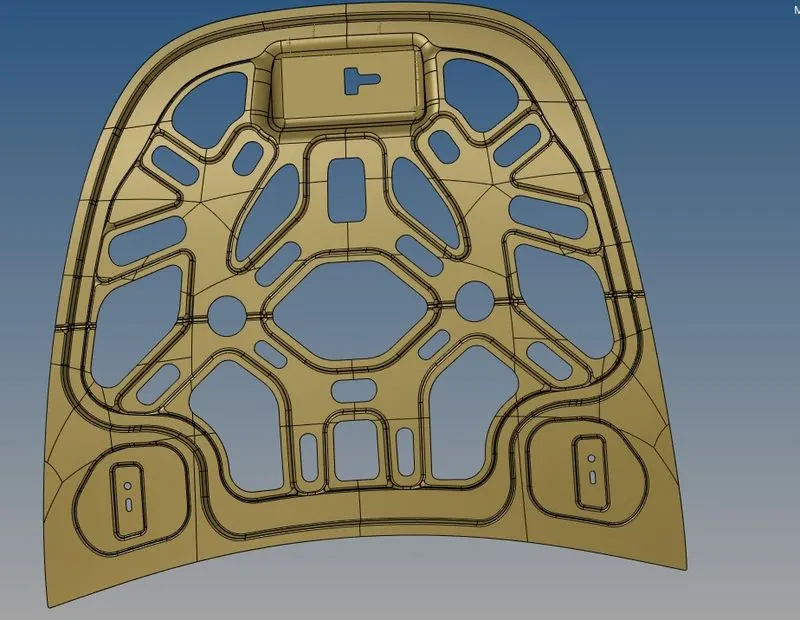
Inner extract
Now, you can work in any order
I will start from inner extract
First delete the solid by clicking on delete - solid-select entities-delete
Now check if there is any deformation in geometry and repair it if any
Then create midsurface by going to geometry -midsurface-create
Then new file will be made named middle surface rename it accordingly
Now the main part is mesh
Before doing mesh there are different methods like only work on half geometry then reflect it or do the mesh on whole component.
Here,i have done the mesh on whole component.
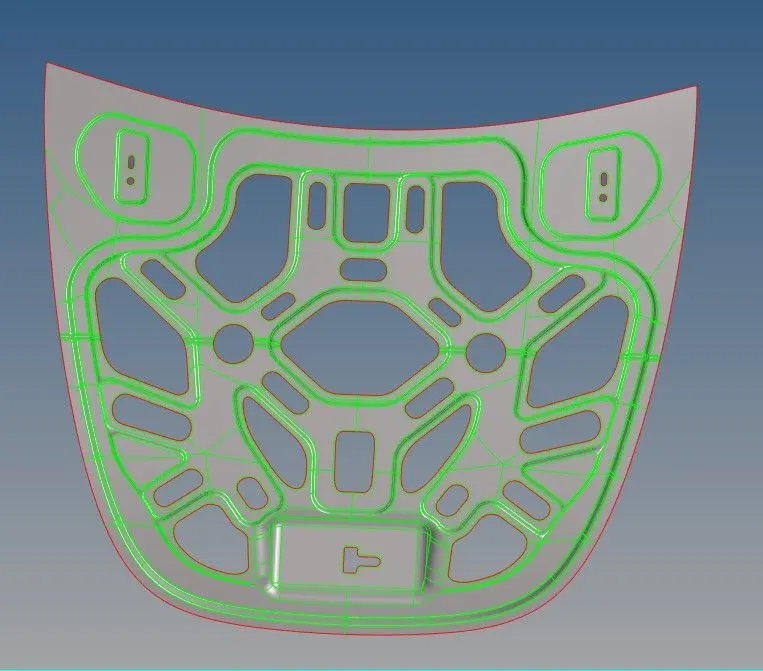
fig-washer split on inner extract
First, i used washer split on the Circle and other shapes which are hollow by going to geometry quick edit-washer split
Now, create surface split and toggle the other lines because mesh gets properly in square shapes by going to geometry -surface split node and for toggle go to geometry -toggle
Now,go to 2D-Automesh-select the surface and select mixed and give the value 5 for target element size and then click on mesh.
Now,try to minimise the tri elements as much as possible
Things i have done to minimise the tria elements
Rebuild mesh multiple times by going to 2D-rebuild mesh
Go to quality index by going to 2D-quality index and check how many elements are failing and worse conditions and correct them using cleanup tools in quality index.
Use align option by clicking F7 key
clean elements by going to 2D-edit elements and
See if there is any coloured elements and clean by selecting the elements and click on clean.
2.outer extract
Now select the outer extract
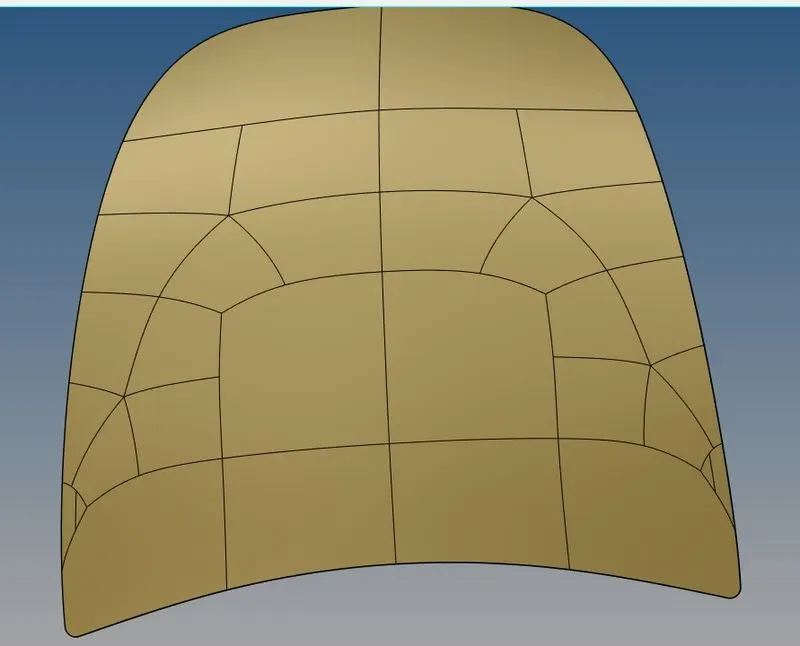
fig-outer extract
First delete the solid by clicking on delete - solid-select entities-delete
Now check if there is any deformation in geometry and repair it if any
Then create midsurface by going to geometry -midsurface-create
Then new file will be made named middle surface rename it accordingly
Now the main part is mesh
Before doing mesh there are different methods like only work on half geometry then reflect it or do the mesh on whole component.
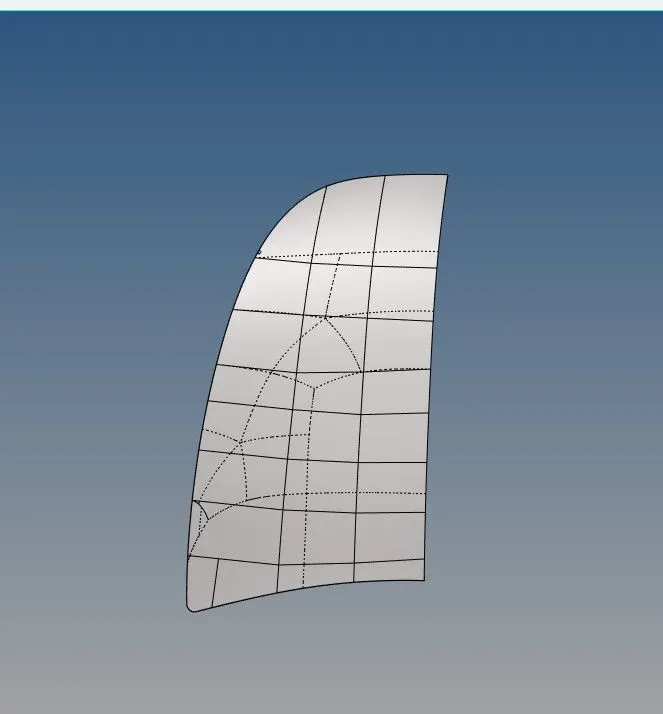
fig-done the surface split,toggle lines,extracted half component
Here,i have done the mesh on half component
Now, create surface split and toggle the other lines because mesh gets properly in square shapes by going to geometry -surface split node and for toggle go to geometry -toggle
Now,go to 2D-Automesh-select the surface and select mixed and give the value 5 for target element size and then click on mesh.
Now,try to minimise the tri elements as much as possible
Things i have done to minimise the tria elements
Rebuild mesh multiple times by going to 2D-rebuild mesh
Go to quality index by going to 2D-quality index and check how many elements are failing and worse conditions and correct them using cleanup tools in quality index.
Use align option by clicking F7 key
clean elements by going to 2D-edit elements and
See if there is any coloured elements and clean by selecting the elements and click on clean.
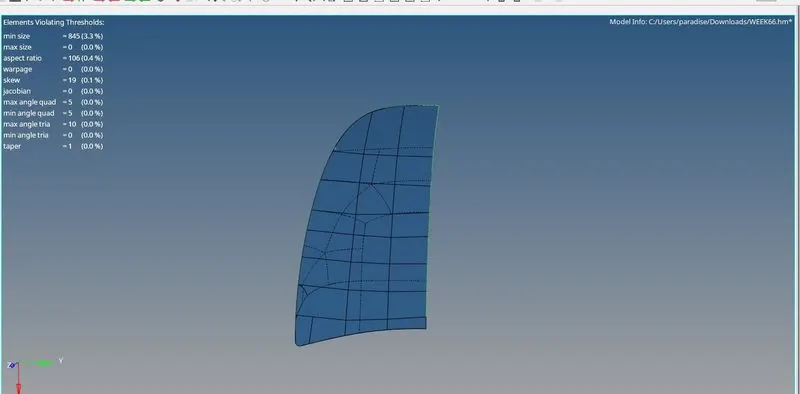
fig-meshed the half component
After meshing is done go to tools-reflect-then select surface-then click on duplicate -original-then select the axis and select base and then select reflect and it will reflect with the same mesh.
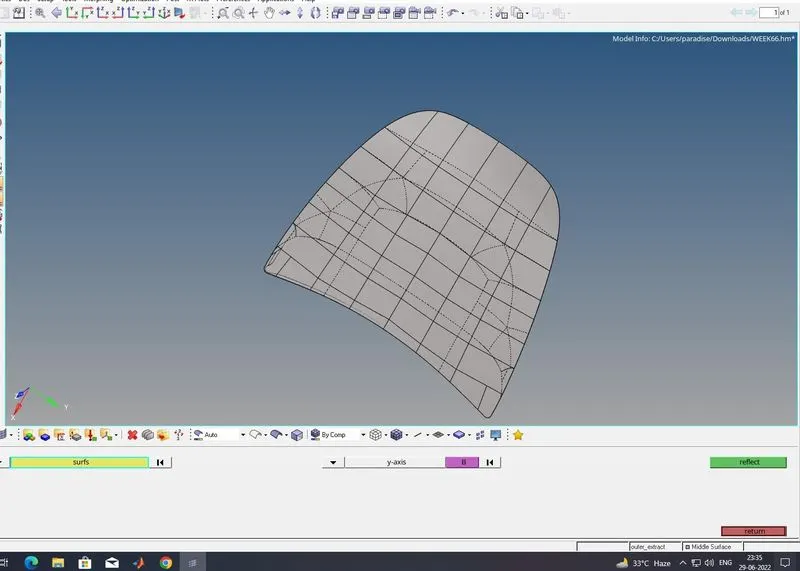
fig-reflected the component
3.latch
Now select the latch extract
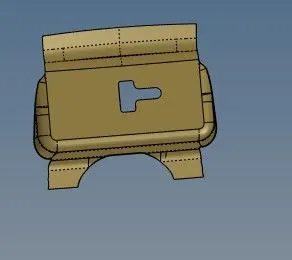
fig-latch
First delete the solid by clicking on delete - solid-select entities-delete
Now check if there is any deformation in geometry and repair it if any
Then create midsurface by going to geometry -midsurface-create
Then new file will be made named middle surface rename it accordingly
Now the main part is mesh
Before doing mesh there are different methods like only work on half geometry then reflect it or do the mesh on whole component.
Here,i have done the mesh on whole component.
First, i used washer split on the shape which are hollow by going to geometry quick edit-washer split
Now, create surface split and toggle the other lines because mesh gets properly in square shapes by going to geometry -surface split node and for toggle go to geometry -toggle
Now,go to 2D-Automesh-select the surface and select mixed and give the value 5 for target element size and then click on mesh.
Now,try to minimise the tri elements as much as possible
Things i have done to minimise the tria elements
Rebuild mesh multiple times by going to 2D-rebuild mesh
Go to quality index by going to 2D-quality index and check how many elements are failing and worse conditions and correct them using cleanup tools in quality index.
Use align option by clicking F7 key
Edit elements by going to 2D-edit elements and
See if there is any coloured elements and clean by selecting the elements and click on clean.
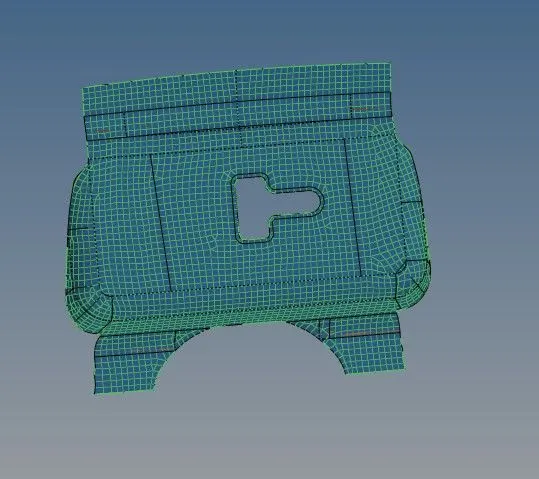
fig-meshed the latch
4.hinge
Select the hinge extract
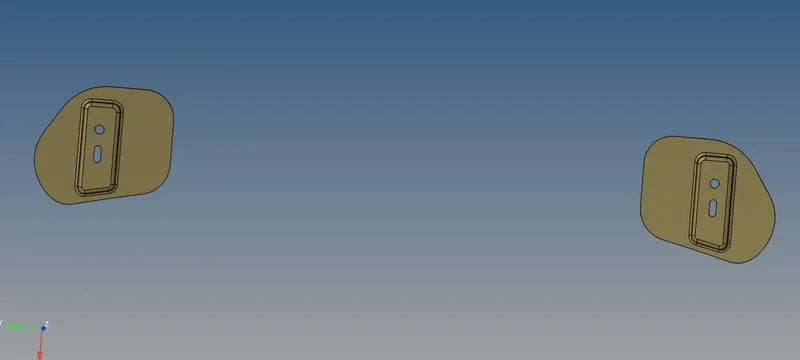
fig-hinge
First delete the solid by clicking on delete - solid-select entities-delete
Now check if there is any deformation in geometry and repair it if any
Then create midsurface by going to geometry -midsurface-create
Then new file will be made named middle surface rename it accordingly
Now the main part is mesh
Before doing mesh there are different methods like only work on half geometry then reflect it or do the mesh on whole component.
Here,i have done the mesh on whole component.
First, i used washer split on the Circle and other shapes which are hollow by going to geometry quick edit-washer split
Now, create surface split and toggle the other lines because mesh gets properly in square shapes by going to geometry -surface split node and for toggle go to geometry -toggle
Now,go to 2D-Automesh-select the surface and select mixed and give the value 5 for target element size and then click on mesh.
Now,try to minimise the tri elements as much as possible
Things i have done to minimise the tria elements
Rebuild mesh multiple times by going to 2D-rebuild mesh
Go to quality index by going to 2D-quality index and check how many elements are failing and worse conditions and correct them using cleanup tools in quality index.
Use align option by clicking F7 key
clean elements by going to 2D-edit elements and
See if there is any coloured elements and clean by selecting the elements and click on clean.
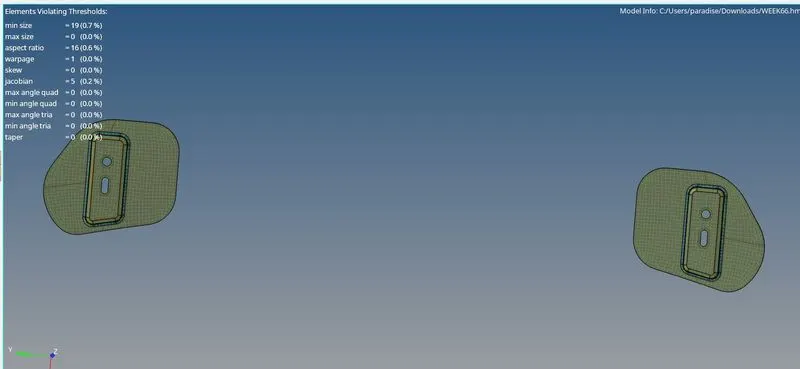
fig-meshed the hinge
conclusion
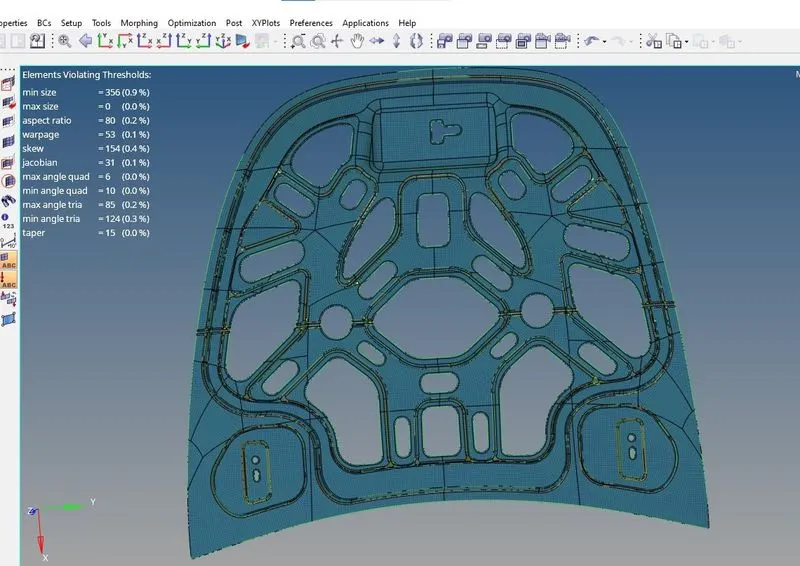
meshed the hood using the given quality criteria
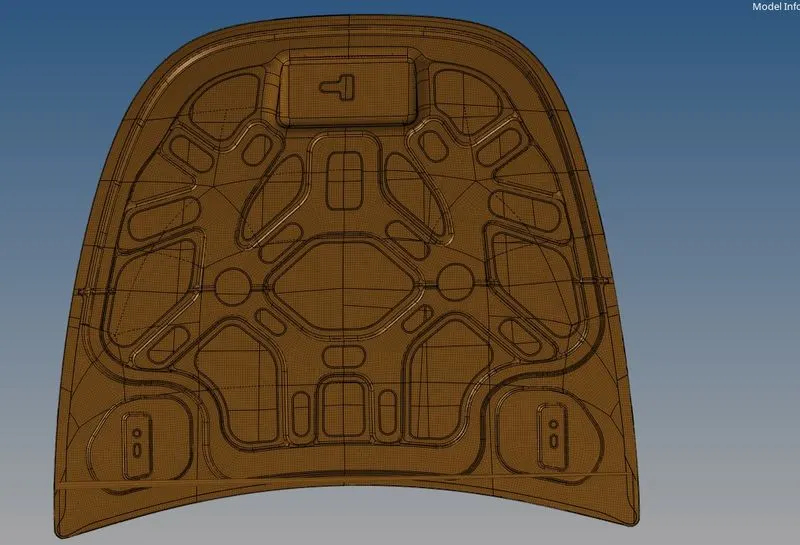
fig-how hood look after the meshing the whole component