Week 5 Challenge : Surface wrap on Automotive Assembly
AIM:
To learn about surface wrapping around an assembly, which is surface meshing along the entire volume. For the given model we need to do topo clean up and merge all the 3 components and then perform meshing The CAD models to which can be found here.
ENGINE
GEARBOX
TRANSMISSION
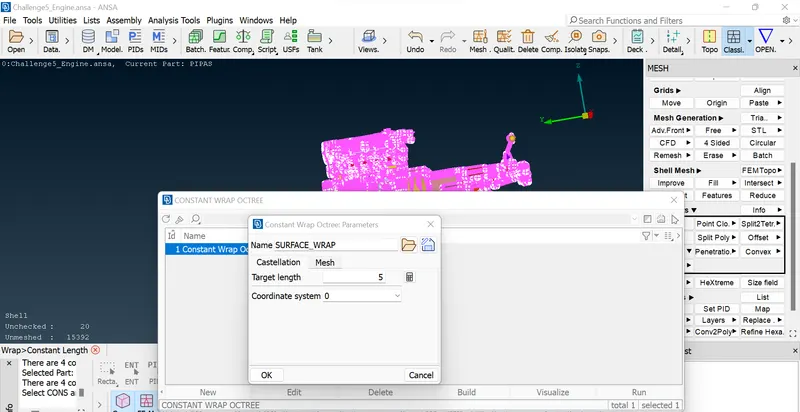
Target length = 5 mm
INTRODUCTION:
- Surface wrap is the process of meshing where the designer is only interested in the outside surface of the assembly i.e., the component inside the volume will be kept as it is. This kind of meshing is only used for the simulation in which weare interested in the outer surface only like external flow simulations.
- ENGINE MODEL
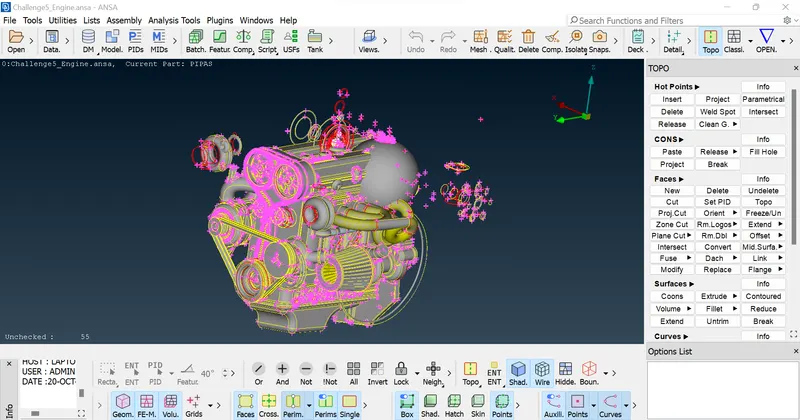
- As we can see there are many rings like surface which don’t look like of any use as this ring are used by designer sometime
to create fillets in the model so we need to delete all those surfaces which don’t have any significance Now, in wrap meshing
the interior part is not that important so we don’t need to worry about all the single cons or all the overlap surfaces but it
is good practice to delete all the unwanted surfaces so make the geometry as fine as we can. - FOR THE ABOVE MODEL WE NEED TO START WITH DELETING THE RINGS ON EVERY FILLET.
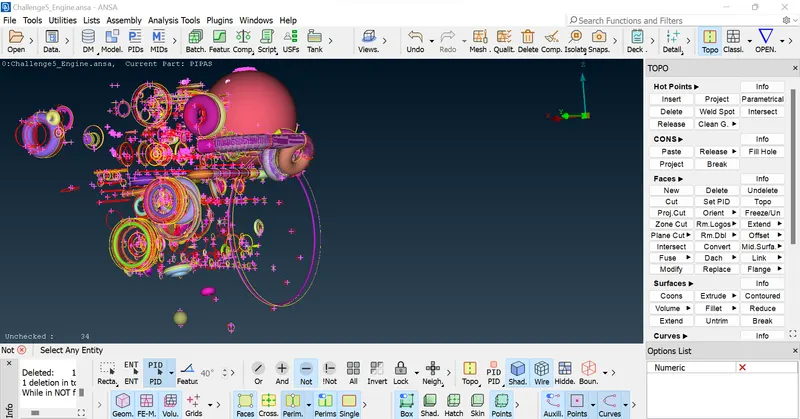
- An easy way to so look at all the rings quickly we can use NOT Option with PID selection and we can hide the important parts by which we can see all the rings clearly and then we can carefully delete the unwanted surfaces.
- Also, the above pipes which can be seen as overlap surfaces are not important so can be deleted also in wrap meshing the part which has small thickness can be deleted as we are using same target length for all the parts.
- After deleting and closing all the open holes, closing all the holes is important as in wrap meshing the outer surface will be selected and if the opening and it will mesh it from inside which we don’t need so we need to close all the open holes.
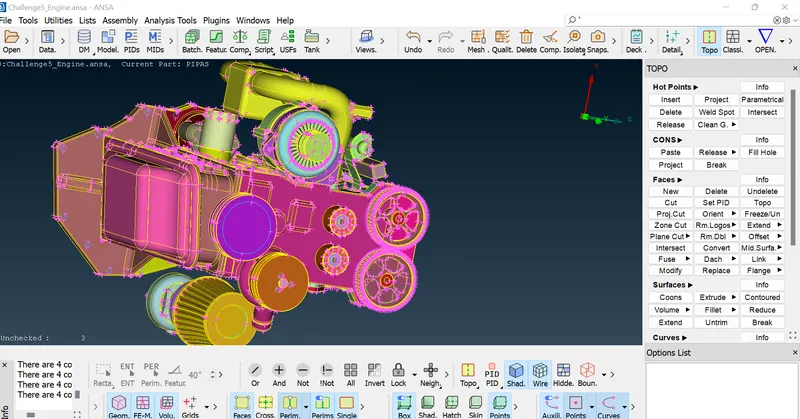
- TRANSMISSION
- We don’t need to worry about the internal surface but on external surface we need to close the holes and make it even.
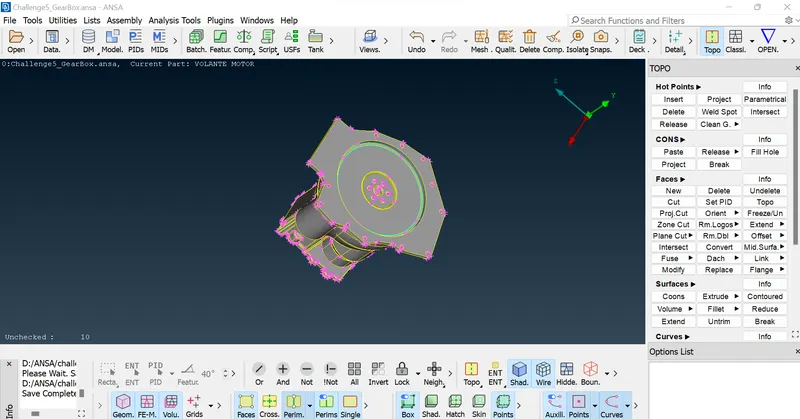
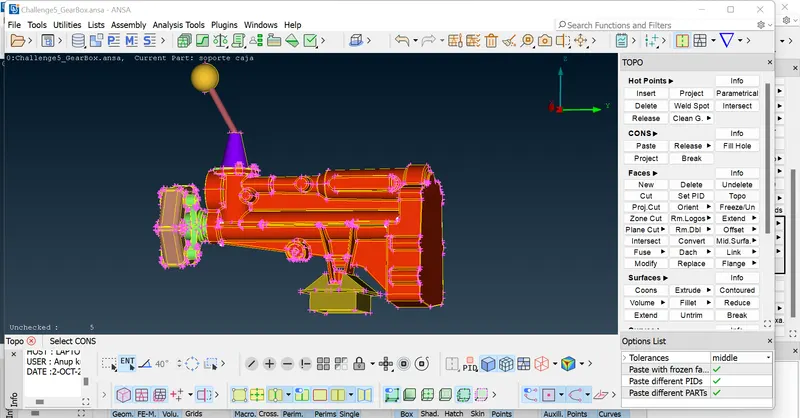
- GEARBOX
- Similarly, we need to do topo clean-up and close all the openings.
- MERGE:
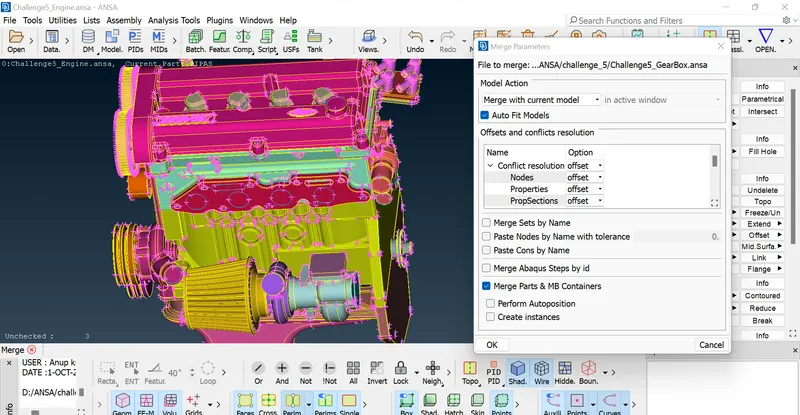
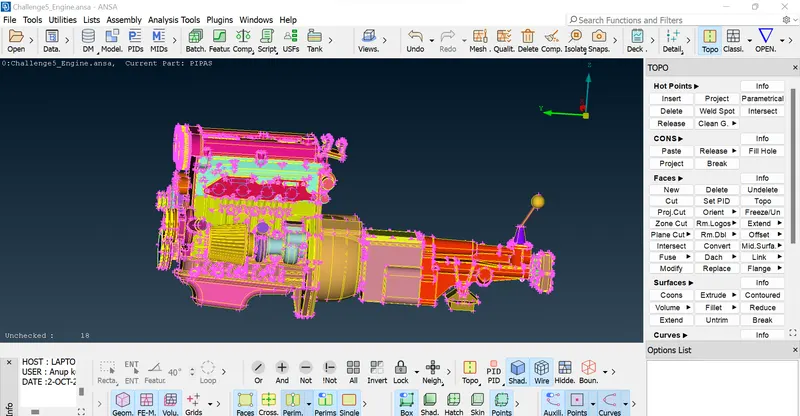
- After cleaning all the models, we can merge them wo create an assembly, For merge we can go to FILE-> MERGE.
- SURFACE WRAP
- We can Wrap the above model by using wrap option in the mesh option.
- Compress or Delete all the Non- Assigned PID's for the final Surface Wrap.
-
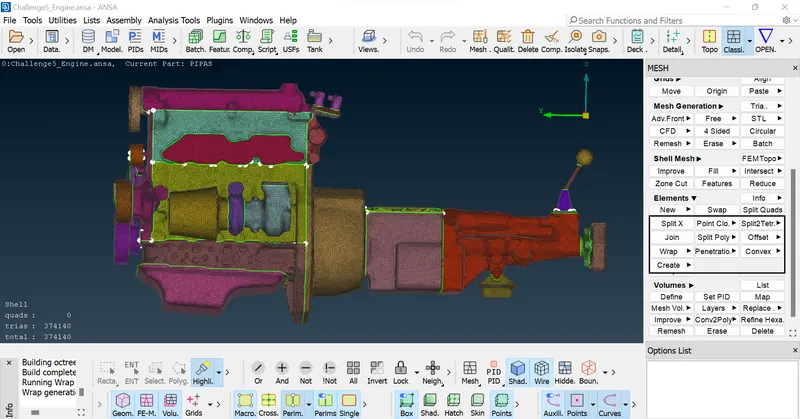
Select all PIDS and put it in right box those will get selected, as shown there are 72 items. It will take 10-15 min.
- Conclusions
- We learned to merge the geometry and then we created the surface wrap mesh.The surface wrap is achieved on the given powertrain components.
- The surface is easier to perform since it does not depend on the quality of the wrap on each material as we are not interested in physics in the body.
- The effective surface wrap is achieved on the given body for a given mesh length of 5 mm.
- TO ACCESS THE FINAL GEOMETRY PLEASE GO THROUGH THE FINAL LINK.
https://drive.google.com/file/d/1gV-1iPr-L2TRr14igo27eq0CPtyxH-LO/view?usp=sharing
https://drive.google.com/file/d/1sEjdSEJv9BnF_r5zCIyBOldyVemmx3lM/view?usp=sharing
https://drive.google.com/file/d/1rf8m7TZEEKfOAG_NpU19_utwjZKVaDHE/view?usp=sharing
https://drive.google.com/file/d/1avIbyCQda2BhNP06pIqbuu8wtZe8_y0c/view?usp=sharing