Week 4 Challenge : CFD Meshing for BMW car
AIM:
The aim of this project is to mesh a BMW car model create a wind tunnel for CFD analysis using ANSA software .
- Import the CAD model
- Display setup
- Geometry check-up
- Creating the PIDs
- Defining the Element size or length
- selection of meshing type
OBJECTIVE:
The aim of this challenge is to perform geometry clean up on a BMW car
perform surface meshing with the following parameters
Body - 3 mm
Lights - 4 mm
Grills - 1 mm
Rims and Tyres - 2 mm
Optical Rearview mirror - 2 mm
Window - 2 mm
Silencer - 3 mm
Logo - 1 mm
and create a wind tunnel for CFD analysis using ANSA software
PROCEDURE
- STEPS TO OPEN A FILE IN ANSA
- Click on File
- Select Open
- Select File (FORMAT .igs/SLDPRT .ansa etc.)
- Click Open
- A translator window appears CLICK OK
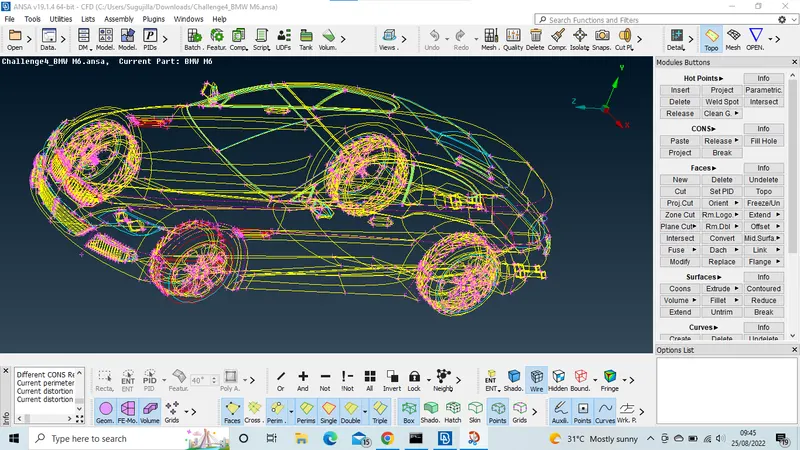
As the part gets opened in ANSA, firstly it is in wire mode and in entity mode, for desirable visualization we have to change it to shadow mode (It is the visualisation of the part in solid 3D) and the ENT Mode to PID Mode.
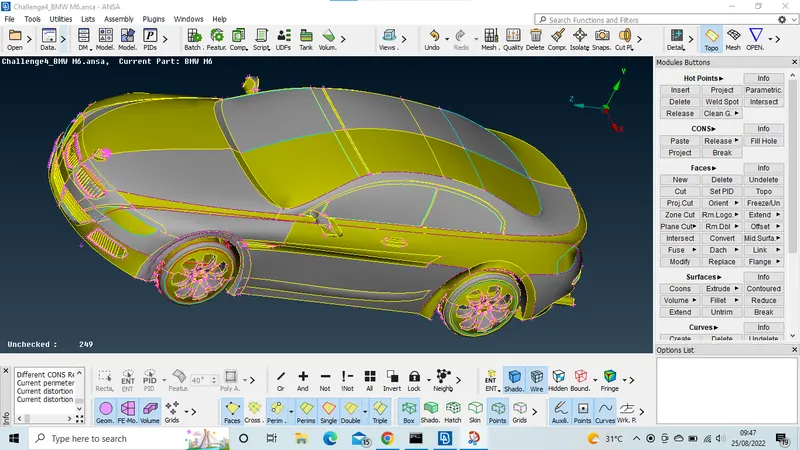
As we change it to PID Mode we need to change the colour of the edges in model for desirable visualization as for this we need to follow the following steps:
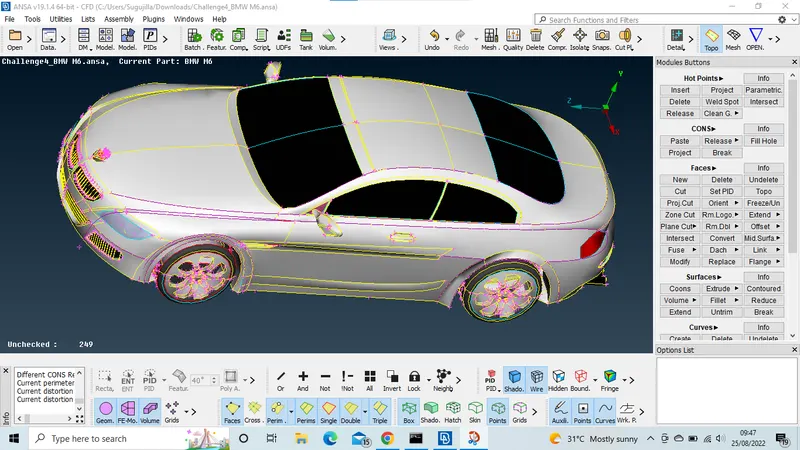
- Steps To Change The Colour Of The Edges In The Model
- Go to Quality criteria option (F11)
- Select the tab Presentation Parameter
- Under visualisation option select Draw CONS in PID
- Click Apply then click on ok.(Now the edges will be in yellow colour ).
- Checking The Geometry of the Model
- Goto checks option
- Select Geometry
- An information box will appear
- Click on execute to see the error though it should show no geometrical error for perfect meshing .
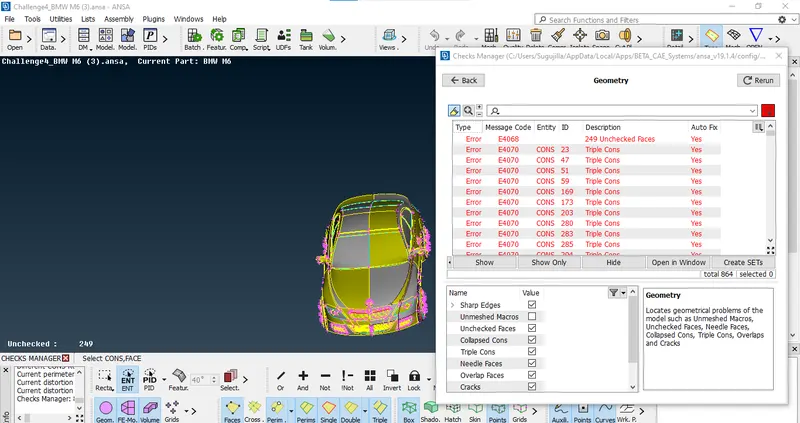
Open the given IGS file in ANSA software and the model will be as shown.
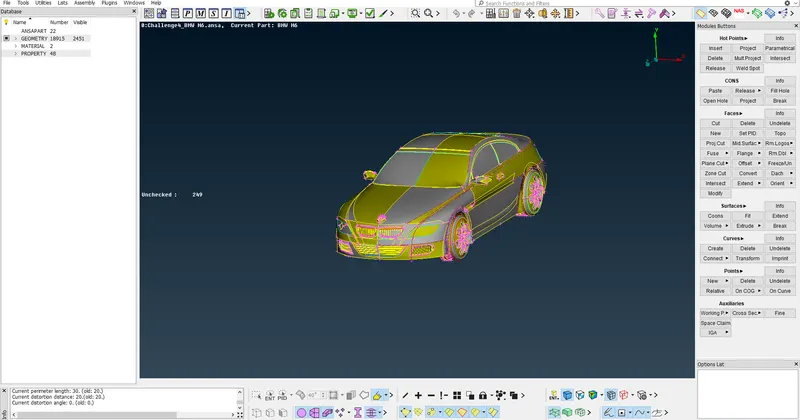
Enable the shadow mode and it shows the 3-D figure and keeps the model in PID mode
Using the shortcut to reduce the unchecked parts and clean up
- GOTO MESH
- PERIMETERS
- CLICK LENTH(1MM) AND APPLYING
Enable all the cons and crosshatches to perform geometry clean up and also goto MESH > PERIMETERS> LENGTH and keep the length as 1mm to have smooth curves
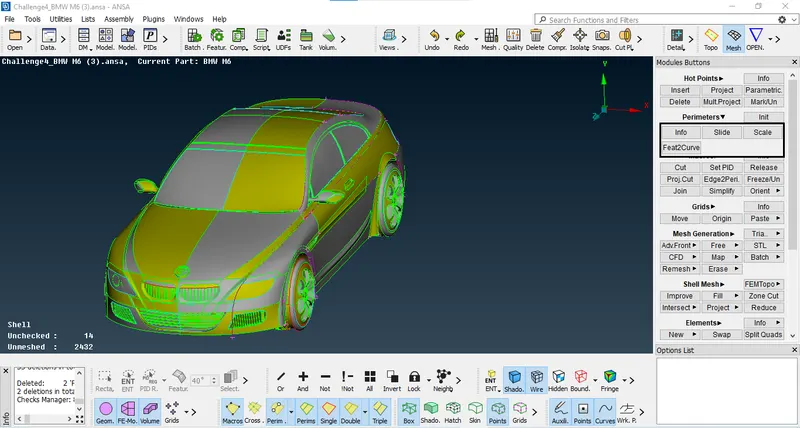
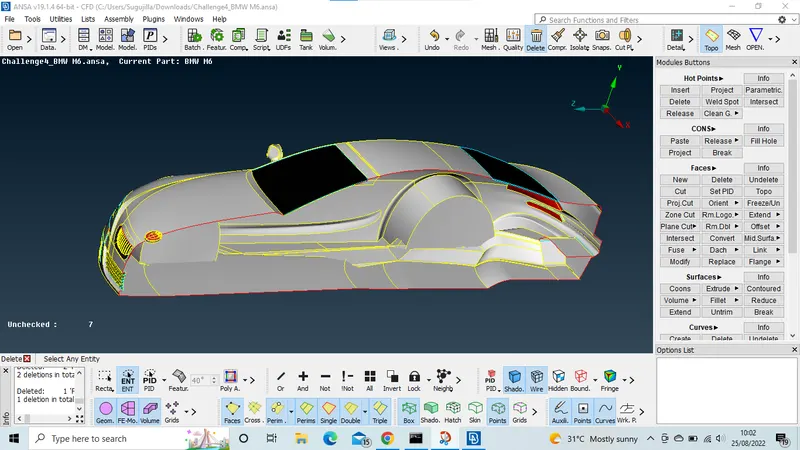
We can see that the geometry of the car is symmetric hence we edit one-half of the model and mirror it to get a full model. The right side of the model has more errors than the left side hence we delete the right side of the model.
- USING TOOLBAR
- CLICK DELETE
- SELECT THE ONE-HALF
- AND CLICK MIDDLE BUTTON
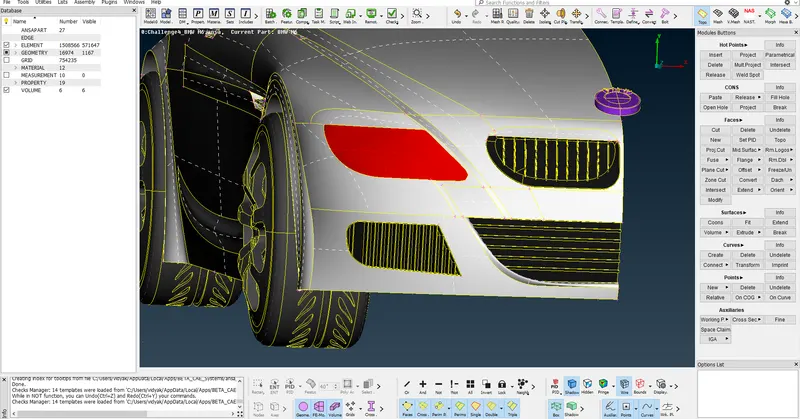
GEOMETRY CLEAN UP OF GRILLS:
Assigning Property to the model
To assign the property to the model we need to select TOPO MODE (upper right of the menu tool box)
- Go to TOPO MODE
- Under FACES sub-menu
- Select Insert the hot points(shown as Pressure value)
To perform geometry clean up for SIDE GRILL we have to isolate the part and lock it by using NOT mode and LOCK mode
We have to delete the unnecessary surfaces on the grill
Goto FACES > CUT and enable the parametric cut and then cut the fins that are present on the grill
Perform to all fins and remove the unwanted surface
Goto FACES > NEW > COONS /FITTED to join the deleted surfaces by using these options and the geometry clean up is completed
Delete the half part of the car and perform the geometry clean up for the remaining parts
To perform geometry clean up for BOTTOM GRILL we have to isolate the part and lock it by using NOT mode and LOCK mode
Primarily we have to delete the unwanted surfaces by using DELETE option and make sure it is in ENT mode
Goto CONS > PROJECT and project the cons of the grills onto the surface and delete the unwanted surfaces
Sometimes we can create a new surface by deleting the old surface according to our necessity
Goto FACES > NEW > COONS /FITTED to join the deleted surfaces by using these options and the geometry clean up is completed
Perform similar operations on the INTAKE GRILL
Remove the interior extruded surfaces by using the DELETE option
GEOMETRY CLEAN UP FOR BOTTOM SURFACE AND TYRES:
First, isolate the tires by using NOT and LOCK Mode
Then remove one of the tires because it has more errors and we cannot rectify and we can replicate the part by using the SYMMETRY option
Goto CONS > PROJECT and project the cons of circles of tires onto rims
Then DELETE the common surfaces present in between tires and rims
Thus geometry clean up of tires is completed
Remove the unwanted surface on the bottom part and also not associated with wheels
Perform operations for EXHAUST also
Perform same operations as mentioned above and complete the geometry clean up
After performing geometry clean up for all parts perform geometry checkup by hiding single cons
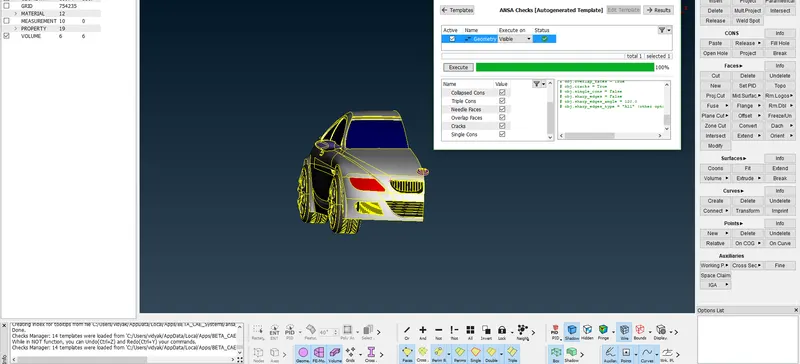
ASSIGNING RELEVANT PID's:
To assign PID's for the given figure, goto PID MANAGER tool
It shows all the PID's assigned to the figure
First, isolate the body and lock the figure. Then goto > PROPERTIES it shows the PID's assigned to the body so we have to rename as BODY by creating a new PID
Repeat the same process and assign PID's to all parts of the car
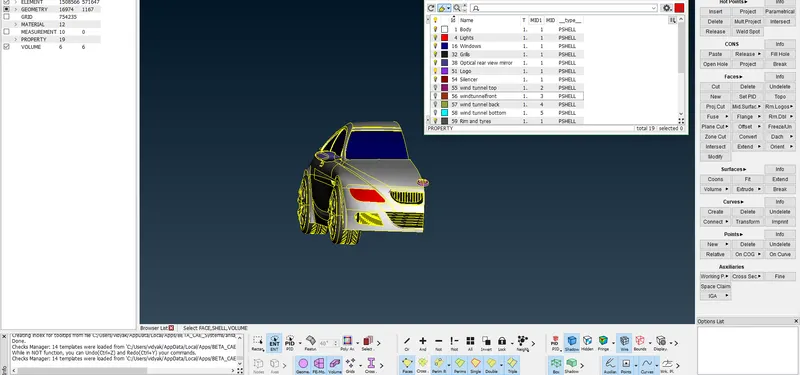
SURFACE MESH:
Mesh the surface according to the given parameters
Body - 3 mm
Lights - 4 mm
Grills - 1 mm
Rims and Tyres - 2 mm
Optical Rearview mirror - 2 mm
Window - 2 mm
Silencer - 3 mm
Logo - 1 mm
- GOTO MESH
- PERIMETERS
- LENGTH AND MACROS (APPLYING GIVEN THE QUESTION)
Use TRIA elements and the mode of mesh is a spot mesh
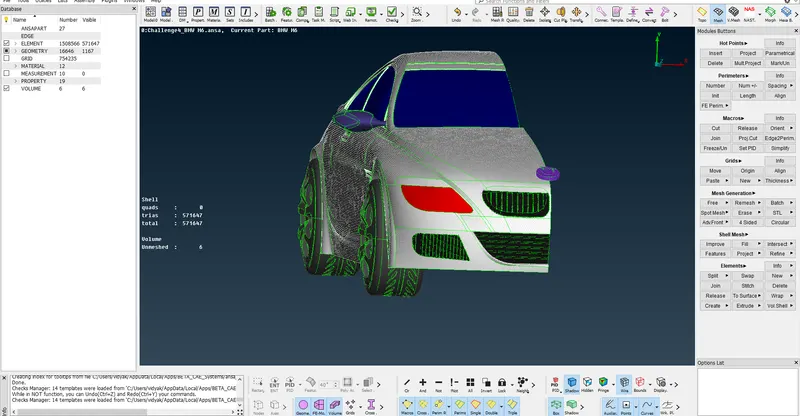
After the surface mesh checks can be done and eliminate the errors that occurred in the mesh model using tools like move, reconstruction, and split.
ELIMINATION OF SKEWNESS, MIN LENGTH, AND MAX LENGTH ERRORS:
Goto mesh quality criteria and adjust the parameters to standard values
In our model MIN LENGTH = 1mm so the limit is set to 0.2 mm and MAX LENGTH = 4mm so it is set to 5mm
Apply the changes and the errors that appeared on the left side of the screen and we have to eliminate those errors and it is shown as OFF elements
Goto SHELL MESH > RECONSTRUCT to reconstruct the model to eliminate min length and max length errors and make sure that the elements are within our limits
To find skewness error goto skewness and right click then click on the show only it will show only skewness error
This error is rectified by using GRIDS > MV SURF option or GRIDS > PASTE options and also by reconstructing the structure
After eliminating all errors it shows OFF ELEMENTS is zero
SYMMETRY:
Goto TOPO mode and perform the symmetry operation for the model
First, we have to isolate tires and lock the remaining model
Goto SYMMETRY > COPY and copy the entire model and select the MIRROR 3 POINT PLANE and select three nodes then it replicates the other image
For safety use the TOPO option to make all cons to double cons by selecting the entire model
In order to perform symmetry on the front tire goto POINTS > ON COG to locate the center part of the tire and use undelete option to retrieve some part of the tire and locate the midpoint of other tires
Perform symmetry Operation by copying tire and translation using two nodes
Change the threads on right-side tires using the same option
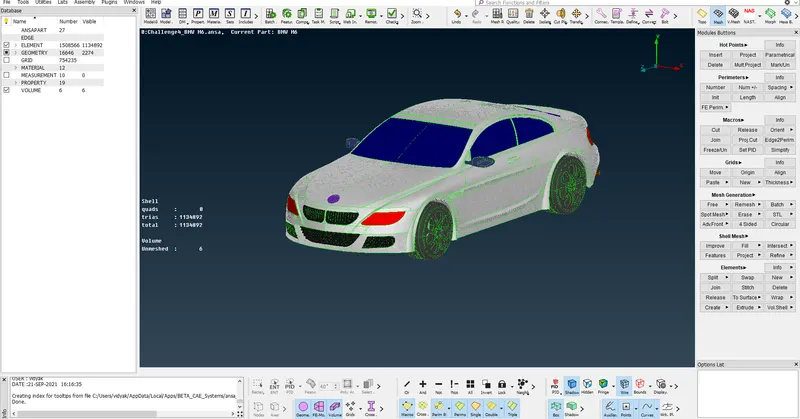
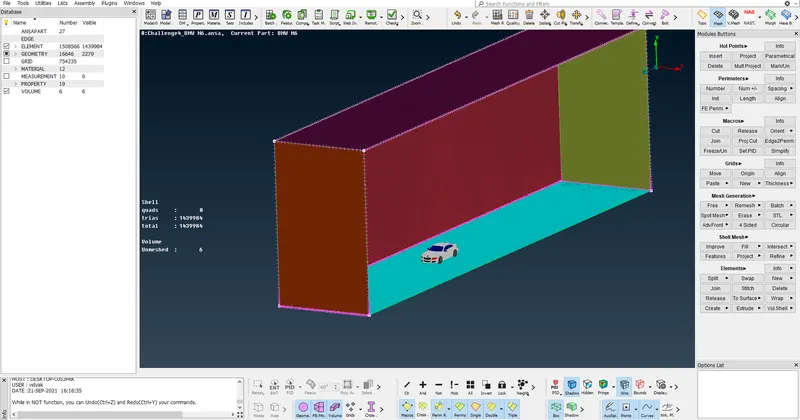
CREATION OF WIND TUNNEL:
To create the wind tunnel first calculate the length of the car
Then goto > POINTS > NEW and create points in all directions according to the directions of the wind tunnel
Create three nodes that are responsible to draw a plane
Goto surfaces > PLANE and draw a plane using those three nodes and replicate the same plane using translation symmetry
Repeat the same procedure for the other two sides
Goto CONS > INTERSECT to intersect all planes and delete the unwanted surfaces
Thus wind tunnel is created and assign PID's to differentiate INLET and OUTLET
MESH OF WIND TUNNEL SURFACE LINES:
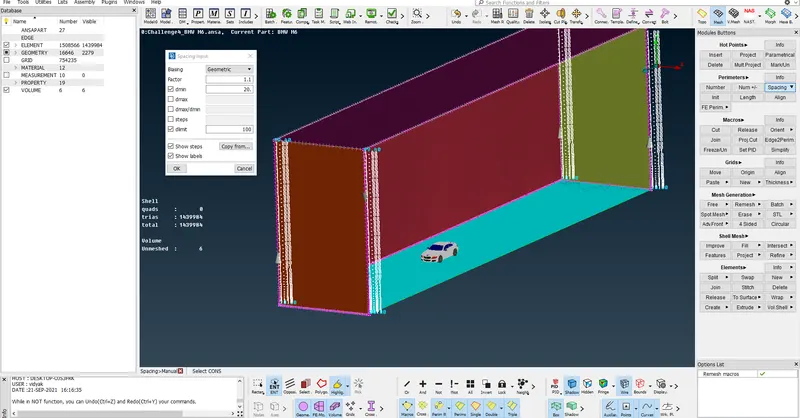
Sides of the bottom of the tunnel of length 20mm
Sides of front and back as of length 50mm
Sides of top of the tunnel of length 100mm
Then goto PERIMETERS > SPACING > CONSTANT LENGTH and assign min value as 20mm and max as 100mm and assign to all front and
backsides
CONCLUSION:
The BMW car model has been meshed with the given criteria. A total of 1508566 2D elements have been generated. The generation of 3D elements for this model requires huge power resources and time. Hence the volumetric meshing of this model cant be done.
The link for the meshed model can be found here
https://drive.google.com/file/d/1Ej1fJbKJ5DwmzAWRP7OnPdJrydNhwMxn/view?usp=sharing