Week - 4
AIM:
- Implement control logic of a “washing machine” using Stateflow as per given sequence:
- If the power supply is available, the system gets activated
- If the Water supply is not available, stop the process & indicate through LED
- Soaking time should be 200s followed by Washing time of 100s.
- Then rinsing happens for the next 20s & dryer runs for 50s
After all the processes have completed turn on the finished LED
2. Make a Simulink chart for the “Gear shift” logic as per the below conditions:
Speed Range(km) Gear
0 to 15 1
16 to 25 2
26 to 40 3
41 to 60 4
Above 61 5
Give speed input while the simulation is running & display the gear number.
PROCEDURE:
1. Washing Machine
A washing machine is a machine used to wash various types of clothes without applying any physical effort. With a washing machine, you don’t have to rub the clothes with your hand or squeeze them to remove the water from them. The washing machine is also called a clothes washer or simply a washer. The washing machine enables you to wash your clothes automatically without having to supervise its operation. All you have to do is put the clothes in the machine and select the wash mode. The washing machine automatically takes in the amount of water and detergent required and it also automatically sets the timer for washing, rinsing, and drying as per the selected mode and the number of clothes.
Stages of washing machine:
Let us now undergo the stages of a washing machine which in turn helps you to understand better and pick the option depending on the basis of your need successfully.
- Prewash
- Washing
- Rinsing
- Spinning
As per challenge, conditions for the washing machine are:
- If the power supply is available, the system gets activated
- If the Water supply is not available, stop the process & indicate through LED
The sequence of the washing machine along with its operational time is;
- Soaking time 200s
- Washing time 100s.
- Rinsing time 20s
- Drying time 50s
From the above it is evident that, at first we need to understand the sequence of the operation, and implement it. Then provide it with the condition.
This is what it looks like in the State flow chart:
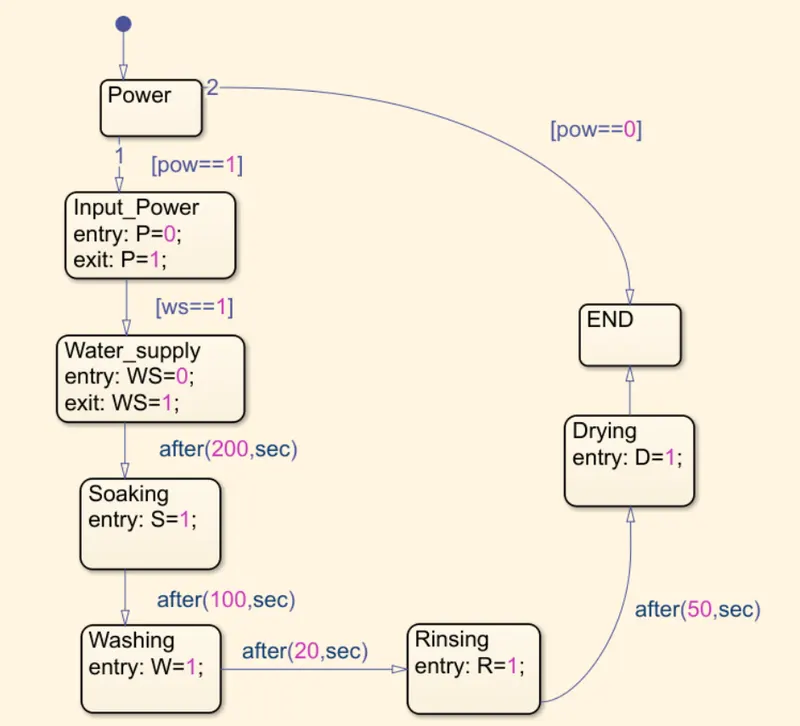
Fig: Stateflow for sequence of operations
The first block with input is taken. The block is named as Power. The logic is, if there is power the value will be 1 else it will be 0. To implement this another block is taken, where we input the name as Input_Power. We give input variable of power as pow. When pow is 1, then the process will go ahead, else it will end. After input power, if the water level is checked. If the water level(ws) is not 1 then process will not go ahead. When process goes ahead. First the soaking operation takes place for 200 sec. For this there is an inbuilt function called after in the Event naming. When we use after we can give the timing that process will stay in for. Basically in that time the process will be going on for the mentioned time. The next process is Washing, which goes ahead for 100 seconds. Then rinsing for 20 sec and then drying for 50 seconds. Once this is completed the process will end. We have used various variable. First during input we have taken P. When the process goes ahead the value of P is stored as 1. We stored this is exit statement. The same is done for Water level (WS). For soaking, washing, rinsing and drying we have used the entry condition to showcase the process is going on.
Once it is done, we need to define the input and output variables. The ports are first defined as input and output data. What it essentially do is give the ports to the chart.
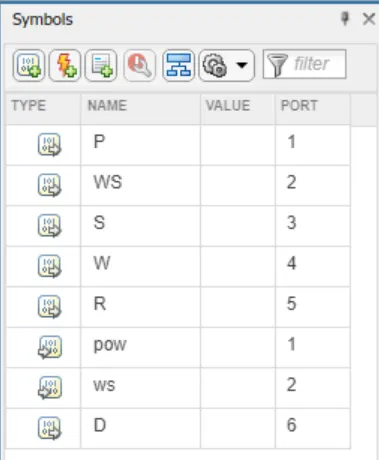
Fig: Defining the input and output data for port
The simulink model for Washing Machine along with stateflow chart is:
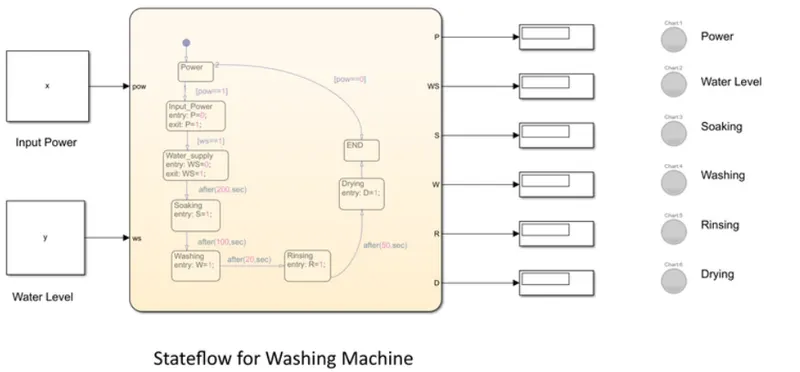
Fig: Simulink model for Washing Machine
Modeling of Washing machine in Simulink:
these are the following things we need for modeling the subs system of washing machine logical block settings:
1. Toggle switch
2. Constant
3. State flow chart
4. Lamps
5. Display
The input data is the constant named x and y. The display is used to see the result. The value of x and y that is the condition is given by user from the command window. We have used lamp here to display the operational success of the process. We map every display with the lamps. When there is no power the signal will display red colour else green. When there is no water the signal will display red colour else it will display green colour. Only if first two process is a success rest of the operation takes place. The logic behind that is, if the values comes out as 1 the signal will display the green colour.
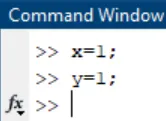
The input for x and y is given from the command window.
In case of power on and filled water level, x and y are 1:
In case of power off and no water, x and y are 0;
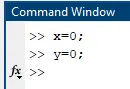
In case of power on and no water, x is 1 and y is 0;
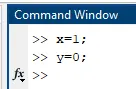
The timer is set for time over total operation time (370 s). Lets say time is 400 s
2. Make a Simulink chart for the “Gear shift” logic as per the below conditions:
Speed Range(km) Gear
0 to 15 1
16 to 25 2
26 to 40 3
41 to 60 4
Above 61 5
Give speed input while the simulation is running & display the gear number.
The Transmission operating mechanism:
To effect a gear change, selecting first gear, for example, the driver depresses the clutch, disengaging the input shaft. Using the shift lever, the driver selects the first gear, and the linkage moves the shift fork to connect the 1st-2nd locking collar with 1st gear, locking it to the output shaft. Now, when the clutch is released, engaging the input shaft, the output shaft turns because 1st gear is locked to the output shaft by the locking collar.
As the driver speeds up, selecting 2nd gear simply involved repeating the process, but moving the shift lever to 2nd gear. The shift shaft moves the shift fork to disengage 1st gear and engage 2nd gear. Releasing the clutch engages the input shaft again, this time routing power through 2nd gear. Changing to 3rd gear involves using a second shift linkage, shift fork, and locking collar, this one between 3rd and 4th gears.
Because the countershaft and output shaft turn at different speeds, moving from 1st to 2nd gear, trying to engage a higher gear while the vehicle is moving slower would be like trying to turn the shaft at two different speeds, which is impossible. Synchronizer rings are like tiny clutches, using friction to bring the locking collar and the gear to the same speed, at which point they easily mesh and power can be reapplied.
Before we go into the Simulink for the transmission box simulation w need to follow the below conditions for the setup.
Speed Range(km) Gear
0 to 15 1
16 to 25 2
26 to 40 3
41 to 60 4
Above 61 5
and by doing so we do that in a coded pttern in the state flow chart wich we get to see below:
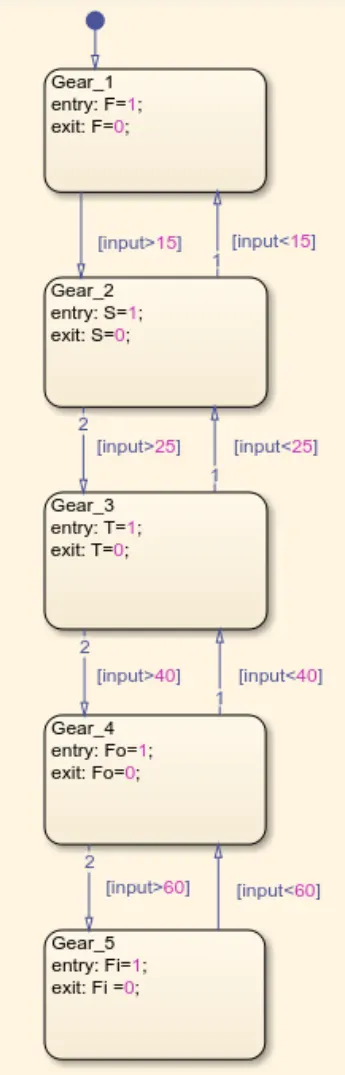
Fig: Stateflow for Gear Shift
The condition using if is bidirectional, that is if the speed crosses certain limits it goes in next gear, if price is less than than certain limits, it goes previous or lower gear. For above condition if the speed is above 15 system goes in second gear else it remains in the first gear. If the speed is above 25 the system goes in third gear or it will fall below it. Likewise the condition goes for the gears above. Here the variable F, S, T, Fo, Fi is used for entry and exit statement. If the gear is in some postion, its entry value will be 1 and evrything else values is 0.Once it is done, we define this variable as an ouputor input data set.
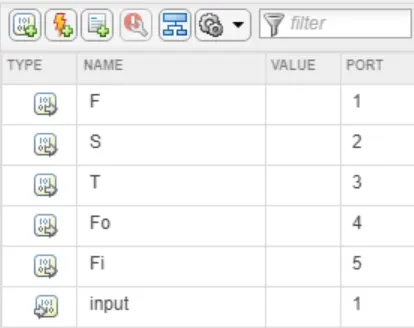
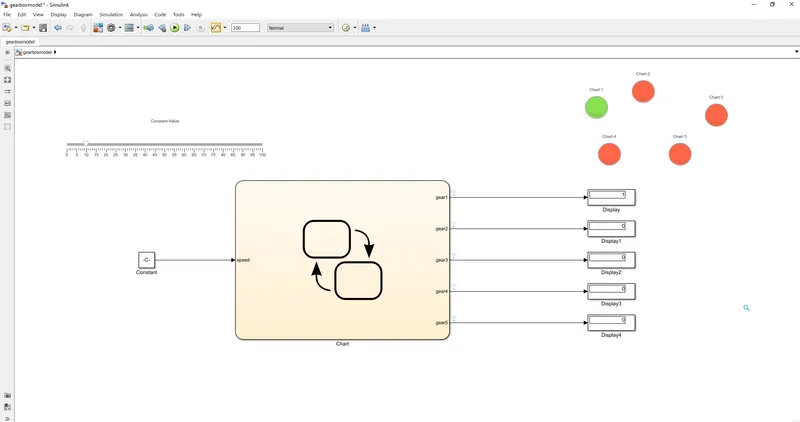
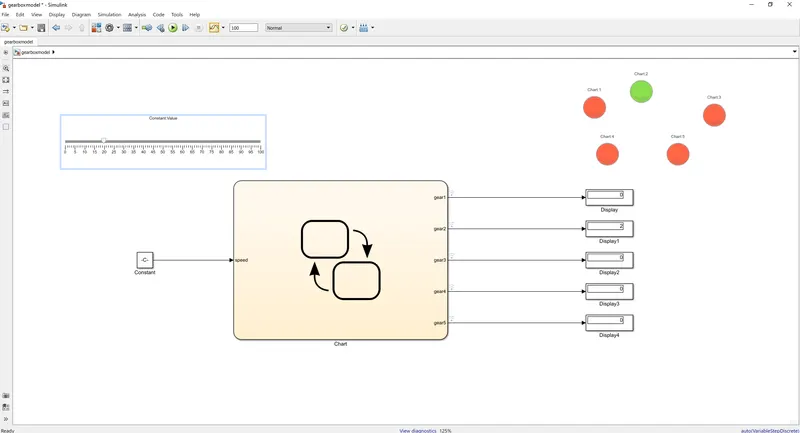
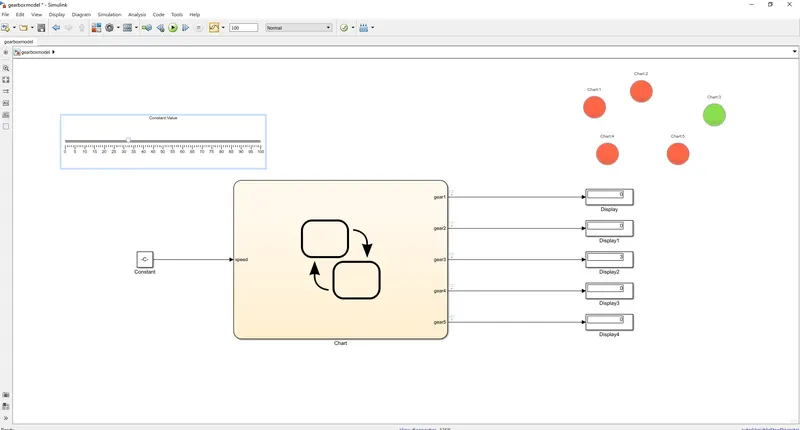
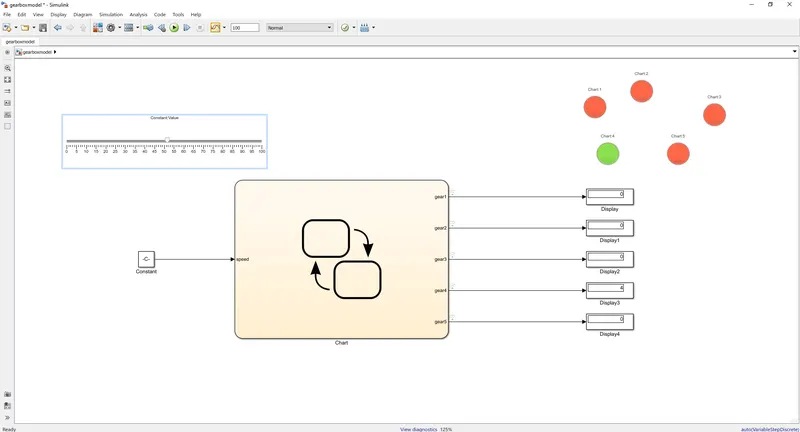
These are the following block setup did we need for the setup:
1. State flow chart
2. Slider
3.Constant
4. Display
5. lamps
and the output is just as similar as it is
0 to 15 1st gear
16 to 25 2nd gear
26 to 40 3rd gear
41 to 60 4th gear
Above 61 5th gear
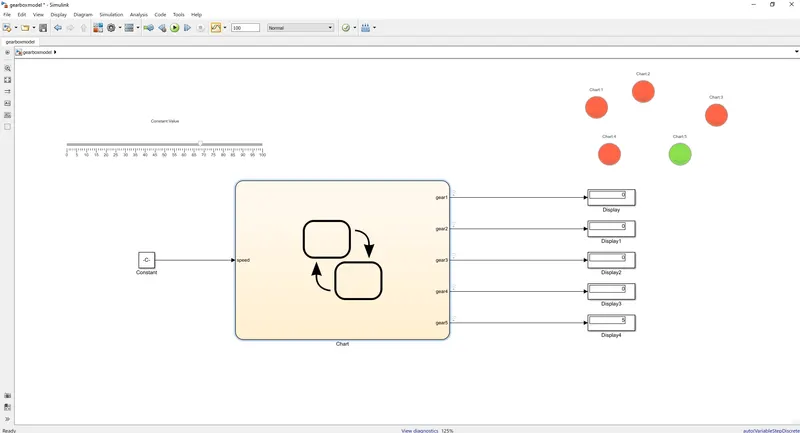
and that's how we did the Gear shift logic in the simulink.
As speed is below 15 kmph, we see system is in First gear.
As we can see the lamp is lit according to the gear it shows and the gear is at the current running according to the speed we selected from slider.
CONCLUSION:
- Implemented the control logic of a washing machine using Stateflow as per the sequence.
- Created a Simulink chart for the “Gear shift” logic with the given conditions