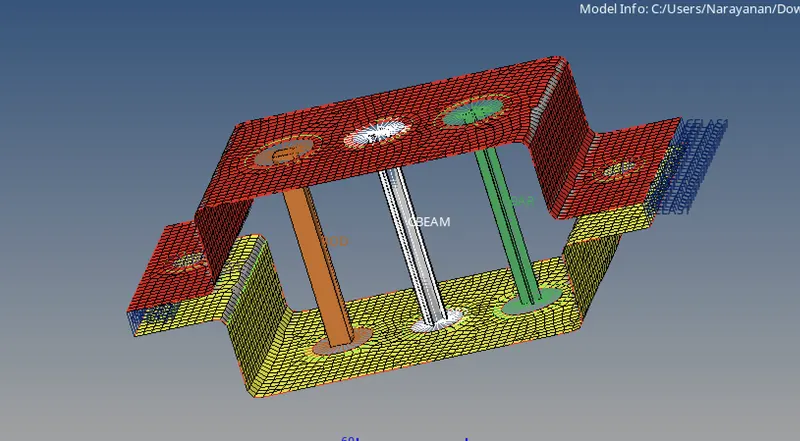
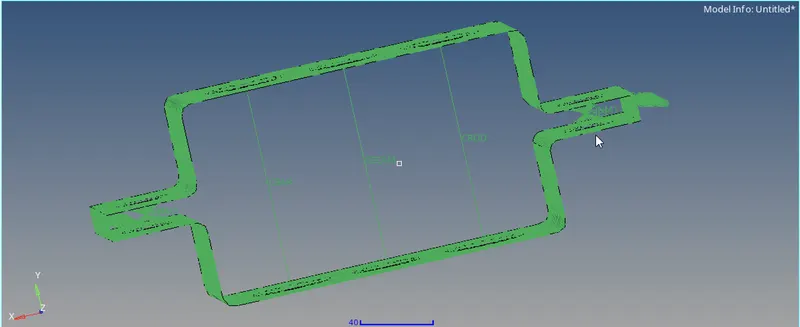
Week 4-1D Element Creation Challenge
Objectives:
1.Mesh the Given component with the Size of 5 Units. Create 1D elements on the following component with given cross-section and DOF
a. Rod element:- Translational DOF should be Constrained with RBE2 link
Cross-Section: BOX- Dimension a= 12 mm
dimension b=10 mm
Thickness t= 0.75 mm
b. Beam element:- All DOF should be constrained with RBE3 link
Cross-Section: I Section- Dimension a= 8 mm
Dimension b= 10 mm
Dimension c= 8.5 mm
Thickness t1= 0.75 mm
Thickness t2= .6 mm
Thickness t3= .6 mm
c. Bar element:- Constrain only x and y DOFs With RBE3 link
Cross-section: X section- Dimension DIM1= 5 mm
Thickness DIM2= 1.2 mm
Dimension DIM3= 10 mm
Thickness DIM4= 1.2mm
d. & e. Apply the mass of magnitude 10 with the RBE2 link
f. Join the two components with Spring elements
PROCEDURE:
1. Import the Geometry through IMPORT-GEOMETRY as IGST file.
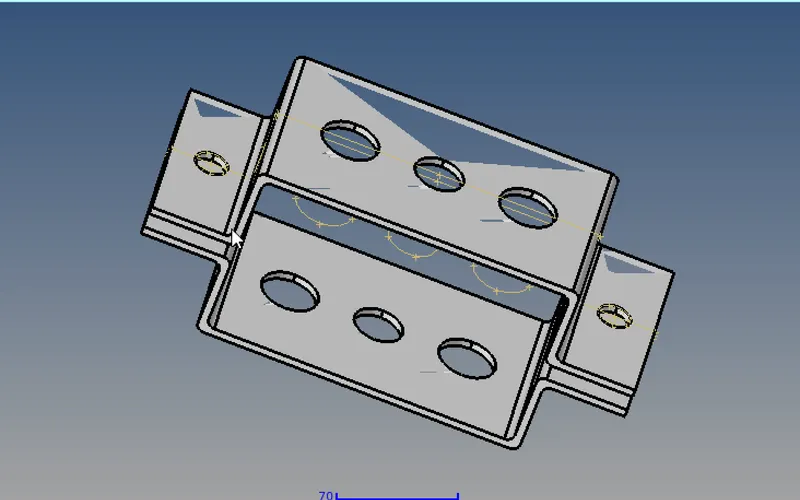
2. Creating a mid surface of the solid using GEOM-MIDSURFACE option
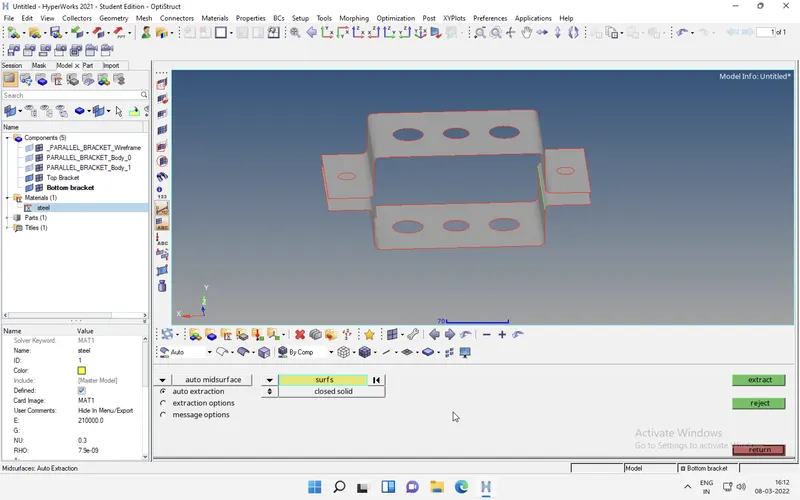
3. Given geometry is in symmetric shape so we can extract midsurface by AUTO EXTRACT option
4. Before going to mesh we create washer for all pinhole using GEOM-QUICKEDIT option
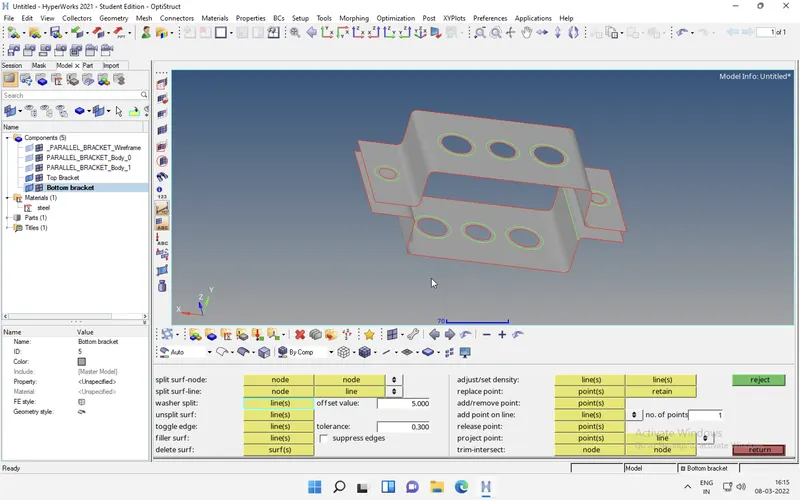
5. After creating washer then goto 2D-AUTOMESH option and set element size as 5
6. Then goto Material menu set mat name as STEEL card image MAT1
7. Then select create/edit option set youngs modulus E value,NU value,RHO value.
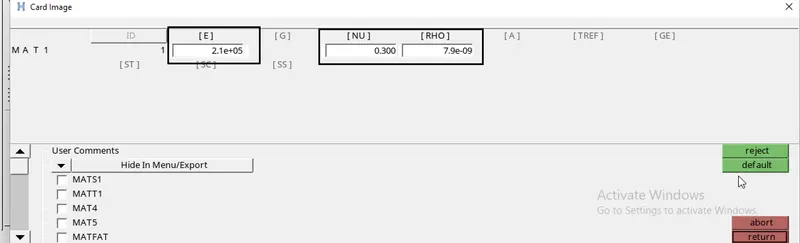
A. Rod element
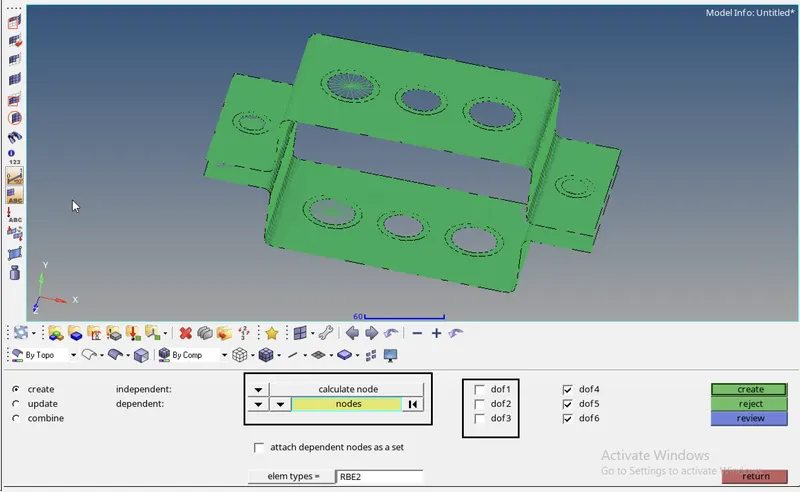
1. Then goto 1D-RIGIDS option set node as MULTIPLE NODE and CALCULATE NODES then select nodes through pinholes A
2. Before create rigid make sure to deselect the dof1,dof2,dof3 to make Translational DOF as Constrained then create RIGID element.
3.Then goto HYPERMESH select standard section and select hyperbeam in standard section library and Thinwalled box as standard section type.
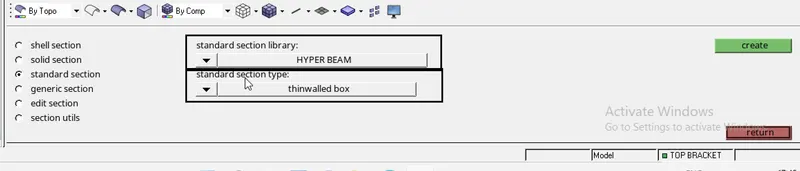
4. Set dimension as Dimension a= 8 mm Dimension b= 10 mm Dimension c= 8.5 mm Thickness t1= 0.75 mm Thickness t2= .6 mm Thickness t3= .6 mm
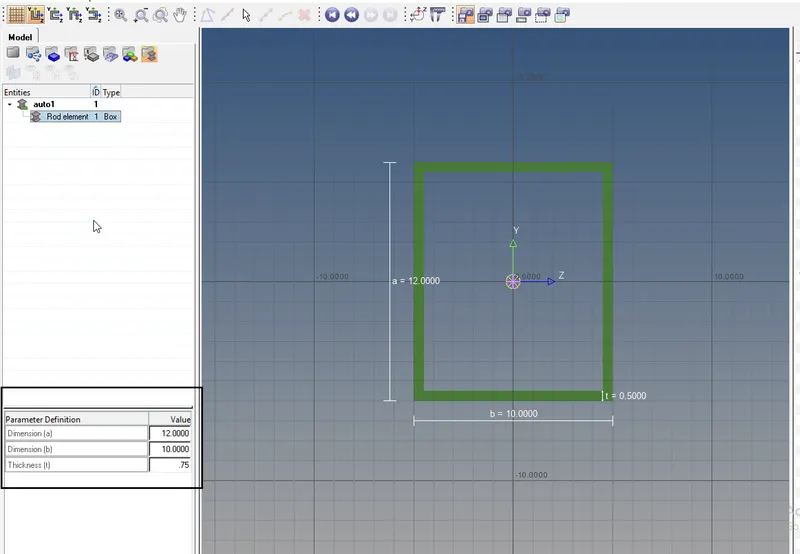
5. Now create property use Property menu set prop name as ROD ELEMENT card image as PBAR beam section as Rod element create in hyperbeam.
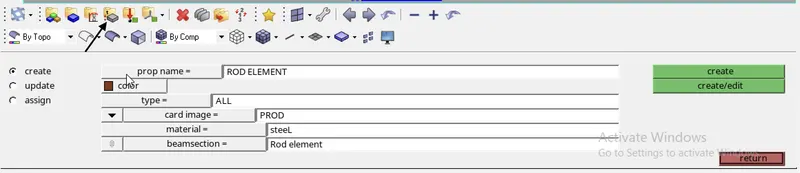
6. Now goto 1D-ROD menu select node in pinhole select property as ROD ELEMENT where create in property menu elem types as CROD then create.
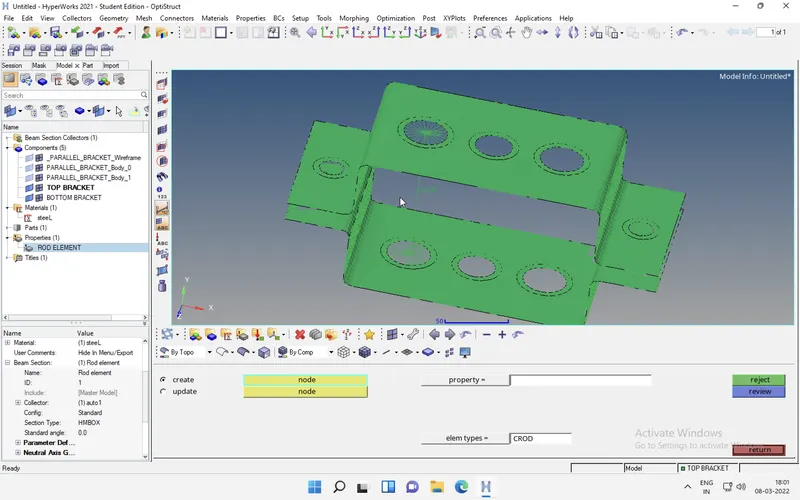
B. Beam element
1. Then goto 1D-RBE3 option set node as MULTIPLE NODE and CALCULATE NODES then select nodes through pinholes A then create RIGID element.
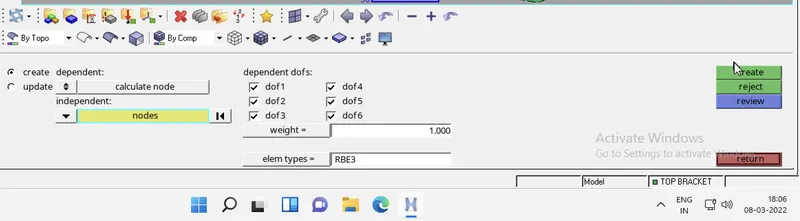
2.Then goto HYPERMESH select standard section and select hyperbeam in standard section library and Standard I section as standard section type.
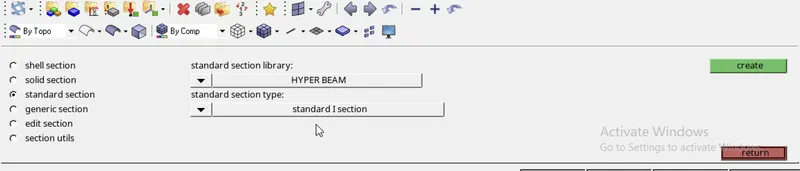
3. Set dimension as Dimension a= 12 mm dimension b=10 mm Thickness t= 0.75 mm
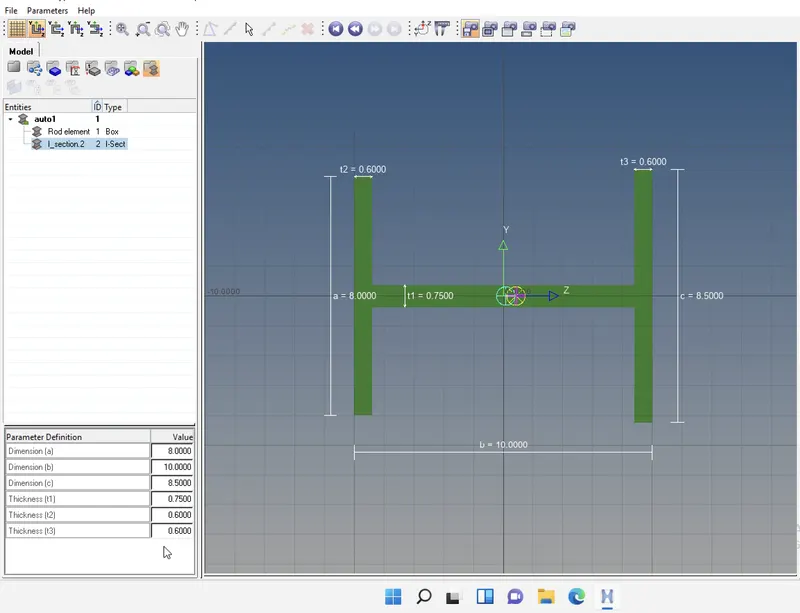
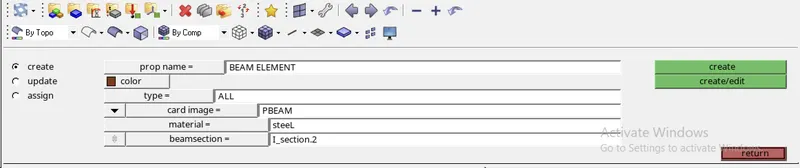
4. Now create property use Property menu set prop name as BEAM ELEMENT card image as PBEAM beam section as I section create in hyperbeam.
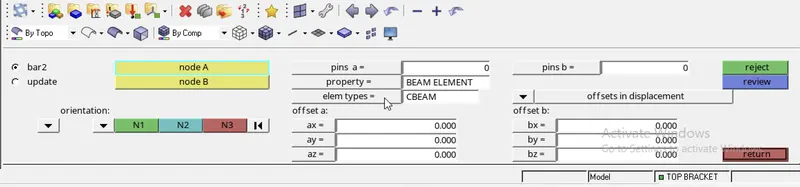
5. Now goto 1D-BAR menu select node in pinhole select property as BAR ELEMENT where create in property menu elem types as CBAR then select the nodes and create.
C. BAR element
1. Then goto 1D-RBE3 option set node as MULTIPLE NODE and CALCULATE NODES then select nodes through pinholes C then create RIGID element.
2. Before create rigid make sure to deselect the dof1,dof2,dof3,dof4 to make X,Y axis DOF as Constrained then create RIGID element.
2.Then goto HYPERMESH select standard section and select OPTISTRUCT in standard section library and CROSS section as standard section type.
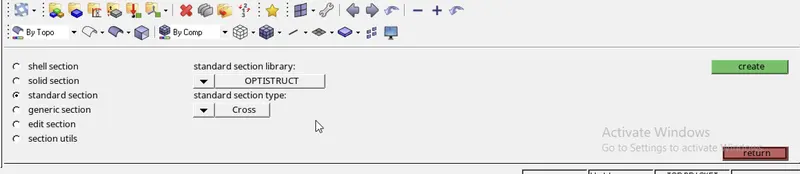
3. Set dimension as Dimension a= 12 mm dimension b=10 mm Thickness t= 0.75 mm
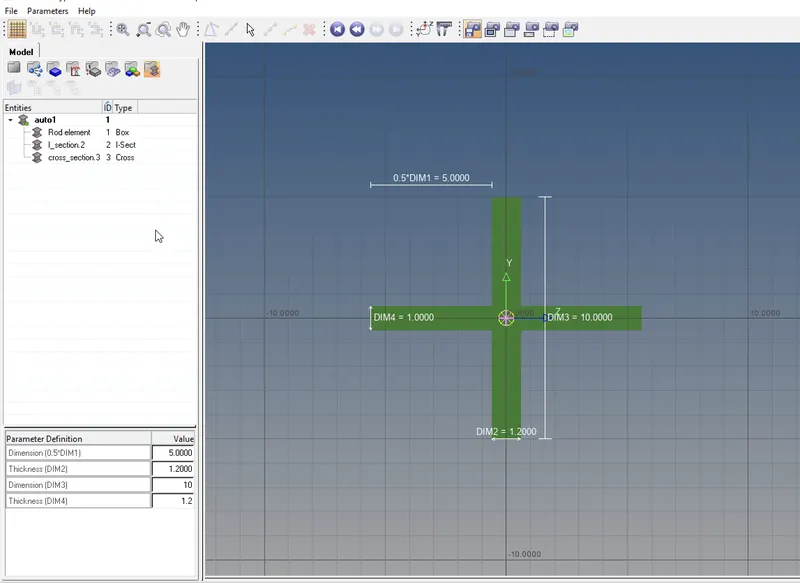
4. Now create property use Property menu set prop name as BAR ELEMENT card image as PBAR beam section as CROSS section create in hyperbeam.
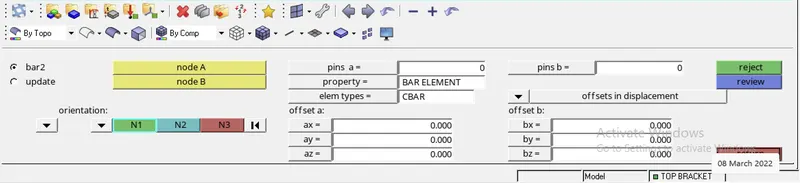
5. Now goto 1D-BAR menu select node in pinhole select property as BAR ELEMENT where create in property menu elem types as CBAR then select the nodes and create.
D&E MASS
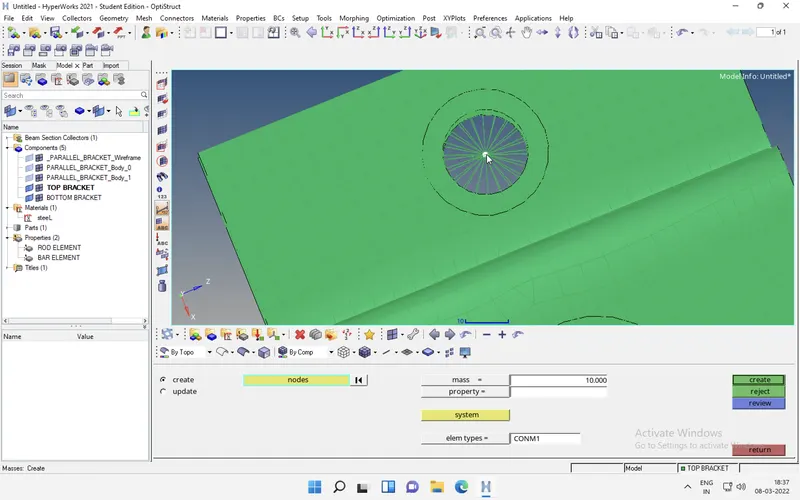
1.Then goto 1D-RIGIDS option set node as MULTIPLE NODE and CALCULATE NODES then select nodes through pinholes D&E
2.Now goto 1D-MASSES Select magnitude as 10mm elem types as CONM1 then create
F SPRINGS
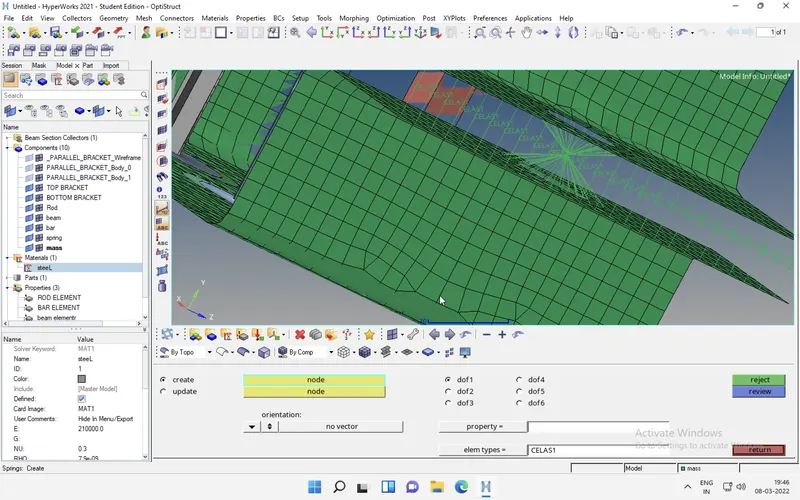
1. Now goto 1D-springs then select the nodes on comonets to create spring element then select elem types as CELAS1 then create
RESULTS.