Week - 3 Drop test Challenge
Aim : To perform the drop test to simulate the dropping of a cell-phone onto a solid platform.
Procedure : After downloading the model we will perform the case setup.
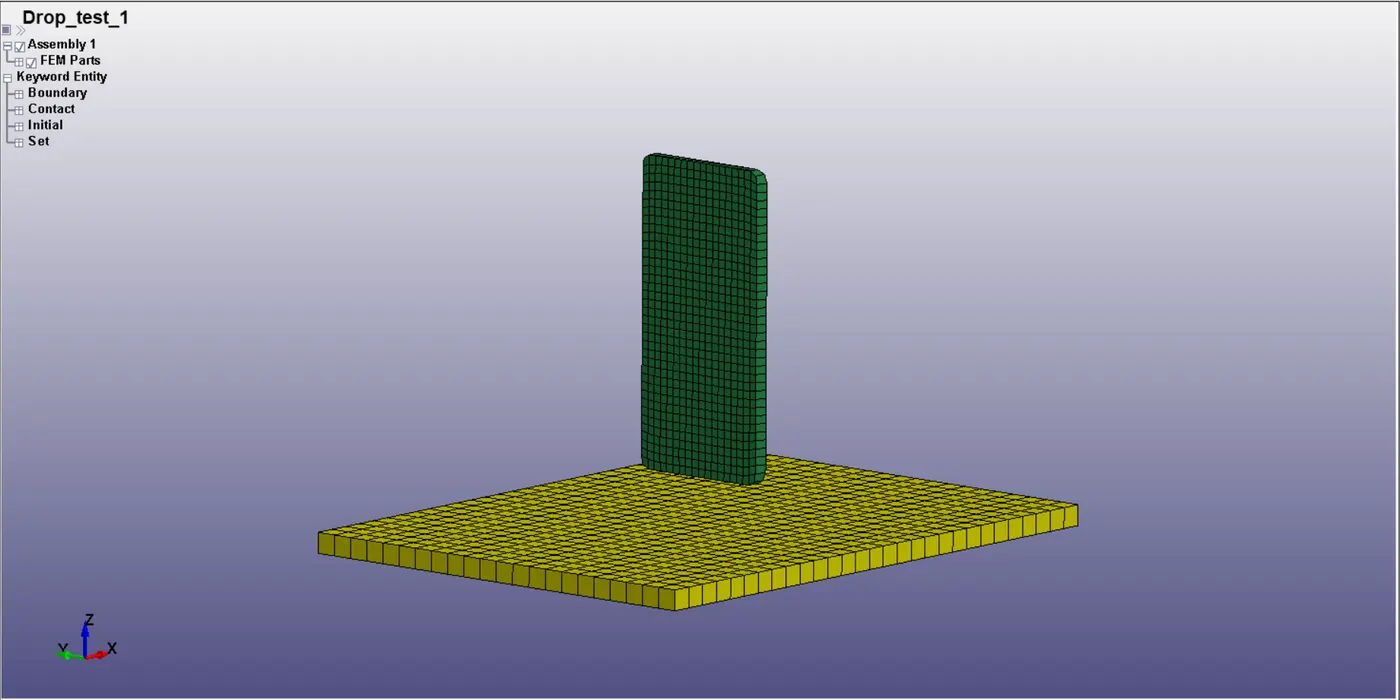
There is a top shell element layer on the table top. That has been deleted to keep all the elements solid. Now both the phone and table consist of just solid elements.
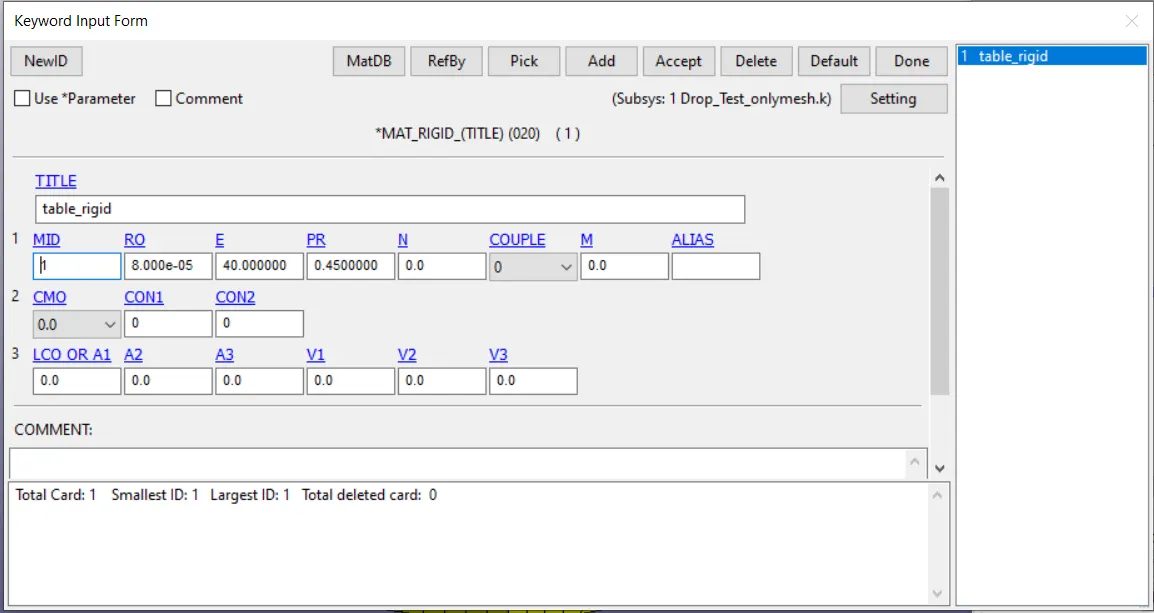
Material creation : First we create the materials for both the phone and table top. For the table top we create a Rigid material as follows (values taken form previous assignments)
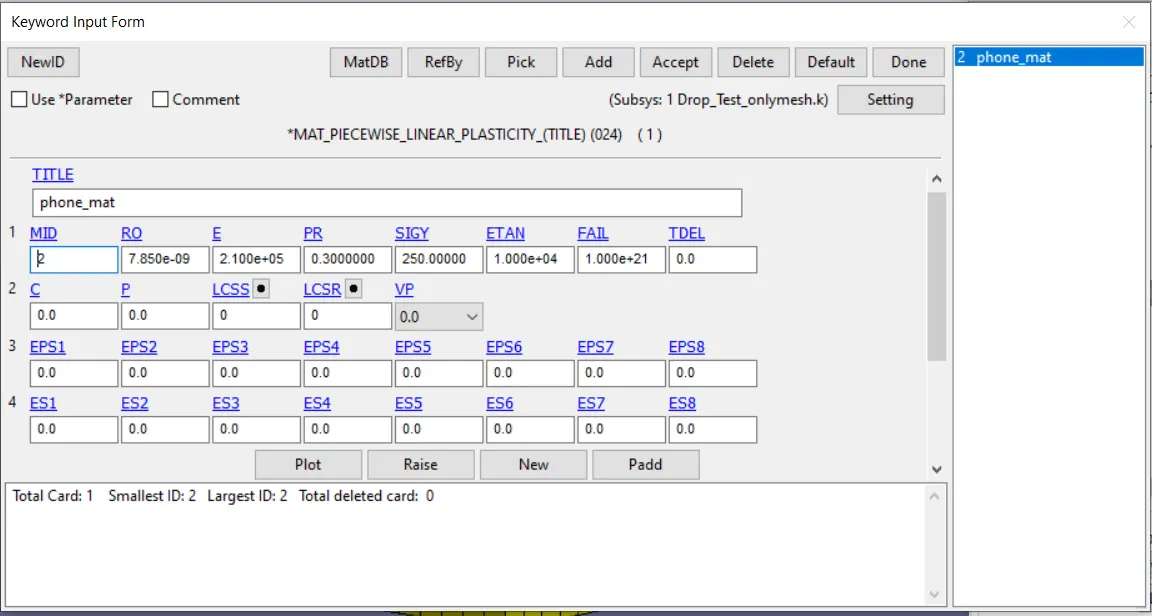
For the phone we create a piecewise linear plasticity material card with following values.(values taken form previous assignments)
Section creation : Next we create sections to assign element properties, depending upon which the solver will compute the displacements depending upon the element formulation. For solid elements we choose elform = 1 as shown below.
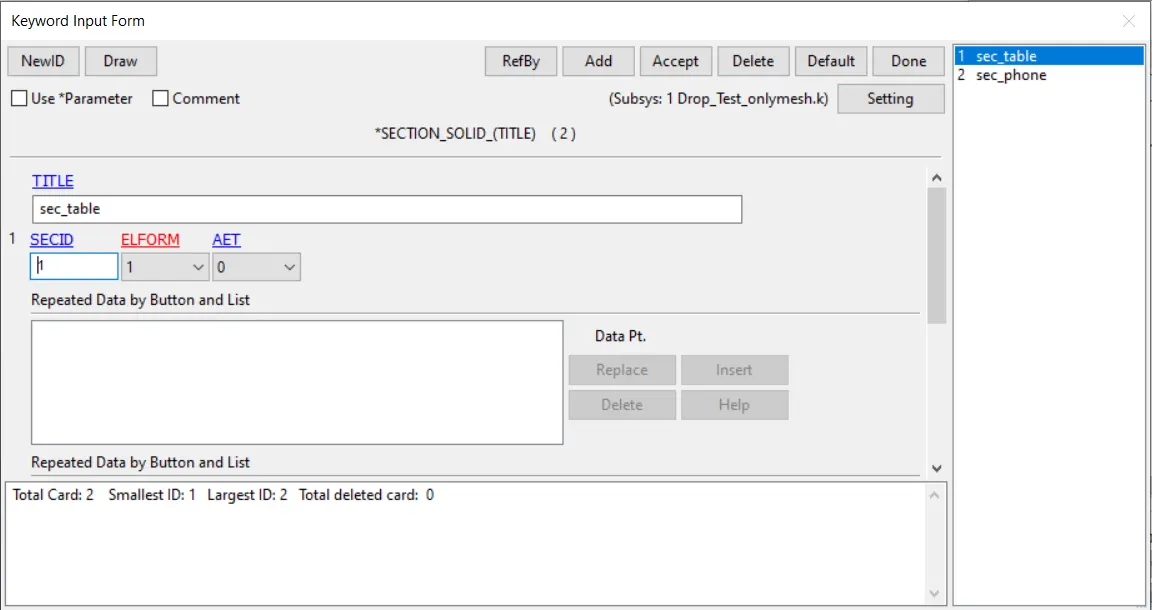
Similarly a similar section is created for phone as shown in the picture.
Part definition : Next the above defined materials and sections are assigned to the parts as shown below by entering their IDs.
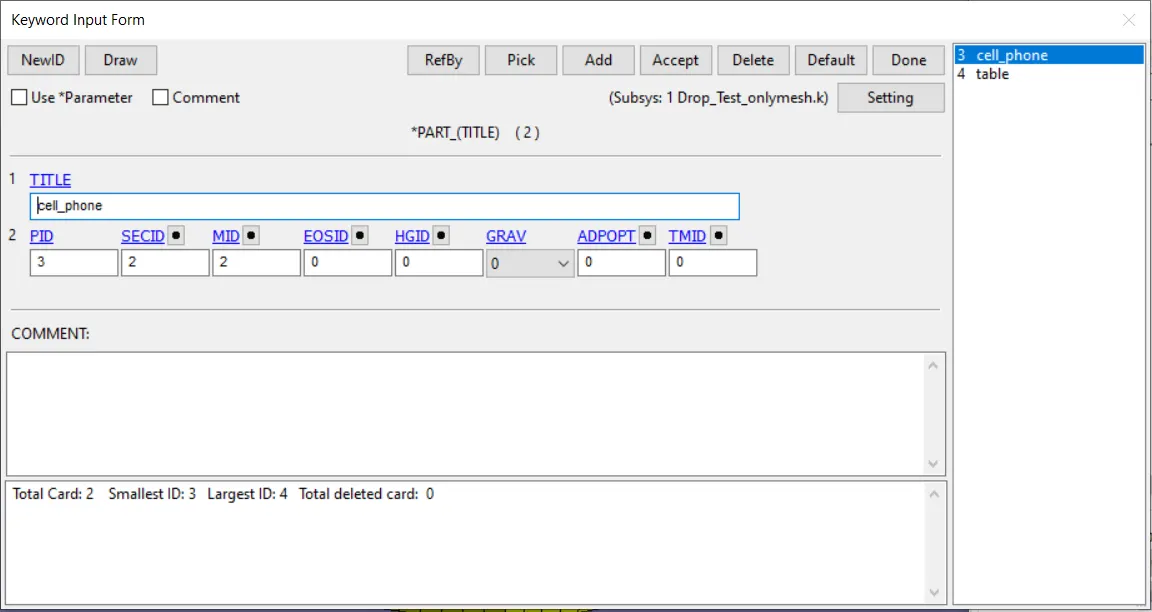
This is the cellphone part.
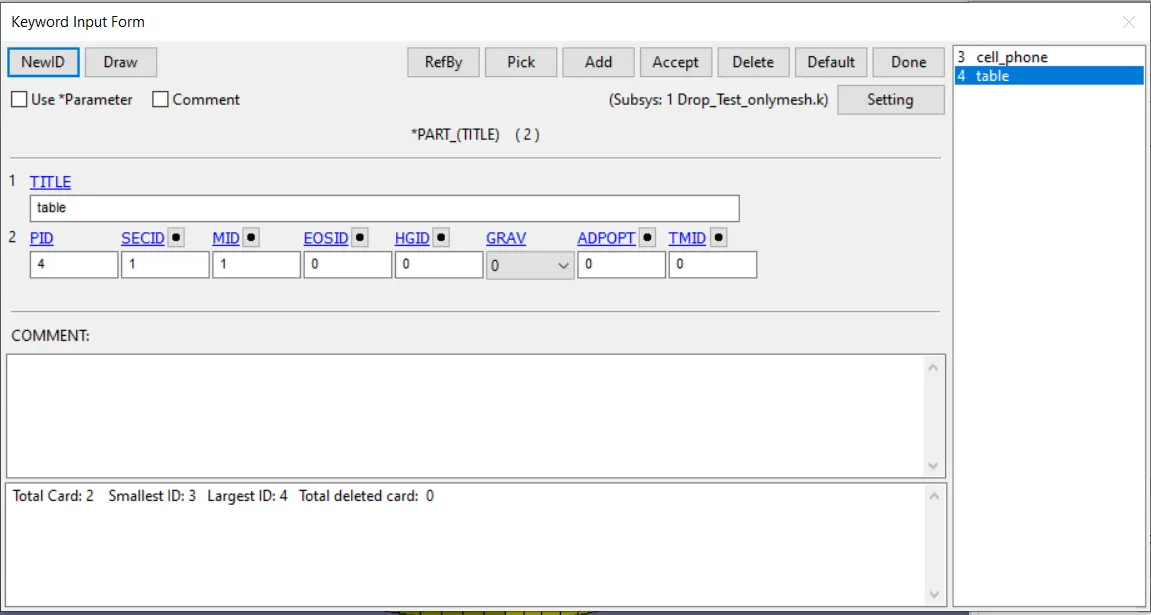
This is the table part.
Boundary Creation : Next we create the boundary conditions for the simulation. We do this by going to create entity-->spc-->create-->pick and then selecting the nodes we want.
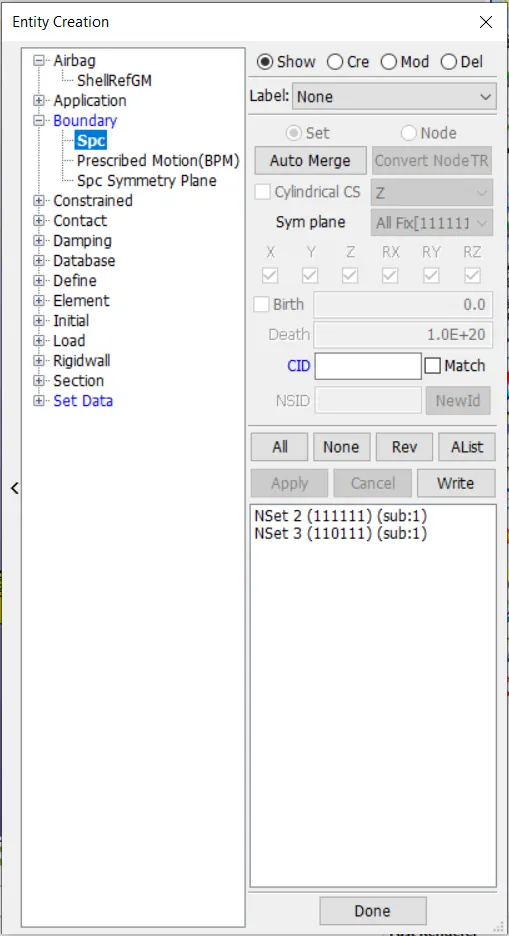
First we create the spc for the table to keep it stationary. All DOFs are locked for the table as shown below.
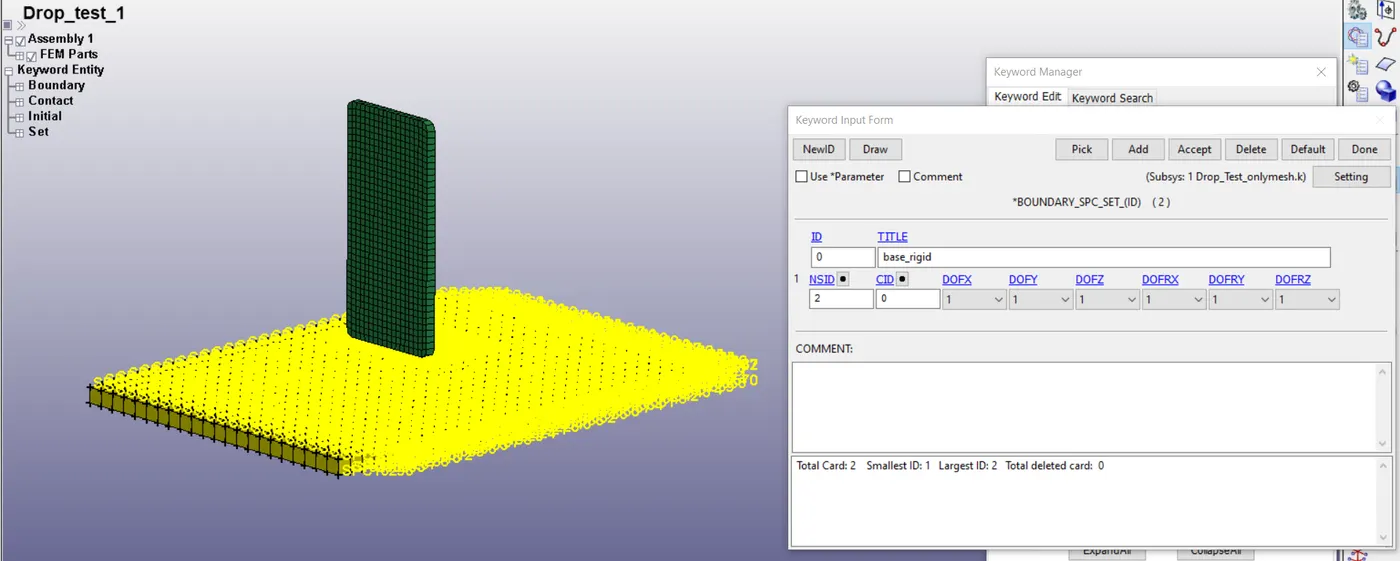
Next we create an spc to fix the direction of the phone while it is undergoing motion
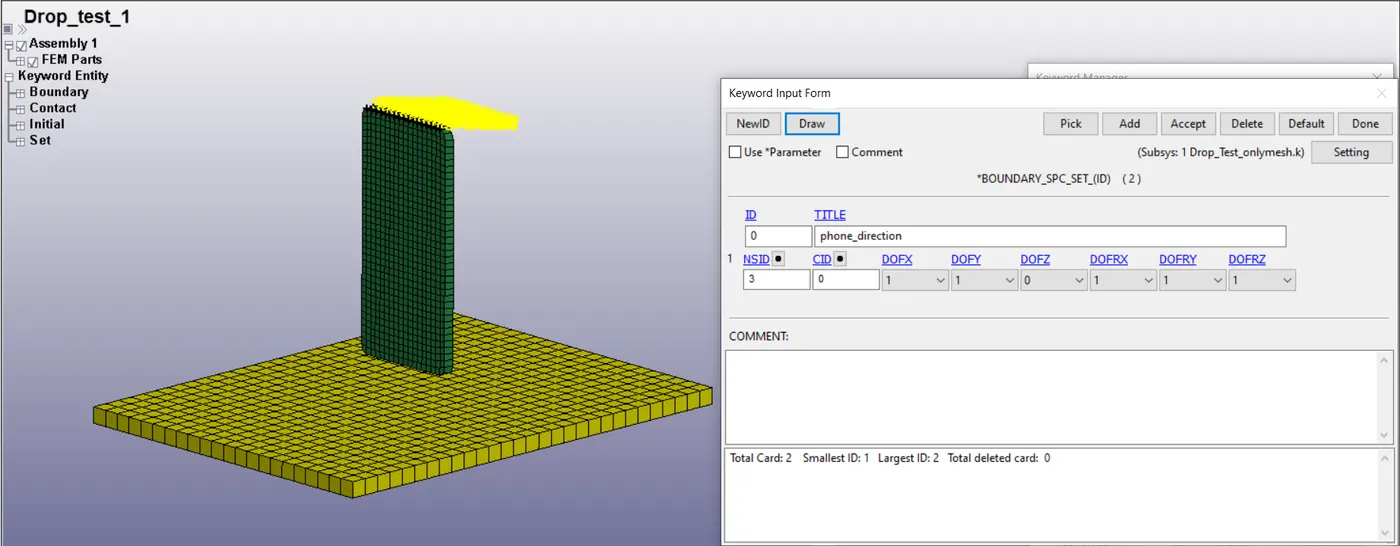
We select a group of nodes on top of the phone and lock all DOFs except translation in z-axis.
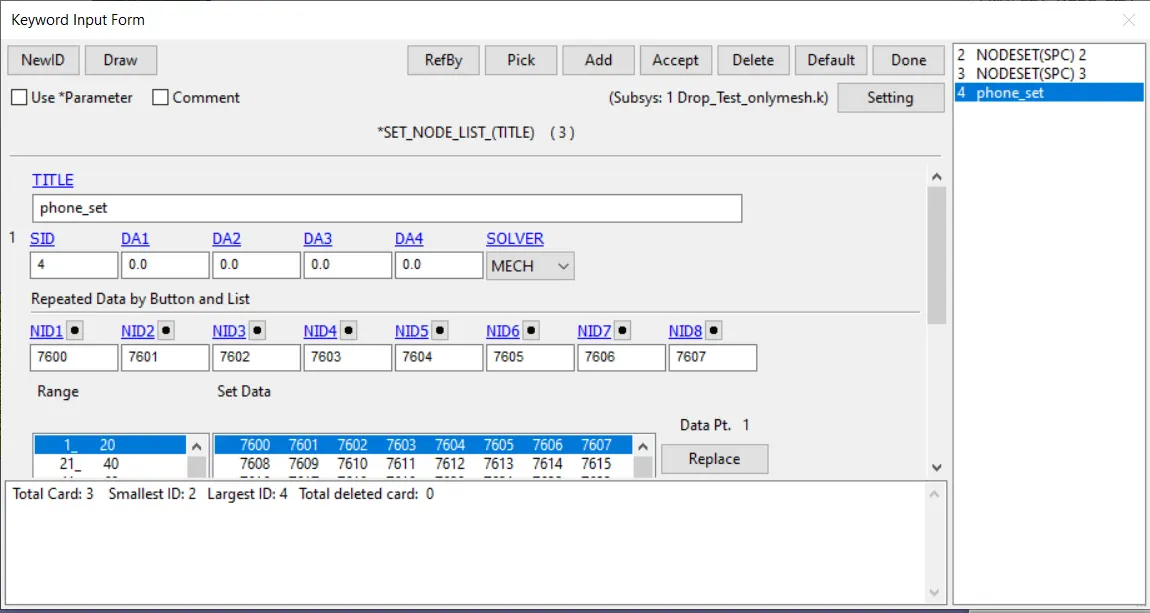
Creation of node_set : As we can see, while creating these SPCs, node sets automatically get created. We will further create another node set consisting of all the nodes of the phone for creation of contacts.
Contact creation : Next we create contacts to define the interaction between the phone and table top during the simulation. We choose the type automatic nodes to surface as shown below.
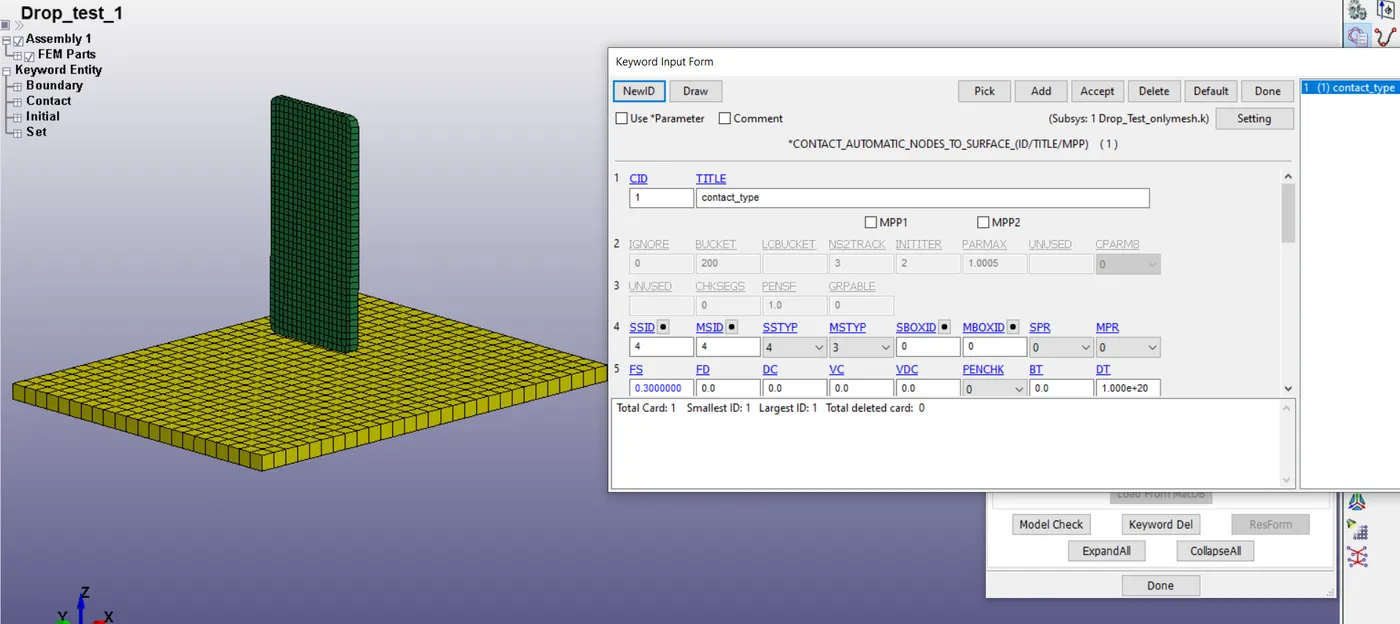
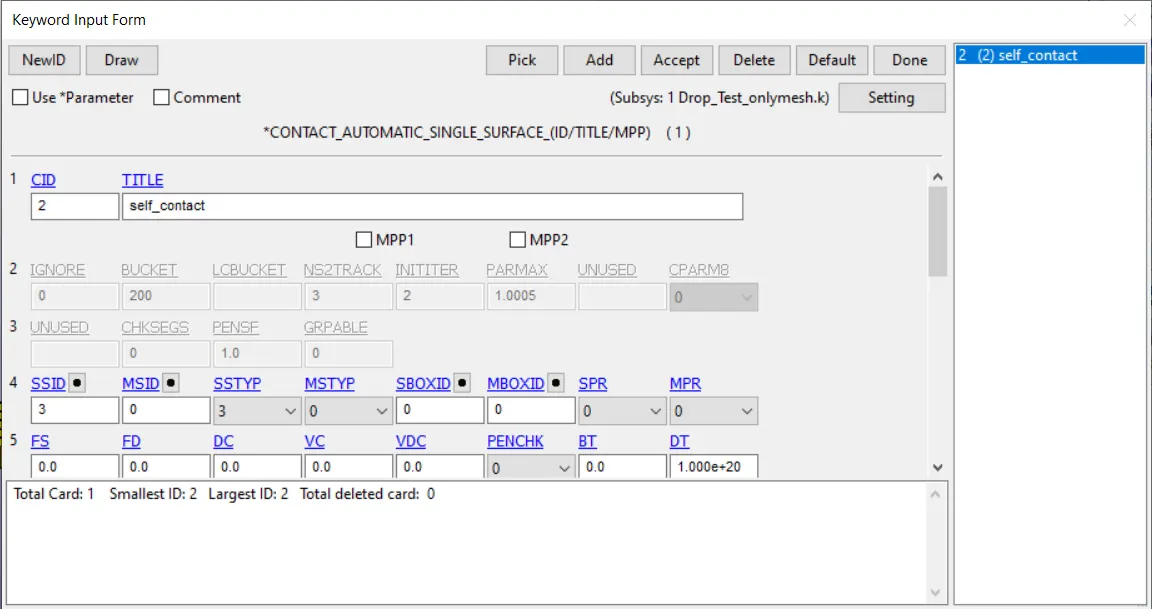
We select the type of input for slave and master components in SSTYP & MSTYP respectively as nodeset id and part id and enter the IDs, give riction coefficient as 0.3 and click on accept and done. Next we will create a self contact interface as well for the nodes of the phone so that they dont penetrate each other.
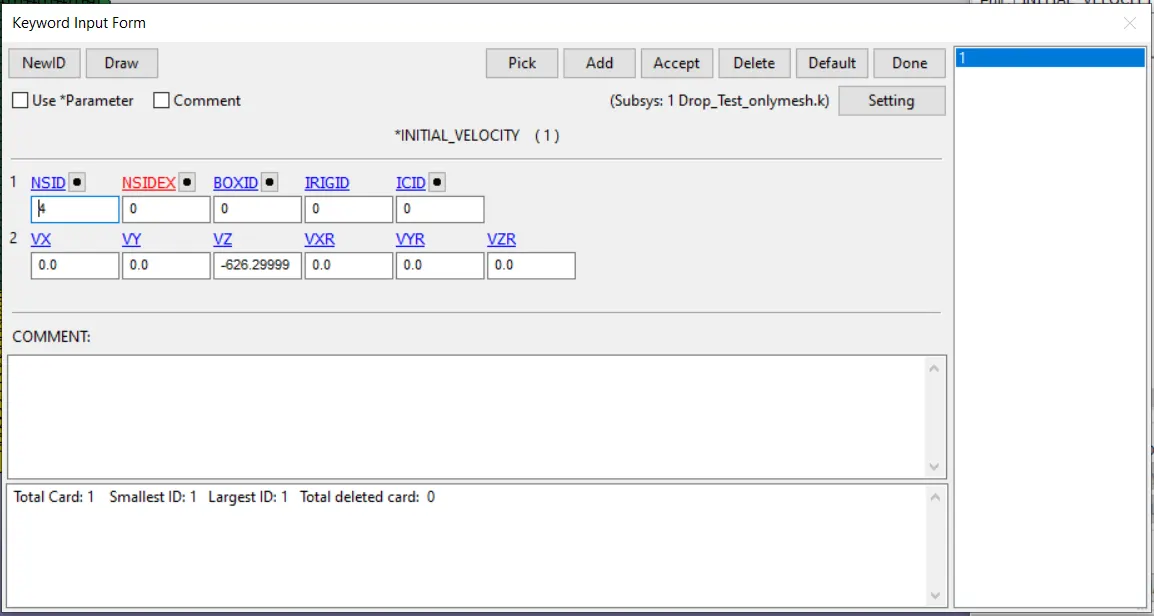
Initial conditions : Next we select the initial conditions i.e. the initial velocity of the phone. The distance of the phone from the table is around 20mm. Based on this the velocity of the phone at the time it strikes the table will be around 0.6263m/s. This value is inputed in the initial-->velocity card in the Vz section (according to the current unit system)
Control parameters : Next we select the control parameters, which govern the conditions in which the simulation will be computed.
Control_accuracy:
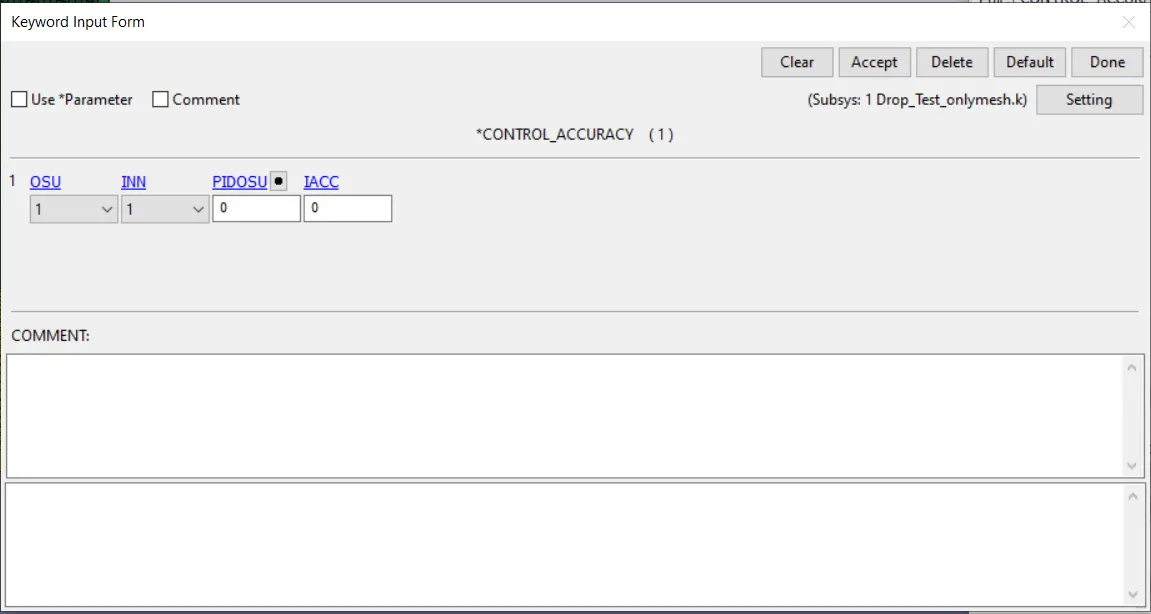
These options are selected for this simulation, objective stress update is on.
Control_energy:
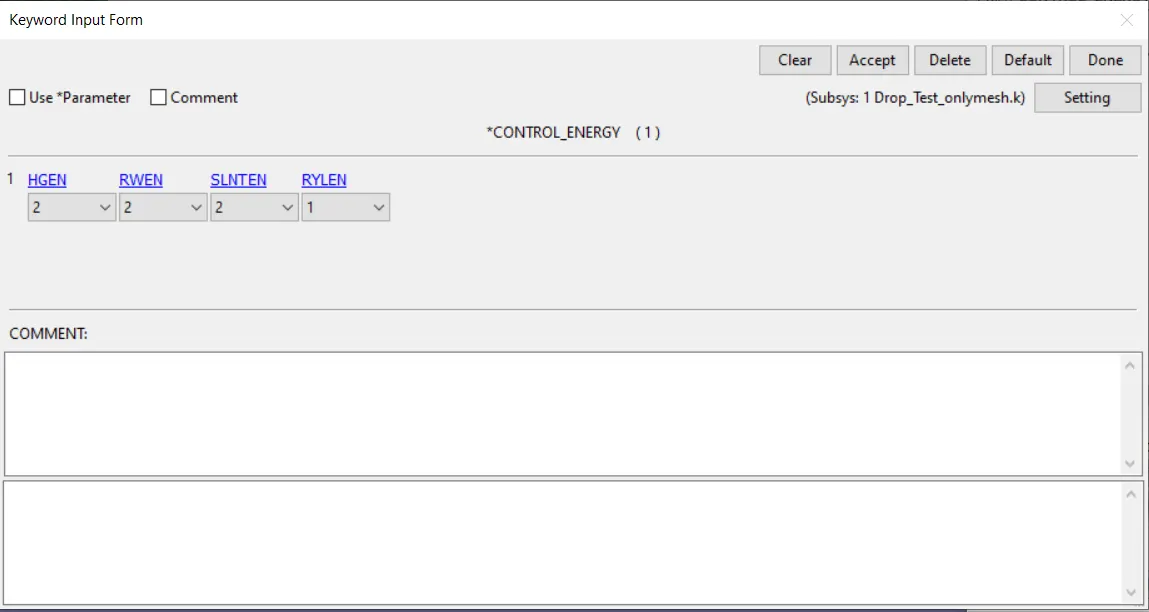
These options are selected so that hourglass energy, sliding interface energy and stonewall energy dissipation are calculated.
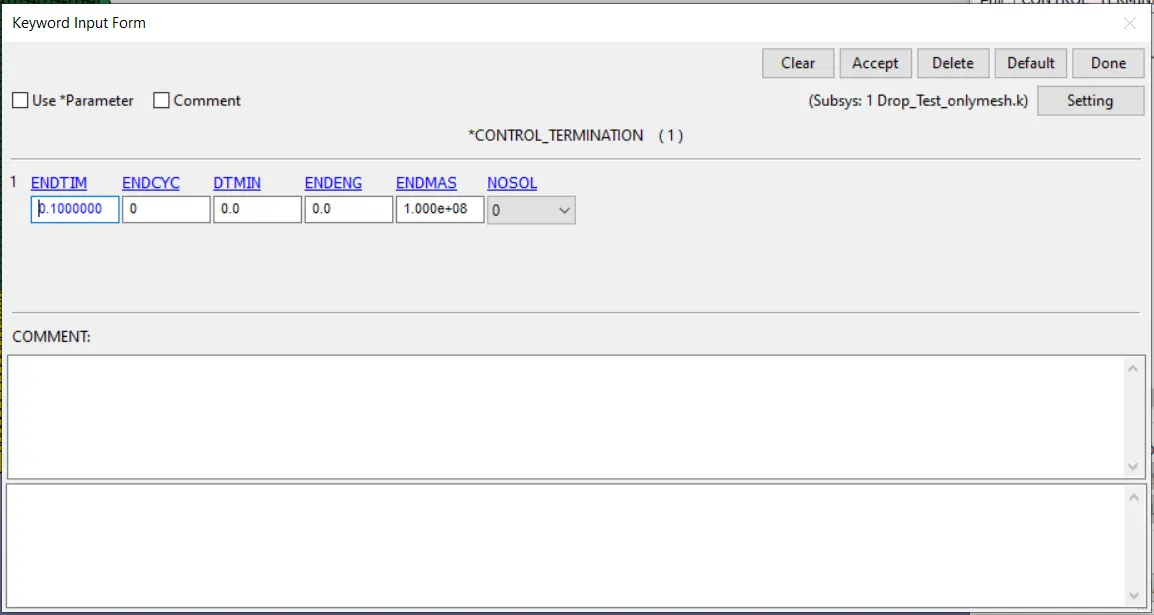
Control_termination : This option decides the termination time which is set at 100ms.
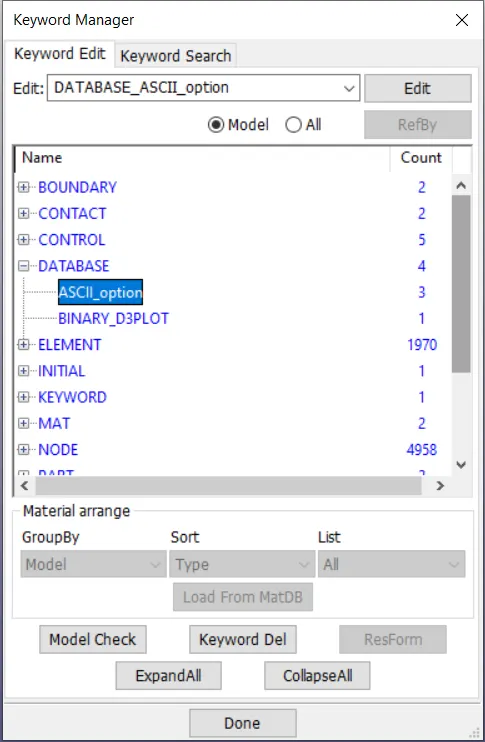
Database options : Next we select the options which we want to see in the output characteristics. The following options are selected in Database_ascii. The options GLSTAT, ELOUT & RCFORC are shosen to show the energy curves, element energies and interface forces respectively.
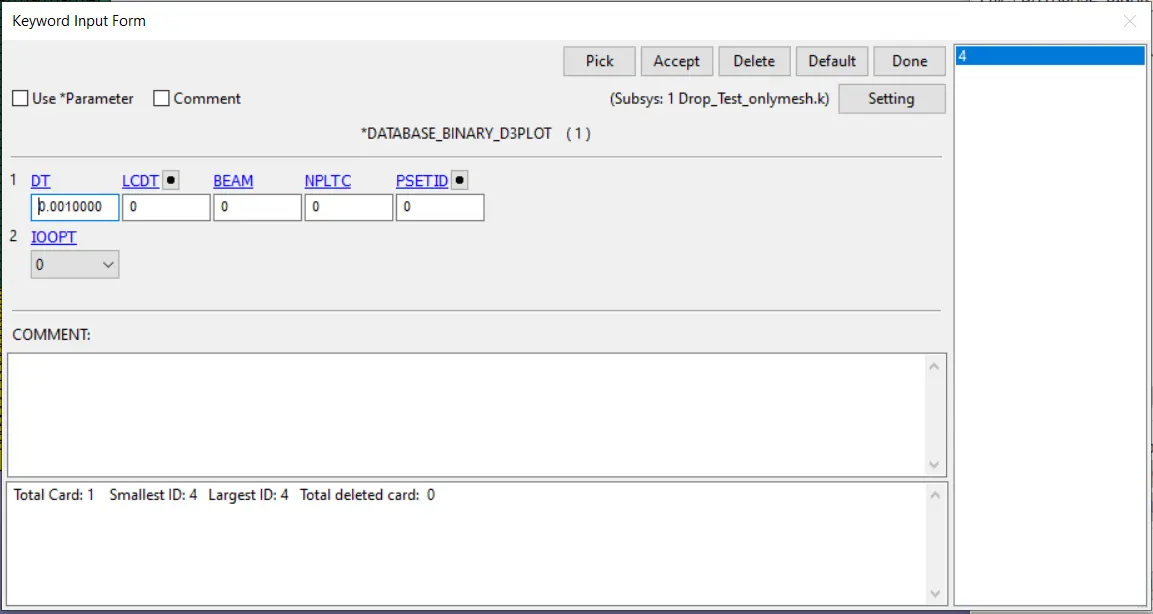
The following options are selected in Database_binary_plot. The timestep is kept at 1ms as shown below.
Now all the pre-processing is complete and we are ready to run the simulation.
Running the simulation : Now we will run the simulation
Post processing :
Case 1 : Without gravity
After running the simulation we plot the results.
We see that there are a total of 102 frames in the simulation.
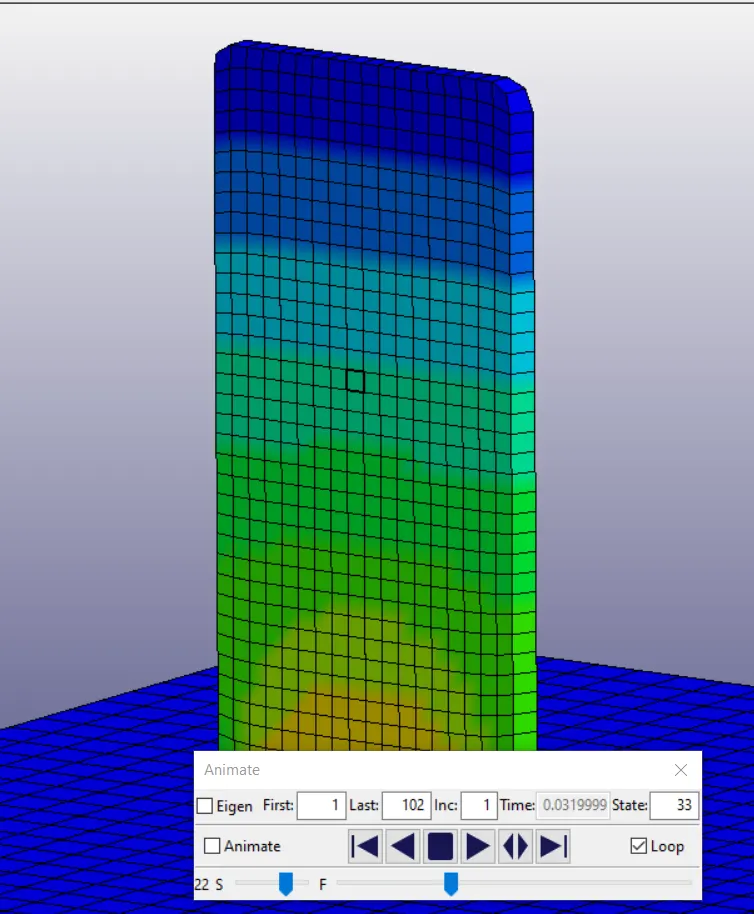
Mechanism of drop : We can see that the phone upon making contact with the floor bounces back and keeps on going upwards as there is no opposite firce. It makes contact with the floor board at frame 33.
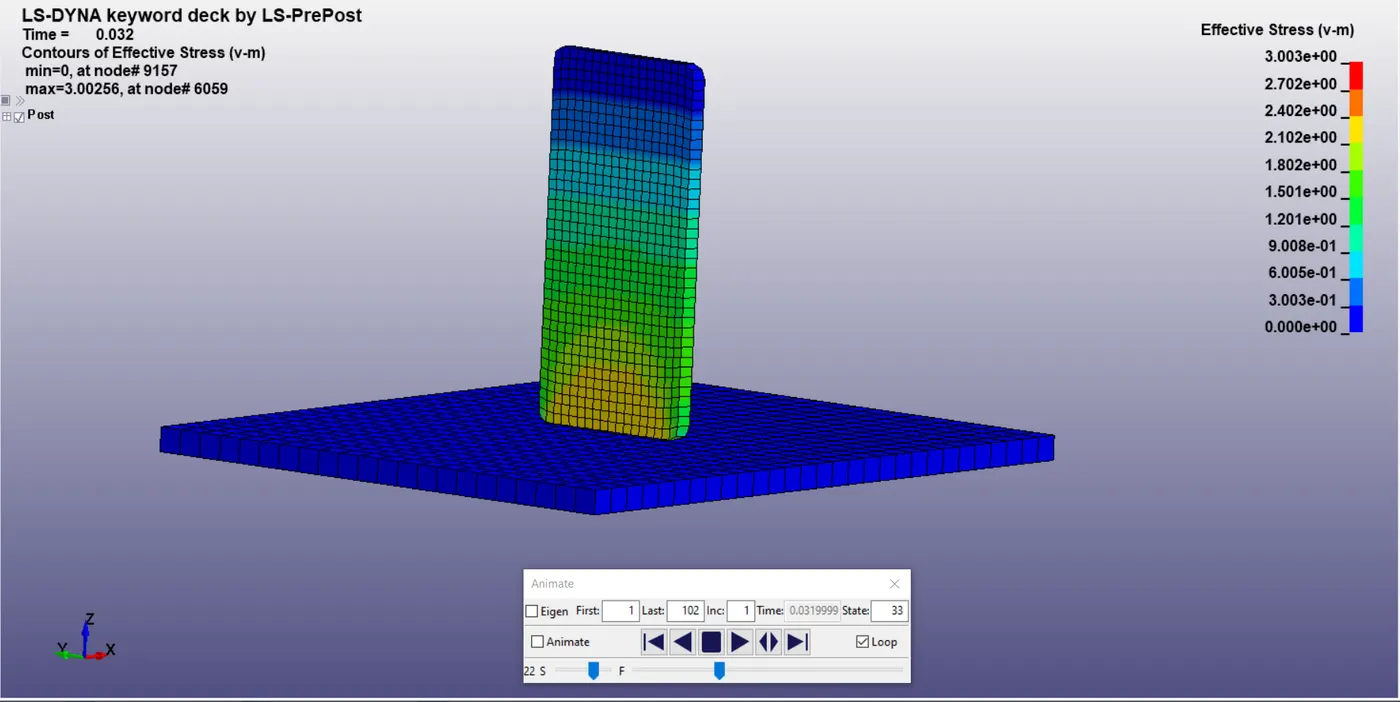
As we can see the stress distribution occurs in a ripple like manner from the centre of the point of contact and diffuses as the pressure waves travels upward. The stress at the time of collision is highest near the point of contact at around 2.1 Pa.
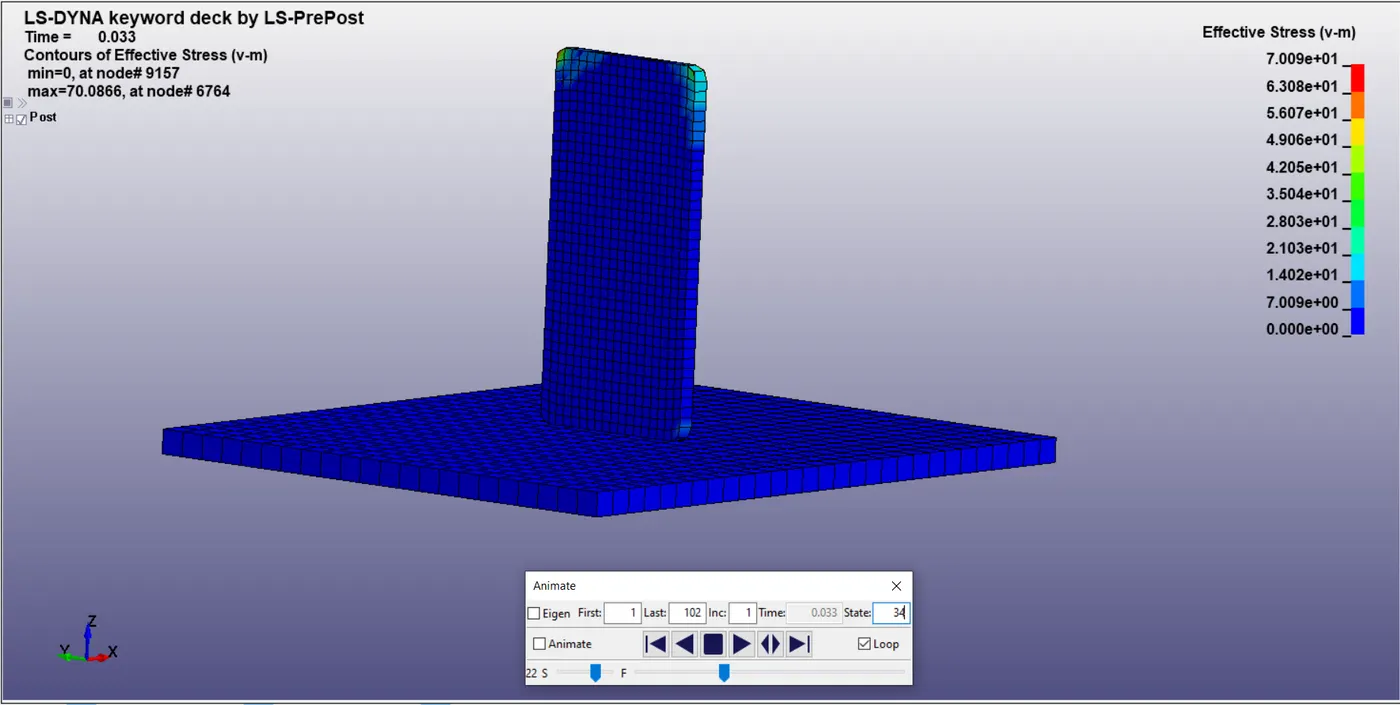
We can see that in just the next frame the pressure waves has completely diffused out of the phone body as shown. All this occured in 1ms.
In the Starting position the phone is at a height of roughly 20mm from the floor board.
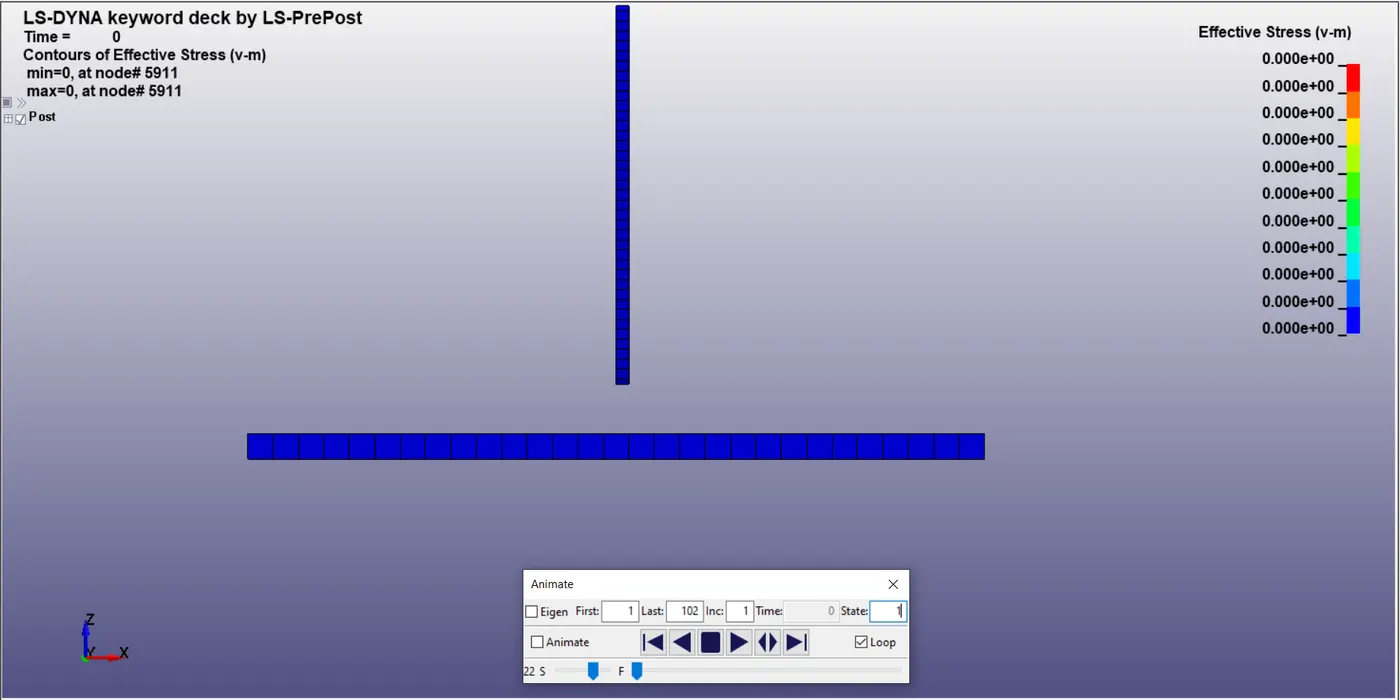
Where as in the final frame the phone is even higher than from where it started due to the absence of an opposing force.
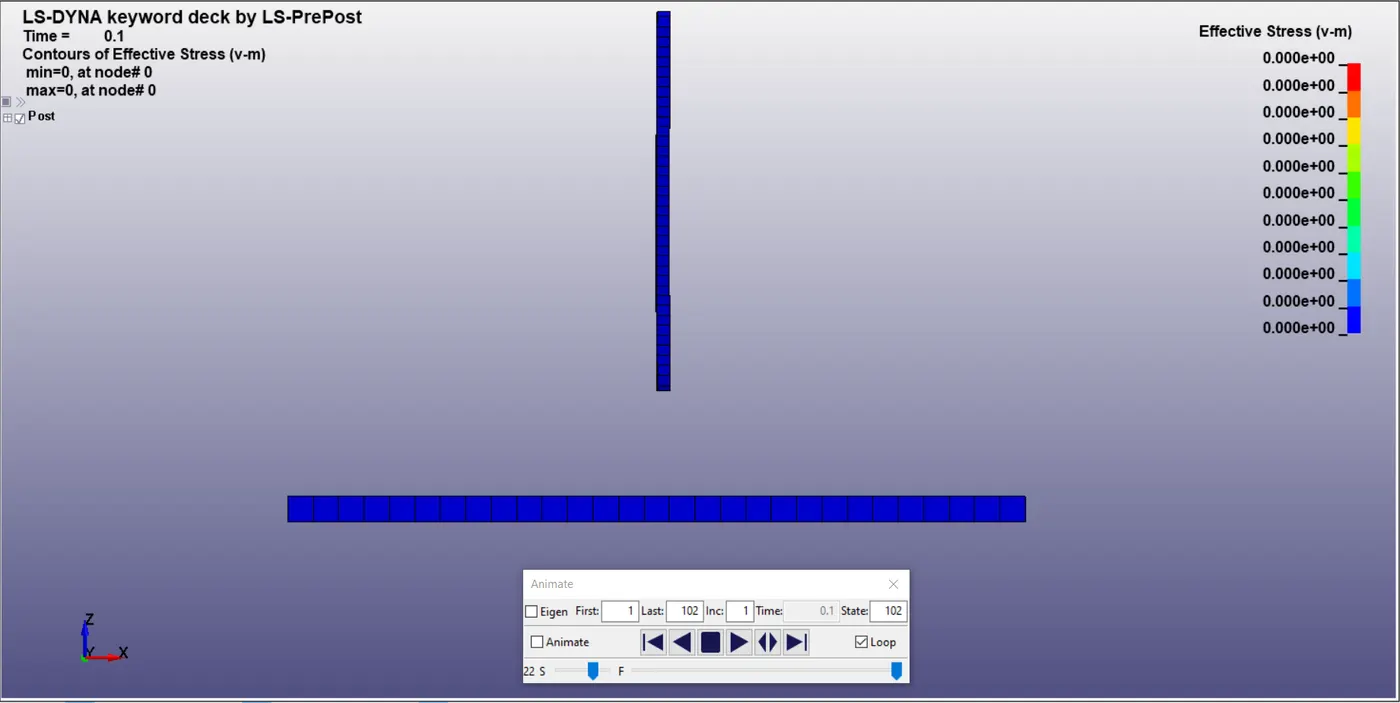
The phone keeps on going upwards till the end of the simulation.
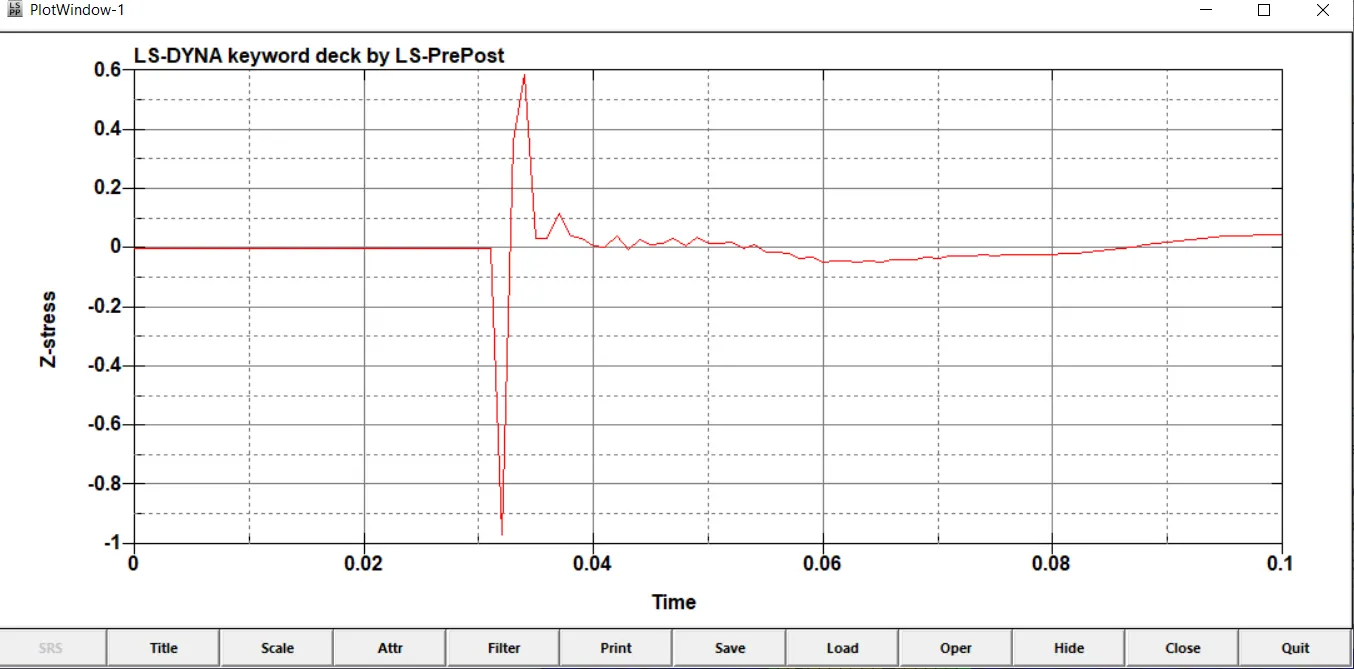
Stresses : The stress at a central element is calculated as shown.
We can see the variation at the point around the 33rd millisecond. This is the sttress acting in the z-direction i.e direction of motion of the phone.
Next we plot the von-misses or effective stress on the same element as shown below.
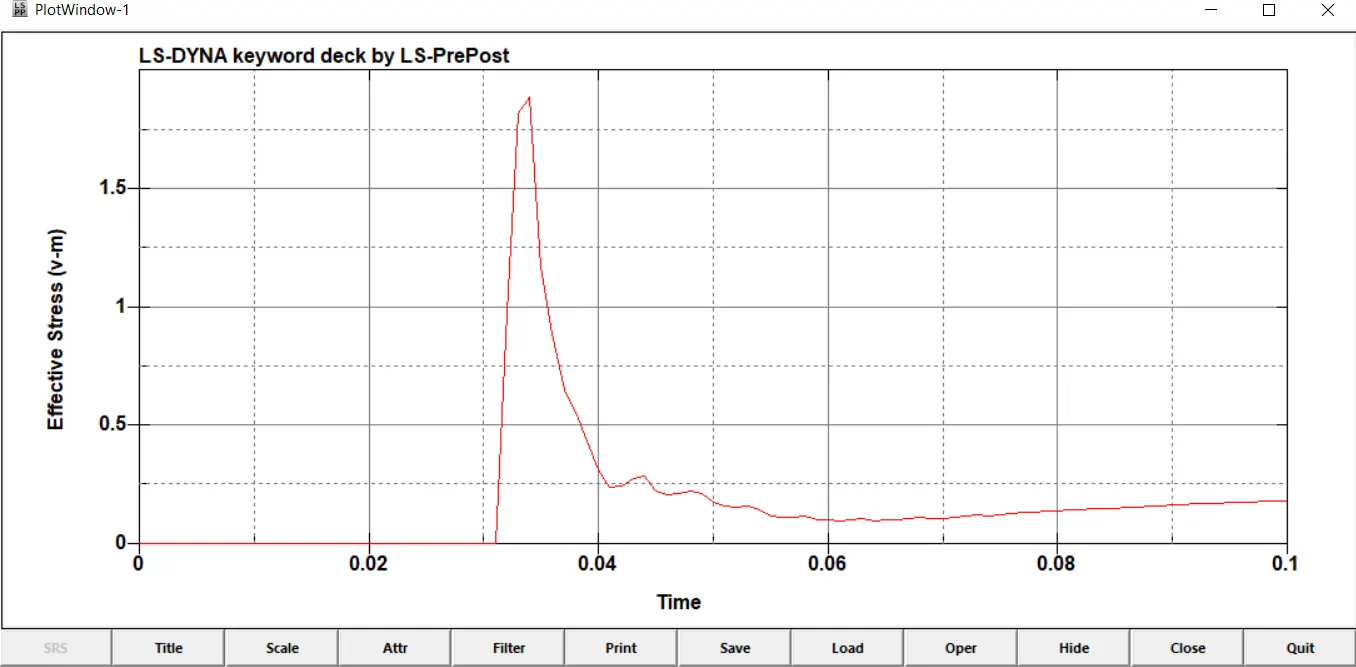
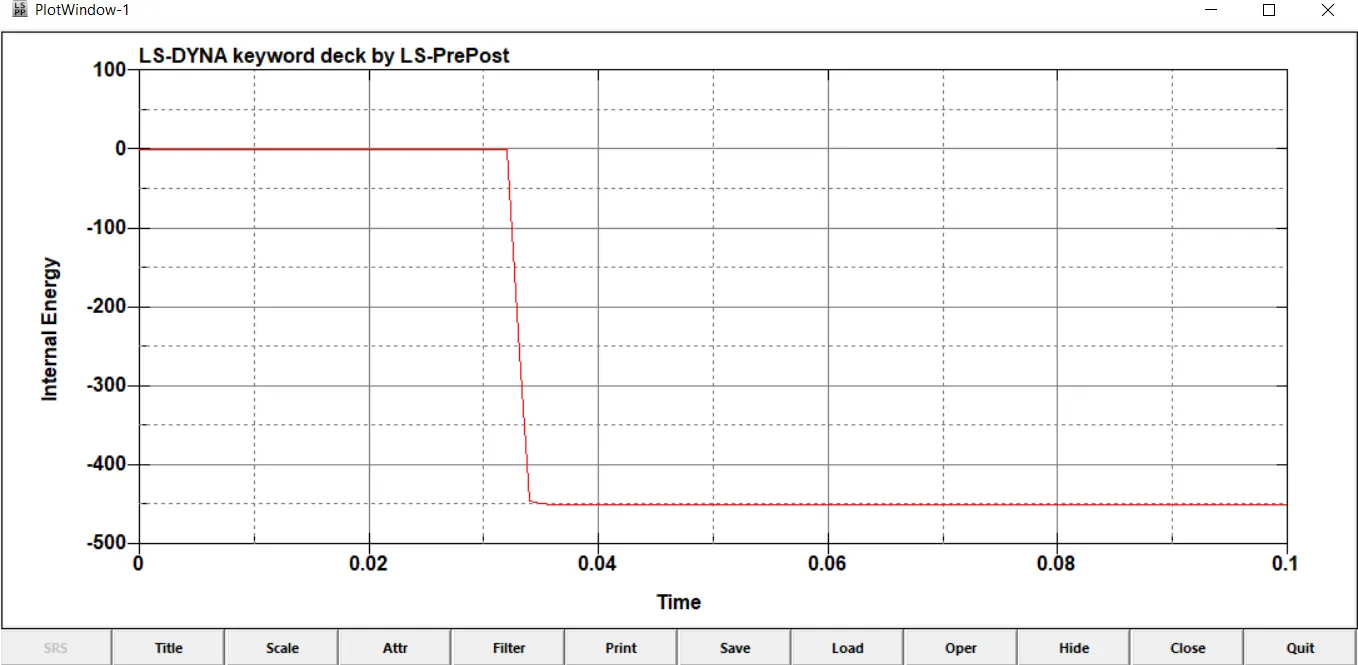
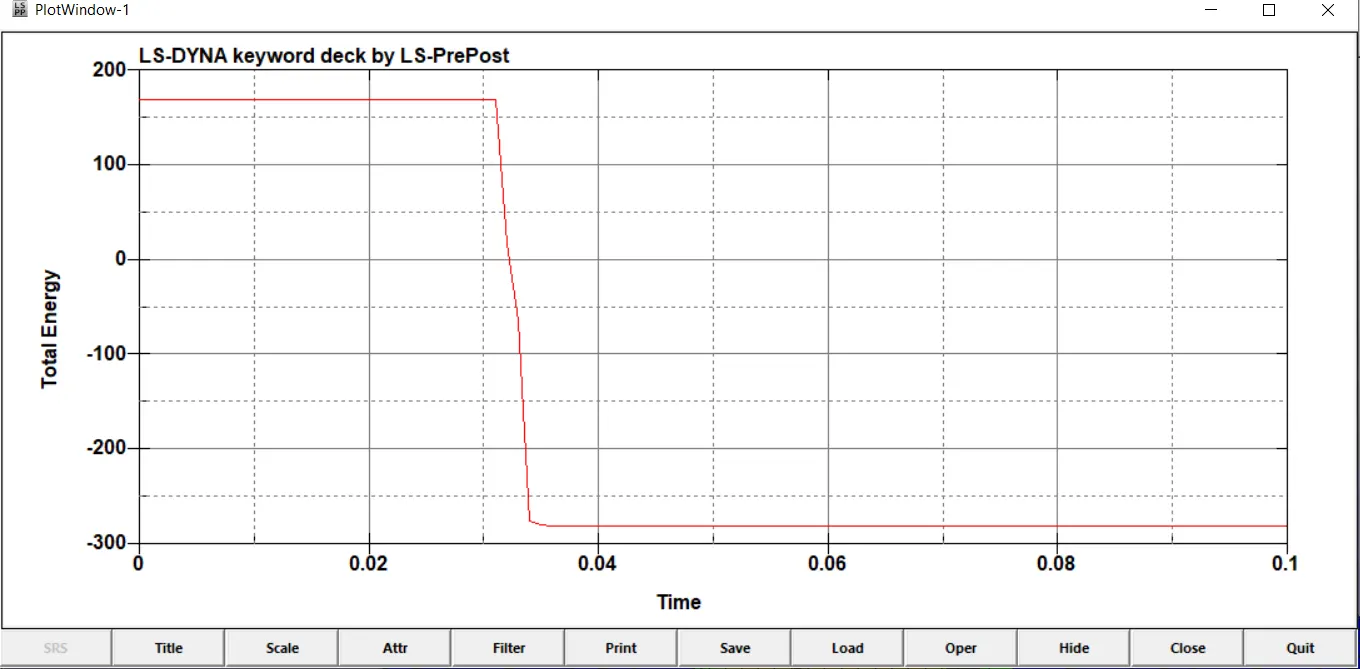
Energies : The global variable of energies are plotted as shown below.
Internal Energy :
Total energy :
Internal energy v/s kinetic energy :
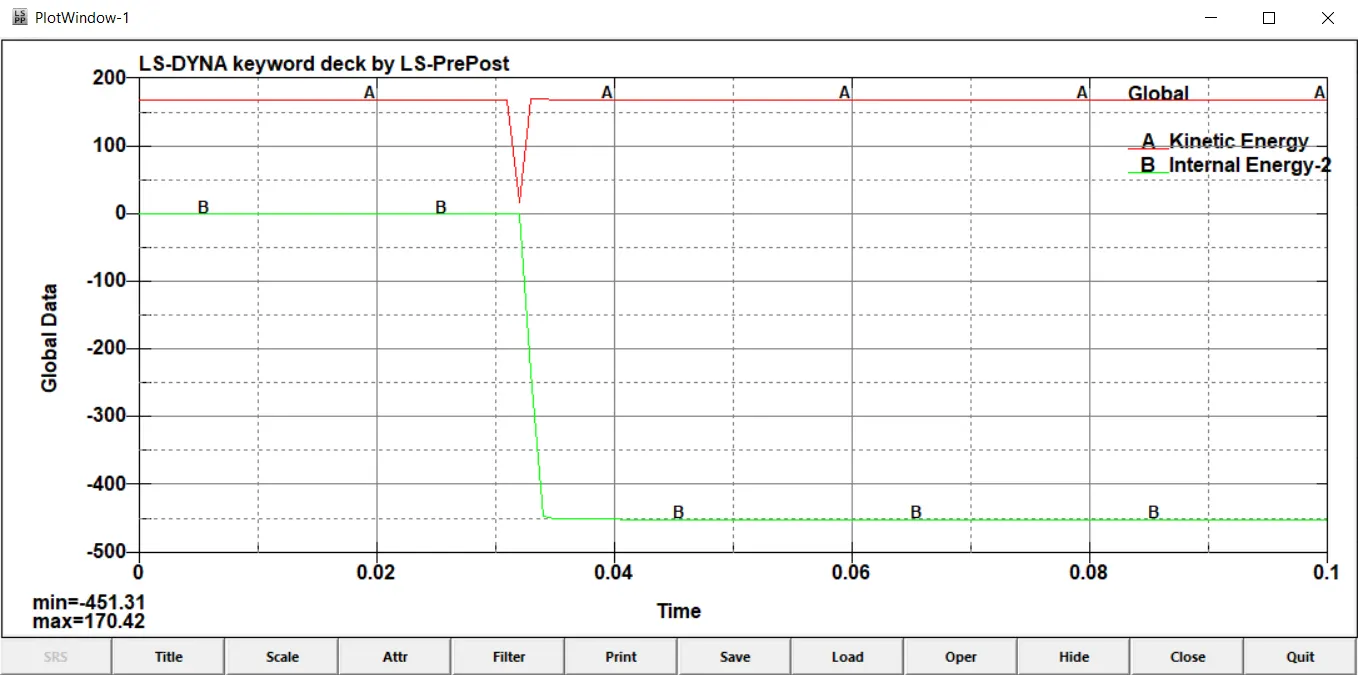
The internal energy drops in a sudden manner whereas the kinetic energy drops suddenly and picks up suddenly indicating the phone carrying the same velocity after hitting the board in opposite direction.
Case 2 : With gravity
In this case as the name suggests we apply gravity.
First define a curve as shown below in define-->curve
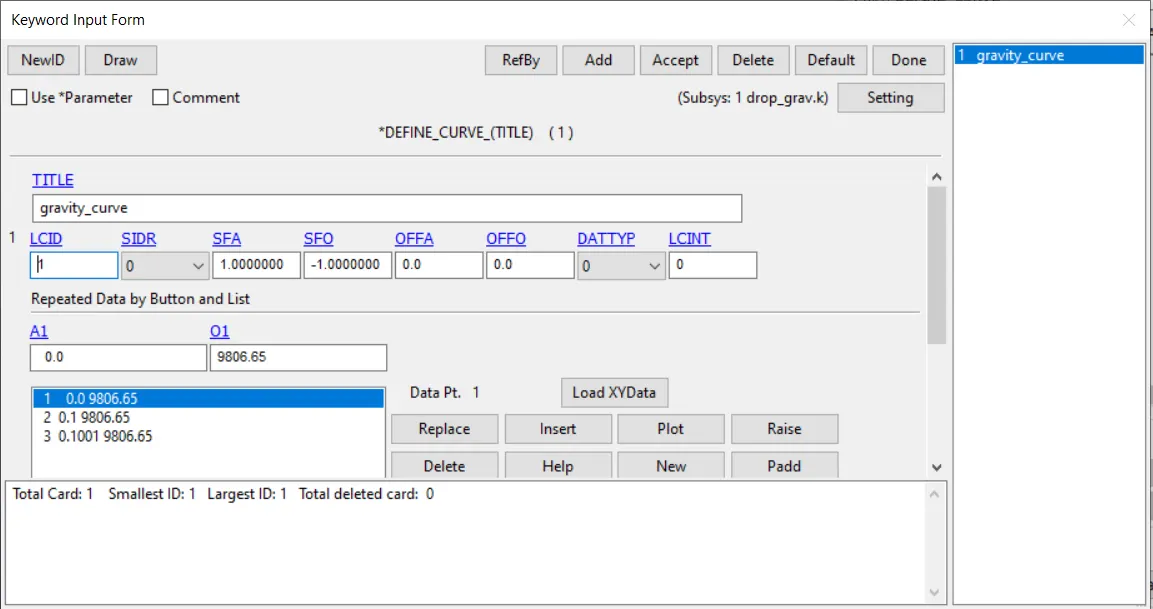
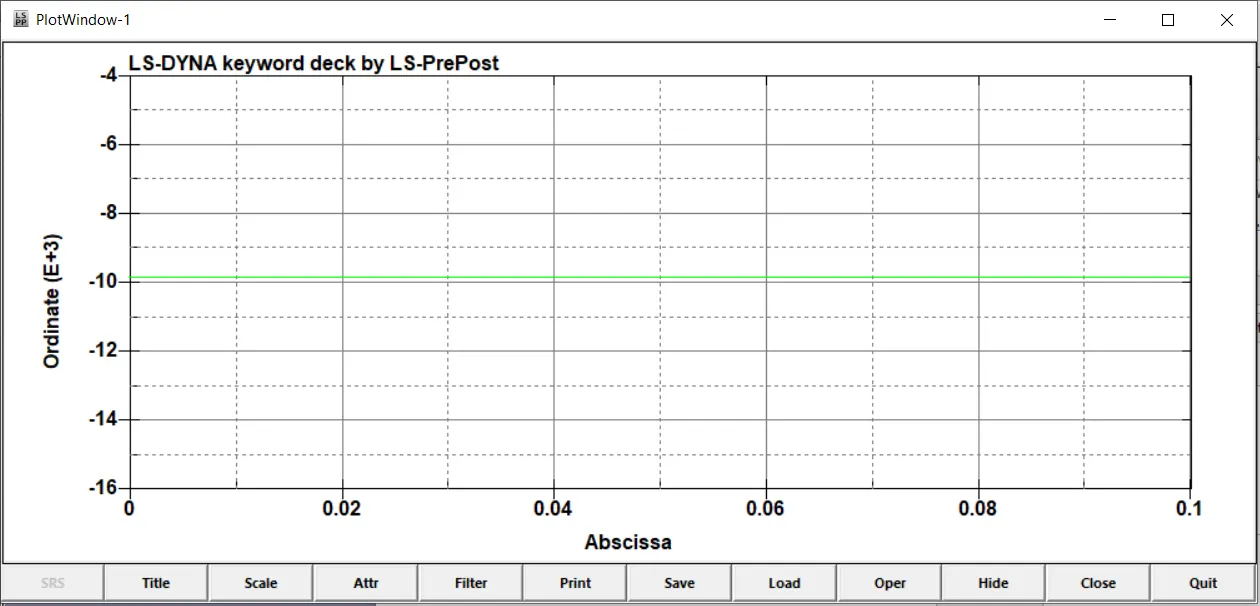
This is how the curve is, a flat line indicating constant gravity.
Mechanism of drop : We can see that the phone upon making contact with the floor bounces with a lot of opossing resistance due to gravity and its upward motion is kind of dampened with it spending more time in contact with the board.
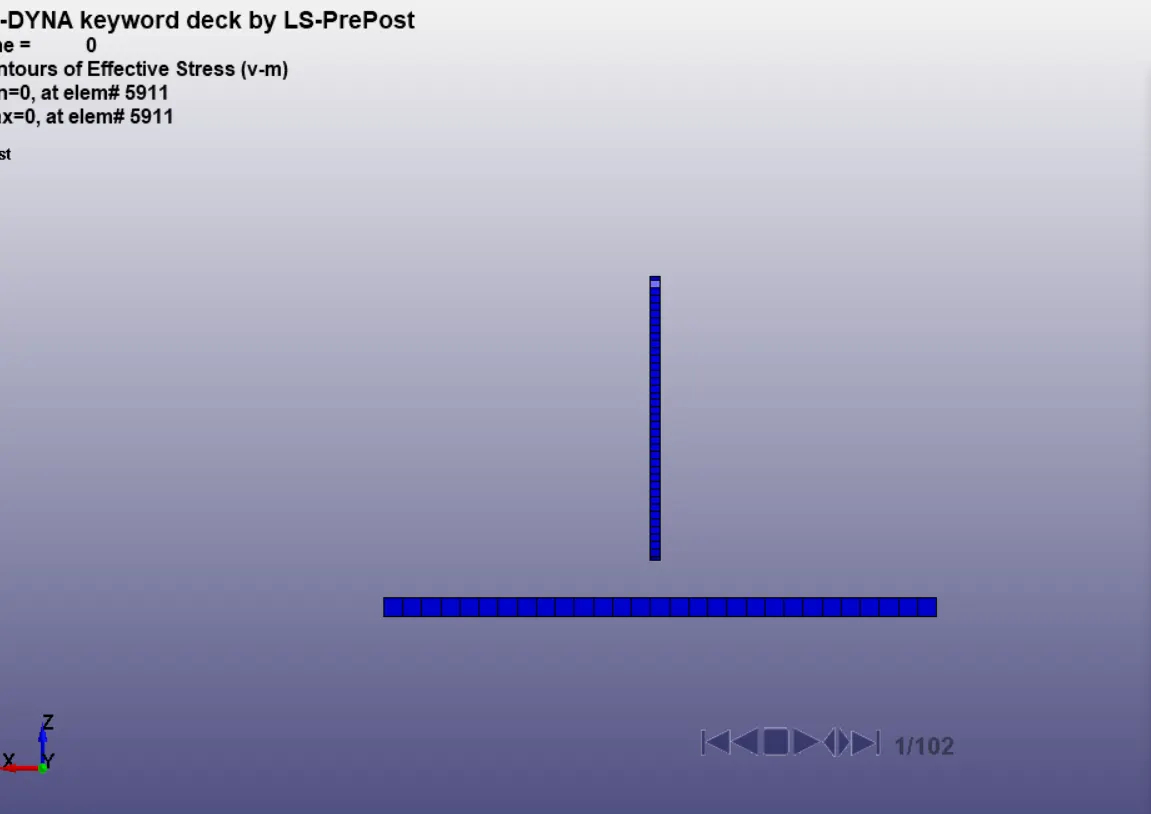
This is the initial point.
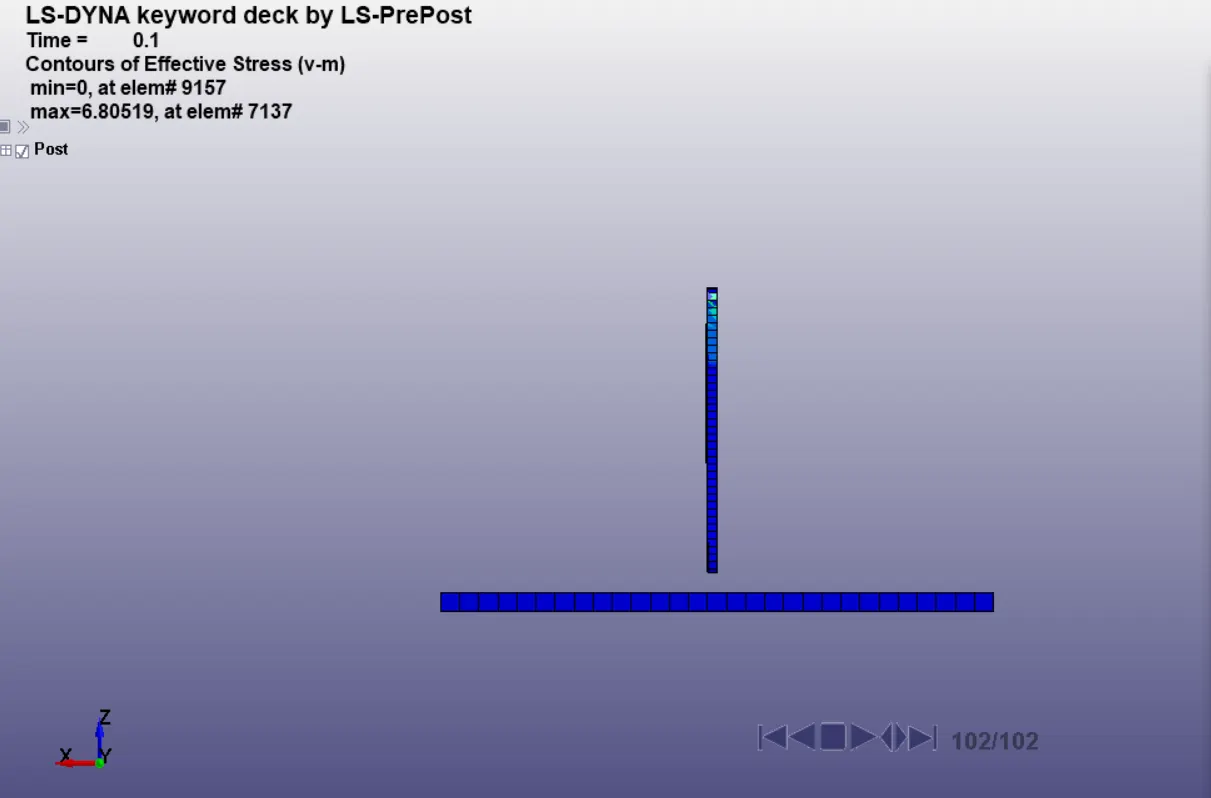
This is the final point. As we can see it finishes lower than from where it started.
The phone remains in contact with the floor for a longer period of around 10-15 frames whereas in the case without gravity it was in contact for just a single frame.
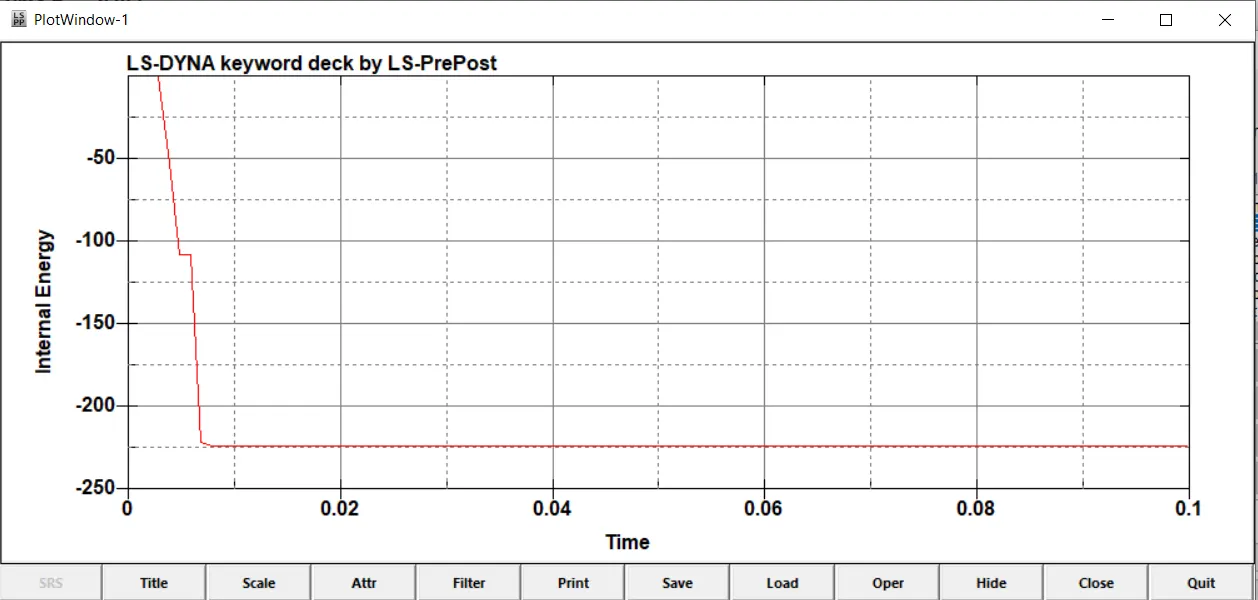
Energies :
Internal Energy :
Total Energy :
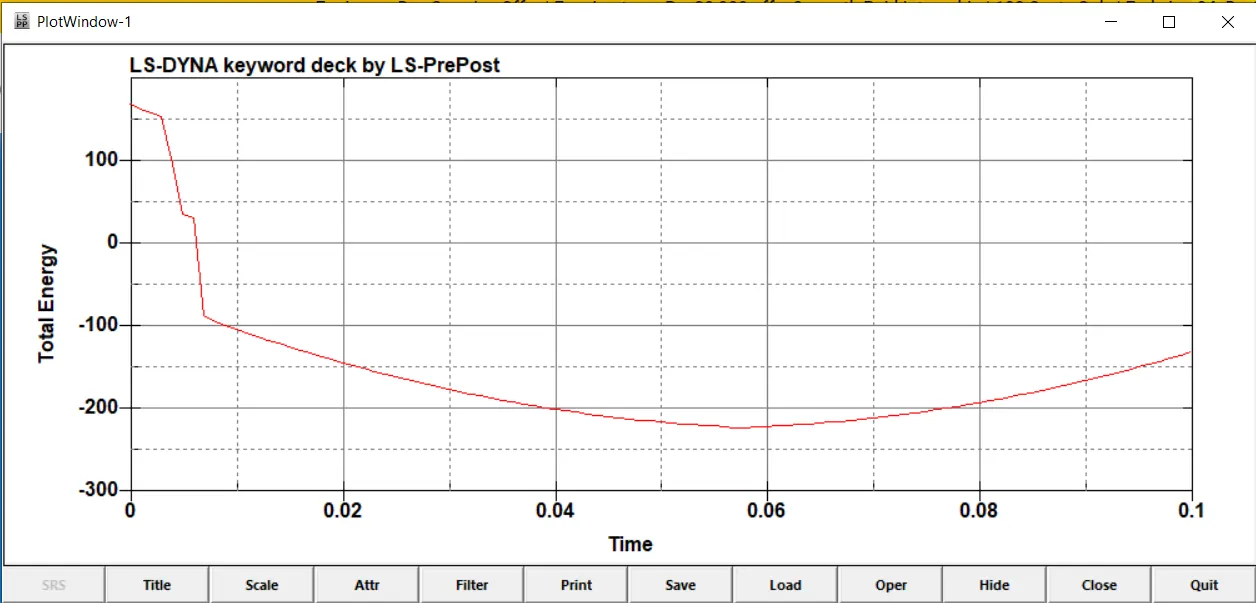
The total energy instead of dropping suddenly and remaining low follows a more gradual decline followed by a gradual increase indicating a dampening after after striking the floor board.
Internal Energy v/s Kinetic Energy :
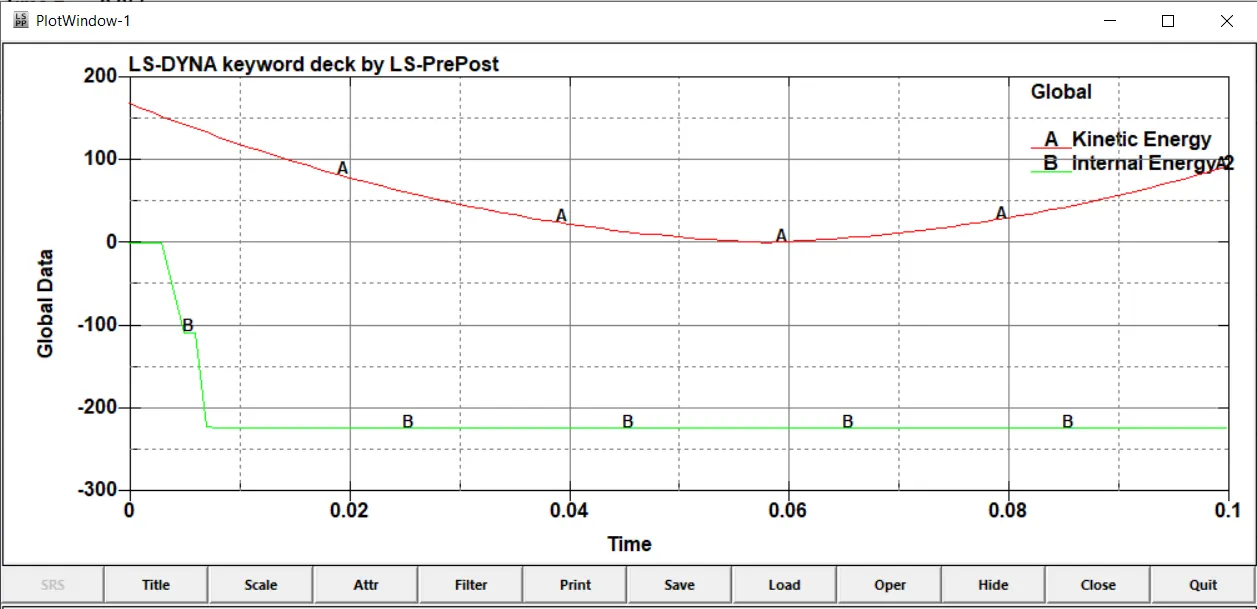
The internal energy drops in a staggered manner whereas the kinetic energy drops in a gradual manner forming a smooth slope as shown above.
Conclusion : In this way we have successfully studied the phone drop test case scenario.
Result : 2 models are attached, one with gravity named drop_grav and one without gravity titled drop_test_onlymesh
Google drive link : Drop_test