Week 3 - 2D meshing for sheet metal
Mesh Generation on Hood model of a passenger car BIW
1. Introduction
A passenger car hood section consists of four parts: inner extract, outer extract, latch reinforcement, and hinge reinforcement. For crash simulation of the car model, all the parts need to be meshed with predefined criteria. This is called preprocessing and ANSA is a widely used tool to perform such tasks. In this exercise, the CAD model for the hood was imported into ANSA and it was first cleaned for geometrical errors and shell mesh or 2D mesh was generated on it.
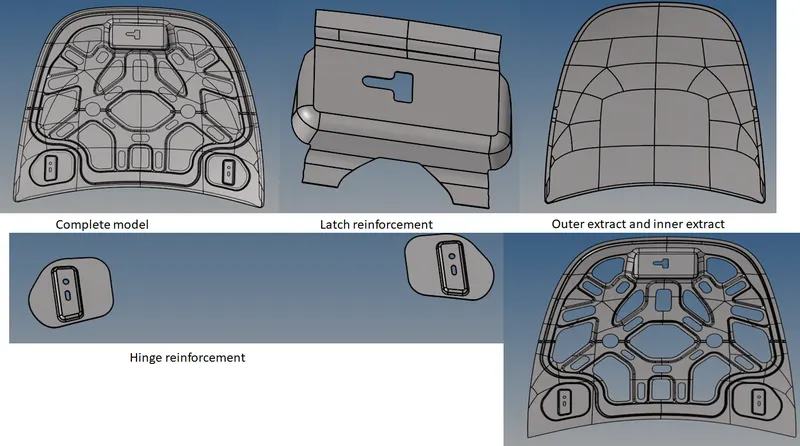
Fig 1.1: the complete hood model and its parts.
Shell meshing or 2D meshing refers to the mesh generation technique which is preferred for components having thickness lesser than 6 mm. Examples are sheet metal and plastic components used in vehicles. The first step is the extraction of a mid surface from the CAD model. This is basically a 2D representation of the component which is used to generate shell elements. The elements generated are assigned thickness using property assignment. Half the thickness is assigned to the upper side of the mid surface and another half to the lower side.
In this manner, a significant amount of time and resources are saved for preprocessing of such components.
2. Geometry cleanup
ANSA has several tools that can be utilised for geometry cleanup. It is mostly performed in the Topo module, which has many tools to perform surface splits, cons or edge operations like toggling or suppressing them and defeaturing them to meet the quality criteria, especially the minimum element length required.
The simplest among the available components was the latch reinforcement and it was first worked upon. A geometry check was performed on the model to see for errors like single cons(free edges), triple cons (T edges-connecting three surfaces), needle faces and cracks. They are repaired according to the need. Some of the tools that are used includes cut tool present in the faces menu, topo tool which basically pastes two single cons together and hot point insert and delete options. Hot points are basically the fixed points present on the CAD surface.
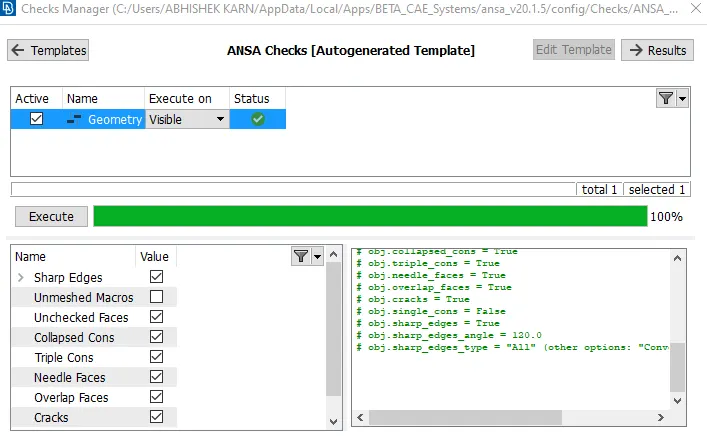
Fig 2.1: A typical geometry check
3.Mid surface Generation and final cleanup
The next step was to extract a mid surface out of the CAD models. The preferred method to do so is by manually offsetting the surfaces by half the thickness value but, there are automatic extraction options available in the ANSA. Skin is one of them, it works with components that are to be made by stamping process or they have a constant thickness throughout. Fortunately, the hood section components are all compatible with this method so it was used to perform the mid surface extraction.
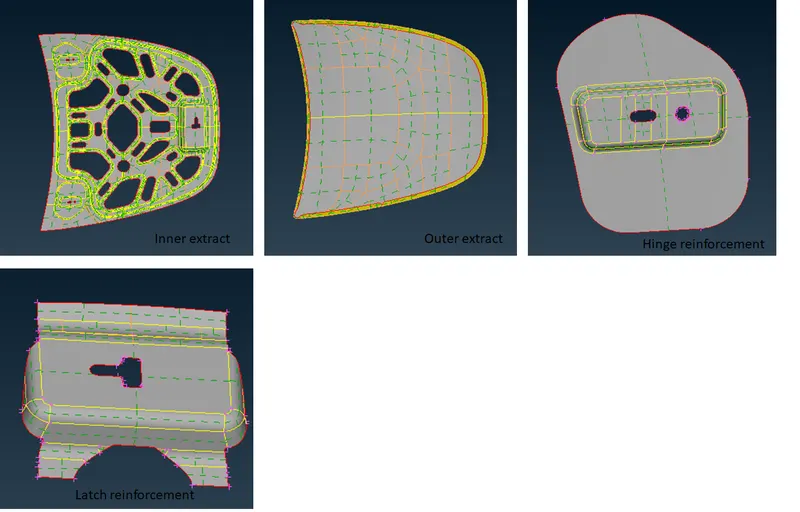
Fig 3.1: The extracted mid surfaces
After this, the length command which basically changes the distance between two hot points and ultimately decides the mesh size was used with a value of 5 mm. Then all the features were checked thoroughly for any chances of minimum length failures. The special focus was around the fillets and corners. Duplicate and very close double cones were toggled and split lines were created to divide the macro (area) into small pieces. Smaller areas facilitate easy quality control over mesh.
3.1 Symmetry
The presence of symmetry in the model saves a lot of time and effort. Only one half of the model needs to be worked upon and the remaining one can be easily reflected using the transform tool. The inner extract and the outer extract seemed to be symmetrical about the vertical line and there is a tool present in the ANSA which can be used to check for symmetry. The Rm.Dbl tool (remove double) is present in the faces section of the topo module. It was used to check the symmetry as shown in the attached figure.
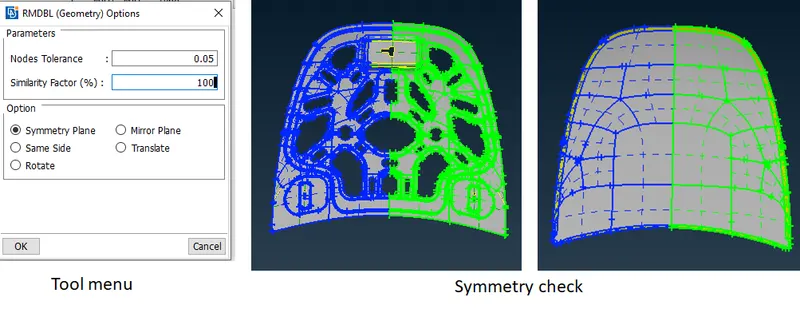
Fig 3.1.1: the symmetry check using Rm.Dbl tool
As clear from the above figure symmetry was present for the two models so half of them were deleted to simplify the task.
4. Mesh Generation.
The mesh module has a number of shell mesh generation techniques that can be utilised for meshing. Before proceeding with the meshing the quality criteria needs to be keyed into the software. This can be done from the utility menu where the quality criteria link is present. Attached below is the criteria used for this exercise.
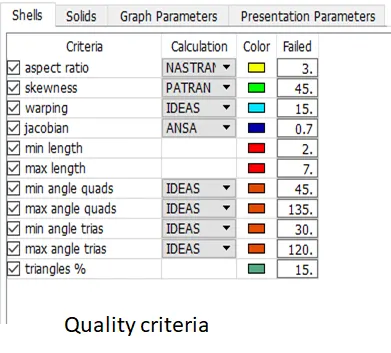
Fig 4.1: The quality criteria used for mesh generation.
After this, the mesh parameters window needs to be filled with the target length and minimum as well as maximum length for the elements. This window can be accessed from the same list.
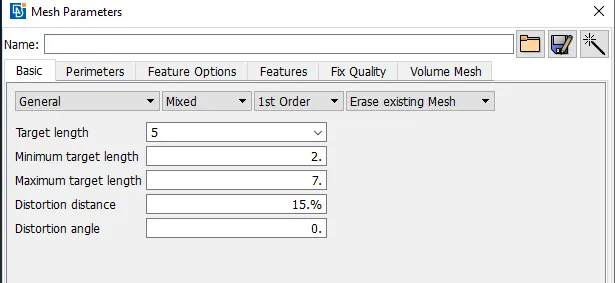
Fig 4.2: the mesh sizes used for the exercise.
The mesh generation was performed piecewise on the surface. First, a mesh was obtained using the Best tool on the surface which was followed by the use of Reconstruct tool. The reconstruct tool optimizes the present mesh for things like low tria concentration, avoiding back to back tria and correcting failed elements. These all are followed by the use of the split tool for forwarding transfer of tria element, paste option for backward transfer of the trial element and smooth tool for healing the disruptions caused in the mesh. Sometimes the fix quality tool needs to be used for fixing quality issues like warpage issues and minimum length issues. Also, the origin tool present in the Grid section of the mesh module was used frequently to bring all the elements to the perimeter.
The results of the above procedure are depicted below for each component.
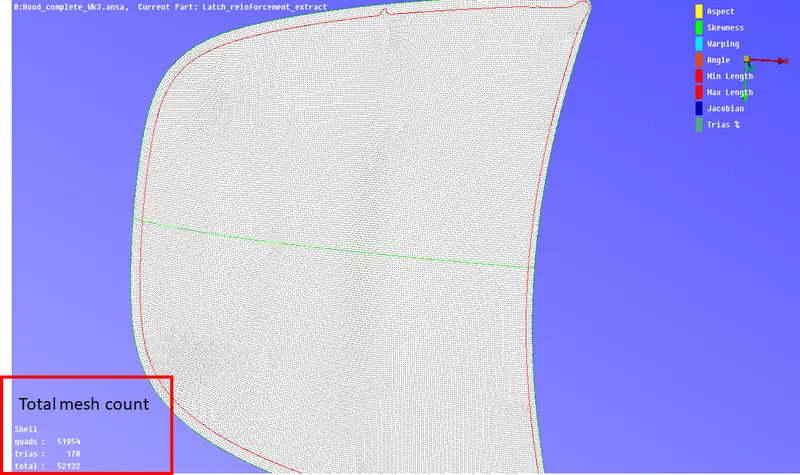
Fig 4.3: the mesh on Outer extract
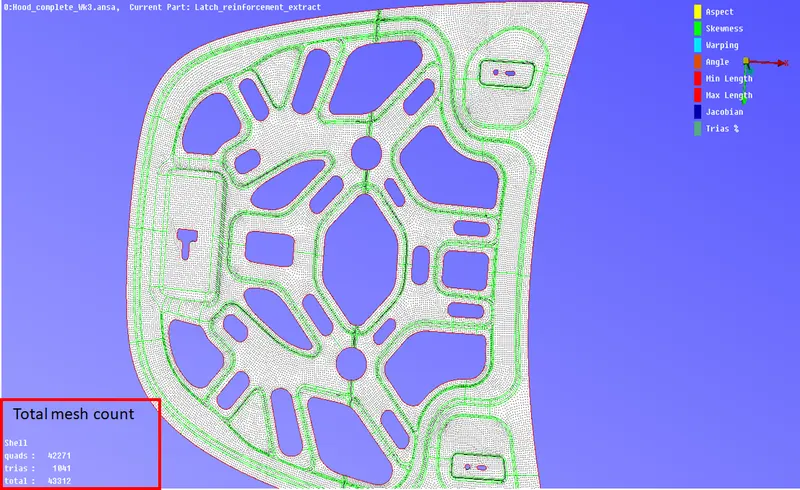
Fig 4.4: The mesh generated on the inner extract of the model
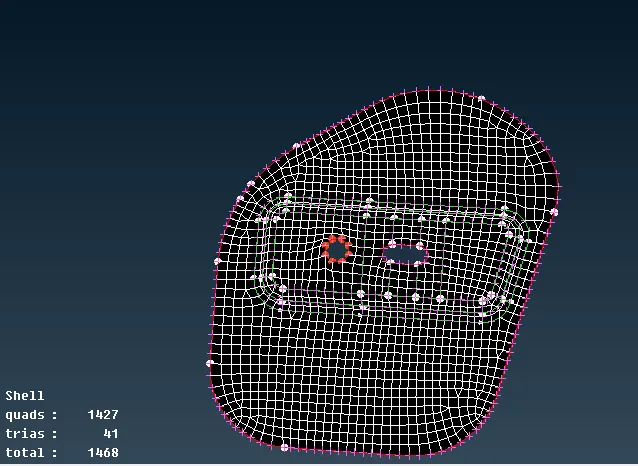
fig 4.5: The mesh generated on the Hinge reinforcement
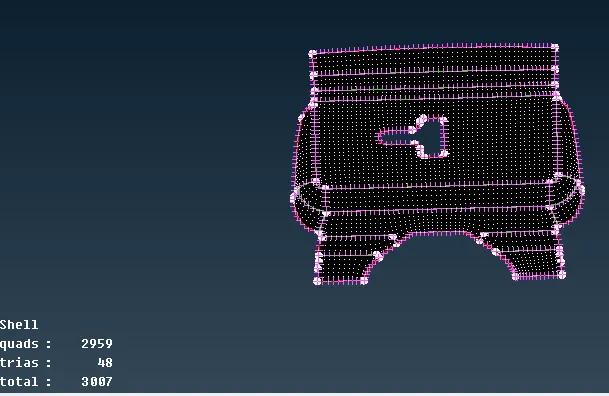
Fig 4.6: the mesh generated on the latch reinforcement
At last, the material assignment was carried out for all the mid surfaces and 'draw shells as solids' was activated for detailed visualisation of the elements.
5. Conclusion
This exercise was a good hands-on for shell mesh or 2D mesh generation for the sheet metal components. A very good understanding of the geometry cleanup and various tools available in the ANSA software can be developed with the help of this exercise.
The models are attached for evaluation.
Thank you.