Week 2 Challenge
Week 2 Challenge.
Question 1:
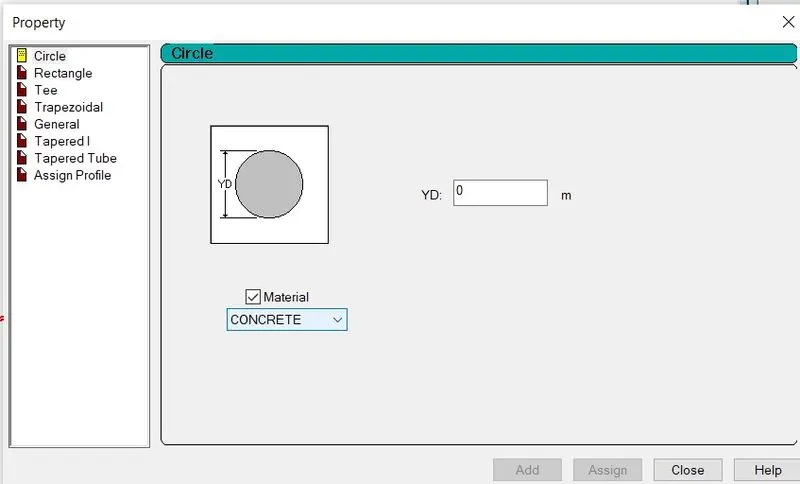
1. How will you assign Circular section to column?
Answer:
- Go to property > Define > Select Circle > input dia YD > Add > assign.
2. How will you assign Unit system to a .std model file?
Answer:
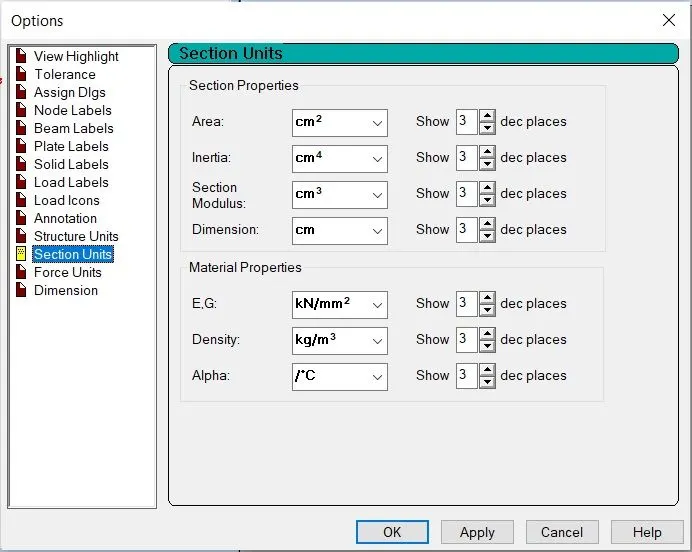
- Go to view > Display option > select structural units and change the dimensions to the required units.
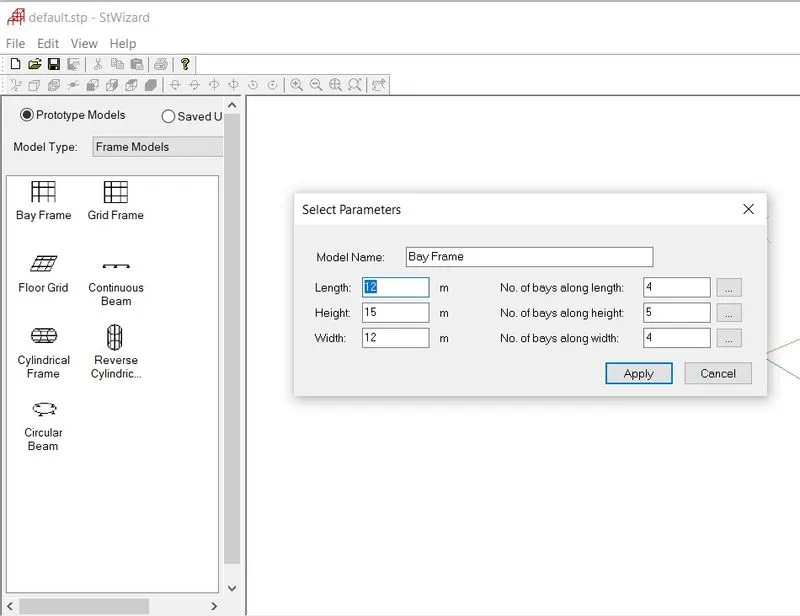
3. What are the parameters to be specified while using “Bay Frame” option?
Answer:
- Go to analytical modelling > structure wizard > model type, specify > model name
Model name
Length = No:of Bays along Length
Height = No:of Bays along Height
Width = No:of Bays along Width
4. Name few codal standards incorporated in STAAD Pro software.
Answer:
- In STAAD pro the codal standard are incorporated for the steel, concrete, Aluminium.
- For Steel codal provision are IS 800 : 2007, IS 801
- For Concrete codal provision are IS 456, IS 13920 for seismic design.
5. How will you specify the design compressive strength for a RCC section?
Answer:
- Go to Design option> Specify case > Design parameter > In the design parameter the compressive strength Fck of RCC section is given as 25000 KN.m.
Question 2:
1. state the ‘’ Input ‘’ steps involved in RCC design.
Answer:
Following are the inputs involved in RCC design;
- GEOMETRY
- The Node location & node spacing are given.
- PROPERTIES.
- Specify the sectional properties of the section.
- MATERIALS
- Specify the properties of materials.
- SPECIFICATION.
- Specification are given
- SUPPORT.
- The end support are to be given
- LOADING.
- Need to provide the loading pattern & the loading combination
- ANALYSIS.
- Need to analyse the model & all the input specification are given.
- DESIGN.
- Finally the design are to be done.
2. Explain the difference between Fixed and Enforced support condition in STAADPro.
Answer:
- Fixed Support: When the fixed or fixe but type of support is specified, for those degrees of freedom which are to be treated as fully restrained,
STAAD assumes the displacements to be known qualities whose value is zero. Hence, those DOF are not considered for the stiffness matrix, & their value is not calculated.
- Enforced Support: When the enforced or enforced but type of support is specified, for those degrees of freedom which are to be treated as restrained,
STAAD assigns a spring with a very high spring stiffness - translational stiff springs for translational restraints, and rotational stiff springs for rotational restraints. Those degrees of freedom which are free to displace are assigned springs of zero stiffness. Hence, for all the 6 degrees of freedom at such supports, the displacements are calculated. The ones which have a stiff spring will end up having a negligible displacement, and those with zero-stiffness-springs will have a displacement based on the structure geometry, properties and loading.
Question 3:
1. Explain the steps involved in analysis of a model using STAAD Pro sequentially.
Answer:
- Create model using Node system > Add beams > choose properties > Add supports > Add specification if any > Add loadings > apply perform Analysis > Run the model > Go to post processing > Note Displacement, Shear Force and Bending Moment.
2. Explain the two ways in which a structural framework/model can be created in STAAD Pro software.
Answer:
- By Nodal method.
- By Structure wizard method.
3. Elaborate the different support conditions in STAAD Pro.
Answer:
- Fixed Support.
- Pinned Support.
- Fixed But.
- Enforced Support.
- Enforced But Support.
- Tension / Compression Only spring.
- Multilinear spring.
- Foundation.
4. How will you extract the stress distribution for a staircase slab?
Answer:
- After Running the Analysis.
- Go to post processing > plate result > Select load case > select stress type > max Absolute.
5. Explain the different ways to view SFD & BMD in STAAD Pro.
Answer:
- Go to Beam Result > SF and BM click on Ribbon.
- Go to Layout > Beam Result graph.
- Double click on beam get result in of SFD & BMD with diagram.
PRACTICAL
1. Analyze the following structural elements and validate the results
A. Simply Supported Beam
a. A Simply supported beam with two point loads symmetrically placed
b. Span L = 20m
c. Load P = 50kN each
d. Both P located at 5m from each support
PROCEDURE:
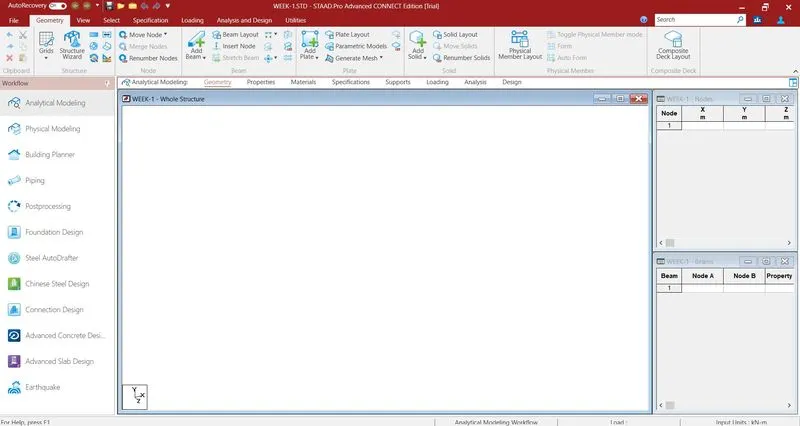
- Open up the software and create a new model.
- The first step is to initiate the project in STAAD.
- The same can be done by clicking on the new option available on the staad inro screen.
- After clicking on the new model, you can feed the project details.
- Also, you will be asked to specify a location within your system.
- Then, click on create to start a new project.
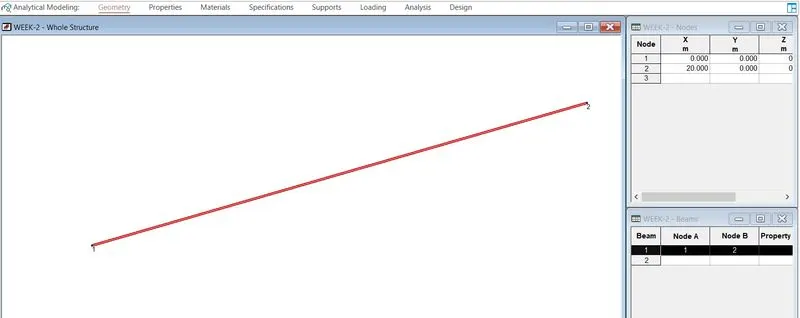
- Model the Beam of Required Span.
- To model the proposed beam, go to geometry and create the first node at x-0, y-0 & z-0.
- Then, select the created node by switching to the node cursor.
- Press Ctrl+C & Ctrl+V.
- Specify the span length that is 20 m in x-direction & enter.
- Both the ends of the required beams are created now go to add beam > select first node and then second to create a beam of the proposed length.
Nodes and Beams;
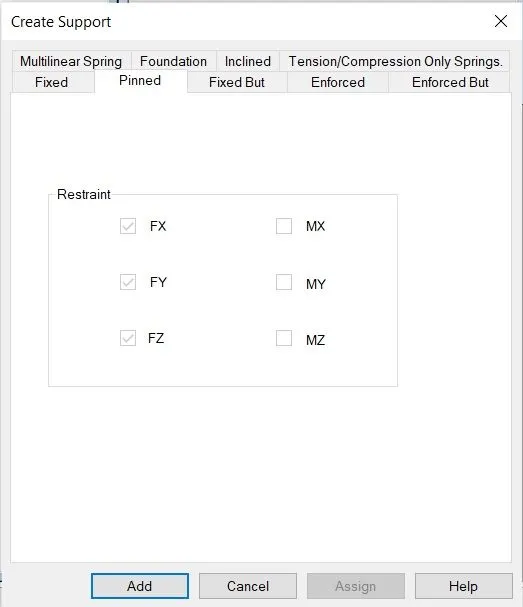
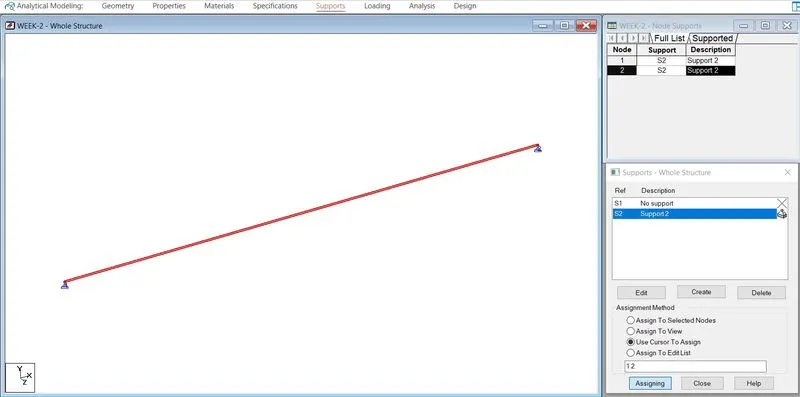
- Assign support conditions.
- Go to support > Simply supported (Pinned) > select one node > assign to selected nodes > Enter OK.
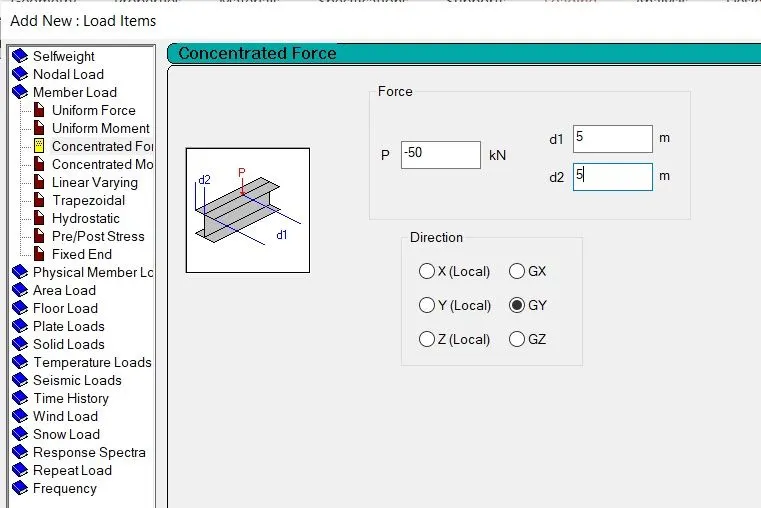
- Assign the proposed load.
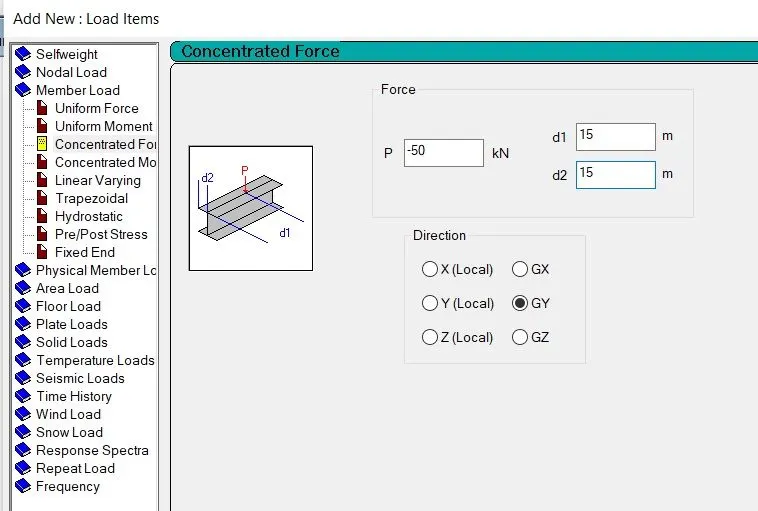
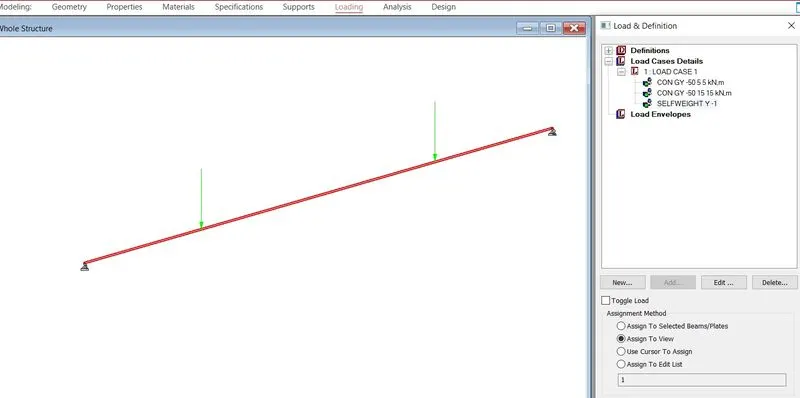
- Go to loads > create > Concentrated force load > global y > P= -50 KN > d1= 5, d2=5 & OK. and
- Go to loads > create > Concentrated force load > global y > P= -50 KN > d1= 15, d2=15 & OK.
- Now, select the load and beam and check the radio button for assign to selected > apply > ok.
- Assign the section property and Run the analysis.
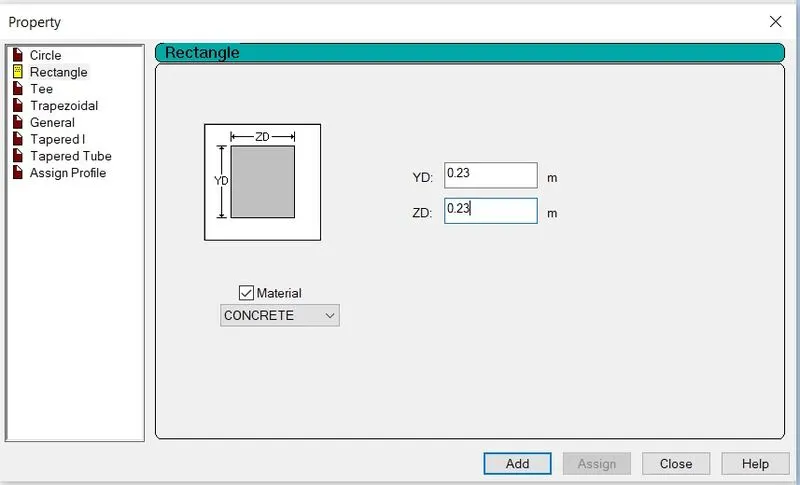
- To assign a concrete section to the drawn beam, go to properties > define > concrete rectangular > specify the typical dimensions > OK.
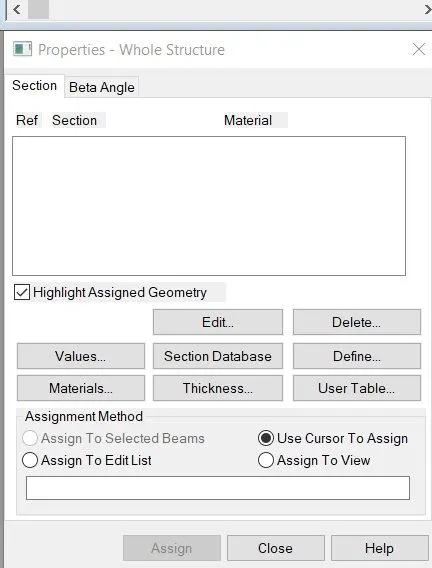
- Now select the beam and assign the section property by checking the radio button.
- After this, select the analysis method that is perform analysis from the design and analysis panel.
- Once you are done with setting up the analysis method ahead and run the analysis from the analysis and design panel.
- Wait some time for the analysis to get complete and look for errors and warnings.
- If there are no errors or warning signs upon completion of the analysis, you’re good to go.
- Analysis Command > Run Analysis.
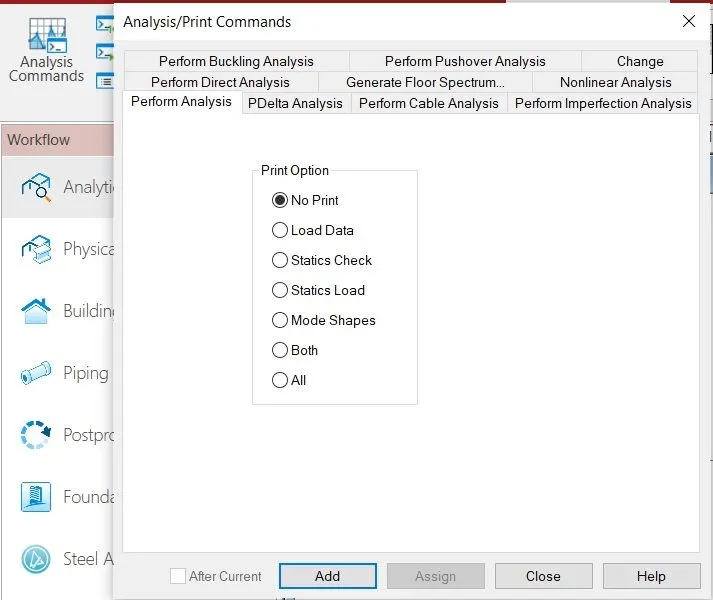
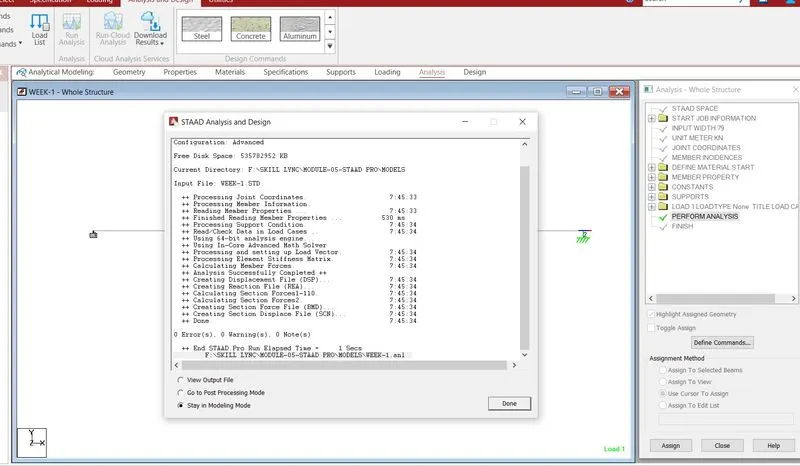
- Draw Shear Force Diagram and Bending Moment Diagram.
- Now, go to the post-processing mode > select the load cases > apply OK.
- The, all the analysis results will be automatically visible on your staad screen.
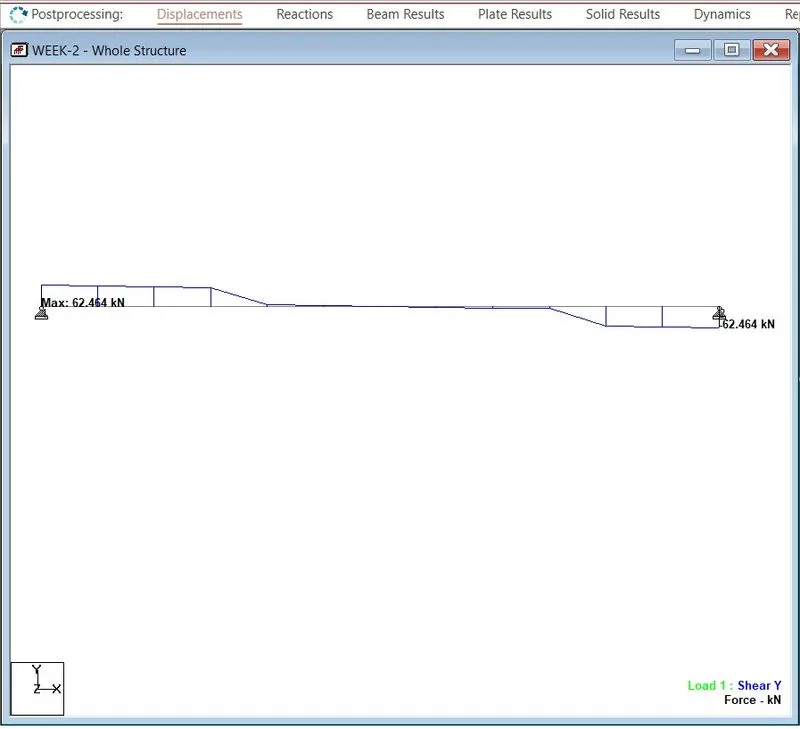
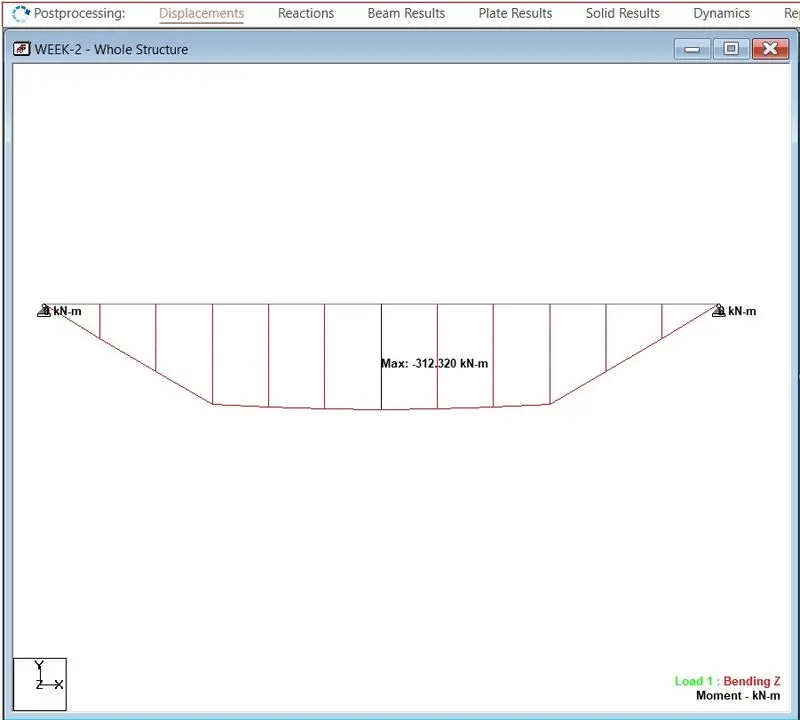
- Select beam results > Mz for bending moment > Fy for shear force diagram.
- Make sure to check the annotate option to view the values along with the diagrams are inserted below.
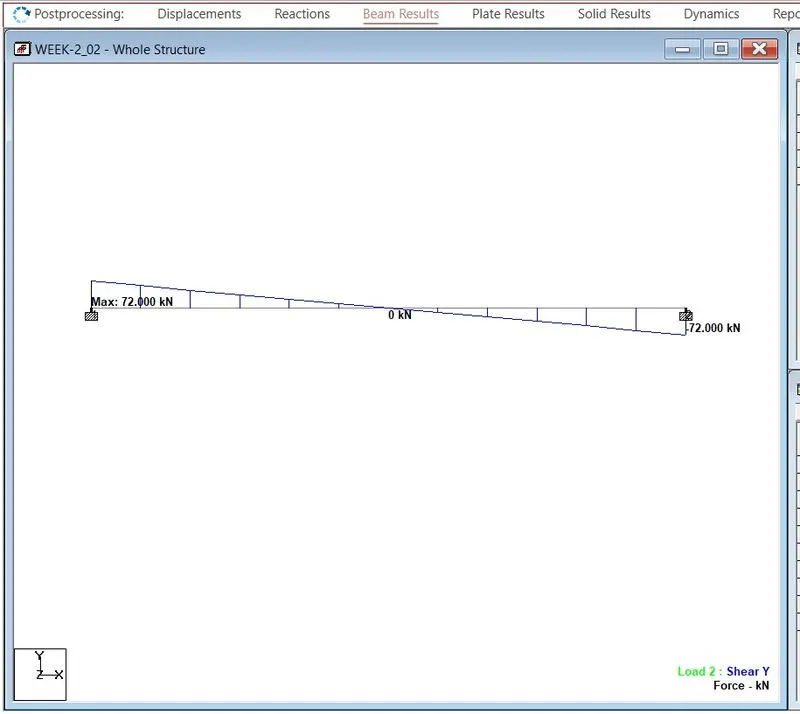
Shear Force Diagram.
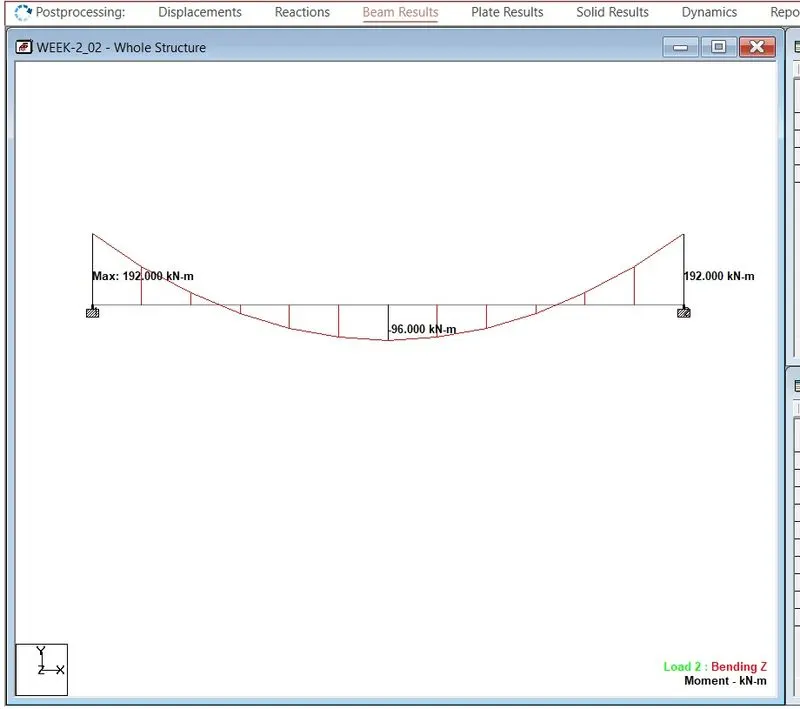
Bending Moment Diagram.
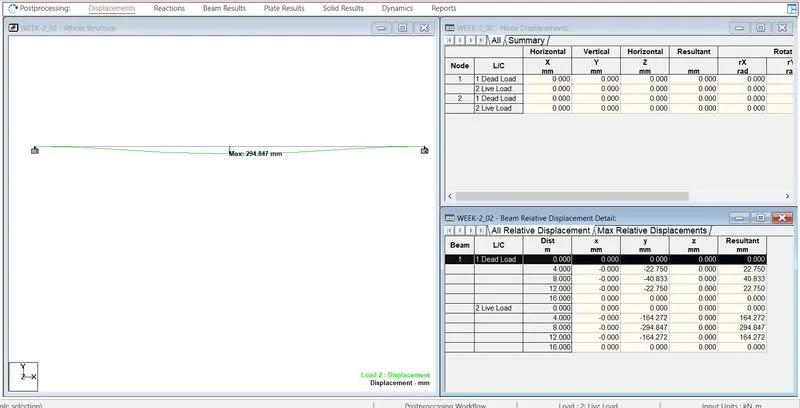
Displacement.
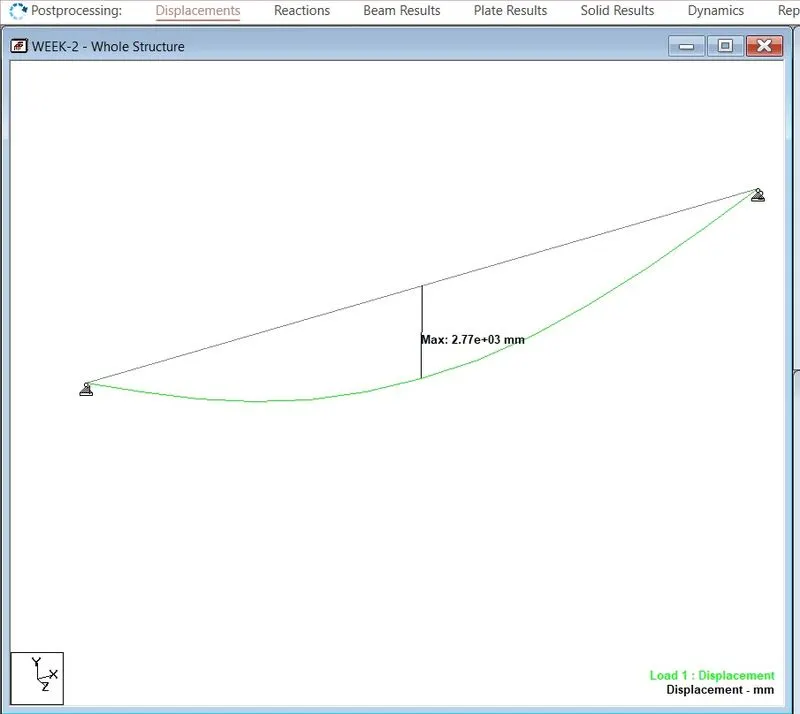
B.Fixed Beam
a. Span L = 16m
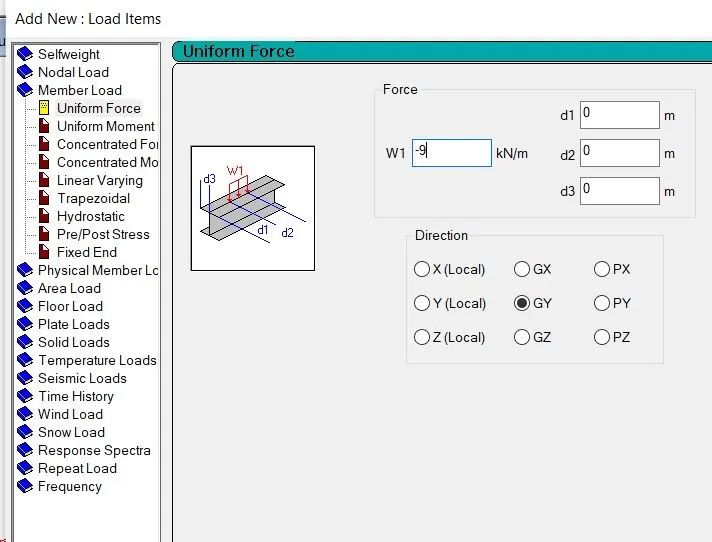
b. Uniformly Distributed Load w=9kN/m
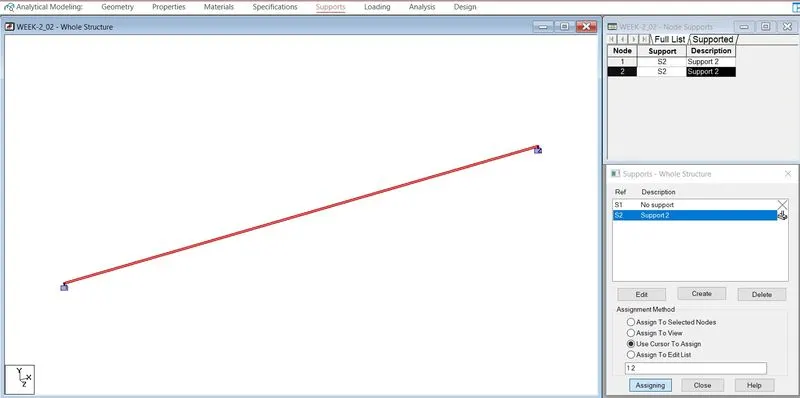
Span Length = 16m @ Fixed support.
Uniformly Distributed Load w=9kN/m.
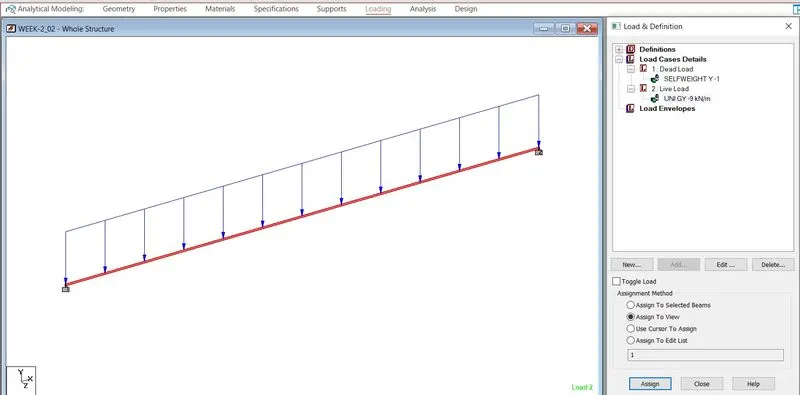
Shear Force Diagram.
Bending Moment Diagram.
Displacement.
RESULT:
- Analysis & Design of Beam is created using STAAD Pro software successfully.
- Shear Force Diagram & Bending Moment Diagram is shown.
- Location of Maximum and Minimum moment & shear force is noted.