Week -2
1. doorbell:
here, the simulink block is made for the doorbell with solenoid switch. firstly, we have to understand how the doorbell works using solenoid switch.
theory:
solenoid:
The solenoid is a coil of wire, and the plunger is made of soft iron. The magnetic field is formed around the coil when an electric current passes through it and draws the plunger in. We can say that the solenoid is responsible for converting electrical energy into mechanical work.
working of solenoid:
Solenoid works on the principle of electromagnetism. When the electric current passes through the coil, the magnetic field is generated. When a metal core is placed inside the coil, the magnetic lines of flux are concentrated on the core. This increases the induction of the coil as compared to the air core. This concept is known as electromagnetic induction.
As we know, coils are made of numerous turns of copper wire wound tightly around it. A strong magnetic flux is developed when the current passes through the wire. The concentration of flux is high on the core, while some of the flux appears at the ends of the coil and outside the coil too. By increasing the flow of electric current or by increasing the density of the turns, the magnetic strength of the solenoid can be increased.
The housing is made of iron or steel. Housing is surrounded by the magnetic field created due to the coil. The plunger lets the mechanical force do work. Solenoids too feature positive and negative poles, through which an object can be attracted or repelled.
Consider a solenoid whose length is more than the radius. Enameled and insulated wire is wrapped with a wire in the form of a helix with a small gap between the turns. The amount of vector force provided by each turn, and the total magnetic field created by the solenoid are equal to that formed by a circular loop. This gives the total magnetic field of the solenoid.
door bell:
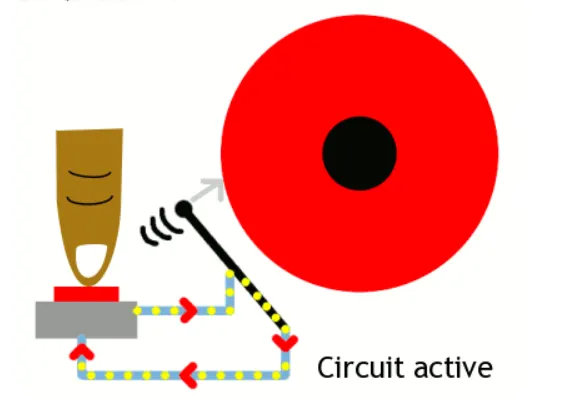
when the circuit is closed.
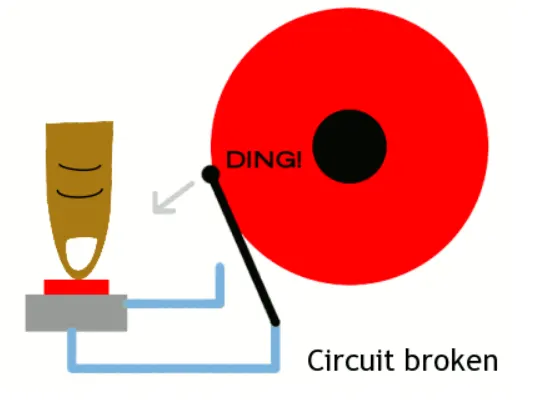
doorbell in open circuit.
if the push button is closed.the circuit become closed and current flows . when the current flows through a solenoid it create a electromagnetic field which pull the rod. and make the circuit open when the moves to normal the circuit become close and again the bell ring. this cyclic process will continue untill the switch is released. and in some case it is in vice versa .
required block in simulink:
ps simulink convertor,simulink ps converter, switch, battery, electrical and mechanical referance,scope , display,pulse generator,solenoid, mechanical translational sensor and solver.
simulink:
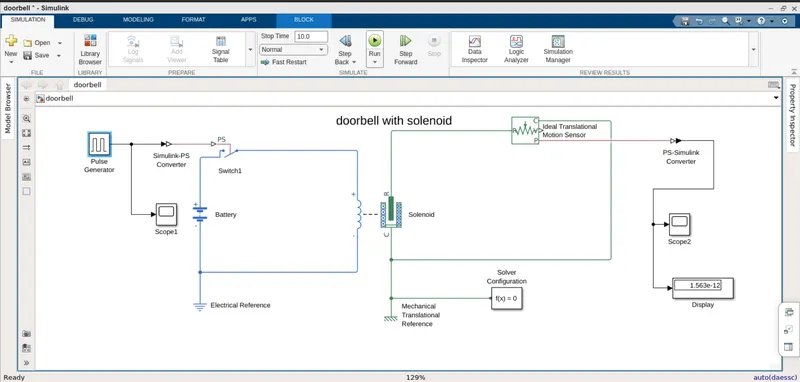
block diagram for doorbell with solenoid.
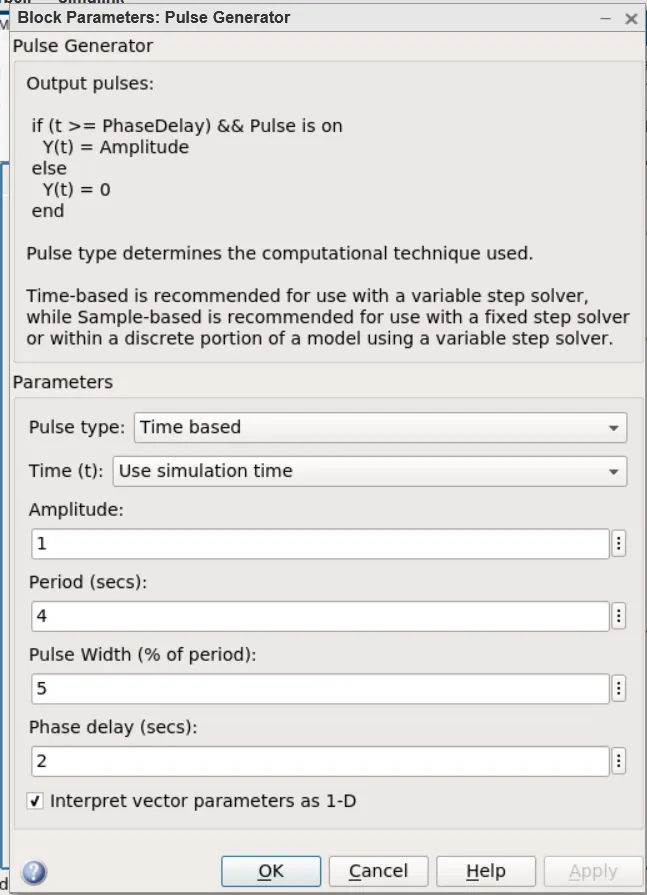
seting for pulse generator
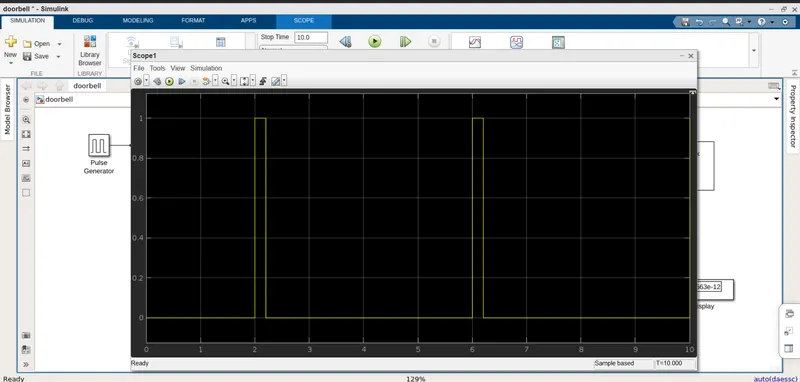
input for pulse generator.
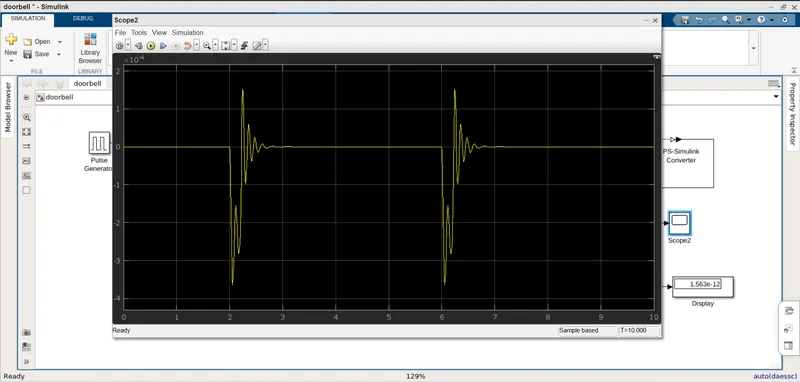
output in the doorbell.
conclusion:
here the simulink block for the doorbell with solenoid is done.
2.thermistor:
Temperature source – 20 from 0 to 10 seconds, 27 from 10 to 30 seconds, 23 from 30 to 50 seconds.
Fan conditions – ON if temperature above 25 degrees , OFF otherwise.
Simulink model explanation:
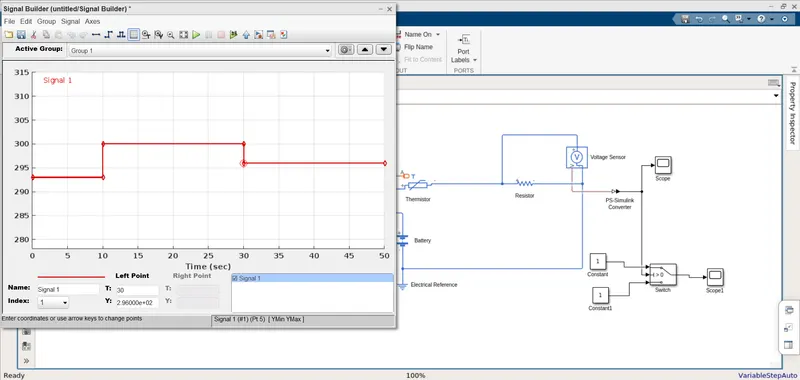
Signal building block is added to input the values as per given conditions.
At point 1, time = 0 sec & Temperature = 293K.
At point 2, time = 10 sec & Temperature = 293K.
At point 3, time = 10 sec. & Temperature = 300K.
At point 4, time = 30 sec. & Temperature = 300K.
At point 5, time = 30 sec. & Temperature = 296K.
At point 6, time = 50 sec. & Temperature = 296K.
required block for thermistor:
Controlled temperature source,Thermistor,Resistor,Voltage sensor,Voltage Source,Electrical Reference, scope,solver configuration, thermal referance, signal builder and constant.
what is thermistor?
Thermistors, derived from the term thermaIly sensitive resistors, are a very accurate and cost- effective sensor for measuring instruments. Available in 2 types, NTC (negative temperature coefficient) and PTC (positive temperature coefficient), it is the NTC thermistor that is commonly used to measure temperature. A thermistor is a type of resistor whose resistance is strongly dependent on temperature, more so than in standard resistors. The word thermistor is a portmanteau of thermal and resistor. Thermistors are divided based on their conduction model.The term thermistor comes from “thermal” and “resistor”. A thermistor is a type of resistor whose resistance is reliant on temperature; it's a resistance thermometer. They're made from metallic oxide which is moulded into a bead, disk, or cylindrical shape and then enclosed with epoxy or glass.
block diagram for thermistor:
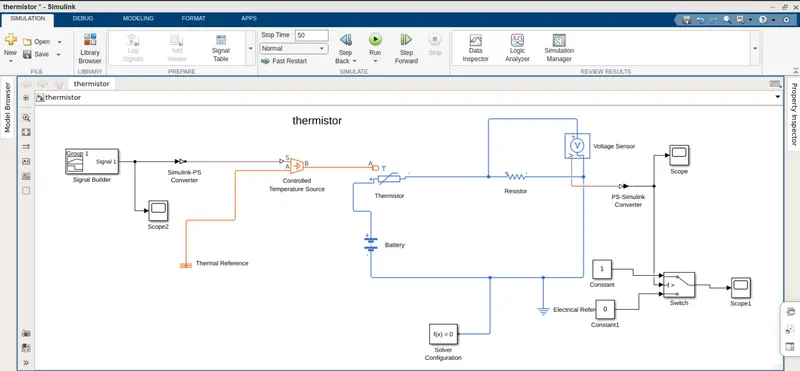
In this model the signal block is used to get temperature signal for the controlled temperature source (heater).
The temperature of the heater is supplied to thermistor to sense it. Now in order to run the fan when temperature reaches the value of 298K we have to trigger the circuit with some external supply of battery and as there is no device to calculate the resistance value of thermistor so we have attached another resistor in series across the terminal in series. The voltage sensor is attached across the resistor to calculate the voltage drop into it & this voltage drop value is inputted as threshold value to the switch to start the fan & fan will go on when threshold value is more than 0.109.
signal builder input:
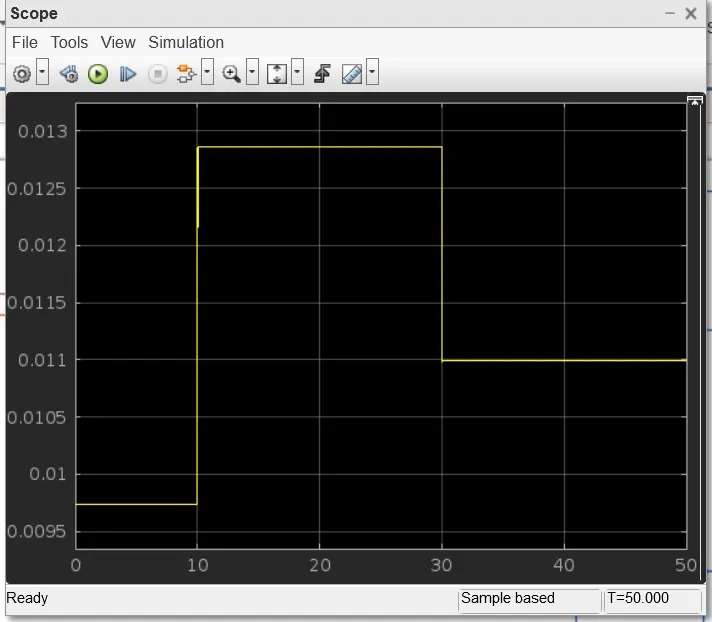
result:
conclusion:
using simulink model, with the help of temperature in the heater the fan is turned on and off. From 0-10 seconds fan is OFF because the temperature is 293K which is below 298K, after 10 seconds it goes to 300K, so fan will turn ON because temperature exceeds 298K. after 30 seconds fan will turn OFF because temperature goes 296K less than 298 K.