Week 12:Project 2-Meshing of Rear Wheel Holder challenge
AIM: To mesh Rear Wheel Holder of the Panel with the proper mesh flow for the given Criteria File.
Objective:
1. To clean up the geometry error in the model
2. To extract the Mid-Surface of the component
3. Once we extract the Mid-Surface of the component we have to clean the geometry to avoid any minimum criteria element error while meshing it.
4. To Check the Defeature of the components
5. To Mesh the midsurface while trying to avoid the trias elements and their concentration.
6. If the Mesh follow is not good we have to rebuild it to achieve a good mesh follow
7. Clear all elements that tend to achieve the quality criteria.
8. After that Assign a Thickness to the element to the actual length of the component as 0.75mm
9. Checking for the Free-edges in the components
Procedure:
Step 1:
To start up with the model, we have to import the model into Hypermesh.
Check for any distorted parts are occurred in the component, since while checking the model here we can see some of the errors are been occurred in it.
The below parts are needed to be captured or rebuilt on the surface.
Some pictures are shown below which were needed to check-up with the surface errors.
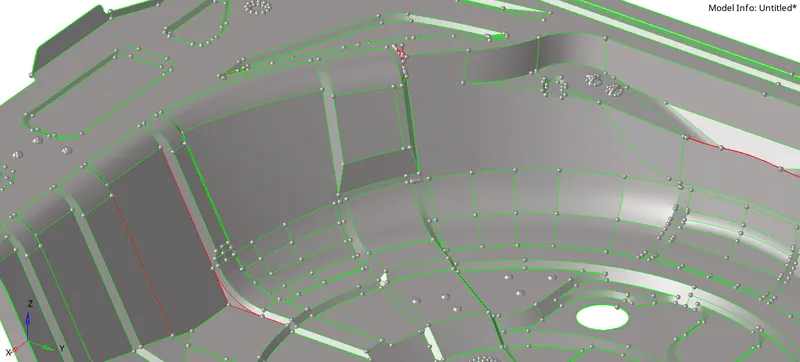
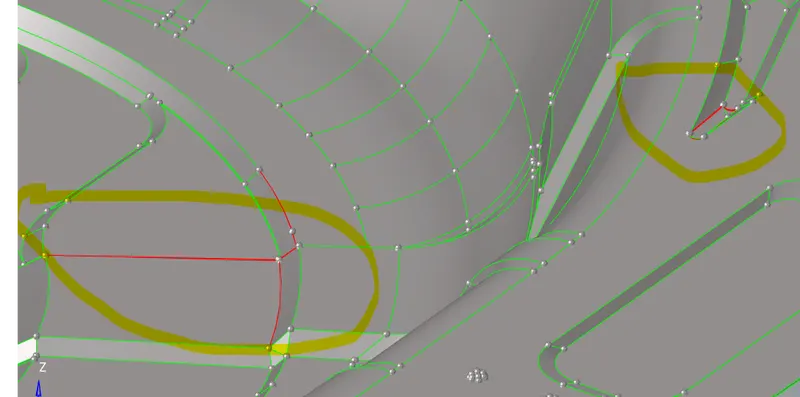
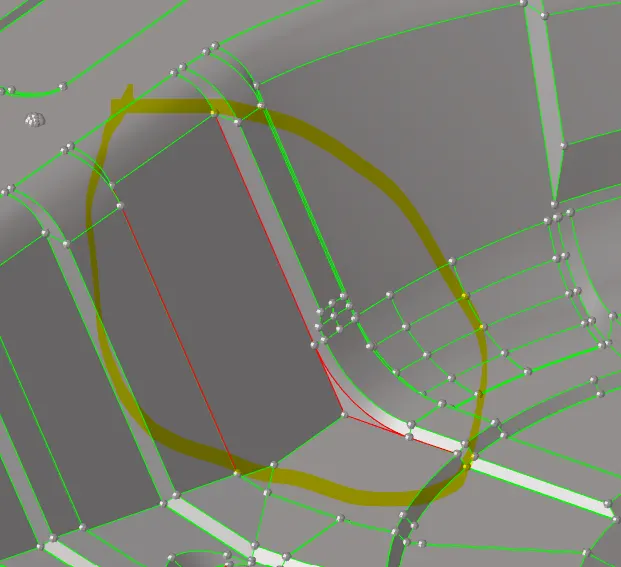
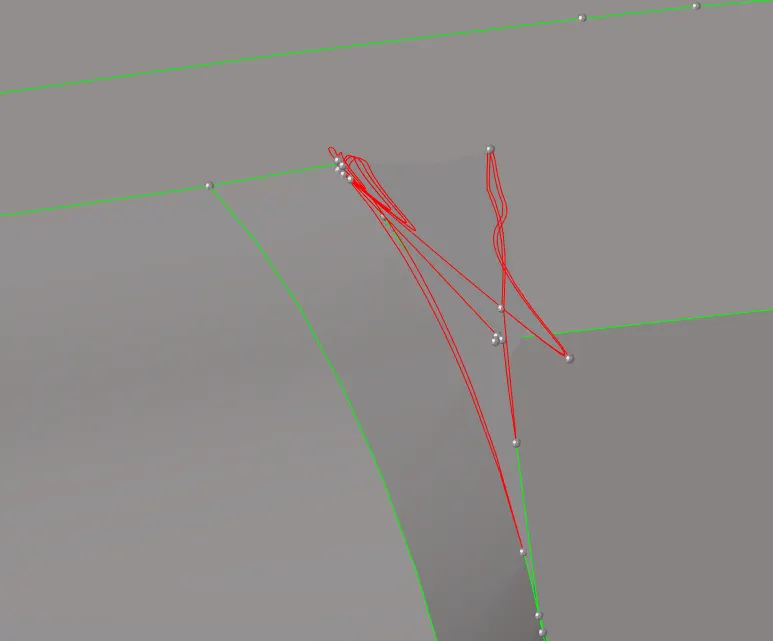
An added step during the geometric clean-up is the process of defeaturing all the fillets that will fail for the minimum length criteria when we mesh on it.
Through this process, we can make the extraction of the mid-surface much more easier and improve the mesh flow overall. After the Defeature command is done, we then need to switch to the surface view to "By Topo" to view for any free edges and then thus resolve them if necessary.
Step 2:
Once after cleaning up the geometry error in the component, we performed to overcome the error to achieve the exact midsurface, Since the model is more over equal in thickness which is varying from 0.75 to 0.85mm, as of now is it consider a uniform thickness.
Now we need to extract the midsurface since it is sheet metal, we can use the Midsurface command, in that mostly for that to extract the sheet metal we will use the "Skin Offset" method, But I can't able to achieve it so that I have used "Offset" method.



The below image is after the extract of the Midsurface:
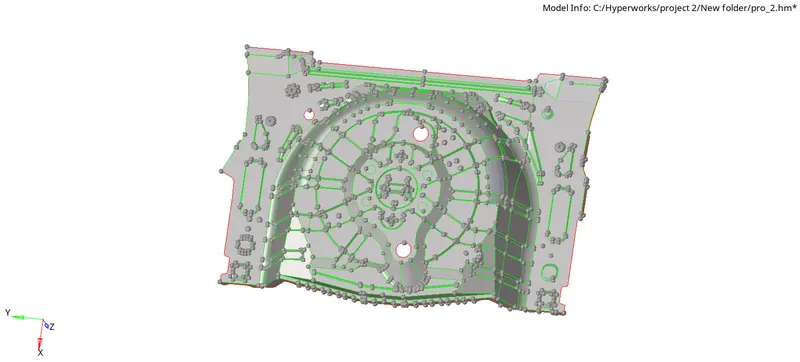
After the mid-surface is extracted, then we need to proceed to clean the midsurface for anywhere we might get a minimum length error. To do this, we first need to measure the distance between two points on the surface where we might get an element that might fail for a minimum length. To measure the distance, we need to use the Distance command under the Geometry tab (shortcut-F4).
Then we select the two points and view the distance between them. If the distance is below the minimum element length then we either toggle the line or take a mid-line of the feature so that the feature is also captured.
Step 3:
Meshing the Component:
To get the proper flow of the elements, I have split the component into 4 parts, once the meshing is done we can toggle the line.
Before we can start meshing, we need to set the Quality criteria for the meshing process. To do this, we need to use the Preferences tab and use the option of Criteria File Setting. In this option, we need to fill in all the necessary Quality criteria values such as the value of the minimum and maximum length or even the value for warpage, etc.
Target Element Length = 5 Units
| S.N | Quality Criteria | Value |
| 1 | Aspect Ratio | 5 |
| 2 | Skewness | 45 |
| 3 | Warping | 15 |
| 4 | Taper | 0.5 |
| 5 | Min. Length | 2 Units |
| 6 | Max. Length | 8 Units |
| 7 | Min angle Quad | 45 |
| 8 | Max angle Quad | 135 |
| 9 | Min angle Tria | 20 |
| 10 | Max angle Tria | 120 |
| 10 | Tria % | 10 |
Once set the Quality criteria, then need to proceed to mesh the midsurface. To perform meshing on the component, we need to use the command of Automesh (Shortcut-F12) under the 2D Tab. In this command, we need to change the element type to "Mixed" and change the average element length to 5mm (as given in the Quality criteria).
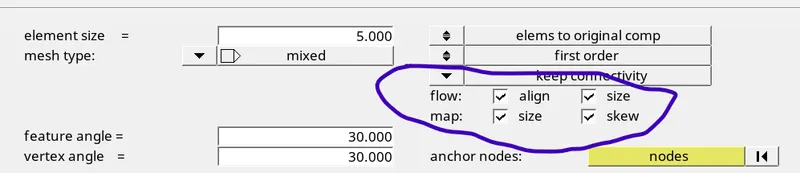
Always keep the flow Align and size option ticked as it will give a much better mesh flow on the component. The basic rules while meshing are to be followed here, such as that there should be no tria element on a feature line and even to avoid the rotational Quad elements in the mesh. We also need to keep the tria count as low as possible because Tria elements are much stiffer than Quad Elements, but Tria elements are to be given preference over the presence of Rotational Quad Elements. If we get any Fixed/Pattern Tria we simply need to remesh these regions. Or we can simply resolve the Rotational Quad elements into two separate tria elements in two different directions or even resolve the Fixed/pattern tria elements into three different directions as well.
For better mesh flow and control over the nodal number, we can divide the geometry into much smaller segments that can be meshed individually.
The below image is shown once extraction is done to the surface:
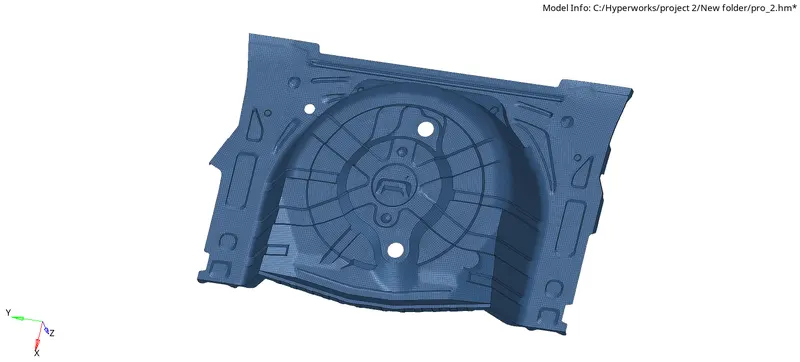
Once the Extraction of the element is done, now we have to clean up the element which tends to achieve the quality criteria, to get into that option 2D -> Quality Checks, in it, we have many options to optimize the element according to the criteria file.
Quality checking options such as optimize node, element optimizes, smooth, place node, split edges, etc.,

Another method is also available in the Hypermesh to check up the quality criteria, 2D -> Element Cleanup, in it we can directly drag the element to clean up the model.
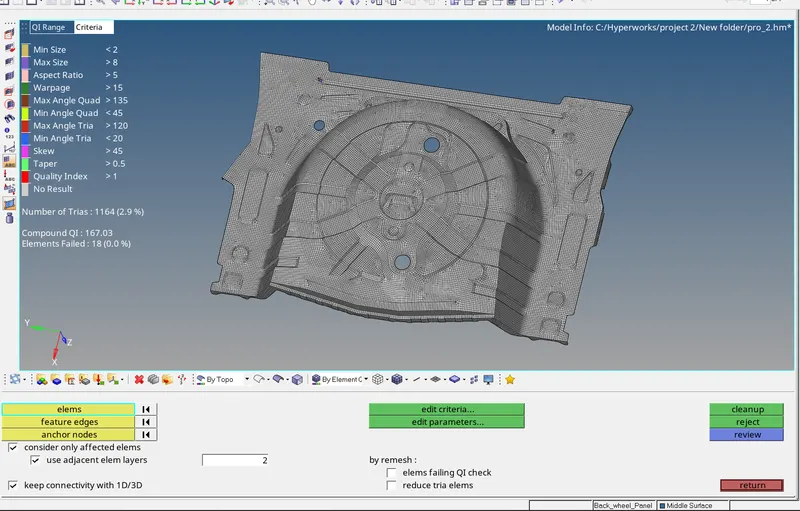
As of now, we have completed the extract of the model, now we have to assign the thickness to the model to match up the thickness of the model as the same.
The following steps are used to assign the thickness and material to the component,
The first step when assigning thickness is to measure the thickness at various spots in the model.
Now to assign proper thickness to the elements, we need to create properties and change the value of thickness for that property. To create a property, we again right-click on the tree and select the create option and under this option, we need to select the option of Property.
After we create the property card, we then need to change the value of thickness for this property. The value of thickness for a property is under the value of "T" under the property tab. So if the thickness of the component is 0.75 mm, then we need to change the value of "T" to 0.75mm, type of card let it be as "PSHELL".
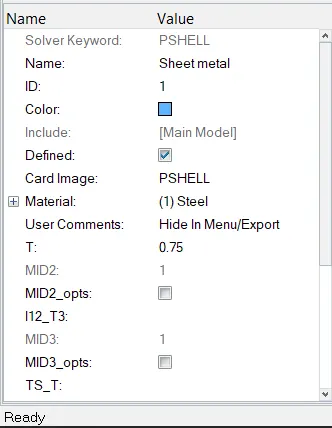
After the property is created, we then need to assign this property to the component for it to reflect onto the elements. To do this, we simply need to right-click on the component and select the option of assign.
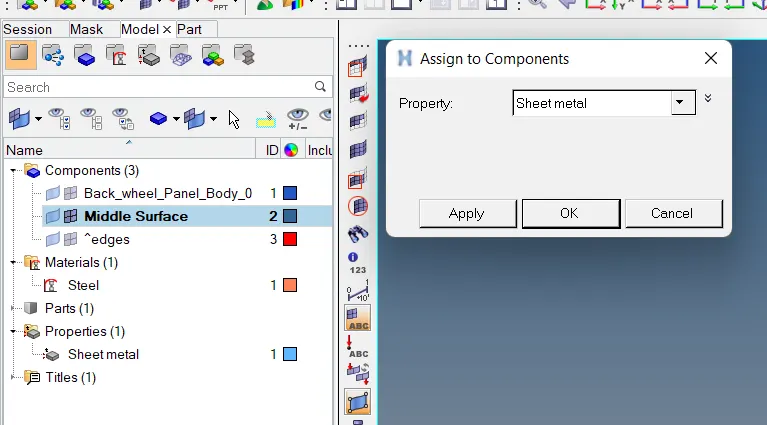
Once assign the thickness of the model now we can create a Material for the Sheet metal to get its properties of it.
The same procedure is followed as we did to create a property card.
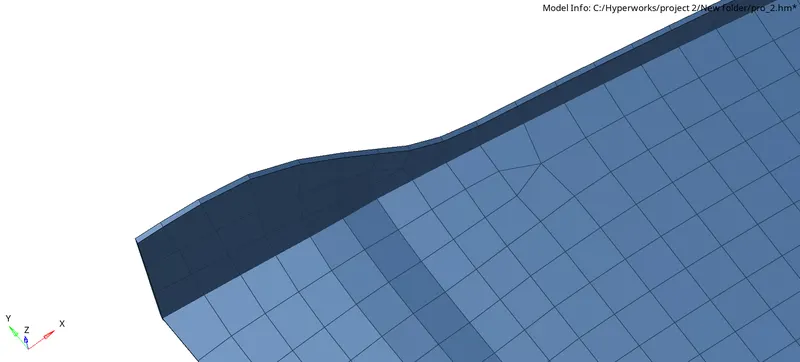
Once assign the material card and property card to the middle surface now is time to check the thickness of it, in a manual method to approach it, first, we have to click the 2D traditional Representation -> 2D detailed Representation" , the below-attached image is for the reference.
Step 5:
Find the Free Edges:
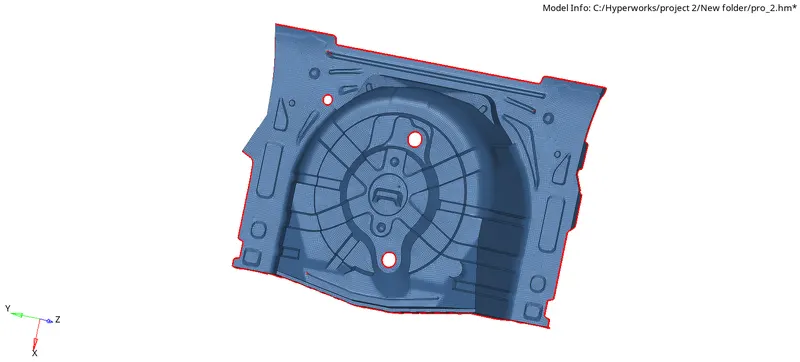
The final Step in the meshing process is to check for free edges on the component. To check for free edges on the component we need to use the shortcut of Shift+F3 and open the option of free edges. We then need to select all the elements and then search for Free edges on the component. If there are Free edges present in the middle of the model (except in the cases of holes), then we need to check the connectivity between the nodes and fix them by using the Equivalence command or by using the node connectivity command (shortcut-F3). This connectivity is important as it shows how the energy will flow when the model is being put under certain loads and Boundary conditions.
Conclusion:
As required the Shell (2-D) mesh is done Successfully for the Rear wheel holder model by eliminating geometrical errors and considering the given element quality criteria also assigning thickness and material card using Hypermesh.