week-11 Joint creation and Demonstration
Objective: To demonstrate revolute, cylindrical, spherical, and translation joints between two rigid bodies also with two deformation bodies using CONSTRAINED_JOINT keyword.
Procedure
The revolute joint
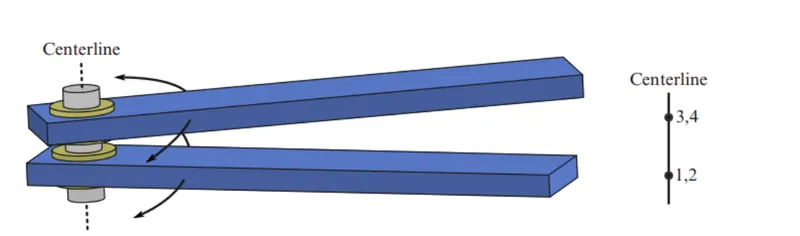
The revolute joint is LS-DYNA is also called hinge joint and has only one degree of freedom.
The above fig shows a revolute joint with two nodal pairs formed by nodes 1,2 and 3,4. The nodal joints 1 and 2 should coinside in the initial configuration similarly, nodes 3 and 4 should satisfy this condition nodes 1and 3 should belong to one body (A) and nodes 2 and 4 should belong to another body (B).
For rigid bodies use *CONSTRAINED_EXTRA_NODES to include to joint nodes(nodes 1,2,3,4 shown above) to the respective rigid bodies, for deformable bodies, the joint nodes should be a part of *CONSTRAINED_NODAL_RIGID_BODY which has some shared nodes with the deformable body
creating geometry for revolute joint
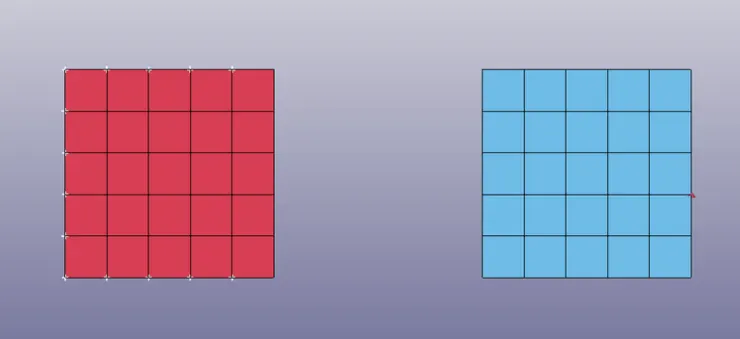
Two seperate shell element are create using the element and mesh>shape Mesher option available in LS-PrePost. select the entity as 4N and assign the node coordinate for the shell element with the required mesh density.
some free spaces are kept in between the 2 pairs for a better presentation of a revolute joint.
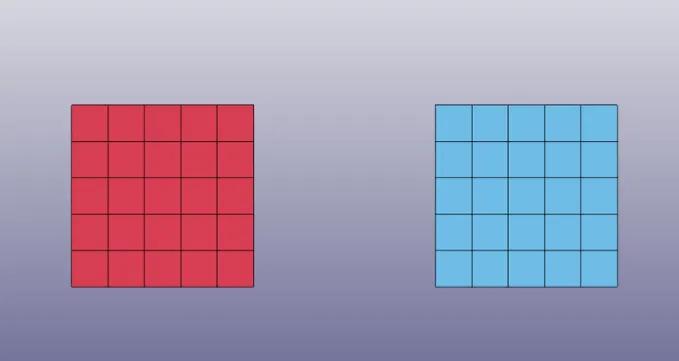
1. Revolute joint between two rigid bodies using CONSTRAINED EXTRA NODES
Define a section property as a shell for created elements by using the *SECTION_SHELL keyword. Also define rigid material using *MAT_RIGID keyword use a reasonable value while defining the material properties.
create four extra nodes manually which are further needed to be associated with two parts for making a revolute joint. create nodes by element tool>Node editing option to given district nodes ids for all four nodes. here four nodes are numbered as 73,74,75,76.
The nodes 73 and 74 are coincident and nodes 75 and 76 are also coincident.
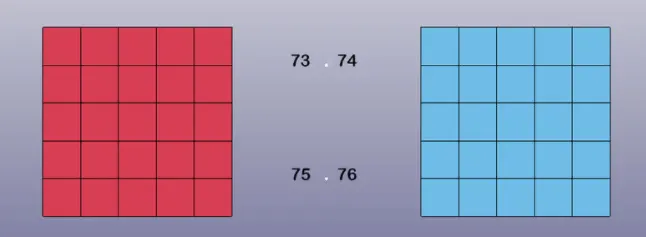
Now create a new node-set, where nodes 73 and 75 belong to one node-set and node 74 and 76 belong to another node-set. this can be done using create entity >set data>*SET NODE>create option.
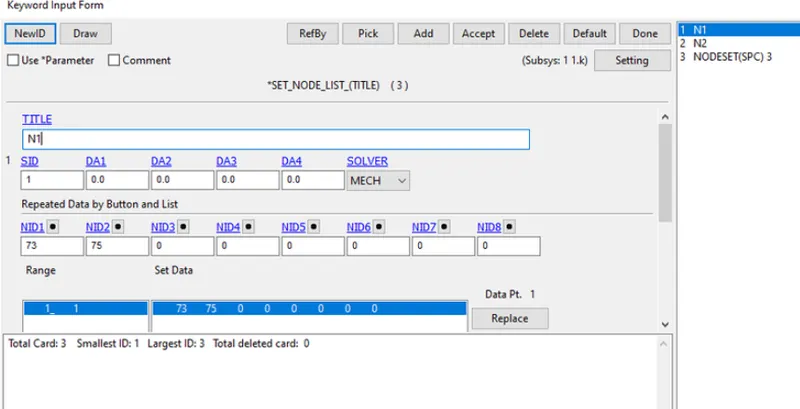
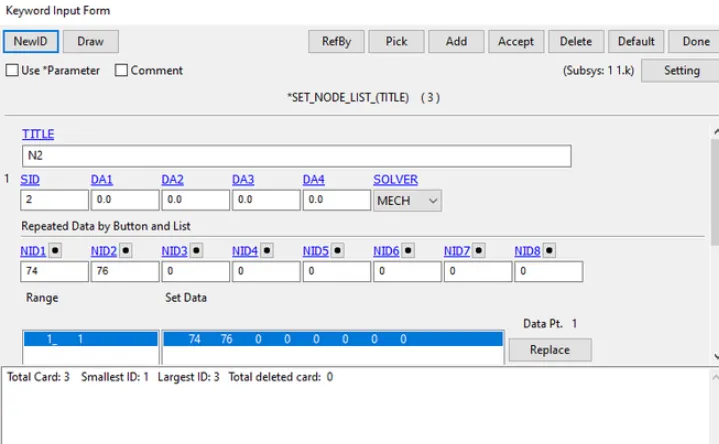
these newly create nodes are in the space and do not belong to any of the parts now. so, for associating these nodes with part 1 and part 2, *CONSTRAINED_EXTRA_NODES_SET is used.
Here node 73 and 75 belong to one part and 74 and 76 belong to another part .
Now, the revolute joint is defined by using the *CONSTRAINED_JOINT keyword. four nodes should be defined to create a revolute joint N1 and N3 belong to body 1 and N2 and N4 belong to body 2.
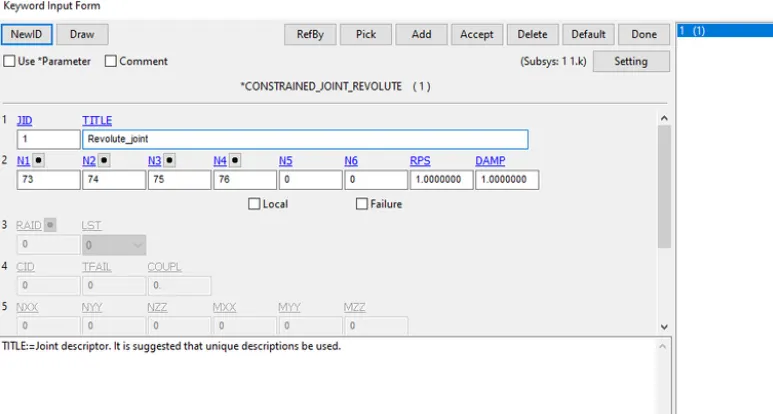
Now, to make this revolute joint work, few boundary condition are essential. so, a displacement along the Z direction is aplied to one of the nodes in part 2. This is defined by the *BOUNDARY_PRISCRIBED_MOTION keyword. The Z-translation DOF is kept free by assigning DOF=3 in the keyword.
Single point constrained (SPC) is also used to fix part 1at this position. several nodes on the edge of part 1 are selected and assigned *BOUNDARY _SPC. The fig below shows (left part) fixed nodes in part 1 which is marked in green colour and a node is selected to give displacement in part 2 which is denoted in red colour.
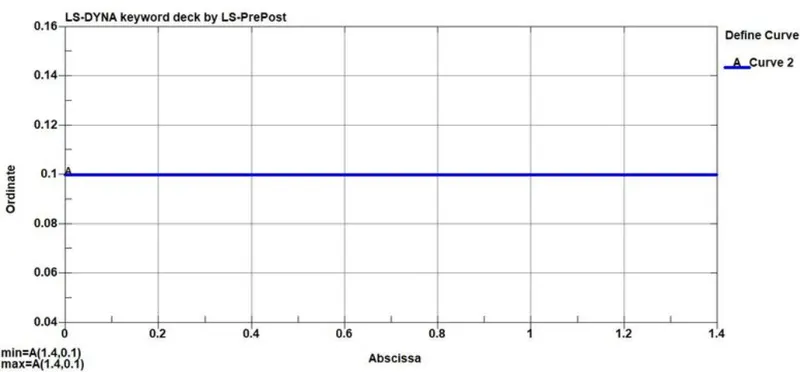
A displacement curve was also defined for the prescribed motion keyword which is defined by LCID.
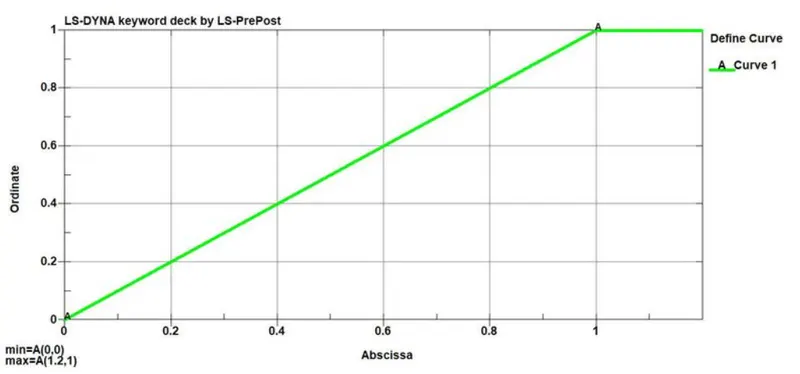
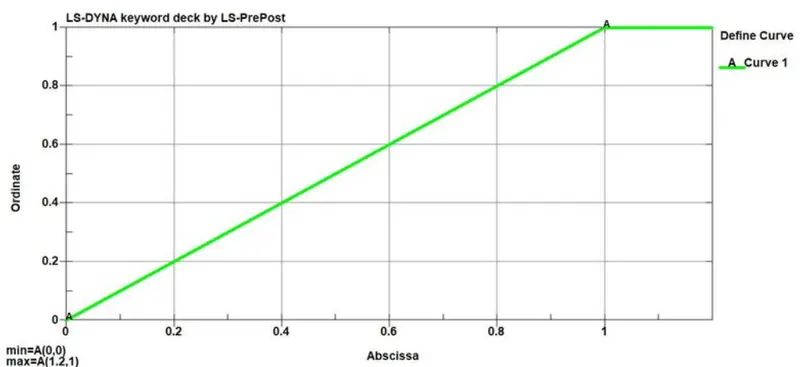
CONTROL_TIME STEP card is used and a load curve which is below assigned through the LCTM option.
Other keywords cards required for post-processing are then assigned and the model is been run in the LS-program manager.
RESULT: The revolute joint between 2 deformable bodies using CNRB'S.
2. The revolute joint between 2 deformable bodies using CNRB's
To create a CNRB, go to create entity>constrained>nodal rigid body (CNRB)>create. Toggle off the crePNODE option which will disable the creation of PNODE at mass center of the selected nodes.
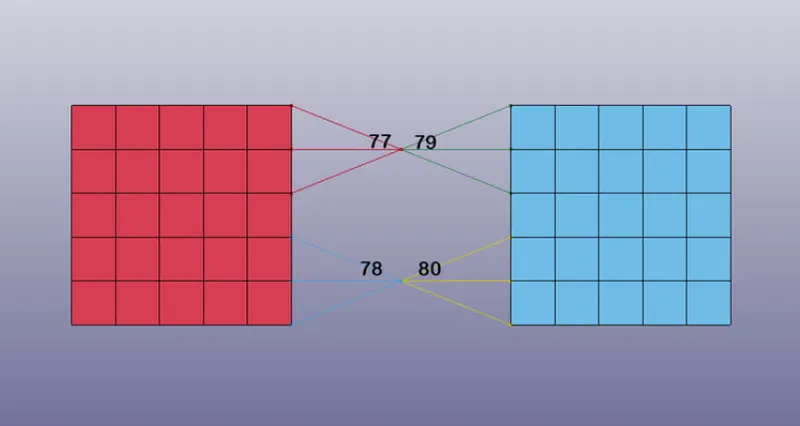
for deformable bodies, the material is assigned using the *MAT_ELASTIC keyword. here also the material card and section card are finally assigned to the part ID
Revolt joint is defined by using the CONSTRAINED_JOINT keyword four nodes should be defined to create a revolute joint. here N1 and N3 belong to part A and N2 and N4 belong to part B.
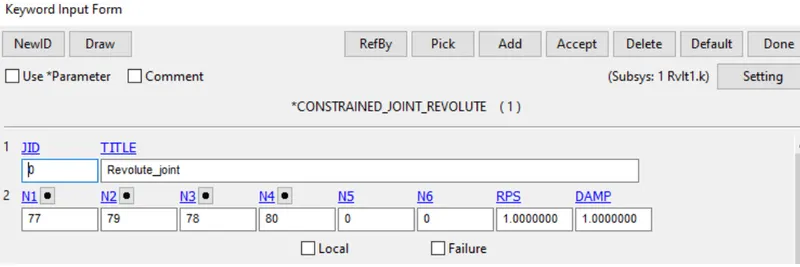
Here *CONSTRAINED_EXTRA_NODES should not be used .
The same boundary condition, displacement, and time step curve are used in this analysis which is similar to previous section.
Result: The revolute joint between 2 deformable bodies using *CONSTRAINED_EXTRA_NODES is shown
the cylindrical joint
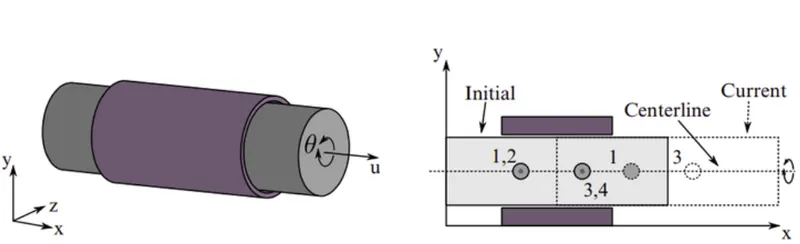
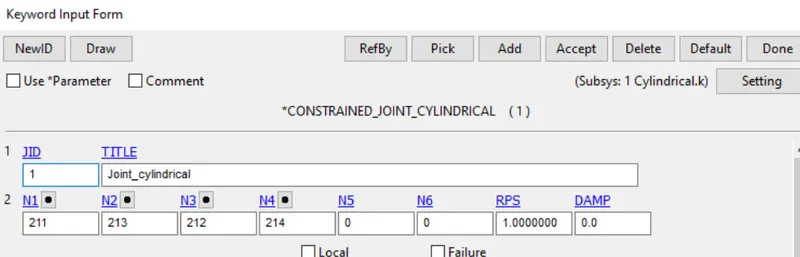
The above fig shows a cylindrical joint with a nodal pairs here the node 1 and 2 should coincide with each other and the node 3 and 4 should coincide each other. it should be assigned in such a way that node 1 and 3 belong to the inner cylinder and the node 2 and 4 belong to the outer cylinder
creating geometry for cylindrical joint
two cylindrical shell elements are created using the element and mesh>shape mesher>entity>cylindrical shell option available in LS-PrePost.
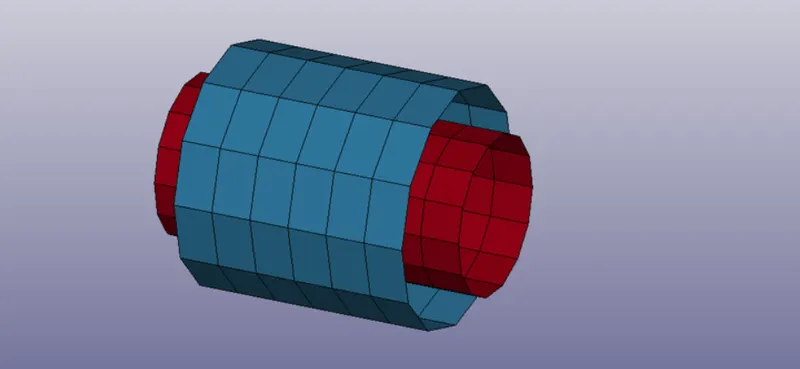
1. Cylindrical joint between two rigid bodies using *CONSTRAINED EXTRA NODES.
Now the cylindrical joint is defined by using the CONSTRAINED_JOINT keyword. four nodes should be defined to create a cylindrical joint N1 and N3 belong to body 1 and N2 and N4 Belong to body 2.
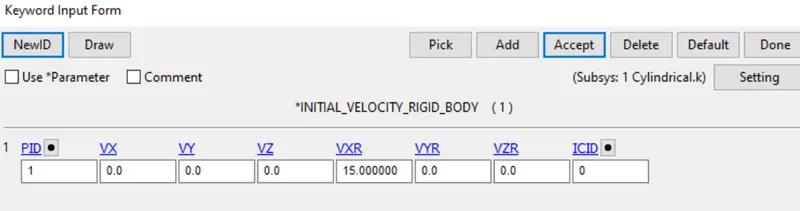
Now an *INITIAL_VELACITY_RIGID_BODY card is created to assign the velacity by selecting the required PID. since the cylindrical joint possesses both translation and rotational motion about a particular axis, we may assign it accordingly.
CONTROL_TIME STEP card is used and a load curve is assigned similar to that of the model done above.
Other required post-processing cards are assigned and then its been run in the LS-PROGRAM manager
RESULT:
The cylindrical joint between 2 rigid bodies using CONSTRAINED_EXTRA_NODES
2. The cylindrical joint between two deformable bodies using CNRB'S
To create CNRB, go to create>entity>constrained>nodal rigid body (CNRB)>create. toggle off the crePNODE option which will disable the creation of PNODE at the mass center of the selected nodes.
First, take any part inner or outer, select the middle node, and then other nodes as shown below
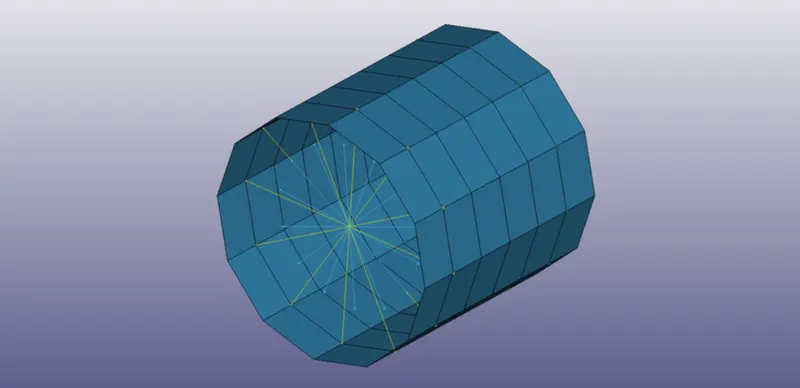
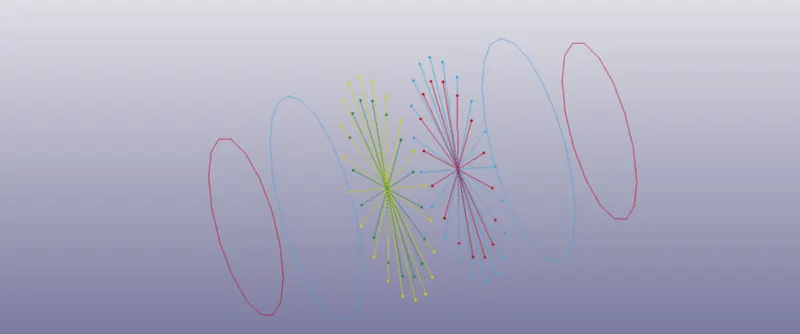
for deformable bodies, the material is assigned using the *MAT_ELASTIC keyword. here also the material card and selection card are finally assigned to the part ID.
The cylindrical joint is defined byusing the *CONSTRAINED_JOINT keyword. Four nodes should be defined to create a cylindrical joint here N1 and N3 belong to part A and N2 and N4 belong to part B.
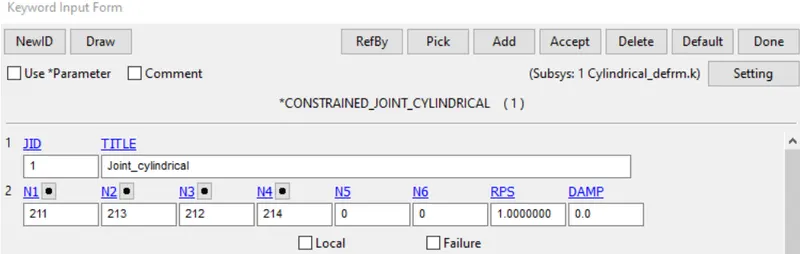
Here also *CONSTRAINED_EXTRA_NODES should not be used
Now an *INITIAL_VELACITY card is created to assign the velacity.
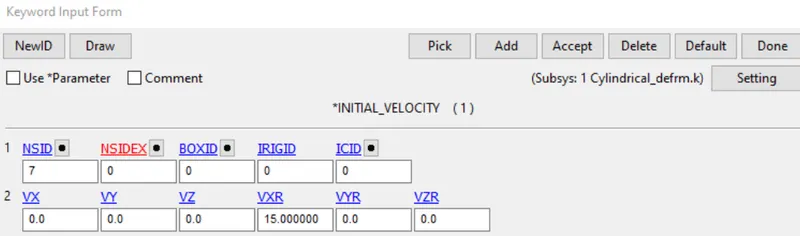
Finally, a termination time is then assigned and run in the model in the LS-DYNA program manager.
RESULT:
The cylindrical joint between two defoemable bodies using CNRB'S is shown.
spherical joint
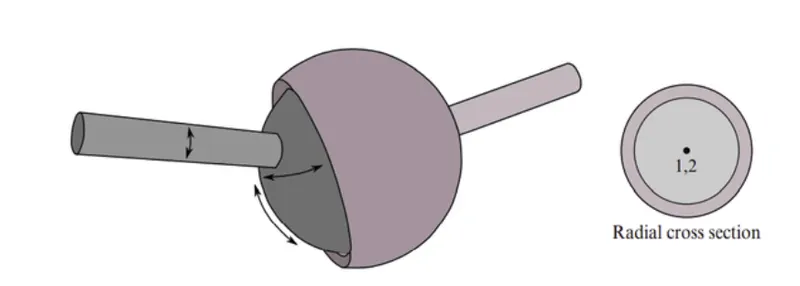
creating geometry for cylindrical joint
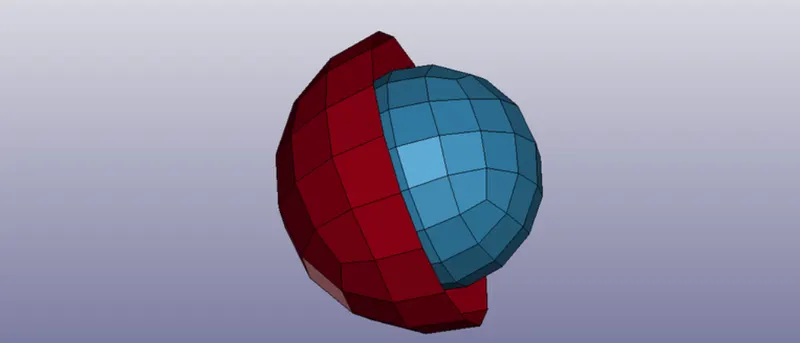
1. spherical joint between two rigid bodies using *CONTRAINED EXTRA NODES
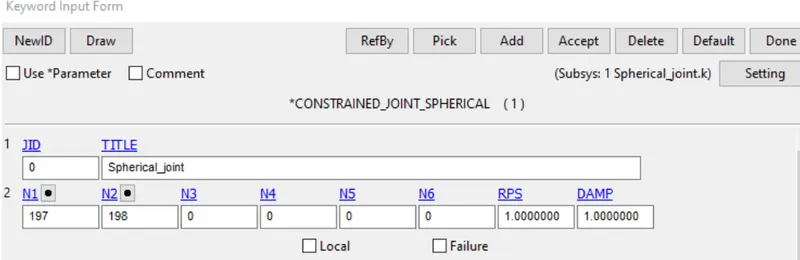
2.The spherical joint between two deformable bodies using CNRB'S
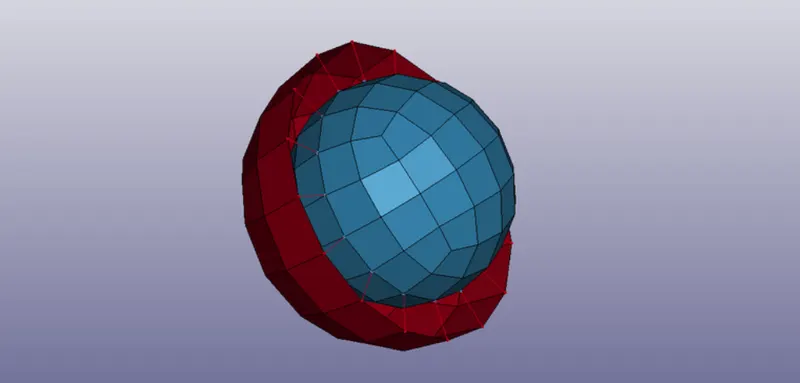
RESULT: The spherical joint between two rigid bodies using *CONSTRAINED EXTRA NODES.
translation joint
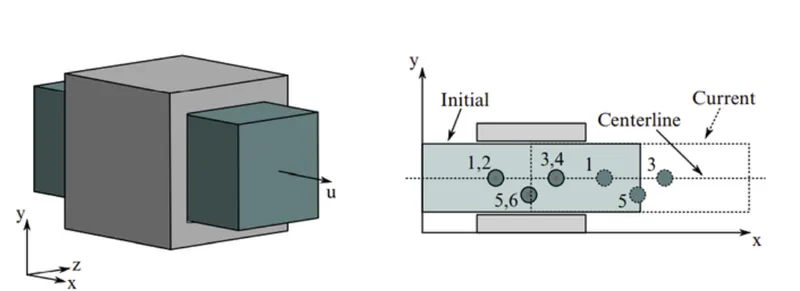
creating geometry for translation joint
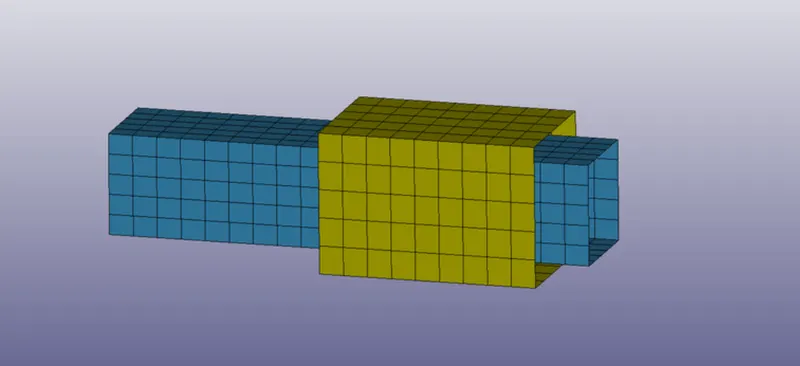
1. translation joint between two rigid bodies using *CONSTRAINED EXTRA NODES
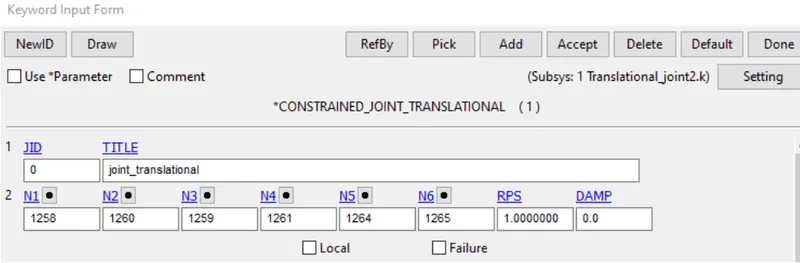
RESULT:
The translation joint between 2 deformable bodies using CNRB'S.
CONCLUSION:
The joint demonstration for Revolute, cylindrical, spherical and translation joints between two rigid bodies also with two deformable bodies using *CONSTRAINED_EXTRA_NODES and CNRB'S to create the joint accordingly for two cases. Although the definition of joints for the two cases remains the same, the ways of implementation differ.