Week 1 Challenge
1.1Write the steps involved to upload a .std file through web mail
Step 1 - Open staad pro software
Step 2 - select share option in that select Mail
Step 3 - Upload File and send Mail.
1.2. Name the different materials that can be designed using STAAD Pro.
Materials used in staad pro are
- Conrete
- Steel
- Aluminium
- Timber
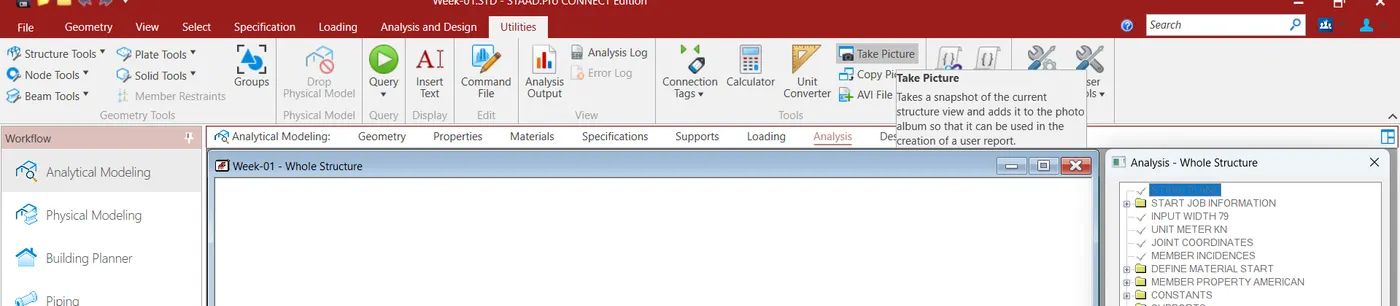
1.3. Is it possible to capture images in STAAD Pro? If yes how
Yes we can Capture the Image for Reference in staad pro by selecting Utility option and Select the take photo
1. 4. Name the three ways by which you can create a model.
Model which we can create in Staad Pro are
1.Analytical Model
2.Physical Model
3.Building Planner model
1.5. Write the steps followed to assign properties in a model
Step 1 - Select Property panel
Step 2 - Click Material and select desired material ( Concrete , steel , Aluminum )
Step 3 - Select Assign the view and Assign the material to your model.
2. 1. Name any six design parameter involved in RCC design.
- Target strength of concrete (fck)
- Steel yield Strength (fy)
- Cover
- Depth
- Min & Max reinforcement
- Bar diameter
2.2. What are the different cursor types available in STAAD Pro?
Different cursor are available in Staad Pro are.
- Beam Cursor
- Plate Cursor
- Load cursor
- Node Cursor
- Geometry Cursor
- Solid Cursor
- Physical Member Cursor
2.3. How will you generate different views for a model? State the steps involved.
Select View option in ribbon
- Top View
- Bottom view
- Back view
- Front view
- Right View
- Left View
- Isometric View
2.4. Explain the procedure to define a “Simply Supported” condition in STAAD Pro
Step 1 - Select Support option
Step 2 - Select Create Support option
Step 3 - Select Pinned support for one Node & Fixed But for other Node
Step 4 - Assign the Support to Beam
2.5. Name any five topics that you will include while creating DBR.
Design Basis Report (DBR) is created to understand detail project report which include -
- Name of the Project & Location of the Project
- Structural Layout
- Construction Methodology
- Quality Assurance & Quality Control
- Budget for the Project
2.6. Describe the term “Multi material design” of STAAD Pro.
In Staad Pro It offers different material which we assign material based on design Consideration. So we can use the multi material in Building in 3D Option.
3. 1. Name the structure systems in STAAD Pro? Explain each system?
Structure System in staad pro Are-
- Space - Three Dimensional framed structure with load applied in any Plane
- plane - Two Dimensional framed structure with in Global X-Y Coordinate System
- Truss - Which is made for Truss Member and load applied in axial member Force and No Bending Moment.
3.2. Explain the coordinate system adopted in STAAD Pro software.
There are two type of Coordinate System are
Global Axis - Standard Coordinate System which will not change
Local Axis - Local Axis x (Longitudinal Direction) will not change , Y&Z will Variable based in Design
3.3. Elaborate DBR and its uses.
- Design Basis Report is detail report to understand Structural Design and Construction Methodology.
- To Specify & Compile the data required for analysis and design of structural element of the Project.
- It Clear depicts the assumption And Specification that are being used to develop the construction documents for a project
- Provide Client Details, Project name & Location, Soil Report and Design Calculation.
3.4. Explain the different types of analysis options in STAAD pro.
Analysis option in Staad Pro
- Perform Direct Analysis
- Perform Analysis
- P Delta Analysis
- Perform cable analysis
- Perform Pushover Analysis
- Perform Buckling Analysis
- Non Linear Analysis
3.5. Explain the difference between Fixed and Fixed But condition.
Fixed Support - In Fixed Support 6 Degree of Freedom are restrain and Displacement not allowed.
Fixed But Support - It is roller support with Spring (k) -FX,FY,FZ MX,MY,MZ & K
Practical :-
AIM - To Create the Model in Staad Pro by provided Specification given.
INTRODUCTION - As we cresting the bream with support for both end And Assigned load for the Beam. Analysis the beam with Load And Providing Shear Force & Bending Moment Diagram.
PROCEDURE -
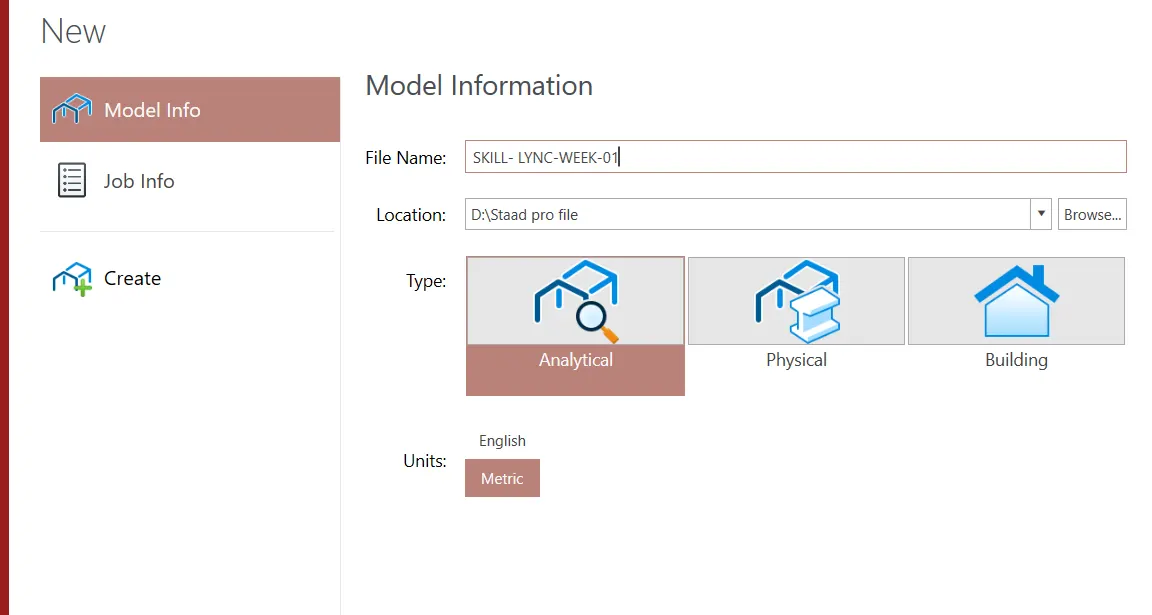
Create the New file in staad Pro Software & unit in Metric
New File Will be Created.
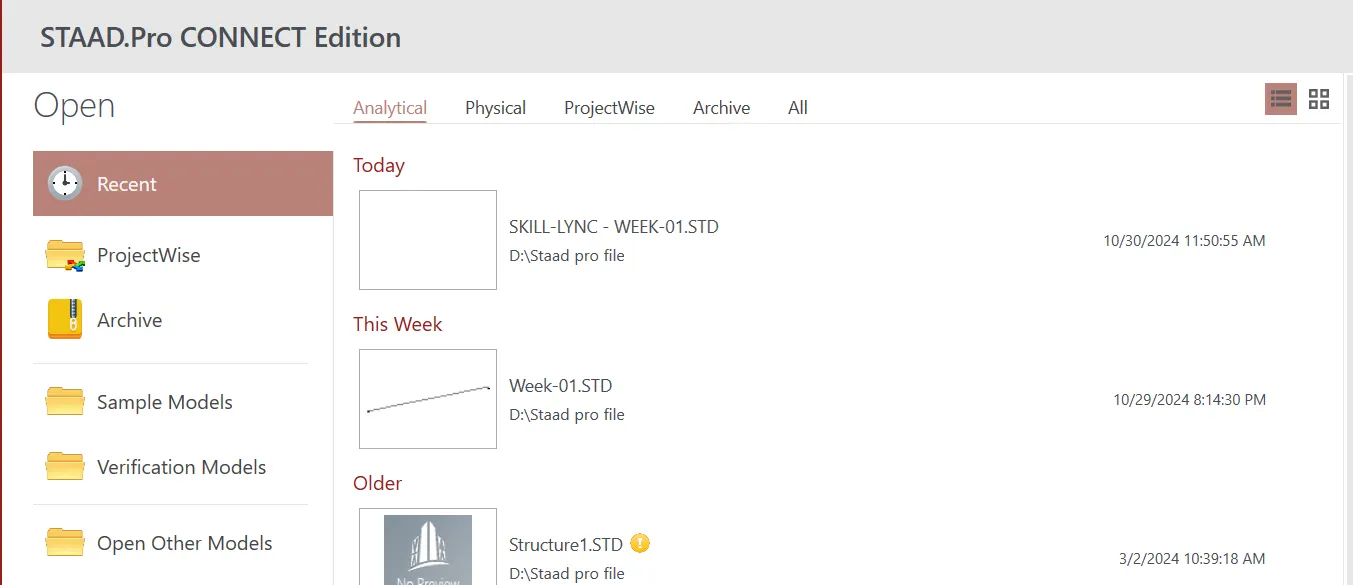
Enter into Created file. Create the Node of distance 16m after that create the Beam.
Provide Support for Beam in Both Nodes Pinned and Roller Support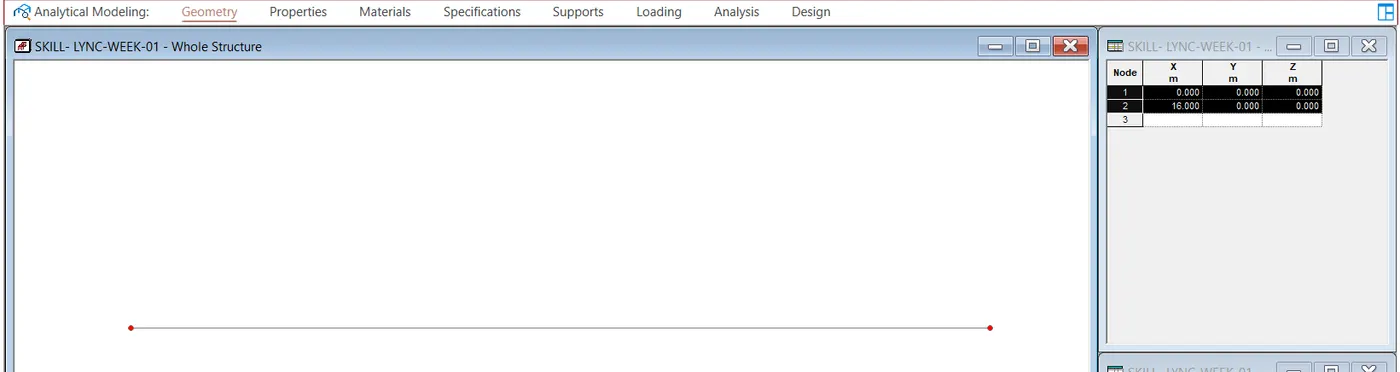
Select Material after that apply Perform Analysis and Run Analysis.
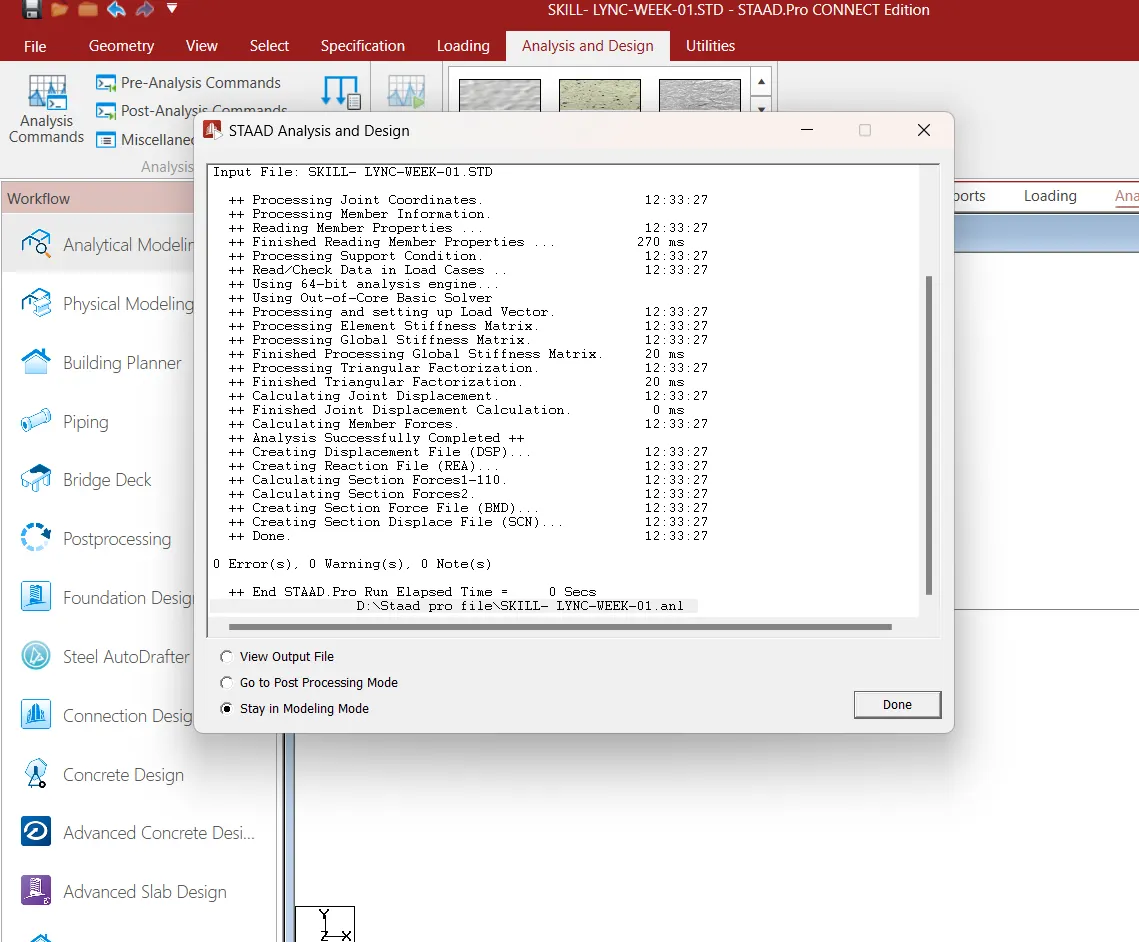
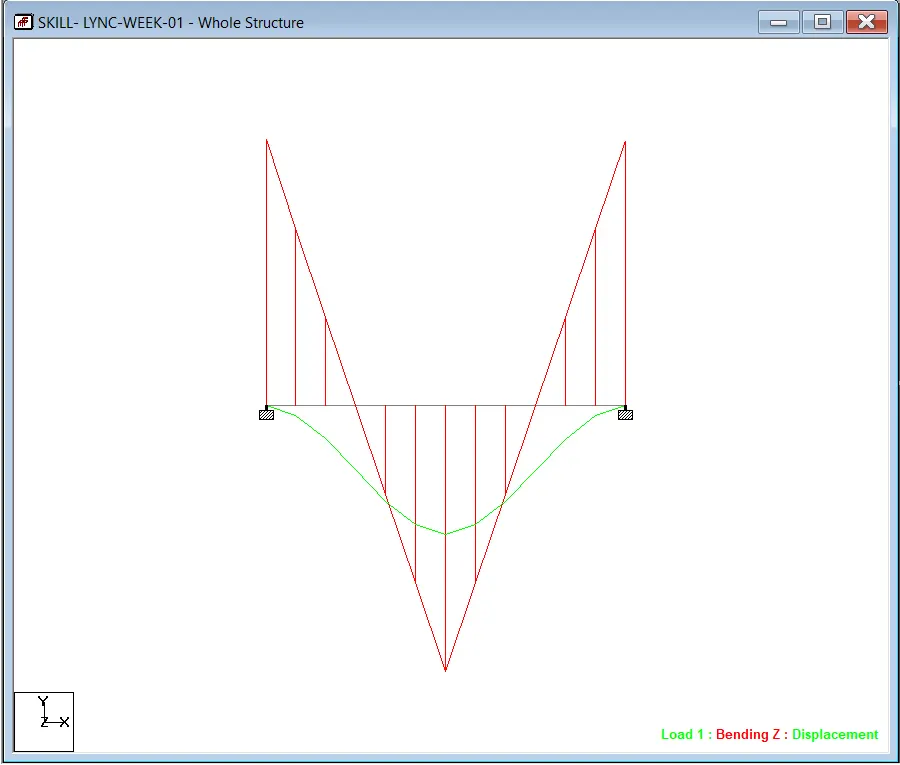
Go to Post Processing Mode We find the Shear Force and Bending moment Diagram
Bending Moment Diagram
Shear Force Diagram
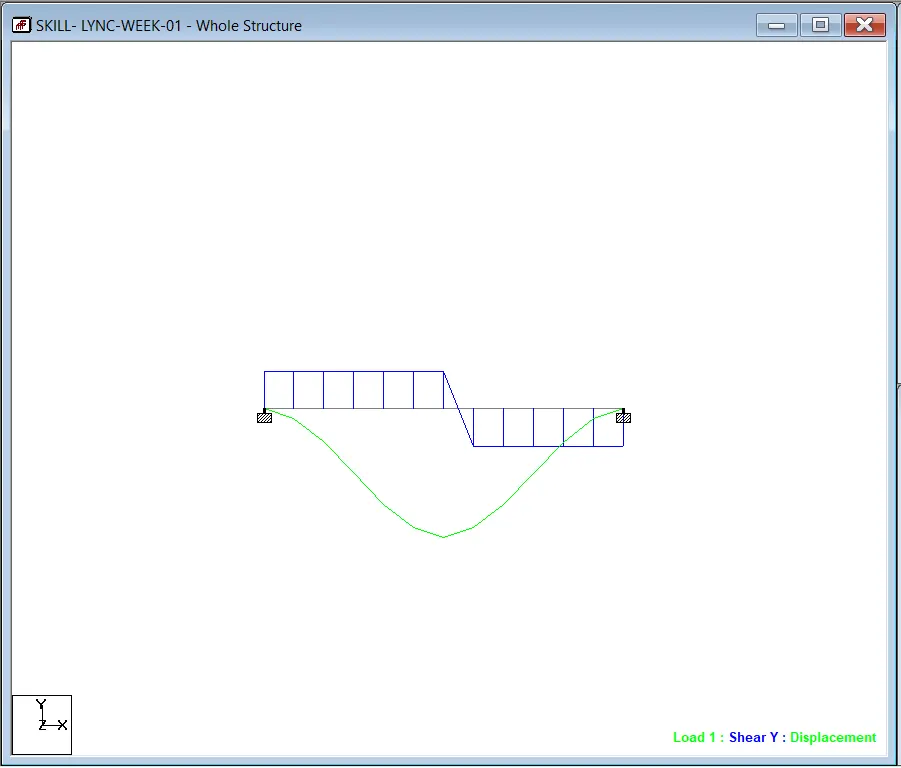
Result - Beam in Safe Conduction under the Load applied