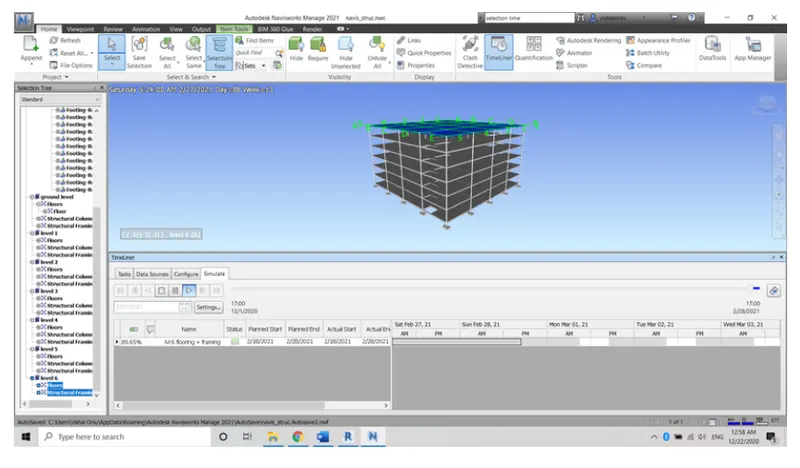
Usage of Navigation tool , Timeliner and Clash Detection test using Naviswork
- Question no.1
- Ans -
- Aim - To exporting the revit architecture and structure model to the naviswork.
- Introduction - Here we cache the file using naviswork. It is a project review software that allows Architecture, Engineering and Construction professionals holistically review integrated models and data with stakeholders during preconstruction to better control project outcomes. Here is a list of some tools and functionalities:
- Coordination.
- Clash Detection.
- 5D Project scheduling.
- Rendering.
- Quantification.
- Construction Simulation.
- Navisworks is available in three versions namely Freedom, Simulate and Manage. Freedom is a free viewer for native NWD files. Simulate is the base level and includes the functionalities except for Clash Detective. Manage on the other hand is the top level and includes all features.
- Tools used -
- File.
- NWC.
- Navisworks.
- Process -
- Step 1 -
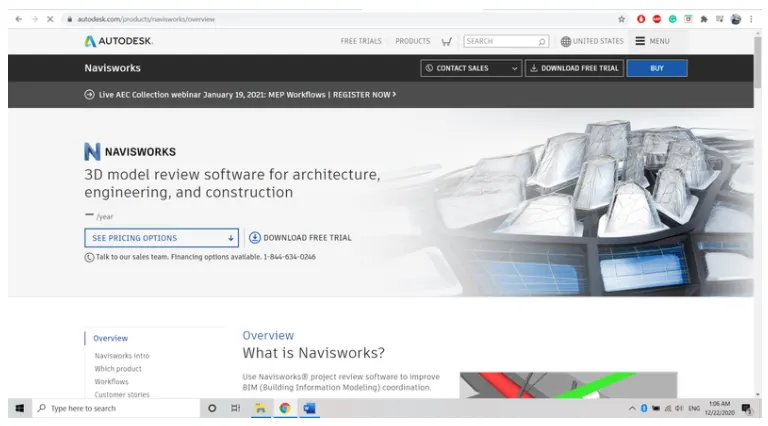
- Go to autodesk website.
- Search naviswork export utility and download 2021 version.
- Click run and extract it.
- Step 2 -
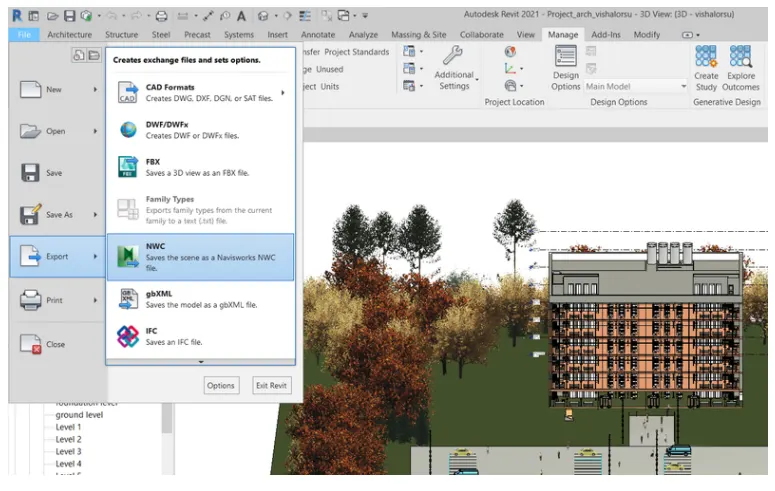
- Open a saved file in revit application.
- Click file and export it into NWC.
- Save the file in an appropriate location.
- Step 3 -
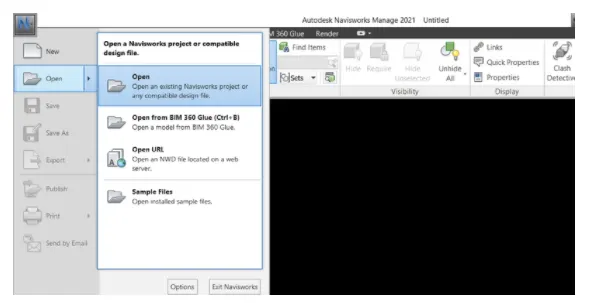
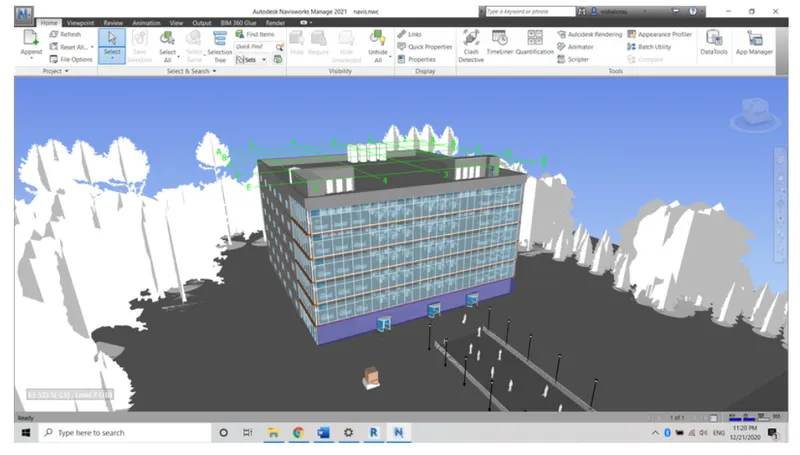
- Open naviswork manage 2021.
- Click the file menu and choose open.
- Open the file that we saved from revit application.
- Result -
- Thus revit file has been exported to naviswork successfully.
- Question no.2
- Ans -
- Aim - To creating the walk through model and recording the movements using naviswork.
- Introduction - Here we use walk through in model tools. Autodesk Navisworks, which lets you create a walk through the file without any scripting skills. Control your view with mixed reality (tangible objects & webcams), touch devices and tablets. Let your management and clients interact and experience your newest building.
- Tools used -
- Walk.
- Record.
- Step 1 -
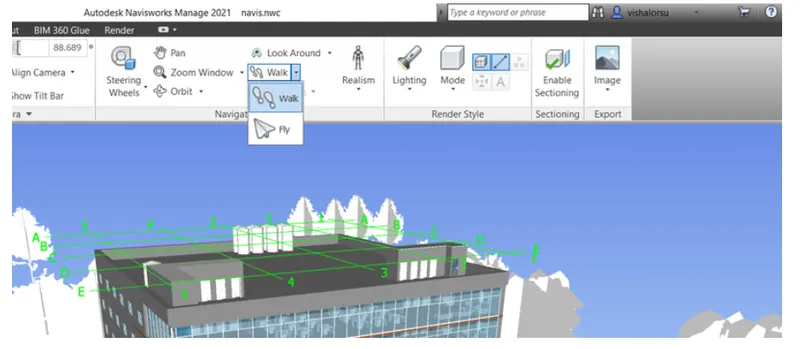
- Open a naviswork and import a file.
- Click the walk tool in the view port tab.
- Step 2 -
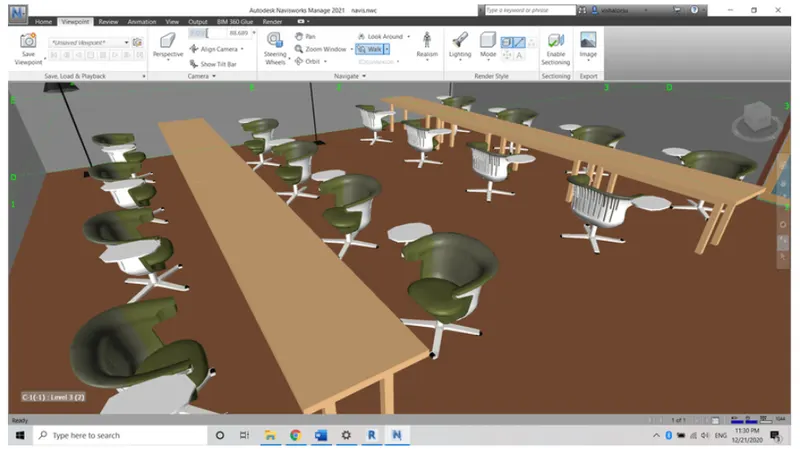
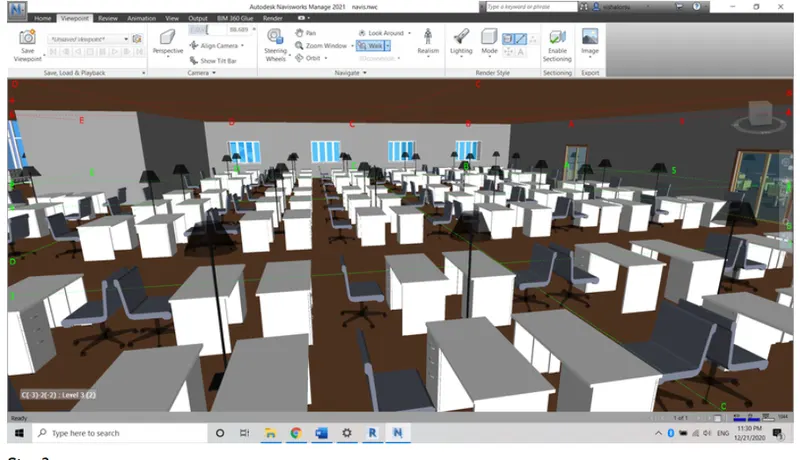
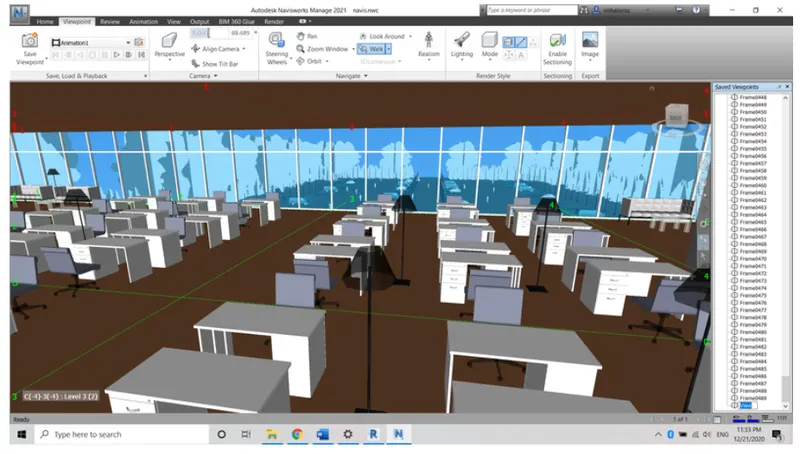
- In the selection tree select the 3D view which you want to walkthrough.
- By using the mouse move as your wish.
- Depends upon the mouse moving the screen will moving inside the room as human walking.
- Step 3 -
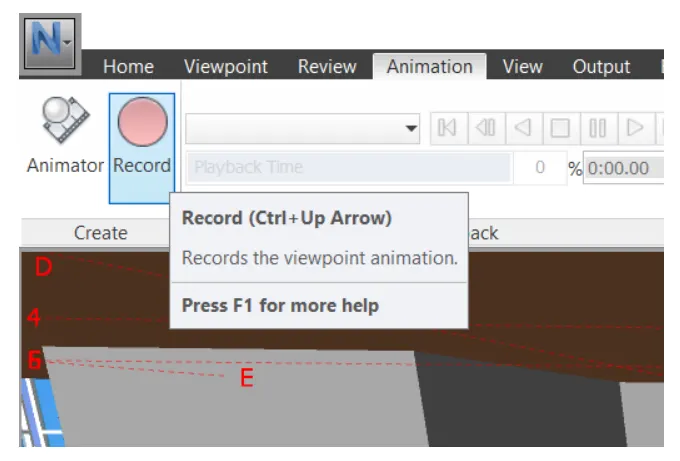
- Click the record option in view point.
- Once recording start move your walkthrough.
- Stop the recording and the saved files will automatically appear in the selection tree.
- Result -
- Thus the walk through our model using navigation tool has been done successfully.
- Question no.3
- Ans -
- Aim - To create the realism feature to walk through the model using the navigation tool in navisworks.
- Introduction - Here we navigate the model with walk through and record animation. Display one of the Full Navigation wheels or the mini Tour Building wheel. Click and hold down the Walk wedge. The cursor changes to the Walk cursor and the Center Circle icon is displayed. Drag in the direction you want to walk. Release the button on your pointing device to return to the wheel.
- Tools used -
- Walk.
- Realism.
- Record.
- Framings.
- Process -
- Step 1 -
- Open a naviswork and import an architectural file.
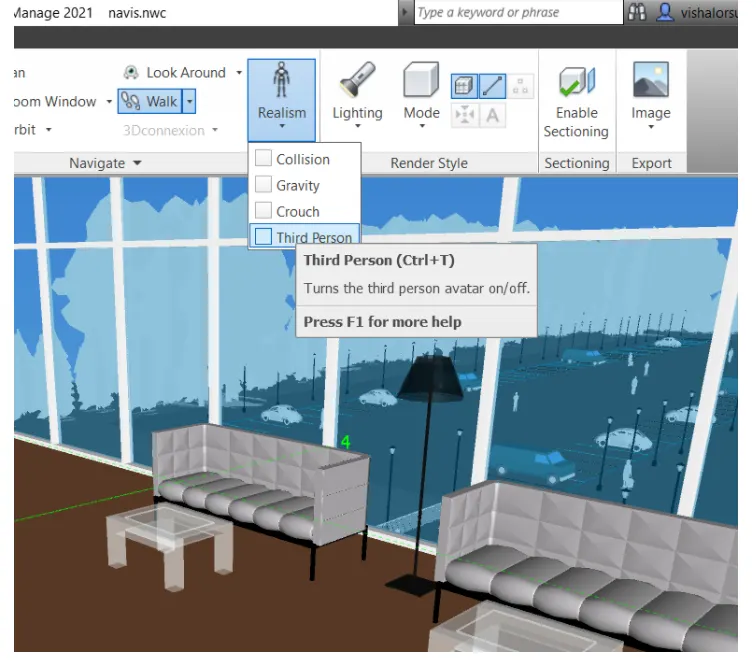
- Click realism tool in the viewport tab.
- Choose third person option.
- Step 2 -
- Step 2 -
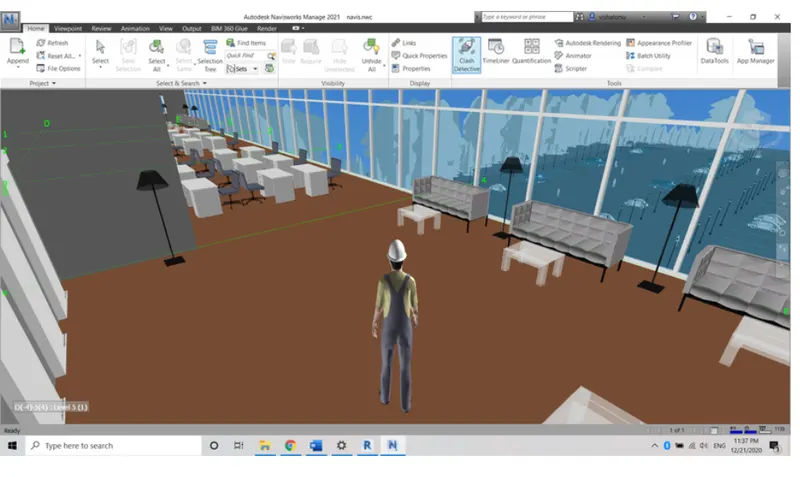
- After clicking the realism option.
- A human model will appear on the screen.
- From this human model we can easily walk through and seeing the plan more realistically.
- Result -
- Similarly we record these walk framings as we did in the normal walk through the tool.
- Question no.4
- Ans -
- Aim - To run the clash detection test between two files and listing the clshesh using navisworks.
- Introduction - “Clash Detection” as the name suggests, it is about playing a “Detective” role and finding out clashes among trades in the virtual building design model. Any building design comprises mainly five trades/disciplines—Architectural, Structural, Mechanical, Electrical, and Plumbing. To give a simple analogy of a human body with respect to trades/disciplines – Architecture is the skin, MEP is the cardio-vascular system and Structure is the skeleton. Clash detection is the method of identifying and inspecting the various building design interferences which frequently occur during the BIM coordination or Construction Gatekeeping process. Clash detection is like a review process that ensures all building components, assemblies, and trades are in ready-to-be-installed conditions generating no conflicts with other building trades. Clash detection will only come into the picture when all the building design trades (Architectural, Structural, Mechanical, Electrical, Plumbing, Fire Protection, and others) are integrated into the BIM model.
- Types of Clashes - A conflict occurs when the elements of different MEPFP or other trades occupy the same space. This conflict can be geometrical (for example, HVAC crossing through structural beam), schedule-based (when the sequence of work is not as per the schedule or multiple things take place at once), or the changes are not updated in the drawings. There are primarily 3 types of clashes:
- Hard clash - A hard clash occurs when two components of a building intersect or pass through each other.
- Soft clash - Soft Clash occurs when one element is not given the spatial or geometric tolerance and because of which its buffer zone is breached. It is a type of clash which gets flagged when a distance of less than a set tolerance is detected.
- Workflow/4D - Workflow clashes, as the name suggests, are the timeline conflicts. They actually represent a mismatch in the scheduling of contractors or when there is a conflict of timeline with equipment or material delivery. It is knowns as 4D clash as it results from scheduling clashes that affect the efficiency of the entire construction firm. If the Clash Detective window is not already open, click Home tab Tools panel Clash Detective. Click the Tests panel expand button and select the test you want to run. Click the Select tab and set the required test options. Once the Selection A and Selection B items are selected, and the clash type and tolerance defined, click the Run Test button to start the test running.
- Tools used -
- Clash detective.
- Run.
- Status.
- Process -
- Step 1 -
- Open an architectural file.
- Export it to naviswork.
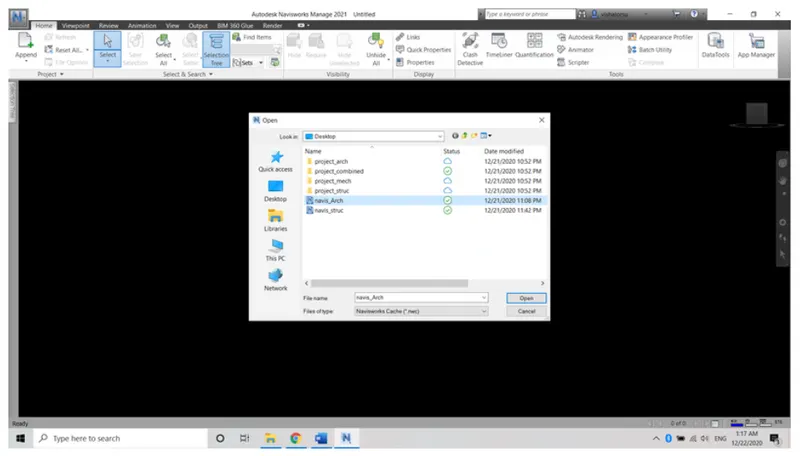
- Step 2 -
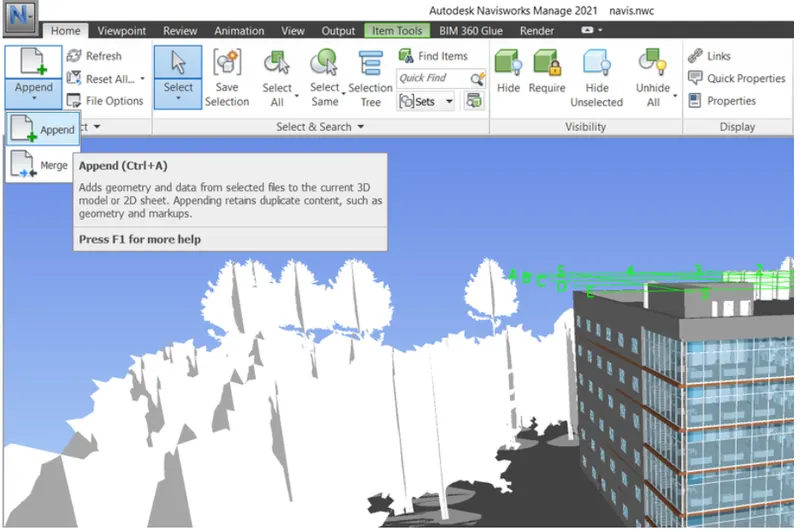
- After exporting architecture file click append.
- Choose to append and import structural file in to this file.
- Step 3 -
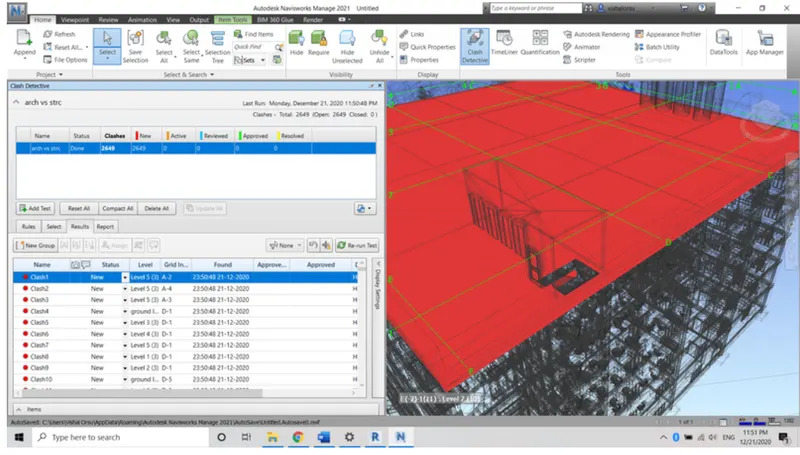
- Once the architectural and structural file has been merged click the clash detective tool in viewport.
- Click start test.
- Choose architectural vs. structural.
- Click run test.
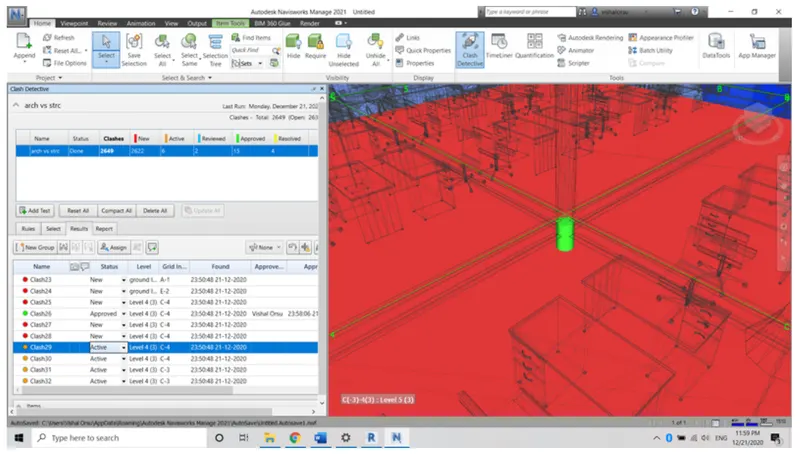
- After running the test the result screen will appear.
- Step 4 -
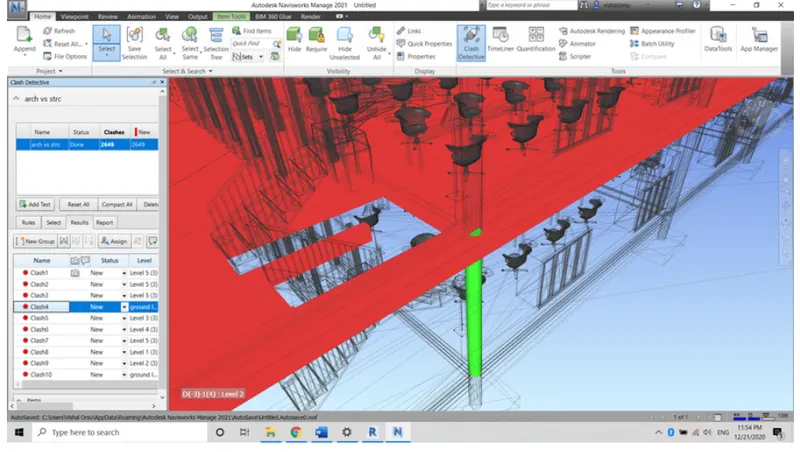
- Here I allocate the status as approved, reviewed active. Resolved based on preference.
- When you click clash and switch it into approved it turns as green round similarly yellow for reviewed orage for active.
- Question no.5
- Ans -
- Aim - To create schedule of project using navisworks.
- Introduction - In Autodesk Navisworks, the process of creating and running TimeLiner simulations is as follows:
- Load a model into Autodesk Navisworks in the usual way (see open files for more information), and then click Home tab Tools panel TimeLiner
 .
Note: Although the ability to create simulations is limited to users with access to the full TimeLiner functionality, Navisworks Freedom can play back simulations once they have been set up.
.
Note: Although the ability to create simulations is limited to users with access to the full TimeLiner functionality, Navisworks Freedom can play back simulations once they have been set up. -
Create some tasks, each having a name, start and end date and a task type. You can add task manually. Alternatively, click Auto-Add Tasks
 on the Tasks tab, or right-click within the Tasks area, and create an initial set of tasks based on layer, item, or selection set names. TimeLiner defines some default task types for you (Construct, Demolish and Temporary), or you can define your own task types on the configure tab. You can also view a read-only graphical representation of your project schedule, and can switch between Planned, Actual, and Planned vs Actual Gantt charts.
 -
First of all, create the BIM Revit model and export it to Navisworks. However, prior to export, it is essential to set the tags for individual elements clearly for the ease of access on Navisworks. Moreover, architectural firms, MEP engineers and structural design engineers should prepare a building schedule on Excel. Here are the significant considerations while creating your 4D scheduling: Ensure a column with increment values. Examine the fact that there are no missing values within it. This will be significant for you at a later stage to map the columns for scheduling tasks on Navisworks. Name it as Synchronization ID. To use Auto, you need to assign tool on Navisworks. This will automatically help you to assign elements to their subsequent tasks. Name tasks after the tag names for individual elements. Consider the date format and make it consistent, otherwise Navisworks software platform may provide you a tough time recognizing the dates.
- Tools used -
- Item tools.
- Timeline.
- Simulate.
- Process -
- Step 1 -
- Open the naviswork and import the file you want to schedule.
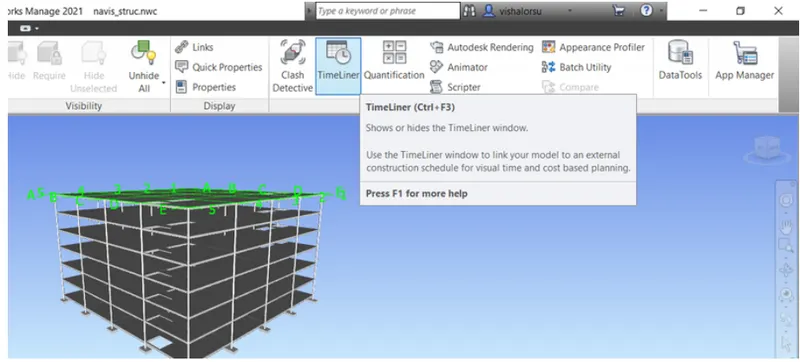
- Click the timeliner tool in the home tab.
- Step 2 -
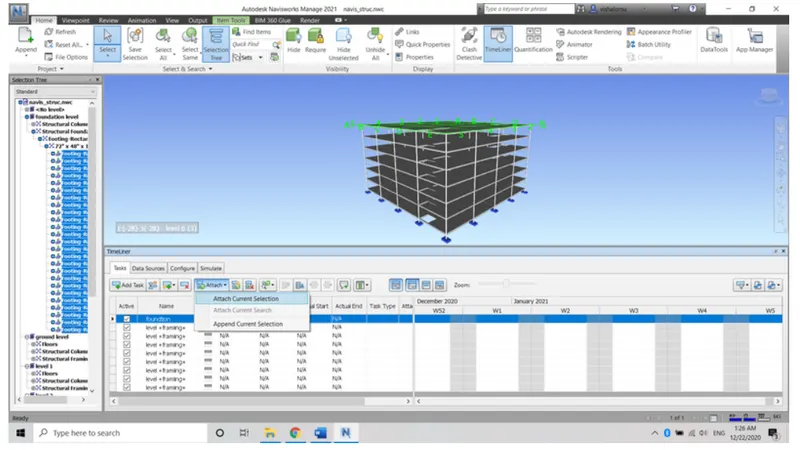
- After clicking the timeline tool enable the selection tree on the left side of screen
- Click add task option.
- Name the task and assign the start date and end date of activity.
- Click attach and choose the current selection simultaneously.
- Step 3 -
- After entering all the neccessary data in the field.
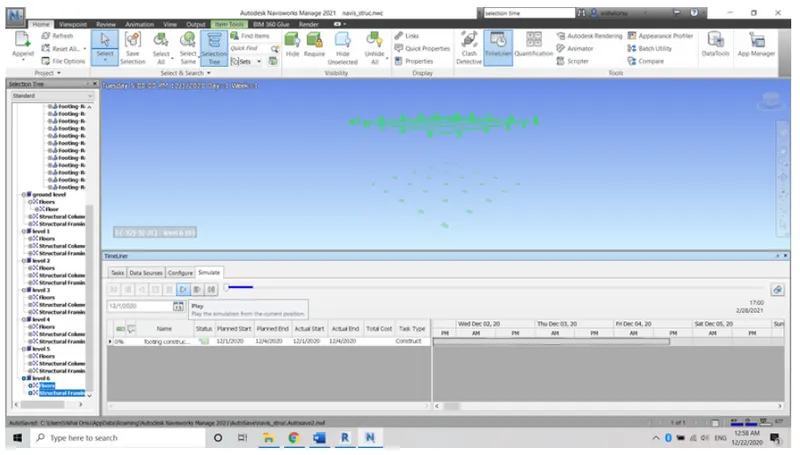
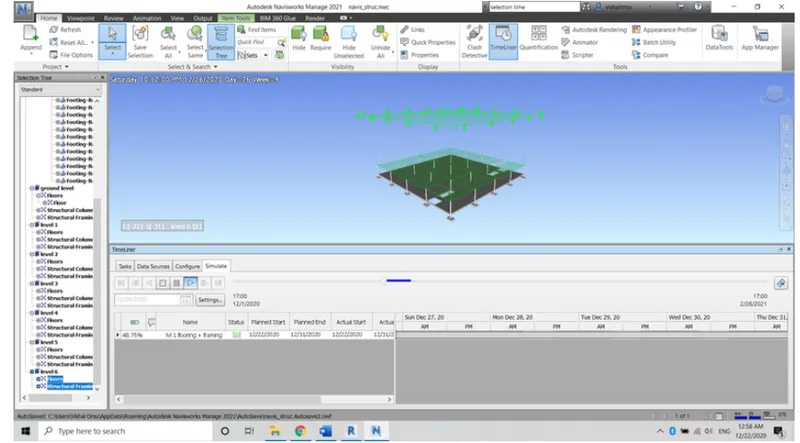
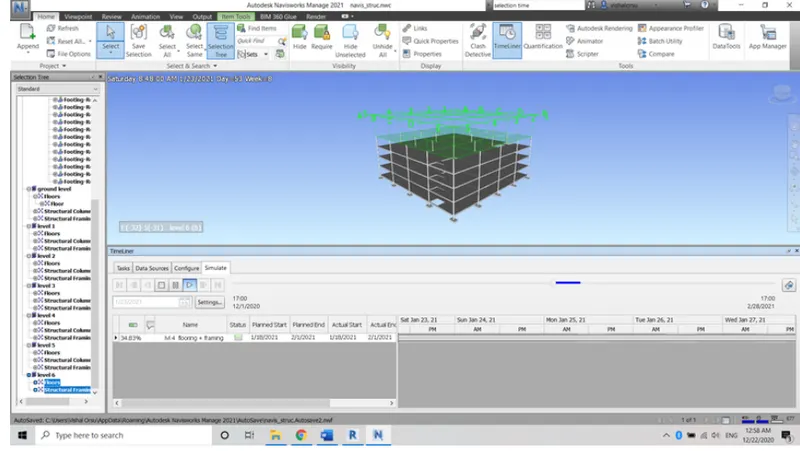
- Click the simulate tool.
- Click the play option.
- Now schedule will play as per selection and date.
- Video will play from foundation to roof as per date we scheduled.
- Result -
- Thus schedule has been done using timeline features in navisworks successfully.