Usage of Navigation tool , Timeliner and Clash Detection test using Naviswork
1) Use the Architecture/ Structure Project file developed by you in Week 6 to 8. Export the Revit architecture and structure model to Navisworks Cache file following the export settings discussed in class
AIM:- To export the Revit architecture and structure model to Navisworks Cache file following the export settings using the Architecture/ Structure Project file developed in Week 6 to 8
INTRODUCTION:- Navisworks Manage software is a comprehensive project review solution that supports coordination, analysis and communication of design intent and constructability.
PROCEDURE:-
- In Google, search for Autodesk Navisworks 3D viewer to download and install Navisworks NWC File Export Utility 2023.
- In Revit, open the Architectural and Structural file, perviously created challenge in week 6 to 8.
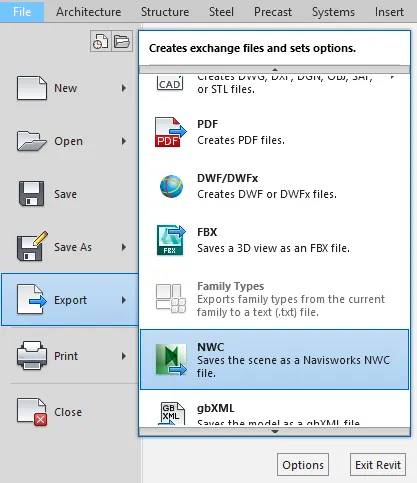
- From File tab, under Export, select NWC to save the file as NWC file.
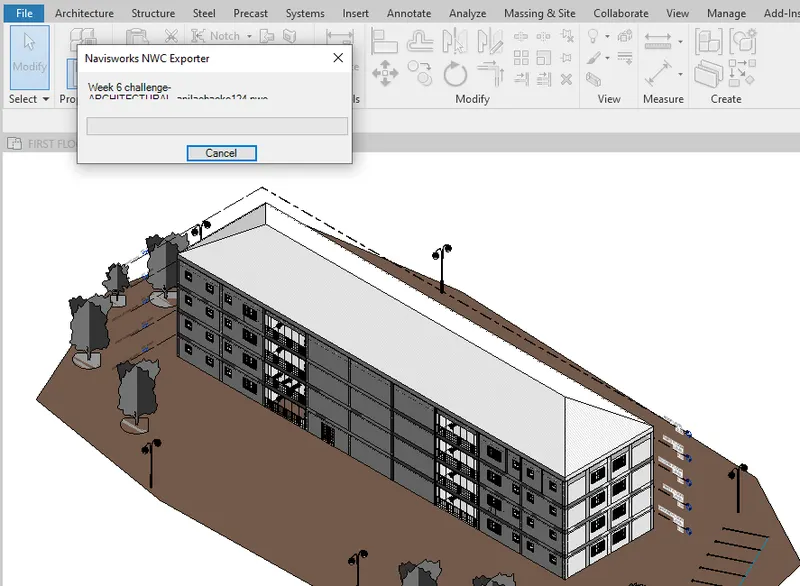
- Save and export the NWC file to required space.
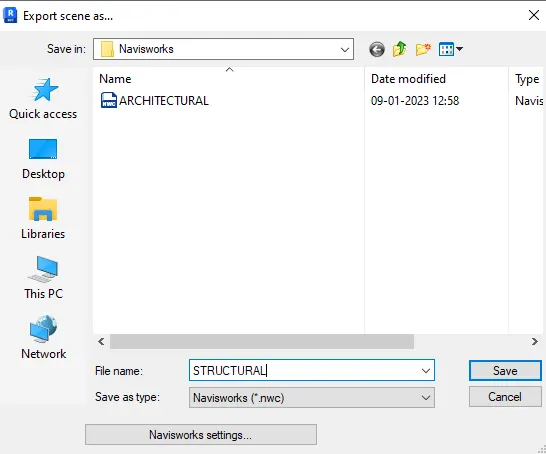
- Similarly, save and export the Structural file as NWC file,
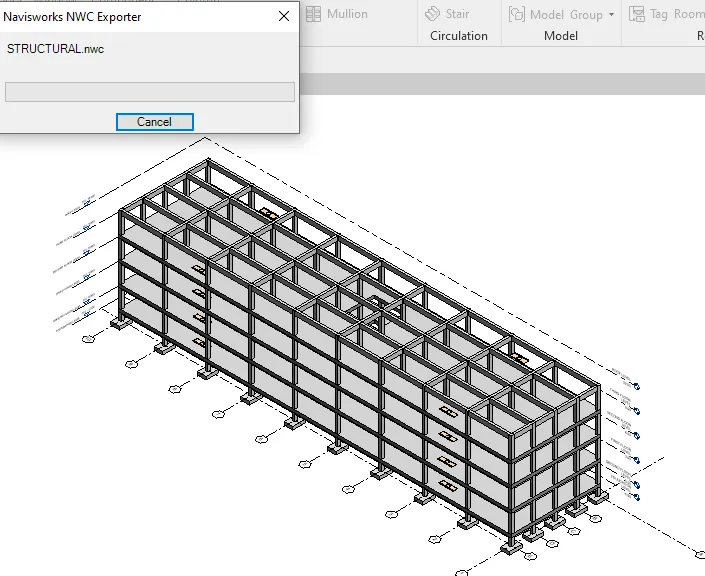
RESULT:- Hence, exported the Revit architecture and structure model to Navisworks Cache file.
2) Use Navigate Tool to walk around the model and walk through the rooms created and record your moving as animation in your Navisworks file
AIM:- To walk around the model and walk through the rooms created and record your moving as animation in your Navisworks file using Navigate Tool
INTRODUCTION:- Navisworks Manage software is a comprehensive project review solution that supports coordination, analysis and communication of design intent and constructability.
PROCEDURE:-
- Open the exported Architectural NWC file in the Navisworks project.
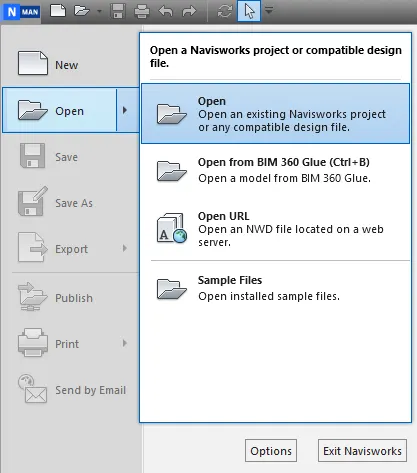
- Open the Architectural file in Navisworks Cache.
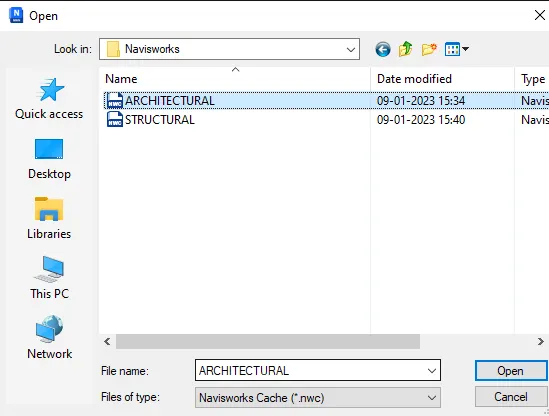
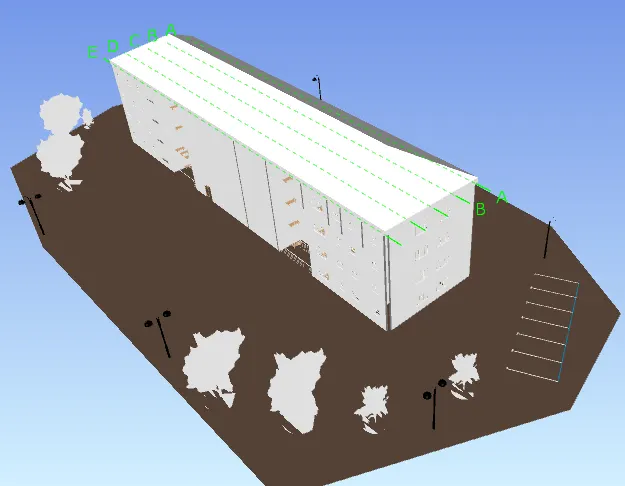
- Exported Architectural file is opened in Navisworks.
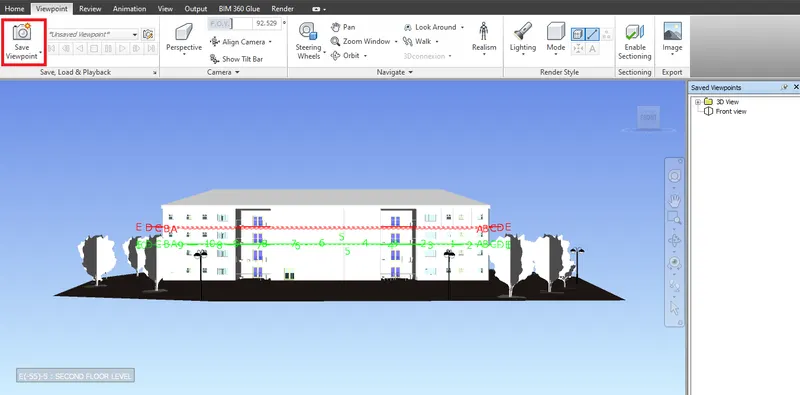
- Go to Viewpoint, to save the viewpoint of the front view as shown below.
- Go to Living Room in 3D view and save the viewpoint.
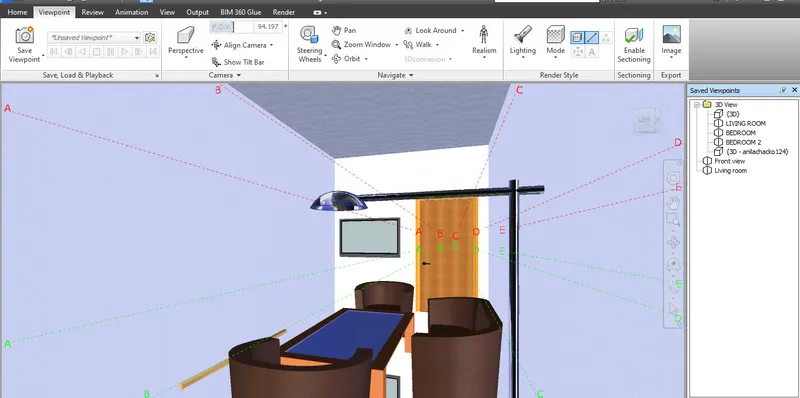
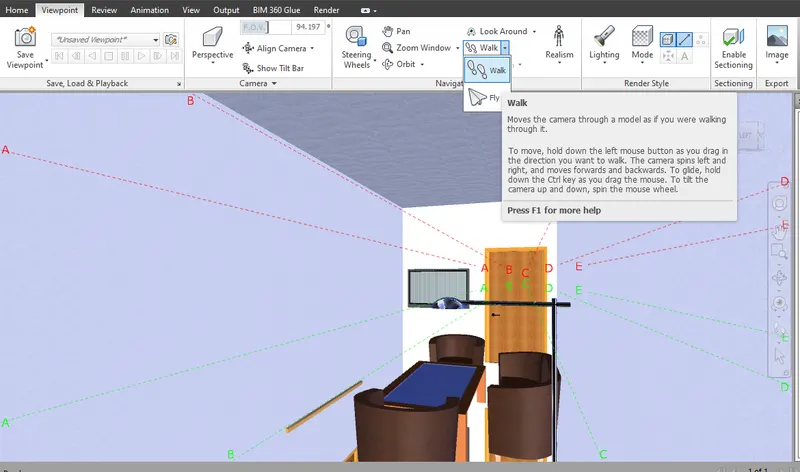
- Go to Living Room in 3D view, under Viewpoint select Walk to move around.
- Record the walk from living room to bedroom.
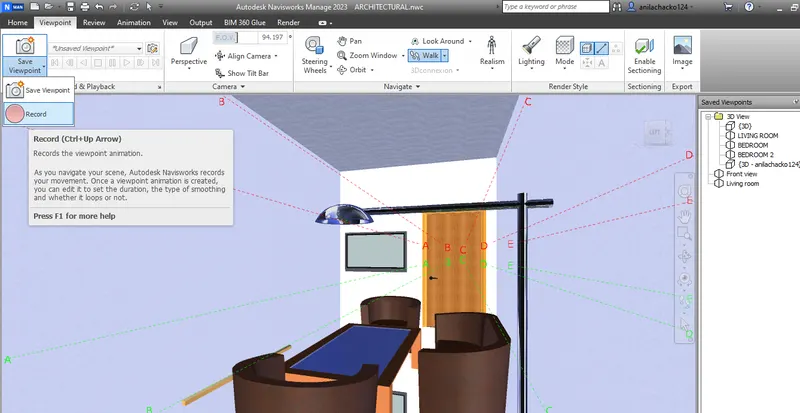
- Click on Stop after recording and save it to a new name.
- Saved viewpoint are saved as Frames as shown below.
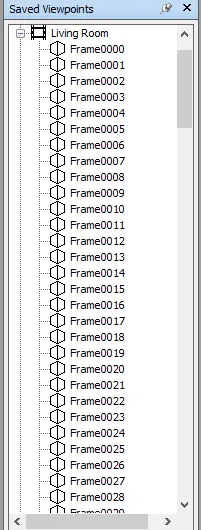
- Similarly, walk around the model.
RESULT:- Hence, using Navigate Tool, walked around the model and walked through the rooms created and record your moving as animation in your Navisworks.
3) Use Navigate tool to use Realism feature to walk through the model and record your moving as animation in Navisworks file
AIM:- To use Realism feature to walk through the model and record the moving as animation in Navisworks file using Navigate tool
INTRODUCTION:- The Realism feature in Viewpoint tab helps to navigate panel to give a realistic view of the 3D model by making a third person walk through the model.
PROCEDURE:-
- Under Viewpoint, select Realism and pick the third person.
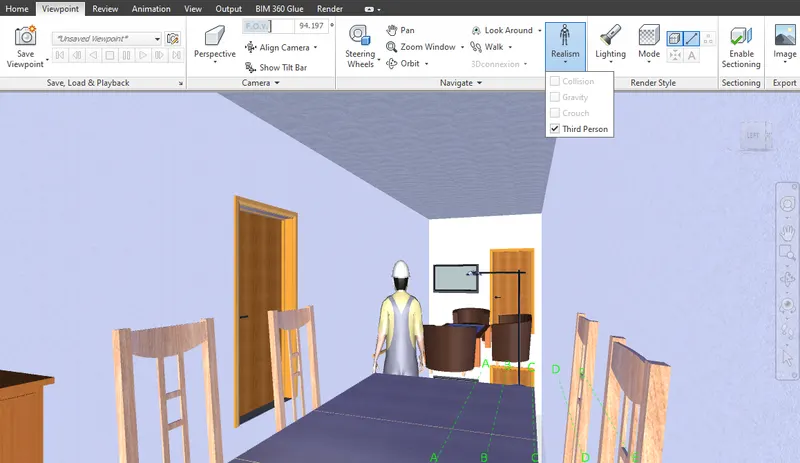
- Then select walk to allow third person to walk through and record the video.
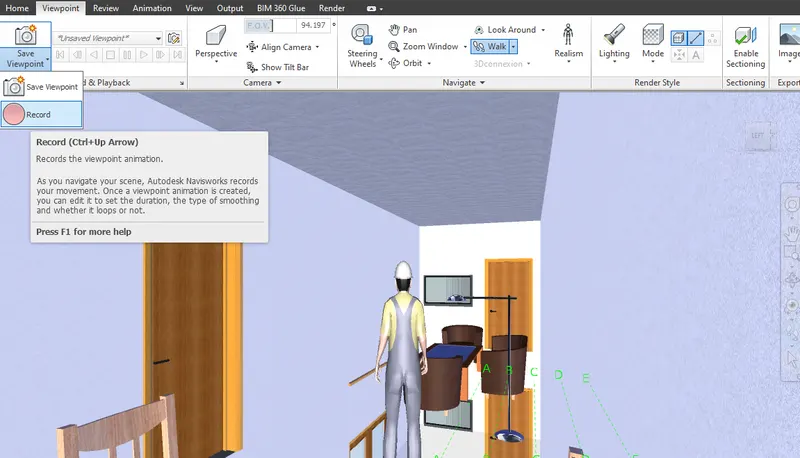
- Allow the third person to walk.
- Stop the video after recording.
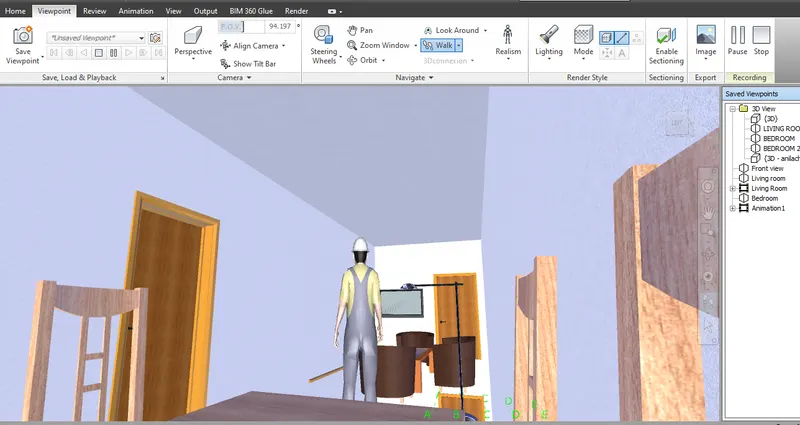
- Saved viewpoint are saved as Frames as shown below.
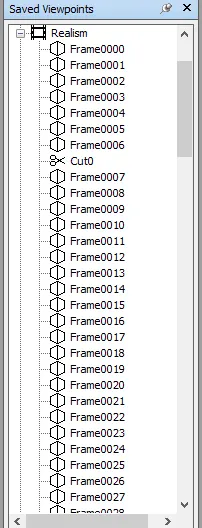
RESULT:- Hence, used Realism feature to walk through the model and record the moving as animation in Navisworks file using Navigate tool
4) Embed both architecture and structure *.nwc file to your Navisworks file. Create a clash detection test between the two models
a. Run the Clash Detection Test
b. Study the clashes between the two models
c. List which of the clashes could be approved
d. List which of the clashes could be neglected ( will be taken care later)
e. List which of the clashes can be resolved
f. Save the results after color coding the clashes to the Navisworks file
g. In case of resolution annotate the clash and save the view to defined views in Navisworks
AIM:- Embed both architecture and structure .nwc file to Navisworks file and to create a clash detection test between the two models
INTRODUCTION:- Clash Detective window helps to find and report on interferences between different parts of the scene, ie, accidental interference between two components while positioning it.
PROCEDURE:-
- Firstly, open the Architectural cache file in Navisworks manage.
- Under Home tab, select Append to add the Structural file to the current Architectural file.

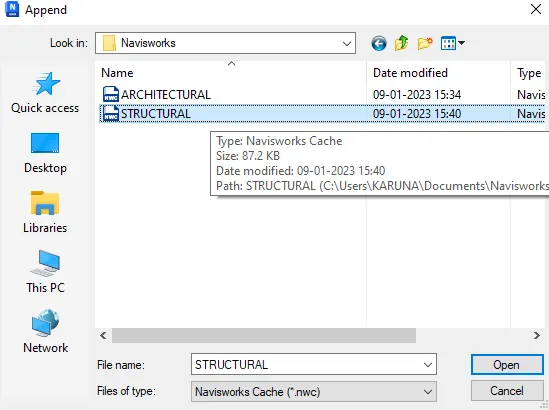
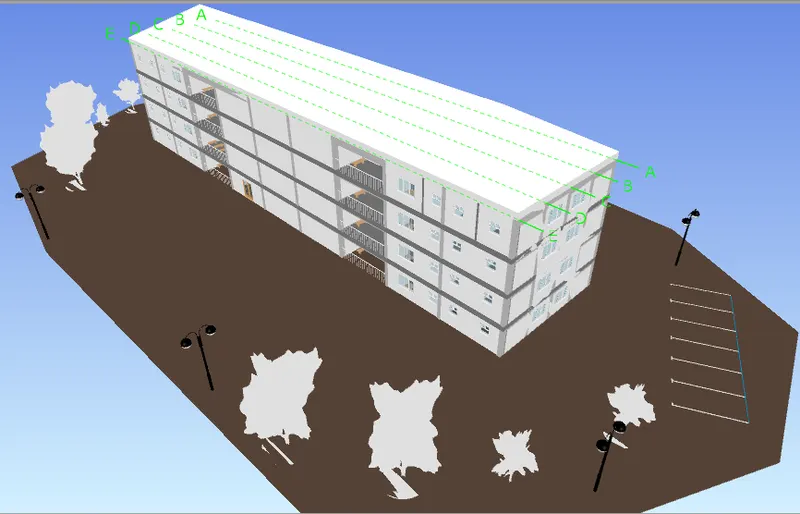
- Select Clash Detective from Home tab.

- Clash Detective tab appears on the screen.
- Click on Add Test to add new clash test.
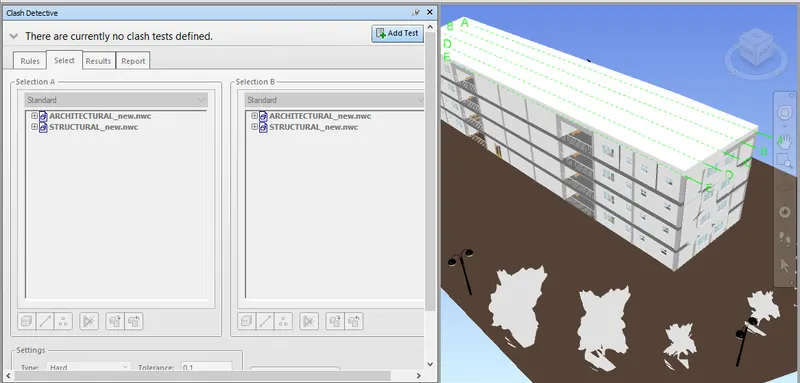
- Select Architectural from section A and Structural from section B and Run Test.
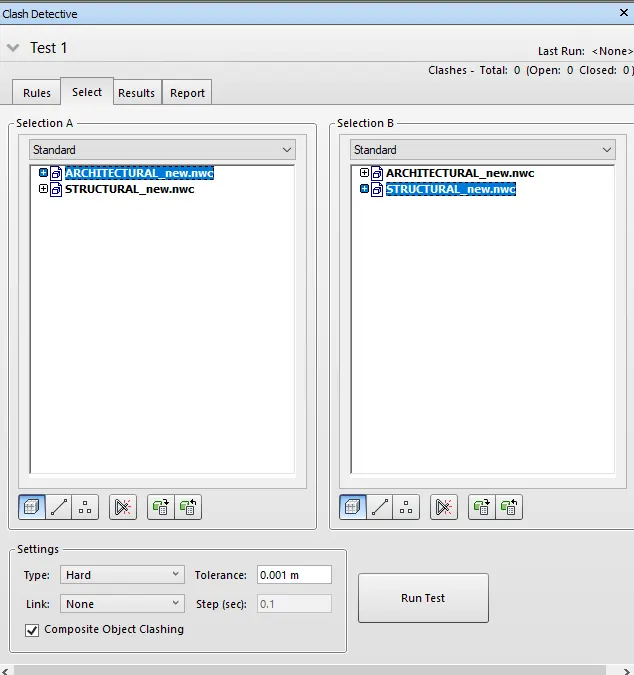
- After Run test, it is seen that there are total 1448 clashes in the model.
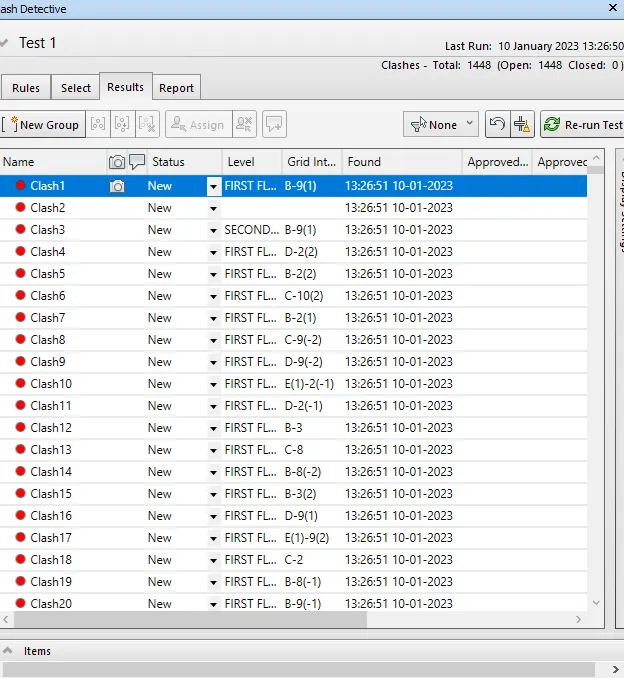
- Select clash 6 from result tab to see the clash in the model.
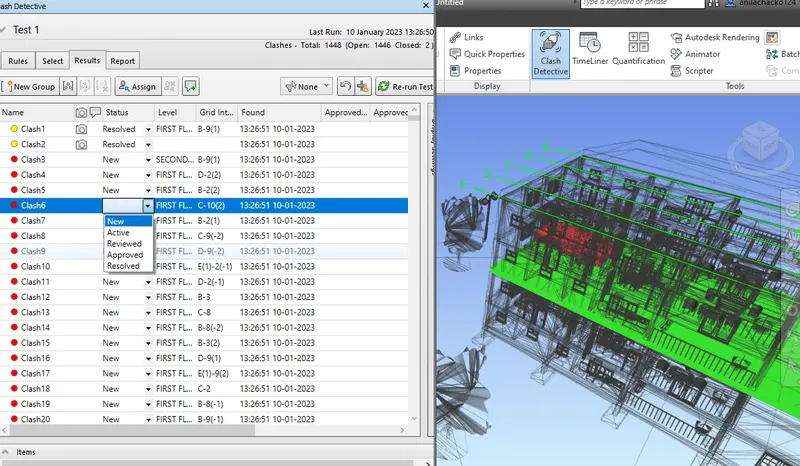
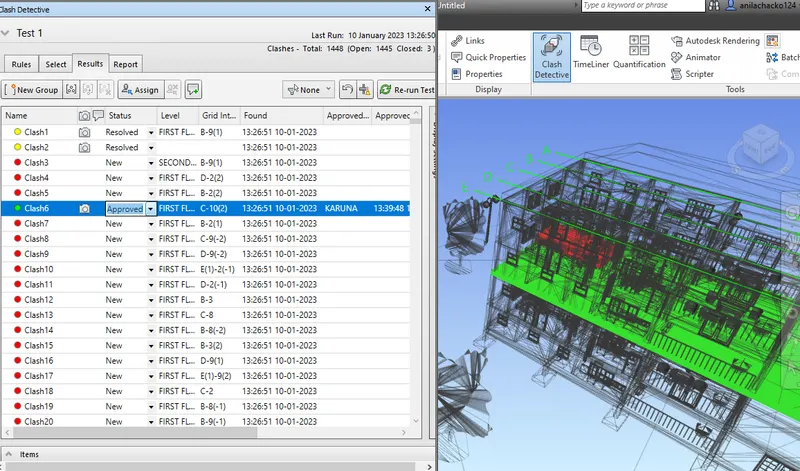
- Mark clash 6 status as approved as shown below.
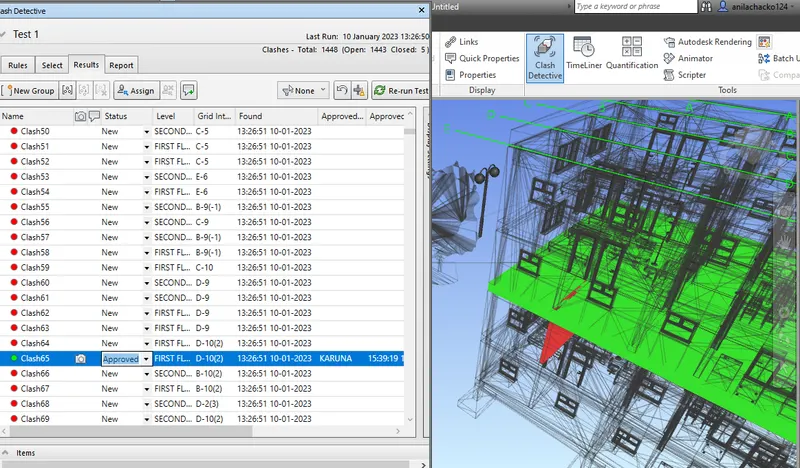
- Similarly, select clash 65 and mark status as approved as shown below.
- Similarly, select clash 82 and mark status as reviewed as shown below.
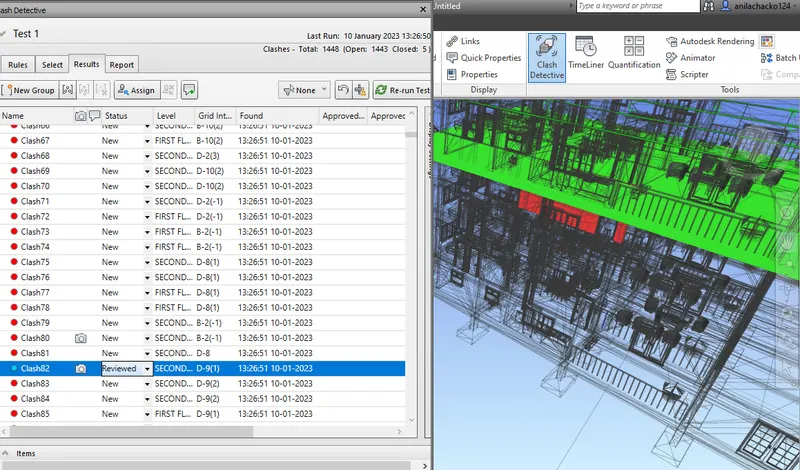
- Similarly, review status of all the clashes and update in status.
RESULT:- Hence, embedded both architecture and structure .nwc file to Navisworks file and created a clash detection test between the two models
5) Using the Timeliner feature in Navisworks prepare a schedule for the project developed in week 6 to 8 by adding reasonable assumptions for task start date and end date and simulate the task completion as a visual simulation. Record it and save the timeline simulation to Navisworks file
AIM:- To prepare a schedule for the project developed in week 6 to 8 by adding reasonable assumptions for task start date and end date and simulate the task completion as a visual simulation and record it and save the timeline simulation to Navisworks file using the Timeliner feature.
INTRODUCTION:- TimeLiner window enables you to link the model to an external construction schedule for visual time and cost based planning. TimeLiner helps in tracking of the project throughout the scheduled time.
PROCEDURE:-
- Open the exported structure model in Navisworks.
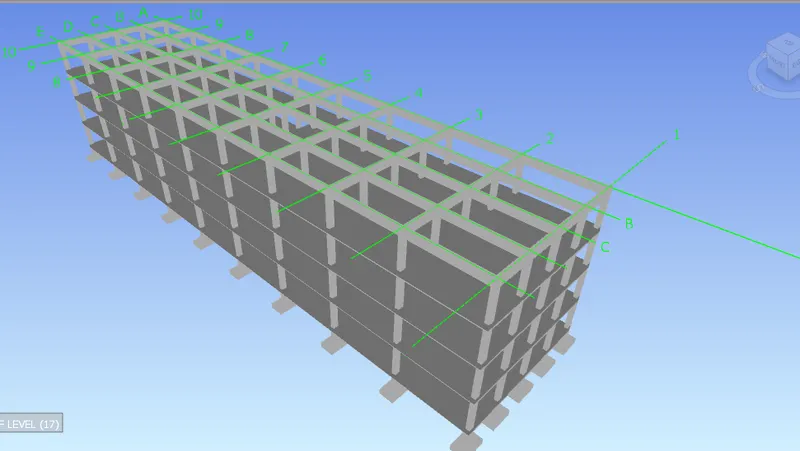
- Under Home tab, select Timeliner and the Selection Tree.

- Therefore, timeliner and selection tree window appears on the screen.
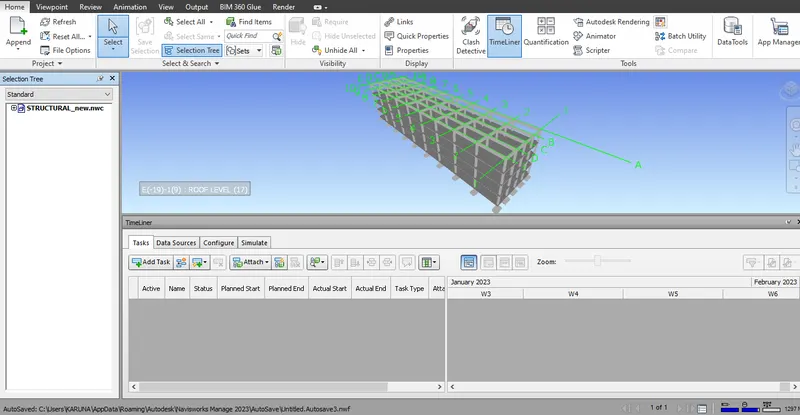
- Click on Add Task to add task to the list.
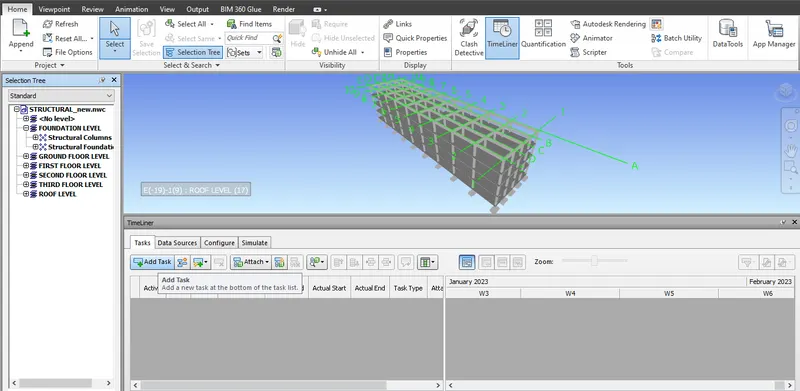
- Name the task, mention the planned dates, actual dates and task type as shown below.
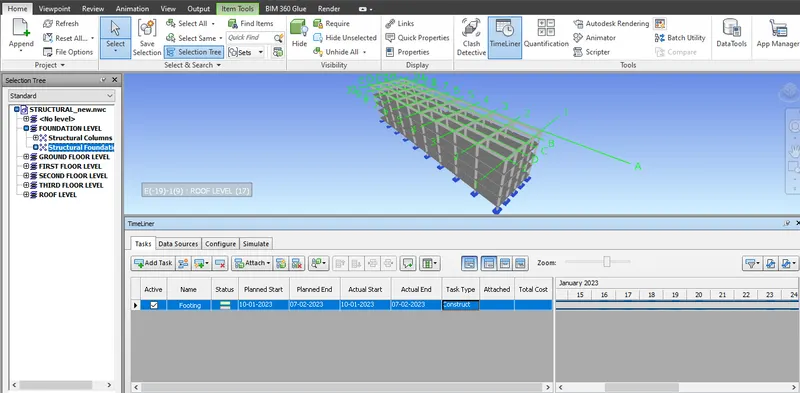
- Attach the selected foundation from the selection tree as shown below.
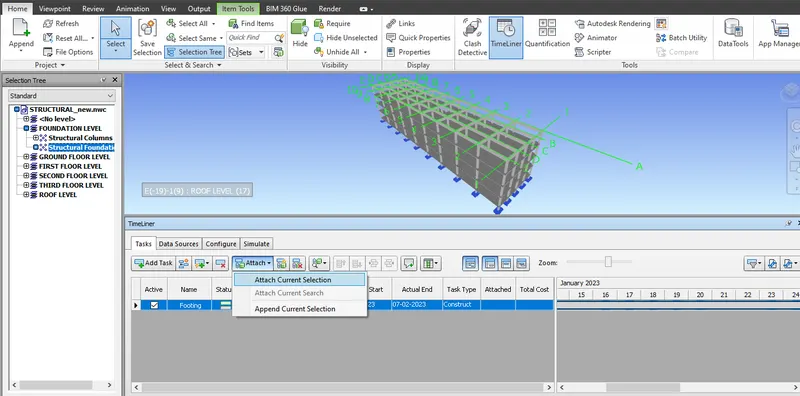
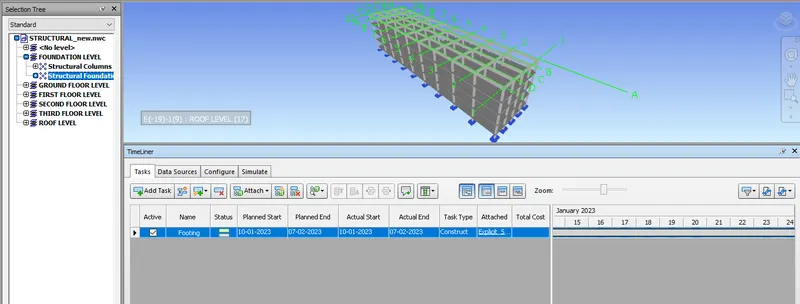
- Therefore, structural footing is attached to the assigned task.
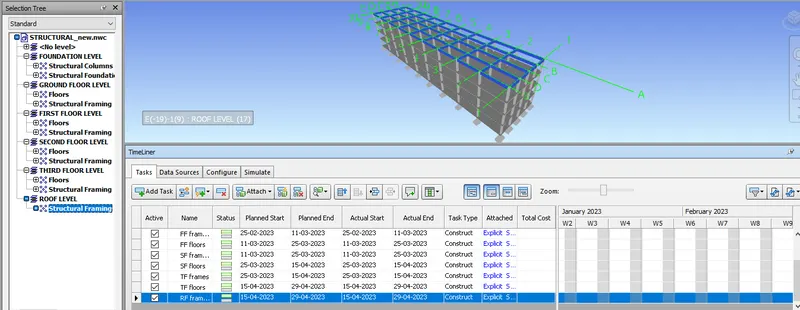
- Similarly, add tasks and components to the timeliner as shown below.
- Click on Stimulate option and then on play button to see the current position of the work.
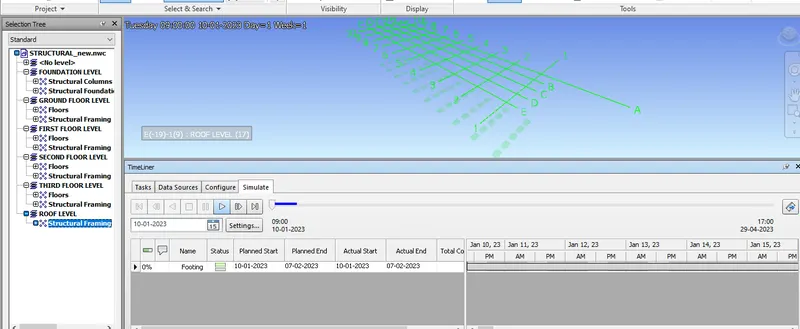
- On playing the play button, we get to see the work progression.
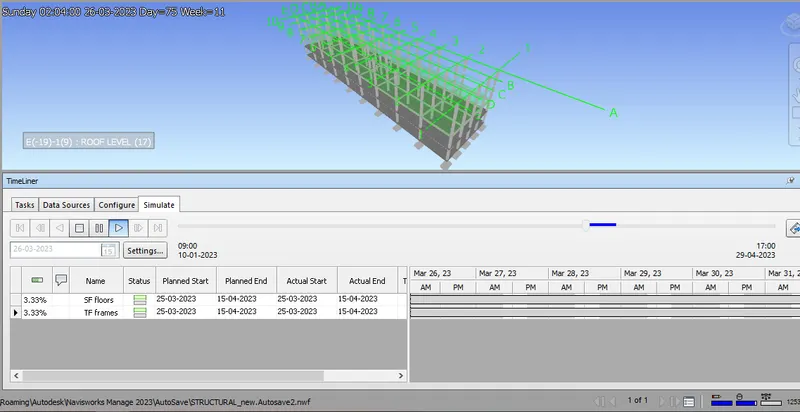
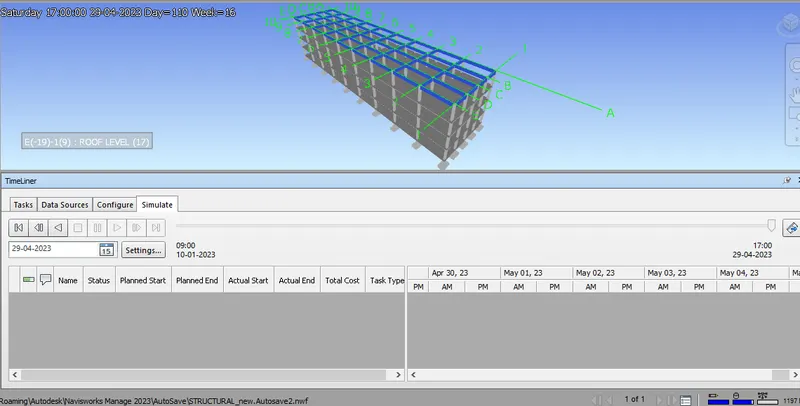
- Export the animation by clicking the icon shown below.
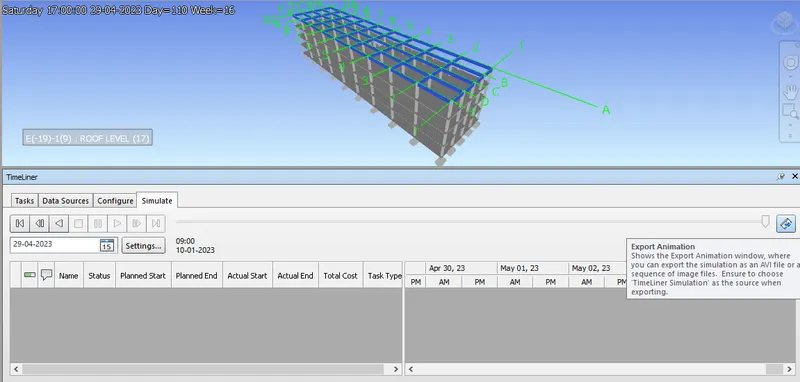
RESULT:- Hence, prepared a schedule for the project by adding reasonable assumptions for task start date and end date and simulate the task completion as a visual simulation and recorded it and save the timeline simulation to Navisworks file using the Timeliner feature.