Usage of Navigation tool , Timeliner and Clash Detection test using Naviswork
Question1) Use the Architecture/ Structure Project file developed by you in Week 6 to 8. Export the Revit architecture and structure model to Navisworks Cache file following the export settings discussed in class.
AIM: To export the Revit architecture and structure model to Navisworks Cache file following the export settings discussed in class.
INTRODUCTION: First lets understand what is naviswork? So naviswork is a software which deals with the opening and combination of 3D models,navigate through the model,real time walkthrough in the model. It allows the user to navigate around the model in real time. It is also used to improve the co-ordination on the BIM. So in this section we will be able to understand the concept of exporting the Revit file into the Naviswork software. The extension for the Naviswork file is .nwc.Here in this setion we will be able to export the Revit file into the Naviswork in just few steps so lets see how we can do this,the detailed procedure has been discussed below.
PROCEDURE:
(A) Architectural Project File:
- So to export the Revit file into the Naviswork first of all we need to download the Naviswork exporter after downloading the Naviswork software.
- So in order to download the Naviswork exporter just go to the Google from there type Navisworks exporter 2023 because i am using the Revit of 2023 version. So just type that in the search box and then press Enter. After doing so there will be another window of Navisworks 3D viewer. In that page there will be an option called Navisworks Exporters 2023 .exe. Just click on that option and allow that to download. After completing the downloading the Navisworks exporter is ready to use in the Revit software.
- To check whether we are having the navisworks exporter istalled or not just go to the revit software,open a new file and in that file just go to the Add-ins tab there will be an option called External tools in that option there are another two options called Naviswork 2023,it means the Navisworks exporter is installed completely as shown in the below figure:

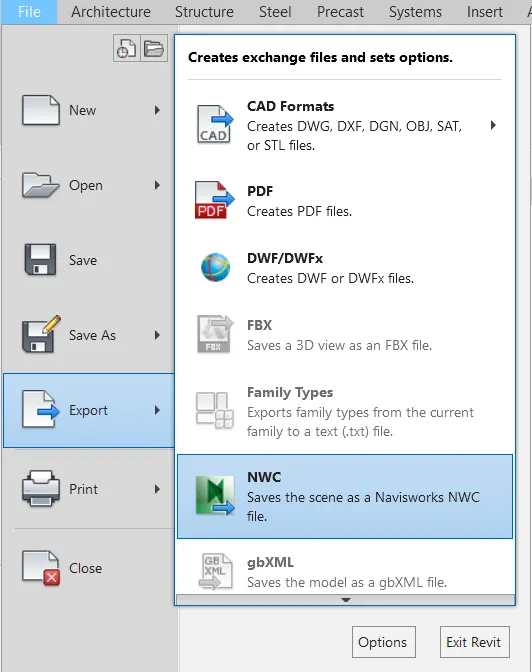
- Now to export the file into the Naviswork just go to the File tab there will be an option called Export and then NWC option click on that as shown in the below figure:
- After clicking that there will be a new dialouge box appears on the screen called Export scene as, in that dialouge box save the file with the Naviswork extension i.e, nwc, here i have saved the file as School buiding architectural new with file extension as .nwc, now click on the Save button in that manner the file have been save with the Naviswork extension. In this dialouge box we can Do the naviswork settings also the icon or we can say that the button for the Naviswork setting is present at the borttom of the dialouge box as shown in the below figure:
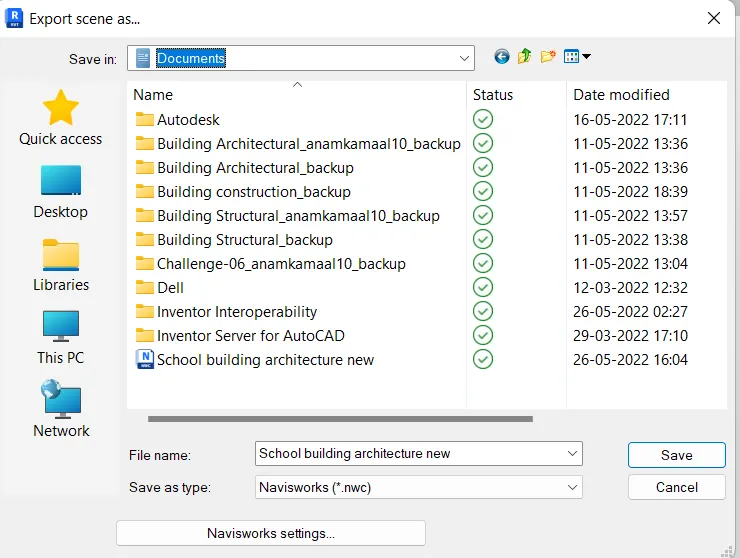
- After saving the Revit file into the Naviswork the file will start exporting into the Naviswork Software,the exporting of file into the navisworks will not take much time to export as shown in the below figure:
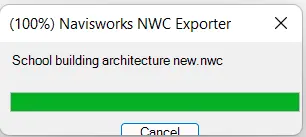
- Now after the process of exporting the file in the Revit software finishes just go to the Naviswork manage software and from there click on the Application button as shown in the below figure:

- Now after clicking on the Application button go to the option open and then there will be another dialouge box appears on the screen from that dialouge box open the file which we have already expoted from the Revit software as shown in the below figure:
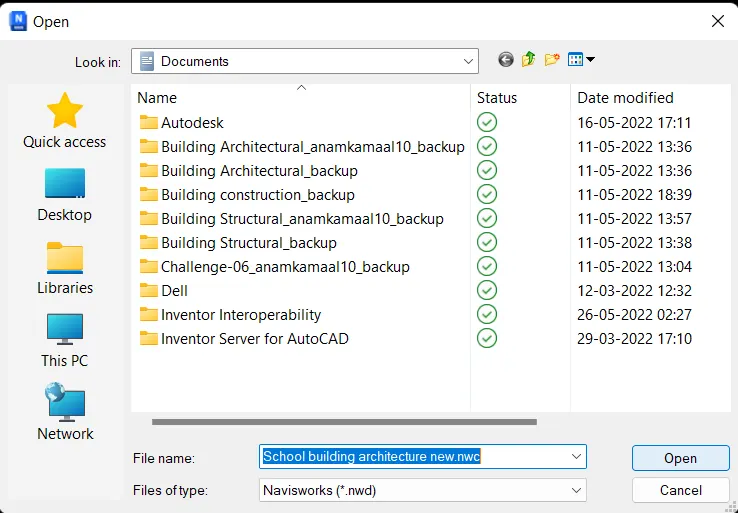
- Now the exported architectural file opens in the Naviswork as shown in the below figure:
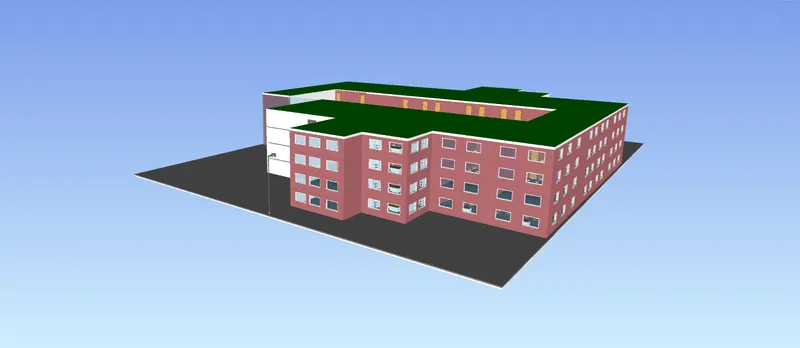
(B) Structural Project File:
- So to export the Structural Revit file into the Naviswork first of all we need to download the Naviswork exporter after downloading the Naviswork software.
- So in order to download the Naviswork exporter just go to the Google from there type Navisworks exporter 2023 because i am using the Revit of 2023 version. So just type that in the search box and then press Enter. After doing so there will be another window of Navisworks 3D viewer. In that page there will be an option called Navisworks Exporters 2023 .exe. Just click on that option and allow that to download. After completing the downloading the Navisworks exporter is ready to use in the Revit software.
- To check whether we are having the navisworks exporter istalled or not just go to the revit software,open a new file and in that file just go to the Add-ins tab there will be an option called External tools in that option there are another two options called Naviswork 2023,it means the Navisworks exporter is installed completely as shown in the below figure:
- Now to export the file into the Naviswork just go to the File tab there will be an option called Export and then NWC option click on that as shown in the below figure:
- After clicking that there will be a new dialouge box appears on the screen called Export scene as, in that dialouge box save the file with the Naviswork extension i.e, nwc, here i have saved the file as School buiding architectural new with file extension as .nwc, now click on the Save button in that manner the file have been save with the Naviswork extension. In this dialouge box we can Do the naviswork settings also the icon or we can say that the button for the Naviswork setting is present at the borttom of the dialouge box as shown in the below figure:
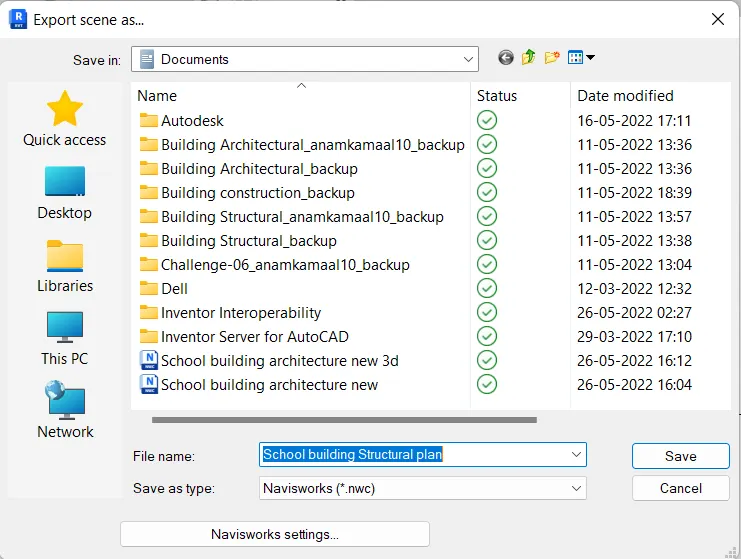
- After saving the Revit file into the Naviswork the file will start exporting into the Naviswork Software,the exporting of file into the navisworks will not take much time to export as shown in the below figure:
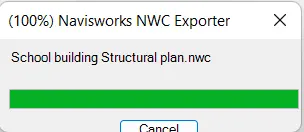
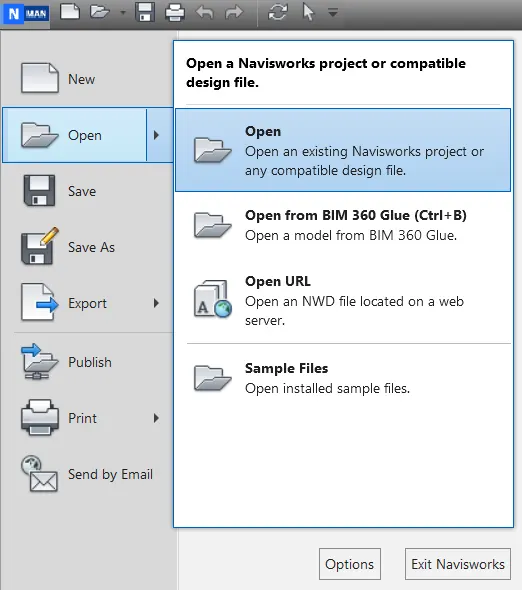
- Now after the process of exporting the file in the Revit software finishes just go to the Naviswork manage software and from there click on the Application button as shown in the below figure:
- Now after clicking on the Application button go to the option open as shown in the below figure:
- And then there will be another dialouge box appears on the screen from that dialouge box open the file which we have already expoted from the Revit software as shown in the below figure:
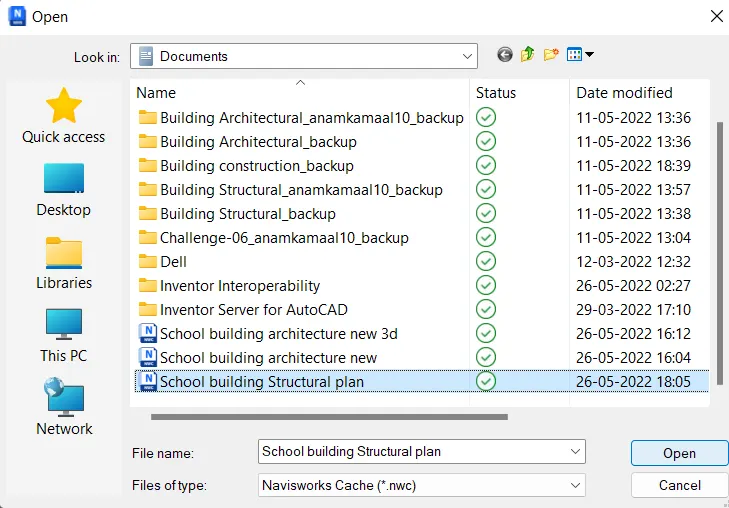
- Now the exported architectural file opens in the Naviswork as shown in the below figure:
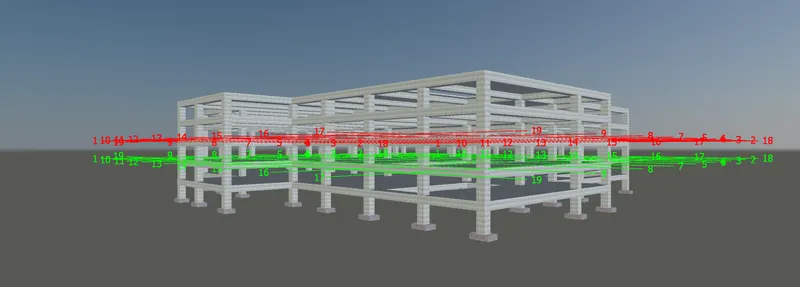
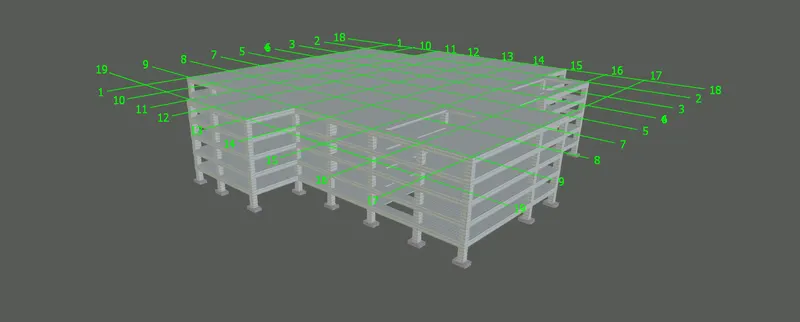
Question 2) Use Navigate Tool to walk around the model and walk through the rooms created and record your moving as animation in your Navisworks file.
AIM: To use Navigate Tool to walk around the model and walk through the rooms created and record your moving as animation in your Navisworks file.
INTRODUCTION: First lets understand what is naviswork? So naviswork is a software which deals with the opening and combination of 3D models,navigate through the model,real time walkthrough in the model. It allows the user to navigate around the model in real time. It is also used to improve the co-ordination on the BIM. So in this section we will be able to understand the concept of exporting the Revit file into the Naviswork software. The extension for the Naviswork file is .nwc.Here in this setion we will be able to understand the concept of walkthrough around the model using the navigation tool in the Naviswork software. And how to record our moving as the animation in the naviswork file. The detailed procedure is given below.
PROCEDURE:
- In order to create a walkthrough the rooms created and record the moving as animation. First of all go to the application button as seen in the below image :
- After that click on the application button there will be an option called Open just click on that option as shown in the below figure:
- Now after clicking on the Application button go to the option open and then there will be another dialouge box appears on the screen from that dialouge box open the file which we have already expoted from the Revit software as shown in the below figure:
- Now the exported architectural file opens in the Naviswork as shown in the below figure:
- Now in oder to create a walk through the rooms that we have created in the earlier projects, just go to the Viewport toolbar as shown in the below figure:

- Now there will be an option called Save viewpoint,in that option there will be another two options called Save viewport and the another option is Record. From there just click on the Save viewport option as shown in the below figure:

- Now there is an option in the Viewport toolbar called Navigate, in that navigate there are multiple options called Steering wheels, Pan, Zoom window,Orbit,Look around,Walk and realism.
- So from these multiple options present in the Navigate bar,we can choose the Pan and walk or look around option to walkthrough the our model as shown in the below figure:
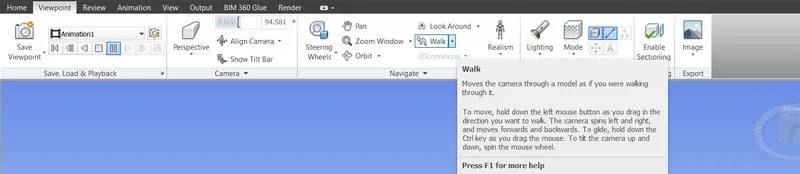
- So we can use these options during the walkthrough process.
- And there is an option in the Save,Load and Playback option there is another option called save viewpoints. Or the saved viewpoint option can be find in the right corner of the screen also. In that option the each view like the Room1,Room2,Bathroom,Study room etc all rooms 3D view saved in that viewpoint option automatically as shown in the below figure:
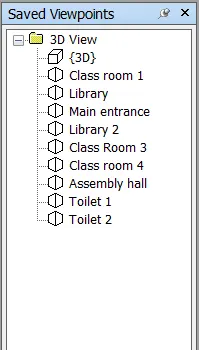
- These all are the automatically saved viewpoints.
- After this we can go through these rooms using the Pan and the Walk option. Just click on the option walk,and go ahead in the direction of your desire to see the real time view of the building.
(A) Class room1:
- Go to the option class room1 in the saved viewport,click on that option and the view of the class room will appear on the screen.
- After that Go to the option Save viewpoint and click on the option Record and start recording.
- After recording have been started go to the navigate tool pick the walk option and slowly and carefully move the mouse in order to get the perfect video recording.
- If we move faster then we can bumped into the wall so go carefully using the walk option and check it out whether everything is fine or not or there are the things which is not correct or something to be redesign. Observe carefully.
- Once your are done with looking around just go to the saved viewpoint option and stop the recording. From there the recording can be stopped.
- So below are the some images taking during the walkthrough the room. So here are the images:
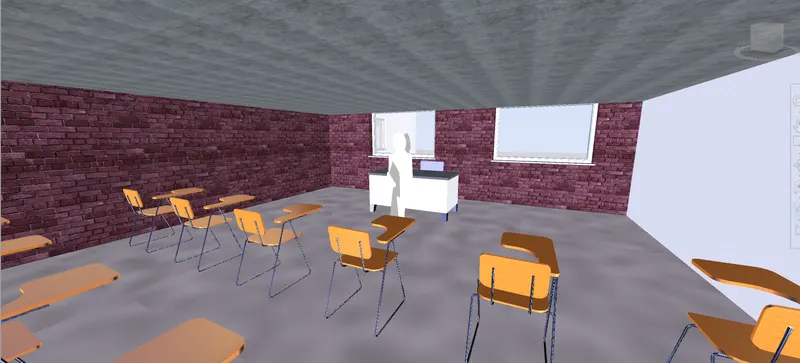
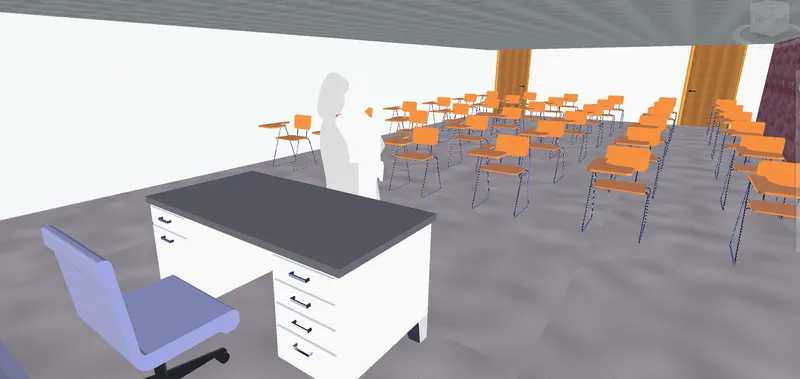
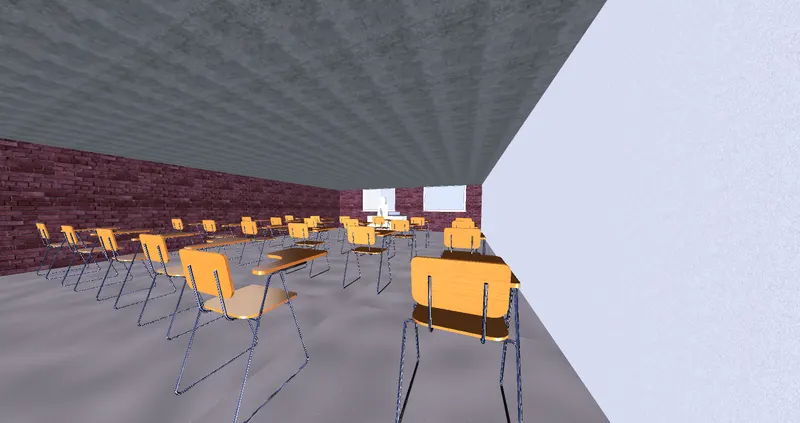
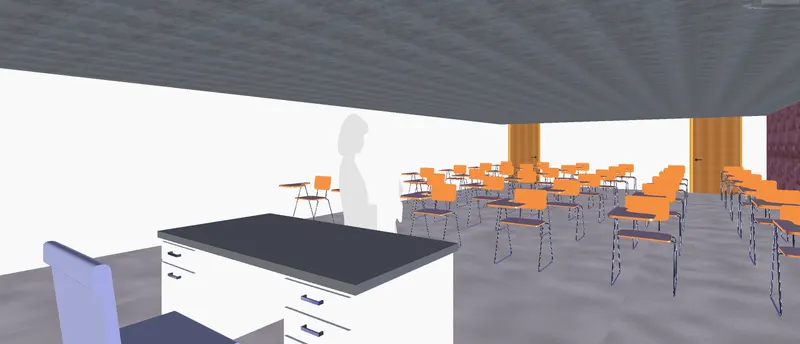
(B) Class room1:
- Go to the option class room1 in the saved viewport,click on that option and the view of the class room will appear on the screen.
- After that Go to the option Save viewpoint and click on the option Record and start recording.
- After recording have been started go to the navigate tool pick the walk option and slowly and carefully move the mouse in order to get the perfect video recording.
- If we move faster then we can bumped into the wall so go carefully using the walk option and check it out whether everything is fine or not or there are the things which is not correct or something to be redesign. Observe carefully.
- Once your are done with looking around just go to the saved viewpoint option and stop the recording. From there the recording can be stopped.
- So below are the some images taking during the walkthrough the room. So here are the images:
(C) Library:
- Go to the option class room1 in the saved viewport,click on that option and the view of the class room will appear on the screen.
- After that Go to the option Save viewpoint and click on the option Record and start recording.
- After recording have been started go to the navigate tool pick the walk option and slowly and carefully move the mouse in order to get the perfect video recording.
- If we move faster then we can bumped into the wall so go carefully using the walk option and check it out whether everything is fine or not or there are the things which is not correct or something to be redesign. Observe carefully.
- Once your are done with looking around just go to the saved viewpoint option and stop the recording. From there the recording can be stopped.
- So below are the some images taking during the walkthrough the room. So here are the images:
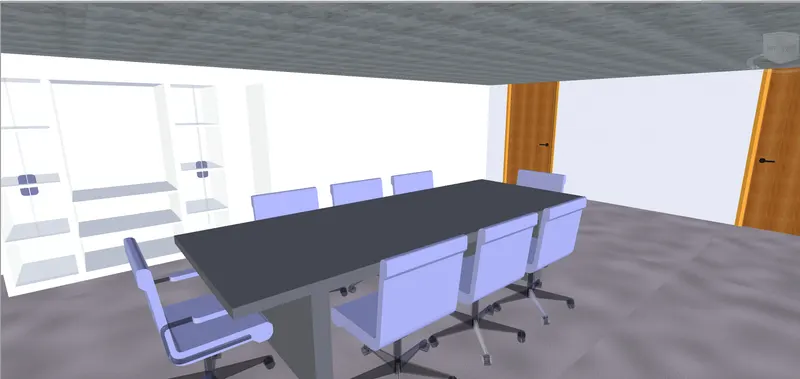
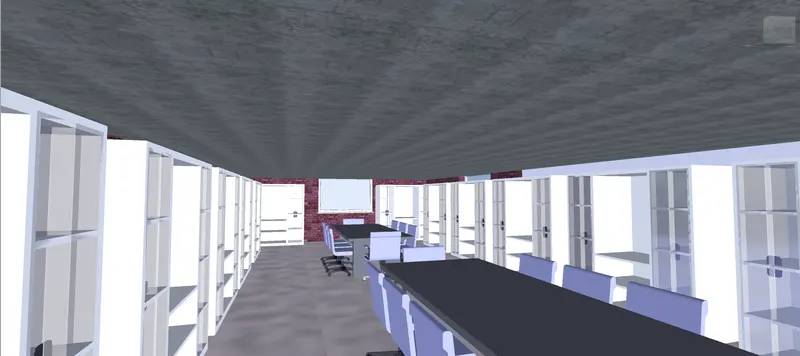
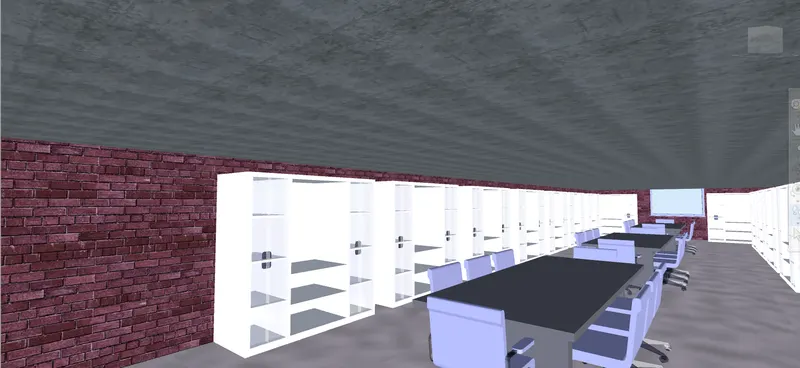
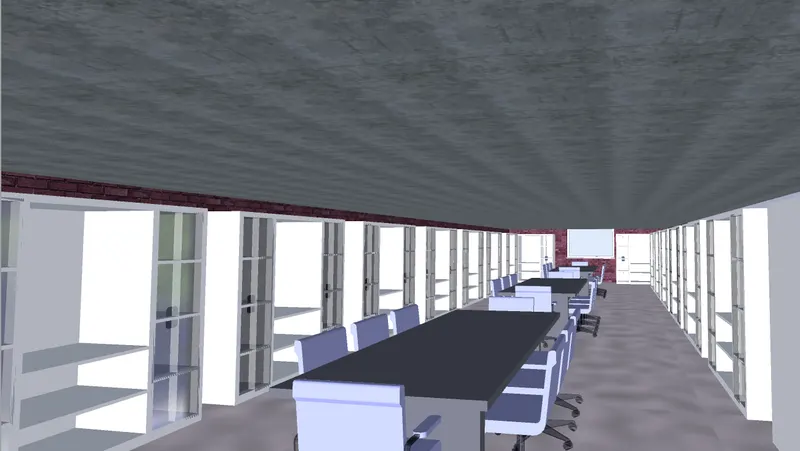
(D) Assembly Hall:
- Go to the option class room1 in the saved viewport,click on that option and the view of the class room will appear on the screen.
- After that Go to the option Save viewpoint and click on the option Record and start recording.
- After recording have been started go to the navigate tool pick the walk option and slowly and carefully move the mouse in order to get the perfect video recording.
- If we move faster then we can bumped into the wall so go carefully using the walk option and check it out whether everything is fine or not or there are the things which is not correct or something to be redesign. Observe carefully.
- Once your are done with looking around just go to the saved viewpoint option and stop the recording. From there the recording can be stopped.
- So below are the some images taking during the walkthrough the room. So here are the images:
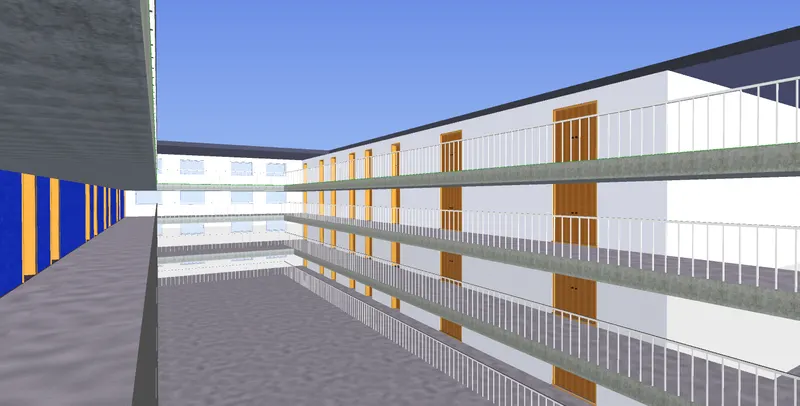
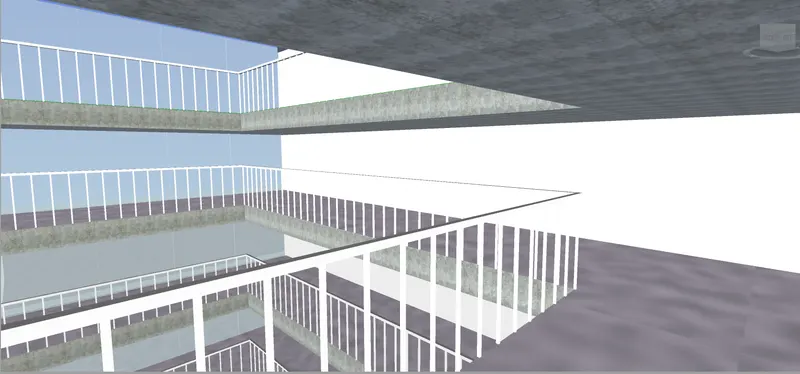
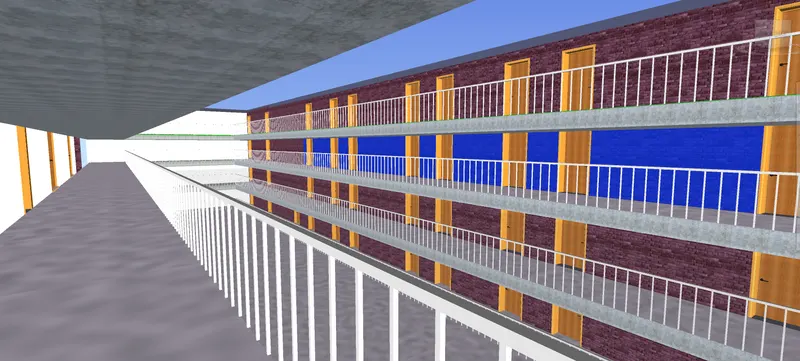
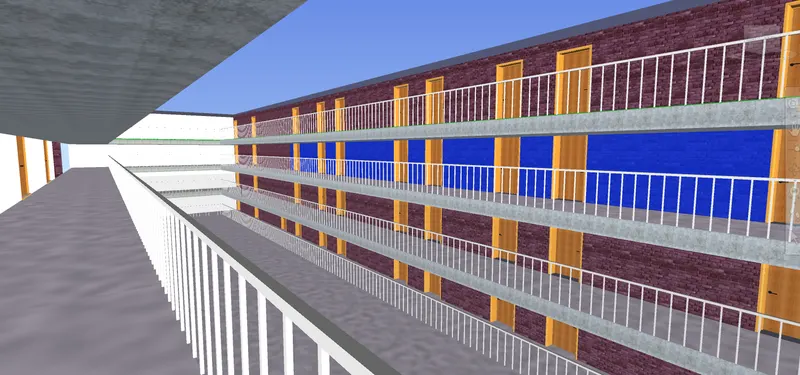
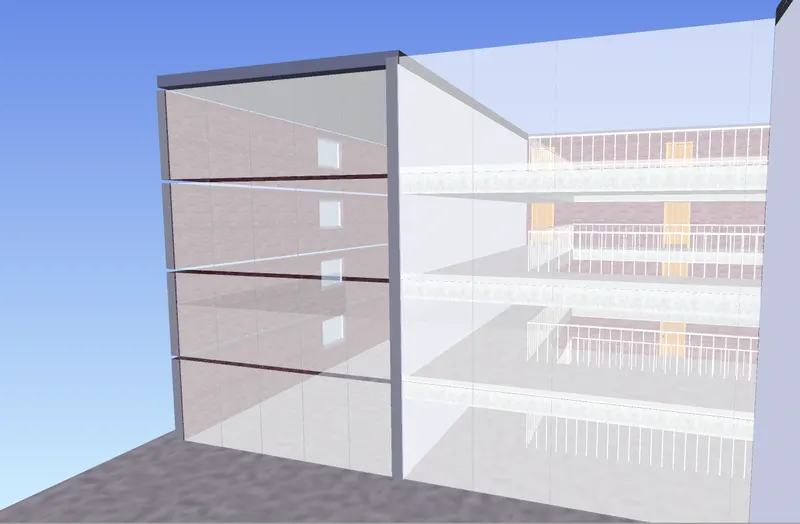
- Similarly we can do the same for all the rooms of our project model.
- After doing all the walkthrough the rooms just stop the recording.
- And to stop the recording just go to the Animation toolbar there will be an option to Stop the recording and to continue to record from there just stop the recording as shown in the below figure:

- After recording the animation or video of the walk through the will saved either in the animation toolbar in the Playback option or can save in the saved viewpoint box as shown in the below figure:

- Or it will be saving in the saving viewpoint bar in the form of the Frames, here we can easily tell the designer that in this frame there is some mistake and can be checked out easily as shown in the below figure:
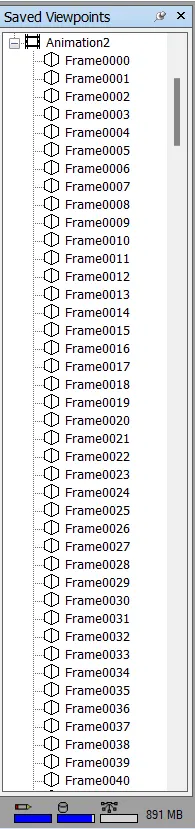
- But if we click on the Play button in the Playback option in Animation toolbar then we will be seeing that the video which we have recorded is played but in the saved viewport it will be saving as the Frames as shown in the above pictures.
- So this is how we can create a walkthrough around the rooms.
Question3) Use Navigate tool to use Realism feature to walk through the model and record your moving as animation in Navisworks file.
AIM: To use Navigate Tool to use Realism feature to walk through the model and record your moving as animation in Navisworks file.
INTRODUCTION: First lets understand what is naviswork? So naviswork is a software which deals with the opening and combination of 3D models,navigate through the model,real time walkthrough in the model. It allows the user to navigate around the model in real time. It is also used to improve the co-ordination on the BIM. So in this section we will be able to understand the concept of exporting the Revit file into the Naviswork software. The extension for the Naviswork file is .nwc.Here in this setion we will be able to understand the concept of walkthrough around the model using the navigation tool in the Naviswork software. And how to record our moving as the real in the naviswork file. The detailed procedure is given below.
PROCEDURE:
- In order to create a walkthrough the rooms created and record the moving as animation. First of all go to the application button as seen in the below image :
- After that click on the application button there will be an option called Open just click on that option as shown in the below figure:
- Now after clicking on the Application button go to the option open and then there will be another dialouge box appears on the screen from that dialouge box open the file which we have already expoted from the Revit software as shown in the below figure:
- In this way we can open the 3D model of our project. The below image is the 3D view of the project as shown in the figure:
- In order to use Navigate tool to use Realism feature to walk through the model and record your moving as animation in Navisworks file.
- Firstly open the 3D image of the model and after opening the 3D in the project go to the Viewpoint toolbar there is an option called Walk option and there will be an another option called Realism just click on that option as shown in the below figure:

- After clicking on that icon/option there will be another option called Third person click on that after clicking on the option Realism and then Third person a real timer person appears on the screen as if a real person is walking through the building as shown in the below figure:

- After selecting the third person option go to the Save Viewpoint view in the View point tab, just click on the option Record which are present in the Save Viewpoint option just as shown in the below image:
- Now walk through the building using the walk option which is present in the Saved viewpoint,we can use the pan tool in case. Pan can be used to moves the current view parallel to the screen.
- For this we first need to go to the Viewpoint in that there is an option called Realism just click on that option and after clicking that option there will be another option called Third person just click on that option and the real time image of a person appers on the screen.
- Now use the walk option which is also present in the View point toolbar.
- Walk through the rooms using that walk option as shown in the images.
- Below are the some images that are created using the Realism option:
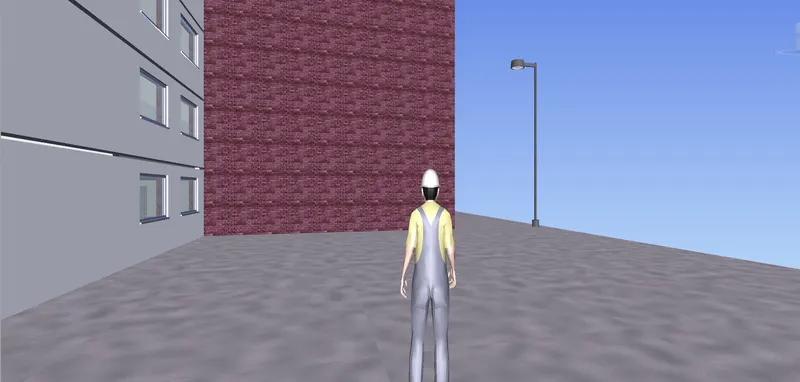
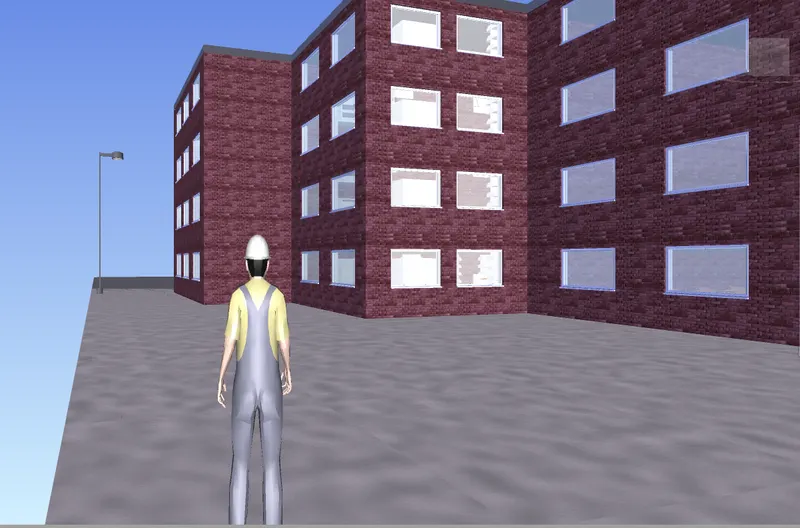
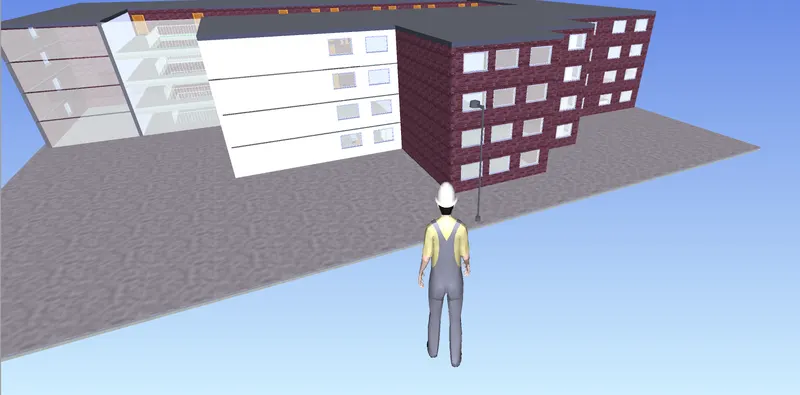
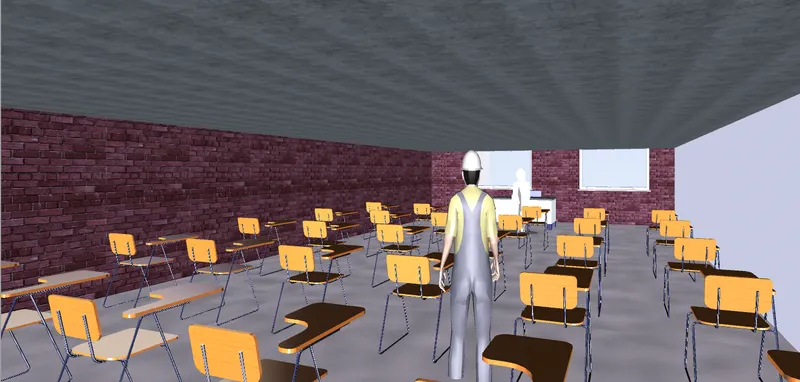
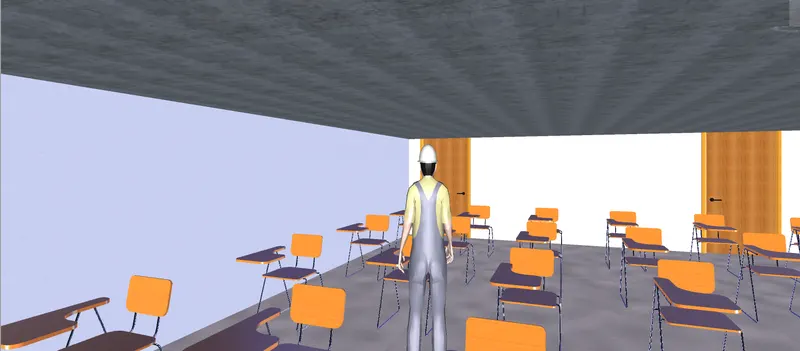
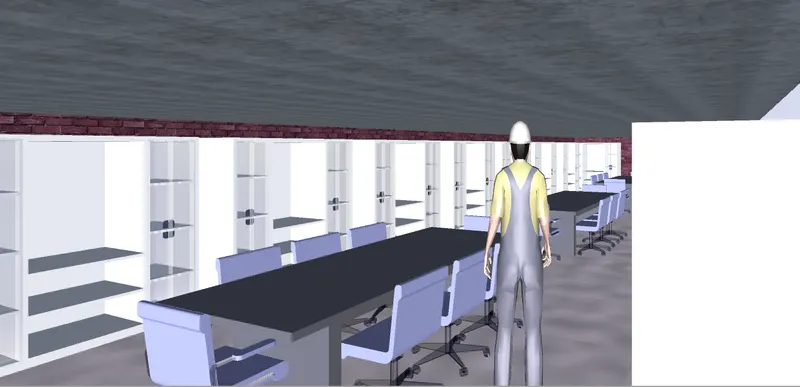
- The above images are the few images taken by using the realism(third person).
- After that stop the recording, and to stop the recording just go to the Animation toolbar there will be an option to Stop the recording and to continue to record from there just stop the recording as shown in the below figure:
- After recording the animation or video of the walk through the will saved either in the animation toolbar in the Playback option or can save in the saved viewpoint box as shown in the below figure:
- Or it will be saving in the saving viewpoint bar in the form of the Frames, here we can easily tell the designer that in this frame there is some mistake and can be checked out easily as shown in the below figure:
- This is how we can use the Realism tool to walk through the buiding in a realistic way.
- After this if we want to play the video just go to the Animation tab there is an option called Play button click on that button and the video will start to play as shown in the below figure:
- And to export the animation just go to the animation toolbar click on the option Export Animation as shown in the below image:
- After clicking on that option a new dialouge box apperas on the screen as shown in the below figure:
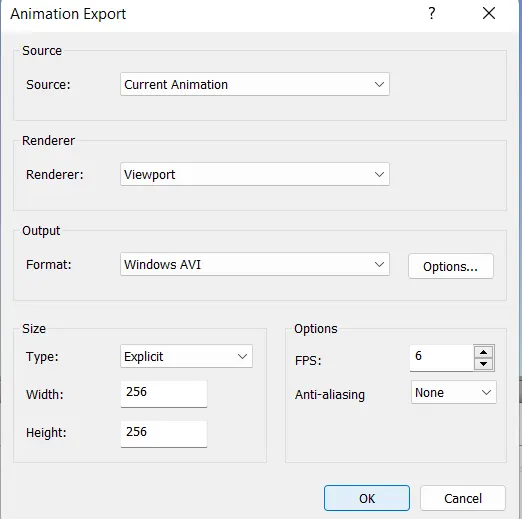
- After this save the exported file at the desired place wherever we want to save that file just save it.
- This is the complete procedure of creating animation or we can say that walk through using the navigate tool to use Realism feature to walk through the model and record your moving as animation in Navisworks file.
Question 4) Embed both architecture and structure *.nwc file to your Navisworks file. Create a clash detection test between the two models
a. Run the Clash Detection Test
b. Study the clashes between the two models
c. List which of the clashes could be approved
d. List which of the clashes could be neglected ( will be taken care later)
e. List which of the clashes can be resolved
f. Save the results after color coding the clashes to the Navisworks file
g. In case of resolution annotate the clash and save the view to defined views in Navisworks.
AIM: To embed both architecture and structure *.nwc file to your Navisworks file. Create a clash detection test between the two models
INTRODUCTION: First lets understand what is naviswork? So naviswork is a software which deals with the opening and combination of 3D models,navigate through the model,real time walkthrough in the model. It allows the user to navigate around the model in real time. It is also used to improve the co-ordination on the BIM. So in this section we will be able to understand the concept of exporting the Revit file into the Naviswork software. The extension for the Naviswork file is .nwc.Here in this setion we will be able to understand the concept of Embed both architecture and structure *.nwc file to your Navisworks file. Create a clash detection test between the two models. The detailed procedure is given below.
PROCEDURE:
- In order to embeded both the architecture and the structural *.nwc file, first we need to open the Architectural file.
- And to open the Architectural file,go to the application button as seen in the below image :
- After that click on the application button there will be an option called Open just click on that option as shown in the below figure:
- Now after clicking on the Application button go to the option open and then there will be another dialouge box appears on the screen from that dialouge box open the file which we have already expoted from the Revit software as shown in the below figure:
- In this way we can open the Architectural file.The below image is the 3D view of the project as shown in the figure:
- After that we need to merge the structural file into the Architectural file,so for doing so just go to the Home tab or toolbar there is an option called Append just click on that option as shown in the below figure:

- After clicking on the append option a new window opens named as Append,in that window just choose the structural file which you need to append with the architectural file and then click open as shown in the below figure:
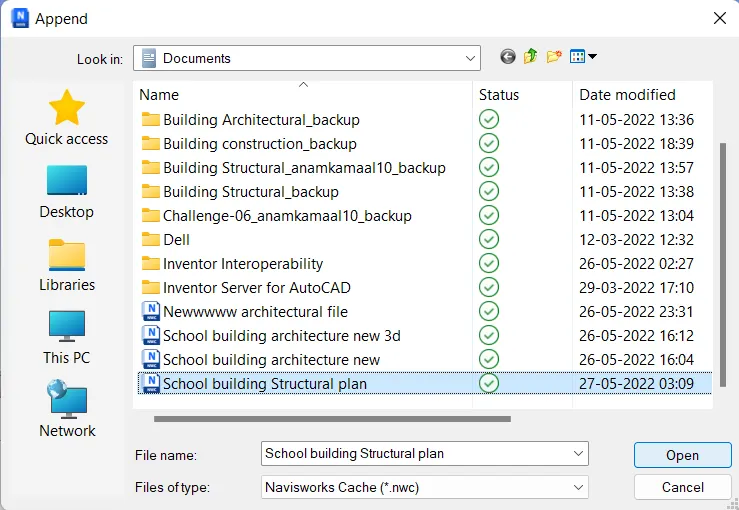
- After that the structural file append into the architectural file perfectly because it shares the same coordinate points as shown in the below figure:
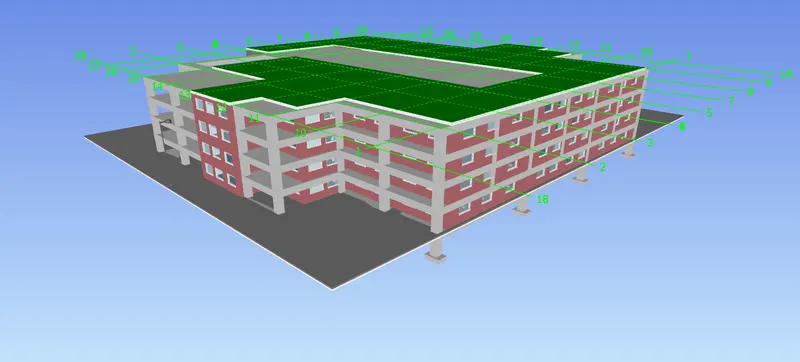
- Now that the architectural and structural files have been merged perfectly,so after that we have to run the clash test as we will be seing in the upcoming steps how to run the clash test so the detailed procedure have been discussed below:
(a) Run the Clash Detection Test:
- To run a clash test first we need to go to the Home tab and in that tab there will be an option called Clash detective just click on that option or we can also use the shortcut key to invoke the Clash detective option just by pressing "CTRL+F2" as shown in the below figure:

- After clicking on the Clash Detective option there will be a dialouge box opens up called Clas Detective as shown in the below figure:
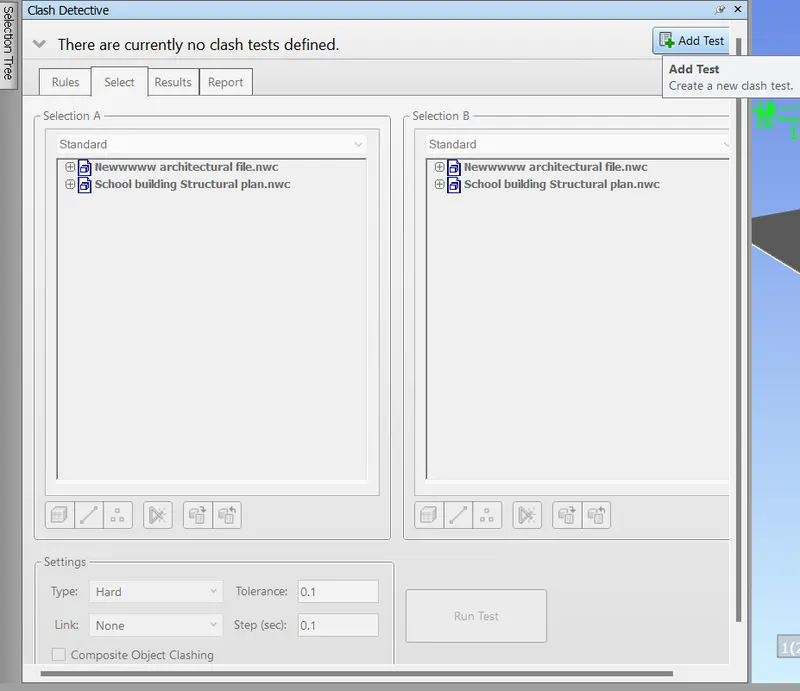
- In that dialouge box there will be an another option at the right hand side of the screen called Add Test just click on that option,this option will help in running the clash test between the architectural and the structural model as shown in the below imgage:

- After clicking on the option Add Test then there will be another window that opens up to run the clash test,this window contains various options like the Status of the project,in this section we will be able to determine the status of the project whether it is new project or it is ongoing project etc.
- And the another options in that window is clashes,in that option when we run a clsh test on the model this option shows that how many clashes we have in the project it will tell the number of the clashes.
- Other options are like New,Active,Reviewed,Approved and Resolved whether the clash is new or the clash is active or the clash have been revievewed already or it has been approved by solving the clash etc as shown in the below figure:
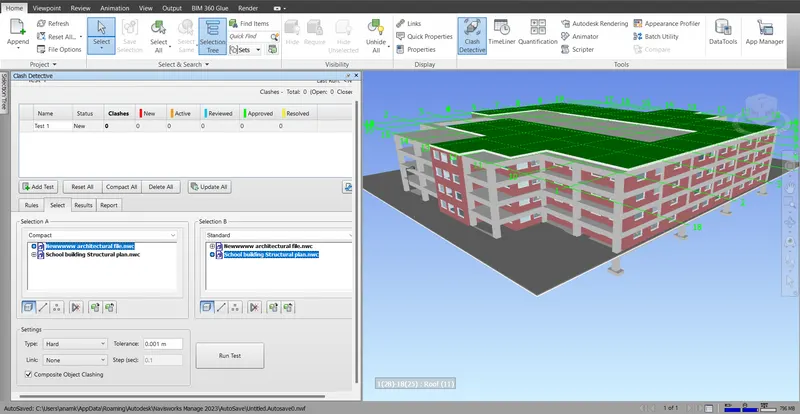
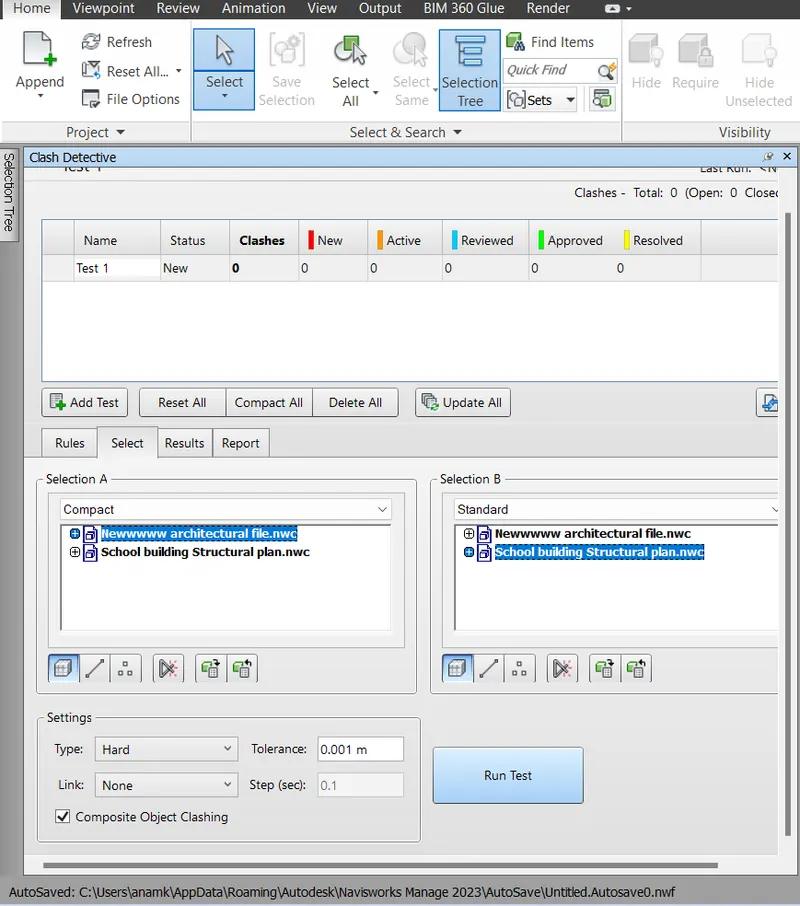
- After that select the Architectural project from the Section-A and the structural option from the Section-B.
- After chossing the plans from both the sections just click on the option Run test which is present at the bottom of the dialouge box as shown in the below figure:
- And the after clicking on the option Run test window opens stating the total number of clashes that we are having in our project as shown in the below figure:
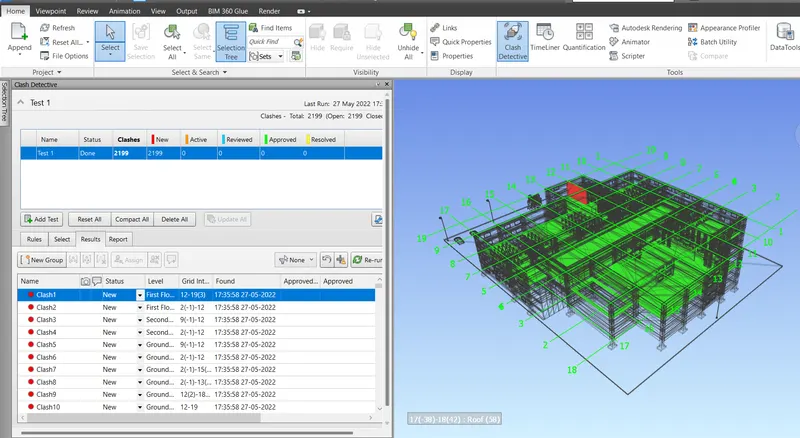
- This is how we can run the Clash test in the Naviswork to find the clashes we have in our structural and the architectural model.
(b) Study the clashes between the two models:
- Next we are going to discuss the how to study the clashes between the two models in detail.
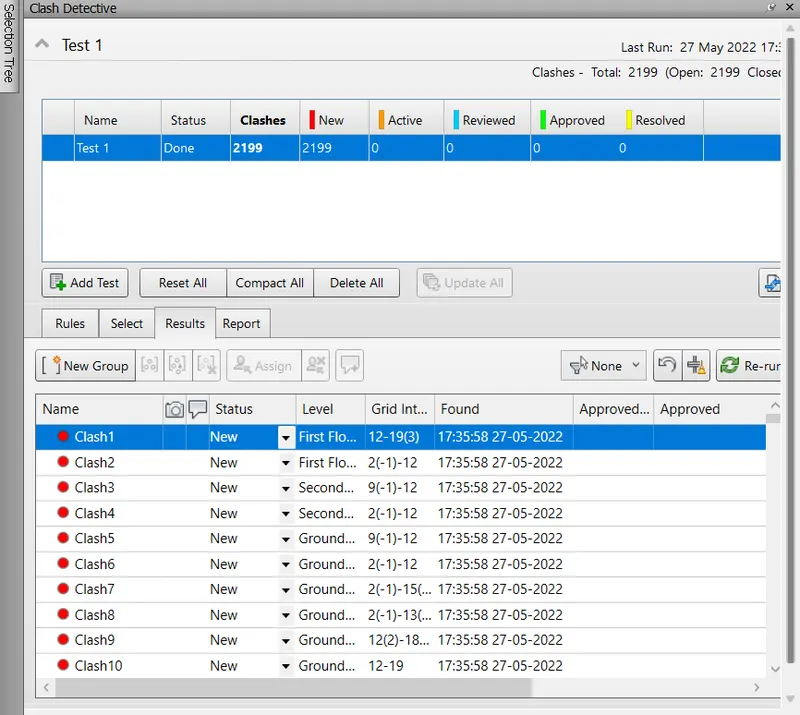
- In this window we have Name options telling the clash numbers, and then the status option in which we can add whatever be the status of the project.
- And then there will be another option called Levels this option tells in which level we are facing the clashes in the model. Suppose it says First floor it means we have clashes in the first floor,and after clicking the first column we are able to see the clash.
- After this there will be another option Grid into it means in what grid we are having problem or clashes.
- And then there will be an option called found in that option there will be time and the date when the clash have been found on which date and at what timings.
- These are all the options that will help us to study the clashes between the two models.
- The image of clash test result is shown below:
(c) List which of the clashes could be approved:
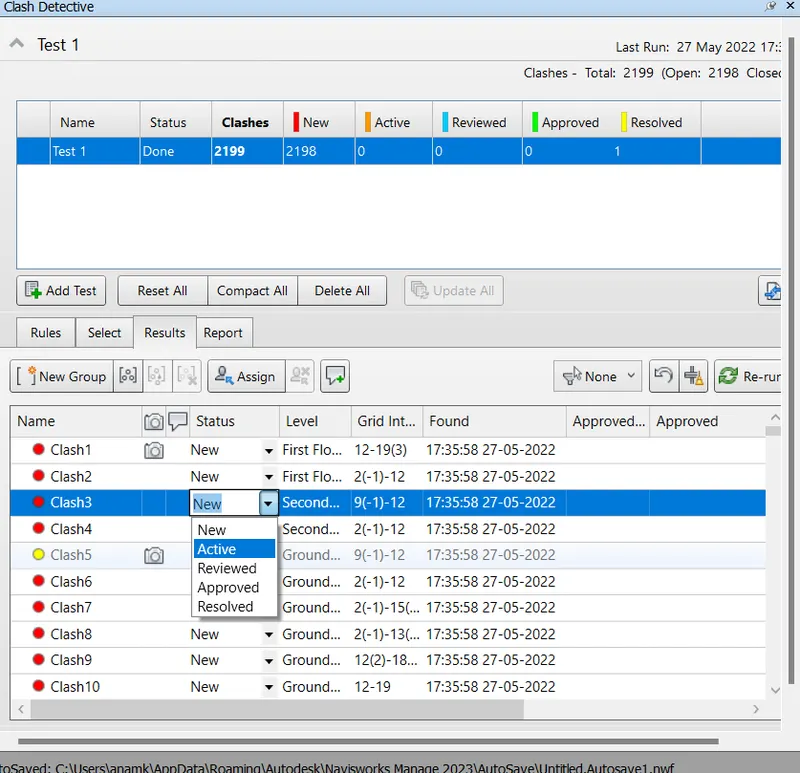
- In order to list the clashes which could be approved,just go to the Status option click on the option which we want to change the status, after clicking on the status option there will be other options also like New,active,reviewed,approved and resolved.
- So from there only we can change the status of the project that could be approved.
- Similar way we can change the as shown in the below figure:
(d) List which of the clashes could be neglected ( will be taken care later):
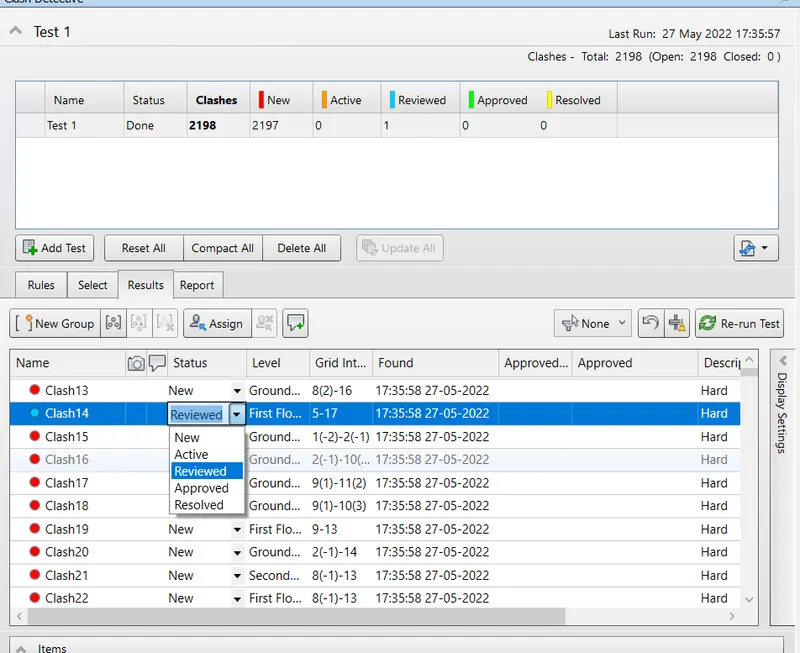
- Similarly we can list the clashes which could be neglected or that can be taken care later,just go to the Status option click on the option which we want to change the status, after clicking on the status option there will be other options also like New,active,reviewed,approved and resolved.
- So from there only we can change the status of the project that could be neglected or that can be taken care later.
- Similar way we can change the as shown in the below figure:
(e) List which of the clashes can be resolved:
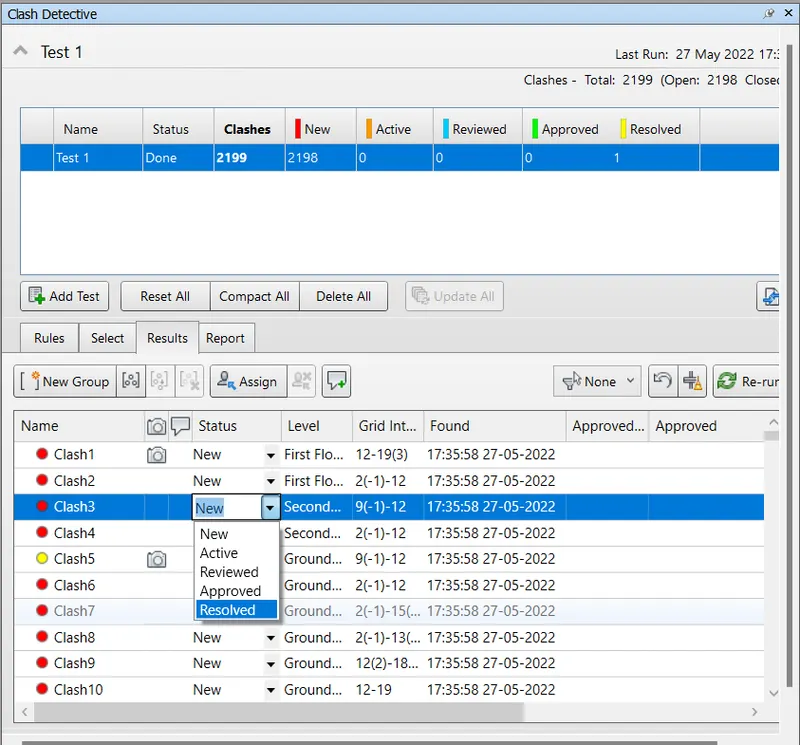
- Similarly we can list the clashes which could be resolved,just go to the Status option click on the option which we want to change the status, after clicking on the status option there will be other options also like New,active,reviewed,approved and resolved.
- So from there only we can change the status of the project that could be neglected or that can be taken care later.
- Similar way we can change the as shown in the below figure:
(f) Save the results after color coding the clashes to the Navisworks file:
- In order to save the result after color coding the clashes to the Naviswork file just go to the icon Export which are present at the clash testing window at the middle of the window at the right hand side of the window.
- That icon export contains two more options i.e, Import clash test and the other one is Export clash test.
- So just click on the Export clash test just as shown in the below figure:
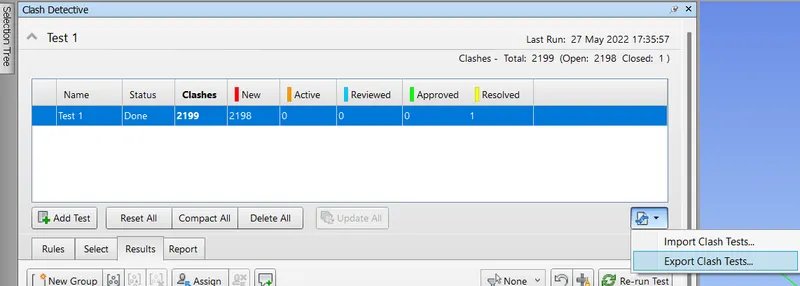
- After clicking on the option Export Clash Test there will be another window called Export, in that window just save the file and then click the option Save as shown in the below figure:
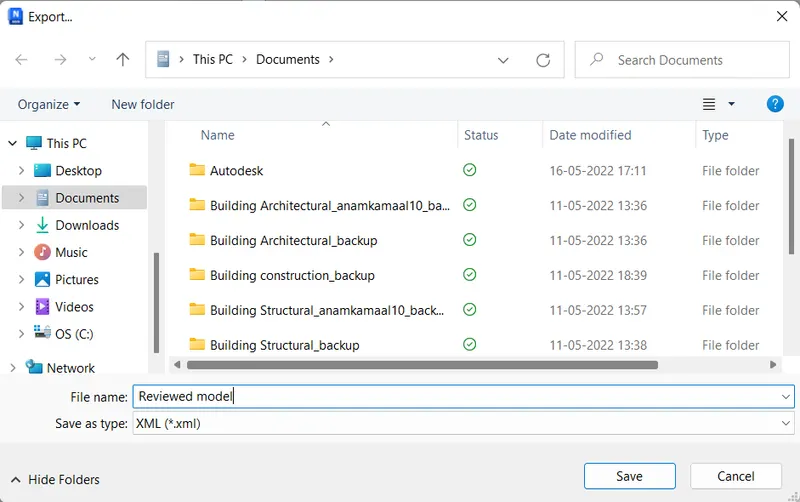
- And the extension for the exported file is *.xml. In this way we can save the result after color coding the clashes to the Naviswork file.
(g) In case of resolution annotate the clash and save the view to defined views in Navisworks:
- So in case of resolution,annotate the clash and save the view to defined views in Navisworks,in order to do that first we have to go to the option Compact.
- By using the option compact we can clear the resolved clashes from the list and can save the view to defined the views in Naviswork.
- So go to the option compact as shown in the below figure:
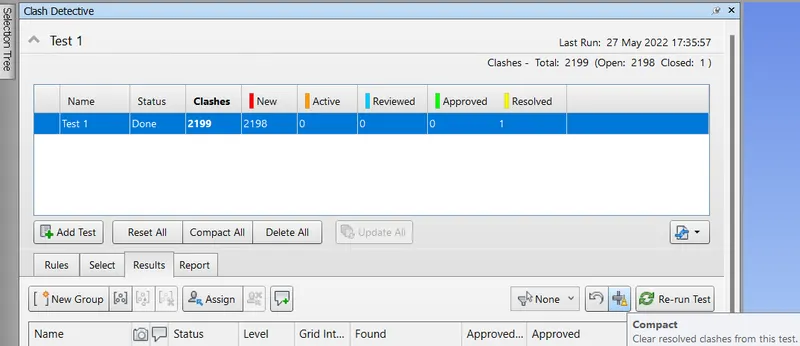
- And after that we can save the view to defined the views in the Naviswork.
Question 5) Using the Timeliner feature in Navisworks prepare a schedule for the project developed in week 6 to 8 by adding reasonable assumptions for task start date and end date and simulate the task completion as a visual simulation. Record it and save the timeline simulation to Navisworks file.
AIM: To use the timeliner feature in Navisworks to prepare a schedule for the project by adding reasonable assumptions for task start date and end date and simulate the task completion as a visual simulation. Record it and save the timeline simulation to Navisworks file.
INTRODUCTION: First lets understand what is naviswork? So naviswork is a software which deals with the opening and combination of 3D models,navigate through the model,real time walkthrough in the model. It allows the user to navigate around the model in real time. It is also used to improve the co-ordination on the BIM. So in this section we will be able to understand the concept of exporting the Revit file into the Naviswork software. The extension for the Naviswork file is .nwc.Here in this setion we will be able to understand the concept of imeliner feature in Navisworks prepare a schedule for the project developed in week 6 to 8 by adding reasonable assumptions for task start date and end date and simulate the task completion as a visual simulation. Record it and save the timeline simulation to Navisworks file. The detailed procedure is given below.
PROCEDURE:
- In order to use the timeliner feature in Navisworks to prepare a schedule for the project,first of all go to the Home toolbar from there toolbar there will be another option called Timelinear just click on the option as shown in the below figure:

- After clicking on that option there will be another window that opens up called the Timeliner.
- In that window there are multiple options like the Active in that option it shows the status of the particular element.
- There is option called Name,in that option add the elements like the ground floor,first floor,foundation etc all the elements that are there in the project will be write down in that column.
- And there is an option called Planned start,Planned end in that option we have to put the dates of the start of the project and the estimated date of the project ended.
- And there is another option called Actual start and Actual end,in that option we have to give the details if by any chance the project will be delayed in that case we have to provide the actual date start and the actual date end.
- This is all about the schedule for the project and the image is given below for the reference purpose:
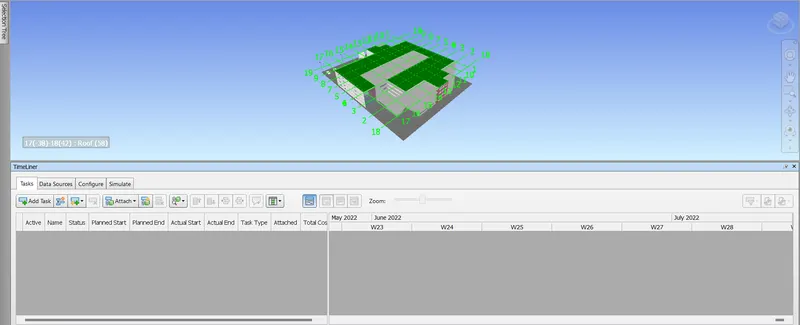
- After this again go to the Home tab there will be another option called Selection tree,then another window opens in that window there are all the floors are present that are available in the structural and the architectural plan.
- The image is shown in the below figure:
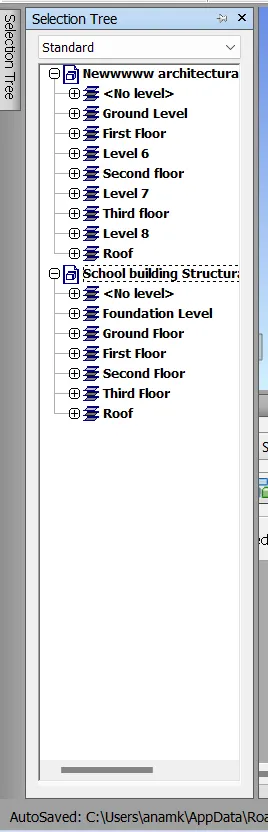
- After selecting the selection tree,go to the timeliner window there will be an option called Add the task just click on that option to add on the task at the bottom of the task list as shown in the below image:
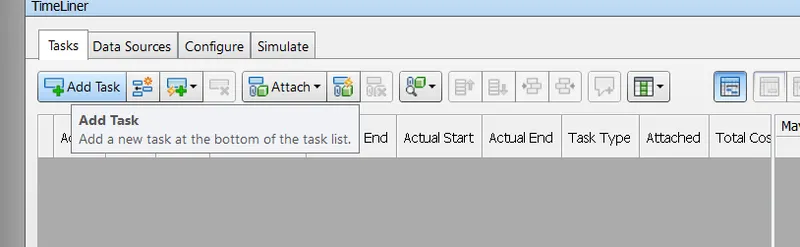
- After clicking on the add task option a new task wii be add at the bottom of the task list, and add the task carefully in order to get the exact result.
- Give the name,put the planned start and the planned end dates carefully and then enter the Actual start date and the actual end date very carefully.
- And select the levels carefully according to the name from the selection tree and add it in to the attached option which are present in the table at the corner.
- And to attach the floor and add to the schedule first select the row of the schedule then go to the selection tree window box from there select the floors from both the architectural and the structural plan,then go to the option attached as shown in the below figure:
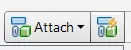
- And then click the attached option in the timeliner window box if the items are successfully selected then the selected floor becomes blue and in the attached colum it will be written as the Exploit.
- And then we can also change the task type also like Construct if it is under construction or the demolish if the building is demolished etc as shown in the given figure:
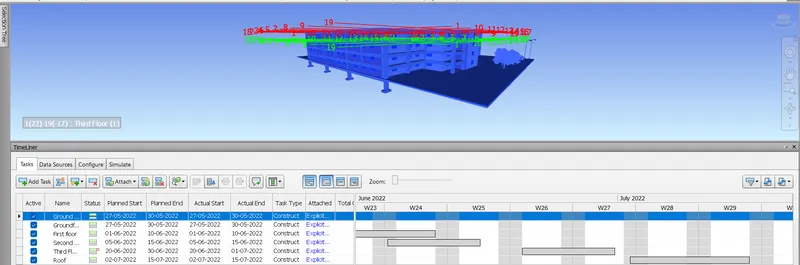
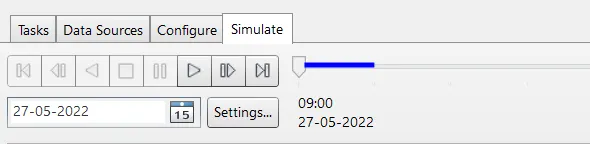
- Now the Timeliner schedule is ready, to view the result go to the Home tab there will be an option called Timeliner after clicking on the timeliner option there will be another option called Simulate option in the Timeliner window.
- In that window there is an icon of Play just click on that icon and the video of timeliner stimulation will be played as shown below:
- After playing the video just go to the Timelinear window at the corner of the window there will be an option called Export Animation.
- From using that window we can export the file using the Export animation tab as shown in the below figure:
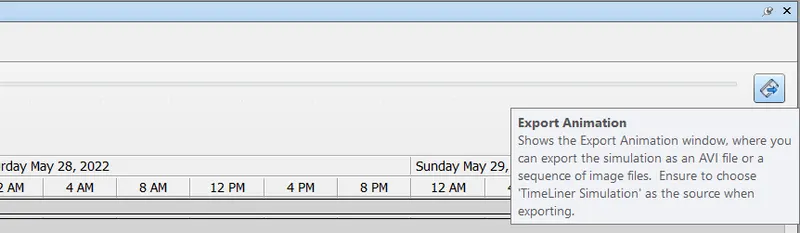
- After clicking on that window a new dialouge box appears on the screen called Export,in that window we can edit the multiple options like the Source,Renderer,the output,size etc just click on the ok option as shown in the below image:
- After this we will be able to save our animation file,so just save the file wherever to want to save it and the file is successfully exported.
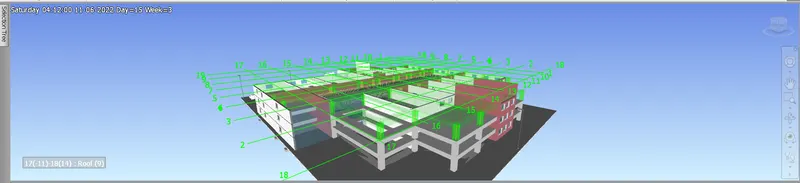
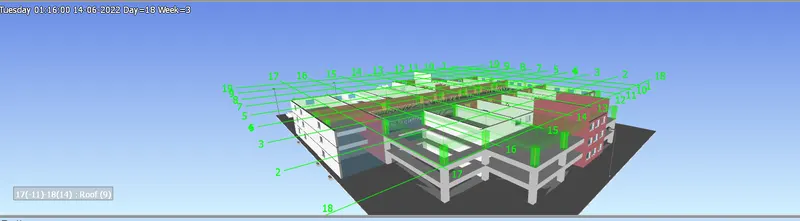
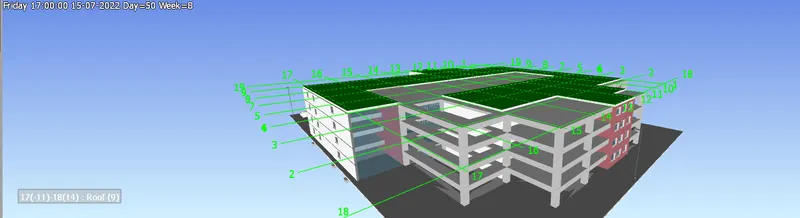
- These are the few images for the timeliner schedule: