Underbody Coating
Write one page about Underbody coating and its purposes
Underbody coating provides long term protection from corrosion to car's underbody. It also protects parts like internal body panels, frame rails and other inner cavities that are not physically accessible but are prone to corrosion.
Types of Vehicle Undercoating
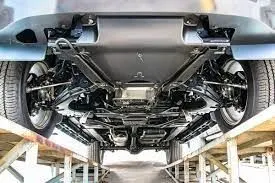
Vehicle undercoating is a process of rust proofing and protecting a vehicle from damage due to sand, gravel, road salts, and other grime, while helping reduce road noise. In areas of extreme climate changes, the lives of vehicles can be extended with proper undercoating. However, it is recommended that all vehicles be undercoated regardless of where you live. There are several types of undercoating available, ranging from do-it-yourself aerosols to professional applications.
Water- and Paraffin-Based Undercoats
Water-based undercoatings are the most popular for do-it-yourselfers. These undercoatings can be found in automotive parts stores in aerosol formats. Water-based undercoatings are thin set and have quick drying times. This type of coating can be done by automotive shops that offer undercoating services inexpensively. The downside to water-based undercoatings is the frequency in which they need to be repeated. Often the smallest abrasion that breaks through the undercoating can result in the need for a new coat. Repetitive undercoating can get expensive even if the product does not cost much. Paraffin-based undercoatings have a wax inclusion that makes them stronger than water-based undercoatings. Paraffin-based undercoatings can be purchased through an automotive store in spray and paint-on formats. This type of coating is also thin set and relatively fast drying. A vehicle owner can get this as an option when purchasing a new vehicle, or it can be professionally applied through an automotive service. Paraffin-based undercoating needs to be replaced at least once a year at the vehicle owner's expense.
Petroleum- and Rubber-Based Undercoats
Petroleum-based undercoatings are made from oil and have greater deflective abilities for road salts and grime. The petroleum base helps repel water and ice better than paraffin- or water-based undercoatings. Petroleum-based undercoatings are available through professional services and can be purchased when buying the vehicle. This type of undercoating also needs to be replaced once a year at the owner's expense. Rubber-based undercoating is the second strongest undercoating available for vehicles. This type of undercoating allows for more flexibility in the undercarriage, and holds up better to rough terrains. Rubber-based undercoatings are available in spray and paint-on applications. Due to the thickness of the application, it is advisable to let a professional apply rubber-based undercoating to ensure maximum coverage. Rubber-based undercoating also can be bought as an option when purchasing a vehicle.
Asphalt-Based Undercoats
Asphalt-based undercoating is the strongest undercoating available. It is used on all-terrain and military vehicles. Asphalt-based undercoating will last longest and is the best option for vehicles that endure heavy road use. Asphalt-based undercoating is the thickest coating with the most damage-resistant properties. It can be bought through professional services and is the only type of undercoating with a limited warranty. Asphalt-based undercoating can be purchased when buying a new vehicle.
Rustproofing
Rustproofing is a process that involves the application of rubberized sealants, lanolin oils, or any number of other rust-repelling coatings on corrosion-prone surfaces. Some of the common areas that get “rust-proofed” include the undersides of fenders, weld points and seams, fuel tanks, suspension arms, axles, rear differentials, and chassis cradles.
Pretty much any surface underneath the vehicle that does not get hot is fair game when rustproofing, and it is not uncommon to see off-road vehicles sporting this stuff on rocker panels for additional outer protection.
Rust Protection
Rust protection on the other hand, is a manufacturing process that infuses rust-inhibiting chemicals into the components that make-up our automobiles. These rust inhibitors are an engrained countermeasure to the circulation of electrical current, a critical component in the development of rust. These inhibitors are particularly affective at creating a rust resistant surface when paired with resilient materials like aluminum.
Quick Nerd Note: Ever wonder what was in that aerosol can of “rubberized” undercoating? Contrary to their title, these products do not rely upon rubber to protect the belly of your automobile. Instead, they tend to rely upon calcium carbonate (the primary component in eggshells, snail shells, seashells, and pearls), and asphalt to serve their purpose.
WHAT ARE THE DIFFERENT METHODS OF APPLY UNDERCOATING?
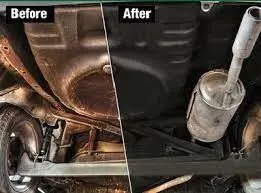
If you’re considering in having a professional undercoat your car, you’ll need to decide whether to go with a pro installer or a dealership.
While dealer-installed coatings are limited to manufacturer-specific products, privately held service repair shops often have a variety of options to choose from with various pricing plans. Just make sure that the shop is certified and has favorable reviews before committing to an undercoating install.
Regardless as to which direction you choose, the methods used during the undercoating application process tend to be the same across the board. That said, here are a few of the more popular rust repelling products on the market today.
Spray-On “Rubberized” Undercoating
Perhaps the most common method of undercoating a vehicle, is via the use of a “rubberized” spray-on product. Utilizing a tar-like substance that has been infused with solvents and protectants, spray-on undercoatings stick to whatever they touch.
Once cured they act as a barrier against salt, moisture, oxygen, and any other foreign substance that may lead to rust and corrosion. We’ll delve a bit deeper into the grimy details of what makes these opaque products so popular a bit later.
Electronic Rust Inhibitors
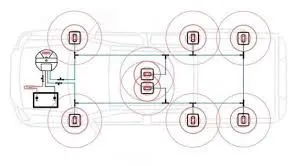
Electronic rust inhibitors are marketed as a permanent, discreet, easy to install solution to corrosion. It may sound crazy, but this is actually a brilliant idea, if you are able to get it to work.
While the notion of electrical current coursing along the underbelly of a vehicle is undeniably odd, it has been proven to work, but not in the way that one might expect. More on that a bit later as well…
Lanolin Wax/Wool Grease
When choosing an undercoating, the lanolin approach remains a proven, if not slightly unusual rust prevention solution. Commercially, lanolin coatings are used as both a rustproof coating and as a lubricant, with everything from ship hulls and rigging equipment, to heavy-duty excavation machines and production facilities relying upon this water-repelling corrosion inhibitor.
On automobiles, lanolin fills in all of the nooks and crannies of the chassis with a sticky, wax-like substance that’s been derived directly from… sheep glands. It may sound strange, spraying sheep funk across your vehicle’s underbelly, but it really does work.
On the downside, curing times will vary depending upon air temperature and how heavy of a coating has been applied. So be ready for some downtime between car rides after this stuff has been sprayed.
THE PROS AND CONS OF APPLYING AN AUTOMOTIVE UNDERCOATING
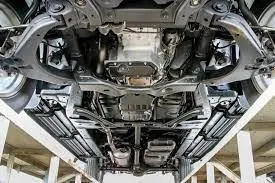
Although the undersides of new vehicles come shielded straight from the factory, those living in cold-weather regions, or areas along the coastline, may require additional undercoatings. But what are the downsides to this stuff, if any? And does an undercoating’s perks outweigh its cons?
Undercoating Pros
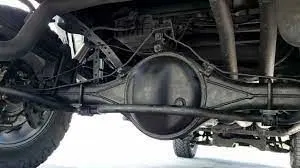
The biggest advantage to having an undercoating installed on the underside of an automobile, is knowing that your vehicle is protected from rust and corrosion, to an extent. While there are no guarantees that a rust bubble won’t appear where a rogue rock chip hit your freshly applied coating, most vehicles go years without requiring a touch-up.
Another perk, is that undercoatings add an extra layer of sound-deadening insulation to the underbelly of a vehicle. While it may not be as affective as a dedicated sound-proofing product, and won’t do much when it comes to repelling heat and cold, undercoatings do reduce road noise.
THE UNDERCOATING PROCESS
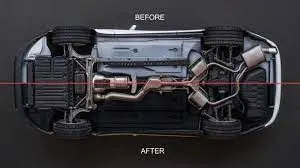
Clean
Prior to applying a rust-repelling undercoating, you will need to remove as much corrosion build-up, caked-on road grime, and any other form of “crap-tastic” contaminant from the underside of the vehicle.
Here are a few of the core steps to completing this process.
Blast- Spray the entire underside of the vehicle with either a pressure washer, or a garden hose that has been outfitted with a heavy-duty spray nozzle. Be thorough, and hit every crevice and corner you can find, especially on higher mileage vehicles. Chances are you will be amazed by how much road gunk you will dislodge.
Degrease – Rinse complete, and undercarriage allowed to dry, it’s time to use a commercial-grade degreaser to remove any grime or oil lurking beneath the vehicle. The spray and walk away stuff allows you enough time to go get another beer, before removing the degreaser with shop rags or a blast of water.
Grind – The next step is to grind any large chunks of rust or hardened contaminants, starting with a mild grinding pad, and gradually moving to more abrasive pads as necessary. You can also use a stiff wire brush attachment on a power tool or a paint scraper, just beware of any electronics or hydraulic lines that could be damaged by these tools.
Sand – Corroded crap and contaminants blasted and scraped away, break out the sandpaper and get to hand scrubbing that underbelly. Start with a 200 grit sheet, and after each pass move a milder grit of sandpaper. This will not only remove any stubborn rust patches, but it will smooth out the scratches left behind by the coarser forms of scouring media.
IPA Time- No, we’re not talking about beer, even though suds and scrubbing do tend to go hand-in-hand on a hot summer day. We’re talking about using an isopropyl alcohol (IPA) blend and dry rags to wipe-down what will be getting undercoated. This final prep process helps ensure that the entire undercarriage is devoid of dust and other gunk.
Prime Time!
Most DIY undercoating products require a primer of some sort to serve as a basecoat. We’ve found that the best primers are those with high zinc levels, as this provides an additional corrosion resistance. Just be sure to follow the manufacturer’s instructions, for many primers have their own unique prep requirements and curing times.
Undercoat
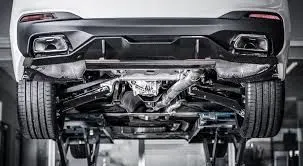
The final step in the undercoating process is the application of the undercoating itself. Most of these products involve a two-stage or dual-layer spray-on procedure.
While the first round of undercoating should be relatively thin, know that it is not there to be the first line of defense, but to serve as a basecoat for the thicker outer coating. An hour or two of downtime on a warm day should provide ample cure time for this first layer. Once it becomes tacky to the touch, it’s time to move on to the final outer coating.
These final layers should be applied liberally, and in smooth, slow movements. Rushing will only cause uneven coverage and drips to form, so take your time. Once fully coated, it’s time to sit back and let your undercoating cure, which depending upon temps and the product used, may take anywhere from a few hours to a few days.
The Effects of Spray Painting Without a Mask
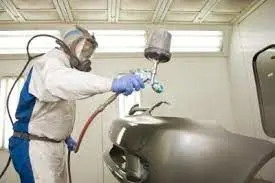
Paint a car without wearing suitable respiratory equipment, and you could end up paying for your negligence with poor health in the future. The dangers of using two-pack paints in the automotive industry have been well-documented in recent years, and strict legislation is now in place to control the release of volatile organic compounds (VOC). Employees who paint cars in body shops, and auto enthusiasts who complete projects at home, should never consider spraying a car without a protective mask in place.
Dangers of Isocyanates
Isocyanates are highly reactive chemicals that have a low molecular weight. These qualities allow isocyanate products to be sprayed as a mist or vapor and they are commonly used in a variety of industry processes. Direct contact with the skin can cause irritation, but isocyanates are at their most dangerous during application. Two-pack paint products contain harmful isocyanates that irritate the membranes of the eyes and damage the gastrointestinal and respiratory tracts. Users of isocyanate materials become sensitized, and this can cause ailments such as asthma if exposure to isocyanates occurs in the future.
Dangers of Spraying Without a Mask
Modern body shops use respiratory equipment to protect their workforce from the dangers of isocyanate poisoning. The most common form of personal protection equipment is an air-fed mask, which feeds a controlled supply of clean air to isocyanate users while spraying is in progress. According to a report by the Health and Safety Executive published in 2009, sprayers are 80 times more likely to develop asthma than a worker in any other environment, and this makes mask use mandatory.
The Short-Term Effects of Isocyanates
Early signs of isocyanate damage can include red eyes that continually water because the membranes have been eroded. Workers will often experience coldlike symptoms including deep coughing and a runny nose. The chest will often feel tight, even when a worker is at home, and breathlessness and wheezing can occur when the worker is resting or sleeping. As exposure to isocyanate materials increases, the symptom become progressively worse until the worker develops severe asthma, which is incurable.
The Long -term Effects of Isocyanates
The effects of isocyanates over a longer period time are more severe. Workers often find that they have to leave their jobs because they fail mandatory lung tests, and this can result in financial hardship if alternative employment cannot be found. For many, the effects of isocyanate poisoning become more concerning as they get older, and many former paint sprayers have to use ventilator equipment to breathe more easily. In some cases, the effects of isocyanates can even be fatal.
Applying Undercoating At Home
Once you've selected the best undercoating for your vehicle, make sure your work area is clean, well-ventilated, and has adequate lighting. Wearing a dust mask and old protective clothing is advised. Make sure it's a nice day with low humidity if you're working outside, and if inside, deep-clean your area to ensure it's free of dust or any other debris that could become trapped in the undercoating.
As always when it comes to updating your vehicle or using any sort of coating, remove the rust completely FIRST and then proceed. Rust removal is easily achieved by sandblasting or sanding, depending on the area and the extent of the rust.
Once you've removed the rust and prepped your undercarriage for coating, give it a quick rinse and let it dry to ensure you aren't further trapping any contaminants on your vehicle's underbelly. Using a degreaser to clean the metal first is also recommended.
Most undercoating is generally applied with a spray gun. A disposable spray gun will work best; once the undercoating hardens, it becomes very difficult to clean the gun even with a lot of thinner. A Schutz disposable spray gun is the best option.
No matter what type of vehicle undercoating you've selected, two coats will provide the optimum protection. Allow ample dry time between coats.
Let the undercoating cure completely (usually overnight) before driving your vehicle on the road.
Selecting the right kind of car undercoating will go a long way towards protecting your car from damage caused by the elements and help prevent further rust or decay. Shop our undercoatings to find a product that will help keep your vehicle in prime condition.
How to Undercoat Your Car?
You have a few options to select from while considering an undercoating for your vehicle. Obviously, if you are getting it done through an authorized dealer, then you would have no choice as they have their own preferences.
Spray
The spray is the most common method used by dealers. The spray consists of a tar-like substance that is applied to the undercarriage. It functions as a barrier for salt, moisture, and oxygen, which causes corrosion.
You can also purchase it as a DIY product, but the whole magic lies behind the method of application, so it’s better to do the job with a dealer, especially if you have a new vehicle.
Electronic
Removing the electrical current capacity of items underneath the vehicles is another method for applying to undercoat. A weak electric current circulates through the material, reducing the chances of rusting.
For using this method, a DIY solution wouldn’t work; you would need an expert.
Drip Oil Spray
If you want to do it yourself, then drip oil spray is the best option. This can be messy but incredibly effective at protecting the undercarriage. It covers every nook and corner of the chassis, forming a robust layer of protection.
Time is the factor where you have to show patience in this method. It takes a long time to dry. In some cases, it drips around 48 hours to a week.
What Are Two Types of Automotive Paint Finishes?
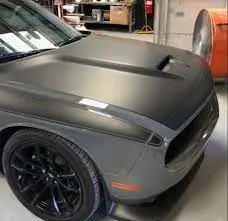
Automotive paint varies in that each type consist of various compounds and chemical formulas. The process of painting involves a pigment or color that becomes dissolved with a medium, which allows the car to be sprayed with a paint gun. Primer paints always get applied under the finishing coat. Several types of paint finishes can be used to paint or restore a vehicle, depending upon the desired finish, ease of maintenance and longevity.
Acrylic Lacquer -- Origin
DuPont De Nemours began the development and production of nitrocellulose lacquers as far back as 1923. The properties of lacquer offered a wide range of color choices, and could be applied easily from a spray gun. An improved version of acrylic lacquer became popular on vehicles, including Rolls Royce, during the 1950s and 1970s, and in some up until the 1980s. Acrylic lacquer still remains popular today.
Acrylic Lacquer -- Properties and Characteristics
Acrylic lacquer must be used with paint thinner when applied. The paint thinner evaporates after application, which leaves the paint pigment on the metal surface. The finished application looks very glass-like or deep in texture, which works well on classic cars. An acrylic lacquer finish must be buffed on a regular basis to maintain the high-gloss sheen. It has a quick drying and curing time, which allows for a shorter time for sanding between coats.
Acrylic Lacquer -- Application
Acrylic lacquer works best when applied through a gun spray nozzle, which achieves a fine mist. Due to its chemical nature a crylic lacquer requires more coats than other types, usually applied in multiple thin layers. Many amateur car and truck paint enthusiasts favor acrylic lacquers over others because of its ease of application and fast drying time. The paint sets up so quickly that dust and other airborne particles do not have a chance to settle on it before the preparation of additional coats.
Pearlescent and Metallic Paint -- Origin
Pearlescent and metallic type paints originated in the 1960s on cars and trucks, including the Wolsley make automobile. Pearlescent paint became popular during the American custom hot rod scene in the 1970s, but it became even more widely used during the mid-1990s, when professional painters became more proficient with its application and versatility.
Pearlescent and Metallic Paint -- Properties and Characteristics
Pearlescent and metallic paints use small material flakes added to the base pigment, which then receives multiple layers of clear coat to cover the profiles of the flakes. Metallic paint contains very small aluminum flakes that have reflective surfaces. The size of the flakes, their reflective properties and frequency of distribution, allows for several degrees of appearance. Pearlescent finishes contain a solid base color, with an additional layer of alternate colors that contain "mica pearl" flakes. This gives the paint the appearance of changing colors in the sunlight and at different angles.
Pearlescent and Metallic Paint -- Application
These paints can be the most difficult to apply, needing professional expertise with the process. Spot painting either type usually requires the repainting of a whole body panel, since the seams and division lines between old and new paint can show dramatic overlapping lines. Mixing pearlescent and metallic paints for the purpose of spot painting, restoring or repainting can be difficult if the painter does not have precise ingredient instructions for the original mixture. Thus, guesswork and approximations must be used.
The Disadvantages of Using Synthetic Motor Oil
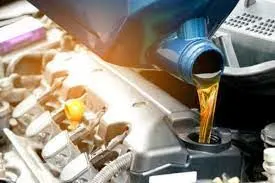
Synthetic oil is often preferred due its cleaner running capabilities. It's also seen as a great alternative to numerous oil changes. With synthetic oil, you need fewer oil changes than with a petroleum-based oil. Even so, synthetic oil can have its own disadvantages. You must weigh the pros and cons to make sure you are purchasing the product that is best for your car.
Cost
The main disadvantage of synthetic oil is the price. Manufacturing synthetic oil requires a far more involved process. Because of this, the price of synthetic oil is nearly four times the price of petroleum-based oil. Using a synthetic oil in a car change could cost you $80 versus $20 of a petroleum-based oil. If you insist on or are comfortable with changing the oil every 3,000 miles, this could get costly for you. Car experts recommend that regardless of whether you use natural or synthetic oil, you should change your oil every 3,000 miles. Synthetic oil does allow for less frequent oil changes, but this is not recommended, especially for more inexpensive vehicles.
New Vehicles
Using synthetic oil is not recommended for brand new or newer vehicles. As new vehicles get broken in, they need the friction created by petroleum-based oils to run properly. If synthetic oils are used right away in a brand new car, this could cause the car to not run as it should.
Pollution
Used synthetic motor oil is a major environmental pollutant. When oil is used, most of it is dumped improperly. It ends up water resources, including groundwater. When this happens it’s very hard to remove the oil from these sources. Dumped synthetic oil can cause health issues for those using water in areas where the oils have been dumped. In fact, 40 percent of pollution in U.S. waterways occurs from carelessly dumped motor oil. Though petroleum-based motor oils have the same effect on the environment, synthetic motor oils seem to be dumped more, as many people feel synthetic oil is a cleaner alternative and thus cannot harm the environment. Synthetic oils harm the environment in the same way that petroleum-based oils do.
What to Spray Underneath a Pickup Truck to Stop Rust
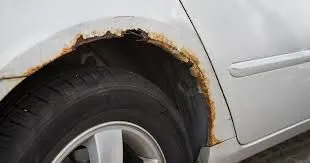
Protecting the underside of a truck is an important part of preserving the life of the vehicle. If you live in an area that is prone to winter weather and you own a truck, you should have the underside of the truck protected from salt and snow. These are the primary causes of rust and can cause a vehicle to prematurely age. In order to properly protect your vehicle there are several areas you must consider.
Avoid General Spay Paint
General aerosol spay paints are not adequate to prevent rust. Salt and ricocheting rocks will weaken the paint and it will chip off the vehicle quickly. According to Duplicolor.com, undercoat paint is formulated with a rubberized base to allow better adhesion and will protect the underside of a vehicle much better than standard enamel aerosol paints.
Brushing, Spraying and Aerosol Cans
Some companies sell a variety of paints that can be applied by brush, automotive air gun painter such as HVLP (high volume low pressure) systems and aerosol cans. Painting with a brush is the most cost-effective but will take the longest time. Using aerosol cans will be more costly because you will need several cans depending on the size of your truck but it will be relatively quick. Using an HVLP system requires specialized equipment but can be completed in a very short amount of time.
Removing Rust
Unless your vehicle is new, it’s likely that the underside of the truck has some surface rust. This can be especially true on axle housings and cross members. All surface rust should be removed to help promote adhesion. Removing the surface rust is usually done with a stiff wire brush, an orbital sander or chemical rust removers. Painting over rust could cause improper adhesion and could cause the vehicle to rust faster.
Prepping for Paint
Proper body preparation is needed when painting. There are various parts, like break lines and wire harnesses, that you may not want to cover in rubberized paint. This can make it hard to repair or replace parts if needed. Using painter’s tape to tape off areas that you do not want to paint will prevent this problem and will also improve the final look of the undercoat.