Underbody Coating of Passenger Vehicle
Underbody Coating
Cars underneath parts such as chassis, muffler, brakes, axles, transmissions may prone to corrosion and rust in long use. Though they are coated with protective coating by manufacturers, it is advisable to have additional protective coating of these underbelly car body parts time to time. This additional protective coating is called underbody coating and basically, it is 2-3 mm thick. The coating itself is a tar-like substance that ‘sticks’ to the undercarriage components and acts as a barrier to resist salt, moisture, oxygen, and other items that lead to corrosion.
Reasons for the corrosion and rusting of underbody parts are bad road and weather conditions such as muddy water, salt water, oily water, waste water on road, potholed roads, stones and other obstacles.
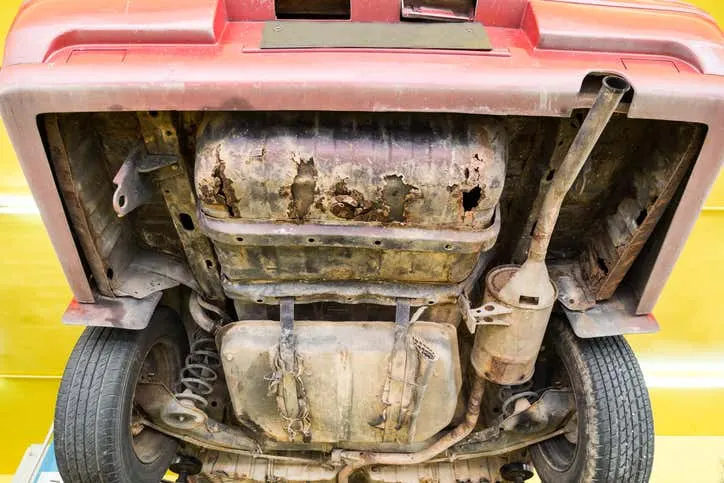
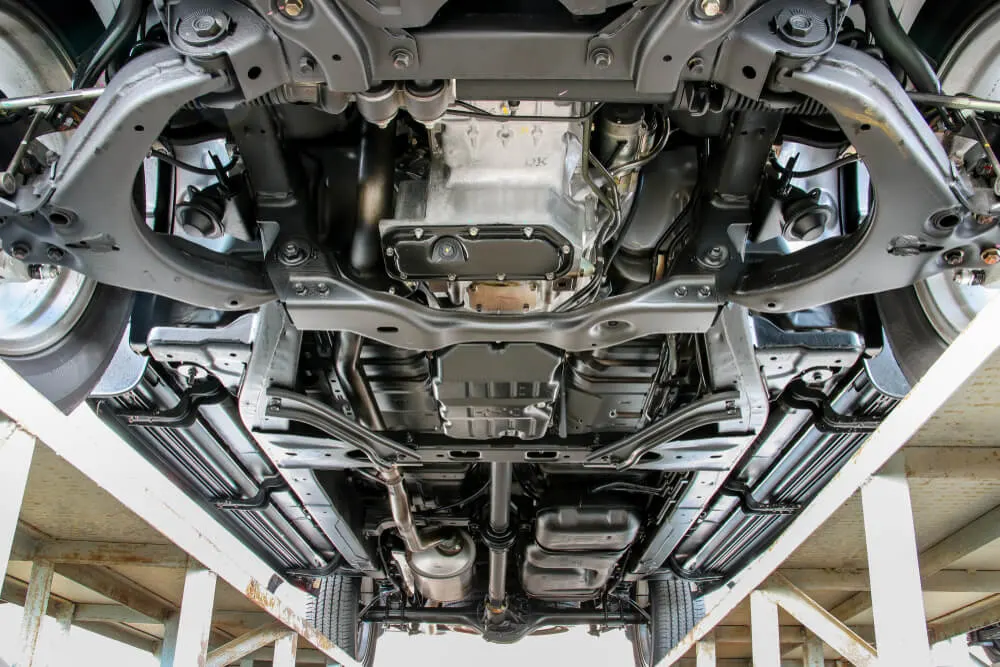
Fig: If not treated Fig: If treated
Benefits of Underbody Coating
1. Extends Vehicle Lifespan
The biggest advantage of undercoating products is the protection against corrosion for longer periods of time. Most of them can last for up to 10 years or more, which helps reduce rust and thus extends the lifespan of the vehicle.
2. Reduces Road Noise
It minimizes the sound from underneath the car resulting a noiseless, smooth driving experience.
3. Heat Insulation
It insulates the interior of the car from extreme temperatures from beneath the vehicle providing a comfortable cabin experience.
The only con of underbody coating is its cost.
Types of Vehicle Underbody Coating
Rubberized Undercoating
Rubberized undercoating is easy to apply, and generally offers the best protective coating for your car’s undercarriage. It cushions surfaces against moisture, rust, dings, and dents. Rubberized undercoating is safe to use on quarter panels and wheel wells and dries with a soft rubbery finish.
Asphalt based Undercoating
Asphalt-based undercoating offers a higher level of protection suitable for large trucks, recreational vehicles, and heavy machinery. It’s formulated with some bits of rubberized material to aid in noise reduction. It offers extra protection against chips and moisture but is not paintable and, therefore, only suitable for undercarriages.
Polyurethane Undercoating
Polyurethane coating is easy to apply and works by sealing up cracks and seams. The compound displaces salt and moisture and protects the unoxidized metal from rust. It’s often sold in canisters that are ready to preload into an application gun. It, however, requires some surface prep work before application, like degreasing, and applying an etching primer to the bare metal.
Wax or Paraffin basedUndercoating
Wax or paraffin-based undercoating sprays are the cheapest and quickest options available. However, their results don’t last long, and you may have to apply a fresh coat after only a few months. In addition, the wax isn’t very adhesive on a metal surface. Its main advantage is that it seeps quickly into cracks and seams, and offers moderate protective properties against moisture.
Different methods to apply Underbody Coating
1. Spray
2. Electronic
3. Drip Oil Spray
3. Drip Oil Spray
The most common method to apply undercoating is via the spray.
Procedures to apply Underbody Coating
Applying an undercoating starts with removing all debris and contaminants underneath the vehicle. To accomplish this, you’ll need some supplies including:
- Degreaser products
- A disc grinder and pads
- Air hose
- Eye protection
- Protective gloves
- Sandpaper
- Scraper
- The Undercoating & Recommended application products
- A hydraulic lift
General Steps to apply DIY underbody coating are:
Step 1: Cleaning the underbody
The first thing you need to do is fully debris the undercarriage or all areas you intend on treating with the spray. To do this correctly, you’ll need a hydraulic hoist or lift.
Here are the general steps for cleaning:
- Degreasering:Degreaser to remove all the grime and oils under the vehicle. Generally, spray, let it soak for a few minutes, then remove with shop rags or microfiber towels you don’t mind trashing.
- Grinding: The next step is to grind any existing rust or hard contaminants from the chassis or areas you want to treat. It’s a good idea to use a mild grinding pad and take a progressive approach to removal. Always use Eye Protection!
- Sanding: After all the crap is off the surface, use a 200 to 400 grit sandpaper to remove scratches and other small contaminants.
- Use a Tack Rag to IPA solution: Once all debris has been removed, complete the prep process by wiping down the area with a tack rag or IPA solution.
Step 2: Priming
Most of the undercoating products for DIY consumers require a primer, which serves as the basecoat. The best type of primers is those with high zinc levels, as this really helps to reduce that whole corrosion process if the surface layer is penetrated.
Step 3: Undercoating
The final step is applying the undercoating itself. Most of the products involve a two-step or dual-layer spray. The first coating should be a rather thin coverage, mainly to coat the entire surface area. You should allow at least an hour for the first layer to tack – especially if you’re using a rubberized type of undercoating.
The second layer of the spray should be applied liberally. Curing will vary from a few hours to a few days.
When you’re finished with the process, the undercarriage should be well protected from saltwater, mag chloride, road grime, and other contaminants that cause oxidation and corrosion and rusting to occur.
Note: Each type of underbody spray is unique, so it will require specific steps to be completed. Check with the manufacturer before proceeding and follow their exact methods.
References:
1. Skill-Lync projects
2. Internet