To plan a structural layout and to create grids using TSD
Q.1 Ans
Aim: Summerize the user interface in TSD with following items-
- Project Workspace - How to access and usage
- Scene content - Demonstrate the use of scene content
- Create two scene views
- Loading drop list - How to access
- Properties window - How to access and usage.
Procedure:
Step 1: Project Workspace - How to access and usage.
- Open the Tekla Structural Designer software.
- The interface will be as shown below.
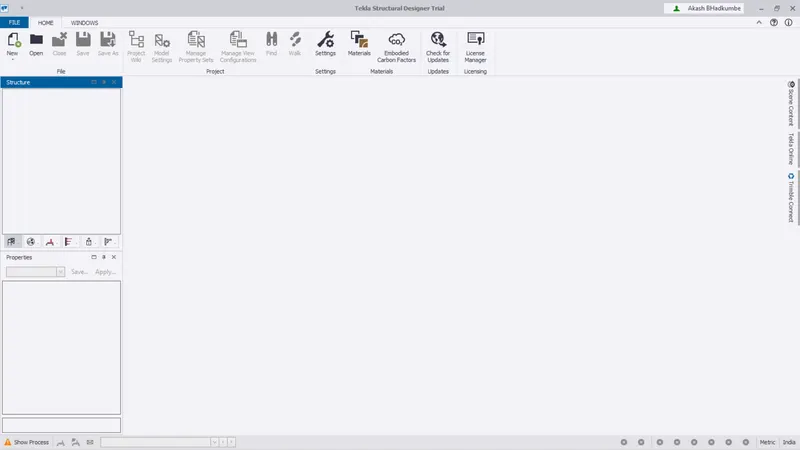
- To create a new project Click on "New".
- All the commands are now visible and activate.
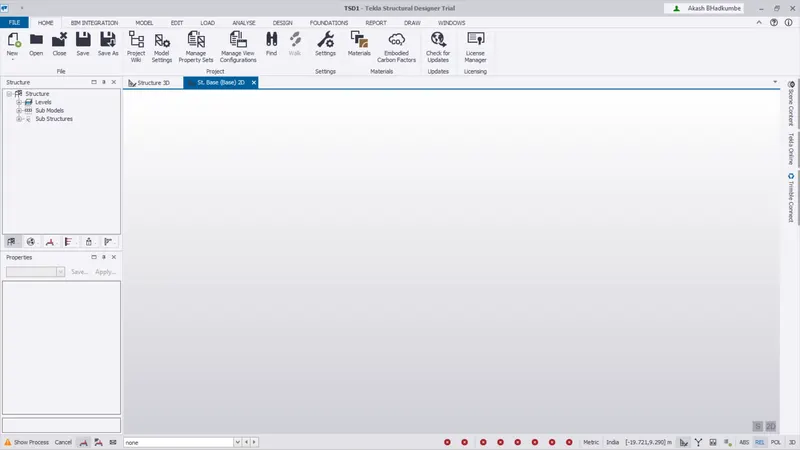
Step 2: Scene Content - Demonstrate the use of scene content.
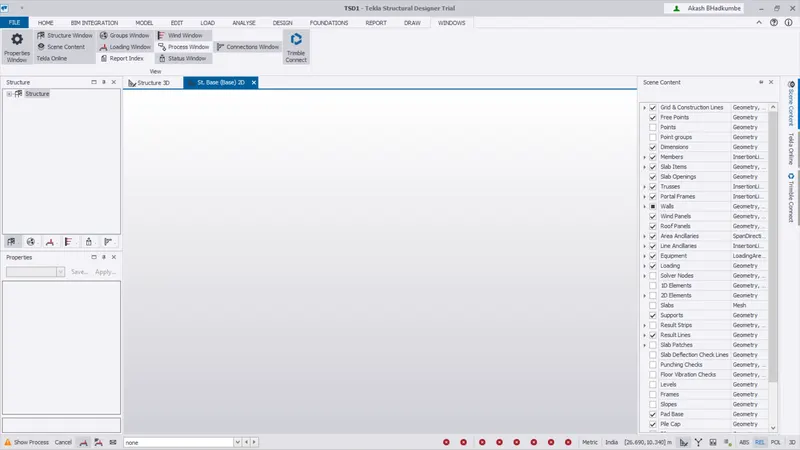
- Go to Windows Tab -> View Panel -> Select the scenen content command or you can directly click on Right side Scene content Tab.
- For the list of checkbox we can use it for hide or visible the element.
 x
x
Step 3: Create Two scene views.
- The Tekla will automatically create the default 2D & 3D views
- Create a sample gridlines with random distance as shown below.
- The Default 2D View be as below.
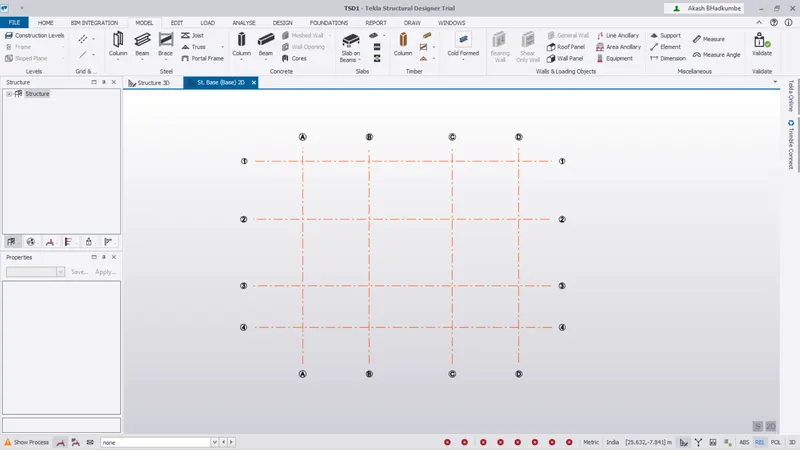
- To check a 3D view we can use the 3D tab from bottom right corner or we can use the CTRL+T to change 2D to 3D view.
- The Default 3D View be as below.
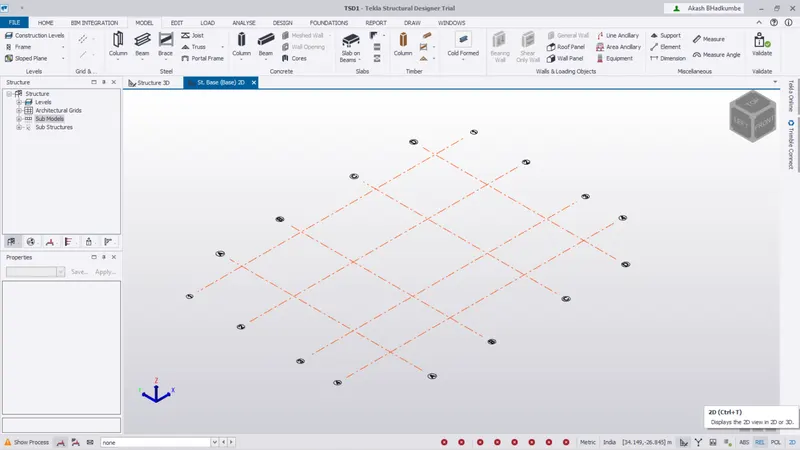
Step 4: Loading Drop list - How to access.
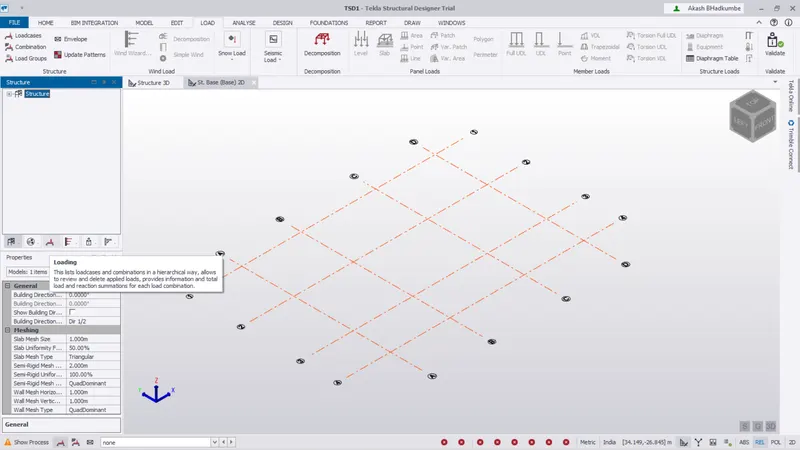
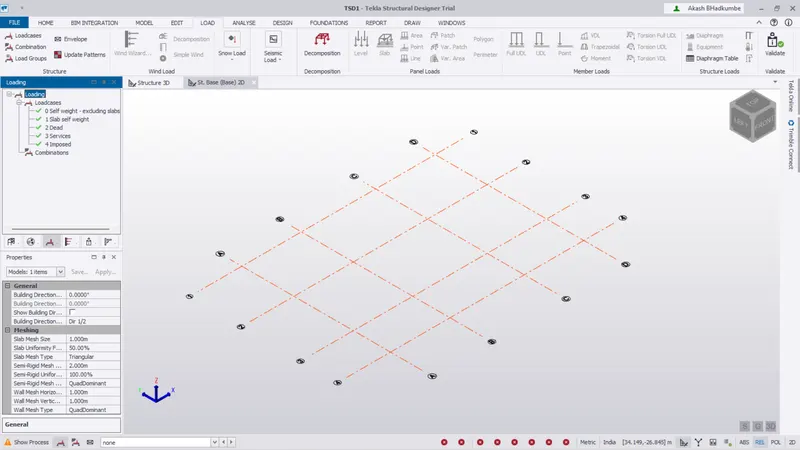
- Go to Project workspace and select Loading.
- Double click on the loading tab so the loading droplist will be visible.
- All the loading parameters and combinations will be shown in that Hierarchy.
Step 5: Properties Window - How to access and usage.
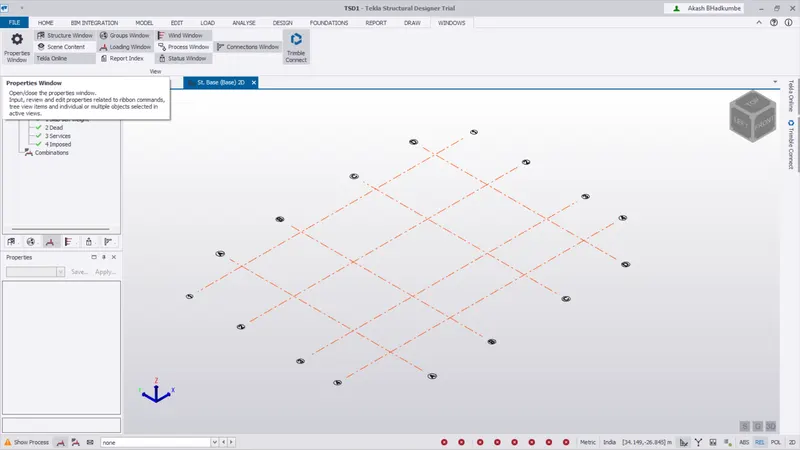
- To access Properties Window Go to Windows Tab -> View Panel -> Properties Window.
- The Properties Window used to :
- Input Data when a command is run from toolbar.
- Review or edit existing properties when individual or multiple items are selected in the active scene view.
- Review or edit properties when a branch of properties window is selected.
Q.2 Ans
Aim: Create a new file in TSD and sut up the settings for a steel building to have member grade Fe410 and concrete grade of M30 as per IS codes. The covers for members to be as per following inputs:-
| MEMBERS | IN CONTACT WITH GROUND | ABOVE GROUND |
| Column | 50 mm | 40 mm |
| Slab | 30 mm | 25 mm |
| Pile cap | 75 mm | |
| Foundation | 50 mm |
Procedure:
Step 1:
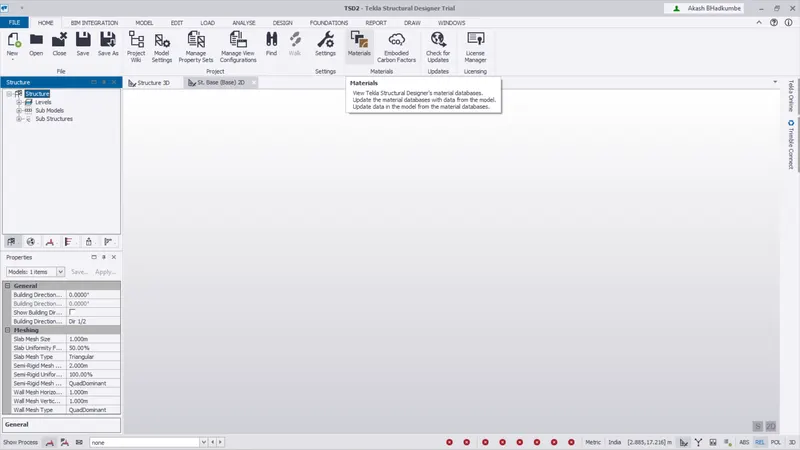
- Go to Home -> Materials -> Materials.
- Add the material for steel as FE410.
- Check that material type is steel.
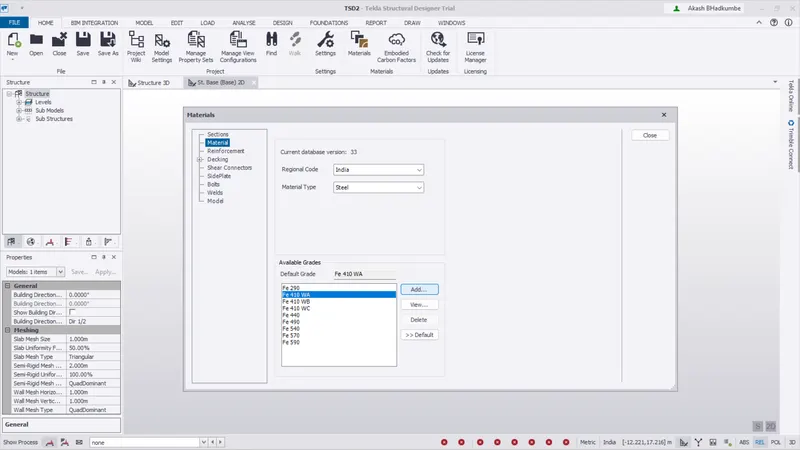
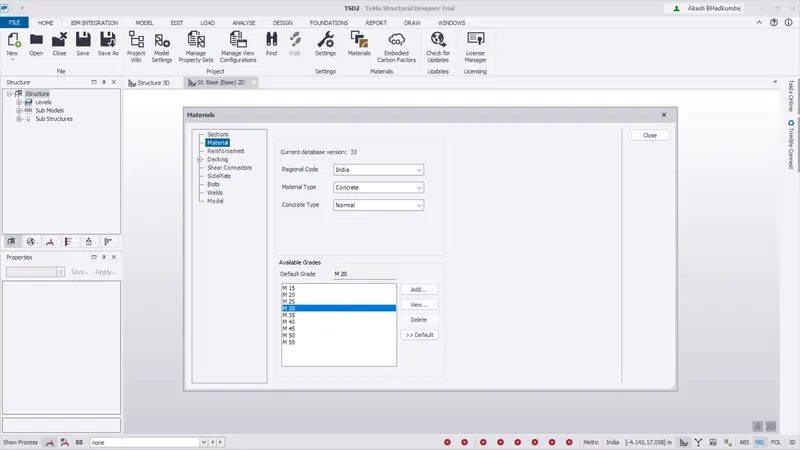
- Add material for concrete as M30 Grade.
- Change the material type as concrete select the grade of M30.
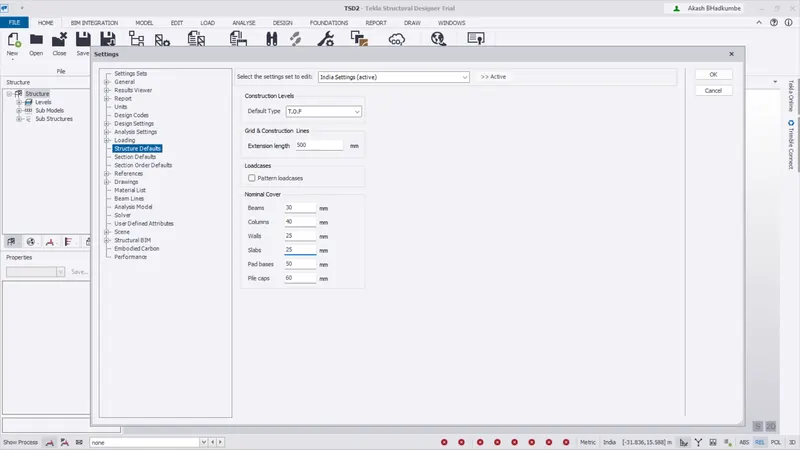
- Go to Settings and select the structure defaults.
- In constrcution level select default type as SSL and add the default cover value for in contact with ground.
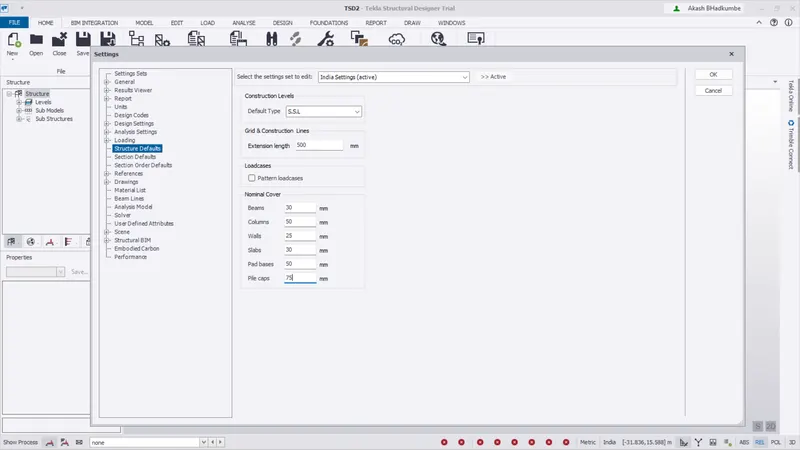
- In constrcution level select default type as TOF and add the default cover value for Above ground level.
Q.3 Ans
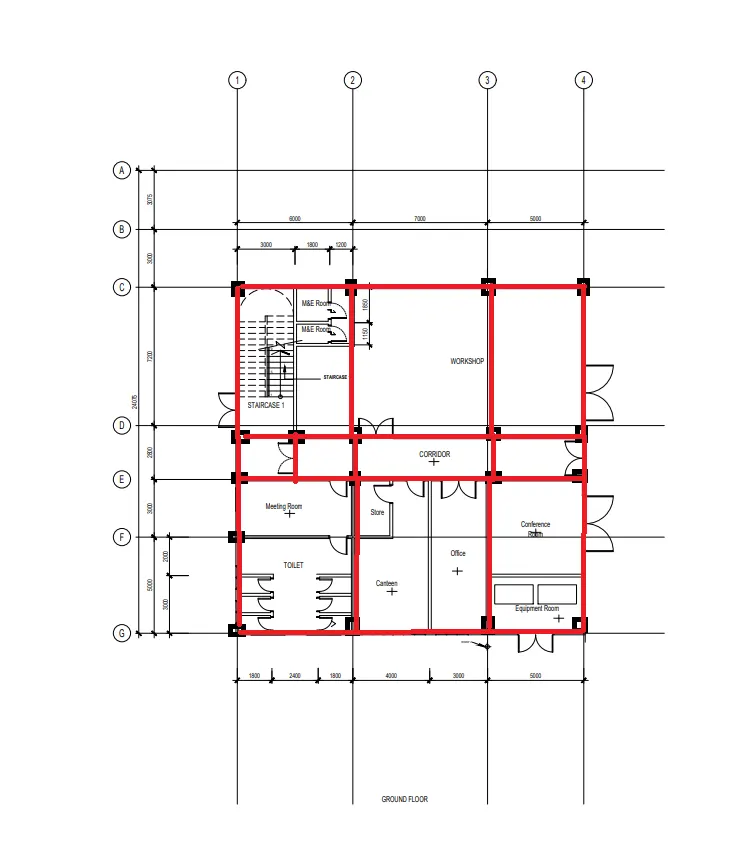
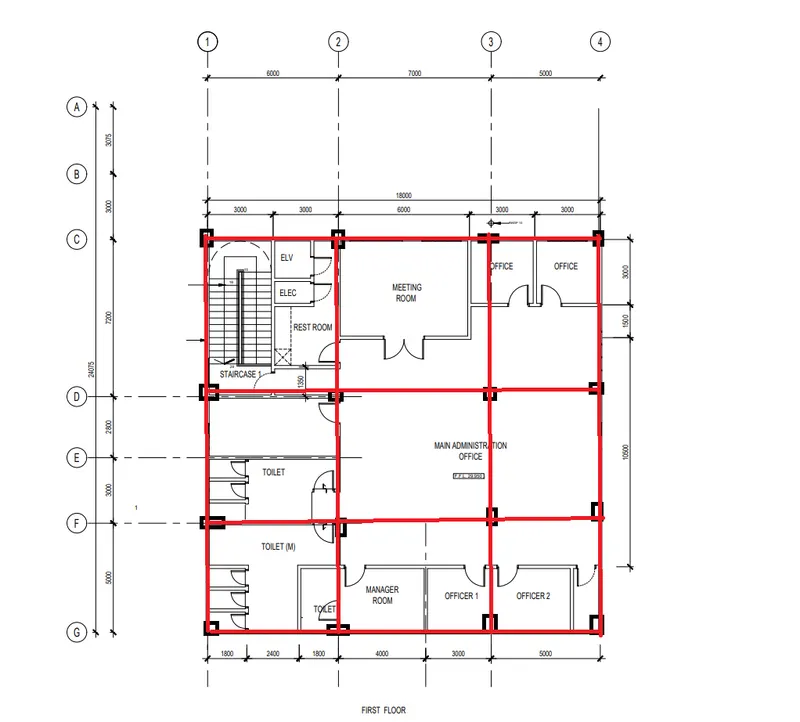
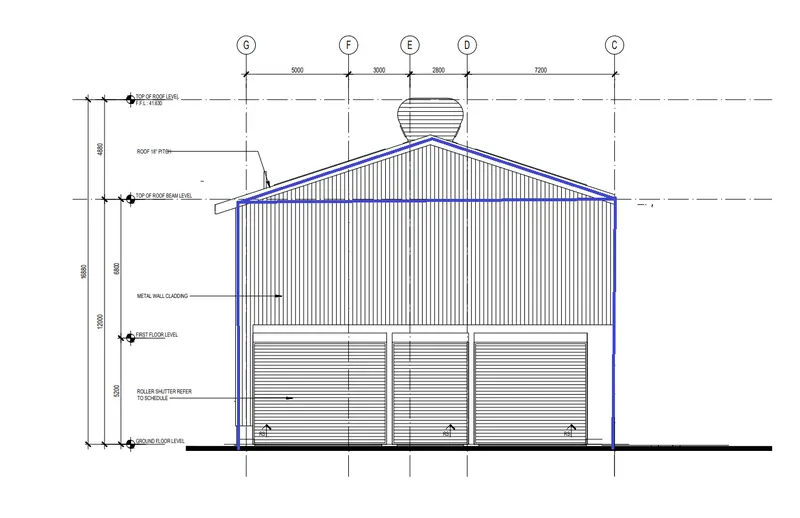
Aim: With the reference drawing as per the attachment 1,1.1 and 1.2 and study the steel building plan and summerize youe understanding of the plan. Based on your study assume and explain the location of columns and beam and develop a hand sketch for each plan.
Procedure:
Step 1:
a.Add column.
- Column should be preferable located at the intersection of beam or wall.
- Place the column in such a way that the bemding moment of beam will be reduced.
- Do not prefer large span of beam.
- Do not prefere the larger centre to centre distance between the columns.
Result:
1. Ground Floor :
2. First Floor
3. Elevation
Q.4 Ans
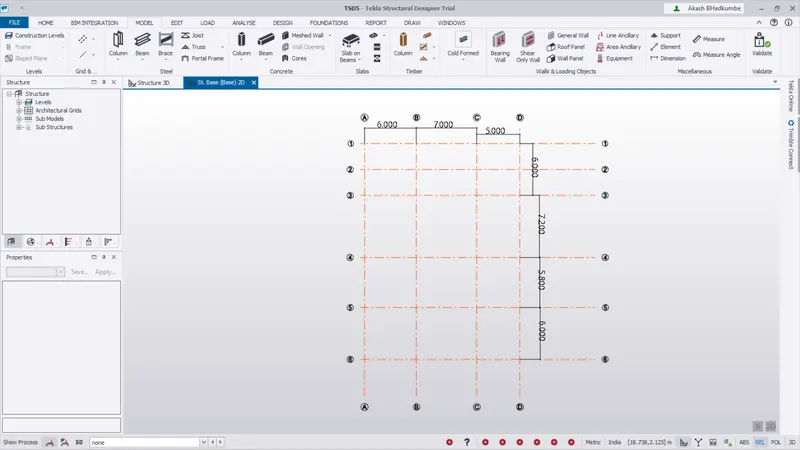
Aim: Model Grid lines and construction levels as per attachment 1, 1.1 and 1.2. All dimensions are in mm.
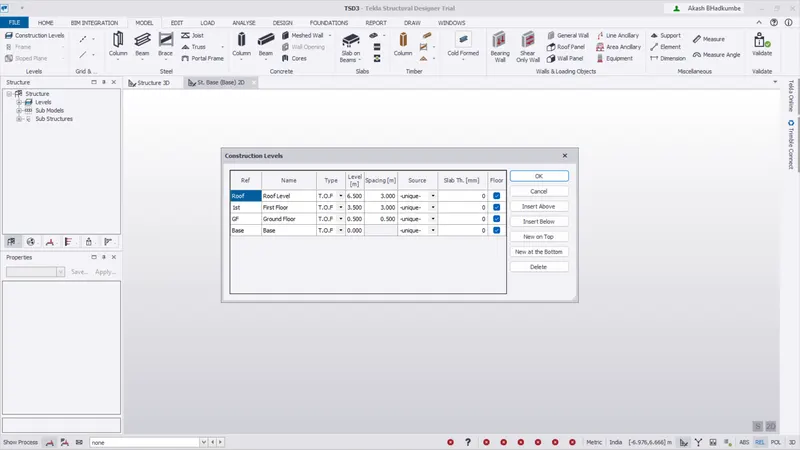
1. The base level to be 500mm below ground level.
Procedure:
Step 1:
1. Open the Tekla software and create a new file by clicking on "New".
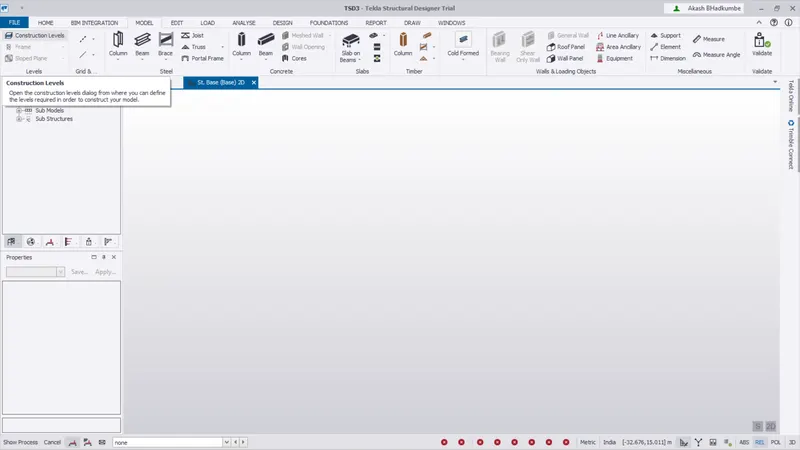
2. Go to Model -> Levels -> select construction level.
3. As you click on the construction line command the construction level dialogue box will be appear.
4. Select the type as TOF for all levels and add the four levels for Base, Grounf Floor, First Floor & Roof.
5. Provide the height for level as given.
Step 2:
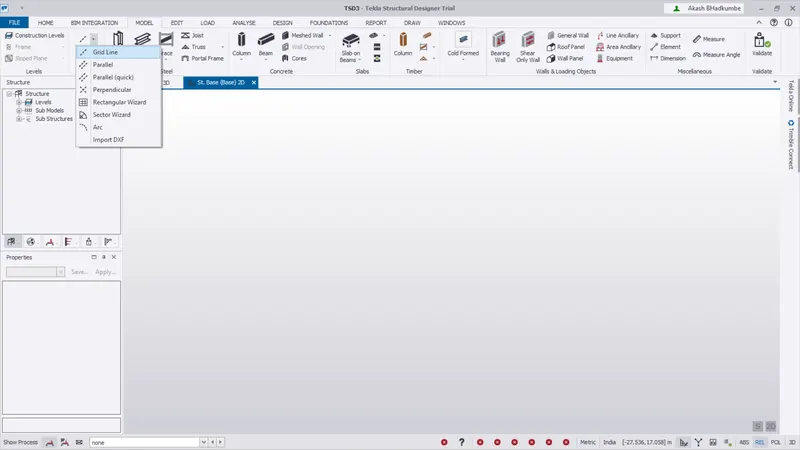
1. Go to Model -> Grid & construction level -> select grid level.
2. Create grids for given dimension.
Result: