To model beams and bracings for industrial steel structures using TSD
Questions. 1. Create beam properties for First floor and model the beams.
2. Create rafter beam on second floor as roof and moment frame action in one direction and add bracings at locations as per the design intent.
Answers.
1. Create beam properties for First floor and model the beams.
AIM: To create the beam properties for the first floor and model the beams in the TEKLA STRUCTURAL DESIGN software.
PROCEDURE:
- To create the beams properties for the first floor,first we need to go to the TSD software.
- After that open the previous assignment file where we have already model the concrete columns,steel column,beams,secondary beams just as we can see in the below given image:
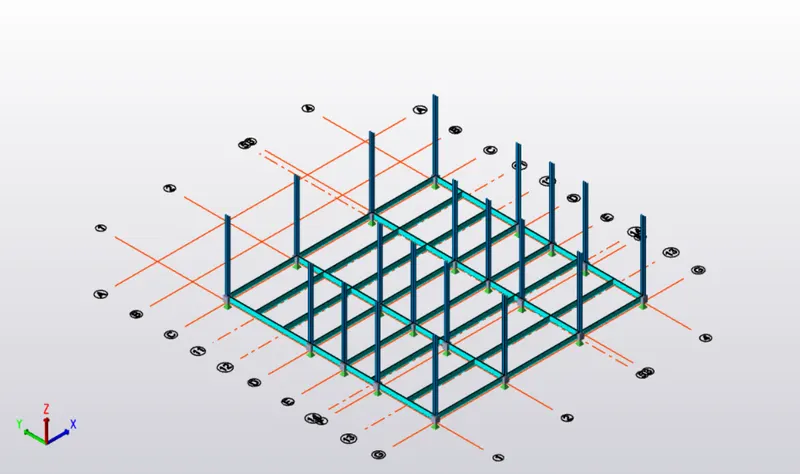
Create Beam properties for the first floor:
- Now we will be assigning the beams in the first floor.
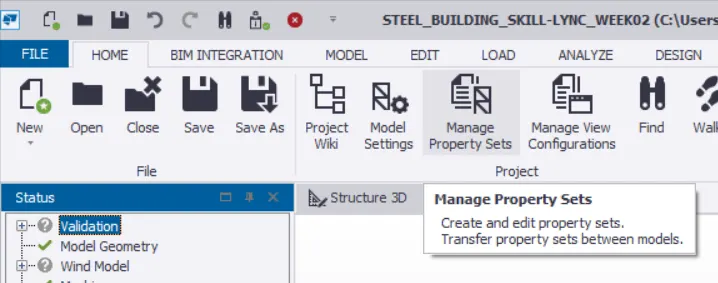
- And in order to assign the beams first we need to go to the Home option click on that option after that there will be an option called Manage property set click on that option just as shown in the below given image:
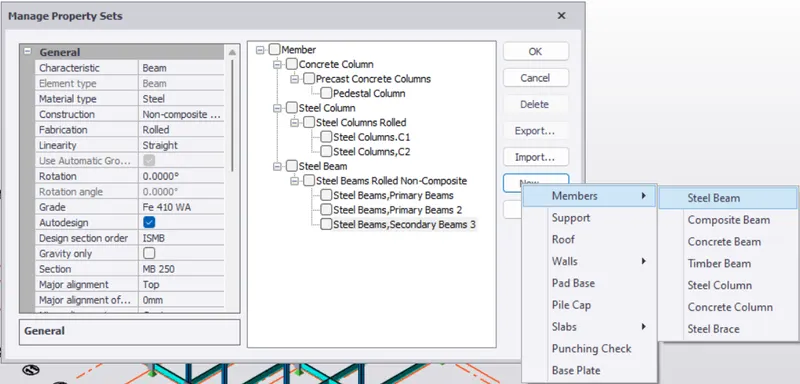
- After that there will be another dialouge box named as the Manage Property Sets.
- And in that dialouge box there will be an option called New just click on the option after that there will be a drop-down list and in that list there will be an option called Members click on that option after that there will be another drop-down list and in that list there will be another option called Steel Beam click on that option just as shown in the below given image:
- After assigning the properties,now we will be modelling the primary beams on the first floor.
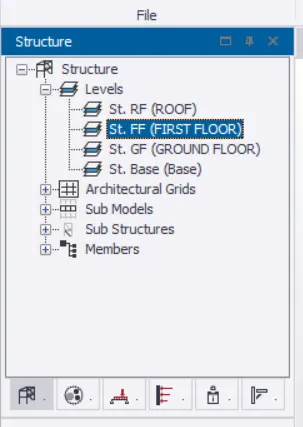
- And in order to create the beam properties go to the Structure option available on the left hand side of the screen of the TSD software,there will be option St.FF (FIRST FLOOR) just click on that option just as shown in the below given image:
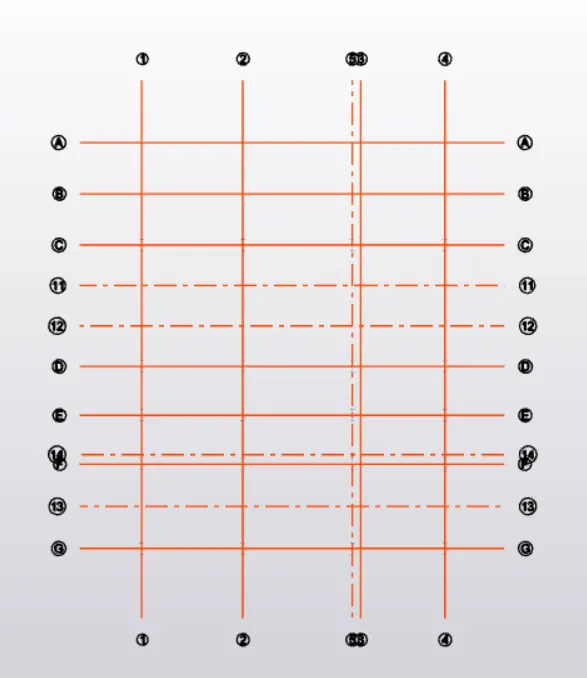
- After this the first floor plans open just as shown in the below given image:
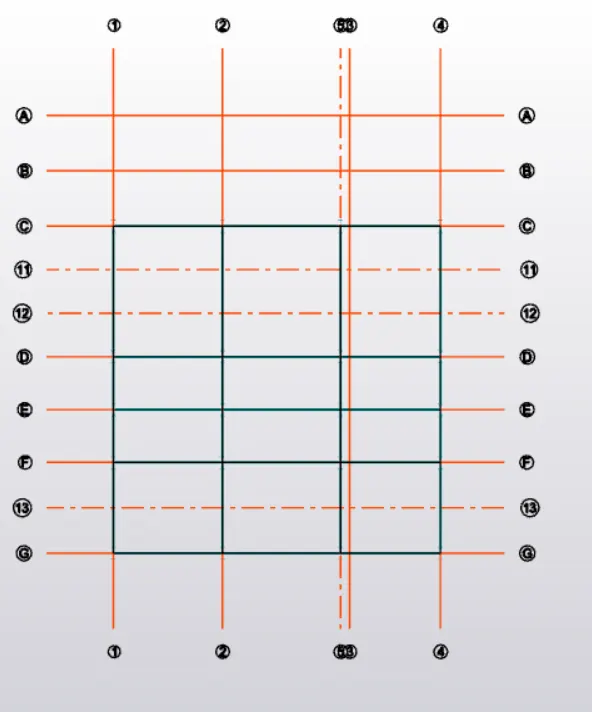
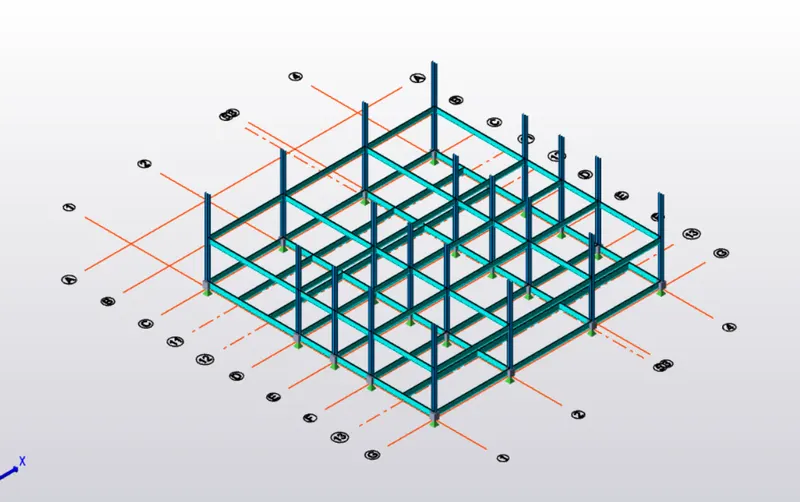
- Now assign the primary beams just as shown in the below given image:
2D-Plan:
3D-View:
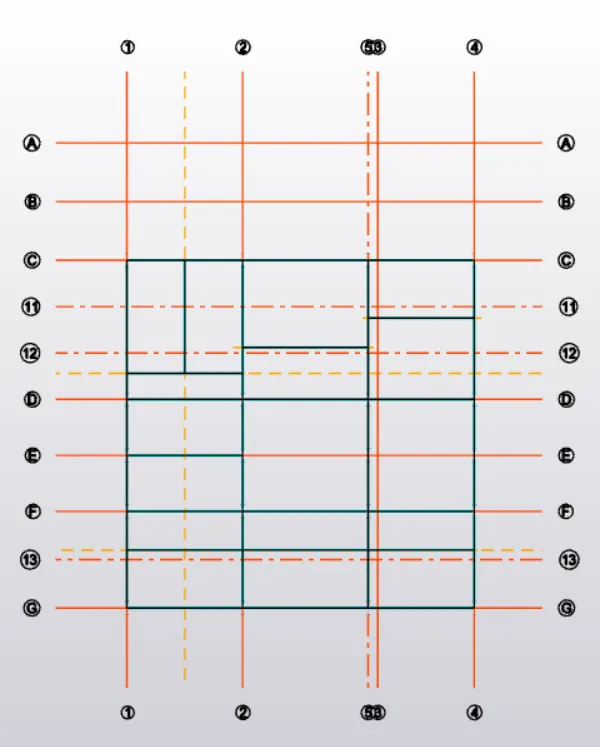
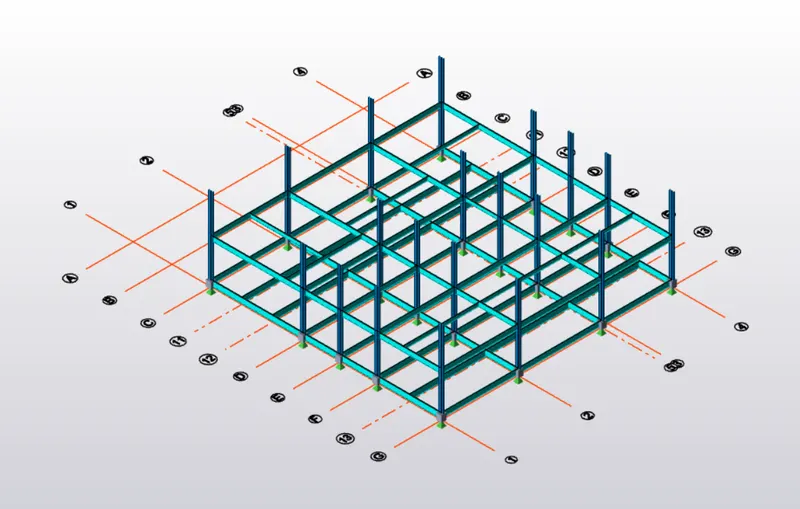
- Now we will be assigning the secondary beams, and in order to assign the secondary beam,first construct the Construction Line according to the given plan just as shown in the below given image:
2D-Plan:
3D-View:
2. Create rafter beam on second floor as roof and moment frame action in one direction and add bracings at locations as per the design intent.
Answer.
AIM:
- To create the rafter beam on second floor as roof and moment frame action in one direction.
- To add the bracings at the locations as per the design intent.
PROCEDURE:
Step 1:
- In order to add the rafter beam on the second floor as roof, first we need to draw the primary beams on the second floor.
- And as for the procedure for the modelling of the primary beams on the roof level we will be following the previous steps as the above.
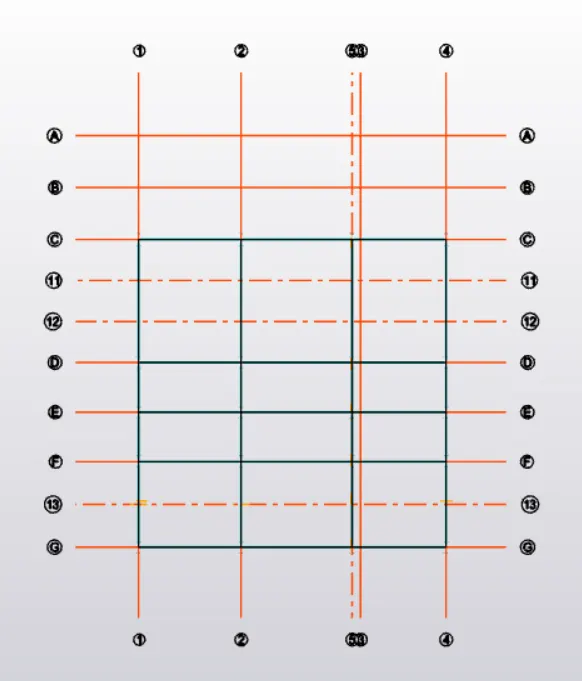
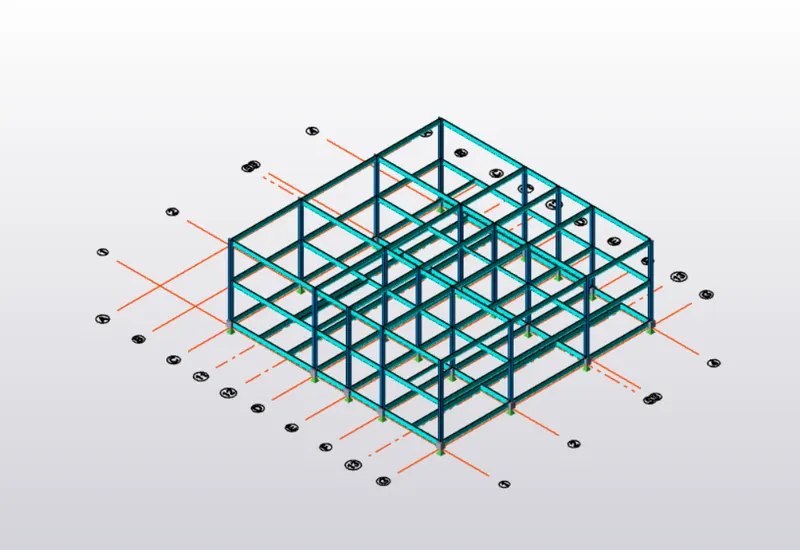
- Below is the given image of the roof after applying primary beams on the roof or second floor:
2D-Plan:
3D-View:
Step 2:
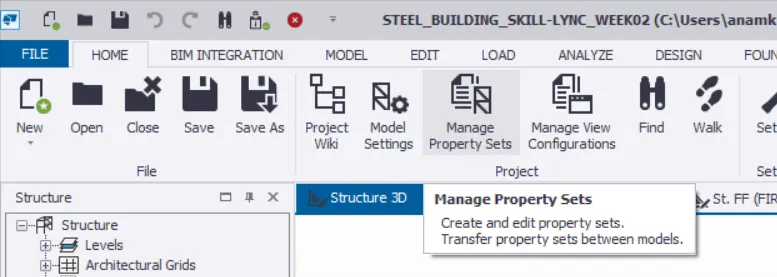
- Now we will be assigning the rafter properties. And in order to assign the rafter properties first we need to go to the Home option click on that option then there will be another option called Manage property sets just click on that option just as shown in the below given image:
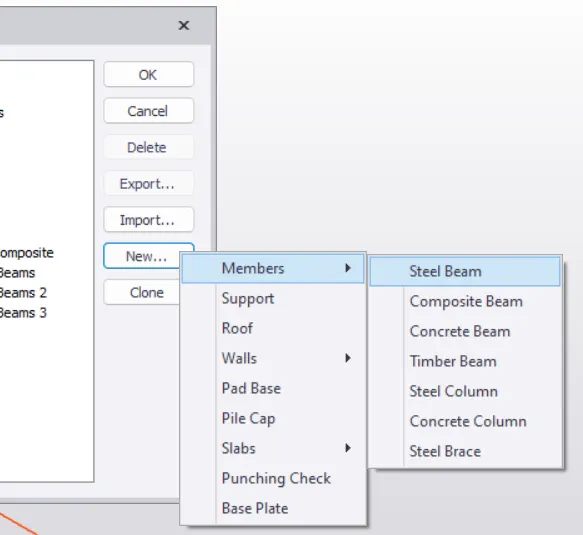
- Now there will be another dialouge box named as the Manage property sets and in that dialouge box on the right hand side of the screen there will be an option called New just click on that option after that there will be a drop-down list and in that list there will be an option Members again click on that option then there will be another drop-down list and in that list there will be another option called Steel Beam just click on that option just as shown in the below given image:
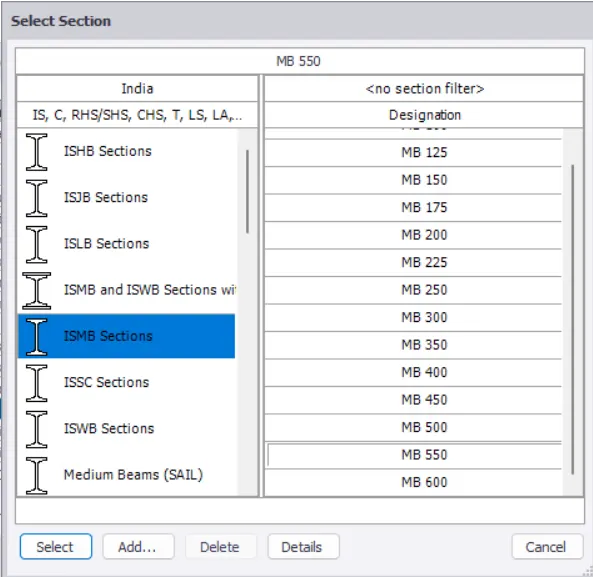
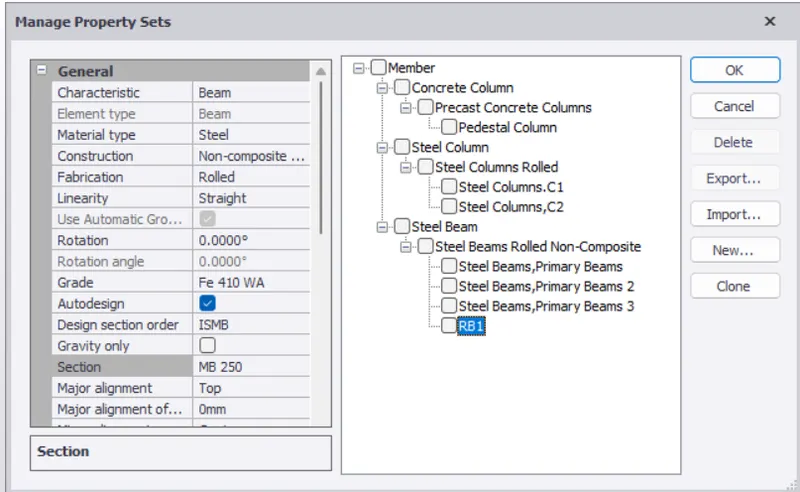
- Now rename it as RB1, assign section as MB 550 just as shown in the below given imaged:
Step 3:
Frame creation:
- Now we will be creating the frames so that it will be easier to see the sections.
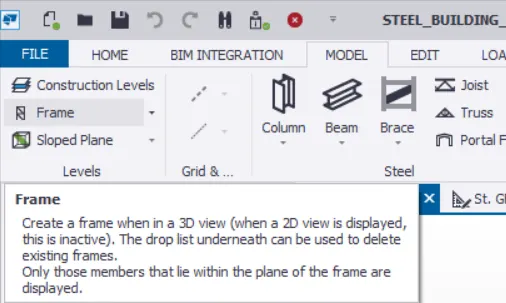
- And in order to create the frames,go to the option Model tab then there will be an option called Frames at the left side of the screen click on that option just as shown in the below given image:
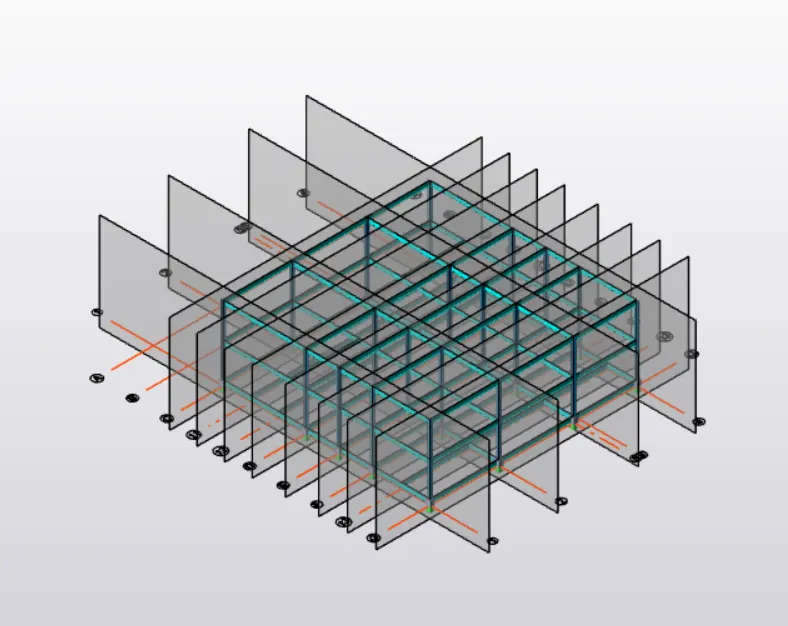
- And in order to assigning the frames, select the grid lines where we will be assigning the frames just as shown in the below given image:
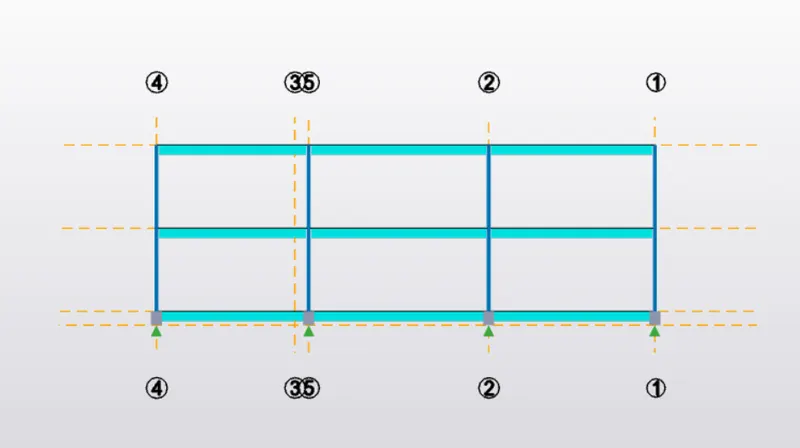
- Now select any single frame C just as shown in the below given image:
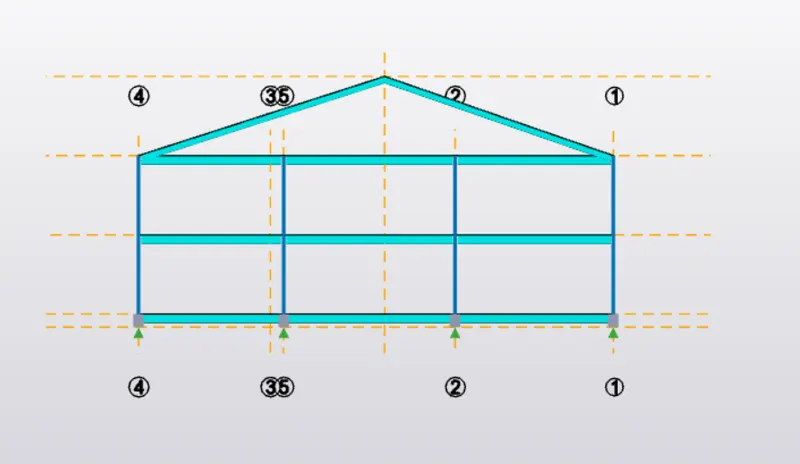
- Now we will be creating the rafter and in order to create the rafter go to the Model tab there will be an option called beam click on that option.
- After that select the beam RB1 as the rafter beam and then create the rafter just as shown in the below given image:
- And now we will be assigning the remaining rafter by using the copy option just as shown in the below given image:
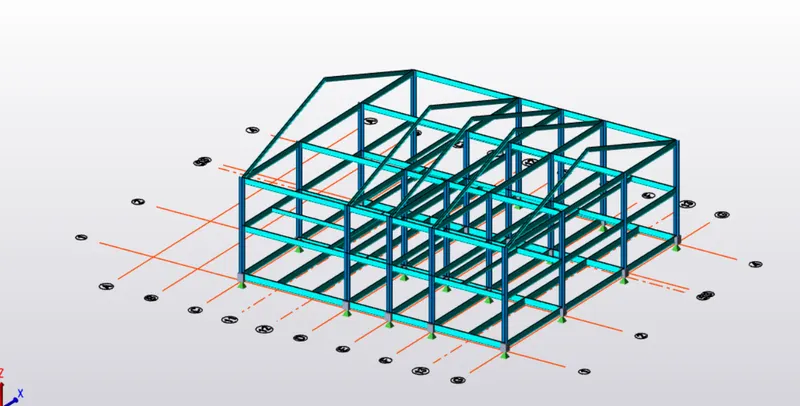
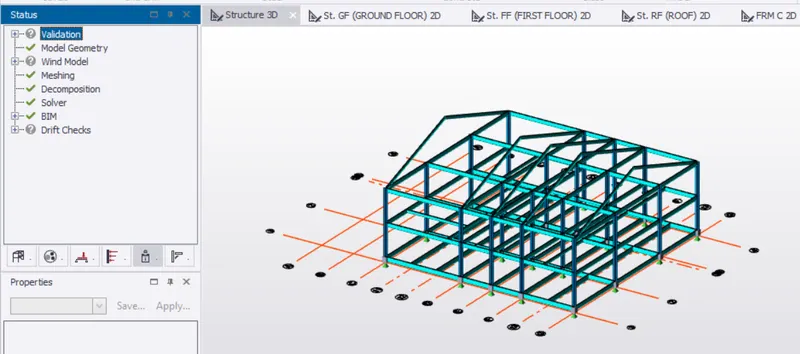
- Now validate the model and check the errors if any, I have validate the model and this model doesn't contain any error it means we can proceed further just as shown in the below given image:
Step 4:
Bracing:
- Now we will be assigning the braces to the steel building.
- To add the bracings to the steel buildings, first we need to go to the Home tab then there will be another option called Manage Property Sets just click on that option just as shown in the below given image:
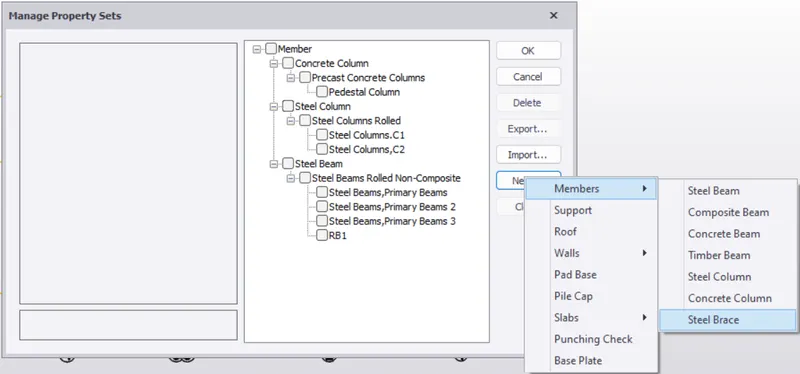
- Now we will be assigning the Bracing Properties and to do so go to the New option which is available at the left side of the screen just click on that option after that there will be a drop-down list and in that list there will be an option called Members click on that option after that there will be another drop-down list and in that list there will be another option called Steel Brace click on that option just as shown in the below given image:
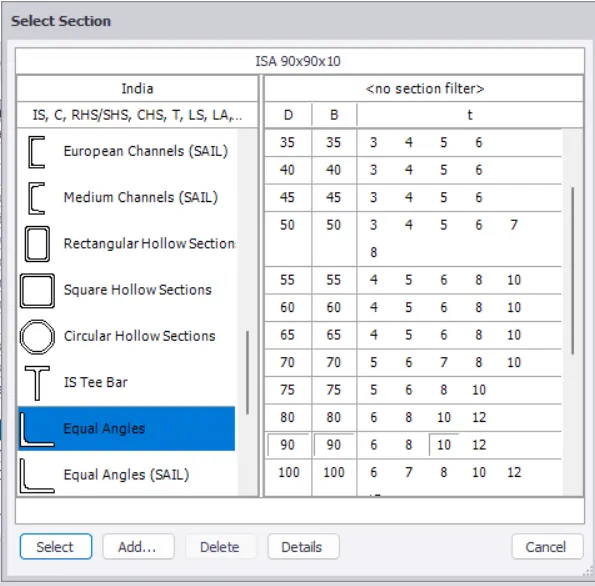
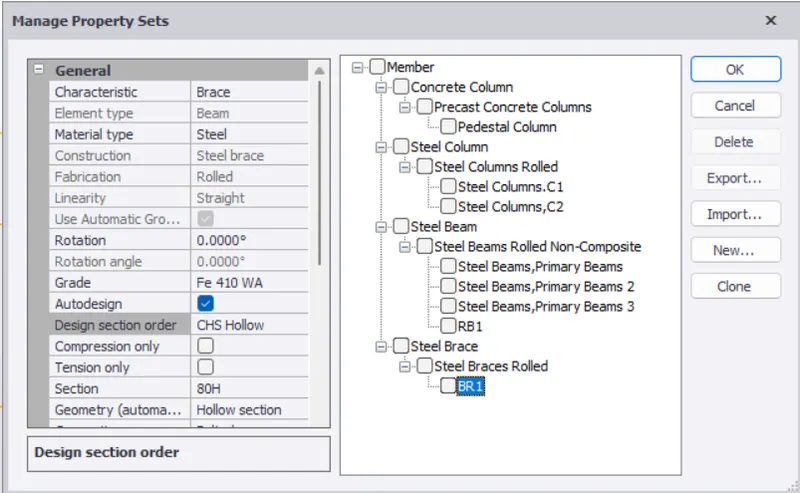
- Now select the section as the Equal Angle ISA 90X90X10 and rename it as BR1 just as shown in the below given image:
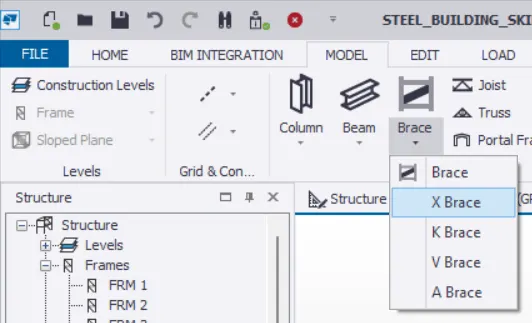
- Now assign the bracing, as to assign the bracing go to the Model tab there will be an option called Brace click on that option then there will be a drop-down list and in that list there will be another option called X-Bracing just as shown in the below given image:
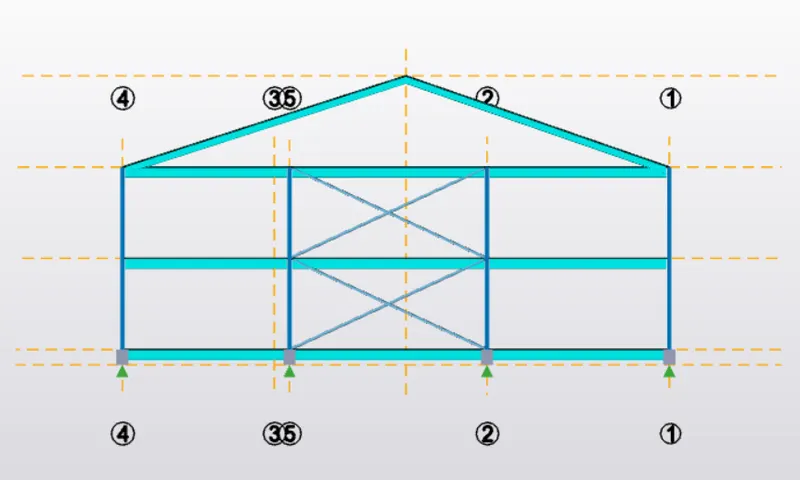
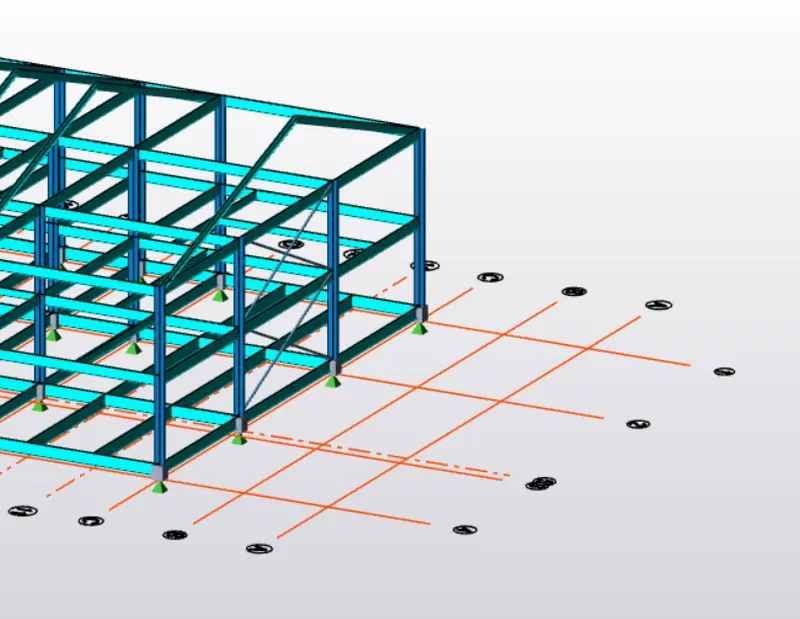
- Now assign the bracing as shown below:
2D-Plan:
3D-View:
- Now do the same procedure for the roofs also just as shown in the below given image:
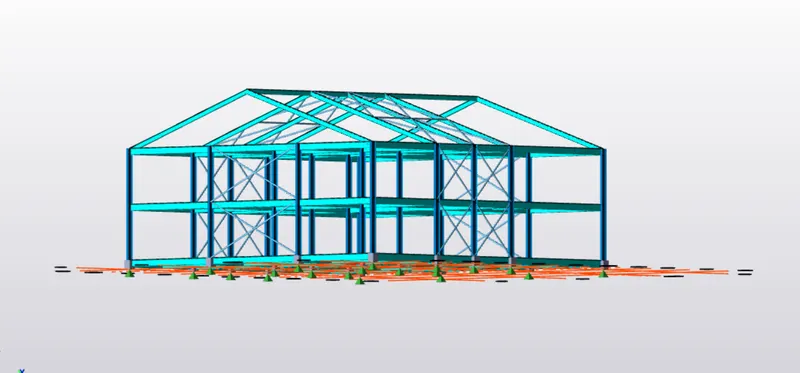
Roof Panel and Wall Panel:
- Now we will be assigning the wall panel.
- And in order to assign the wall panel go to the Model tab there will be an option wall panel just click on that option as shown in the below given image:

- Assign the wall panels just as shown in the below given image:
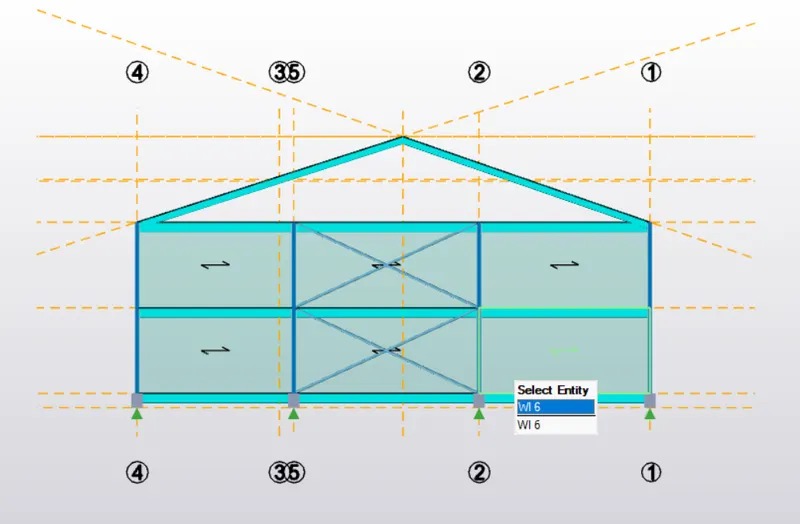
Wall Panel:
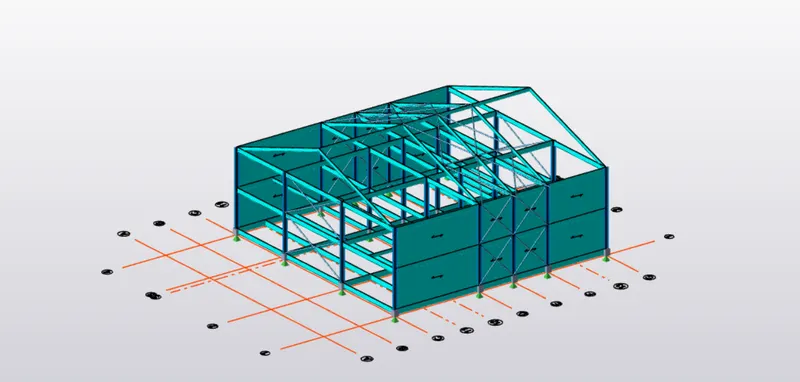
Roof Panel:
- Do the same procedure as we have done for the wall panel.
- Just go to the Model tab then there will be an option called Roof panel just click on the option just as shown in the below given image:

- Below is the given image after creating the roof panels:
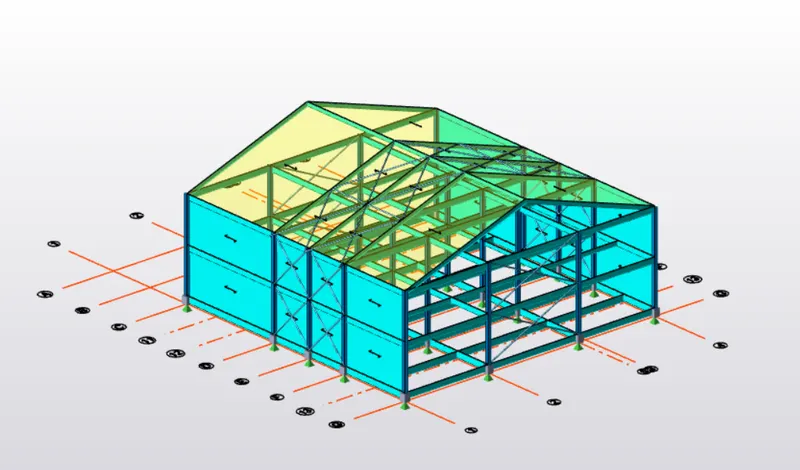
Step 5:
Slab Properties:
- Now we will be assigning the slab properties.
- And in order to assign the slab properties go to the Home tab then there will be an option called Manage Property Sets just click on that option just as shown in the below given image:
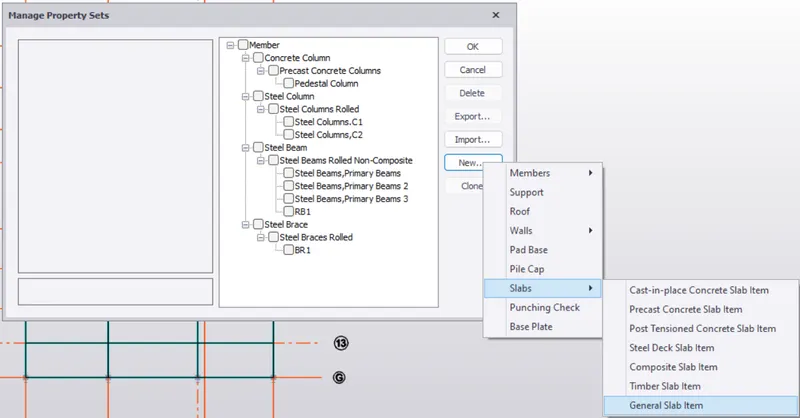
- Now there will be another dialouge box named as the Manage property sets and in that dialouge box on the right hand side of the screen there will be an option called New just click on that option after that there will be a drop-down list and in that list there will be an option Slabs again click on that option then there will be another drop-down list and in that list there will be another option called General Slab Items just click on that option just as shown in the below given image:
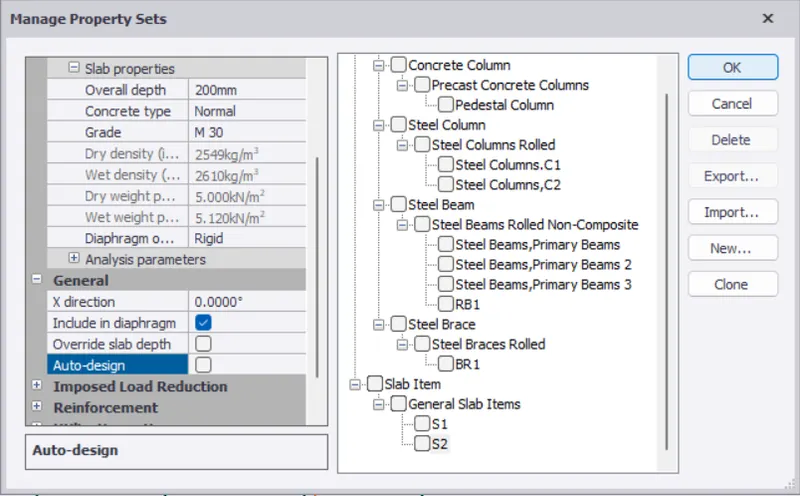
- Now assign the appropriate properties accordingly and rename it as S1 and S2 just as shown in the below given image:
- Now assign the slab properties as shown in the below given image:
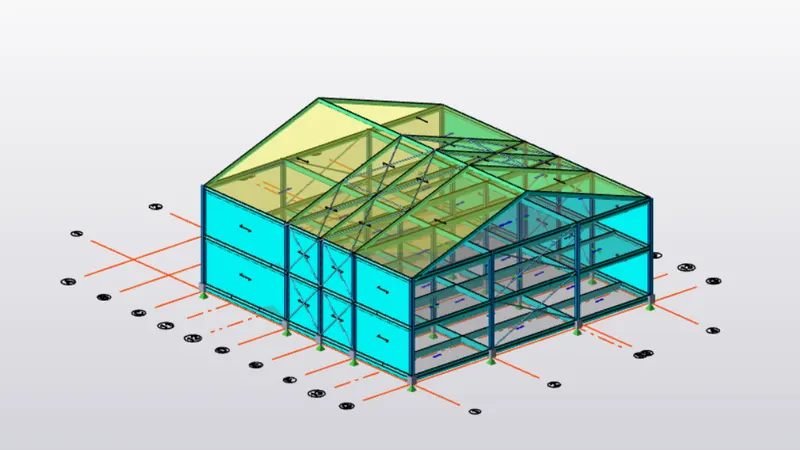
- Now we will be validate the structure.
- After validation there are no errors it means steel structure is good to go upto now as we can see in the below given image: