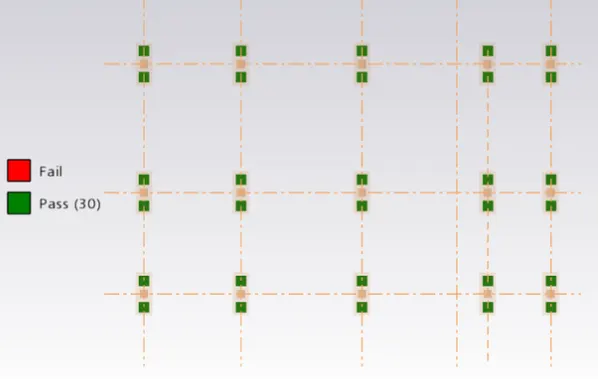
To Design slab and foundation for an RC residential building using TSD
Question. Design the slab and foundation of the model. Outline the thought process for designing of the elements (column, beam, slab and foundations).
Solution:
AIM: To design the slab and foundation of the model in the TSD software.
PROCEDURE:
- First lets design the slab of the model in the TSD software.
Slab design:
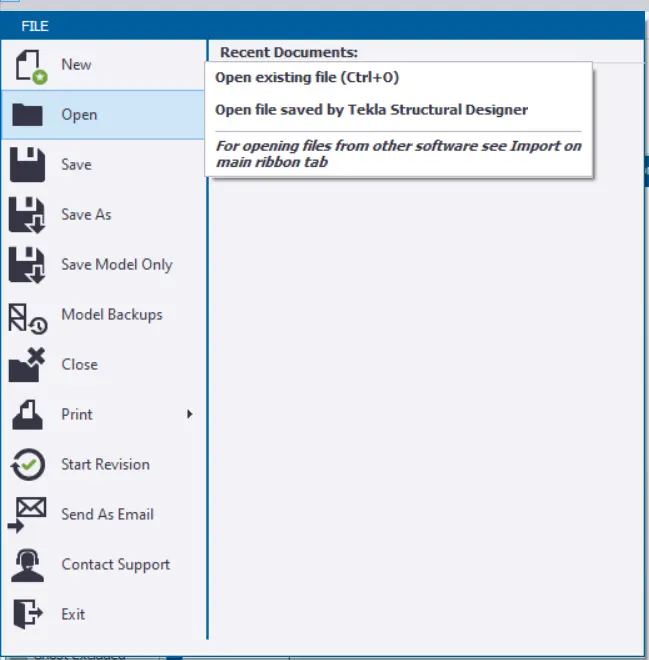
- In order to design the slab first OPEN the TSD software. Go to the File tab click on that option then there will be a drop-down list and in that list there will be an option named as the Open again click on that option and select the file which we want to open just as we can see in the below given image:
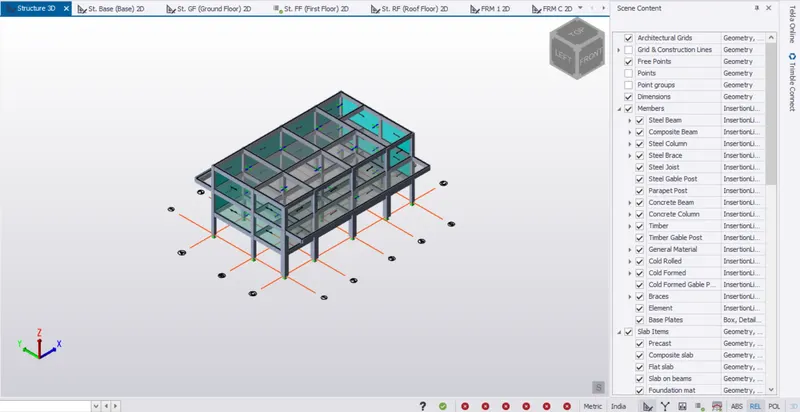
- As we can see our project has been opened now in this project we will be designing the slab:
- Next, go to first floor in scene view just as shown in the below given image:
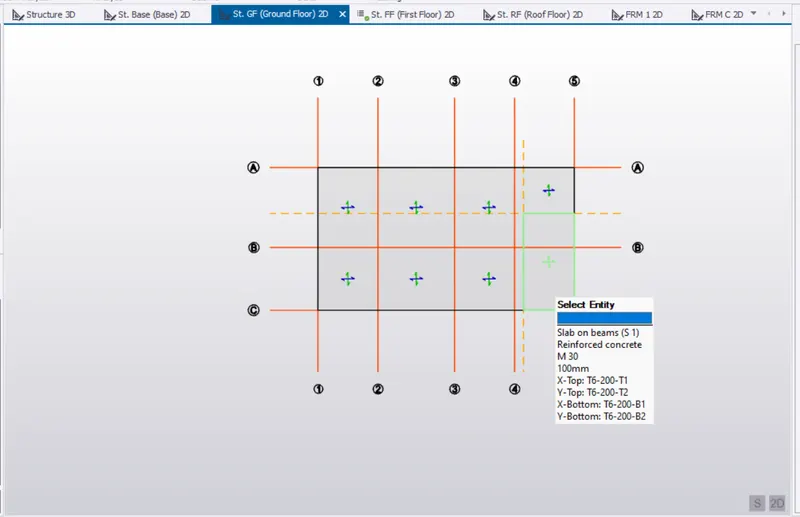
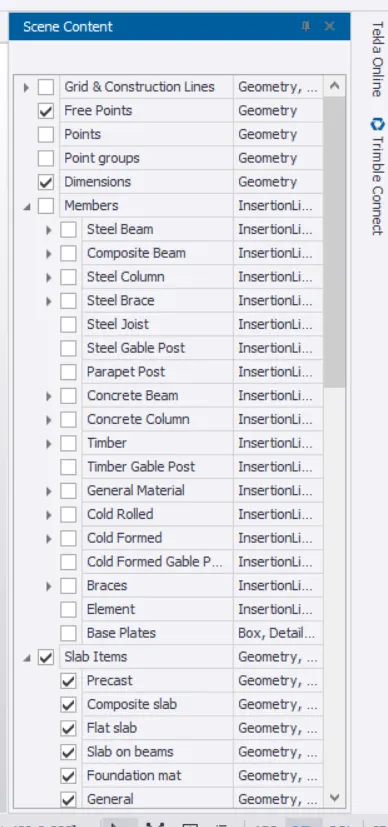
- In scene content which can be seen at the right hand side of the screen, so in that scene content there will be multiple options like Grids, Levels, Walls, Portal frames etc. In that untick grid lines and members, so that only slab members can be seen as we can see in the below given image:
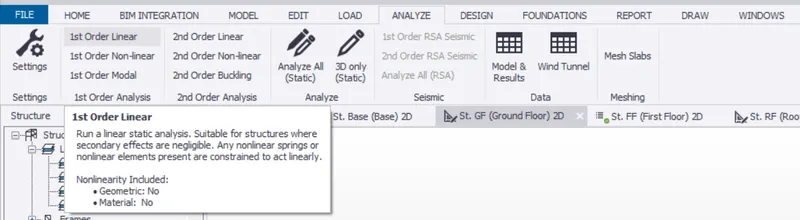
- Next we will be doing the analysis, so in order to run the Analyze of the model, go to the Analyze tab click on that option after that there will be an option named as the lst order linear just click on that option just as shown in the below given image:
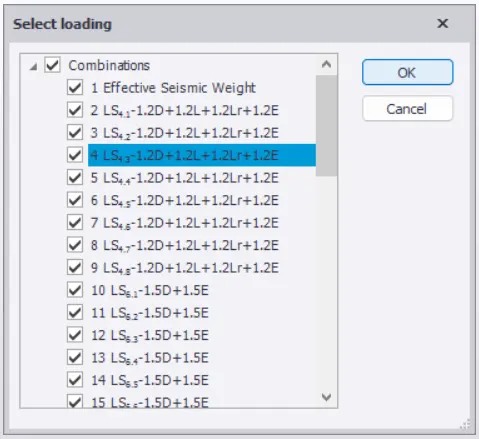
- After this there will be another dialouge box named as the Select Loading in that dialouge box select the cobinations and the loadings just as shown in the below given image:
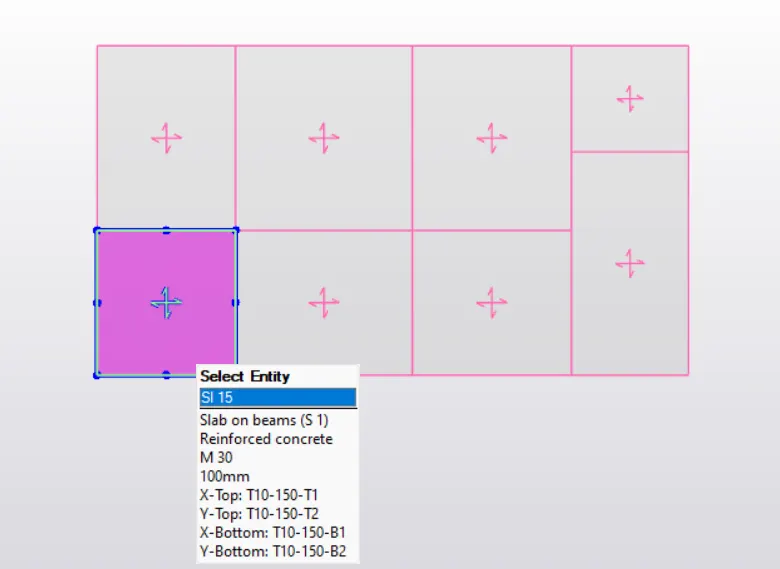
- When the analysis is done, select any of the select in order to design the slab just as shown in the below given image:
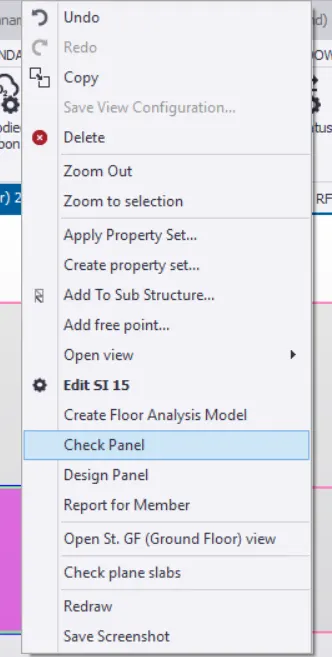
- Now right-click on the slab selected, after that there will be drop-down list in that list there will be an option named as the Check Panel just as shown in the below given image:
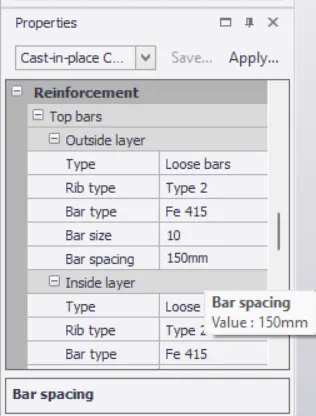
- After this there will be another dialouge box named as the SI 12 rresults (IS 456,2005), in that there will be options which shows if that slab have some errors or not. If we find an error in the slab reinforcement, go back to the plan option, on the left-hand side there will be an option named as the Properties box in that box there will be options regarding the reinforcement adjust the reinforcement options just as shown in the below given image:
- After adjusting the reinforcement check the panels again, but as we can see in the below image there are still some errors, so we must modify the reinforcement settings again:
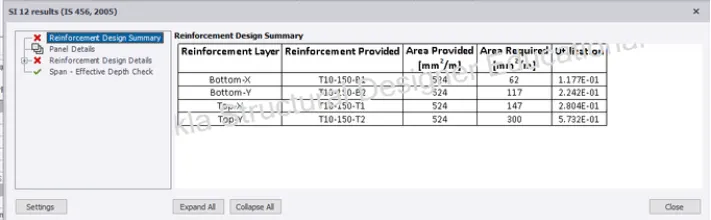
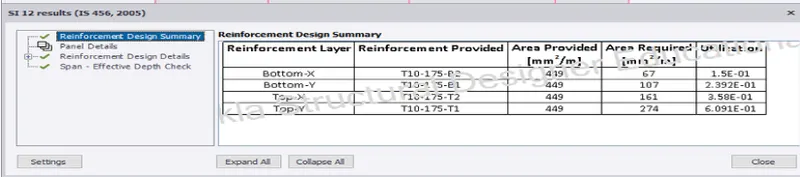
- As area of reinforcement provided is more than the area of reinforcement required, go to property window, change reinforcement spacing to 175mm for 10mm diameter bar.
- Now again check the panel, as we can see in the below given image errors have been resolved:
- Similarly, select the identical slabs who has the similar properties select them and do the same procedure as we have done for the previous slab.
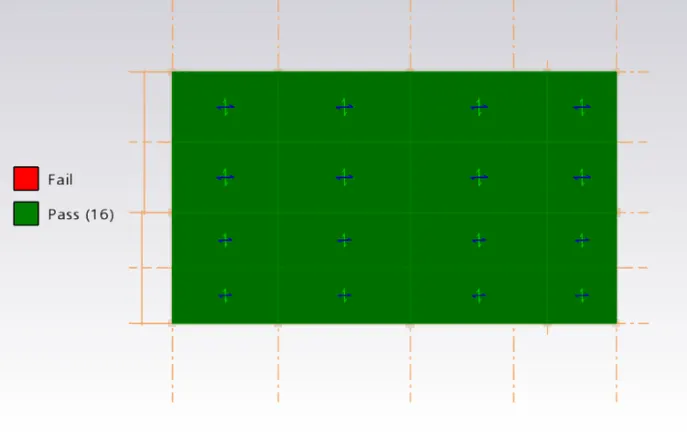
- Again do the Analysis, after analysis we see that there will be no error in the designed slab because the slab is shown in the green colour, this means the slab have passed the design check as we can see below:
- Next we will be designing the Foundation in the TSD software.
Foundation Design:
- In order to design the foundation first go to Home tab just click on that option after that there will be an option named as the Settings just click on that option just as shown in the below given image:

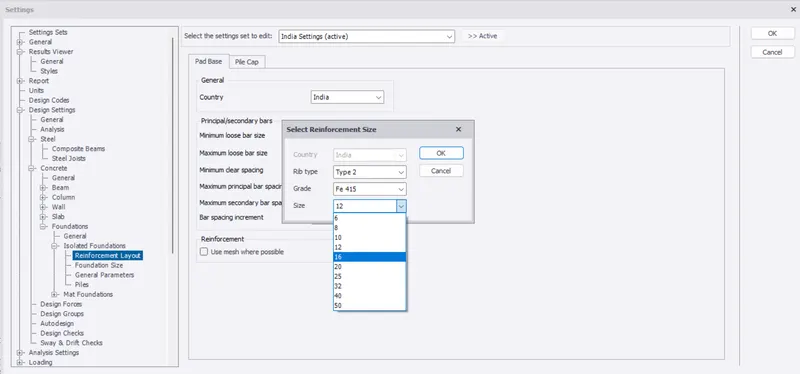
- Now another dialouge box opened named as the Design Settings and in that dialouge box on the left-hand side of the screen there are few options, so in those options there will be an option named as the Design Settings just click on that option after clicking on that option there will be another option under Design settings named as the Concrete just click on that option then under Concrete option there will be another option Foundation just click on that and then click on the Isolated Foundation and then select the Reinforcement Layout.
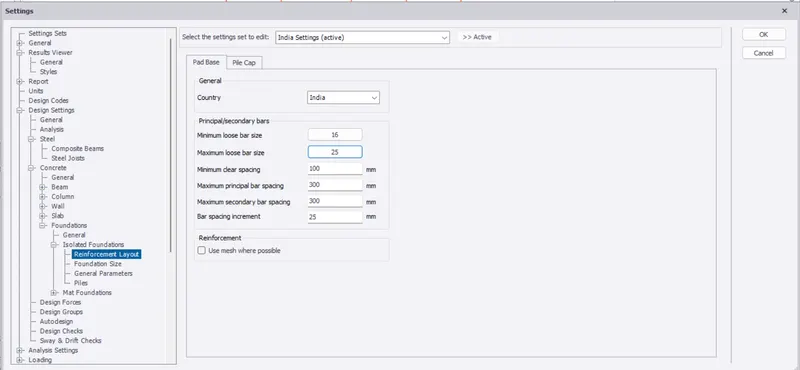
- Next in the Reinforcement layout there will be options to choose the minimum bar size, clear spacing etc.
- So next set the minimum loose bars as 16mm diameter just as we can see in the below given image:
Foundation Layout:
Foundation Size:
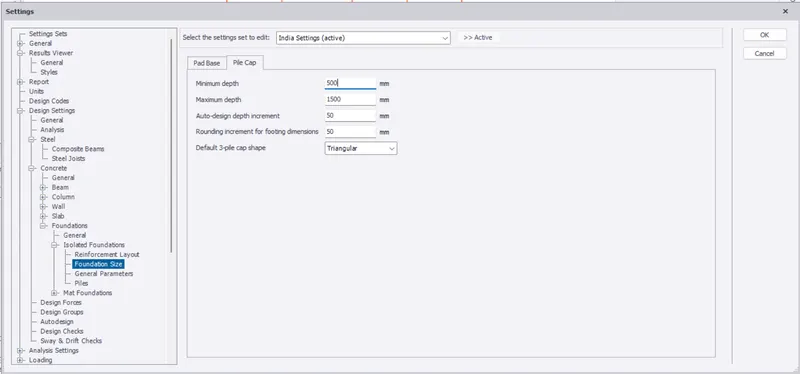
General Parameters:
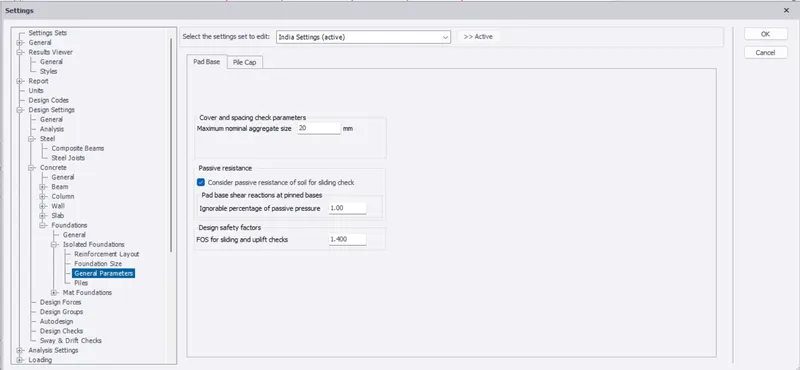
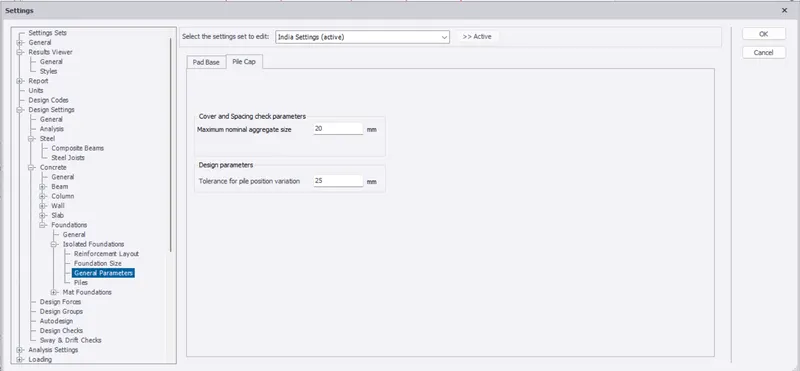
Pile:
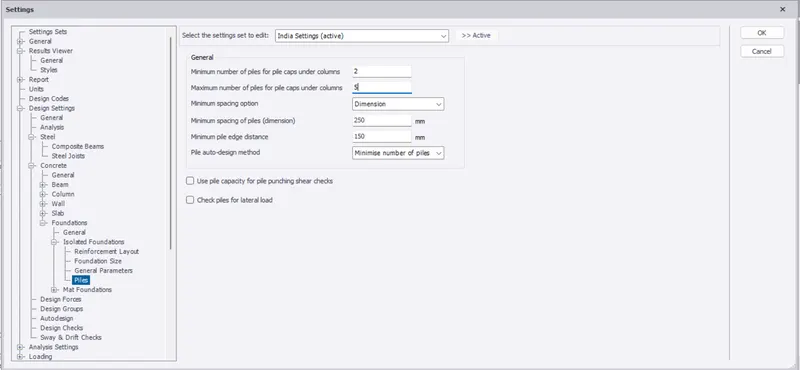
- First of all go to Foundation tab click on that option after that there will be an option named as the CAtalouge in the Pile types option just click on that option just as shown in the below given image:

- After that there will be another dialouge box named as the Pile Catalouge just as shown in the below given image:
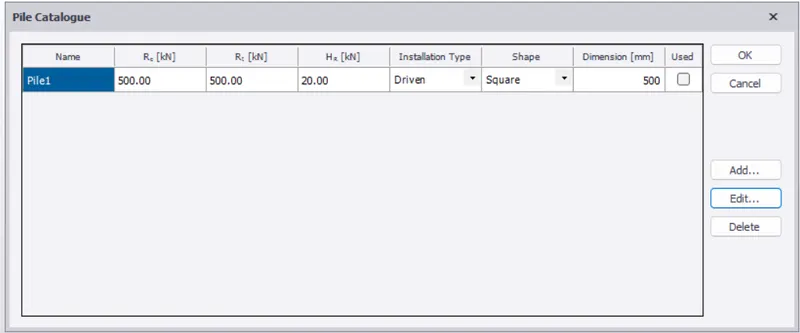
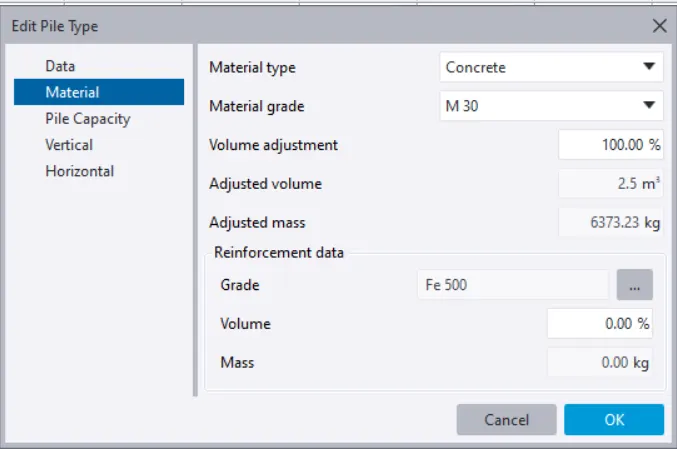
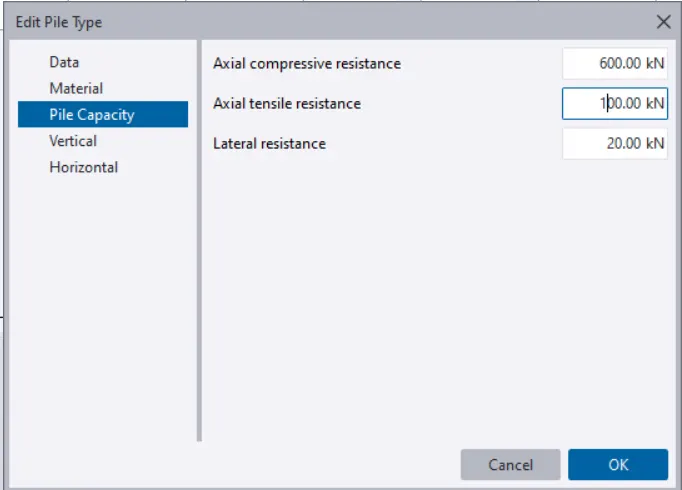
- Now on the right-side of the screen there will be an option Add click on that option and edit data, materials and pile capacity for piles just as shown in the below given image:
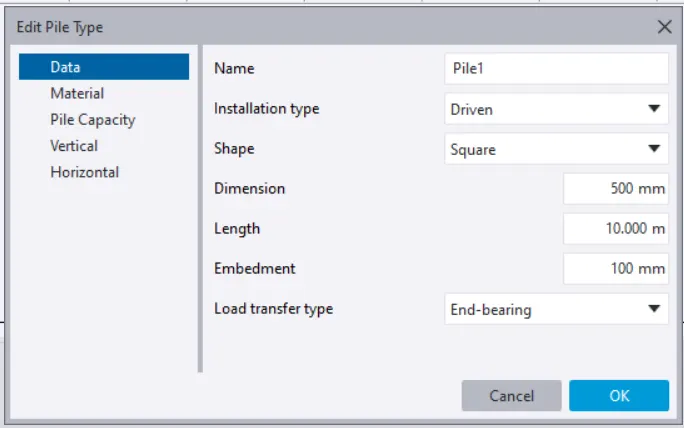
Data:
Material:
Pile Capacity:
- Next go to the Foundation tab click on that option after that there will be another option named as the Pile Cap Column just click on that option just as shown in the below given image:

- Next pick the location to create column isolated pile cap position just as shown in the below given image:
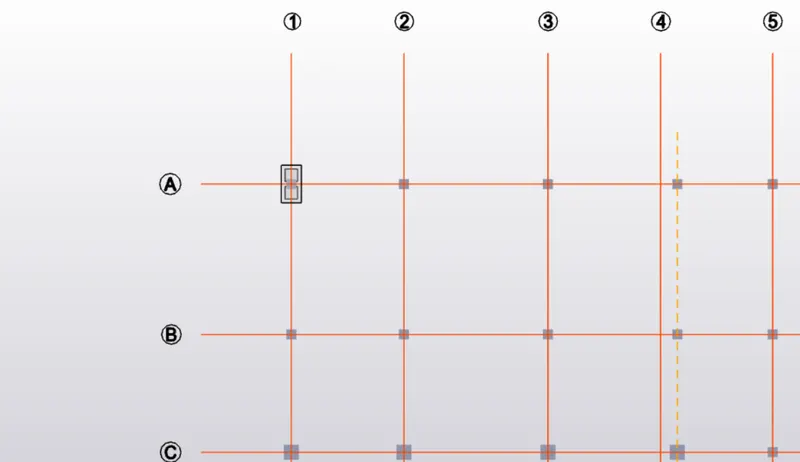
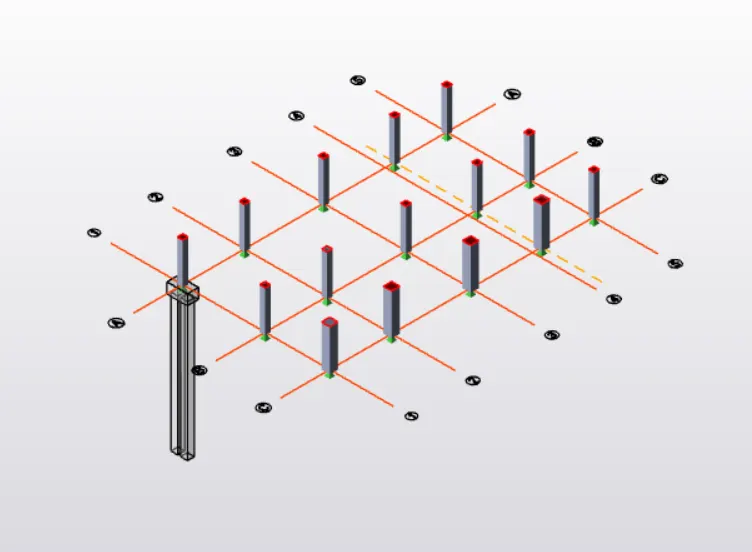
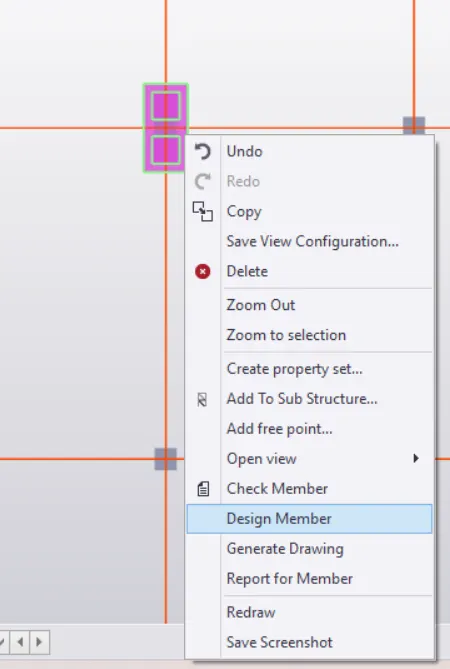
- Next is to select the pile right click and then there will be a drop-down list and in that list there will be an option Design Member just click on that option just as shown in the below given image:
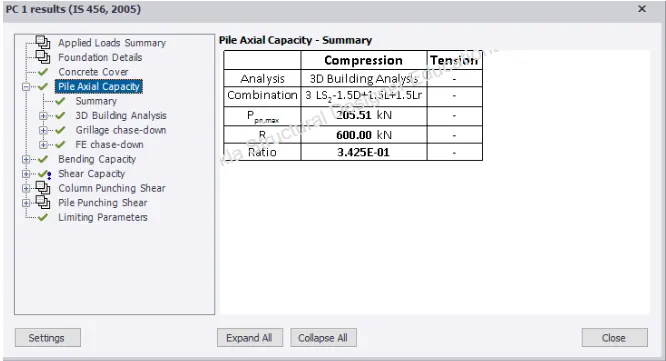
- Then there will be another dialouge box named as the PC 1 Result (IS 456,2005), in that dialouge box we can see there will be no other errors in the pile design just as seen in the below given image:
- Now do the similar steps in order to design the other Piles as we can see in the below given image:
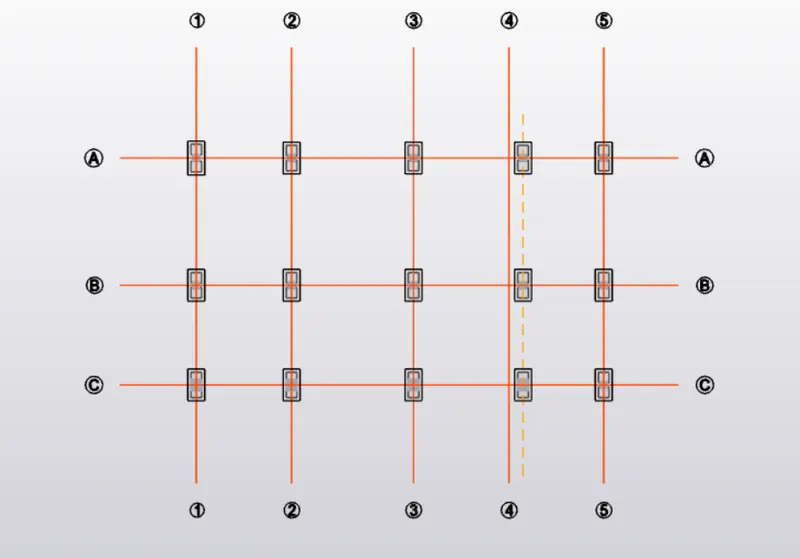
- Next we will be doing the analysis, so in order to run the Analyze of the model, go to the Analyze tab click on that option after that there will be an option named as the lst order linear just click on that option just as shown in the below given image:
- After this there will be another dialouge box named as the Select Loading in that dialouge box select the cobinations and the loadings just as shown in the below given image:
- Now go to the Results tab just click on that option after that there will be an option in Review tab click status, check the status of the pile cap just as e can see in the below given image:

- Below is the image after analyse the piles:
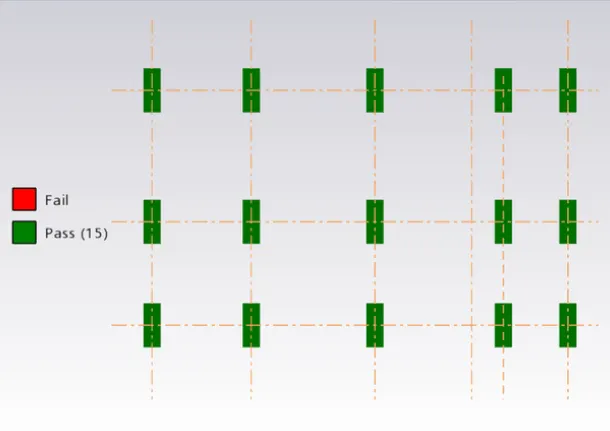
- Now go to the Results tab just click on that option after that there will be an option in Foundation tab click status In review view, check the status of the pile cap just as e can see in the below given image:

- Below is the image after analyse the piles: